You’ve removed your old tile flooring, but the dust got all over; now you have a stack of debris, an irregular stone flooring, and a layer of material that looks like glue and won’t come up.
That is thinset. It holds your tile in place on tough surface areas like concrete with an adhesive mortar. Unlike other types of tile glue, thinset hardens like a stone and can be daunting to get rid of if you don’t know the best way to do it.
Withstand the urge to put a brand-new layer of flooring over it, considering that it is quite difficult to get a flat surface area by doing this and will wind up looking dreadfully in need of leveling once you’re finished.
In this post, we’re going to provide seven simple methods on how to remove the mortar that sticks to tile floors, including the concrete underneath.
Table of Contents
How to Remove Thinset from Tiles
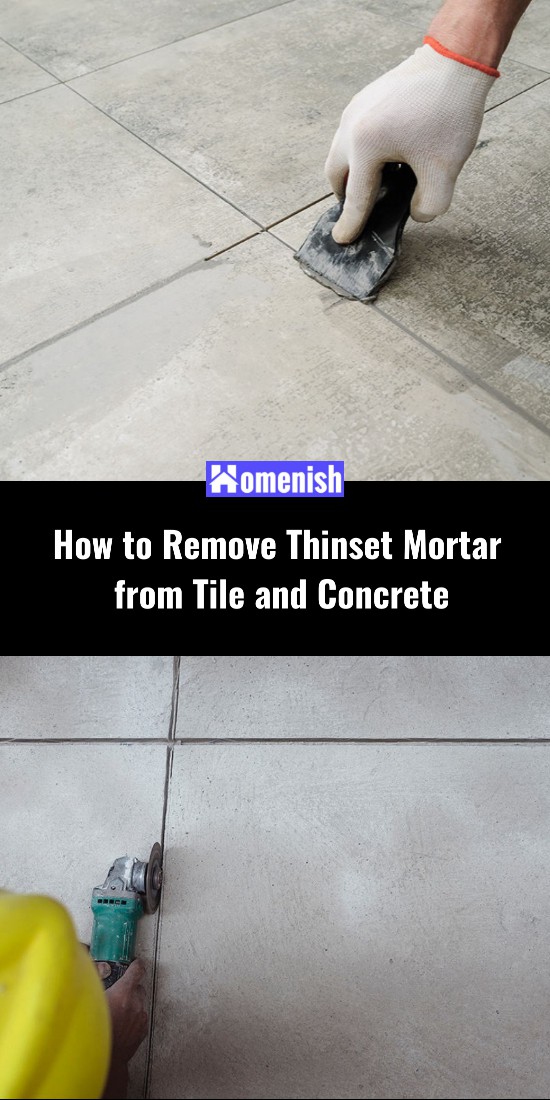
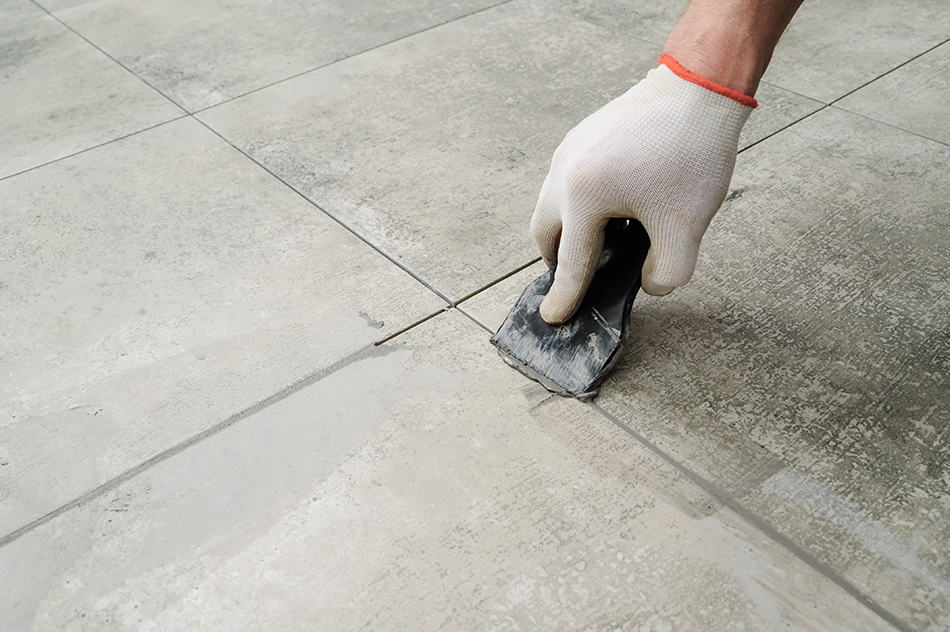
1. Removing Thinset Mortar from Tiles
First, get some regular dishwashing liquid soap in a bucket of warm water. Wet the entire area with the suds and let it sit for a few minutes. You want the thinset to soak up the soapy water and become as soft as possible.
After a few minutes, scrub off as much of the thinset material as you can. Scrub the grout and all. Then dry up your slurry mess on the floor and use a scraper or chisel to get up any remaining large chunks. Be careful to gouge or scratch any tile you want to salvage underneath.
The final step will be to use a rotary sander (50-grit) on the lowest setting to remove any last material. Vacuum the area to remove the dust, and you should be set. If not, go on to the next method.
Pros: Cost-effective, minimal mess
Cons: May take a lot of physical work, involves many steps to remove all the thinset
2. Removing Mortar Cement from Your Tiles
Mix vinegar with water and spray or pour it on the tile surface. Include the grout lines as it will thinset on it as well. Let the vinegar water set in for a few minutes, then sponge the entire area to get it as clean as possible.
Next, use a razor blade or scraper to peel up the mortar. Be careful not to gouge or scratch the tiles. Finally, wipe the floor again with a clean rag. There shouldn’t be any dust in this procedure as you’re not sanding the mortar but scraping it.
Pros: Less mess, effective at removing all mortar
Cons: Time-consuming, can be physically tiring, some people can’t stand the smell of the vinegar
3. Removing Mortar Cement from Reclaimed Tiles
Gather and don goggles and rubber gloves. You’re going to be handling muriatic acid. Mix the acid with water in a bucket, then place the tiles in the bucket to soak. You probably won’t be able to soak all of the tiles at once. Just do one batch at a time.
Once they’ve soaked in the acid water for a few minutes, take one out at a time and scrub it with a brush. You shouldn’t need to do any scraping, but keep a razor blade or scraper handy just in case. Be careful not to splash the acid on any vulnerable surfaces or materials, as it will damage or stain.
Rinse the tiles off in clean water, then let them dry for about 24 hours.
Pros: Easy and effective cleaning method, inexpensive
Cons: Some people don’t like dealing with acid or the necessary protective equipment, acid can stain or harm other materials, the process can be time-consuming depending on how many you have to clean
How to Remove Thinset from Concrete
1. Manually Removing Thinset from Concrete
The most inexpensive method to get rid of thinset is to get a sturdy scraper or a chisel and begin going to town trying to pry it loose from the concrete little by little. You can identify the efficiency of this technique by the bond’s strength in between the concrete and the thinset, as well as how strong you are.
Pros: Great workout, cost-effective
Cons: It can take a long time, physically exhausting if there are a lot of square feet to get rid of
2. Removing Thinset from Concrete Using an Angle Grinder
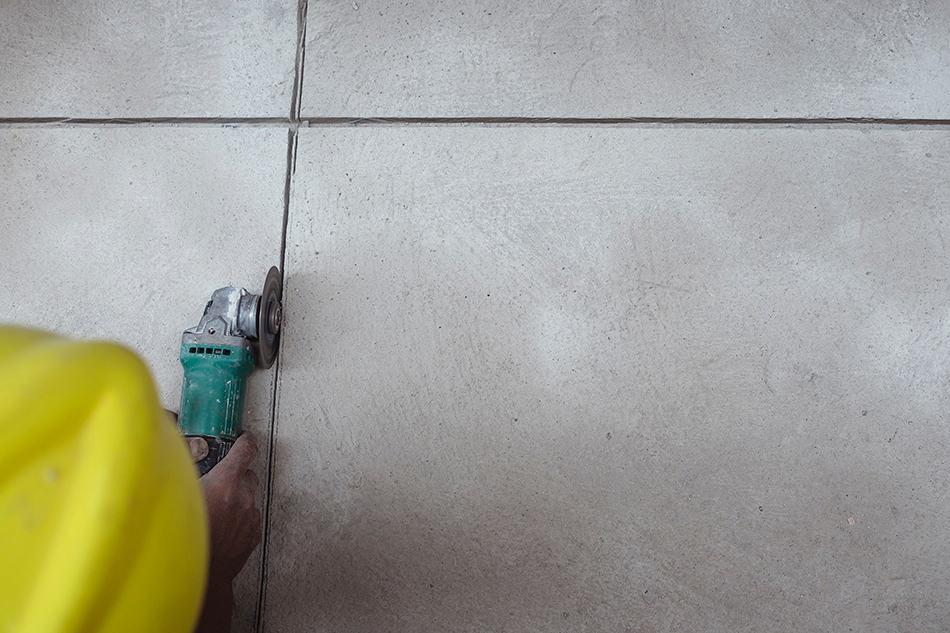
Angle grinders are among the very best tools for thinset removal. Combine it with the stiffest metal brush accessory you can.
This technique works best for the softer varieties of thinset or where most of the thinset came up with the tiles, and some small clean-up is required. If you are fortunate enough to be handling thinset that loosens during soaking, this can be a fast task with very little mess. Of course, some additional time will be required at the outset to soak the thinset.
Pros: Not very tiring, very little dust in the workspace if the thinset is soaked thoroughly
Cons: Effectiveness differs based upon the type and square footage of thinset, can be unpleasant as damp thinset whirls around
3. Removing Thinset from Concrete Using Floor Stripper and a Power Chisel
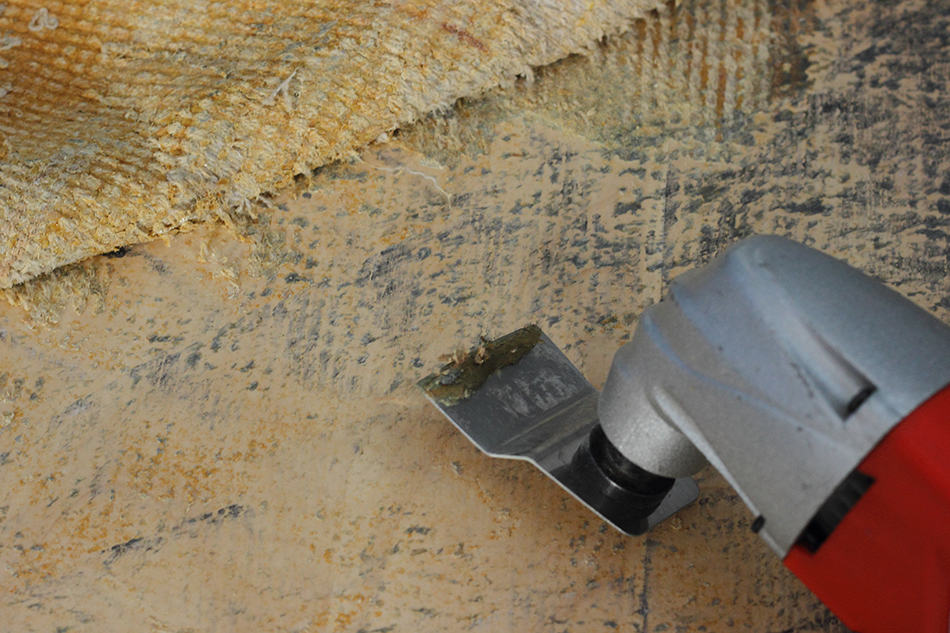
There are numerous kinds of power tools that can work as the perfect kind of tile elimination devices and can sculpt away at the thinset and underlayment. They use a chisel attachment and a fast backward and forward movement to scrape the mortar. Safety glasses are a need as little pieces of tile will fly around.
It is not normally essential to dampen the thinset first. The mechanical approach is generally best for professionals to use when the thinset doesn’t soften when soaked.
Pros: It can likewise be utilized for eliminating tile, requires very little prep work so you can begin right away after bringing up tile floor covering, it needs only one tool for the task
Cons: It can be tough if the bond of the concrete the thinset is too strong, producing air-borne dust
4. Removing Thinset from Concrete Using a Flooring Grinder
A strong surface, generally diamond, is required to grind the thinset down. With the appropriate grinding surface, you can remove your thinset in no time.
Pros: Leads to clearest subfloor, fastest approach, not physically hard
Cons: Creates tons of airborne dust