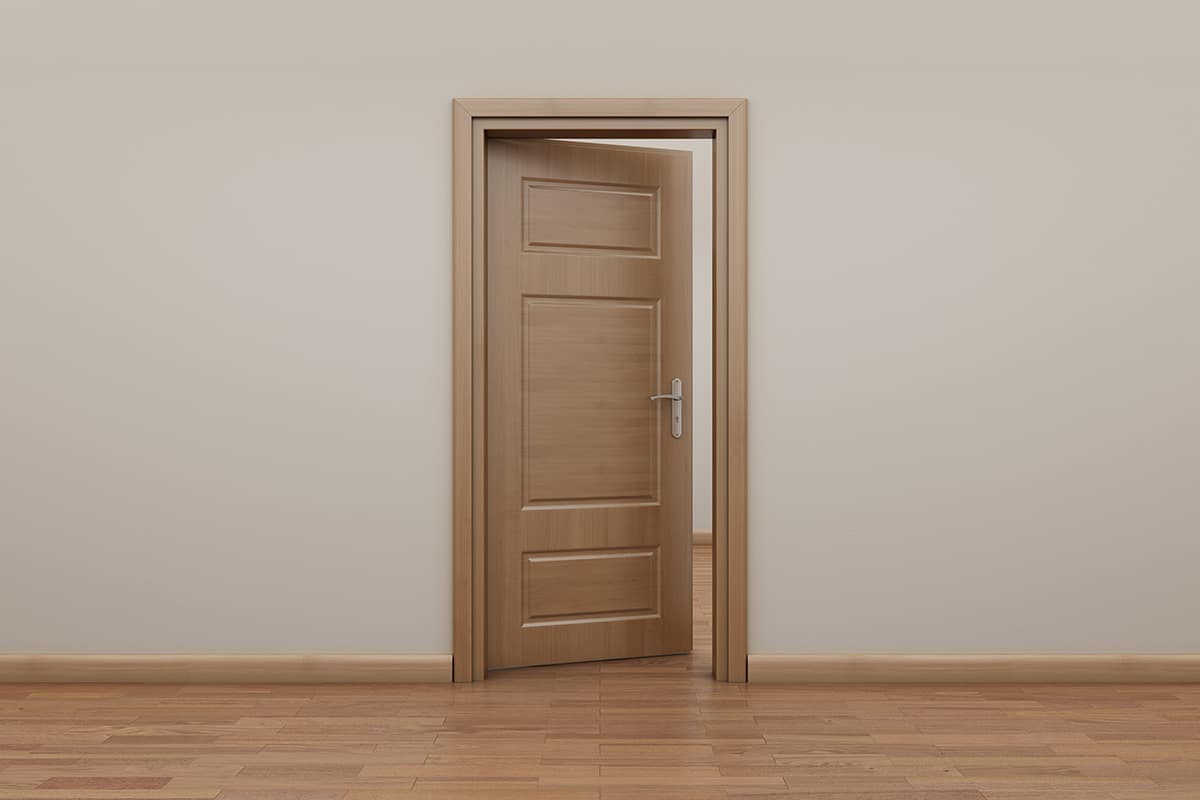
While installing a door, you must leave an adequate amount of space between the door and frame to make sure that the door is always functional.
If there is not enough space, your door may not swing open or close properly because it will hit into the frame. This can cause damage to both your doors and walls, so always be sure to check for this before you install any new doors in your home.
Table of Contents
The Size of the Door
To calculate the best distance between the door and frame, you need to consider the size of your door.
For example, if you have a very large and heavy door that swings outwards and is about 3 inches thick, then it will take more space between the two than a smaller interior-opening door.
The height is measured from top to bottom of the opening when closed (not including any jamb). The width is measured from side to side at its widest point (not including any jamb).
The thickness includes both sides where they meet in the middle of an opening on either side; these are called “fins” or “stiles,” which support moldings along their tops and bottoms, respectively, as well as provide structural strength by helping keep a straight line throughout each entire length.
The Type of Door
Before you can begin to determine how much space is needed between your door frame and the exterior door, you’ll need to figure out what type of door it is. Doors are divided into two categories: interior doors and exterior doors.
Exterior doors are those that open onto an outdoor area such as a porch or deck. Interior doors have no connection with the outside world; they’re just for passage between rooms inside residential homes or commercial buildings like offices and stores.
You may wonder why interior doors don’t have weatherproofing requirements as exterior ones do.
It’s because most indoor spaces are insulated from extreme weather conditions by walls, ceilings, floors, and other structural elements, which will protect them from rain-soaked wind gusts or freezing temperatures associated with winter months in colder climates like Canada or Alaska (if you live there).
Weatherproofing and Fire Safety
Fire doors are designed to close tightly so that the fire door frame seals tightly to the wall around it. This is important for several reasons:
- It keeps smoke from escaping and air from entering the building in a fire emergency.
- It helps prevent damage due to water leakage in a flood or other weather events.
Average Space Between Door and Frame
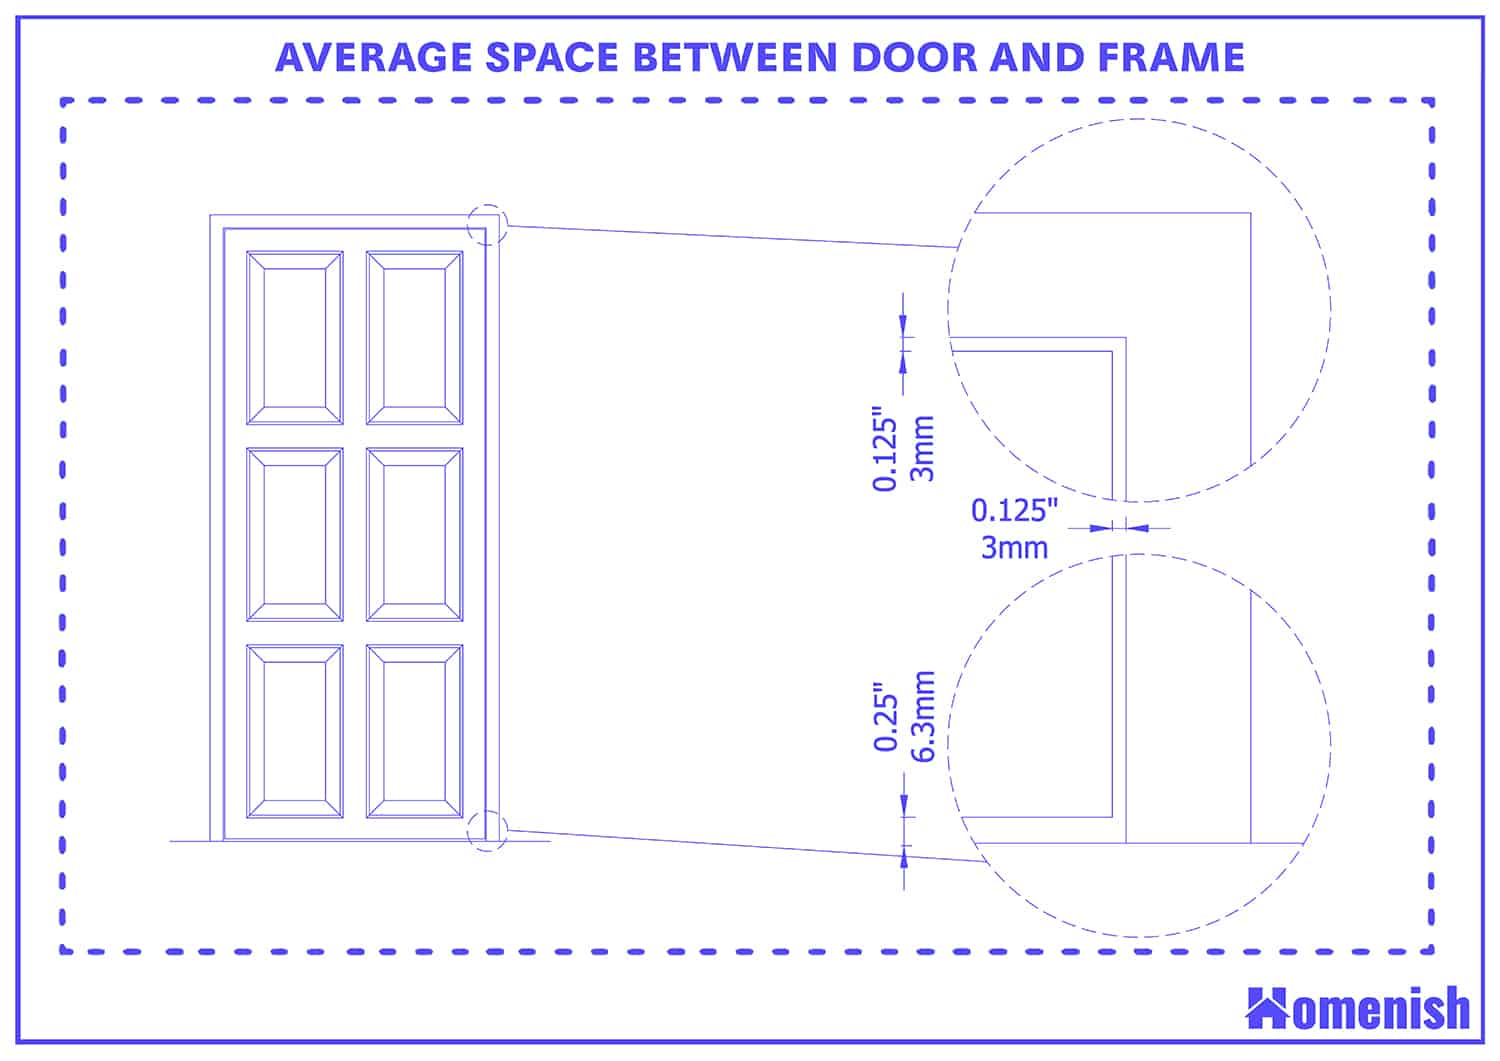
When installing doors, besides keeping in mind the factors discussed above, on average you should leave about 1/8 inches of clearance from the sides of the door to the frame. This can be applied to both interior and exterior doors.
Determining the Optimal Bottom Gap for Your Door
Your door sweep should be about ¼” wide for every 12” of door width. This will give you enough room to sweep the entryway and keep dirt from getting inside your home. If you want something more permanent, try using a door bottom.
One good solution is to use a kitchen cabinet that has an extra shelf at the bottom and place it underneath your doorway so that when you close it, there won’t be any gaps between the flooring and where you walk by each time!
If none of these options work for you, we suggest using another type of material like polyurethane foam which can help consolidate airflow within small spaces like closets or bathrooms where dampness often occurs due to condensation buildup on surfaces such as windowsills (due mainly because they get hot during summertime heat waves).
How Much Space Between Double Doors?
When it comes to double doors, you’ll want to leave about 1/4 inch of space between the two. This is because the door hinge is usually mounted on the edge of the door, and there’s no way to regulate how much space will be taken up by that when you open both doors at once.
How to Install a Door
Remove any existing door and frame
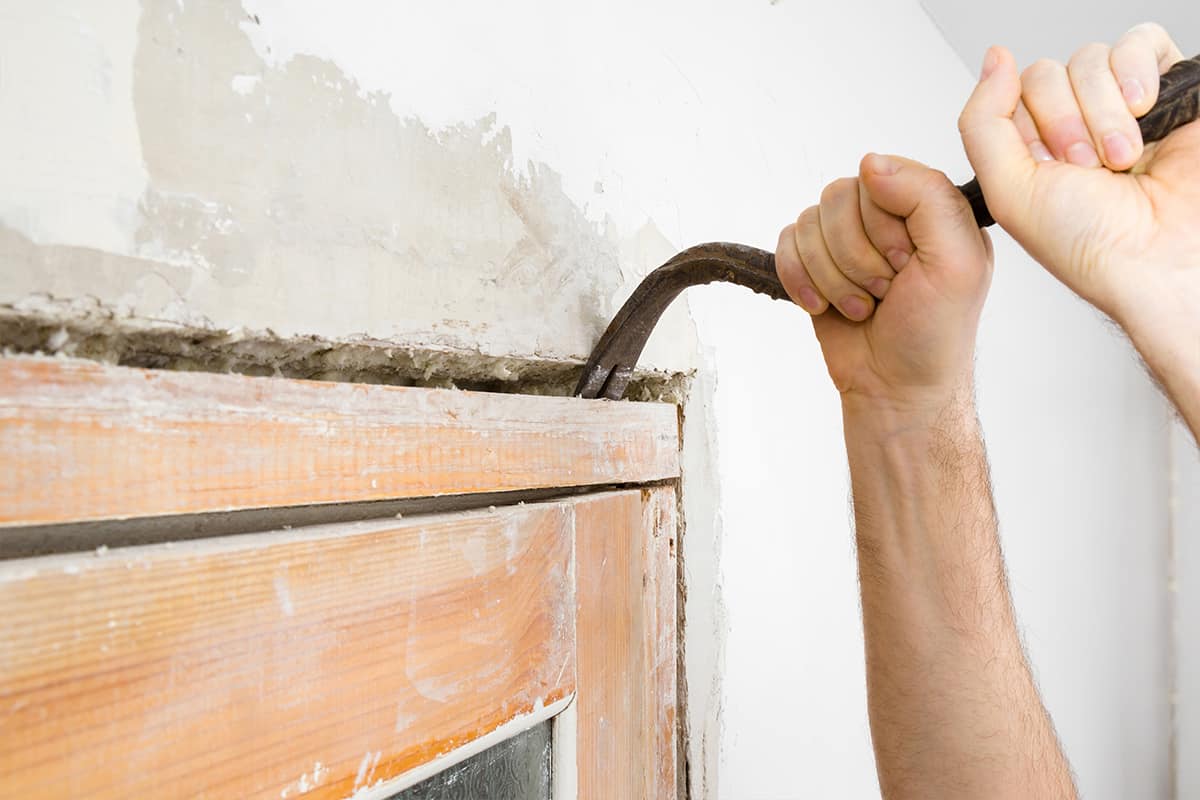
You’ll need to remove any existing door and frame, which will entail:
- Using a pry bar to remove trim around the frame, if applicable
- Removing the hinges on either side of the door’s location (if you’re installing a new one) or removing all hardware securing the old frame to its jambs (if you’re replacing an old one)
- Prying off nails from the inside of your framing studs with a hammer
- Squeezing out any remaining nails in your woodwork using pliers
Place the top of the door in first, then bring in the bottom
When installing a door, it’s best to place the top of the door first before bringing in the bottom. That way, if you have hinges on your door frame, you’ll be able to hook them onto their respective screws without hitting another person who is standing behind you (or one of your own limbs).
When placing a hinge side into position, make sure that both sides are aligned properly before tightening down with an Allen wrench or screwdriver.
Check plumb
- To check plumb, first use a plumb bob (a weighted piece of string) to see if your frame is level. If it isn’t, adjust the door until you get it right.
- Next, make sure that the frame sits tight against the wall; if there’s a gap larger than 1/8 inch (3 mm), fill it with caulk or screws. This can be particularly important if your door has glass panels in its top section—if they’re loose and move around while you’re opening and closing them, they may break more easily!
Use shims to set your jamb and level it
Now that you have your jamb in place, it’s time to level it. This is done by inserting shims into the gap between the top of your frame and the door frame opening.
To do this, remove any nails or screws securing the jamb to its current position, then use a hammer to tap small pieces of wood into place as needed. The shims should be placed at each corner and halfway down each side of the framing materials; don’t forget about any mid-point supports you may have added earlier!
Nail in your shims firmly
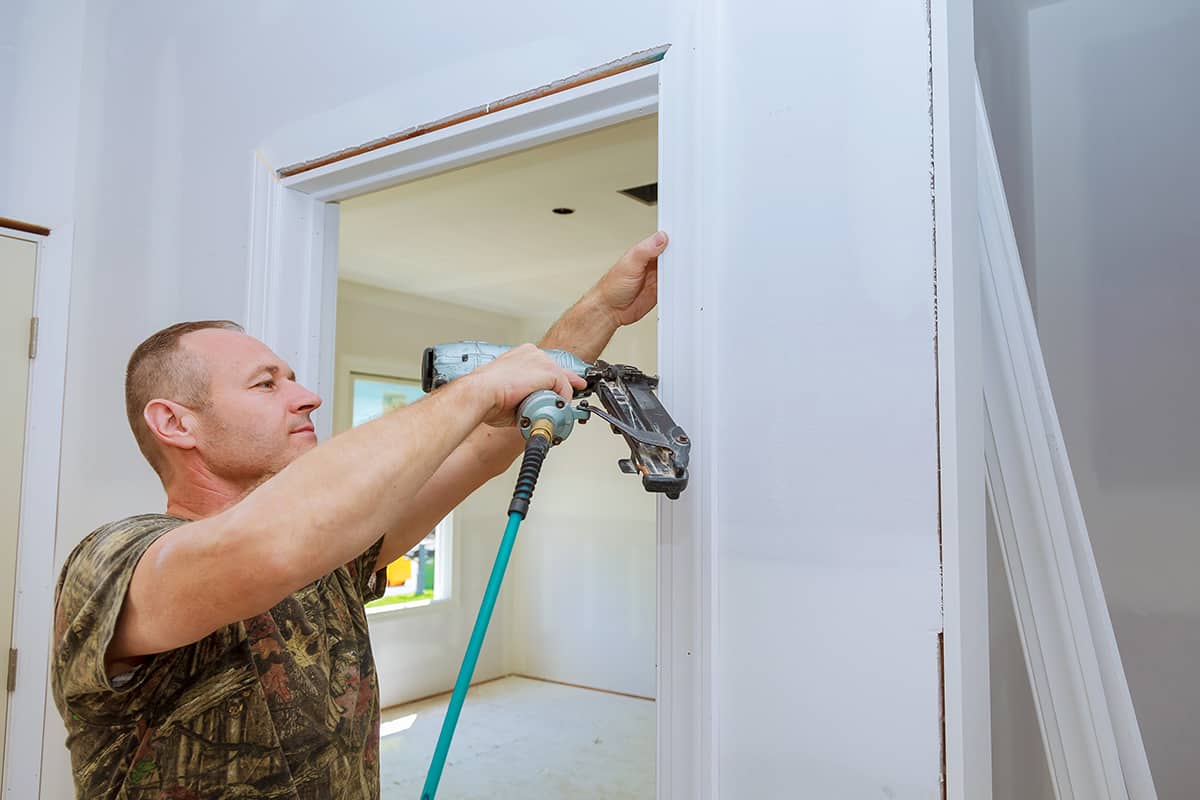
When you’re ready to add the shims, bear in mind that they’re small and easy to lose. You’ll need a few of them on hand before you start, so have some handy.
The amount of shim material needed will vary depending on your door frame and how much it has been trimmed down post-installation.
Once all your nails are hammered in, trim any excess shim material with a utility knife so that it doesn’t get in the way of installing the new door.
Trim excess wood from your shimmed frame
Ball up the excess wood and use a utility knife to trim off any overhang from your shimmed frame. Be careful not to cut yourself, as it can be easy to do when you’re cutting something with such a sharp edge.
Trimming this excess wood helps ensure that your doors will slide easily on their tracks, so make sure you do it right!