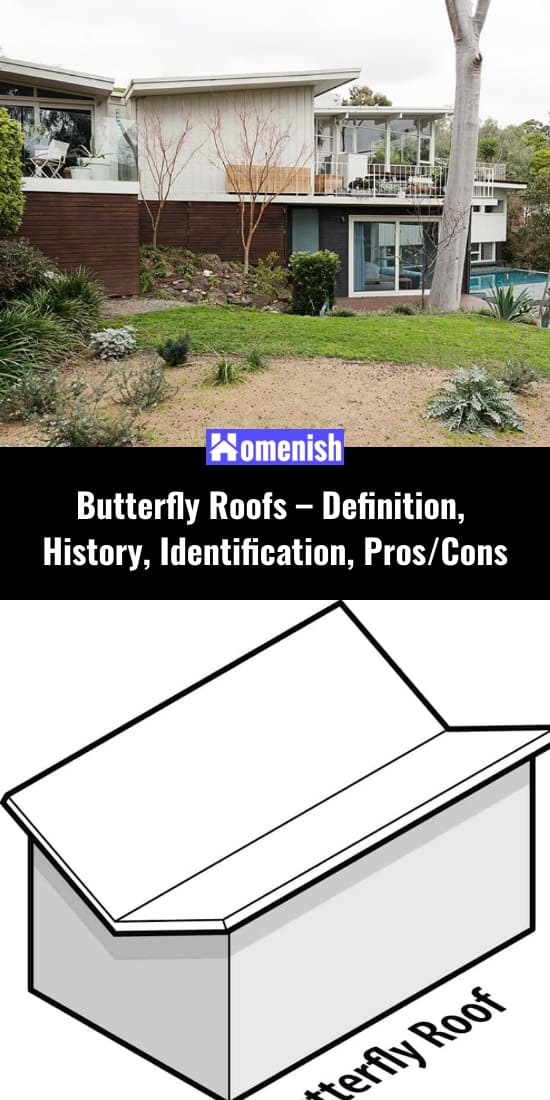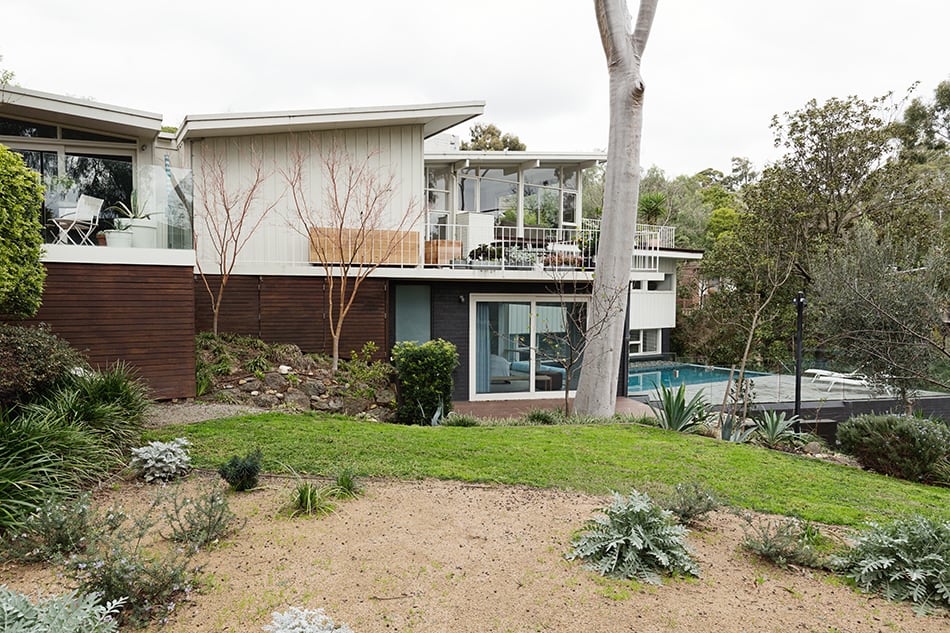
How would you like to live in a butterfly house? Though not what you’ll find in your local conservatory, homes with butterfly roofs can be quite picturesque.
Table of Contents
What is a Butterfly Roof?
A butterfly roofing system is a kind of roof that is V-Shaped, looking like a butterfly. This kind of roofing system includes two areas that slope downwards and converge near the middle of the structure.
When taking a look at the front of the structure, the roofing system looks like the wings of a butterfly, leading to this kind of roofing being an attractive and popular option for numerous people throughout the world.
A butterfly roof might be the choice for you if you are looking to be ecologically friendly. With that in mind, we’ll show you some butterfly roofing system advantages and disadvantages to consider prior to you pushing ahead with this job!
History of Butterfly Roofs
The butterfly roofing system changed classic English-style real estate, like the relaxing home and middle ages Tudor-style houses, with triangle roofing systems and vertically oriented brick fireplaces. The modernism of Post-war America was prominent elements in the development of the natural design behind mid-century architecture and the butterfly roofing system. Today, butterfly roofing is one of a couple of crucial developments from this period that is still an essential aspect in the acknowledgment of mid-century modernism.
Where Are Butterfly Roofs Used?
Butterfly roofing was a typical feature in house style throughout the mid-century, so numerous communities throughout the nation will have residues of the butterfly roofing system. The valley of butterfly roofing is made to catch rain and channel it into an included area. The most popular area for butterfly roofs now is Hawaii.
Identifying a Butterfly Roof
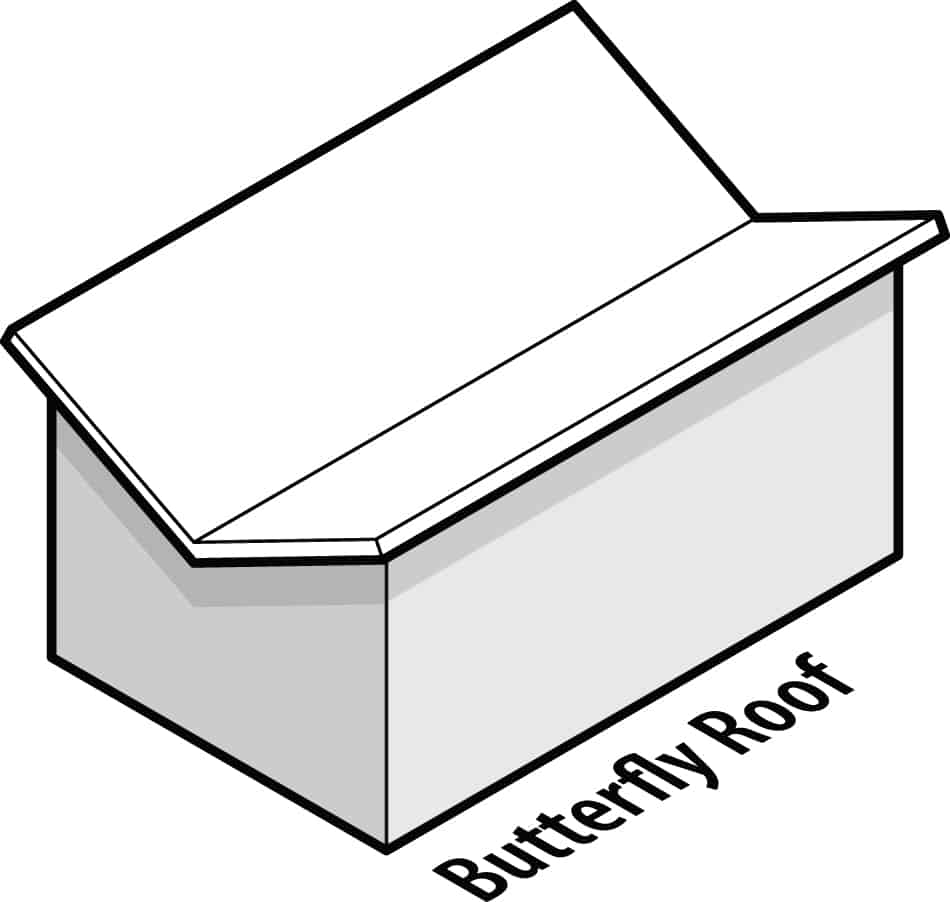
The eaves on the outside of the roofing system are irregular to a lot of roofing system styles due to the fact that they angle up rather than downward, which is regular in much of conventional real estate. The style of butterfly roofing is intended to look like the wingspan of a butterfly flying higher in the air.
Types of Butterfly Roofs
The zigzag roofing system is developed by having numerous butterfly roofs next to each other so that there are downward-facing points and upward-facing points. In gable roofing, you start with a standard triangle-sloped roofing system, though one gable is somewhat longer and combines into an extension of the home with a flat roofing system. Low-pitch butterfly roofing is identified by having a slope of less than 30 degrees, and marina roofing actually has a somewhat rounded convex center with two upward-facing eaves.
Butterfly Roof Pros and Cons
Whilst butterfly roofing systems offer a contemporary and elegant aesthetic to a house, they are classified as an unusual, alternative design, with a variety of benefits and drawbacks in contrast to other kinds of roofing systems. It is crucial to understand the benefits and disadvantages butterfly roofing systems can bring.
You want to weigh out not just the useful elements of the roofing system, but the visual appeal too. Taking a look at butterfly roof advantages and disadvantages will likewise assist you in picking whether it is the best option for you:
Pros
Natural Water Source
A butterfly roofing system is created to gather water in the center of a house (generally in a specifically created holding tank). The water gathered can then be utilized for watering plants, bathing, or perhaps for drinking after being filtered. Bear in mind that this needs unique facilities in place before it can work appropriately.
Drainage
Even if you do not recycle the water gathered, butterfly roofing system enables water to quickly stream off the roofing system, removing any water accumulation and avoiding prospective damage, such as mold development, from emerging.
Resistant to Strong Winds
Due to their aerodynamic structure, butterfly roofing can withstand wind damage from seaside winds and heavy storms. The style of the roofing system likewise suggests less repair work and upkeep, reducing expenses in the long run.
The Choice for Larger Windows
As the slope of the roofing is the reverse of standard roofing systems, this allows you to have actually bigger windows set up in your house. This develops a roomier feel to your house, along with enhancing air ventilation.
Increased Light and Solar Power
Having bigger windows likewise increases natural light and offers you the alternative of setting up add-ons, such as solar PV panels.
Cons
Expense
The primary downside to having butterfly roofing is the expense. Since the roofing is tough to set up and more intricate, this increases the expense in regards to equipment and manual labor, along with setup time.
Upkeep
The style of the roofing indicates that there is a regular requirement for upkeep, which has actually been shown to be expensive and challenging, along with increasing the running expenses. This makes butterfly roofing system less preferable to those operating on a limited budget plan, where the building rate is the primary issue.
Larger Installation Crew Required
When setting up the roofing system, the pattern and aerodynamic structure need more employees. The cost of building can likewise differ depending upon whether you do it yourself or hire professionals. Be sure to ask around and get quotes to guarantee you get the best offer if you select professionals.
Loft Space
Understand that setting up a butterfly roofing system might be restricting in regards to loft area, which might reduce the worth of your residential or commercial property. This implies that you might not have the ability to increase your capability unless another level is included below the roofing, which can add time and be pricey.
Not Ideal for Heavy Rain and Snow
A butterfly roofing system is likewise not suggested for locations with heavy water and snowfall. This is because the more particles that fall onto the roofing system, the more damage can take place, which might possibly lead to the roof collapsing.
Considerable quantities of water might enter your house and trigger a wide variety of issues in the interior, presenting a major health danger.
Temperature Level Control
The style of the roofing system can make it harder to control airflow and temperature levels throughout the house, leading to some locations being much warmer than others. It is highly encouraged to utilize a strong membrane without any joints to keep water out.
There are other options (depending on your spending plan), such as natural products and metal, that can keep your roofing sealed and safe and secure.
How to Build a Butterfly Roof
Butterfly roofing, or inverted roofing as it is also called, is really simple to spot because of how the external walls rise more than they do in the middle. Still popular across America, they permit a really open layout with a large living area. Constructing butterfly roofing is not that challenging, and this section will tell you what you need to know to get started.
Tools and Materials
- Outdoor plywood
- Fabricated butterfly roofing system trusses
- Drip edge
- Scaffolding
- Metal flashing
- 12 GA roofing nails
- Asphalt shingles
- Fasteners for metal items
- Tar paper
- Clips
- Rafter ties
- Claw hammer
- Measuring tape
- Canvas nail belts
- Framing hammer
- Combo square
- Framing square
- Nail puller
- Wrenches
- Woodworking level
- Drills
- Screwdrivers
- Hacksaw
- Chalk line
- Ladders
- Pencils and felt pens
- Sawhorses
- Hand saw
- String
- Plumb bob
- Finishing hammer
- Clam
- Nail gun
- Staple gun
- Chisel
- Tin snips
- Caulk gun
- Nail set
- Plans
- Insurance coverage
#1: Measuring for Trusses
Check the plans for your house and inspect the measurements of the roofing system. You’ll want these measurements prior to you having your butterfly roofing system trusses developed.
#2 – Ordering Trusses
Visit a dependable truss and gable production business and have your trusses prepared according to your measurements. Also, you will need the slope, the size of space between the rafters, and length of rafters in order to have the trusses and joists constructed.
#3 – Framing the Roof
According to the requirements from your plans, start connecting your rafters to the leading plates of your walls. When setting up the rafters, ensure the rafters are equally lined up and constantly utilize a level with a plumb bob.
#4 – Applying Plywood
Start laying your plywood at the bottom of your roof and work upward. Utilize a hammer or a power nailer to nail the plywood to the roofing frame.
#5 – Laying the Felt Tar Paper
Start at the bottom of your roofing system and work upward as you roll the felt paper out. You’ll want to use felt tacks for securing the paper onto the plywood.
#6 – Applying Shingles to the Roof
Start at one of your lower edges on the roofing system and start laying shingles. When you’ve ended up laying shingles all up the roofing , it’s time to go back and shingle the corners. Use one shingle for each corner section and work up the roofing.