Sanding is an often overlooked aspect of any woodworking project. Sure, it takes time, but sanding can turn any wood project from good to great.
Wood that you bought straight from a hardware store may not only be rough but have dents and other imperfections. But when you sand it, you’re not only smoothening the surface of the wood but also emphasizing the beauty of its natural grain. Sanding can also prepare the wood for painting, ensuring that the varnish or pain would go on smoothly.
Which type of sander do you need? There are more options than either using sandpaper or an electric power sander. In this post, we’ll run through the different types of sanders available.
Table of Contents
11 Types of Sanders
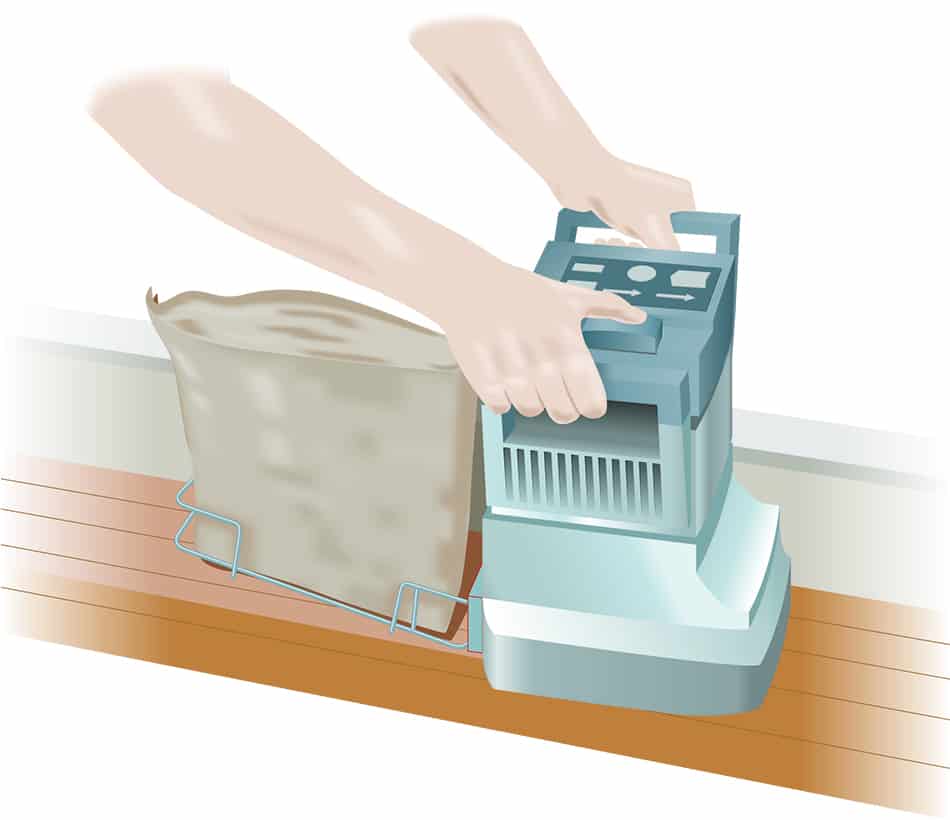
Belt Sanders
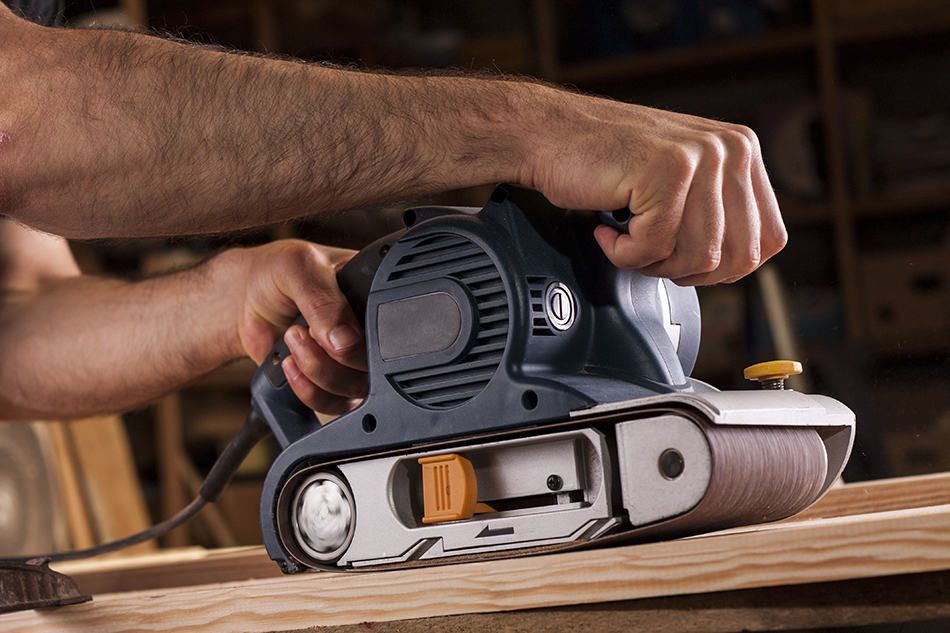
In a belt sander, a large piece of sandpaper works as the belt. It rotates around the sander’s mechanism. They vary in size and power.
There are two kinds of belt sanders:
- Handheld
- Fixed
How do Belt Sanders Work?
A loop of sandpaper is slid onto the rotating mechanism. Usually, you’ll see two metal rollers and a flat base for the sandpaper to fit over. The back roller spins when the sander turns on, and the front roller simply allows the sandpaper to rotate back over that side. The flat area in the middle keeps the sandpaper firm against the surface you’re sanding.
The sanding belts can loosen and expand as you wear them down, so there’s often a way to tighten the rotating mechanism. When you do need to change the belt, you can often simply unlock the tool and make the fit as loose as possible, at which point you can slide the old belt off and slide a new one on.
Uses for Belt Sanders
A belt sander can be considered a versatile tool as you can use it not only in sanding rough surfaces but also for trimming to a scribed line, leveling surfaces, and rounding and shaping. But be careful. They work quickly, and you need to make sure to sand each area of your surface evenly. They’re a little harder to control and more unwieldy, so they’re not for detail work or getting into small areas.
You can get a variety of belts to take off wood, metal, paint, stain, or any other material.
Sander and Belt Sizes: What’s the Best for You?
The sanding belt can take on different sizes. Smaller ones are easier to use and control, but larger belts can cover larger surface areas. However, you may need to be an experienced user in order to harness its full potential.
The most common size of belt sander takes a sanding loop measured 3″ x 21″, though you can find them as small as 3″ x 18″ and as large as 4″ x 24″. The smaller sizes will be easier to control, especially if you have smaller hands, but the larger sizes will cover more area faster.
If you plan on doing a lot of sanding, you might want a smaller size and a larger size to switch between depending on the area you’re sanding. Also, keep in mind that the belt will be tighter when you first put it on and will expand as you use it.
Speed of the Sander
Another variable is belt speed. This goes hand-in-hand with power. A more powerful sander will also generally run at higher maximum speeds. Most models will have a toggle switch to let you run between two or three speeds. The faster the speed, the more area you’ll cover and the more material you’ll take off in a shorter time. Use the slower speed when you need to be more cautious.
Tips for Getting a Belt Sander
Similar to orbital sanders, there are certain features or functions you’d want from a belt sander. First is the dust collection system. The best belt sanders have an integrated dust bag that gathers dust. It usually requires regular emptying. You should also get one with a shop-made stand capable of holding the sander on its side, vertically or upside down. This would let you bring the work to the sander instead of vice versa.
Don’t use a sander that is larger, more powerful, or faster than you need. It’s easy to take off material; it’s much more difficult to fill it back in.
Benefits and Drawbacks of Handheld Belt Sanders
Pros:
- Lightweight and portable
- Usually comes with a removable dust bag to keep the work area cleaner
- Easy to control
- Adjustable speed
Cons:
- Not for large jobs
- May take longer to sand because of its low power
Advantages and Disadvantages of Stationary Belt Sanders
Pros:
- Larger size for sanding wider areas
- More powerful for sanding quickly
- Adjustable speed
Cons:
- Noisy
- Heavy and generally non-portable
- Need to control the piece being sanded rather than the tool
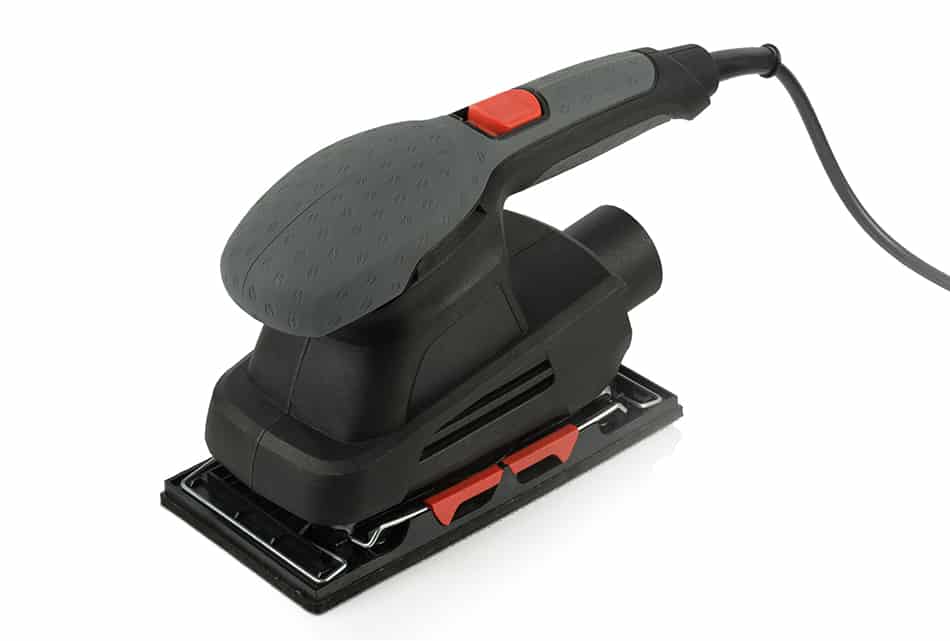
Orbital Finishing Sanders
When you use the word “finishing” in a woodworking project, you’re generally talking about the final steps. This is the type of sander you would use to put the last touches on after you’ve taken off the bulk of the material you need to or when you don’t have much to remove in the first place.
They’re ideal for:
- Rounding sharp edges
- Sanding plaster
- Removing paint
You might also use these for small woodworking projects, such as making birdhouses. Other terms for an orbital finishing sander are quarter-sheet sanders or palm sanders because they use a quarter-sheet of sandpaper, and you need only one hand to control them.
They’re not as powerful as belt sanders, but you can control the speed on many models.
Orbital sanders can be of fixed or variable speed. Fixed high-speed sanders can effectively sand rough surfaces, while sanders of lower speeds can be better suited for delicate finishing work. Then there are the variable speed orbital sanders that offer the most flexibility for DIYers and professional users.
Orbital sanders can be corded or cordless. Corded types can provide reliable power for an extended period, although the cordless type can allow more flexibility and mobility. It’s also safer because you don’t have to deal with wires that may get in the way of your job.
Finally, brushed motors are the more practical choice for home use. Brushless sanders are more reliable and durable, making them ideal for commercial use. Of course, you’ll have to pay more if you buy a brushless orbital sander.
How Does An Orbital Sander Work?
Cut a piece of sandpaper into quarter-size rectangles and clamp into the base of the sander. You can also buy pre-cut sanding sheets, but why would you? The full sheets are cheaper and easy enough to cut or tear yourself.
When you turn the sander on, the base will vibrate the sandpaper. So, instead of the sandpaper revolving around the base like in a belt sander, the sandpaper doesn’t move much. It does vibrate, however, in a circular motion, which you’ll need to be aware of.
If you don’t move the sander evenly across the surface, you’ll get swirls on the surface. This is because the vibration doesn’t go with the grain of the wood.
A good variation of an orbital sander is a detail sander
Detail Sanders
Detail sanders, also called corner sanders, are specialized orbital sander types whose purpose is to give details of the finished work in corners and tight positions. For ease of use and its detailing purpose, a detail sander is usually small, handheld, and has a triangular sander disc.
Benefits and Drawbacks of Orbital Finishing Sanders
Pros:
- Lightweight and portable
- Easy to control
- Sandpaper costs less than sanding belts
- Creates a smooth finish
- Very affordable
Cons:
- Not very powerful
- Not for sanding large areas
- Doesn’t vibrate in the direction of the wood grain
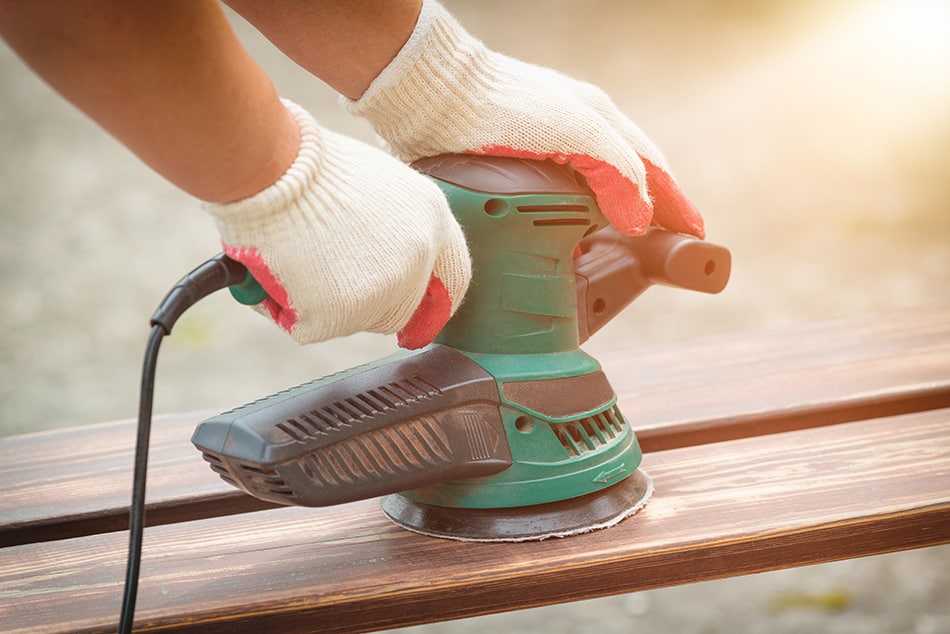
Random-Orbit Sanders
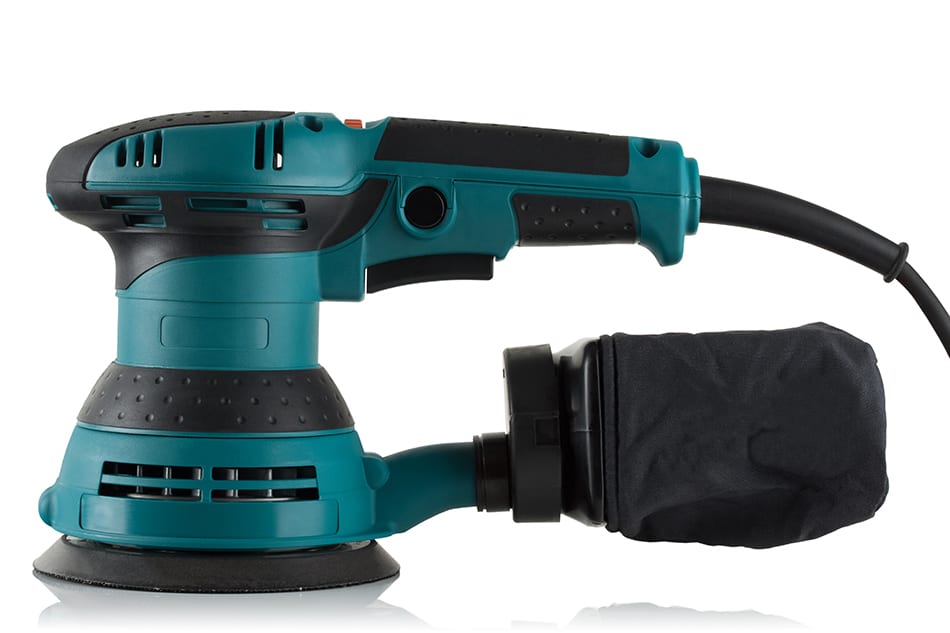
A random-orbit sander, or a random orbital sander, gives you some of the benefits of both a belt sander and an orbital finishing sander. On this type of sander, the base is round, and you use round sanding discs on them. The round base both vibrates (like an orbital finishing sander) and spins (more like a belt sander). The result is faster sand with a smooth finish and no need to worry about the swirl marks that a palm sander can make.
The random orbital sander is often confused with an orbital sander. Many people who are into DIY think it’s the same thing. But there are distinct differences between the two tools. The random orbital sander, for one, has a circular pad, while the normal orbital sander uses a square pad. There is also a difference in the pattern used by the random orbital sander. Moreover, it doesn’t leave behind swirls, unlike an orbital sander.
As mentioned earlier, this is the best sanding tool for preparing a surface before and even after painting. It can leave behind a uniform surface with minimal visible scratches.
It’s also ideal if the idea of a belt sander intimidates you or sounds like it would take off too much material from the surface you’re working on. It’s lightweight, powerful, and easy to control, and you can still set the speed.
Random Orbit Sander Varieties
Random orbit sanders come in four variations:
- Palm grip sanders are the smallest and least powerful. Use them for sanding softwood, plaster, or removing paint.
- Handgun grip sanders are more powerful but usually aren’t portable. They’re more like a table sander that stays stationary in your workshop. You bring the product to it, which isn’t always feasible or convenient.
- Angle sanders are very powerful and durable. You can compare them to a belt sander in efficacy.
- Pneumatic palm grip sanders are the pro version of this type. They’re powered by an air compressor tool, which takes more time to set up but delivers more power than an electric sander model. Use these when you have a lot to sand in a fixed location.
Sander and Disc Sizes
Most random-orbit sanders are handheld, operating like a finishing sander, though you can find a variety of handles and grips. Try picking up some different models to see which grip is the most comfortable for you.
The sanding discs are generally 5-6 inches in diameter. This lets you cover a large area fairly quickly. One variation is the hook and loop design. They cost more than the normal sanding discs but may be more convenient for you to attach.
Benefits and Drawbacks of Random Orbit Sanders
Pros:
- Generally lightweight and portable
- Usually more powerful than finishing sanders
- Easy to control
- Adjustable speed
- Produces a smooth, unmarked surface
- Sanding discs are comparable in price to belts
Cons:
- Usually not as powerful as belt sanders
- Sandpaper requires regular replacement, faster than the belt in belt sanders
- May require an air compressor
Sanding Block
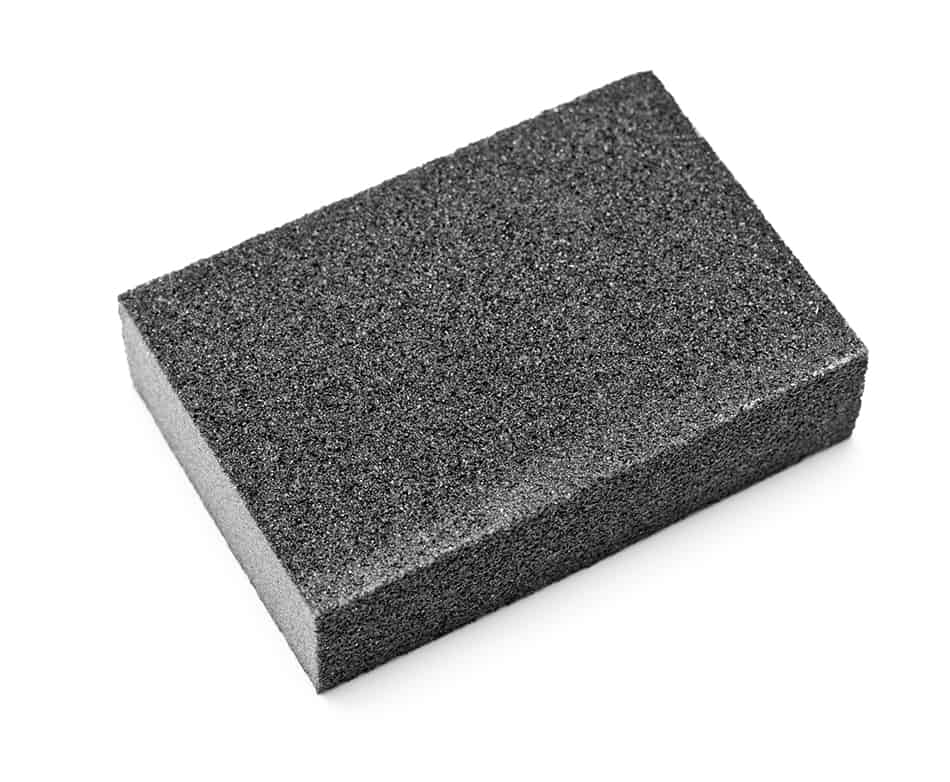
Any list of the best sanding tools will not be complete without mentioning the sanding block. It’s the least expensive sanding tool out there. While it’s cheap, a sanding block is also easy to use. Sure, you’ll have to rely on your power to do so, but when you get the hang of it, you’ll be able to produce a smooth finish for your wood project.
A sanding block is often a block of wood or cork that holds sandpaper and features at least one smooth flat side. It can come in various sizes and shapes like sponge and trapezoid. It is commonly found in almost all hardware stores.
You can even create a homemade sanding block by getting a piece of wood and wrapping sandpaper around it. Cut the sandpaper in such a way that it would cover the bottom and sides of the block. You can then staple the sandpaper to the wood or simply hold it by your hand.
One thing you’ll appreciate about a sanding block is its simplicity. It requires no electricity, meaning you can use it practically everywhere. Its small size and simple design also mean you can use it for crafts and toolboxes. Sure, it requires some skill to be able to attain the best finish, but when you compare it to most electric sanders, a sanding block is still a lot easier to use.
Drum Sander
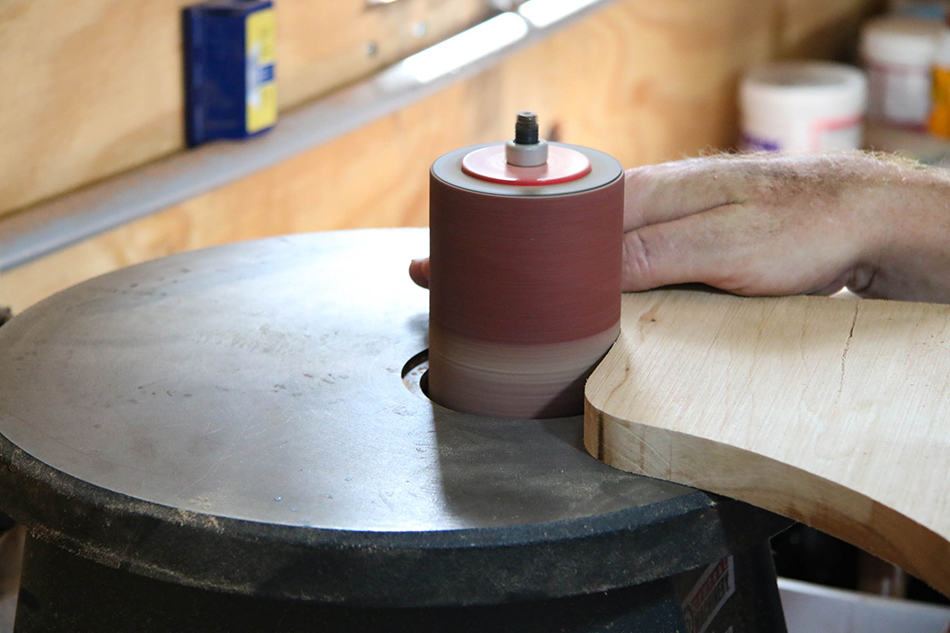
Meanwhile, a drum sander is a smaller and cheaper option than a belt sander. It is a floor sander, meaning it is used in stripping and prepping floors. It can also be utilized in sanding a concrete floor. Drum sanders and edging sanders are the two types of floor sanders.
A drum sander is an incredibly powerful sanding tool capable of removing all sorts of things from your floors, including adhesives and paint. But the power of a drum sander has its drawback, such as its size. Make no mistake about it; this is a heavy tool that you’ll likely need a hand in transporting.
There are two types of drum sanders—open-ended and closed-end.
Open-ended types have an open end, allowing you to maneuver it better. It’s the more appropriate choice for working in smaller areas. However, the drawback is that it is not as stiff or rugged as the closed-end drum sander. Speaking of this type of drum sander, it is typically wider and would be more efficient at sanding large surfaces. It can work at almost twice the rate of open-ended drum sanders.
Edging Sander
The edging sander is a kind of floor sander designed for sanding the edges of floors and stairs or those areas which cannot be reached by a drum sander.
It is a smaller cousin of the drum sander and thus gets closer to the ground. It is easier to handle and weighs less compared to the drum sander.
But make no mistake about it, an edging sander is a powerful tool. Be extra careful in using it as improper handling can lead to injury and even floor damage.
Bench Sander
This is also known as a table sander. As you may deduce from its name, a bench sander sit stationary on a workbench. While not suited for precision work, a bench sander is powerful and thus highly popular among large woodworking shops and factories. It’s useful in sanding, smoothing, and removing jagged edges and splinters on wood and lumber.
There are three kinds of bench sanders, with each one serving a unique purpose. The first type is the belt and disk sander, which features a round disk rotating for sanding. It also has a flat belt on top. Compact and useful, this type of bench sander is an ideal two-in-one option for sanding square and curved ends, thanks to its unique configuration. It also commonly has a tilting work table for working on angled pieces. You can sand angles, bevels, and chamfers on this type of sanders.
There’s also the drum bench sander which can accept long and wide boards for smoothing. This type of bench sander started as a shop tool, but there are now home models used. It can come in handy in smoothing doors and panels.
Finally, there’s the oscillating spindle sander which has a drum moving up and down and spinning in circles. This motion is designed to sand curves more precisely than other types of sanders.
Oscillating Spindle Sander
An oscillating spindle sander solves certain problems or issues posed by using other sanding tools like a drum sander, especially in sanding curved workpieces. For example, a drum sander generates lots of heat that can easily burn a workpiece or damage the sandpaper sleeve. This can happen even if you’re an experienced user.
But an oscillating spindle driver solves this common issue. It moves the sanding drum up and down, resulting in a bigger part of the surface being exposed to the workpiece. This results in a smoother edge on a workpiece and sans burn marks.
At the heart of an oscillating spindle sander is the drum. It is a rubber-lined steel cylinder that’s the workhorse of the tool. It fits over the spindle of the sander. It compresses when you tighten a nut on the end of the spindle, causing it to expand slightly, and this holds the sanding sleeve in place.
The drum of an oscillating spindle sander may vary in diameter, from .5 inches up to 3 inches. It is easily removable from the spindle, allowing you to replace one sleeve with another to fit the radius of the curve that you’re sanding.
An oscillating spindle sander is mostly used in production or industrial shops. But there are now benchtop versions that are more affordable and effective for use in smaller shops. Benchtop spindle sanders are available in the .25 to .5 horsepower range, which is powerful enough for most of the tasks these are designed for.
File Sander
Another sander that can make your job easier is the file sander. Manual sanding can be quite challenging and tiring. It can make your arms tired and aching. With a file sander, you can get the job done without getting tired easily, even if you work for extended hours.
A power file sander can give you superior sanding action to finish tough jobs. It is a handy device with an adjustable and long thin arm that allows it to get into tight or small spaces. Others come with sanding belts.
It also has plenty of power to take on home or DIY projects. It can also be used in sanding tight areas or even car paint repairs. But this is not the type of sanding tool to use in sanding larger surfaces.
Drywall Sander

As you may deduce from the name, a drywall sander is designed to smooth out the surface of the drywall. This is the type of sanding tool you will need to ensure the optimal finish of your drywall project.
A drywall sander is like a disc or belt sander affixed to a pole. Its length can range from 10 to 13 feet. It also has a rectangular sanding surface. With its length, it can reach pretty much anywhere.
There are three things to look for when you are shopping for a drywall sander. First is the motor power. Keep in mind that drywall sanders are electric tools, so the power rating can give you an idea as to how it would perform. Naturally, a 7-amp drywall sander is more reliable and powerful than a unit with a 5-amp rating.
You should also be concerned with the motor speed as this will also give you an idea of the performance of the drywall sander. Again, the higher the rating is, the better performance you can expect from a drywall sander. Lastly, the hose length can affect the flexibility of the tool.
Detail Sander

The last type of sanding tool in this list is the detail sander which looks like a steam iron thanks to its triangle-shaped pad. The shape allows it to be useful for detailed work, especially when smoothing tight spaces. It is a compact and portable power tool that can come in handy for DIY and home projects.
Also known as corner or finishing sanders, detail sanders are commonly used in finishing as well as sanding small and hard-to-reach areas. These include curves, slats, inlays, and carvings. A detail sander’s triangular-shaped pad allows it to reach those awkward and tight areas. It also has a slower rotation compared with other sanders, which is important as it minimizes the risk of damaging the wood.
These are 11 of the types of sanders that you can choose from for your DIY project. As you’ve learned, there is a sander that you can harness or use to suit a particular type of work you have in mind.
Features to Look for in a Sander
Before discussing how each one works (which we’ll get to in a moment), you might want to start a little broader than that.
Power and Weight
Do you need a sander for finishing or re-finishing a wide area, or are you looking to sand a small spot? Some sanders are incredibly powerful for finishing large jobs in the shortest amount of time possible. These more powerful sanders are larger and heavier, and you need to be careful using them because it’s easy to take off more material than you need.
Sanders meant for smaller jobs are lighter weight and don’t work as quickly. They do cost less, though, so they might be a good option for someone looking to do the occasional sanding job.
Portable vs. Installed
Do you need a sander you can take with you to a job site or carry around the house, or are you looking for one to set up in your garage or workshop? The portable, handheld variety is typically easier to use to get into small areas or when you can’t bring the material to the sander. But they’re not as powerful, so using a handheld sander will take longer than a table sander.
If you know that you’ll be sanding pieces of wood or metal that you can feed into the sander without taking too much material off, a table sander will be your most efficient option. You can still move it and take it with you somewhere if you need to; it’s just not as convenient as a portable sander you can throw in the carry case. And, naturally, it will be more expensive for a heavier-duty tool.
Electric vs. Pneumatic
What power source do you want to run on? Electric sanders are generally the most portable and easiest to set up. If you’ll be sanding near an electrical outlet anyhow, with no little chance of losing power, electrical sanders are typically the most convenient. Simply pull it out of your carry bag or run to the garage to get it, plug it in, and you’re ready to go.
Select pneumatic if you’re looking for the most effective sander. They’ll supply the fastest sand. Just keep in mind that you’ll likewise require an air compressor to power a pneumatic sander. This is less convenient to set up, though, unless you’re using other pneumatic tools at the same time, as you need to set up and fuel the air compressor.
With either electric or pneumatic models, you’re still corded. Battery-powered sanders aren’t really an option yet. The amount of power a sander needs to run the whole time you’re using it would take a large battery, and a smaller battery wouldn’t last long enough.
As with any corded tool, be careful not to trip on or get the cord stuck in the work zone.
Conclusion: Which Type of Sander to Use?
So, which sander is best for your job? It depends on how much material you need to remove and how large of an area you’re working on. Belt sanders are the fastest and most powerful. Finishing sanders are the easiest to control in small areas. Random-orbit sanders cross the line between the two.
The other main consideration is whether you need a fixed or portable model. Fixed sanders are more powerful, but you need a place to set them up. Portable models go where you need to, so they’re good for household work or taking with you to job sites.
Finally, consider size and grip. You need something that will be easy for you to control, won’t cause hand fatigue, and is comfortable to hold.