Brad nails are used for the final detail of a project and have a smaller head than their cousin. When selecting brads, it’s important to remember that they’re often much shorter than finishing nails.
The length of your brand is generally determined by the thickness of the wood you’re fastening together and its intended use.
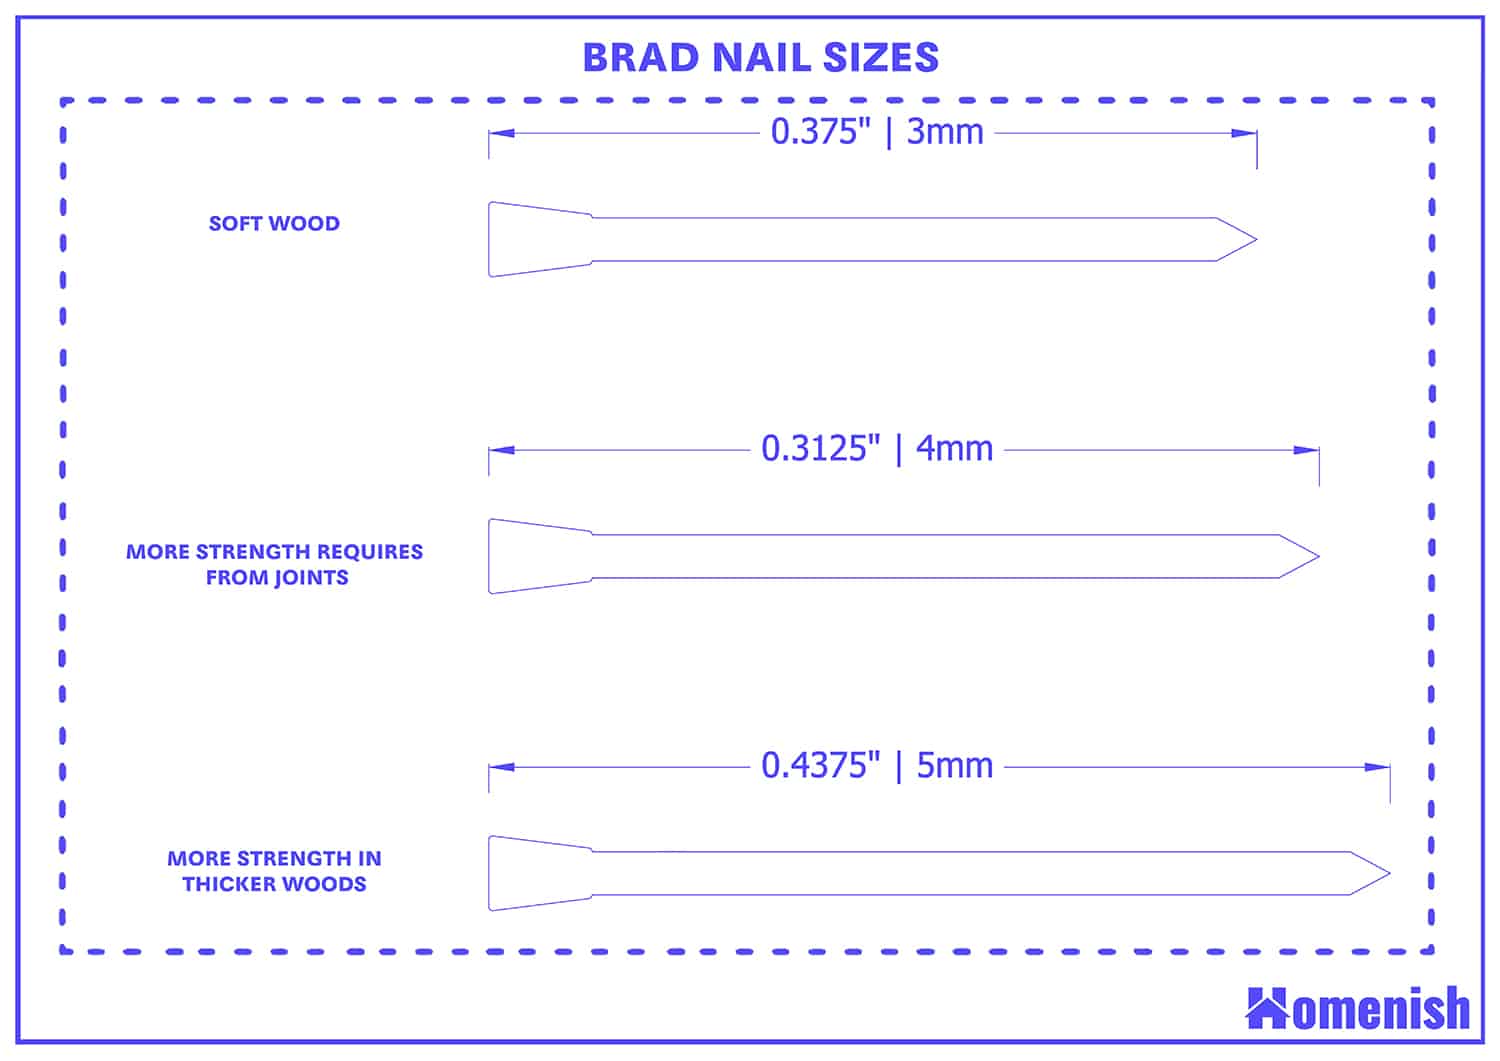
Depending on the wood thickness, here are the size suggestions.
- Soft wood – use 3/8″ -long brads (3mm)
- More joint strength – use 5/16″ -long brads (4mm)
- More strength in thicker wood like MDF boards, particle board – use 7/6″ – long brads (5mm)
Table of Contents
Brad Nail Sizes
When choosing what length of nails are right for your project, take these factors into consideration: type of wood being used; the number of nails needed; thicknesses; whether or not there are any knots present (will require longer ones).
If your wood is soft enough that you don’t want any risk of splitting it, then use 3/8″-long brads (3mm) for all of your projects. To ensure that these fasteners don’t slip out as you work but still allow for easy removal later on, choose #0 or #1 gauge nail sizes based on the thickness and type of material being attached together.
If your project requires more strength from its joints than conventional finishes can provide, consider using 5/16″-long brads (4mm). These will offer better holding power through thick pieces like plywood without risking splitting them apart.
For even more strength in thicker woods such as particleboard or MDF boards (medium density fiberboard), go with 7/16″ – long ones (5mm). This size will also require larger holes in most cases, so make sure they’re drilled accordingly before driving them home!
If you have larger and heavy-duty projects with thicker materials, we suggest you follow our guide on framing nail sizes.
Nail Size for Crown Molding of 2.5 inches
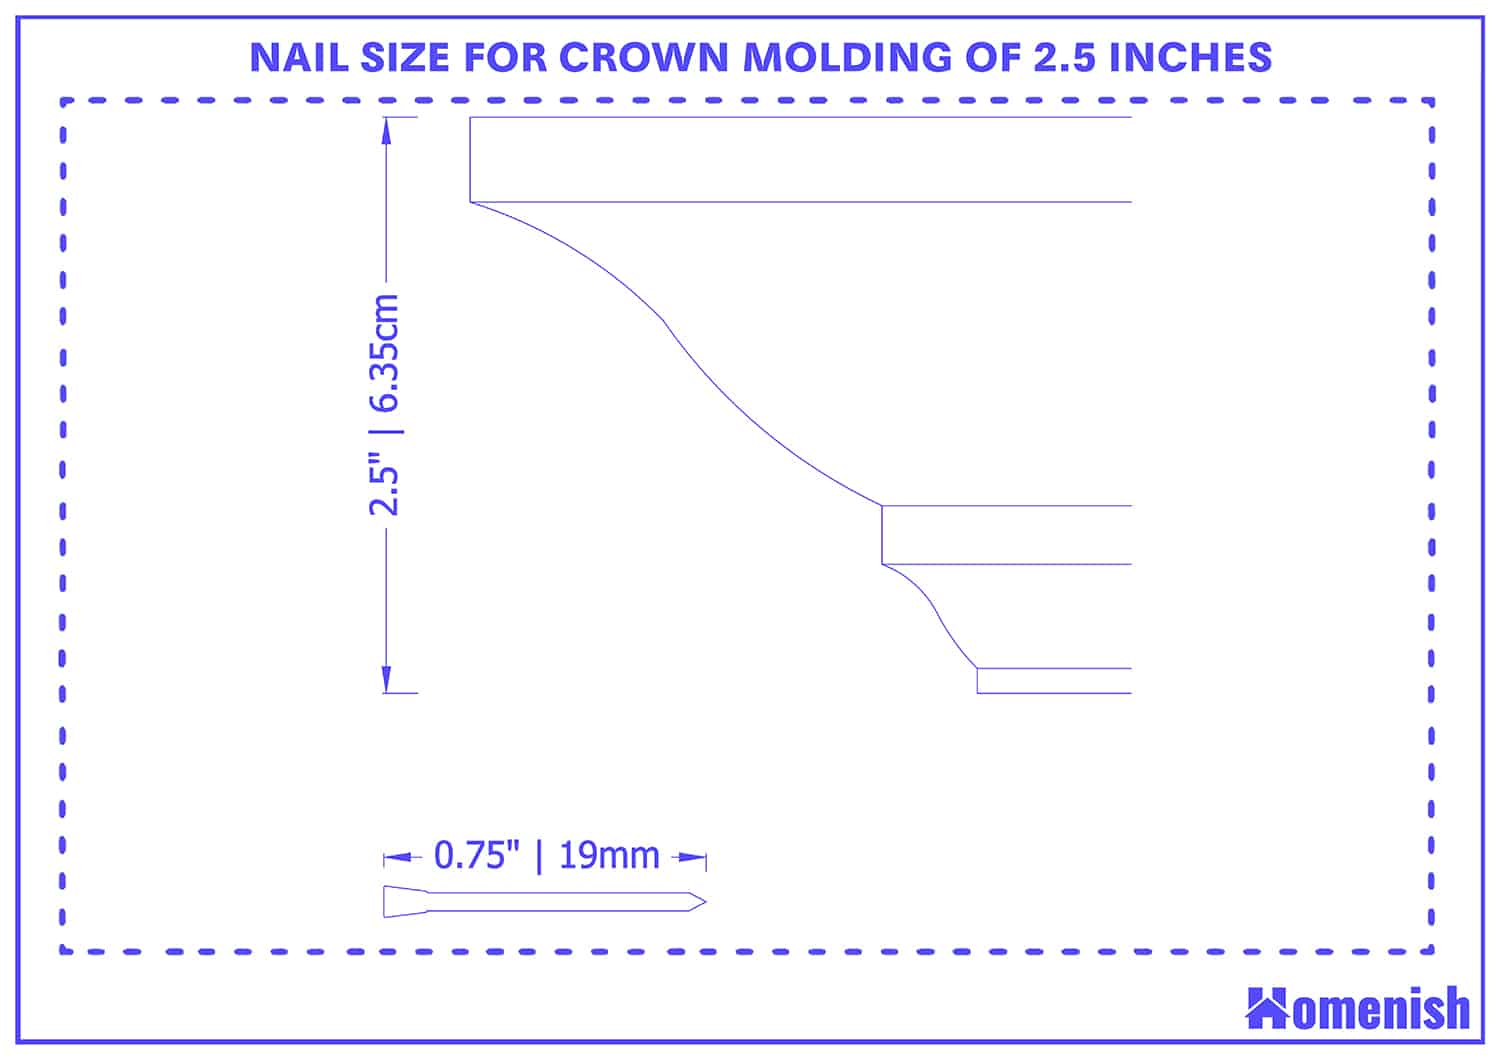
If you are working with any crown molding that is 2.5 inches wide or less, you need nails at least 3/4-inch long. You can use #8 finishing nails or #10 stainless steel finish nails for this purpose.
Nails longer than 3/4-inch will not work for crown molding pieces under 4 inches wide because they will not be strong enough to hold the piece in place with long spans between wall studs and ceiling joists.
You should use 1 1/4-inch-long brad nails or 1-inch-long finishing screws instead of flathead brads, or ring shank cut nails if your project doesn’t require a lot of strength.
Both types are available at most home improvement stores and would be perfect for most do-it-yourself projects involving light-duty framing materials such as plywood sheets and OSB boards without additional sheathing layers such as fiberglass insulation boards (commonly known as “greenboard”).
Nail Size for Baseboards of 1.25″
Here how you should do for a baseboard of 1.25”
Step 1: Determine the type of baseboard.
- Nail-on board (where nails are part of the board) – Use #5 brad nails.
- Board & batten (nails attached to subfloor) – Use #7 brad nails.
Step 2: Determine the depth of your baseboard and choose your nail size based on this measurement:
- 1/8″ thick or less – use a 3/4″ brad nail
- ¼” – ½” thick – use a 5/8” brad nail
Nail Size for Door and Window Casing of 1.5″
If you’re working with 1.5-inch trim, you’ll want a brad nail that’s also 1.5 inches long. This is the most common size in the U.S., and it works on most types of trim (especially casing).
The length of your nail will depend on how thick your wood is—the thicker the wood, the longer brad nails need to be in order to hold securely without splitting or damaging it.
Should You Get 23 Gauge Brad Nails?
When you’re shopping for brad nails, you’ll see that they come in a variety of sizes. The most common are 18 gauge and 23 gauge. The smaller the number, the thicker the nail: 18-gauge brads are shorter and thicker than 23-gauge brads.
The main difference between these two types is their use case—18 gauge nails can be used for more heavy-duty tasks like attaching wood together, while 23 gauge nails are better suited to lighter projects such as attaching paper or fabric to walls (or even just holding things in place temporarily).
Also, note that because they’re thinner and lighter, 23-gauge nails cost more per pound than 18-gauge ones do! But don’t worry—it’s probably worth it if you need something stronger than regular staples but not quite as thick as those screws we were talking about earlier.
Generally, stick with 18-gauge nails for finishing work. The ideal brad nail length depends on what you’re working on. For a table or some other project that’s close to being done, 18-gauge brads are the right choice.
They’re small enough to make sure your piece doesn’t look cheap but large enough that they won’t split the wood and ruin your hard work.
If you don’t have any plans for finishing work, though, or if it’s just something like a sign that needs to be hung up on the wall (which is pretty simple), stick with 16-gauge nails.
How to Sink Brad Nails
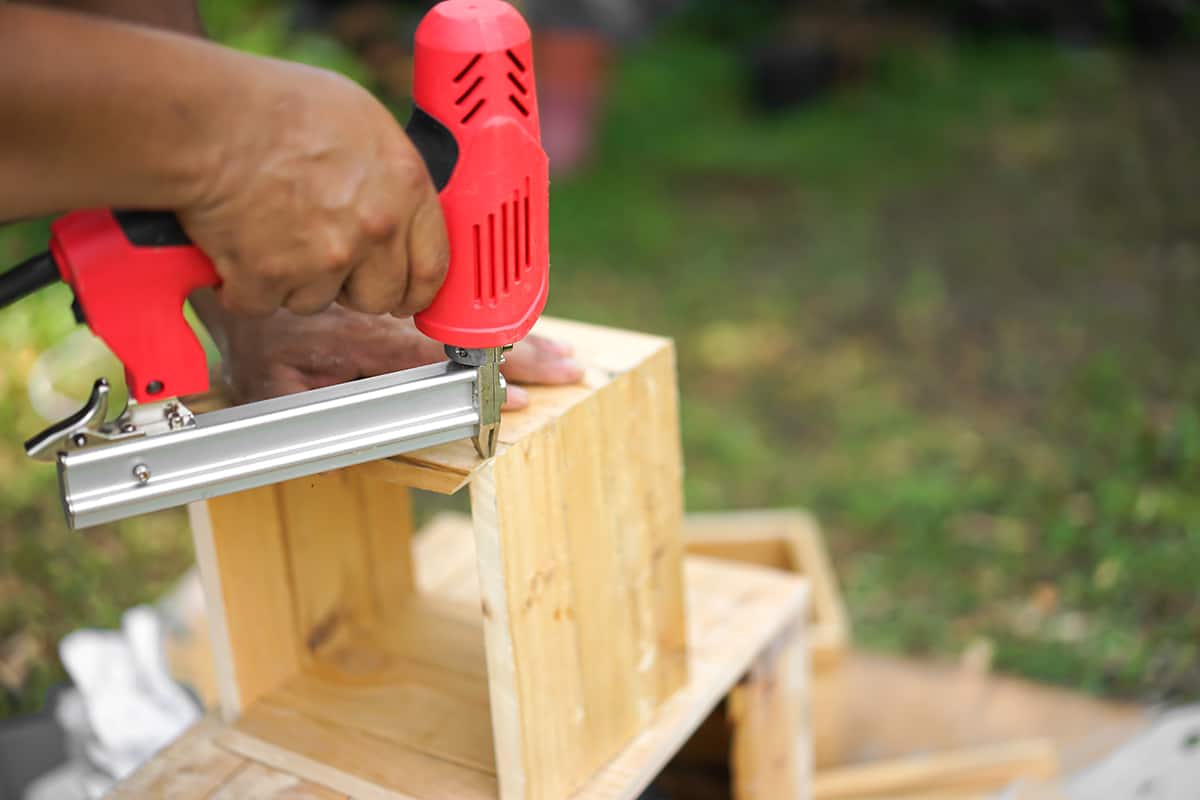
There are two types of brad nailers: pneumatic and electric. Pneumatic models require an air compressor, while electric ones use electricity from wall sockets or batteries as power sources instead of air compressors.
Both types are capable of sinking hundreds of nails per minute, but one has its own distinct advantages over another depending on what type of project you’re working on (such as cost).
Choosing the Size of Nailer
It’s important that you get the right size of brad nailer for your particular project. A brad nailer that is too small will not sink the nails deep enough, while a brad nailer that is too large will result in nails being sunk too deep.
Using an undersized nailer can result in nails that won’t go deep enough into the wood, while using an oversized brad nailer will result in too deep of penetration.
One of the most common mistakes people make when using a brad nailer is to use a nail that’s too large. This will result in the nail penetrating too deep into the wood and possibly causing damage.
For example, if you have a piece of oak that you want to sink nails into, using an undersized brad nailer will cause it not to go far enough into the wood.
You’ll end up with little divots around each nail rather than one smooth imprint. Conversely, using an oversized brad will result in too much penetration, making it difficult for you to get your hand inside those tight spots after they’re finished nailing them all down!
If you are looking for specific screws for engineered wood, such as particle board, be sure to check out our article ‘ The Best Screws for Particle Board – Buyer’s Guide ‘