There is perhaps nothing more cozier than sitting in front of a fireplace with your loved ones. Almost all traditional homes have fireplaces, but this doesn’t mean a newly built home has to miss out on this enjoyable experience. If you have cold winters in your region and you want to add a fireplace to your home, the first step is to choose a chimney. Masonry chimneys are without doubt one of the most popular options because of their aesthetic appeal.
In this article, learn about what a masonry chimney is made of, its pros and cons, its anatomy and how to build this type of chimney in your home.
Table of Contents
What is a Masonry Chimney?
Masonry chimneys are built from a variety of different materials, including metal, brick, mortar, concrete block, flue tile, stone and cast iron. Almost all such chimneys contain a combination of these materials, hence making them the preferred choice for both modern and rustic homes.
Advantages of Masonry Chimneys
- Efficient: these chimneys ensure higher heat reflection when compared to metal chimneys. A masonry chimney serves a dual purpose: to keep the fireplace area warmer and to maximize the smoke removal of the chimney.
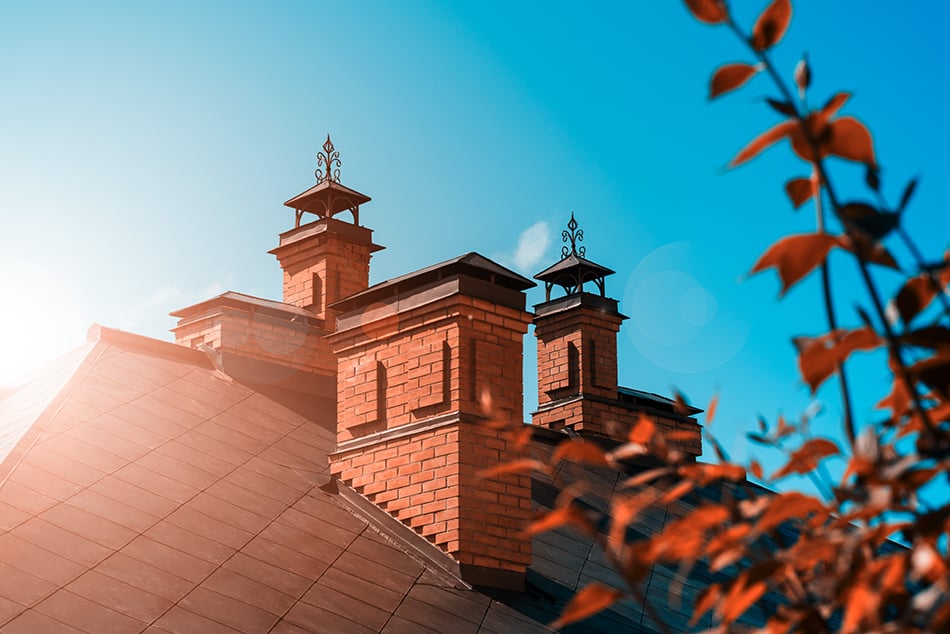
- Aesthetically appealing: since masonry chimneys are made from a variety of materials, they are considered to be visually beautiful when constructed correctly. In fact, some homeowners choose to install several masonry chimneys that extend beyond their main home, such as the patio or porch.
- Durable: masonry chimneys can last for many decades as long as they’re properly maintained. Bi-annual inspections and cleaning is recommended.
- Boost resale value: since these chimneys are the preferred choice for home buyers, installing one for your home will increase its resale value.
Disadvantages of Masonry Chimneys
- Structural limitations: while masonry chimneys are visually beautiful and boost resale value, they are heavy additions and should only be installed on one-story or two-story homes.
- Susceptible to water penetration: this type of chimney is more at risk of deterioration as a result of prolonged contact with water. The materials used to build a masonry chimney don’t withstand heavy snow or freezing temperatures as they tend to expand quickly. Sitting water on the chimney can cause rust in the cast iron or metal and weaken the parts. So what’s the solution? Waterproofing is essential in protecting your chimney against potential damage from snow and rain. It is, therefore, important to inspect the chimney regularly to identify wear and tear before any major problems arise. Another solution to prevent water from entering the chimney through the flue is to install a cap. This will minimize the deterioration of mortar that can eventually lead to mold. Lastly, make sure you replace any damaged flashing or rusted metal that can cause leaks.
- Expensive to install and repair: installing a masonry chimney isn’t for those on a tight budget. In addition to the high cost of installation, replacing the old flue liner sections or other parts of the chimney come at a high cost.
- Require regular maintenance: just like any other part of your home, a masonry chimney also needs regular maintenance every 6 months or annually. A professional chimney sweep company will inspect the flues of the chimney and sweep them as necessary.
- Durability depends on the chosen materials: if you use soft bricks instead of hard ones, your chimney will deteriorate quicker and eventually require rebuilding. A masonry chimney is only durable if the quality of the materials used is high.
Anatomy of a Masonry Chimney
Before we go into step-by-step details on how to build a masonry chimney, let’s take a look at the different parts of this chimney:
Mortar or chimney crown: this part is like a shell that sits on the chimney’s top to prevent the penetration of water into the bricks and mortar. The water won’t leak down the flue and damage your home. Without a properly constructed chimney crown, the masonry chimney won’t have any protection against rainwater. Over time, the bricks and mortar become weak and cause the chimney to collapse.
Flue: this is a chamber that vents out smoke from the fireplace. It is available in different sizes and shapes. A single masonry chimney can have more than one flue if multiple stoves are connected to the same chimney. Just like the crown, the flue is another vital part of the chimney.
Smoke chamber: this is the part just above the damper (we will get to that part in a minute). The smoke chamber angles inward towards a passage and acts as a support to the flue liner. It is normally built with bricks and must have a thin coat or mortar on its surface for insulating purposes as well as to allow smoke to pass smoothly through the passage.
Smoke shelf: this part works with the smoke chamber to push the smoke out of the chimney flue. It is located behind the damper on the bottom of the chimney.
Damper: one of the most important parts of the chimney that’s usually located in the same place as the shelf and chamber. The damper’s job is to seal the chimney when the fireplace is not in use. It is, therefore, important that the damper functions properly so as to prevent heated air from escaping through the chimney when there is no fire. Standard dampers have a handle inside the top of the fireplace that can be shut, but as most are made of metal, they tend to rust every few years. The less expensive alternative to a standard damper is a top sealing damper, which offers better protection from animals (bats and rats) cold drafts in winter and heat in summer. These dampers completely seal the top of the flue and don’t require an entire throat assembly.
Lintel: this is a heavy piece of iron that supports the bricks at the center of the fireplace. The lintel is completely embedded into the chimney’s brick.
Firebox: this is a critical part of the fireplace and chimney system. The firebox consists of a two or three walled structure that carries the heat and directs the smoke into the chamber. Because the firebox is exposed to high heat, it tends to deteriorate faster than other parts of the chimney. Having said that, if it’s constructed with high-quality materials and repaired on time, it can last longer.
Throat: this is the area where the smoke passes through the damper.
Hearth extension: this part protects the area from high heat and ash. It is located directly in front of the fireplace. The typical materials used for the hearth of masonry fireplaces include rock, concrete, brick, granite, tiles, or marble. Wood paneling and other combustible materials will be a fire hazard as they would be considered too close to the opening.
Ash dump: this part comes with a door and is located just below the firebox’s center. When the door is open, ashes fall into the ash dump. This is one of the easiest ways to remove ashes from the firebox.
Clean out door: this part is most often located in the basement and allows you to clear out the ash dump more easily.
How to Build a Masonry Chimney in 6 Steps
Now that you’ve learned all the different parts of a masonry chimney, it’s time to find out how to build one for your home.
Here are the materials you’ll need:
- Flue liners
- Cement mortar (one part Portland cement, one part hydrated lime and 6 parts sand).
- Flashing
- Precast chimney cap made from stone or concrete
- Sheet metal
- Masonry tools
- Trowel
- Leveler
- Concrete blocks
- Fire bricks
- Stone
Note: make sure you build your masonry chimney on a reinforced concrete block or pad. If not, lay a pad of 8-12 inches thick concrete per story before constructing the chimney. The thickness of the concrete obviously depends on how many stories the house has.
Step 1:
Mix the cement mortar with lime and sand. Make sure the consistency is just right as it needs to be the same thickness as peanut butter. Use a masonry trowel to layer each brick with mortar so that the cement mix spills out from between the joints. This ensures the joints are filled without air pockets.
Step 2:
Now lay the bricks on top of one another, starting from the walls of the chimney on each side. Use a leveler to make sure the wall is completely level, both vertically and horizontally. If not, adjust the bricks before the cement mix dries.
Step 3:
As you’re constructing the outer part of the chimney, lay the flue tiles and use the cement mortar to seal them. If the flue tiles are installed too high, now is the opportunity to adjust them.
Step 4:
After building the chimney, install sheet metals on all 4 sides of the opening between the outer part of the chimney and the combustible materials.
Step 5:
The metal flashing needs to be installed where the chimney goes out through the walls. The flashing should be used where the roof and chimney meet along with a lining installed under the cap. Lastly, seal the flashing with a waterproof caulk.
Step 6:
The chimney cap is now ready to be installed over the top part of the brick flue, making sure it extends over the wall of the chimney by at least 2 inches. Note: the chimney cap should not be sloped toward the flue but away from the chimney structure. The cap must have an edge that allows better water flow from the chimney in order to minimize moisture seeping inside.
Important reminder: the chimney cap must be separated from the flue using a strong sealant, rubber caulk, or butyl. Oil-based and silicone sealants aren’t strong enough and don’t hold up well. If the gap between the flue and cap is too large, fill the space with fire-resistant packing before caulking the top of the space to prevent water penetration. Remember the space between the cap and flue allows for contraction and expansion. If you neglect to fill the space between the flue and cap, the sealant will break and cause the flue liner to crack. It is also important to carry out periodic checks of the cap and flue to ensure no water is penetrating through the chimney.
Tips on Building a Masonry Chimney

- Masonry chimneys are generally the heaviest part of a home as they are made of non-combustible materials like stone, concrete, bricks, and concrete blocks. Therefore, the footings of the chimney must be strong enough to hold its weight without setting. It’s best to build such a chimney on well-compacted soil.
- For single-story houses, the chimney footings should be 8 inches thick.
- For two-story houses, the footings should be 12 inches thick.
- Masonry chimneys should be lined with flue tiles that can withstand extreme weather changes without cracking.
- Make sure the masonry chimney you are building has a minimum of 2 inches of space on all 4 sides in order for other combustible materials to be installed without risk of fire. Fill the 2-inch space using sheet metal.
- The wall thickness for masonry chimneys needs to be at least 4 inches.
- The end of the flue liner should not extend above the chimney cap by more than 4 inches. The finished height of the chimney must be around 3 feet above the structure’s highest point.
- And finally, it is important to inspect the chimney every 6 months or annually and sweep it in order to ensure the chimney’s longevity. It is recommended to hire a certified chimney sweep specialist for the task of cleaning and inspection.
Conclusion
If you love the idea of building a masonry chimney for your home, you should know that such chimneys require regular inspections to ensure they are working properly.
This is to prevent costly repairs and property damage caused by leaking. By keeping your masonry chimney in optimal shape, you’ll enjoy its traditional, attractive appeal for many years.
If, after some time, you decide to remove the old chimney, there are many things you need to know. Follow our guide ‘ How to Remove a Chimney Safely ‘ for further details.