Acrylic paint is often associated with arts and crafts. This quick-drying, water-based paint can be used for decorative painting, home decorating, school projects, stenciling, and ceramics.
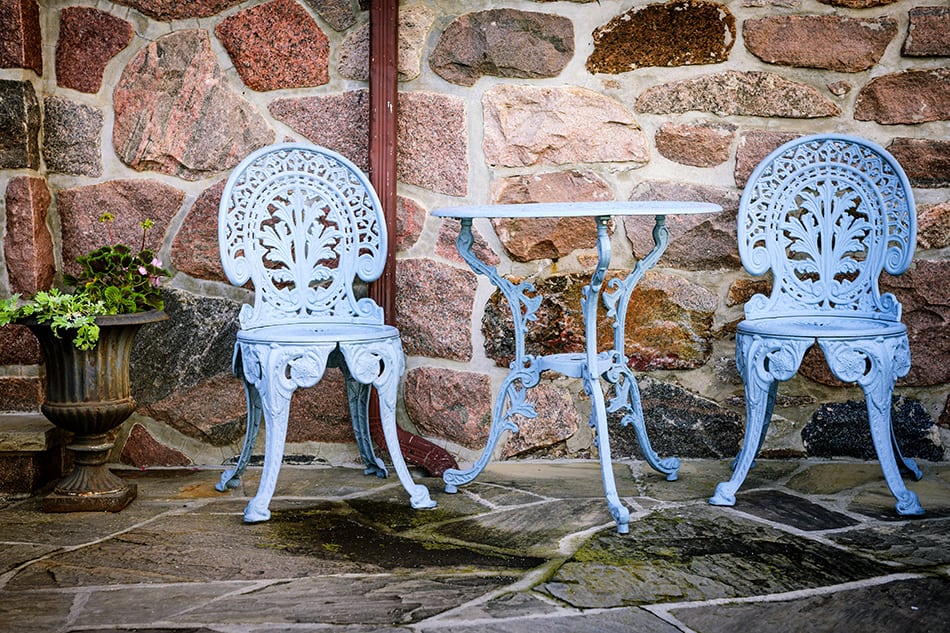
We usually think that canvas is the best surface for applying acrylic paint. But this paint can be used on other surfaces, too, such as metal. Applying acrylic paint on metal means you can use it on many household items like tables and chairs, garden ornaments, garage doors, fences, screen doors, bed posts, among many other things. Whether you’re working on a large-scale project or simply customizing your patio chairs, acrylic paint can do the job for you.
Indeed, acrylic paint is highly versatile. It can be applied over any surface as long as it is free of wax or oil. This opens a world of possibilities for the budding DIY artist in you. And don’t worry, using acrylic paint on metal isn’t as complicated as it may sound. You can transform any metal project into a work of art by following some basic preparation such as:
- Gathering the essential materials
- Removing old paint or rust from the metal surface
- Wiping down dust and removing debris
- Priming the metal surface
- Painting the metal surface
- Sealing painted project
So, how can you use acrylic paint on metal? Read on and find out.
Table of Contents
1. Gathering the Essential Materials
Applying acrylic paint on metal is different than applying the paint on another surface like a canvas. This, thus, requires preparation time. Start this by preparing the area where you are to work and gathering the essential materials such as the paint, paintbrush, and primer, among others.
You’d want your work area to be clear of debris and dirt. One way to do so is to use a plastic or canvas drop cloth. You can place this between your project and work surface to protect your belongings. You’d also need a couple of cleaning rags during the painting process. Look for a cleaning rag made of microfiber capable of trapping dust from your metal project and creating a smooth finish in the process. You’d use this with soap and water, especially when you need to clean up residue from your metal project.
You’ll also need painter’s tape as this would prevent the acrylic paint from getting into unwanted parts of your project. It can also protect surrounding surfaces from coming into contact with acrylic paint.
Keep your hands free from dust and paint. Make sure you have gloves when working on your metal project. Keep those gloves nearby throughout the entire duration of the process.
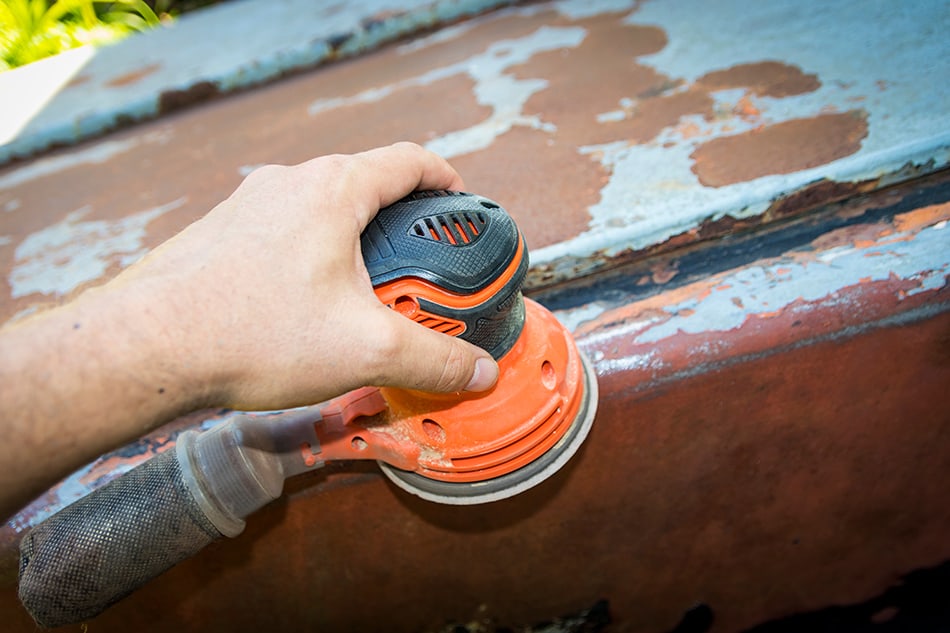
For scraping old paint, rush, and debris, you should also prepare a wire brush. It should have stiff wire bristles capable of scraping old paint and rust that may have accumulated on your surface. For hard-to-reach crevices on the metal, you may also need to use a wire brush with smaller bristles. The sandpaper will also come in handy when removing old paint or rust. You’d want to use 150 grit paper for this purpose.
Just like in most painting jobs, applying primer is necessary when you use acrylic paint on metal. There are a couple of reasons behind this. One is that the primer provides a protective coating on the metal surface, covering up old rust in the process. It can also prevent rust from developing on the surface in the future. Primer also acts as a base for attracting and holding onto the paint.
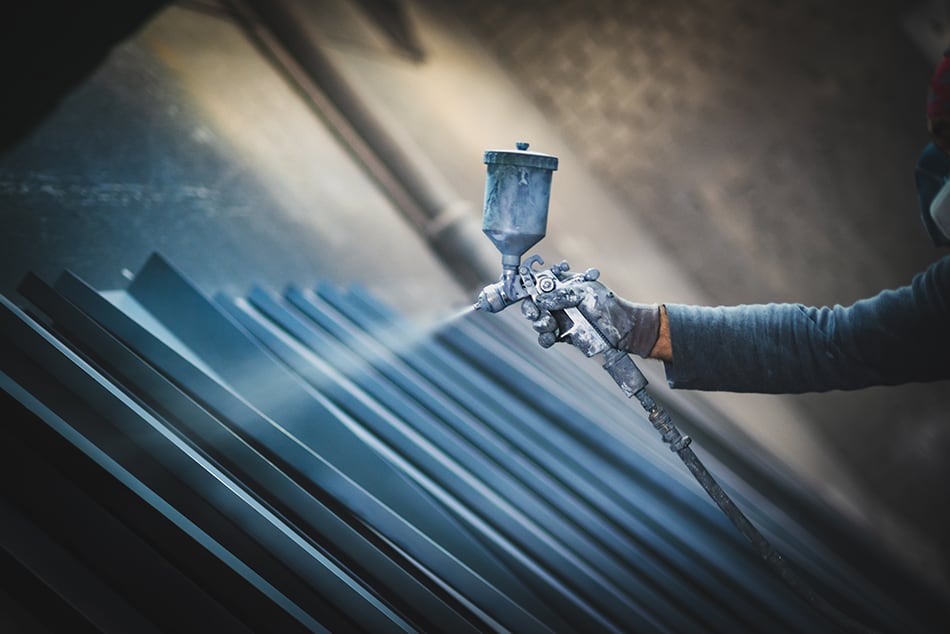
Of course, you’d need acrylic paint for this project. It is available in various forms. Most experts recommend acrylic spray paint for use in metal pieces. Acrylic paints also vary by type. If you’re painting a metal to be located outdoors, you’d want to use exterior or outdoor acrylic paint.
If you feel that acrylic spray paint is not ideal for your project, you can use a paintbrush instead. There are different sizes and types of paintbrushes that you can choose from.
After drying the metal project, you’d need to apply a sealer to protect it against scratches and moisture. It would also give your metal project a finished look. You won’t need a sealer if you use exterior acrylic paint, though.
2. Removing Rust, Residue, and Old Paint from the Metal Surface
Once you’ve gathered all the needed materials, you’ll need to remove rust, residue, or paint from the metal surface.
But you need to clean the surface first. Get the cleaning rag and dip it into a soap and water solution. Remove rust using the wire brush or sandpaper. If there’s oil on the surface, use the cleaning rag with lacquer thinner. Make sure that the entire surface, including small crevices, is clean. Once the entire surface has been thoroughly brushed, sand it using the sanding paper until it is smooth.
If there’s still dust and debris left over the surface, then you can use a cleaning solvent to do the trick. Along with the cleaning rag, use a cleaning solvent to completely remove leftover dust and debris before proceeding with the painting part. Allow the surface to dry completely.
After cleaning the metal surface, you can protect the areas of the metal which you don’t want to get painted. For example, you’re only to paint the legs of a metal chair. Wearing gloves, trim excess tape using a knife or razor blade around that part of the chair. Using gloves will ensure you won’t be contaminating the prepared surfaces.
3. Priming the Surface
Here’s something you need to understand about priming- it’s not necessary if you’re working on stainless steel because the latter is formulated to prevent oxidation and resist rust. But traditional metals, as well as those that were exposed to the elements and thus prone to rusting, should be primed.
Before priming the surface, make sure that the primer you’re using works with acrylic paint. It should also be created for application on metals.
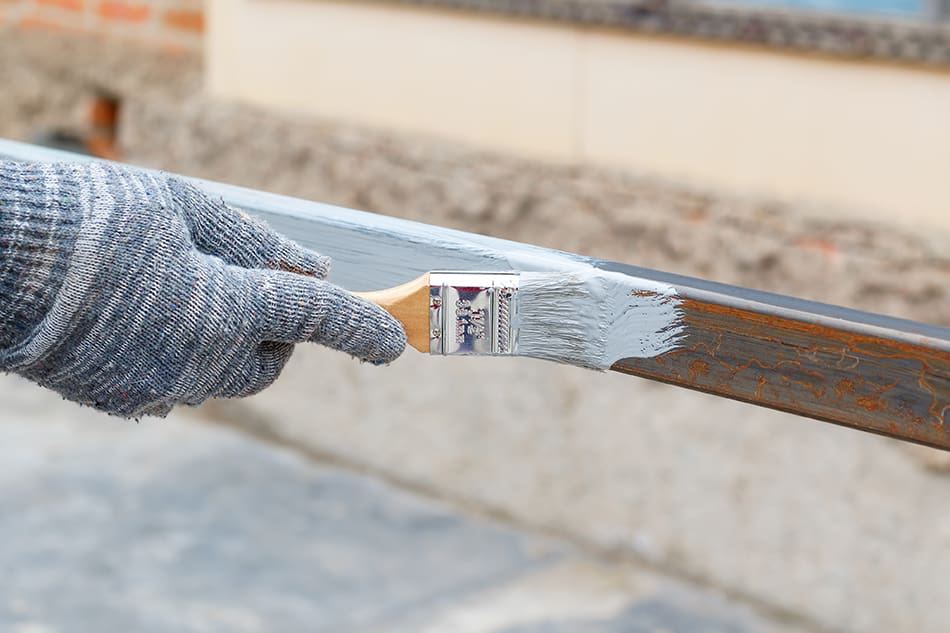
Now, take the primer. Most primers come in spray form, but some come in a bucket and are applied with a brush. Shake it for two minutes before opening it. Spray or coat the primer evenly onto the surface of the metal. Make sure that it is completely covered. If you are working outdoors, avoid spraying it on a windy day.
Wait for the first coat to dry before applying the second coat. The second coat of primer is important because the metal is easily affected by oxidation. Applying another layer or coat would make it less vulnerable to rusting while allowing the paint to adhere to the surface.
And similar to the first coat, allow the second coat of primer to dry first before proceeding with the painting of acrylic.
4. Painting the Metal Surface
Once the primer has completely dried, you can start painting the metal surface with acrylic paint. Don the gloves and start shaking the can of paint for about 60 seconds. If you’re using acrylic spray paint, it’s advisable to re-shake the can once every 1 minute.
If you’re using a paintbrush, make sure that its size would be appropriate to cover the surface of the metal you’re painting. If you are to paint something large, you may even opt to use a roller.
Similar to applying the primer, painting acrylic paint on metal would need at least two coats. You should also wait for the first coat to completely dry before applying the second coat. The good news is that acrylic paint dries quickly; hence, your metal painting project should be over in a day or two, depending on the size of the surface to be painted.
Allow the second coat of the metal to dry for 48 hours before using it. This would ensure that the acrylic paint will last longer on the surface.
You should also know that since acrylic paint is water-resistant, you can apply multiple layers to your project if you desire to achieve various effects on your project. This is one advantage of acrylic paint over other types of paint.
You may also layer acrylic paint. You can add more than one color to your metal project by painting over the first coat of acrylic. Just make sure that the initial coat has dried up before doing so.
Once you’re finished with the painted surface, you can cover it with paper and seal it with masking tape. This will prevent dust and bugs from sticking on the metal surface.
5. Sealing the Surface
This is an optional step. If you want a glossy finished look for your metal project, then this is highly recommended. It can also give long-lasting protection to the surface. But if you used exterior acrylic paint, then this may no longer be necessary. Exterior acrylic paints usually have a sealer.
Conclusion
As you can see, acrylic is a paint that’s easy to use on metalwork. Fast-drying and versatile, acrylic paint can keep its color even when exposed to the elements. Follow the steps outlined above, and you should be able to make a colorful and lasting metal project using acrylic paint.