Portable hand drills are not usually considered very hard to use. For the most part, they are designed for anyone to be able to charge them, press the trigger, and start working – and they even come with an extra guide teaching you which nail is the most appropriate for each purpose.
This all holds true as long as everything is working properly. But imagine this: you are trying to hang a picture frame, and in order to do this properly, you need to drill two holes in your wall. Your hand drill has spent a few months locked in a drawer and has survived a few moves already. However, as soon as you try to get the nail to start moving, something just clicks out.
Table of Contents
Understanding the Different Parts of a Drill
So what happened here? Do you know how to check if anything moved out of place? How well do you understand the way your drill works? Can you describe what’s wrong with a technician over the phone? Before you can do any of these things, you will need to know what each part does and what it’s called.
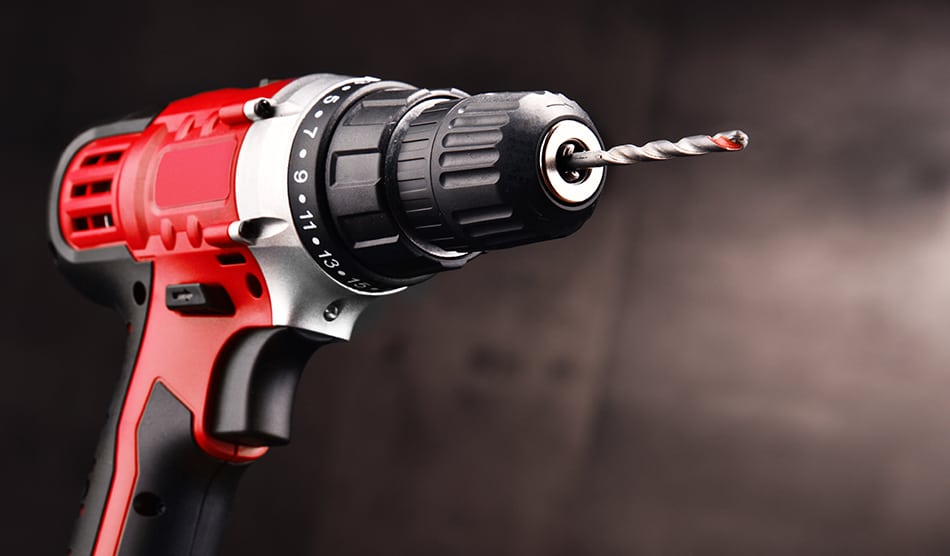
There are various types of drills, but most hand drills look a bit like a futuristic handgun. Because of this, we will be starting this tour from the smoking side – the point where the drilling nail is hooked onto.
Check below a diagram that demonstrates the many parts of a drill.
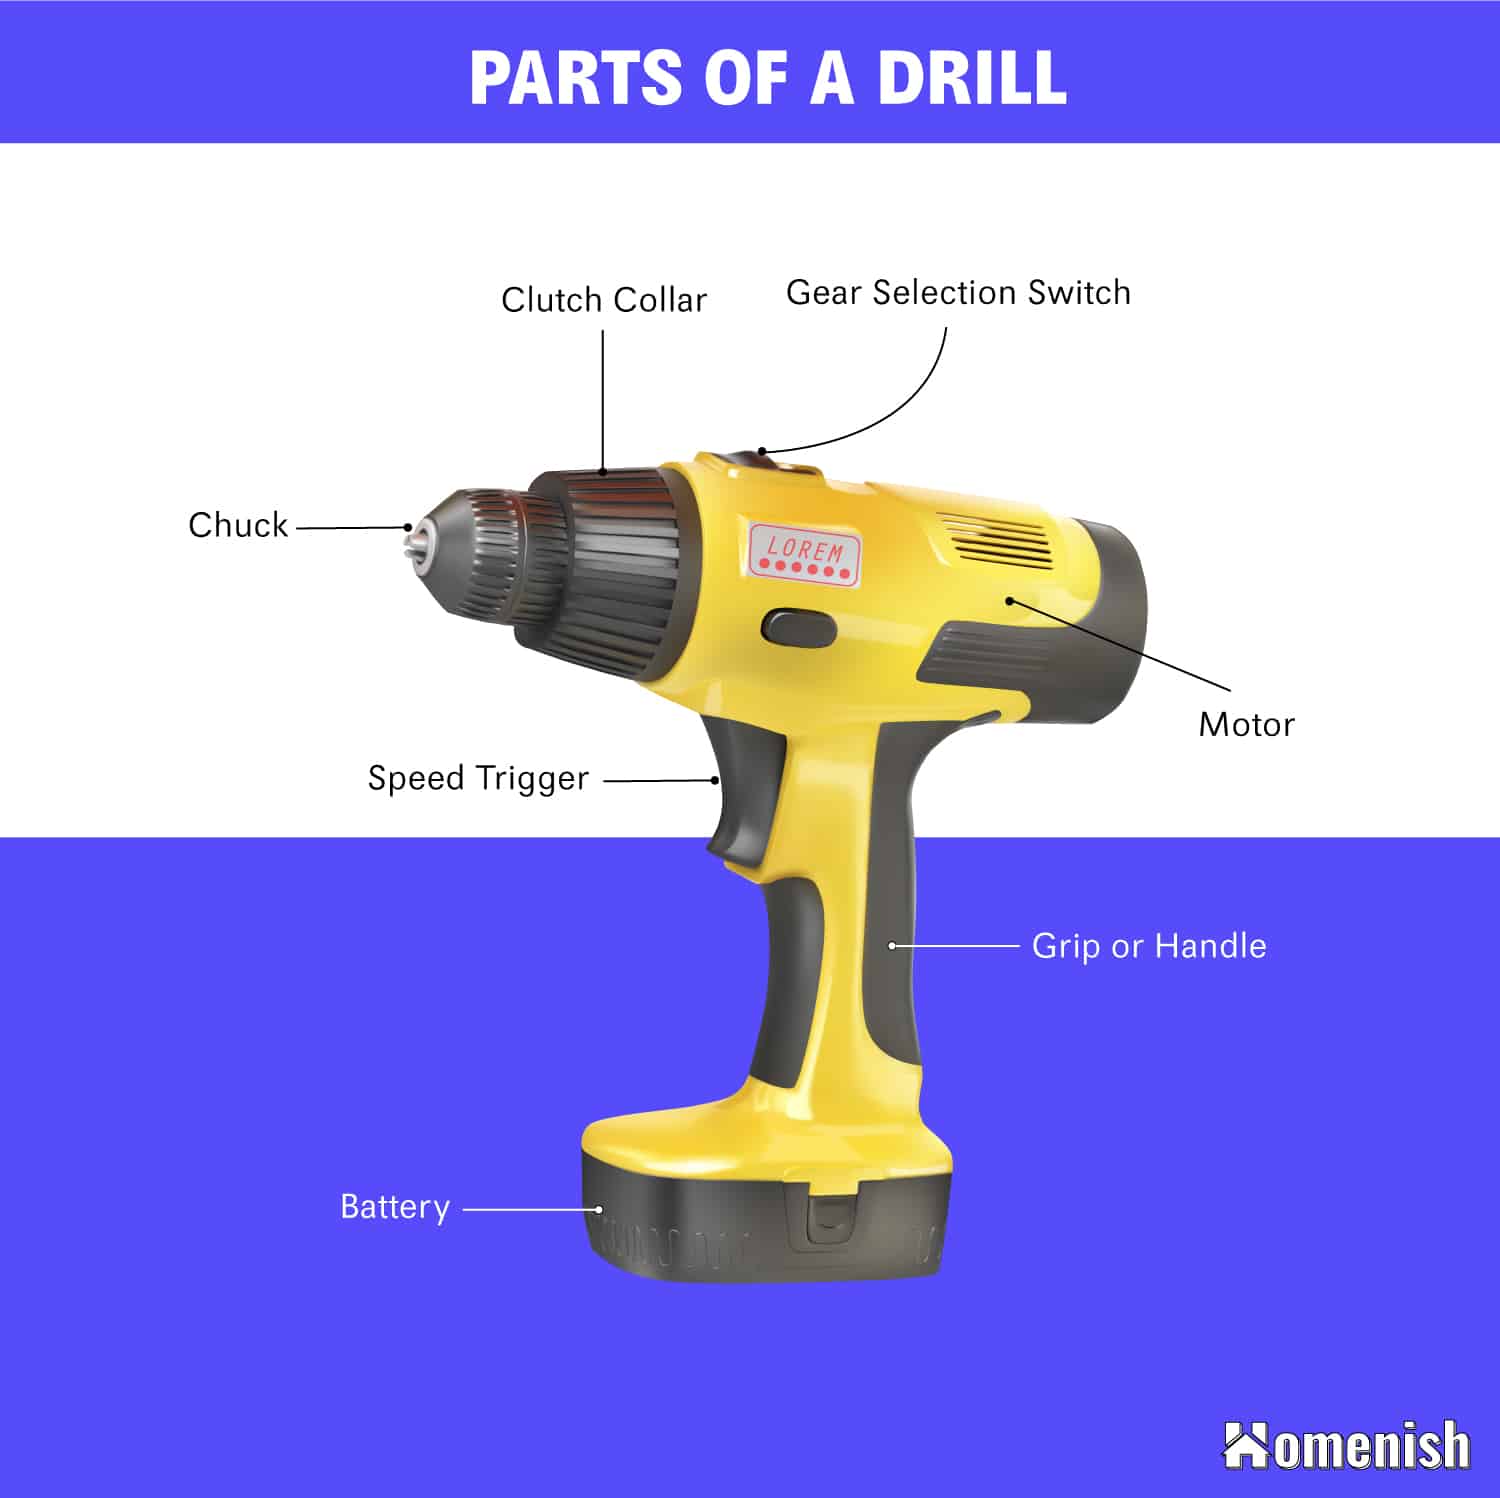
Chuck
The chuck is the part of the drill that holds the nail tightly while it is spinning. Up to a few years ago, most chucks had customized chucks that were meant to fit only the nails in their own set. Nowadays, people take the right to replace parts for granted. Because of this, chucks now come with universal metal prongs that grab your nail (or bit) from the inside.
In this way, you just have to rotate the bit counterclockwise to secure it or clockwise in order to remove it. As an added security measure, most hand drills also have an internal ratchet that clicks when the nail is properly inserted. If it is still loose, the drill won’t start turning.
Clutch Collar
Right behind the chuck, you will find a thicker rotating collar that joins this tip with the rest of the drill. The clutch collar does largely the same job as your car’s clutch pedal does: it allows you to adjust the torque (and by extent, the gear) that your drill will be using.
In many models, you can also find a dial or a set of numbers etched onto the clutch collar. As a general rule, a lower number means a “lower” gear (and a bit that spins at a slower speed).
Clutch collars can occasionally jam and prevent the drill from working properly.
Gear Selection Switch
Depending on the model, your drill may not have a rotating clutch collar but use a gear selection switch instead. In very high models, you will find both. In these cases, your main gear will be determined by this switch, and the collar just adds a more precise control.
Motor
The thickest part of your drill is almost always going to be the motor. This will take up the “butt” of the gun.
In many ways, the motor doesn’t require much of an explanation. This is what powers your drill, and it will usually connect with your power source on the bottom. Yet, when the motor breaks, the chances are that you will need to enlist a professional’s help in order to fix it.
Speed Trigger
The speed trigger is usually located on the same spot as a gun trigger would be. This is simply because it’s a very intuitive place for it and not because designers routinely role play bank robberies with their creations.
When you press the speed trigger, the bit should begin turning. Basic drill models will only spin while you are actively pushing the trigger. However, some models also include a locking mechanism that prevents your finger from getting tired.
LED Light
Some models will emit light whenever they are on. This light most likely comes from a small LED bulb located right next to the trigger or directly on top of it.
The purpose of this light is not to let you know when the drill is in operation (this would be unnecessary, as the noise is hard to miss). Instead, it is meant to help you whenever you are drilling in a dark place. It should point directly towards the chuck and nail.
Rocker Switch
Many models include a smaller rocker switch close to the trigger. This is a safety feature that helps control the chuck. Often, when the chuck doesn’t have an automatic ratchet that locks the nail in, it will have a rocker switch instead.
Flip it, and you will fix the chuck into a specific direction – clockwise or counterclockwise. This will prevent you from accidentally taking out the needle or turning on the drill when it’s still loose.
Grip or Handle
The grip is not just a good, comfortable place in which to hold your hand drill. It also helps connect the motor, or engine, with the power source.
In most models, the handle is ribbed or etched with ergonomic lines, meant to provide a secure grip and to enable more precise movements. In addition, many models also have plastic or rubber coverings on top of the handle. Some are specifically made to mellow out the vibration or to prevent sweaty hands – which can be dangerous when you are dealing with rapidly gyrating sharp objects
Battery
Immediately below the handle, you will find the battery that powers the engine. If your model uses replaceable batteries, then the battery will look like a slightly wider plastic section that you can latch onto the bottom of the handle.
In models with one-piece, rechargeable batteries, you may find a mount instead. This will allow you to plug the hand drill directly onto the power source via a regular plug or AC/DC adapter.
Conclusion
Learning the different parts of your drill will help you troubleshoot it whenever necessary, or at least to ensure that everything is complete and working properly.
If your hand drill breaks, and you aren’t able to repair it yourself, this knowledge will help you understand what’s going on whenever the technician orders expensive new replacement parts. This is the kind of knowledge that saves money!