Hanging and finishing drywall is a skill. But it’s a skill you can learn and accomplish yourself if you have patience and the right tools to work with. With a little experience and an arsenal of materials and tools, you’ll be setting up tight, smooth walls in no time.
And, thankfully, working with drywall isn’t expensive. Most of the tools and materials you’ll need are fairly simple and, therefore, cost-effective.
Here’s what you need.
Table of Contents
Pry Bar
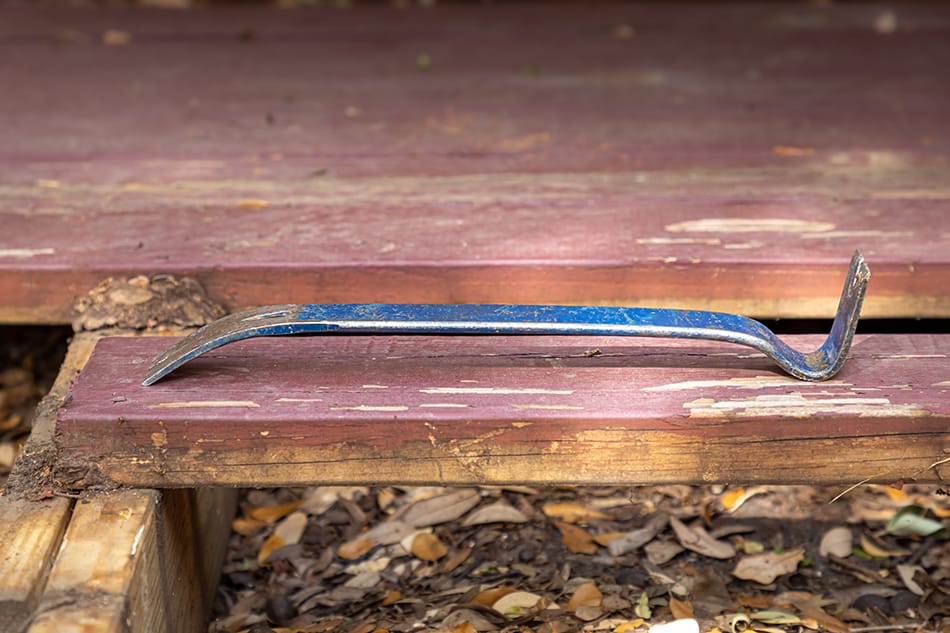
If you don’t have a prybar already, get one. You’ll use it for more than just hanging drywall. Unless you’re building new, you’re going to first have to remove the old drywall or paneling or plaster from the wall. I had a house once that had no drywall – the walls were all plaster!
But with a good prybar, you can break up the plaster and get behind the drywall paneling to pry it from the studs in the wall. Same thing with any wood paneling covering the wall. You want to take everything off to get down to the studs.
You may also need a screwdriver or pair of pliers to remove any screws that are stuck in the studs after you pull the drywall or other paneling off.
Drywall Hammer
You probably have a carpenter’s hammer, but you’ll want a hammer specifically made for driving nails into drywall. (That is, if you’re going to be using nails to hang the panels. You can also screw them into the studs.)
Remember, when you’re hanging drywall, you want to keep the panels as smooth as possible. Making a lot of dents just means more work for you when you go to mud everything in. A drywall hammer is designed to help you drive in the nails without damaging the drywall.
It also has a special claw end that will allow you to grip and remove any errant nails without pressing into the drywall too much. The flat prying ends distribute the weight across a wider section of the panel.
If you’re going to be hanging a lot of drywall with nails, pick one of these up. If you’re doing a one-time task or planning to use screws, skip this tool. It’s not much good for other projects.
Power Drill
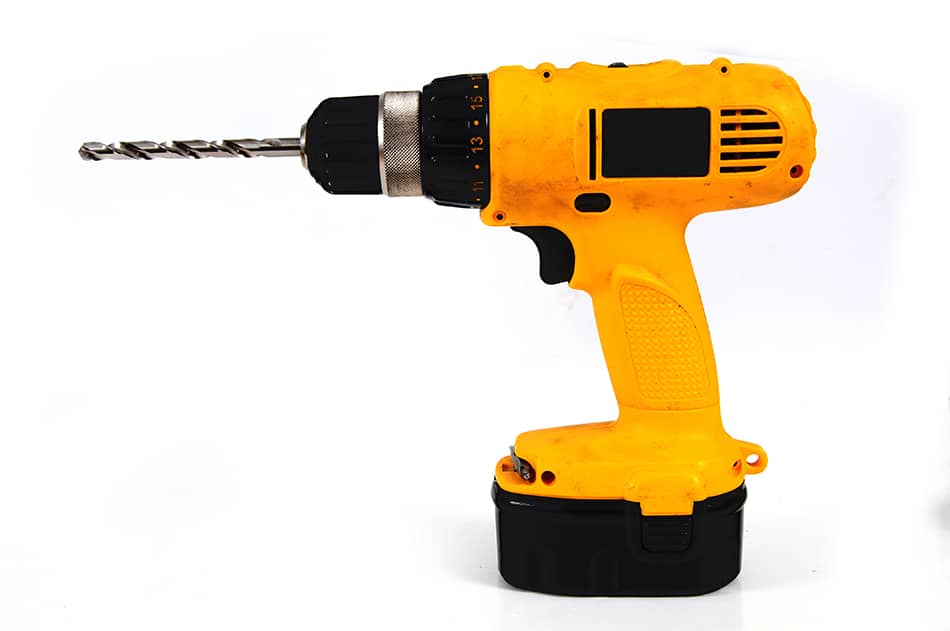
Another tool you’ll want to have around, regardless of your task, a power drill can serve two functions in drywalling. First, if you’re hanging the drywall with screws, you’ll want a power drill to create your guide holes, then drive the screws in. Drills are more convenient than using a hand screwdriver and more powerful than a simple power screwdriver.
But even if you’re not using screws to hang your drywall panels, you’ll still need to mix up your drywall mud. You can get a large mixing attachment for your drill that will whip up the mud much faster and much more thoroughly than doing it by hand with your scraper.
This kind of mixing bit will come in handy for mixing paint, stain, or any other kind of material. Just be sure to clean it thoroughly between uses.
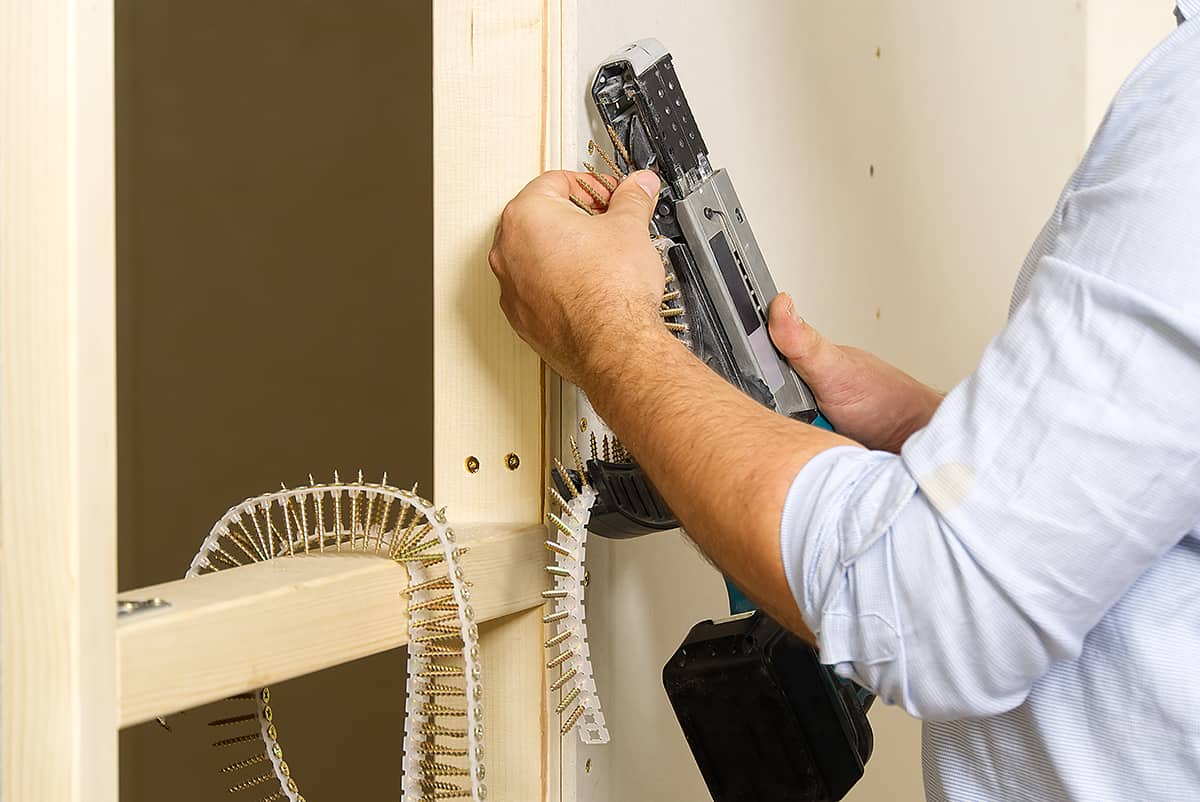
Auto Feed Screwdriver
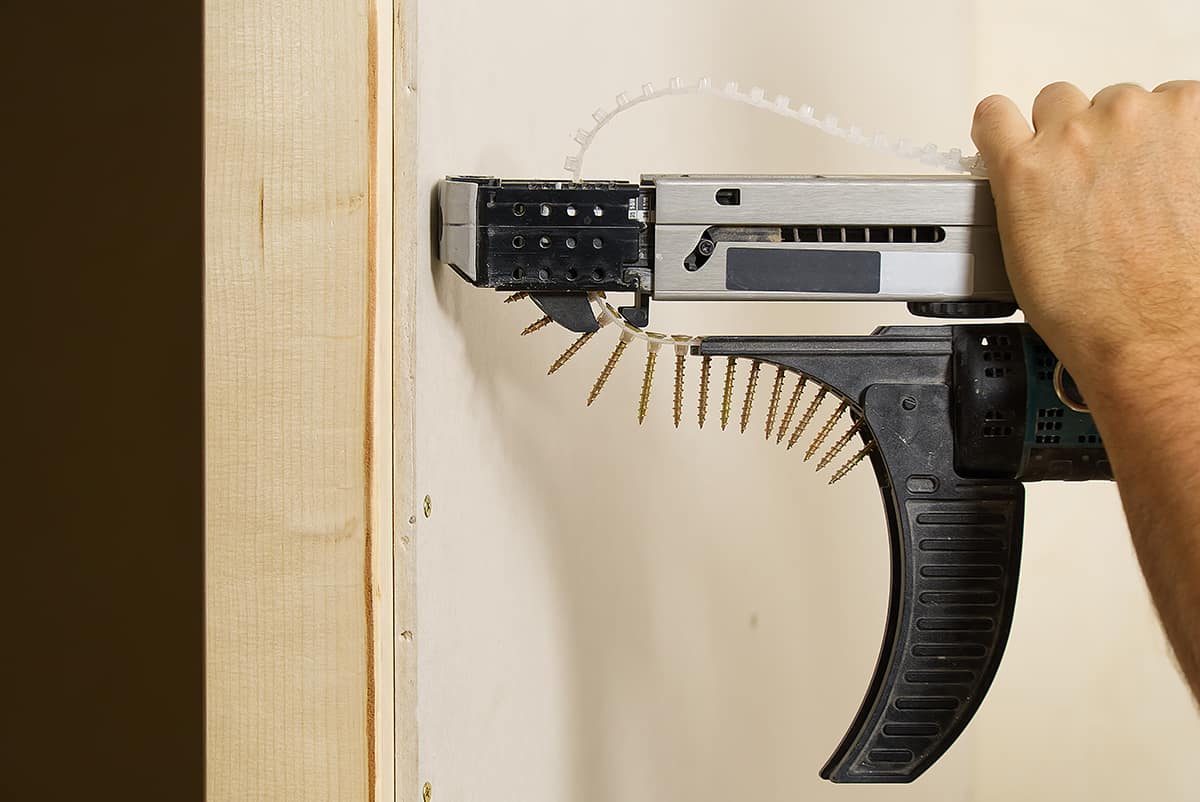
I said a power drill would be more convenient and powerful to use than a power screwdriver. This is the exception. Load your screws and go to town. I would still recommend using a drill to make your guide holes, though.
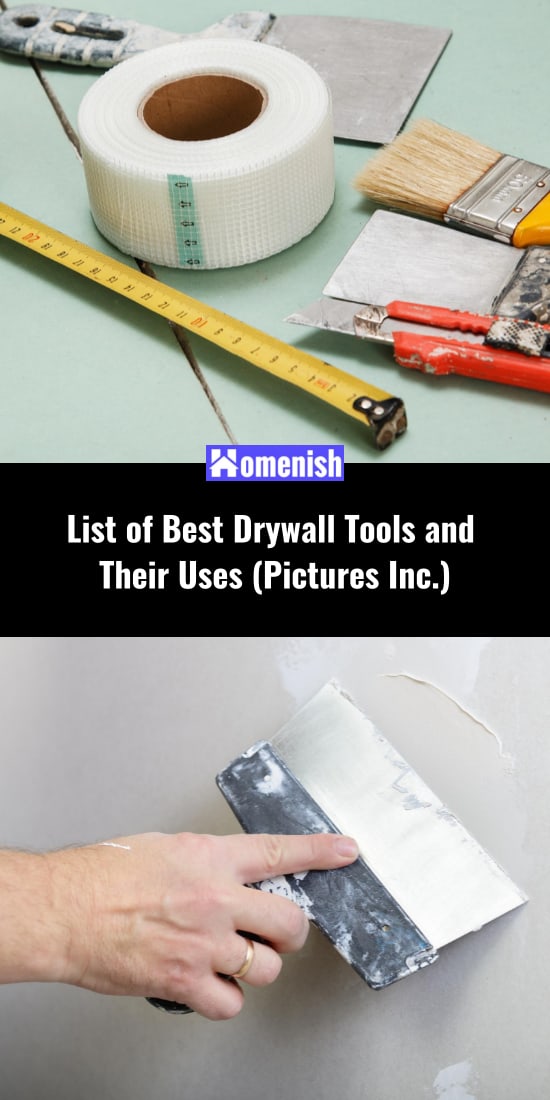
Drywall T-Square
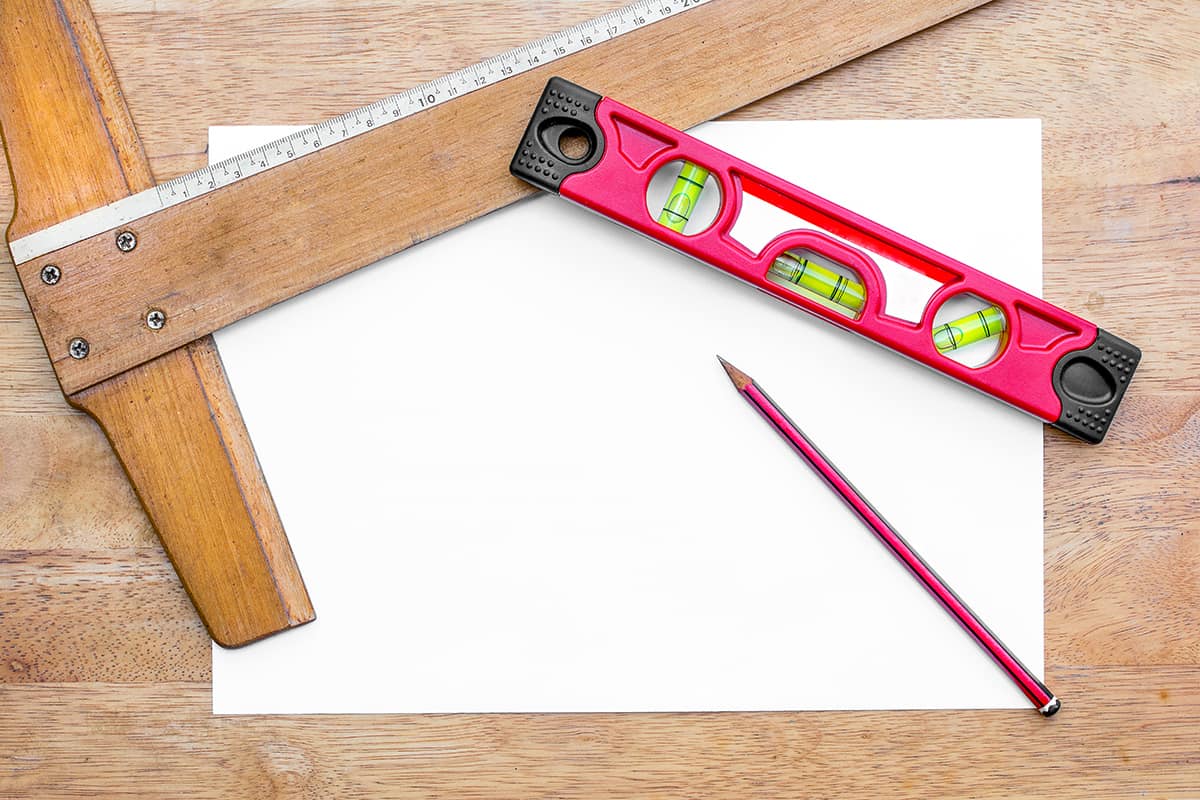
While not absolutely necessary, a drywall T-square will help you measure and hang your drywall more accurately than using a tape measure. Remember, you’re going to need to tape and mud any gaps between drywall sheets, so minimizing those gaps will help you finish the job.
Using a T-square allows you to set the sheets straight in relation to each other. Simply line one edge up on a sheet you have in place, then use the perpendicular side to line up the corner edge of the next sheet. No eyeball guesswork – just straight lines and tight panels!
Plus, a T-square will prove useful for any carpentry or building task.
Utility Knife
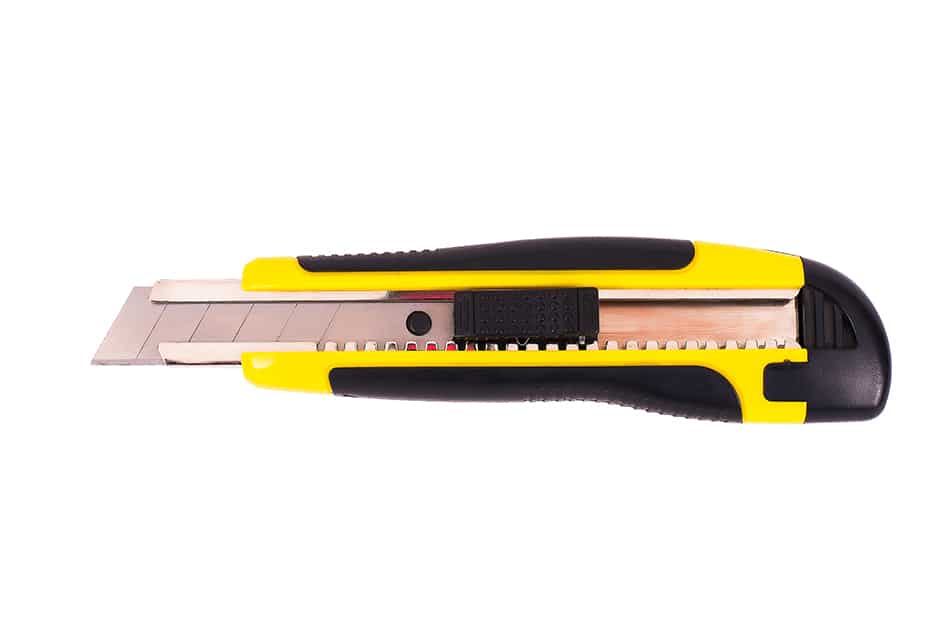
Chances are, you aren’t going to use full sheets of drywall for your entire job. That would be too easy. So, whether you’re patching drywall or setting an entirely new wall, you’re going to need to cut the drywall.
And whereas you might not want to cut through the entire depth of the panel with a utility knife, it will help you score the piece so that you can bend and break it easily or get another tool into the space.
Jab Saw
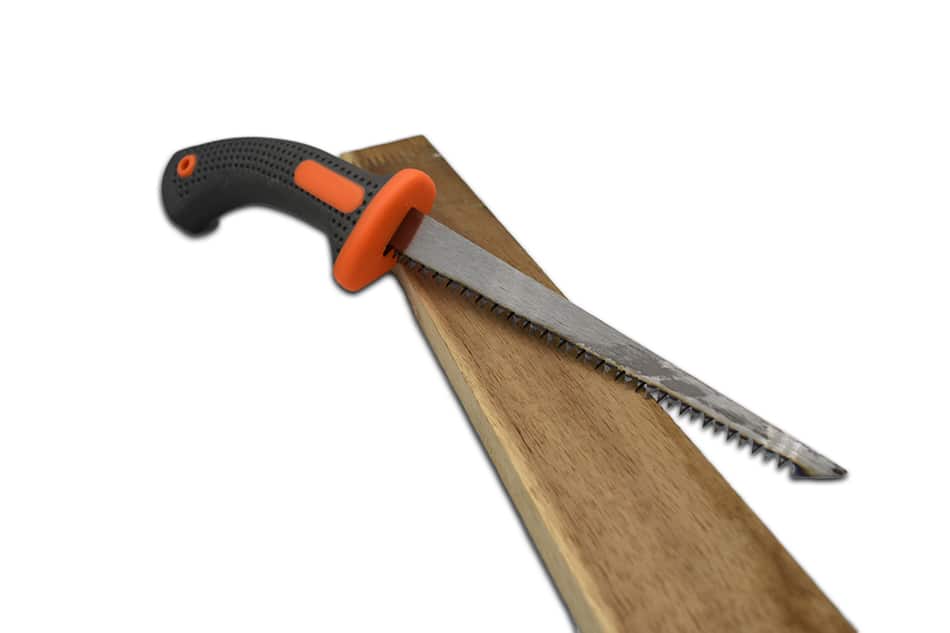
You use one of these exactly as the name implies. You jab a hole in the drywall, then saw along your line. If you have a steady hand, you can cut very clean, straight lines with this tool. Keep it sharp, and it will cut through drywall quite easily, meaning it won’t tire you out like a lot of other hand tools can.
Before using a jab saw to cut your drywall, make sure you’ve drawn a straight line to follow. It’s also a good idea to cut a starter line with a utility knife.
Handheld Router
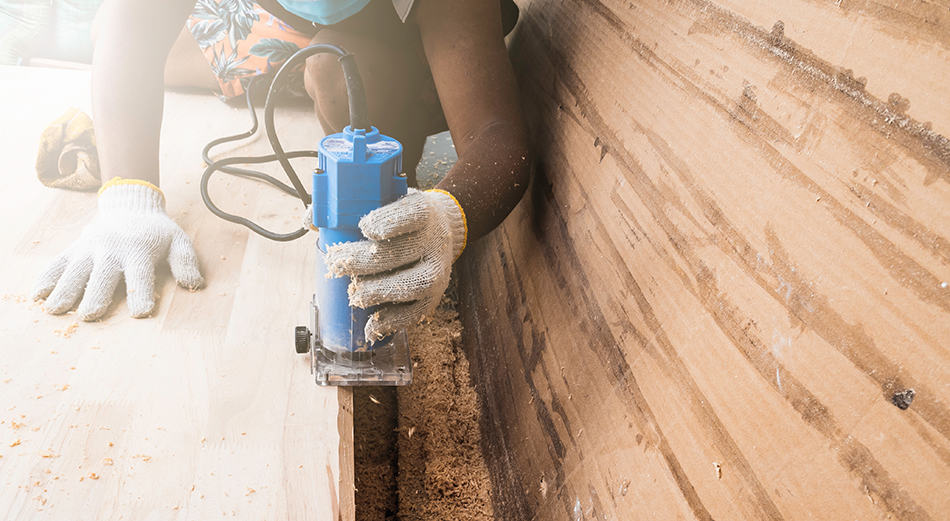
If you need to cut out a small hole, say for a utility box or air vent, you can use a handheld router instead of a utility knife and jab saw. Just make sure you practice using the router first. You don’t want to make a mistake in cutting the piece of drywall you wanted to use.
A router will be useful for a lot of woodworking tasks as well, so even though it’s one of the most expensive tools on this list, it should still pay for itself in usage.
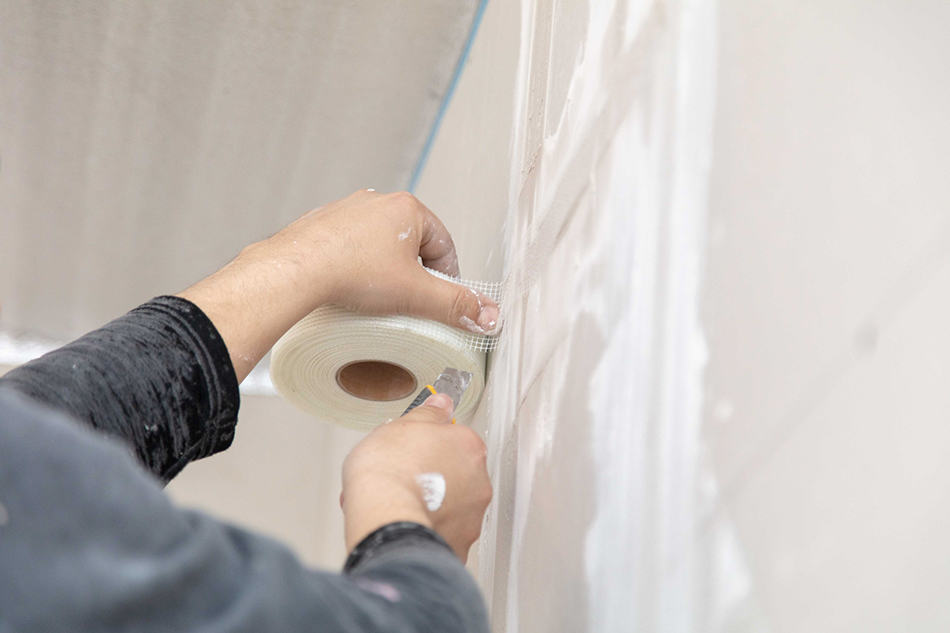
Drywall Taper
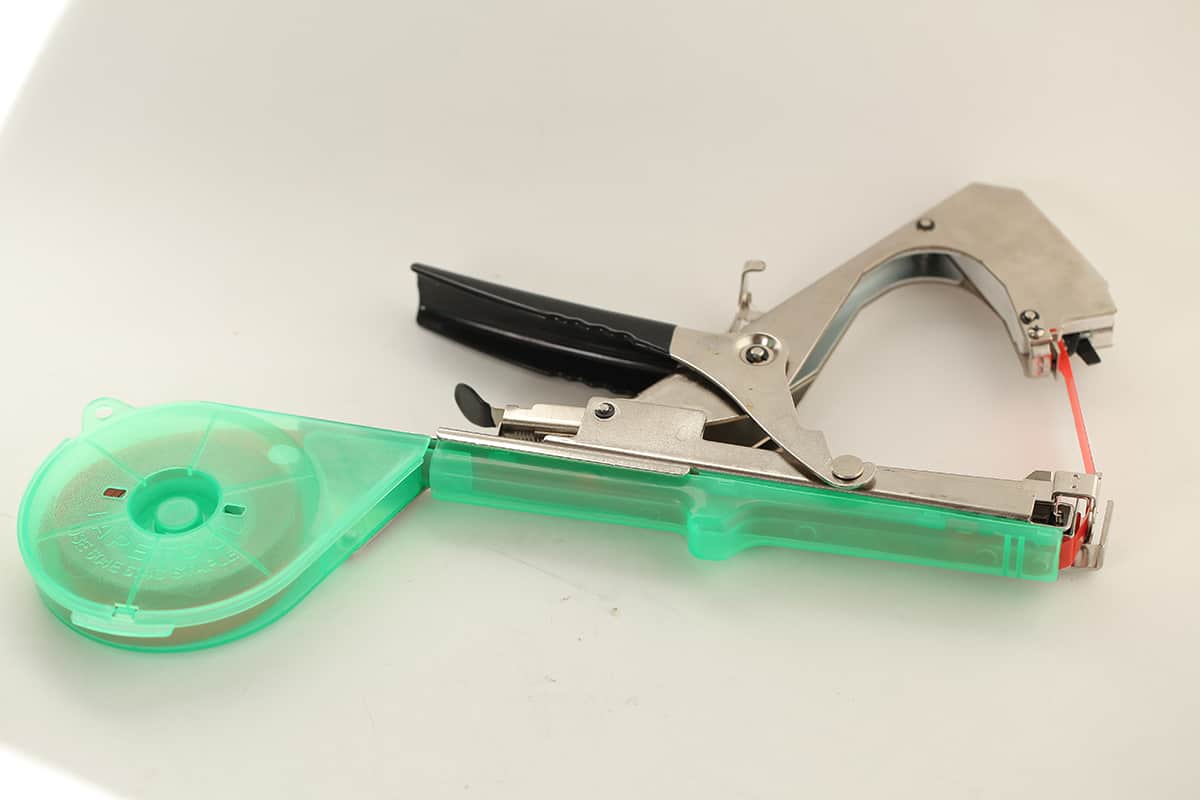
When you’re hanging drywall, you need to tape the seams. If you’re using a type of tape that features a self-sticking back (which is good because you won’t have to get it wet), you run the risk of the tape sticking to itself. Plus, you have to handle the roll, cut it to length, then tape the seam without the roll getting dirty.
A drywall taper is like an industrial tape dispenser. It holds your roll firmly and cleanly in place and lets you apply the tape to the wall, then cut it in place. No more cutting, then applying while trying to keep your tape straight and clean.
You might have heard other drywallers calls these drywall tape banjos.
A-Frame Ladder
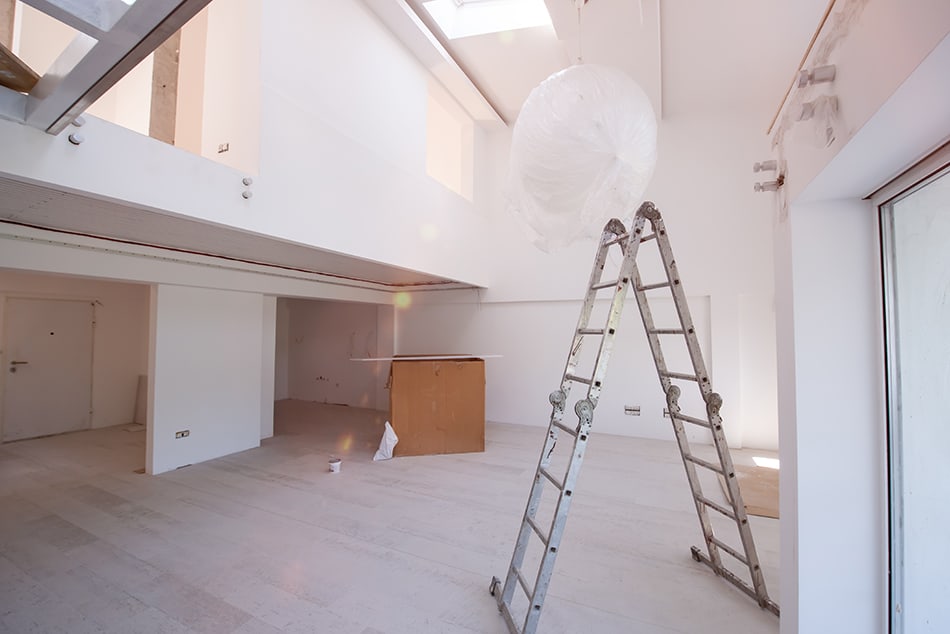
For getting up to the high part of the wall or hanging drywall on the ceiling, you’ll need a good ladder or two. Get an A-frame ladder to avoid having to lean on the drywall. Again, anything you can do to prevent making impressions in the drywall will help you in the mudding process.
A six-foot ladder should be plenty tall enough in most rooms, but you’ll need taller for working in rooms with vaulted ceilings. Unfortunately, a high-quality ladder can cost quite a bit. Still, it’s something you’ll use over and over around the house or on the job, so it’s well worth investing in one or two.
I say you may need two because there are times when you’ll need a partner to help hold the drywall in place.
Drywall Stilts
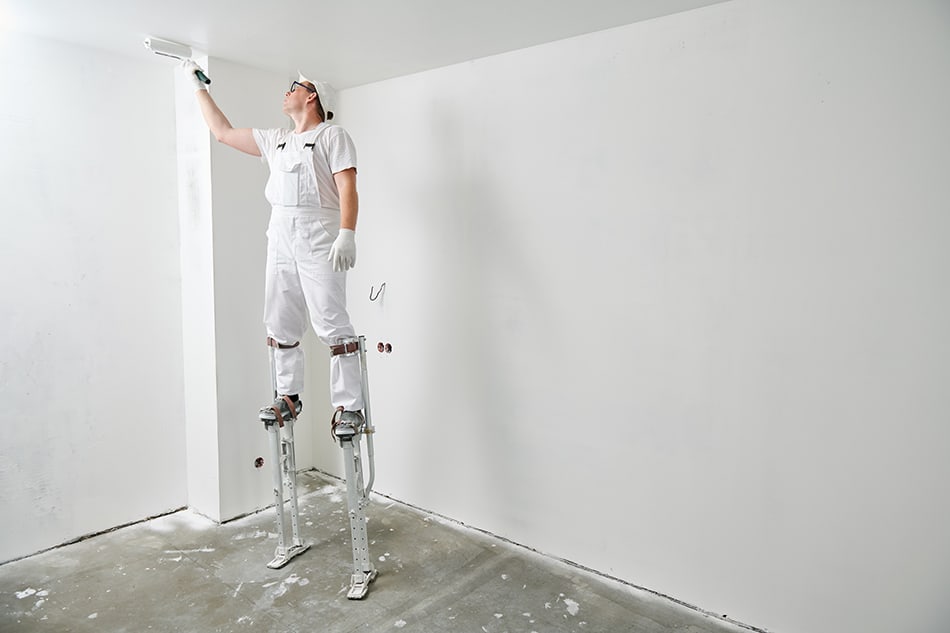
I don’t have the dexterity to use these, but I’ve seen others walk around and work quite naturally using drywall stilts. They’re sturdy and can be more convenient than moving a ladder around. You may find these useful for other home improvement tasks as well.
My one caution would be to use these on flat flooring and have a spotter with you until you get comfortable using them. Also, make sure you clear your path in the work area so that you don’t trip on anything.
Drywall Lifter
If you don’t have a second person to help hold the drywall (or don’t want to pay a second person to help you), you can make a one-time investment into a drywall lifter. You can position it however you need, and it can hold an entire sheet of drywall securely. It might not be the most convenient to use, but it beats trying to hold the sheet by yourself.
If you’re not going to be doing a lot of drywall, don’t buy one of these. You won’t use it for anything else.
Mud Pan
After you’ve hung your drywall, you’re going to use mud to fill in the screw holes, cover any dents and imperfections in the paneling, and give the whole wall a smooth texture. You’re going to need a lot of mud to accomplish all of that.
The mud comes in big buckets, and you could use work straight from the pail for smaller jobs. If you’re doing a large job, though, it’s more convenient to use a mud pan. The trough design of the mud pan lets you get your scraper or trowel into the container much more easily.
You can find these in different sizes and materials. Get a bigger pan if you’re working with multiple people and want to all draw from the same pan, or get a few of the smaller ones for each person to work on a separate section of the wall or in another room.
I personally prefer the plastic pans because they feel sturdier to me, but an aluminum mud pan is easier to clean when you’re finished. Just spray it out and let it dry until the next time you want to use it. You could even skip the cleaning and buy a new aluminum mud pan for every job. They’re that cheap!
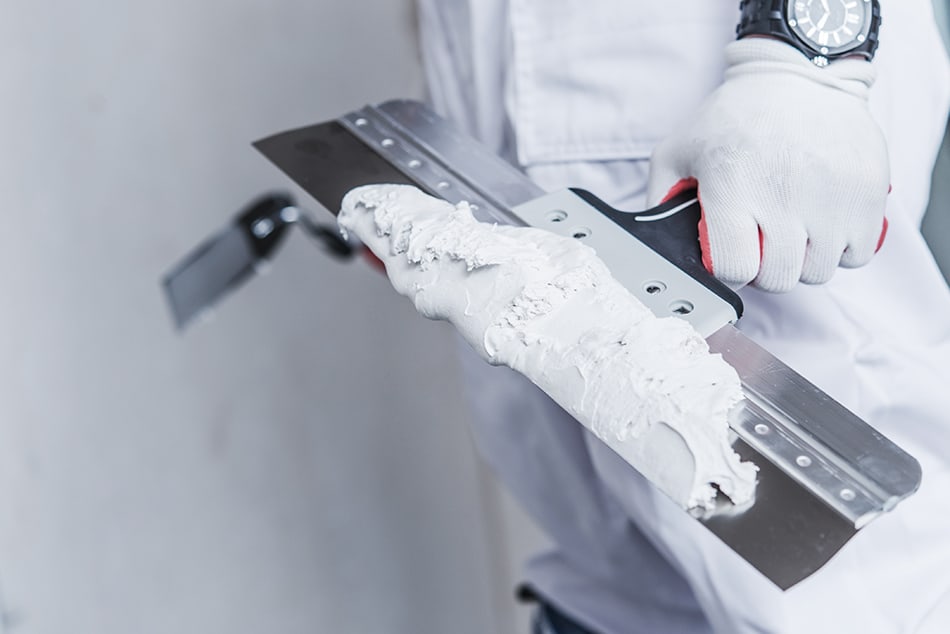
Drywall Knife
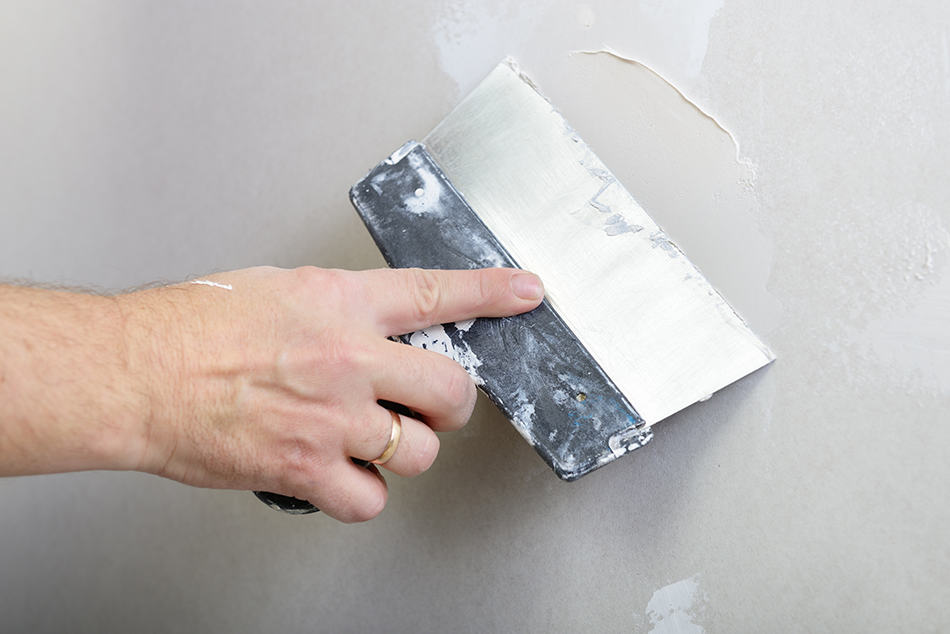
Once you’ve hung your drywall, you need to spread your mud and smooth it out. That’s when this drywall knife comes in. It’s a specialized scraper used to help you apply the mud evenly and smoothly. Other scrapers and trowels you might use can create lines in the drywall mud, which pretty much defeats the purpose of what you’re trying to do.
If you like using a trowel to apply the mud, you can still do so, but then use a drywall knife to smooth it out before it dries.
These knives come in a variety of sizes, and you might want to have a smaller and larger size on hand, depending on the area you’re working in.
Drywall Sanding Sponges
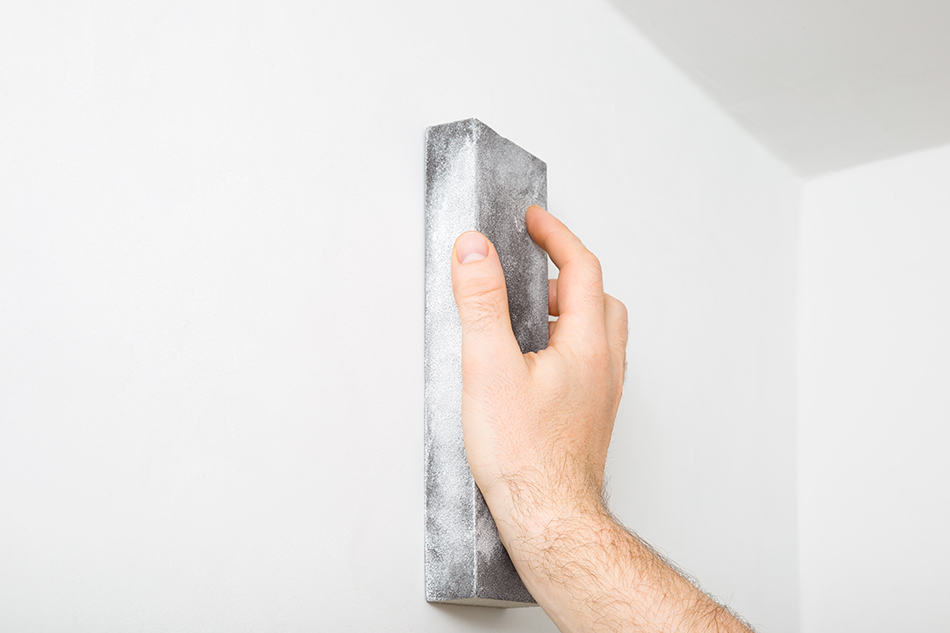
Once your mud is applied and dried on the wall, you’ll need to sand it down to make the entire wall smooth and flat. You can use regular sandpaper for this task, but some people find these drywall sponges to be more convenient.
Made specifically for drywall mud and plaster, these take off the material easily, with less dust, and without leaving scratches. Like sandpaper, you can also buy them in different “grits,” so get one that is more abrasive for larger areas and one that is less so for smaller spots.
Pole Sander
It’s never easy sanding the high parts of a wall or sanding the ceiling, but a pole sander will make it go a little faster. Attach your sandpaper or sponge to the pole and sand the bulk of the material off. If you’re creating a textured ceiling, this may be all the sanding you need to do. Otherwise, finish the job by getting up on a ladder and sanding the rest closer up to it.
Some people don’t like using a pole sander because it can be physically tiring lifting the pole up over your head.
Other Materials
Of course, you’ll need more than hand and power tools to complete the drywall job. Here are the materials to look for to get started.
Drywall Panels
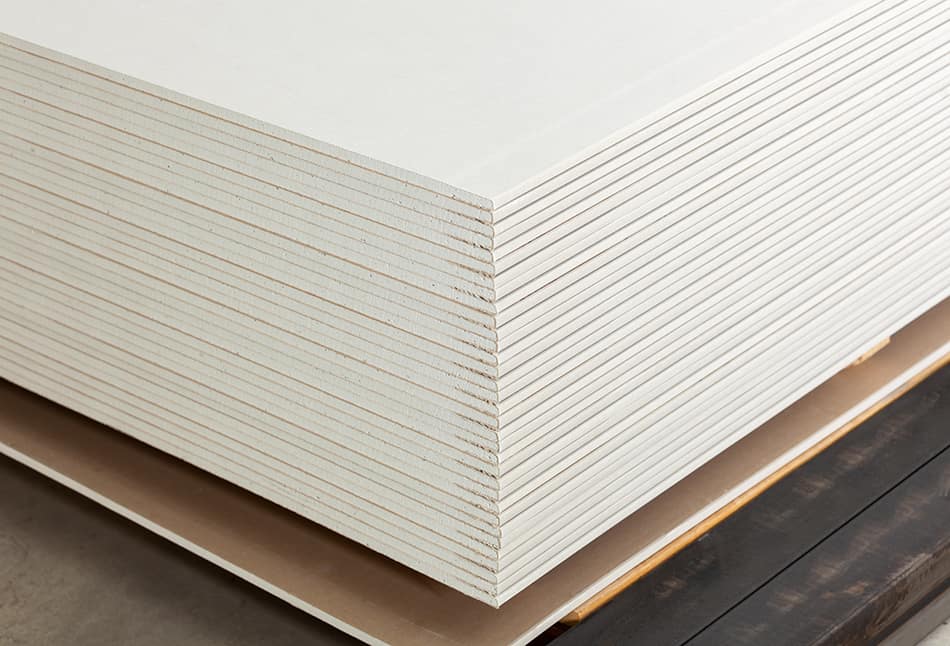
You can buy drywall panels in one or two-layer sheets and in a variety of thicknesses. Thicker and double-layer drywall helps soundproof a room and provides better insulation.
Drywall Fasteners
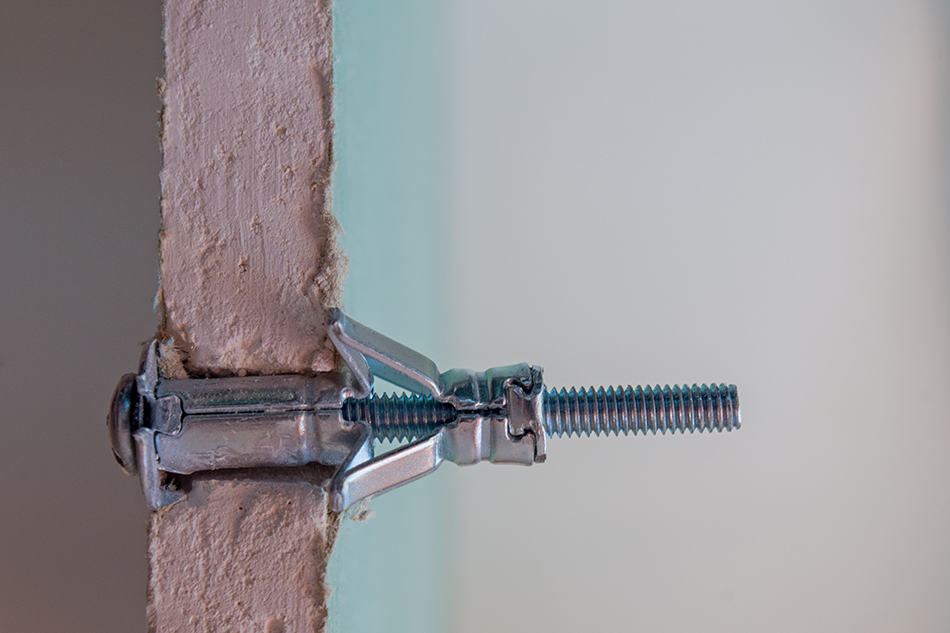
You can use nails or screws to hang the drywall. Just make sure to get them made specifically for drywall to ensure they go through the panels easily and can keep them as secure to the stud as possible. Also, check the length you need.
Drywall Tape
There is a variety of different drywall tapes you can buy, all with their advantages and disadvantages. Make sure you buy one that is easy to use and provides the safety features you need, such as being fireproof or water-resistant.
Drywall Mud
There might be a lot of brands selling various types of drywall mud, but there actually isn’t much of a difference between them. Look for a good price for the size of the container you need.
Some people might prefer different textures of mud, but it’s all the same when it dries.