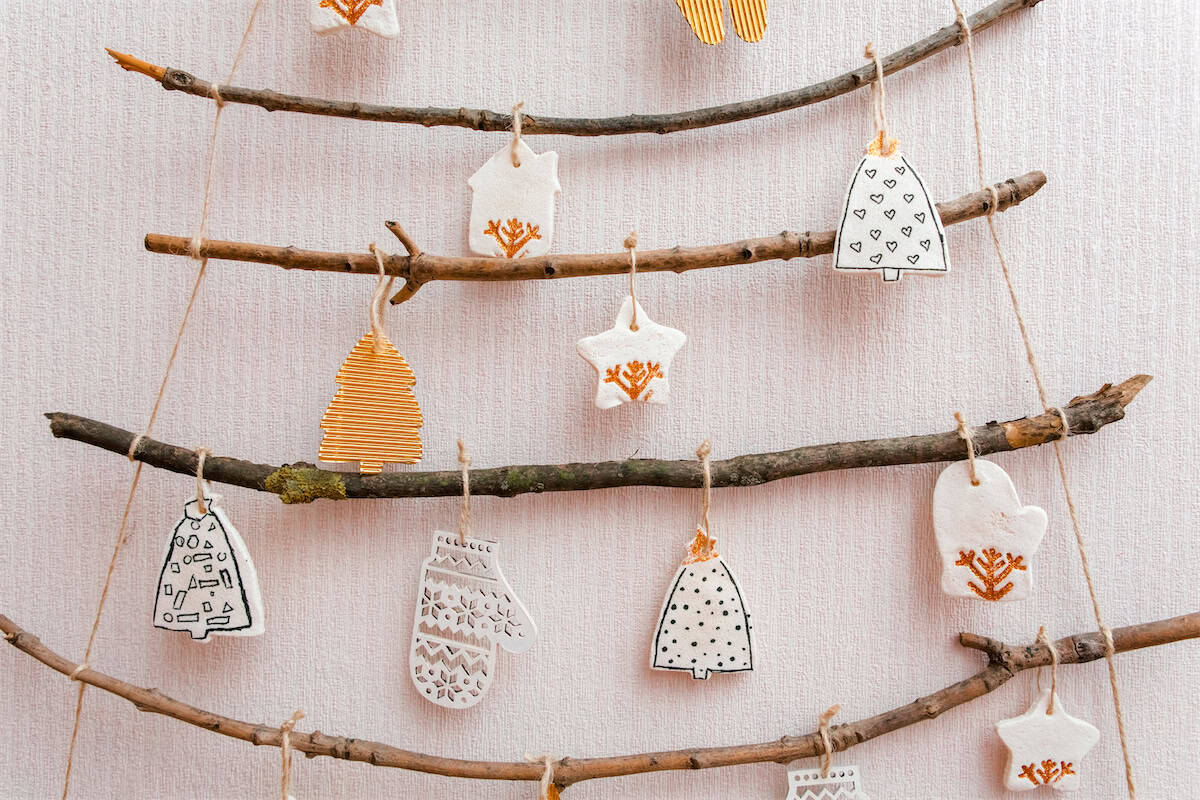
A favorite photo, a scrap of velvet, or a handful of wooden beads can become an ornament you’ll want to unpack again next year. You can make a few for your own tree, add names for family gifts, or turn leftover craft supplies into a matching set.
These DIY Christmas ornament ideas include quick projects alongside pieces worth taking your time over. Browse the ideas below and choose one that suits your supplies and skill level.
Table of Contents
- Beaded Candy Cane Ornaments
- Beaded Wire Snowflake Ornaments
- Botanical Clay Impression Ornaments
- Cinnamon Dough Ornaments
- Denim Christmas Stocking Ornaments
- Wood Slice Snowman Ornaments
- Dried Orange Mini Wreath Ornaments
- Embroidered Felt Gingerbread Houses
- Floral Decoupage Christmas Baubles
- Mini Stocking Advent Ornaments
- Stuffed Heart Wreath Ornaments
- Keepsake Photo Frame Ornaments
- Paper Honeycomb Ornaments
- Mini Macramé Christmas Trees
- Miniature Christmas Stockings
- Cross-Stitch Gift Tag Ornaments
- Mini Embroidery Hoop Wreaths
- Winter Scene Shadow Box Ornaments
- Needle-Felted Mushroom Ornaments
- Oyster Shell Christmas Ornaments
- Terracotta Bell Ornaments
- Painted Winter Village Baubles
- Pearl and Velvet Bow Ornaments
- Birth Flower Disc Ornaments
- Family Name Star Ornaments
- Wooden Pet Portrait Ornaments
- Pressed Flower Glass Ornaments
- Quilled Paper Snowflakes
- Stuffed Fabric Star Ornaments
- Red Felt Christmas Shapes
- Scrap Wood Christmas Trees
- Peas in a Pod Ornament
- Thread Snowman Ornament
- Stained Glass Style Christmas Trees
- Tiny Book Stack Ornaments
- Clay Cottage Ornaments
- Tiny Knitted Sweater Ornaments
- Velvet Acorn Ornaments
- Paper Rosette Medallions
- Wooden Spool Snowmen
- Woven Heart Ornaments
Beaded Candy Cane Ornaments
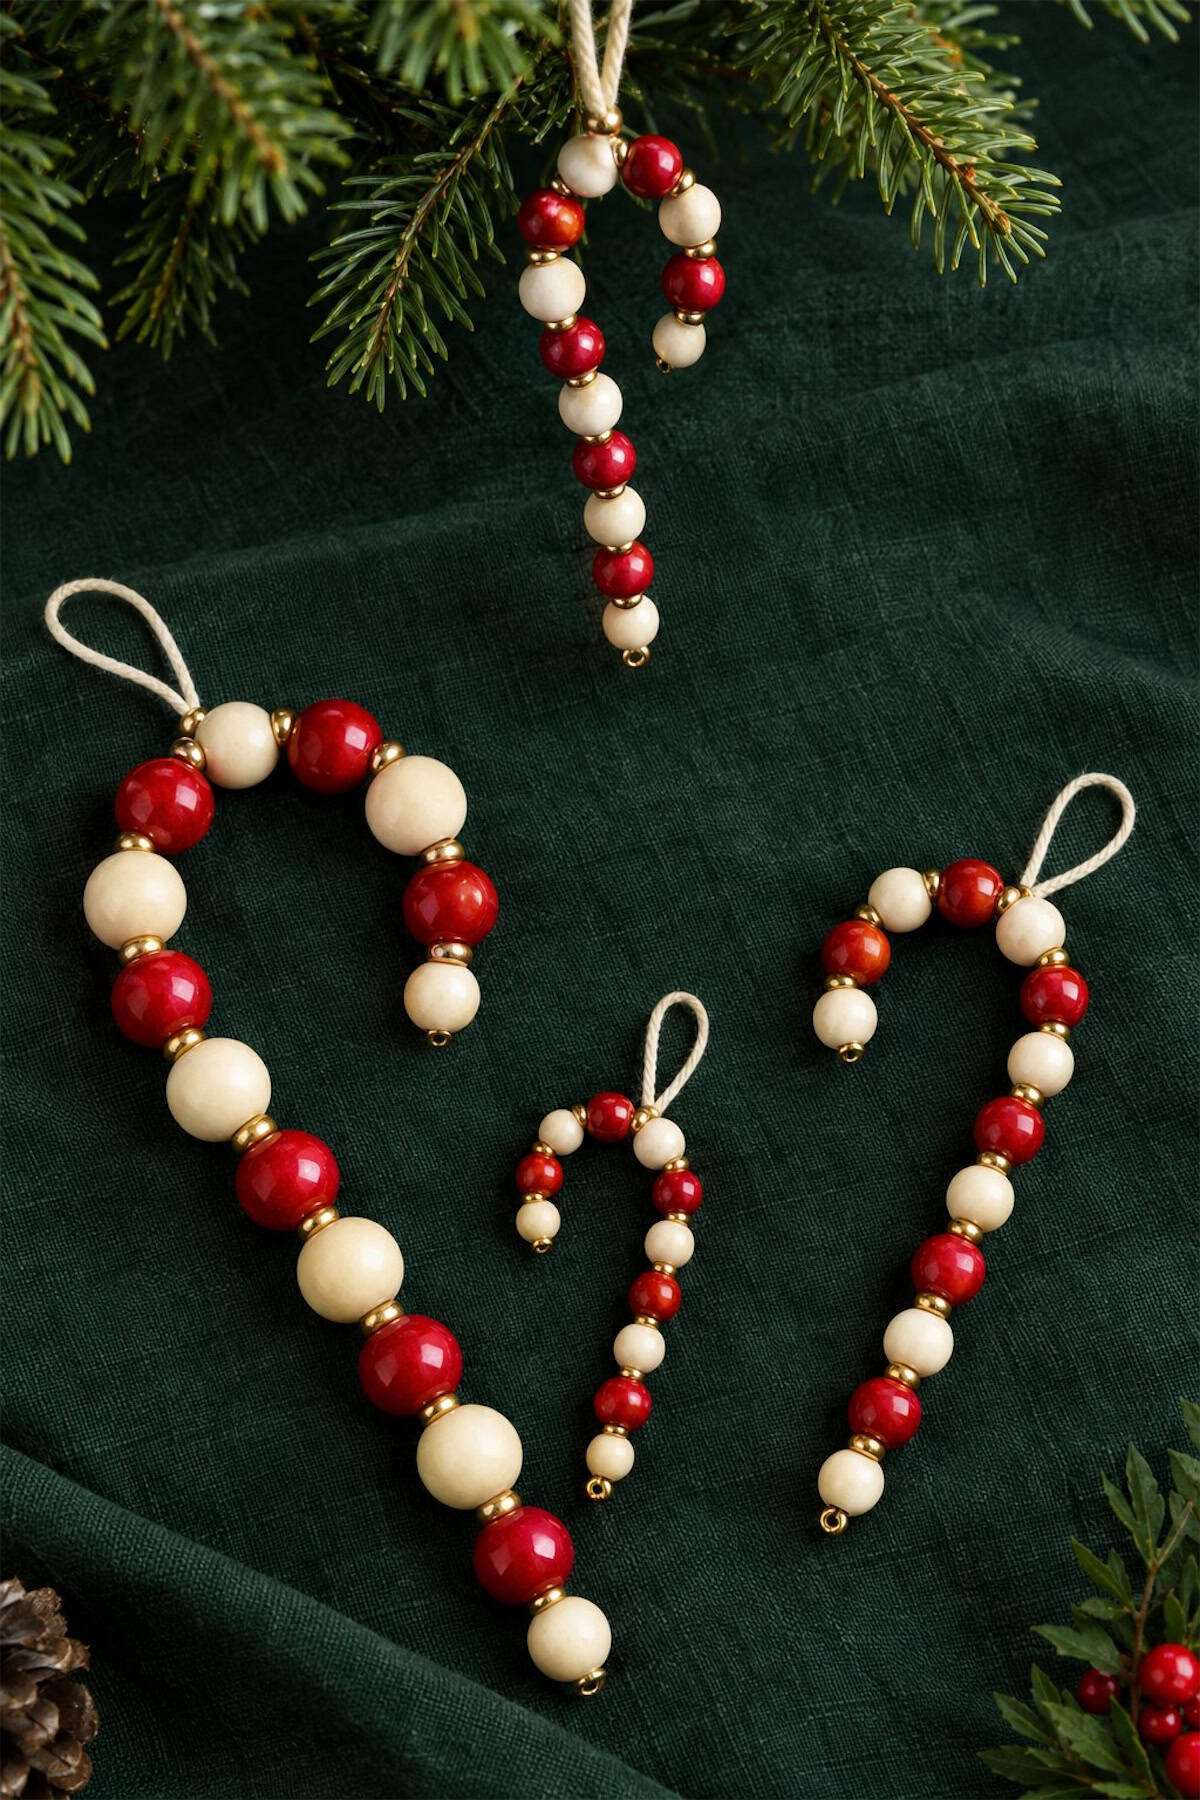
Thread red and cream beads onto craft wire, mixing larger beads with smaller spacers for the version pictured. Curl one end of the wire before threading to stop the beads from slipping off. Once filled, close the other end and bend the top into a candy cane hook. A separate twine loop lets it hang straight on the tree.
Beaded Wire Snowflake Ornaments
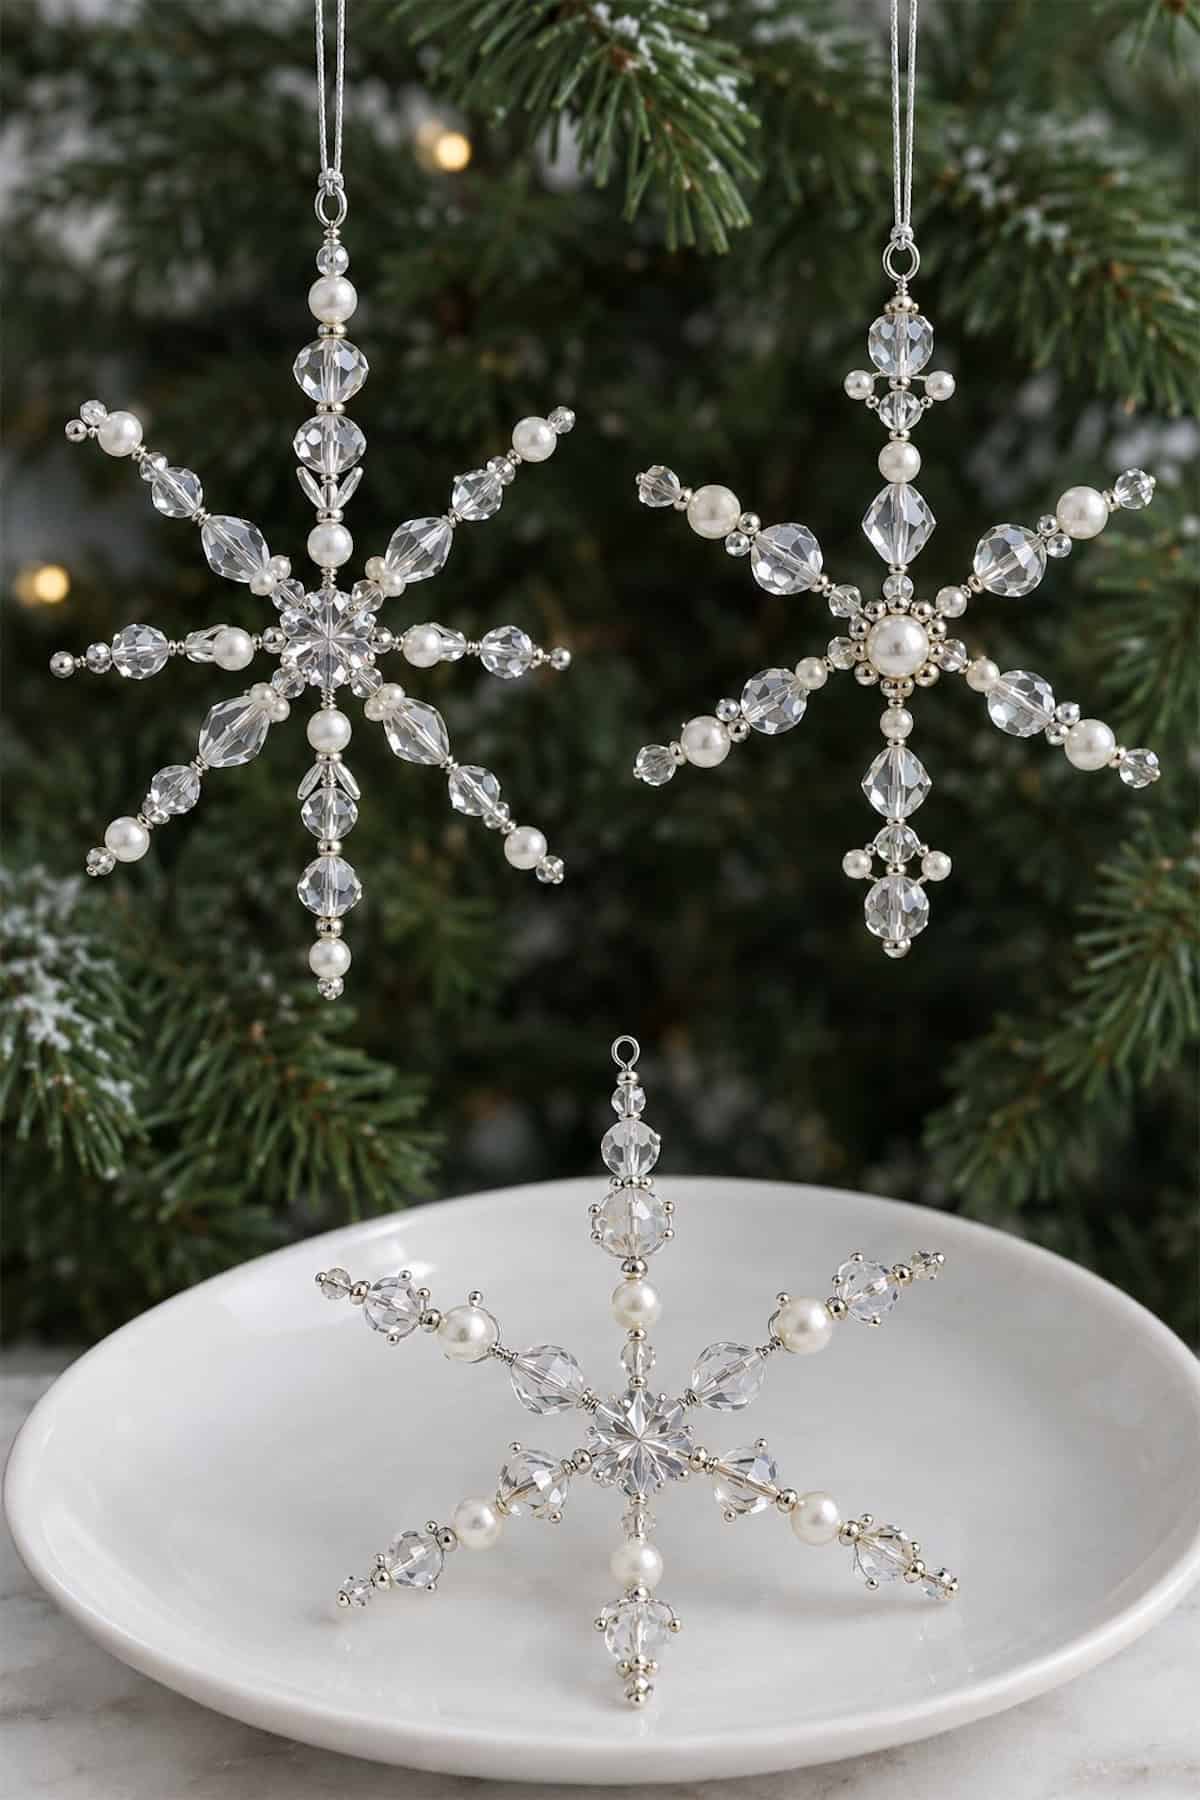
For snowflakes that catch the tree lights, choose clear faceted beads in several sizes. A ready-made wire snowflake form saves you the trouble of joining the spokes yourself; thread each arm, then curl its tip closed with round-nose pliers. Repeat the bead order across the arms to keep the ornament balanced.
Botanical Clay Impression Ornaments
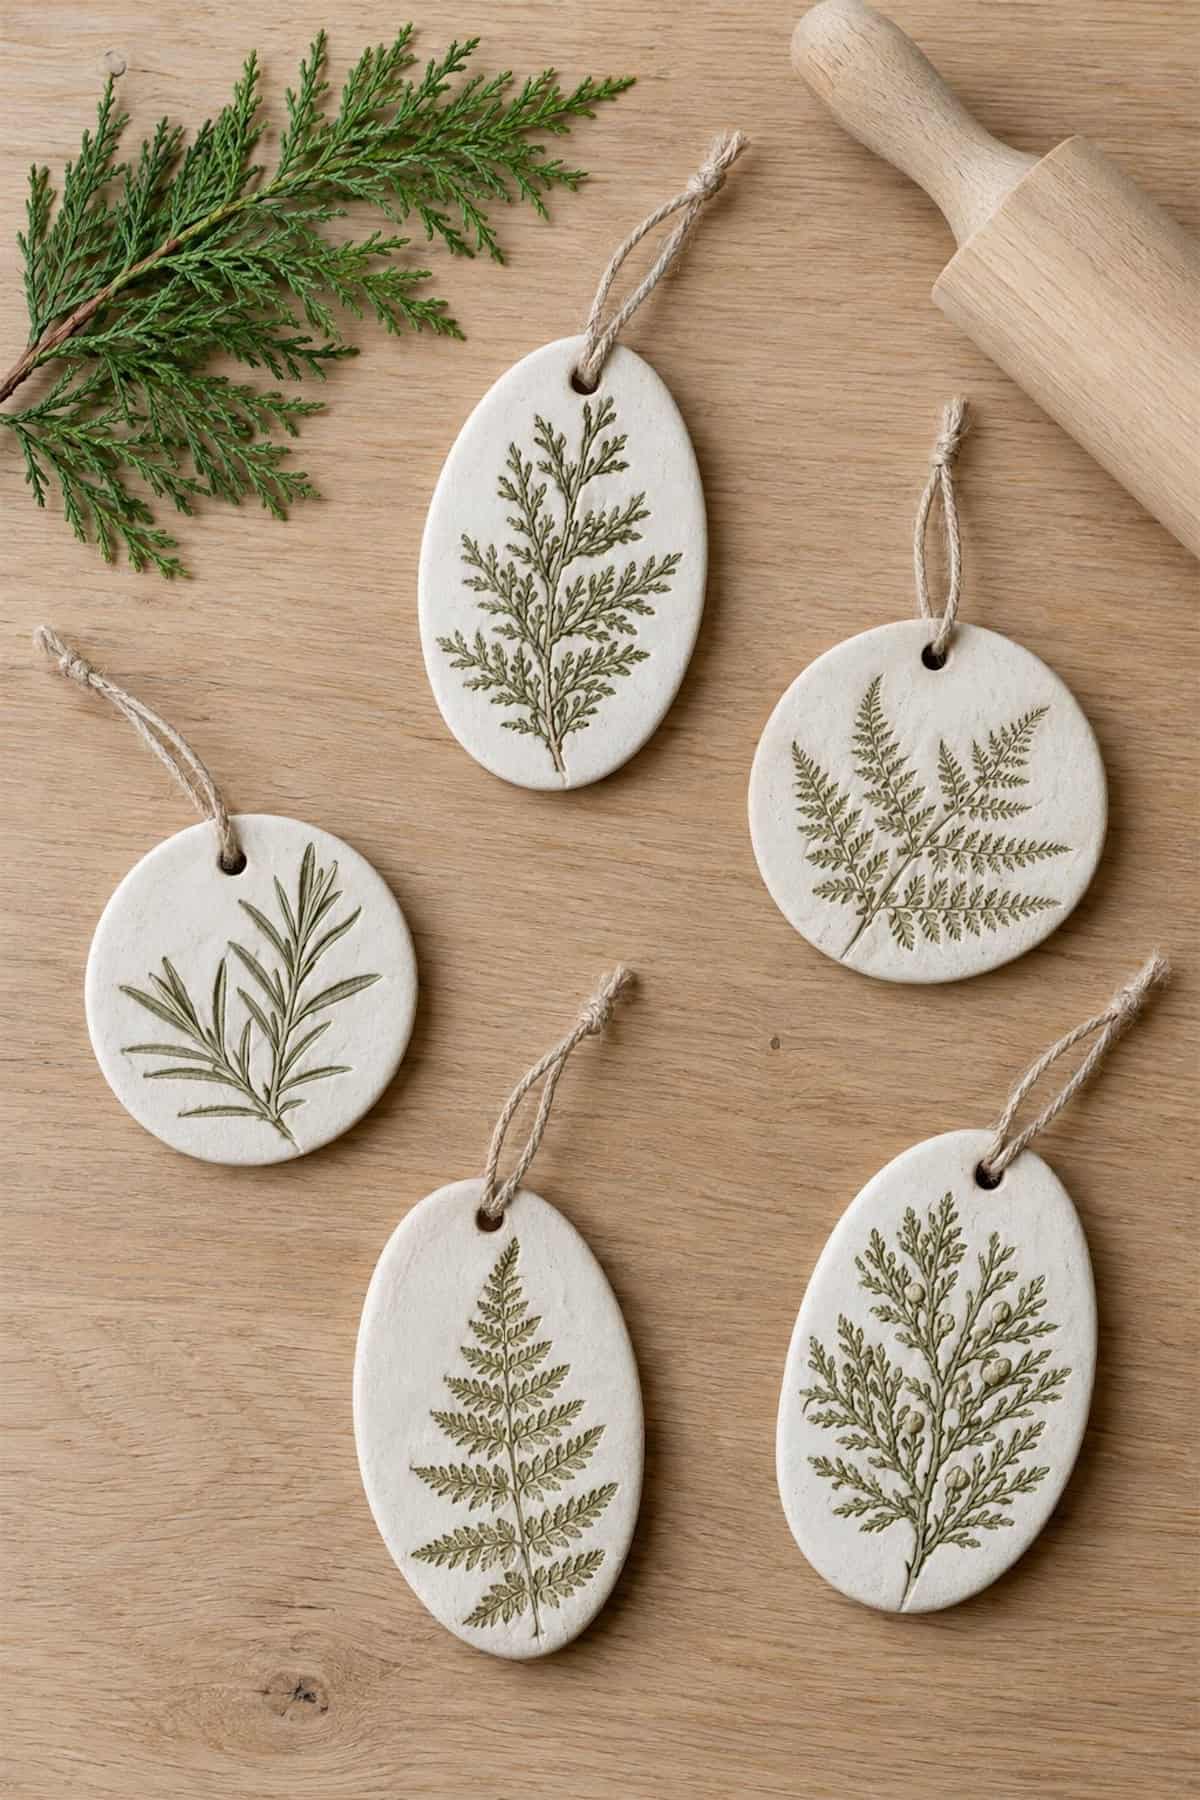
Take a few small foliage cuttings before you roll out the clay. Press each sprig firmly into the surface, lift it carefully, and cut an oval or circle around the impression.
Make the hanger hole while the clay is soft. After it dries, use a fine brush to add green paint inside the leaf marks, with the surrounding clay left white.
Cinnamon Dough Ornaments
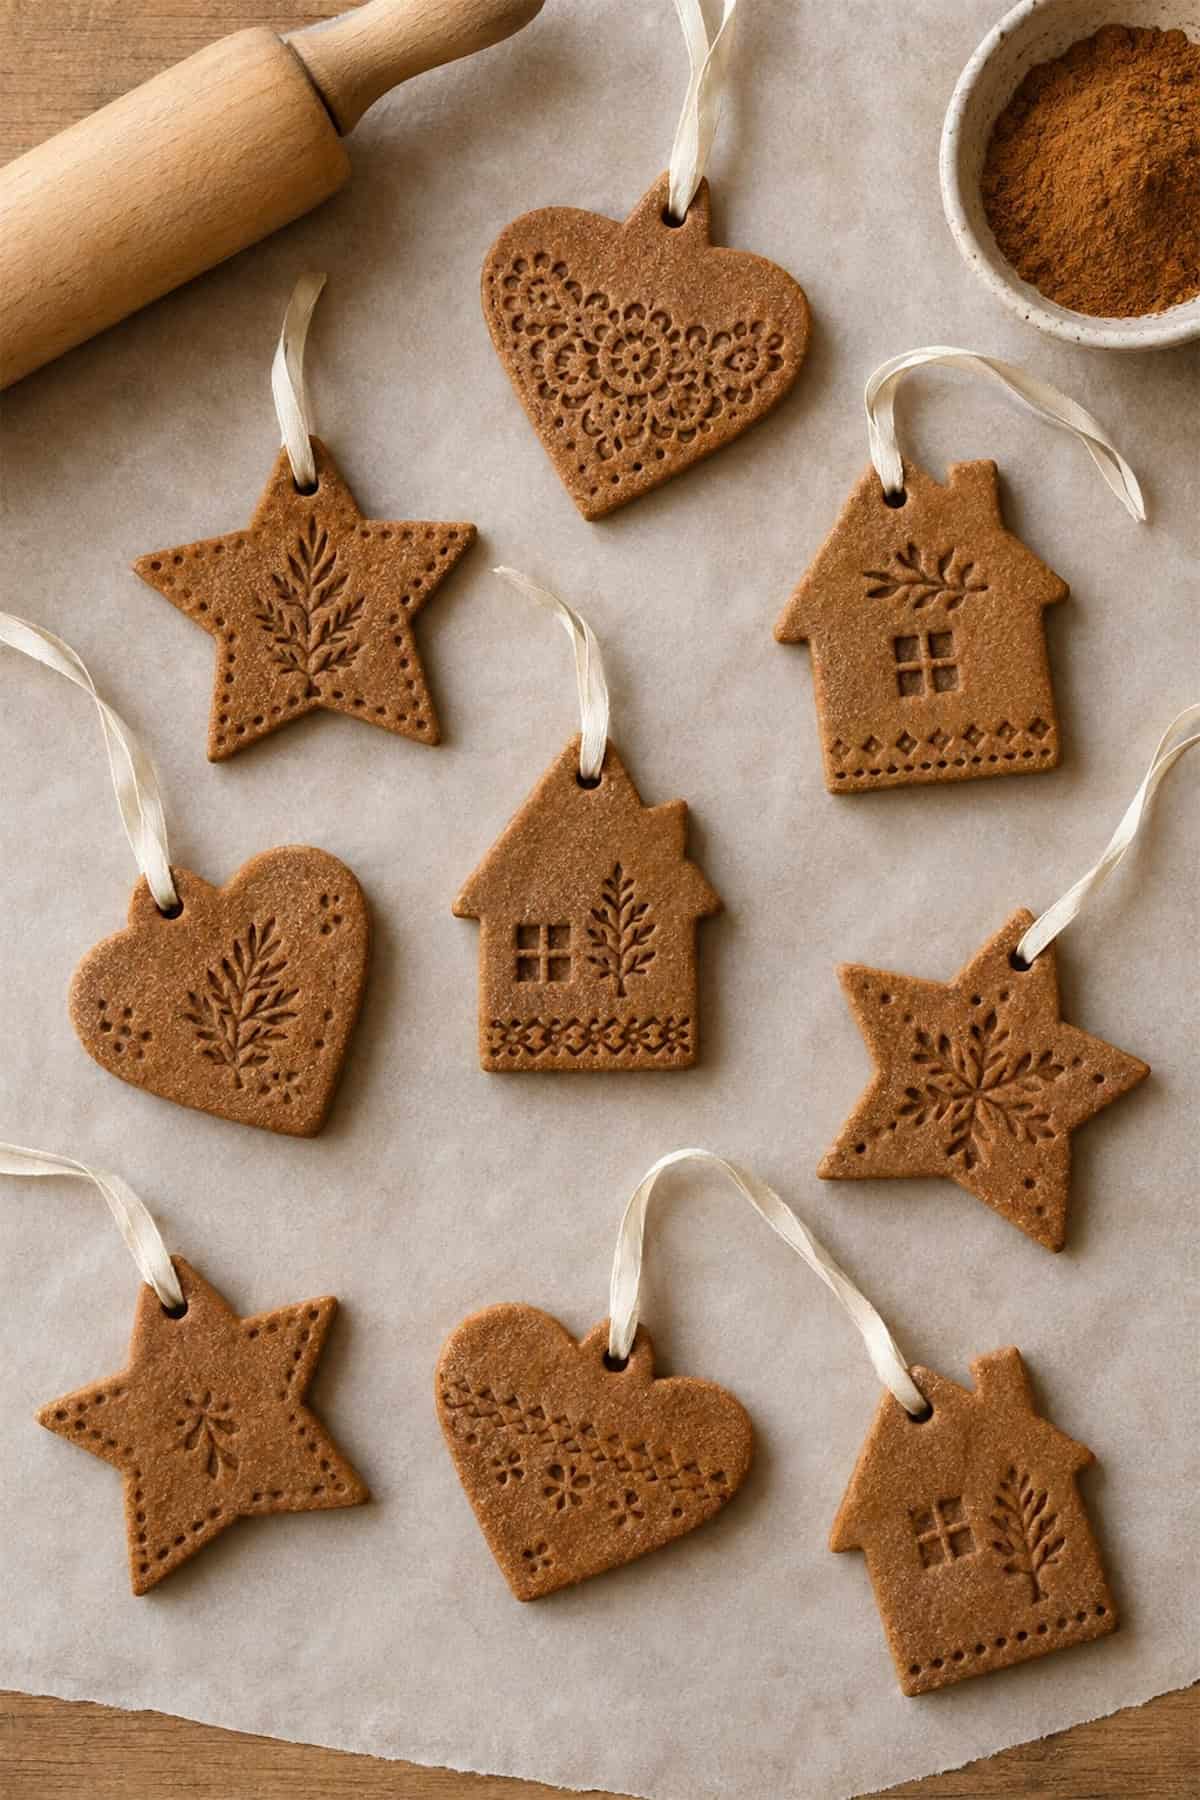
Make the stamped details before cutting out your hearts, stars, and little houses. Use an established cinnamon ornament dough recipe, roll it evenly, and press in small stamps or foliage. Pierce a hole near each top edge and dry or bake as the recipe directs. Cream ribbon suits the gingerbread-like finish; keep these decorations separate from edible treats.
Denim Christmas Stocking Ornaments
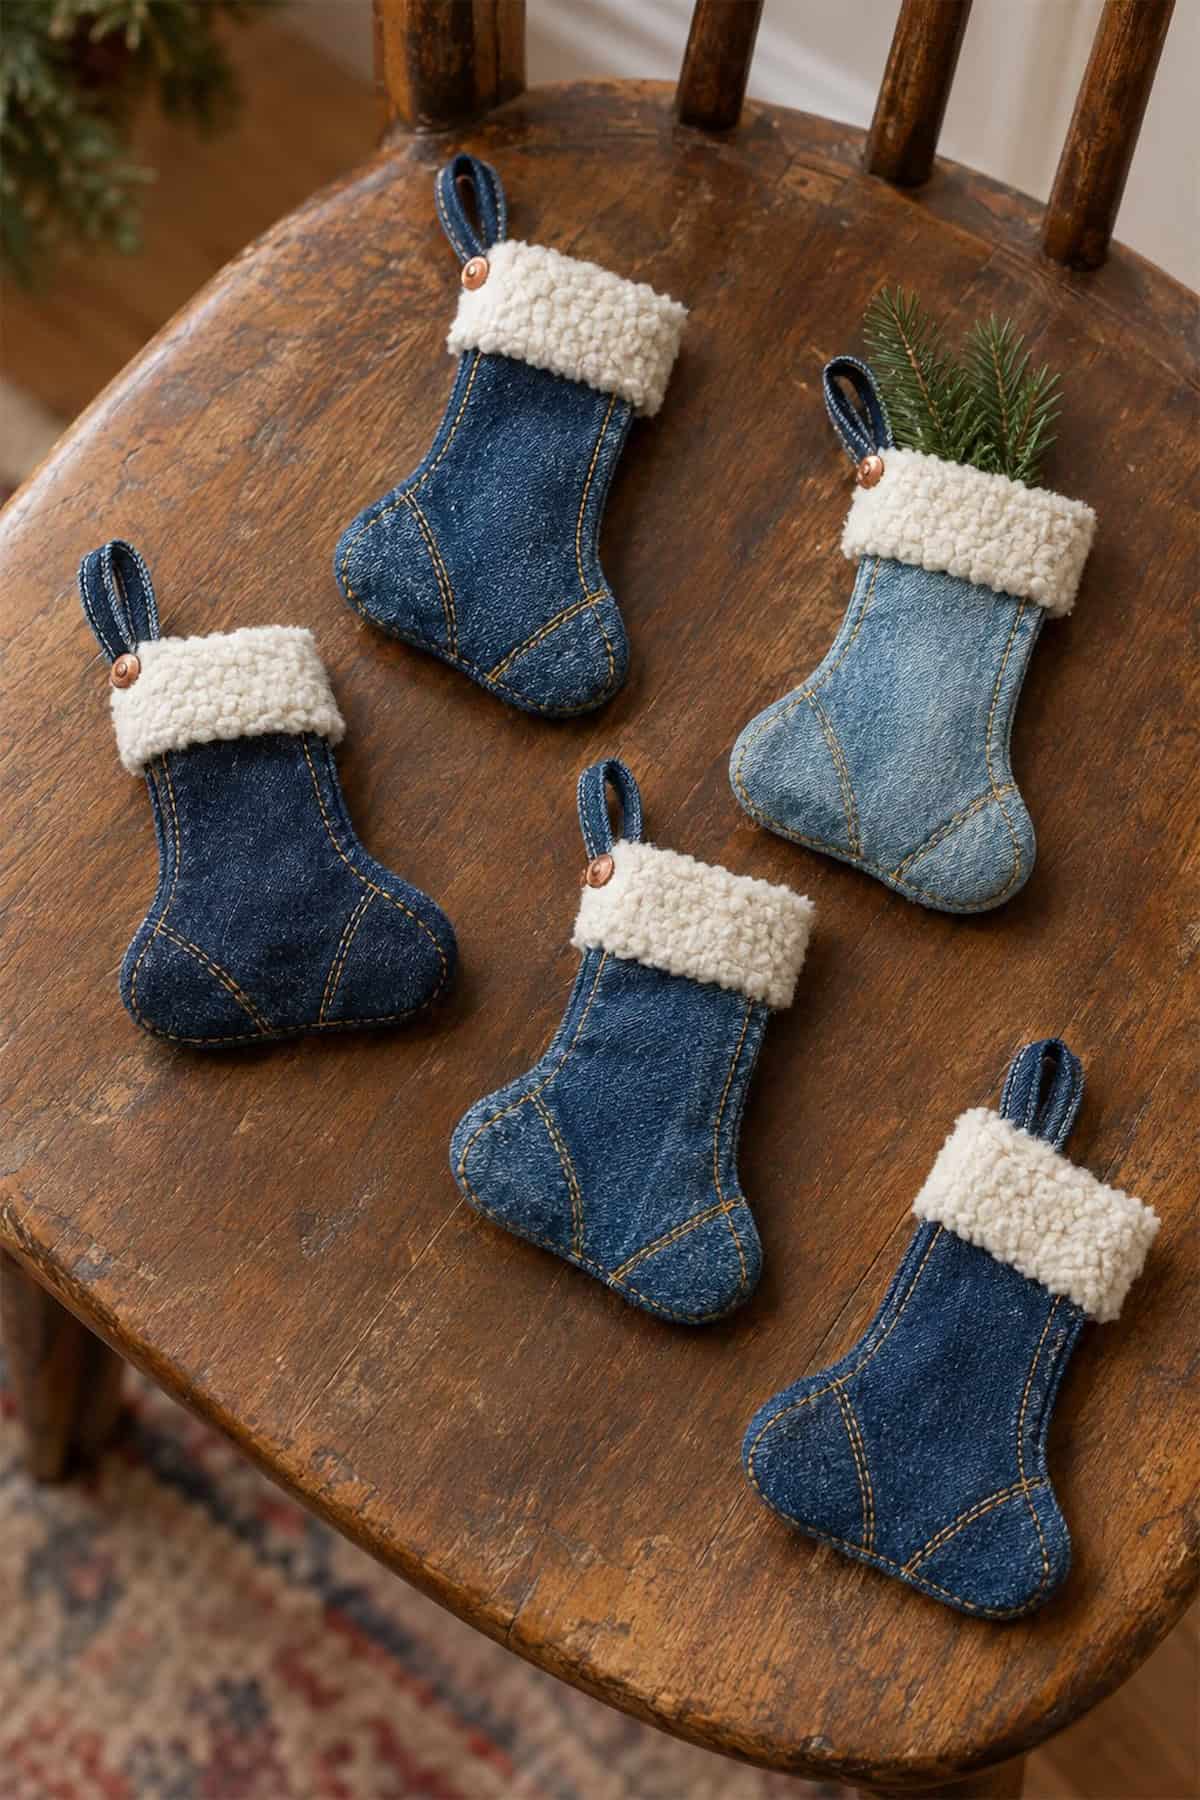
An old pair of jeans can supply enough denim for a whole set of miniature stockings. Cut two matching shapes per ornament, sew them right sides together, and turn them out before adding the cuff. A scrap of cream fleece hides the top edge, while yellow topstitching echoes the seams on the original jeans.
Wood Slice Snowman Ornaments
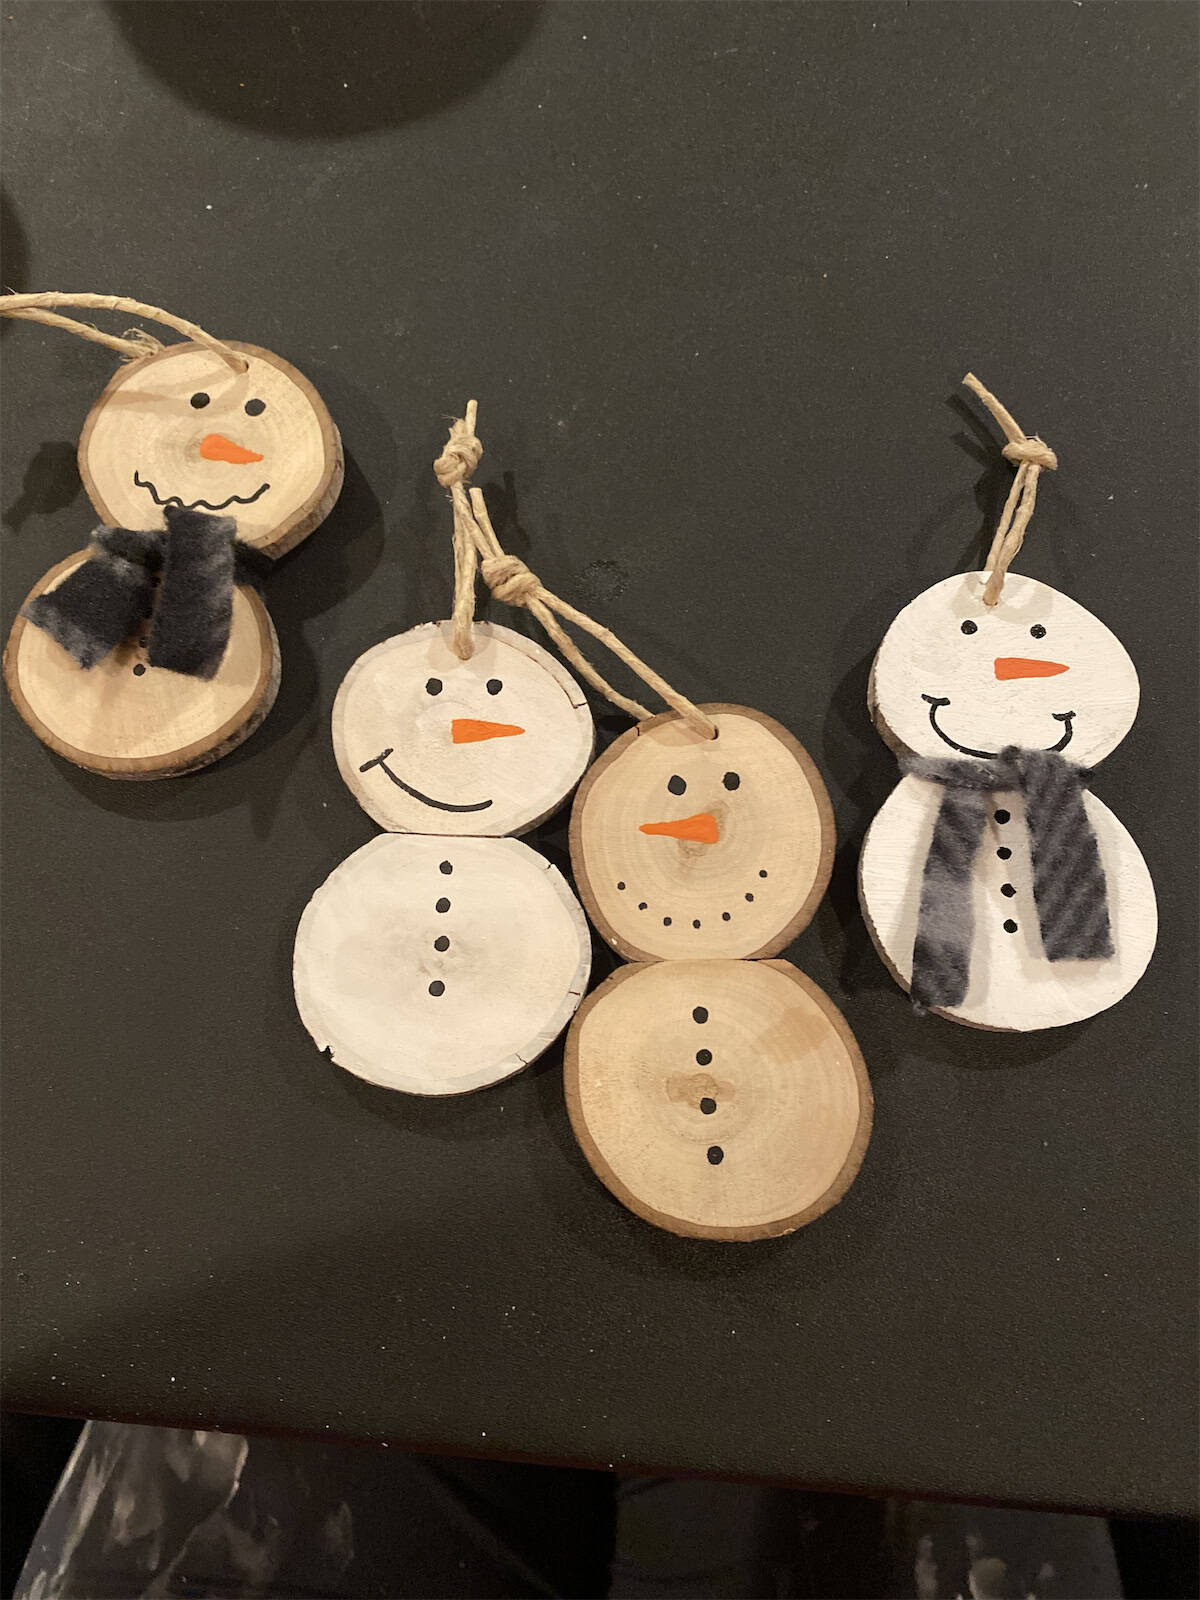
Pair a small wood slice with a slightly larger one to make each snowman. Paint the flat faces white but leave the bark visible, then add dot eyes, an orange nose, and a curved smile. Secure the slices together with a glued backing strip.
Try different expressions before tying on narrow fabric scarves—the faces give this little group its personality.
Dried Orange Mini Wreath Ornaments
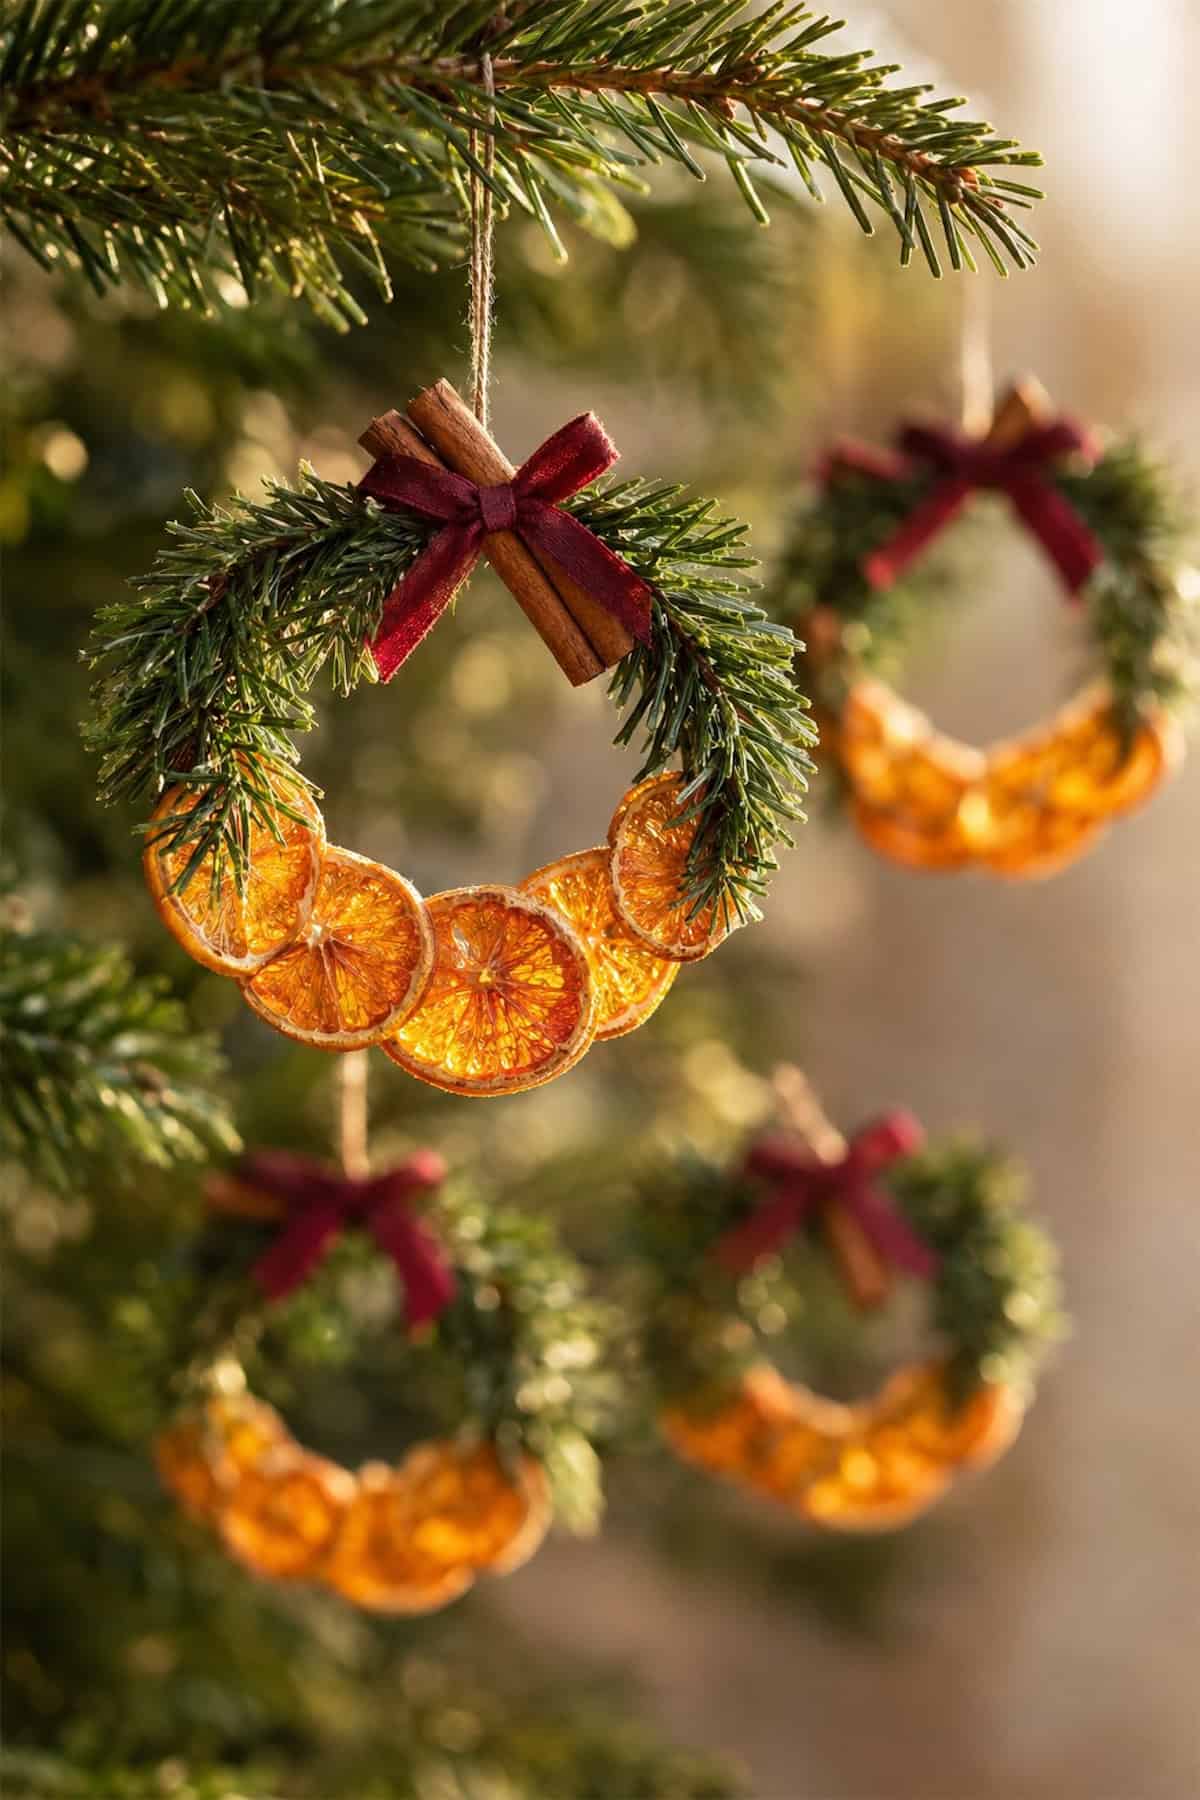
Rather than threading a full garland, use your dried citrus slices around the lower half of a miniature wreath. Start with a small wire ring covered in faux evergreen, then glue overlapping slices along the bottom. Keep the citrus completely dry before assembly. The burgundy bow covers the upper join without hiding the fruit.
Embroidered Felt Gingerbread Houses
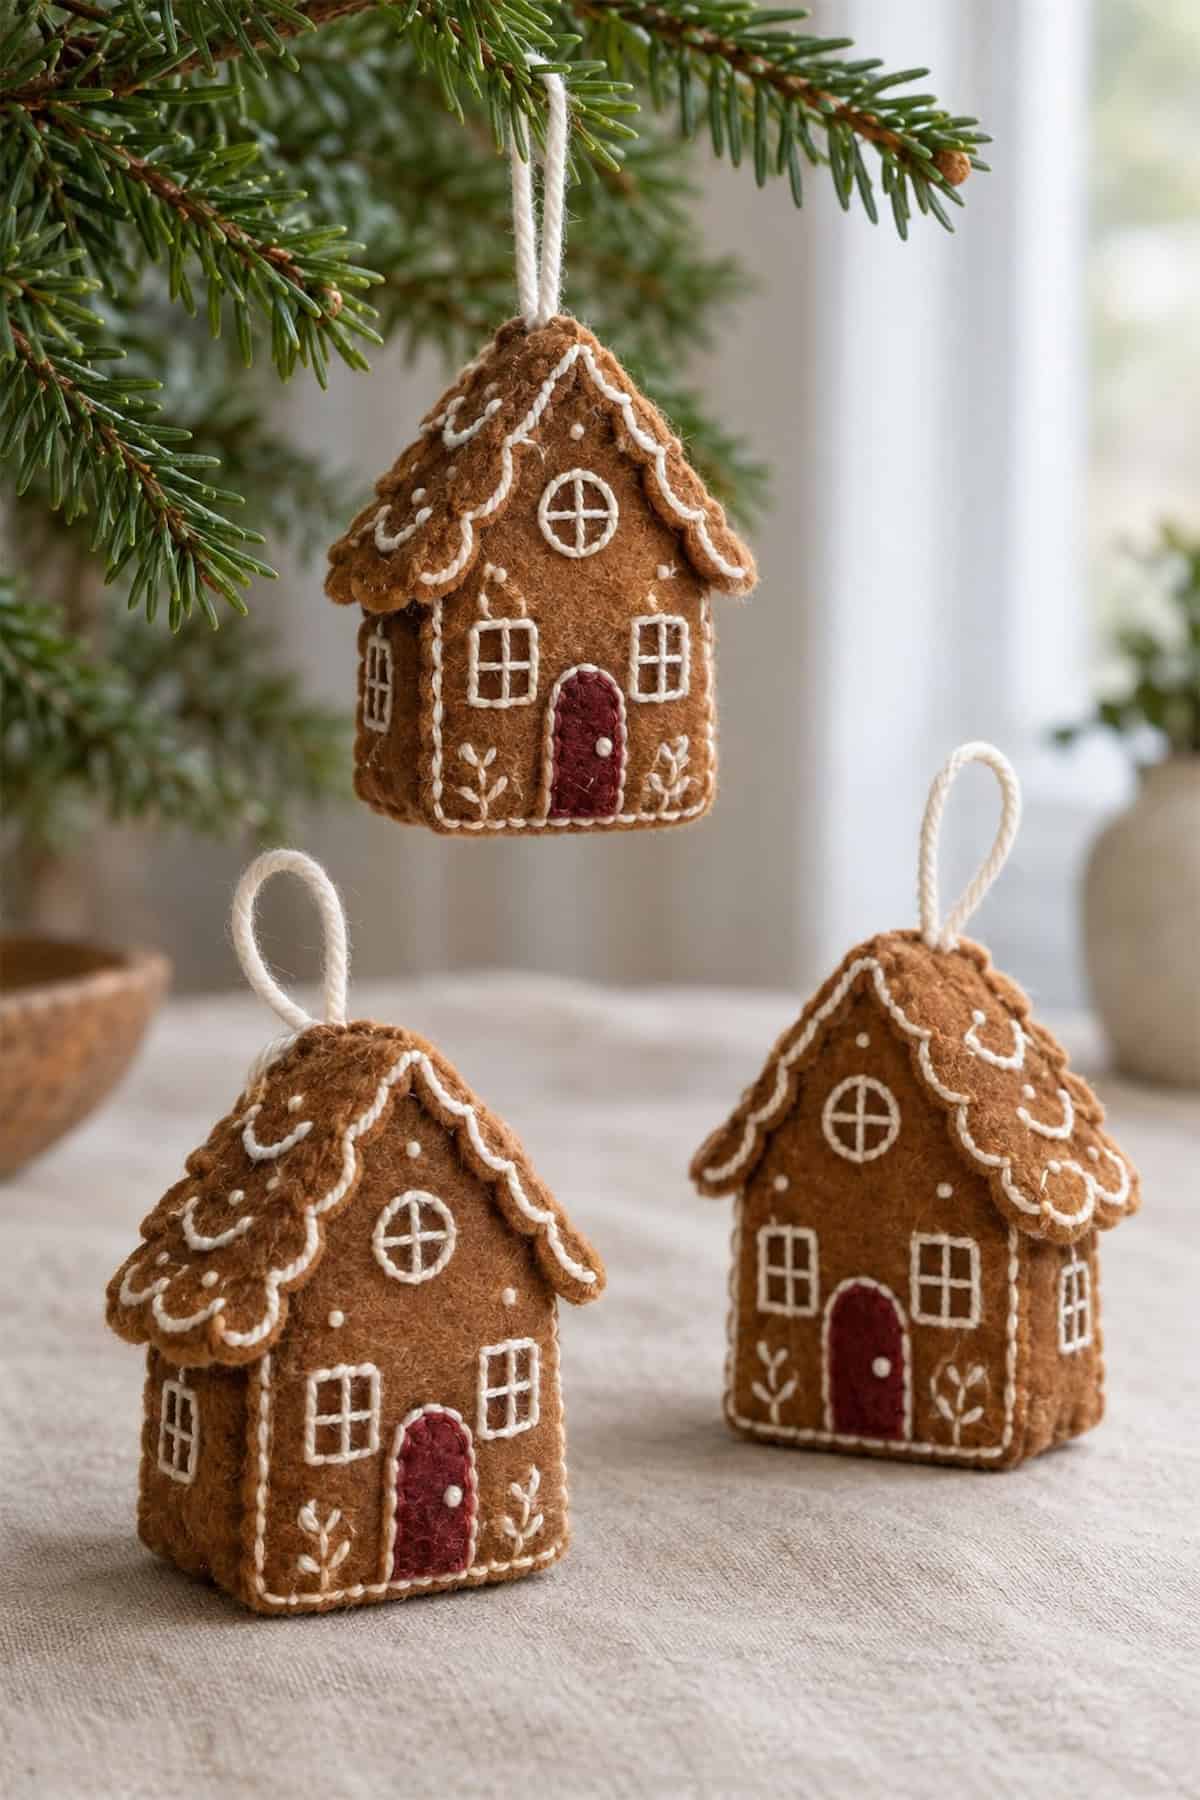
Stitch the windows, door, and white icing details onto brown felt while the pieces are still flat. Cut matching house fronts and backs, plus narrow side and roof panels if you want the standing shape pictured. Sew the panels together, add light stuffing, and close the final seam with a hanging loop caught securely at the roof.
Floral Decoupage Christmas Baubles
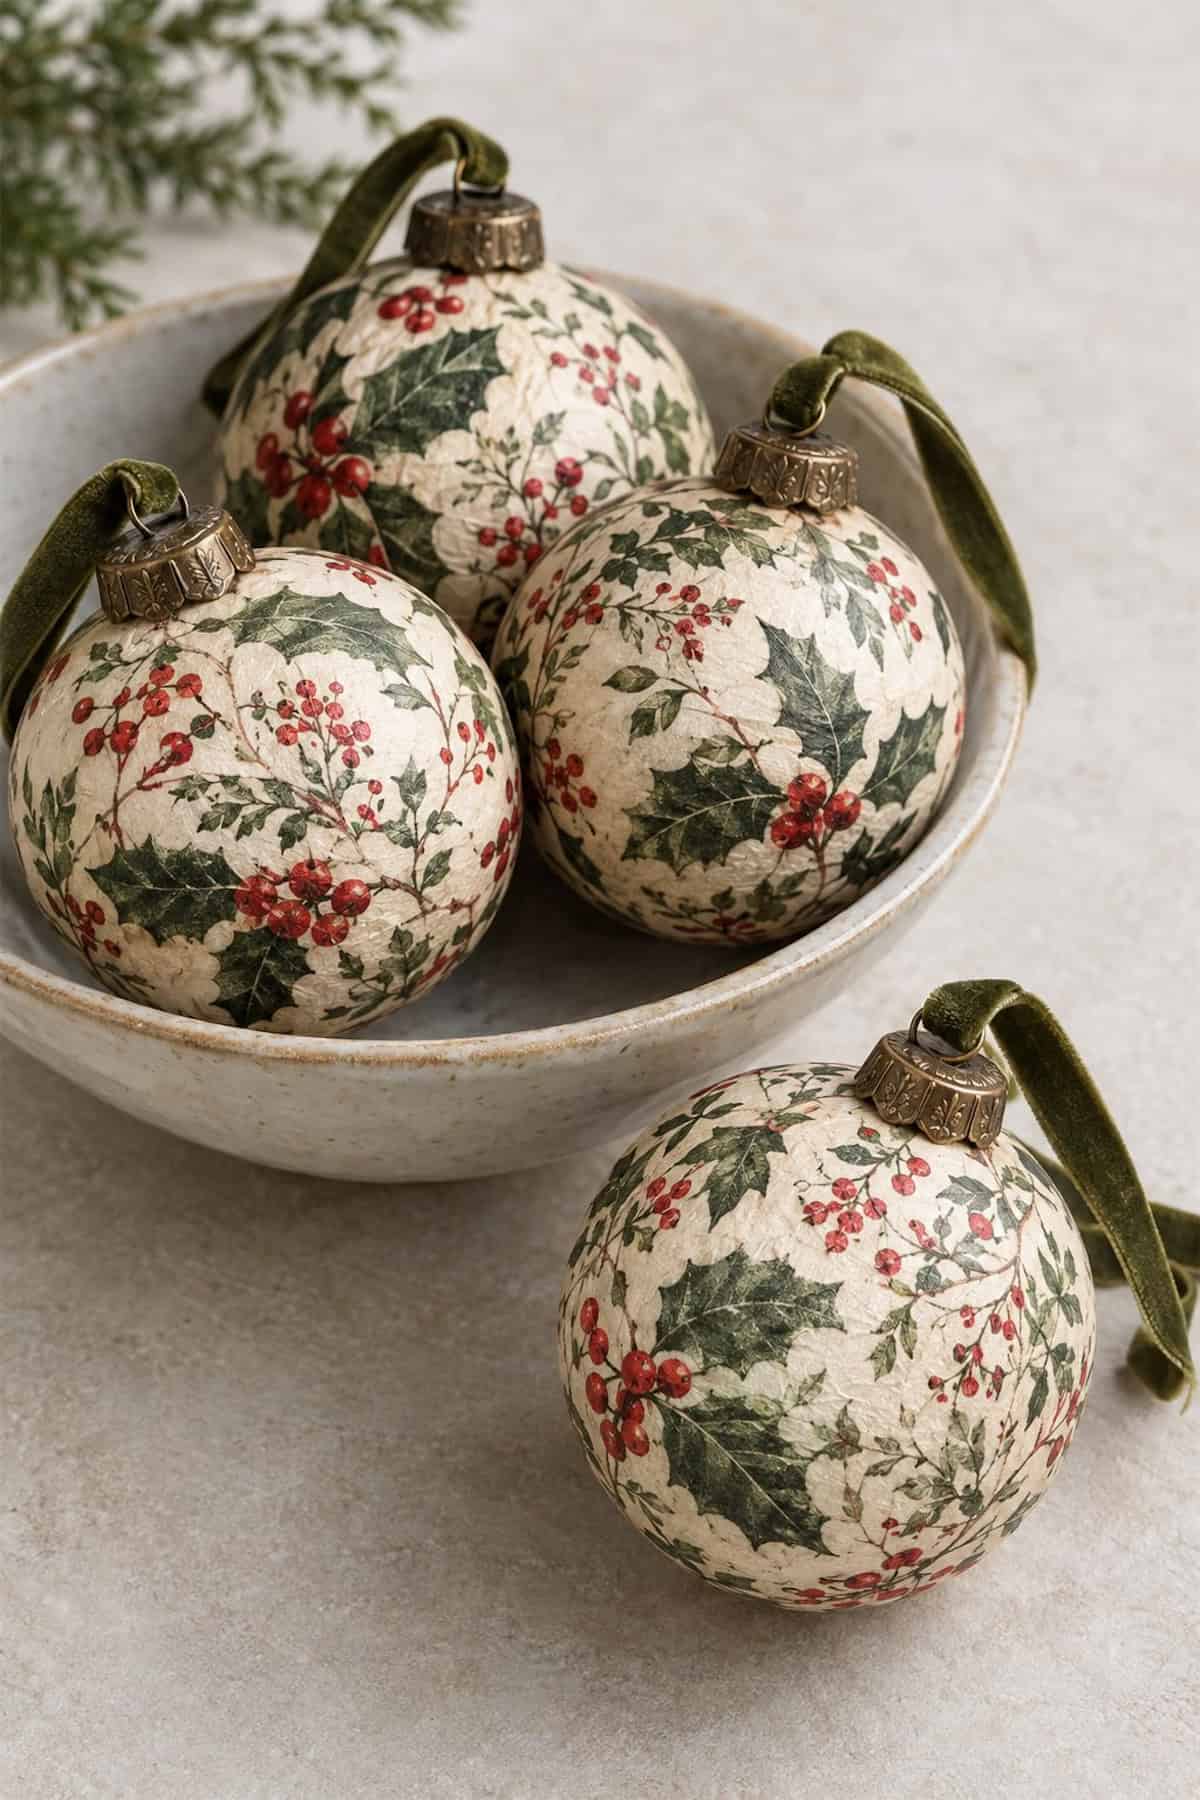
Look for paper napkins with small floral motifs; large flowers are harder to fit around a bauble without creases. Separate the printed layer and tear out individual clusters. Attach them over a pale ornament with decoupage medium, gently smoothing each piece.
Once dry, seal the surface and replace the hanger with a length of olive ribbon.
Mini Stocking Advent Ornaments
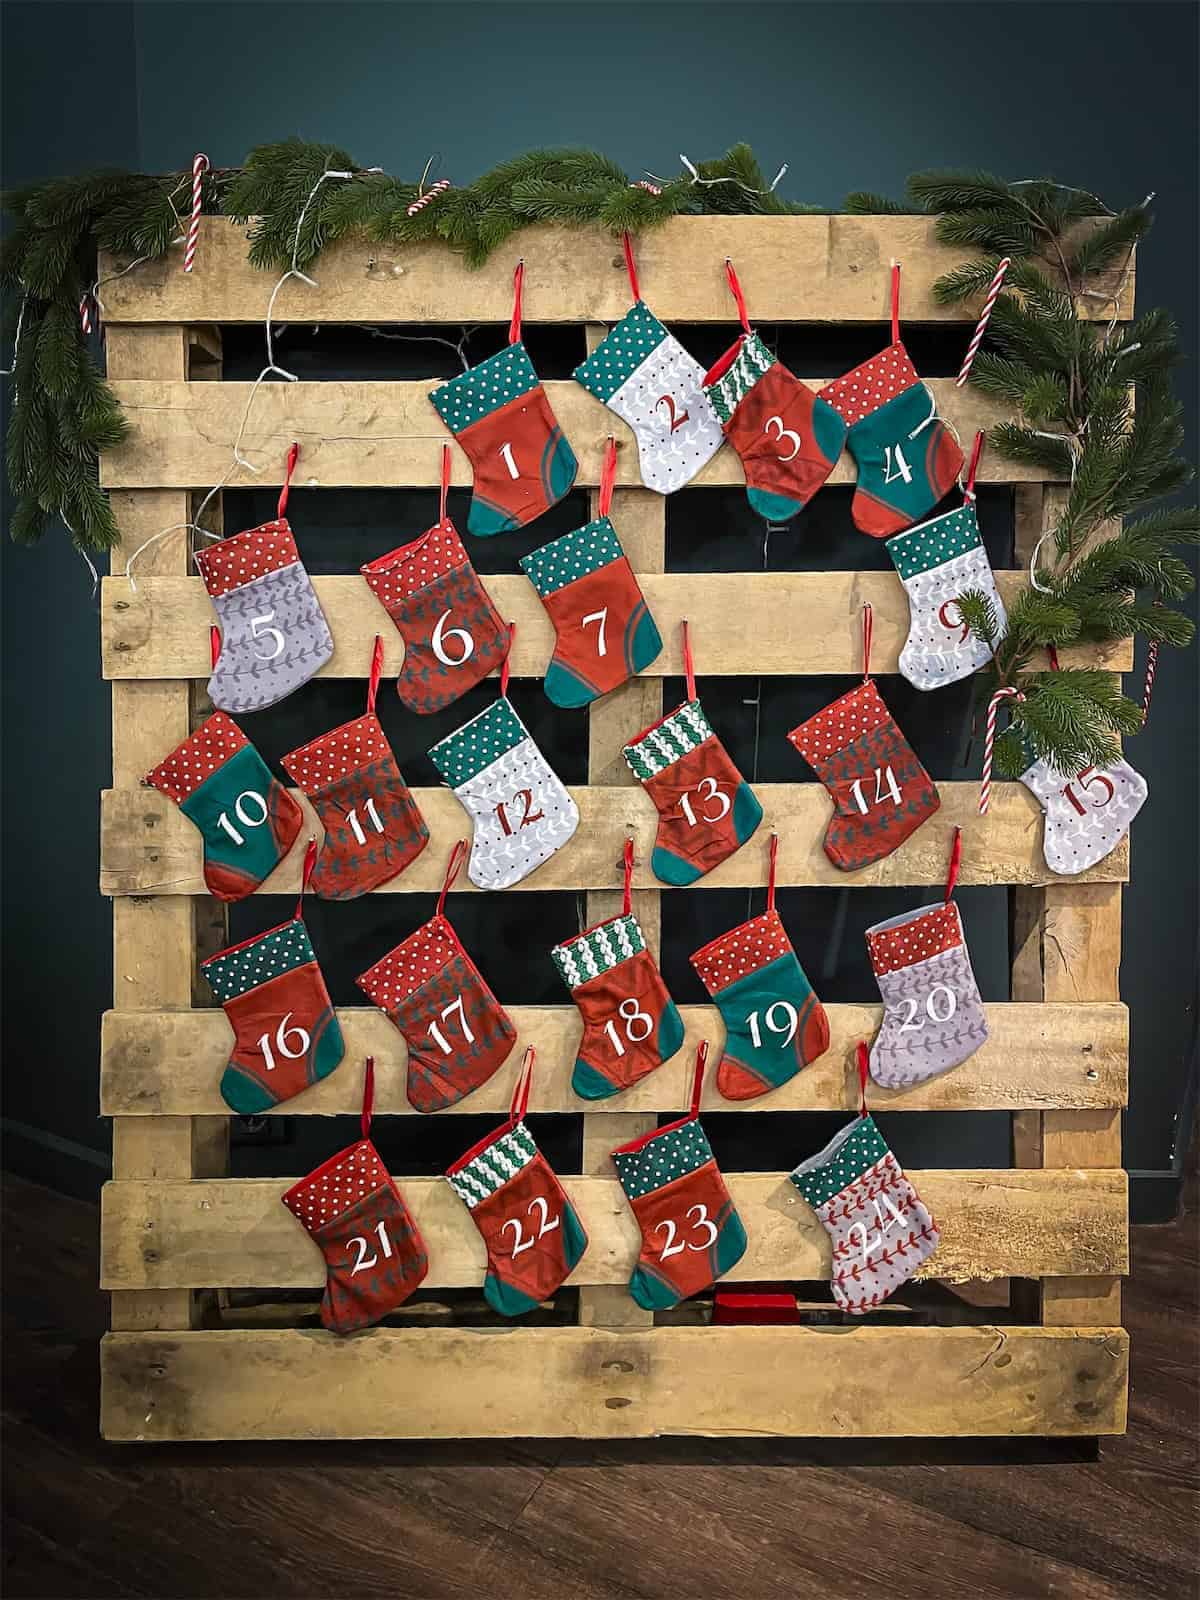
Make numbered stocking ornaments that can spend December on an advent display before moving to the tree. Sew small fabric stockings, attach contrasting cuffs, and add felt or embroidered numbers. Leave the tops open for folded notes or lightweight treats. You can hang them from cords across a wooden board, as pictured, without fastening each stocking permanently.
Stuffed Heart Wreath Ornaments
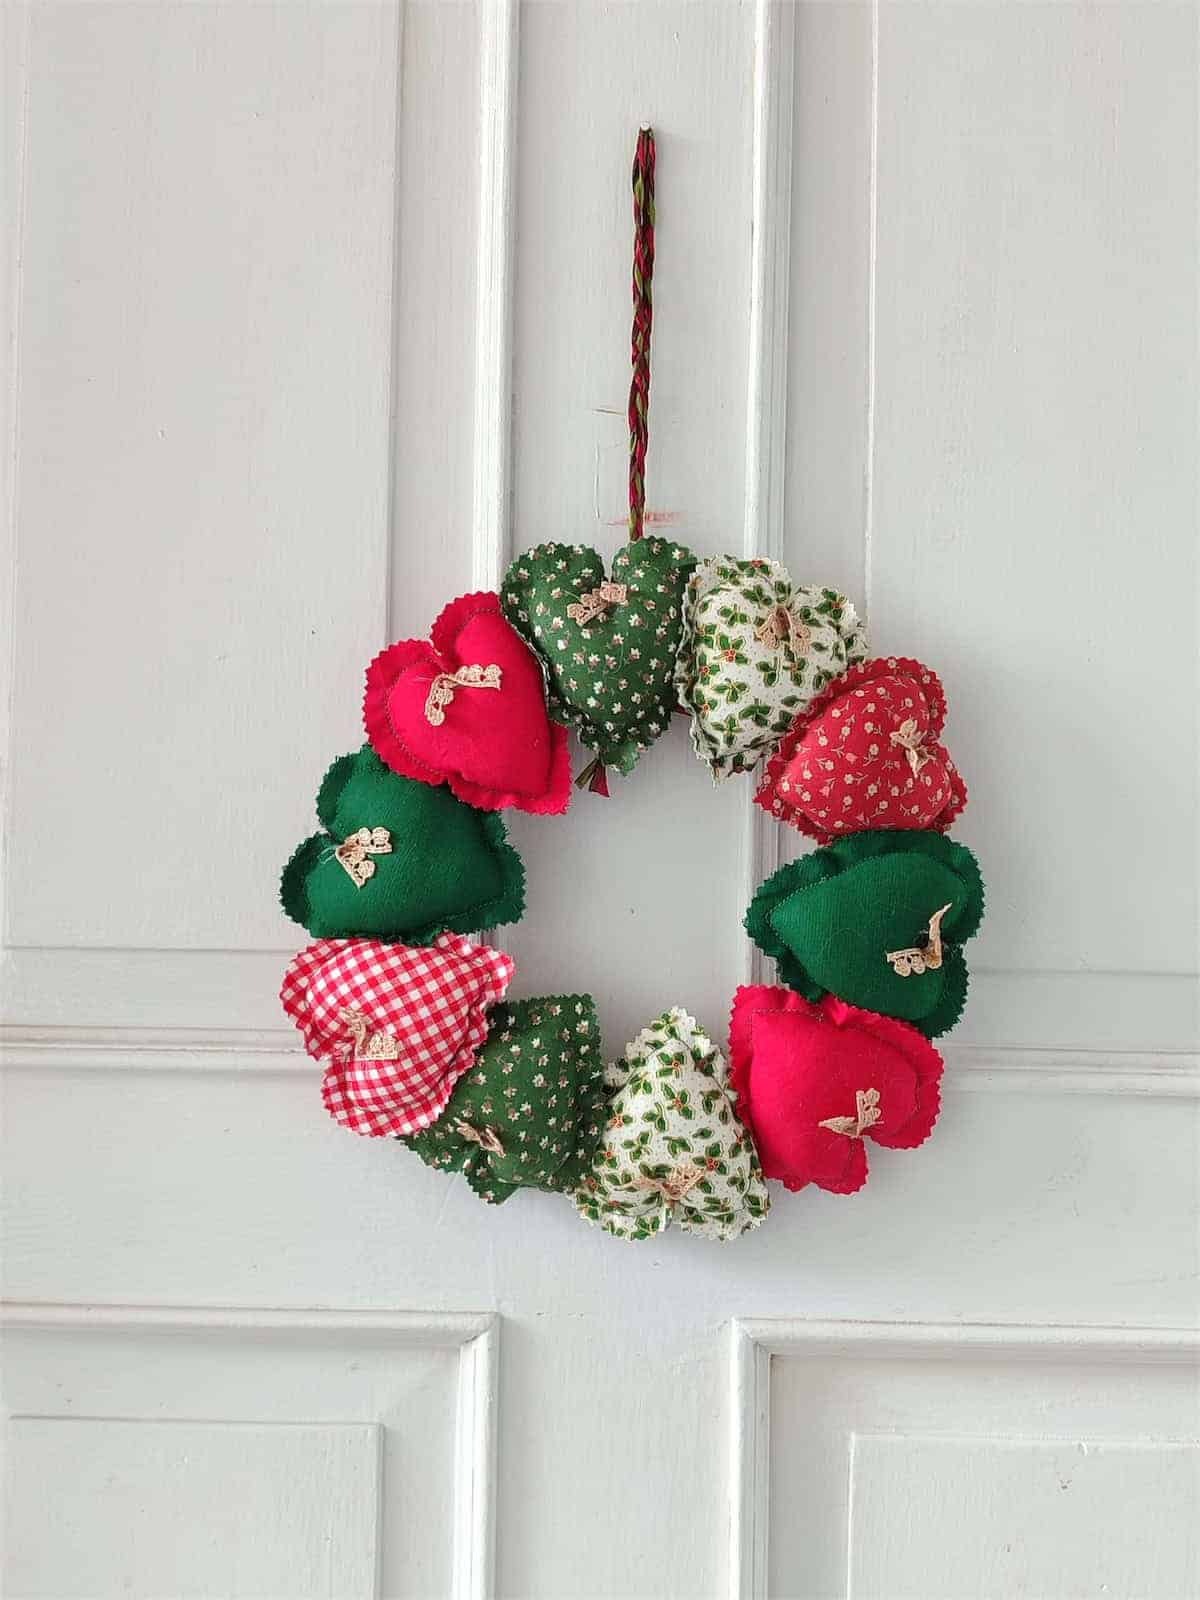
Sew several small stuffed hearts from red, green, and floral fabric, then arrange them around a lightweight hoop. Overlap their edges slightly and stitch them to a fabric-wrapped base for a wreath like this one. For a tree ornament, scale down the hearts and use fewer around a smaller ring.
Keepsake Photo Frame Ornaments
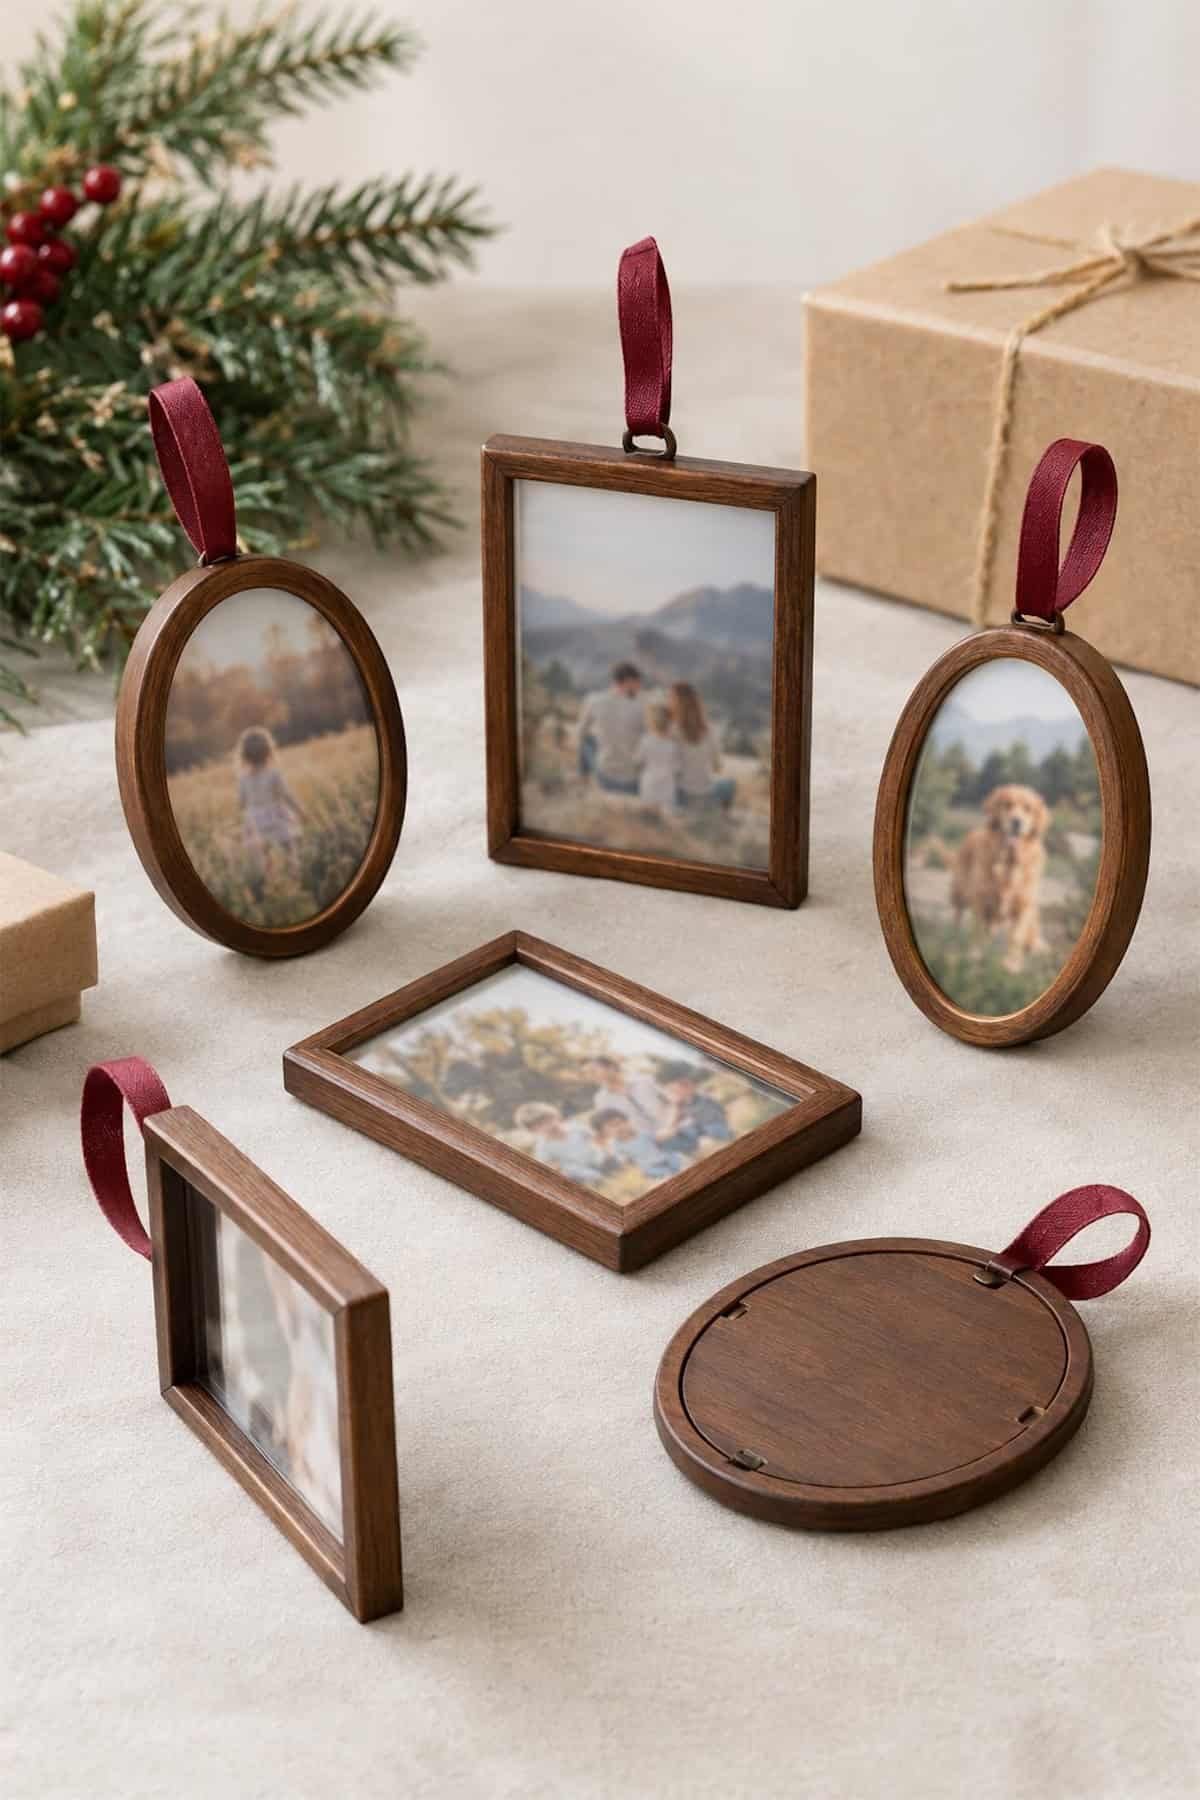
Choose a photograph before buying the miniature frame, since a tight portrait needs a different shape from a wide family scene. Trim a paper copy to fit, insert it, and secure the backing. Attach a ribbon loop with a small screw eye or sturdy frame fitting.
Write the year on the back before wrapping it as a gift.
Paper Honeycomb Ornaments
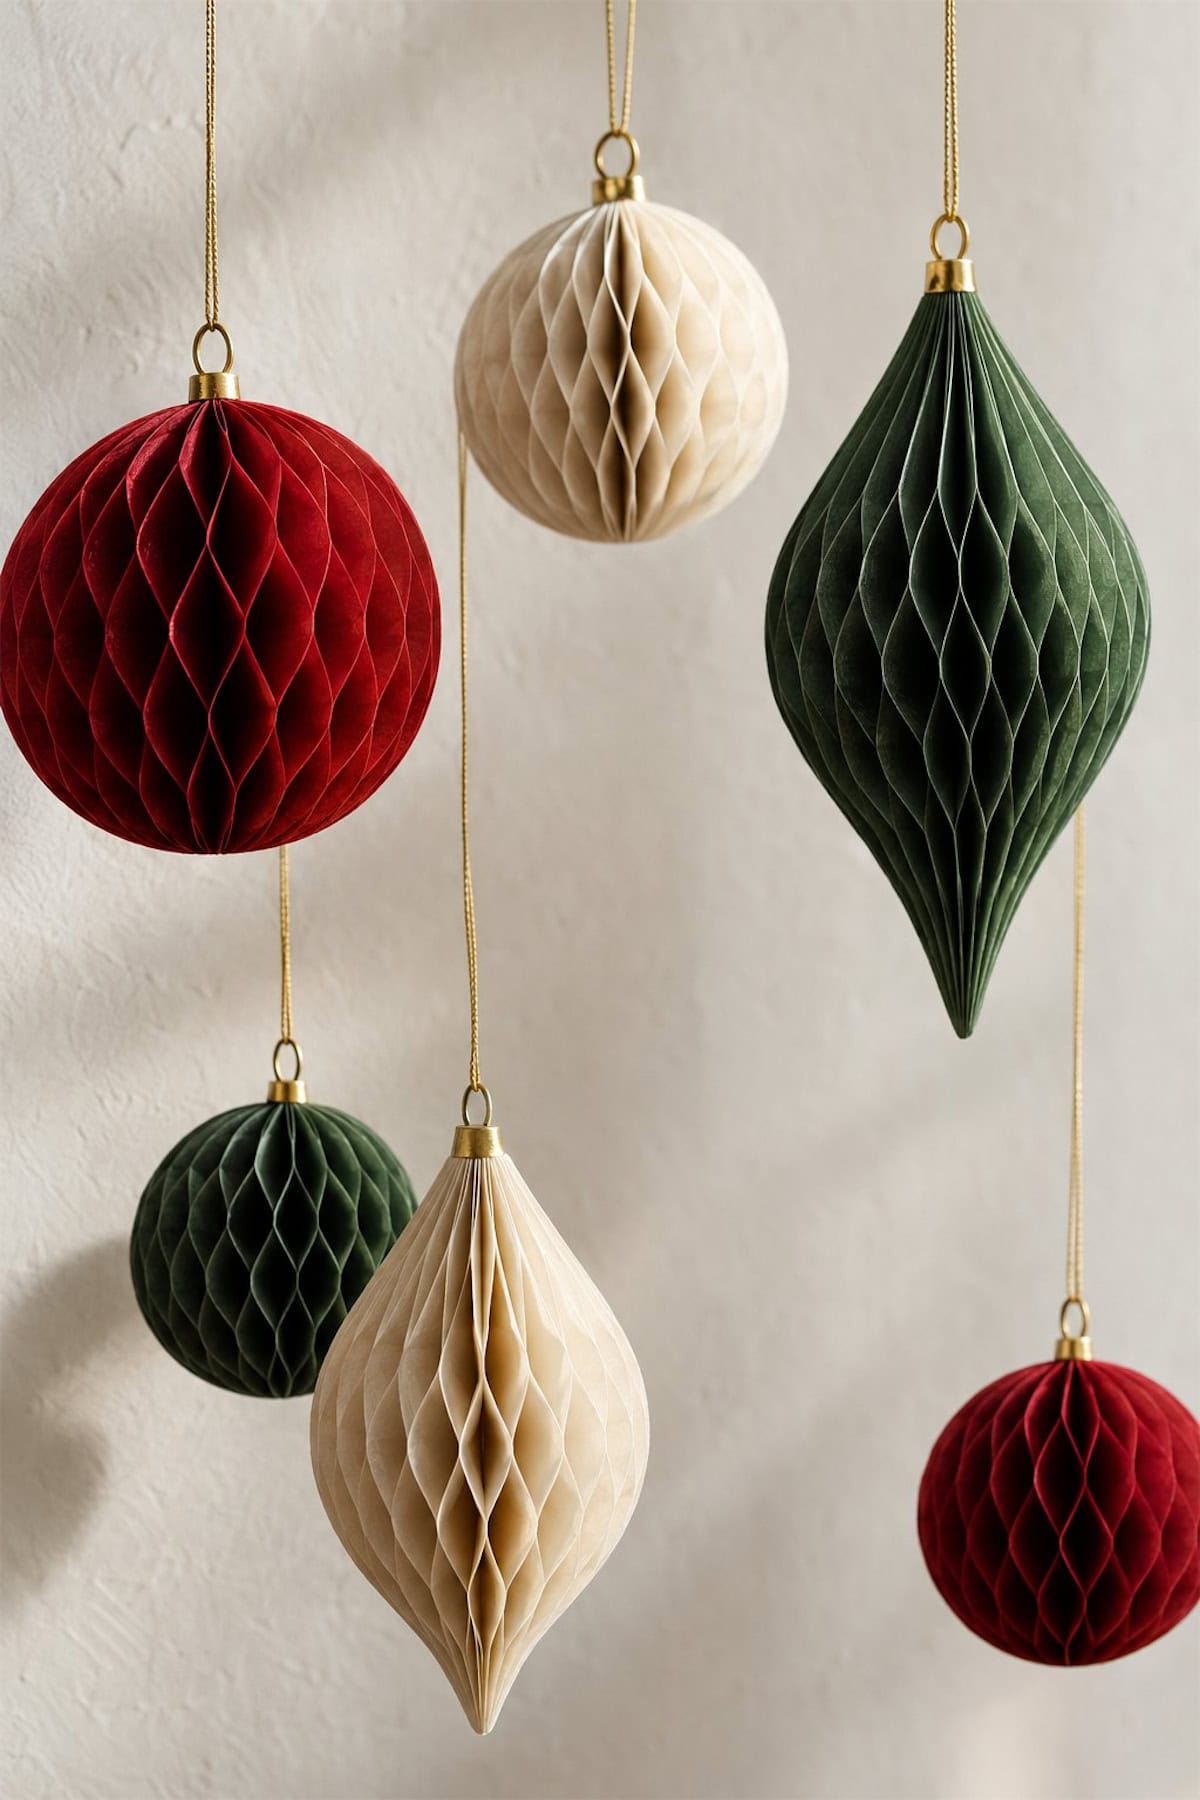
Use honeycomb paper pads for those rounded, open-cell shapes rather than trying to build every layer from scratch. Cut a half-circle or half-teardrop along the pad’s spine, attach cardstock covers, and open it into a full ornament. Fasten the covers with small clips if you want to fold the decoration flat for storage.
Mini Macramé Christmas Trees
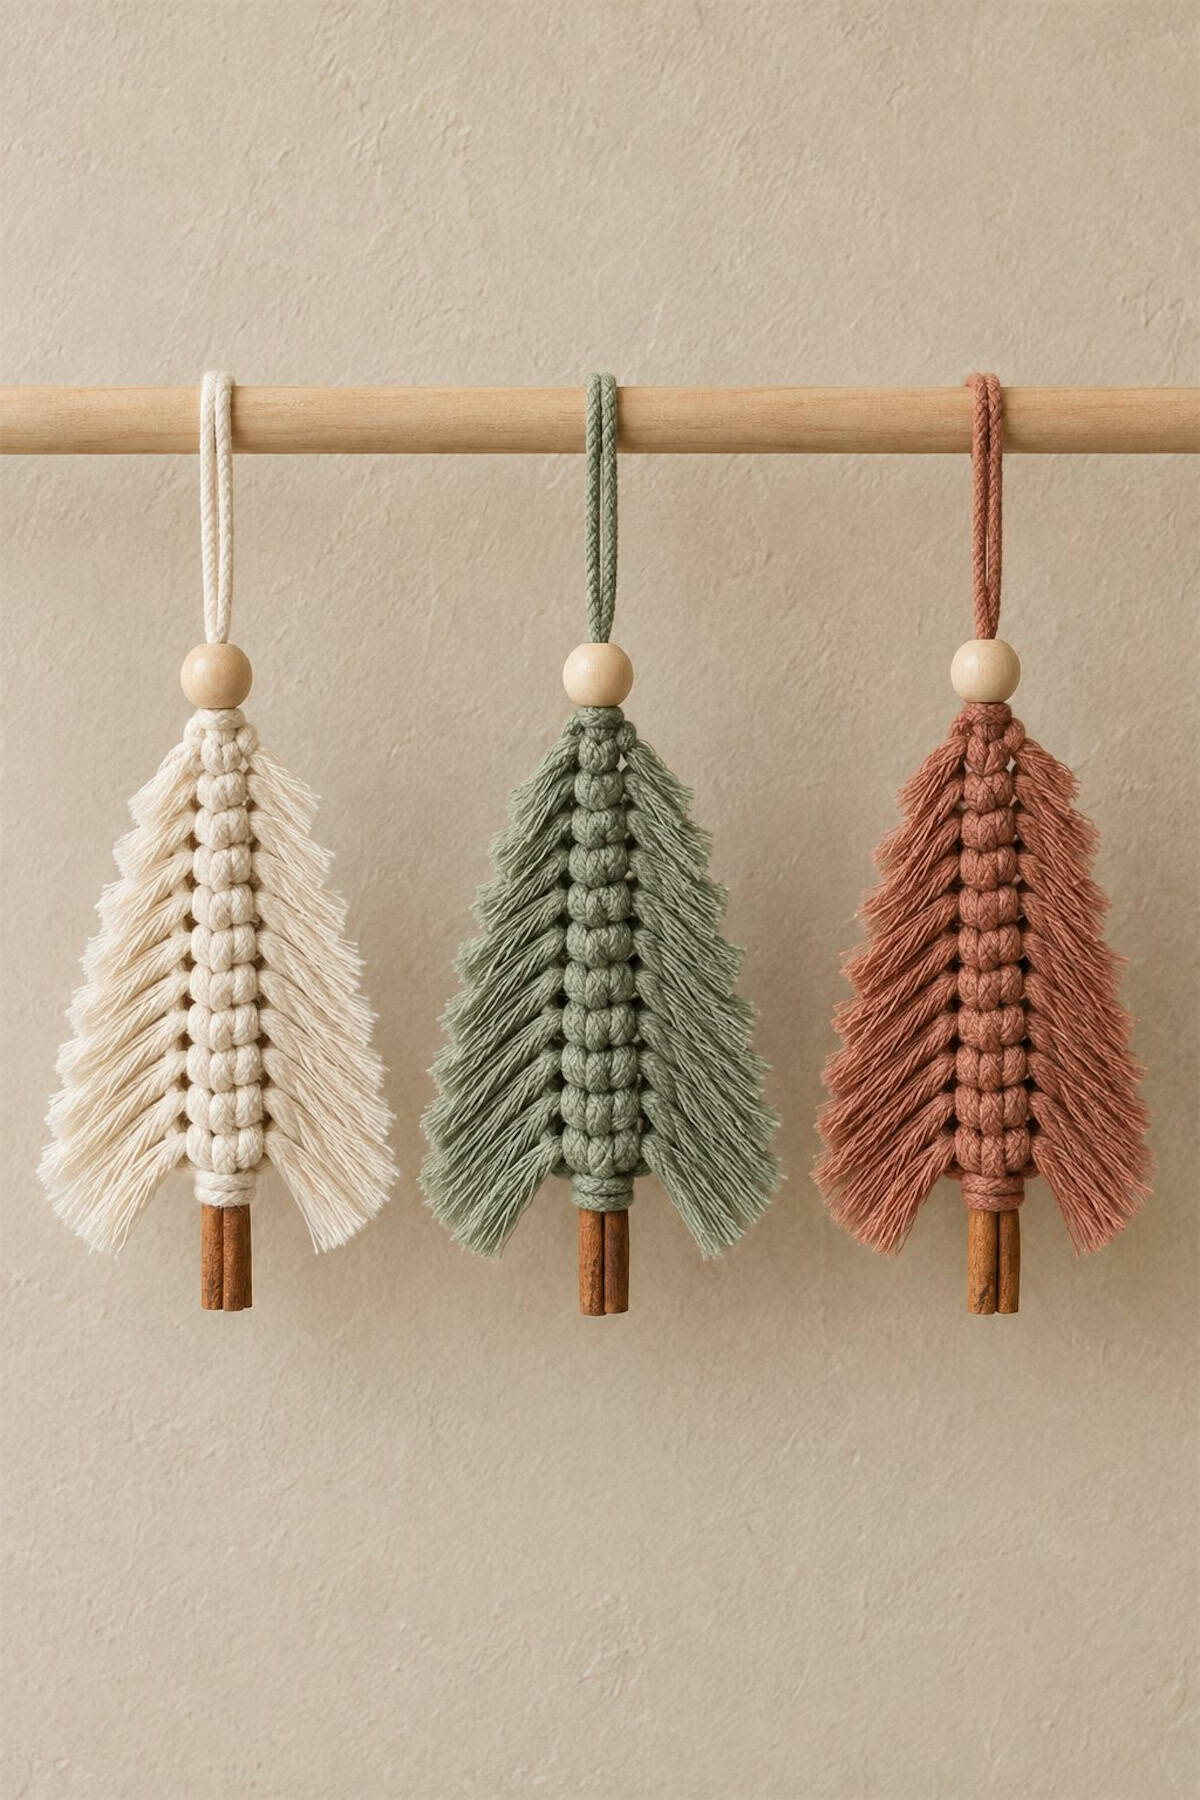
You can recreate this fringed tree with cotton cord knotted around a central support. Tie paired lengths down the middle, comb out their loose ends, and trim the fringe into a triangle. A cinnamon stick forms the little trunk, with a wooden bead above the branches.
Cut the bottom wider than you think you need at first; you can always trim more.
Miniature Christmas Stockings
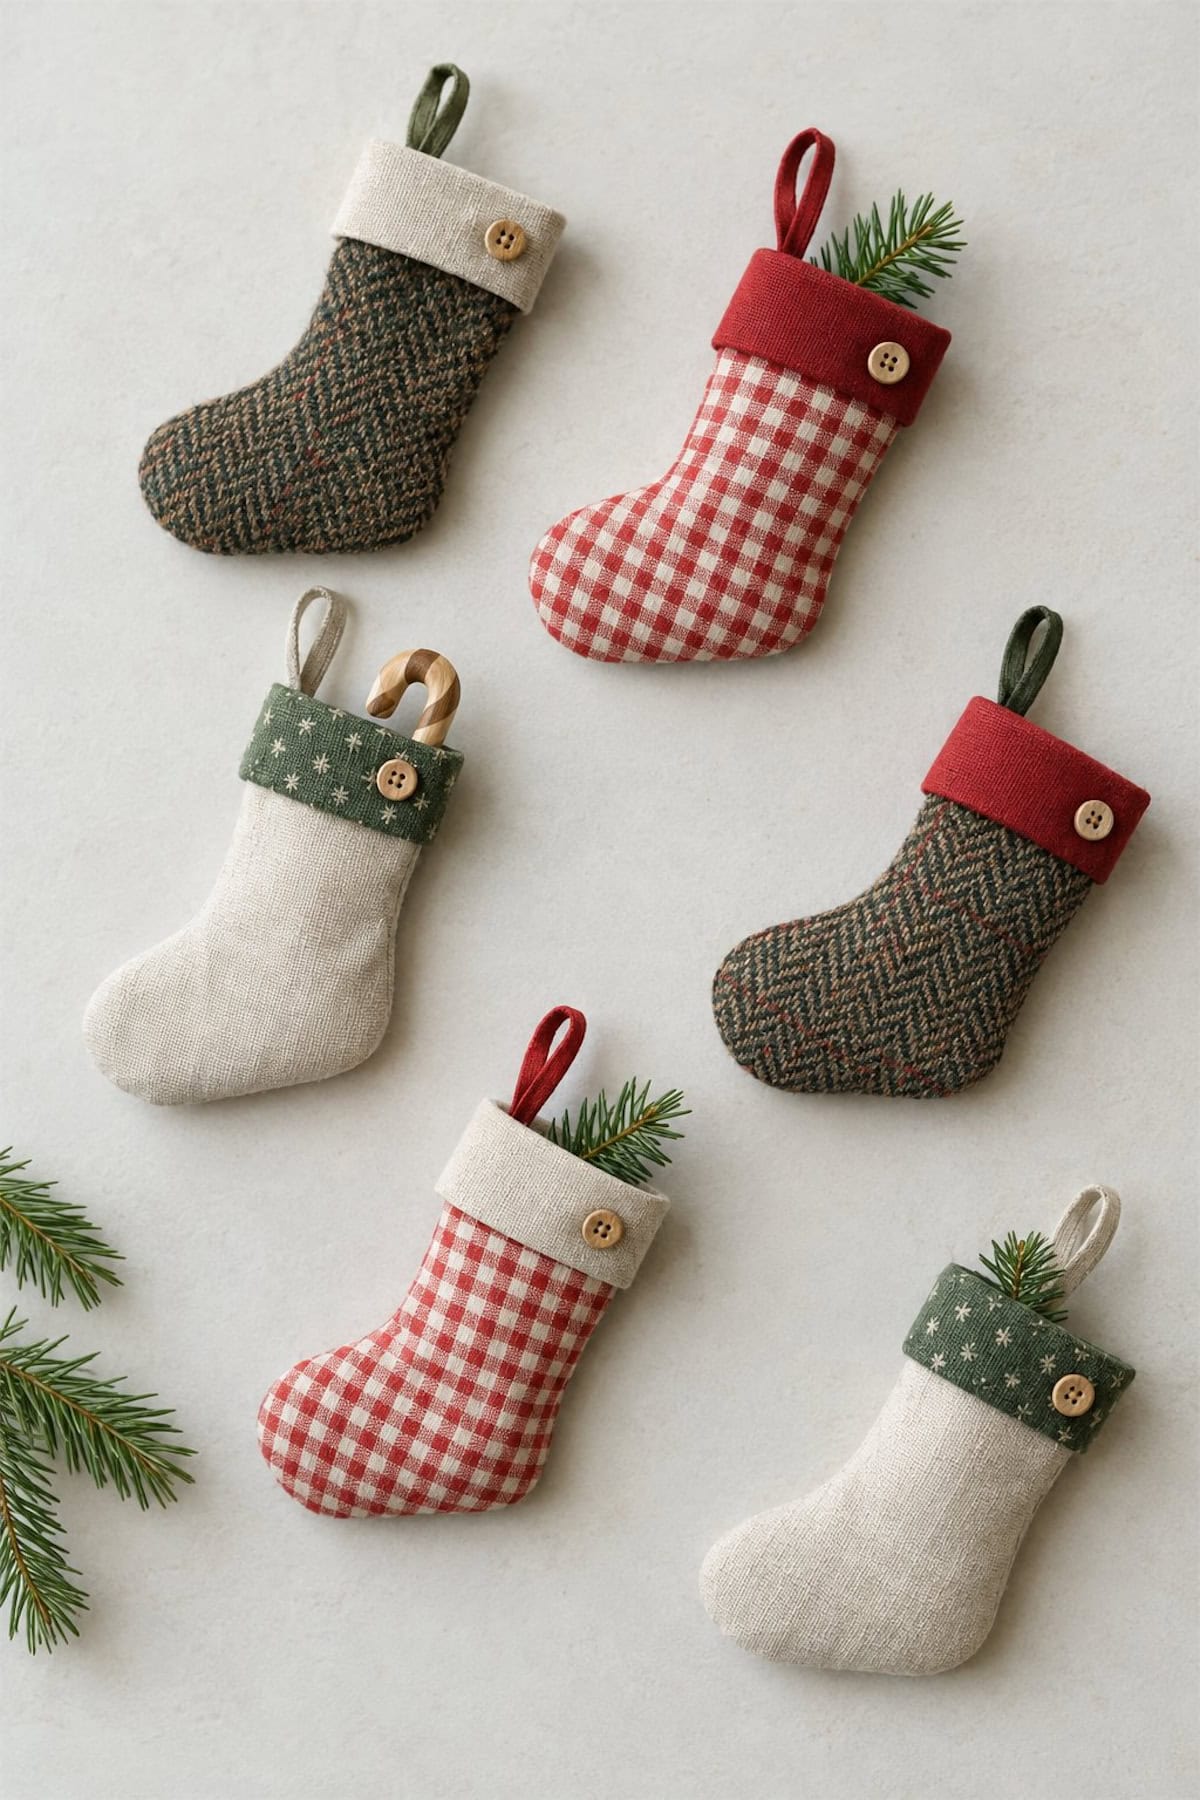
Save small pieces of wool, gingham, and felt for stockings like these. Sew two stocking shapes together, turn them right side out, and add a contrasting cuff with a tiny button. There’s no need for stuffing—the open pocket can hold a handwritten note. Catch a ribbon loop into the upper side seam rather than gluing it onto the cuff.
Cross-Stitch Gift Tag Ornaments
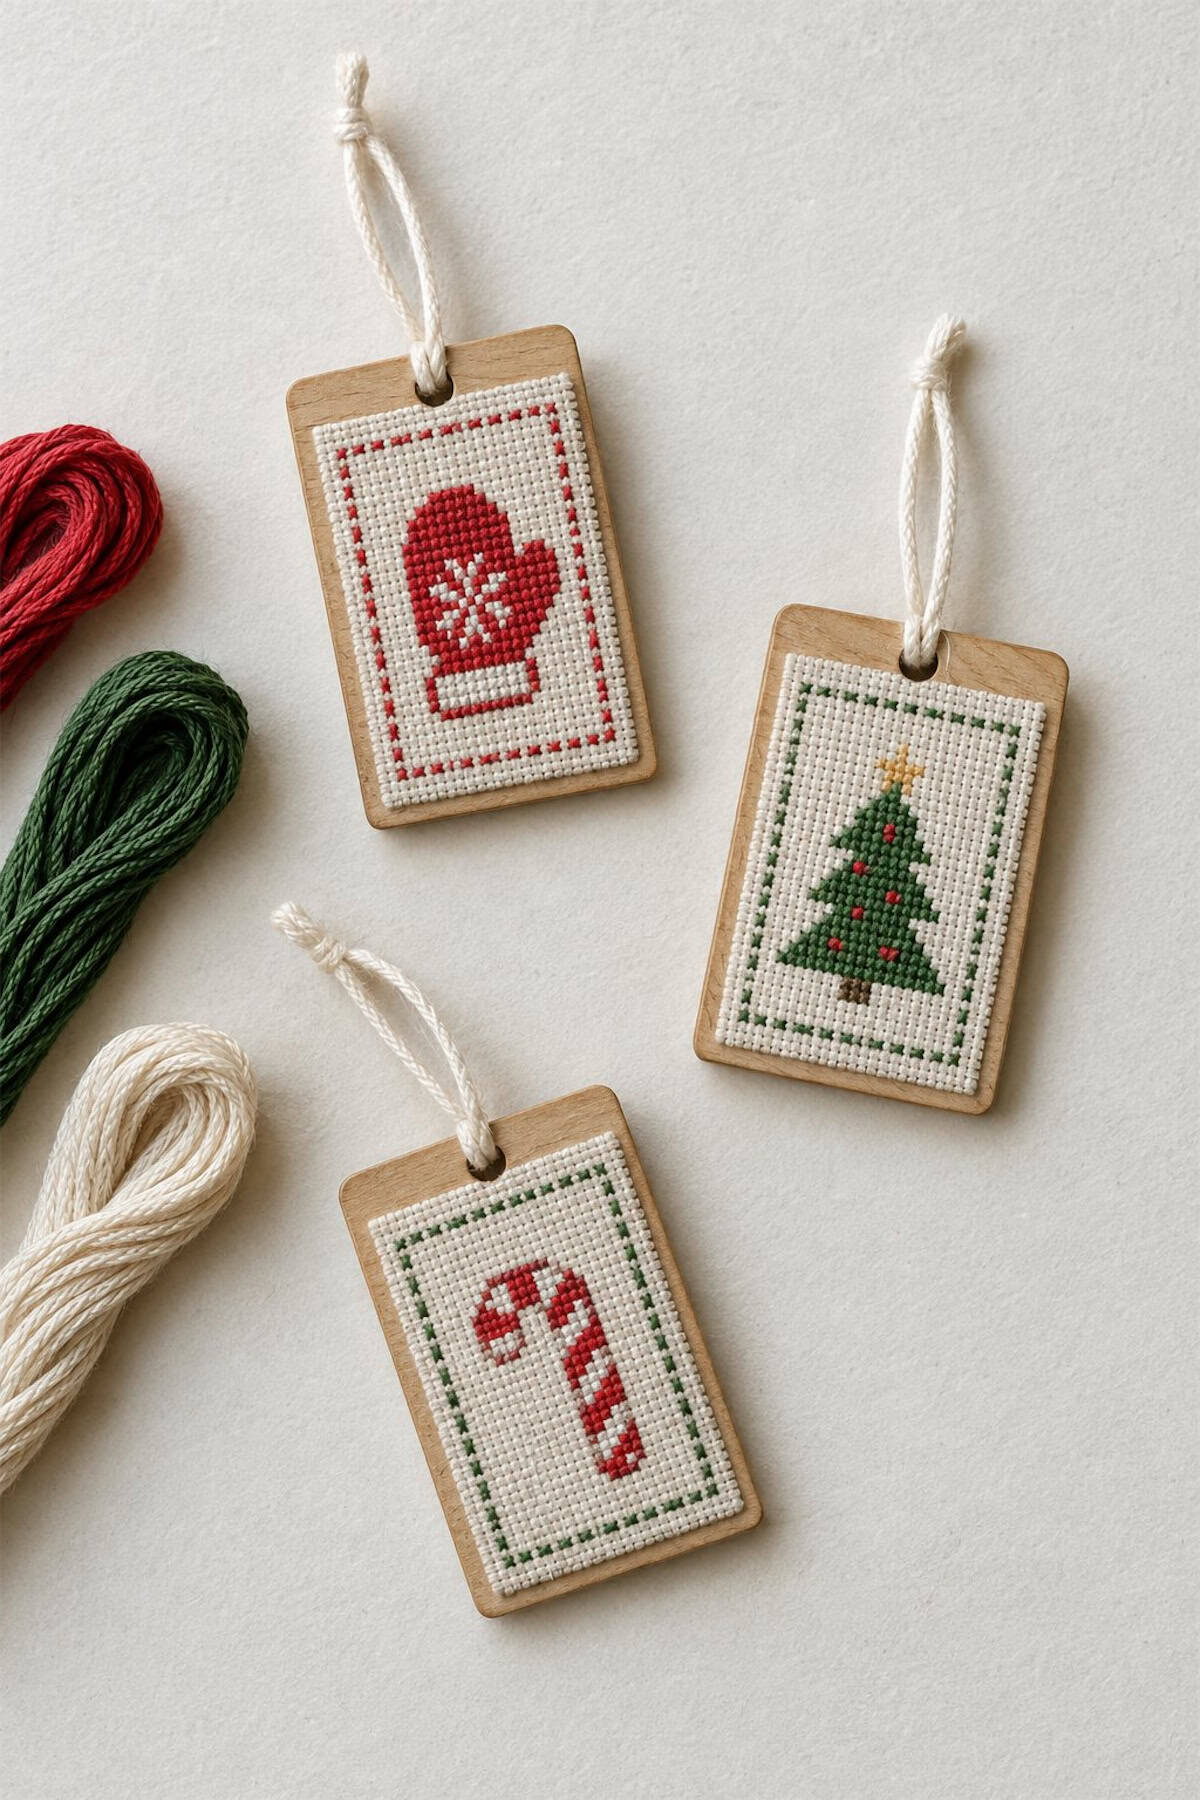
A small motif is enough for an ornament this size: a mitten, tree, or candy cane fits comfortably on a scrap of Aida cloth. Stitch the design first, then mount it onto a stiff tag backing and cover the raw fabric edges. Add a ribbon through the top, ready to move from the gift wrapping to the tree.
Mini Embroidery Hoop Wreaths
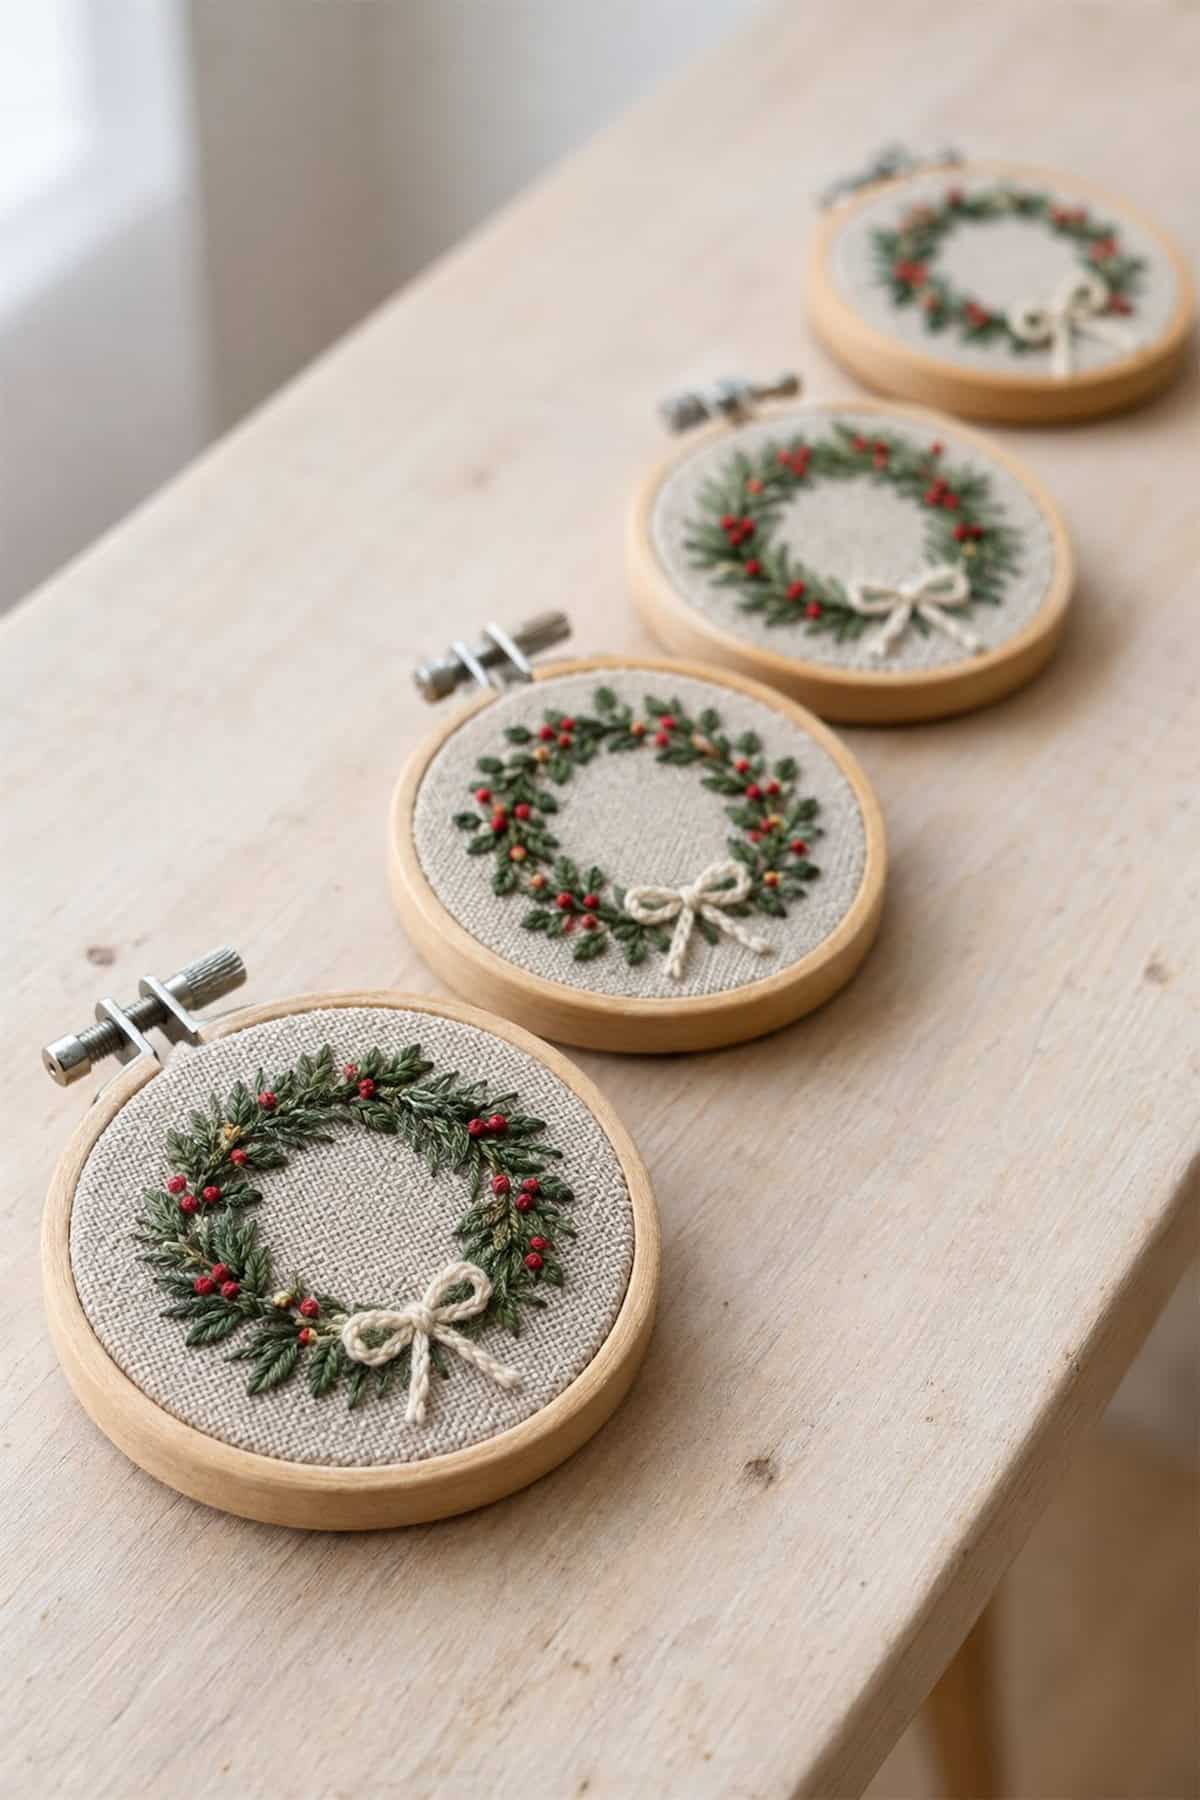
Draw a faint circle onto linen stretched in a miniature hoop. Use short green stitches for leaves and red French knots for berries, leaving the center empty like the wreaths pictured.
Once the stitching is complete, gather the excess fabric behind the hoop and cover it with a felt circle. A tiny bow can sit directly on the embroidery.
Winter Scene Shadow Box Ornaments
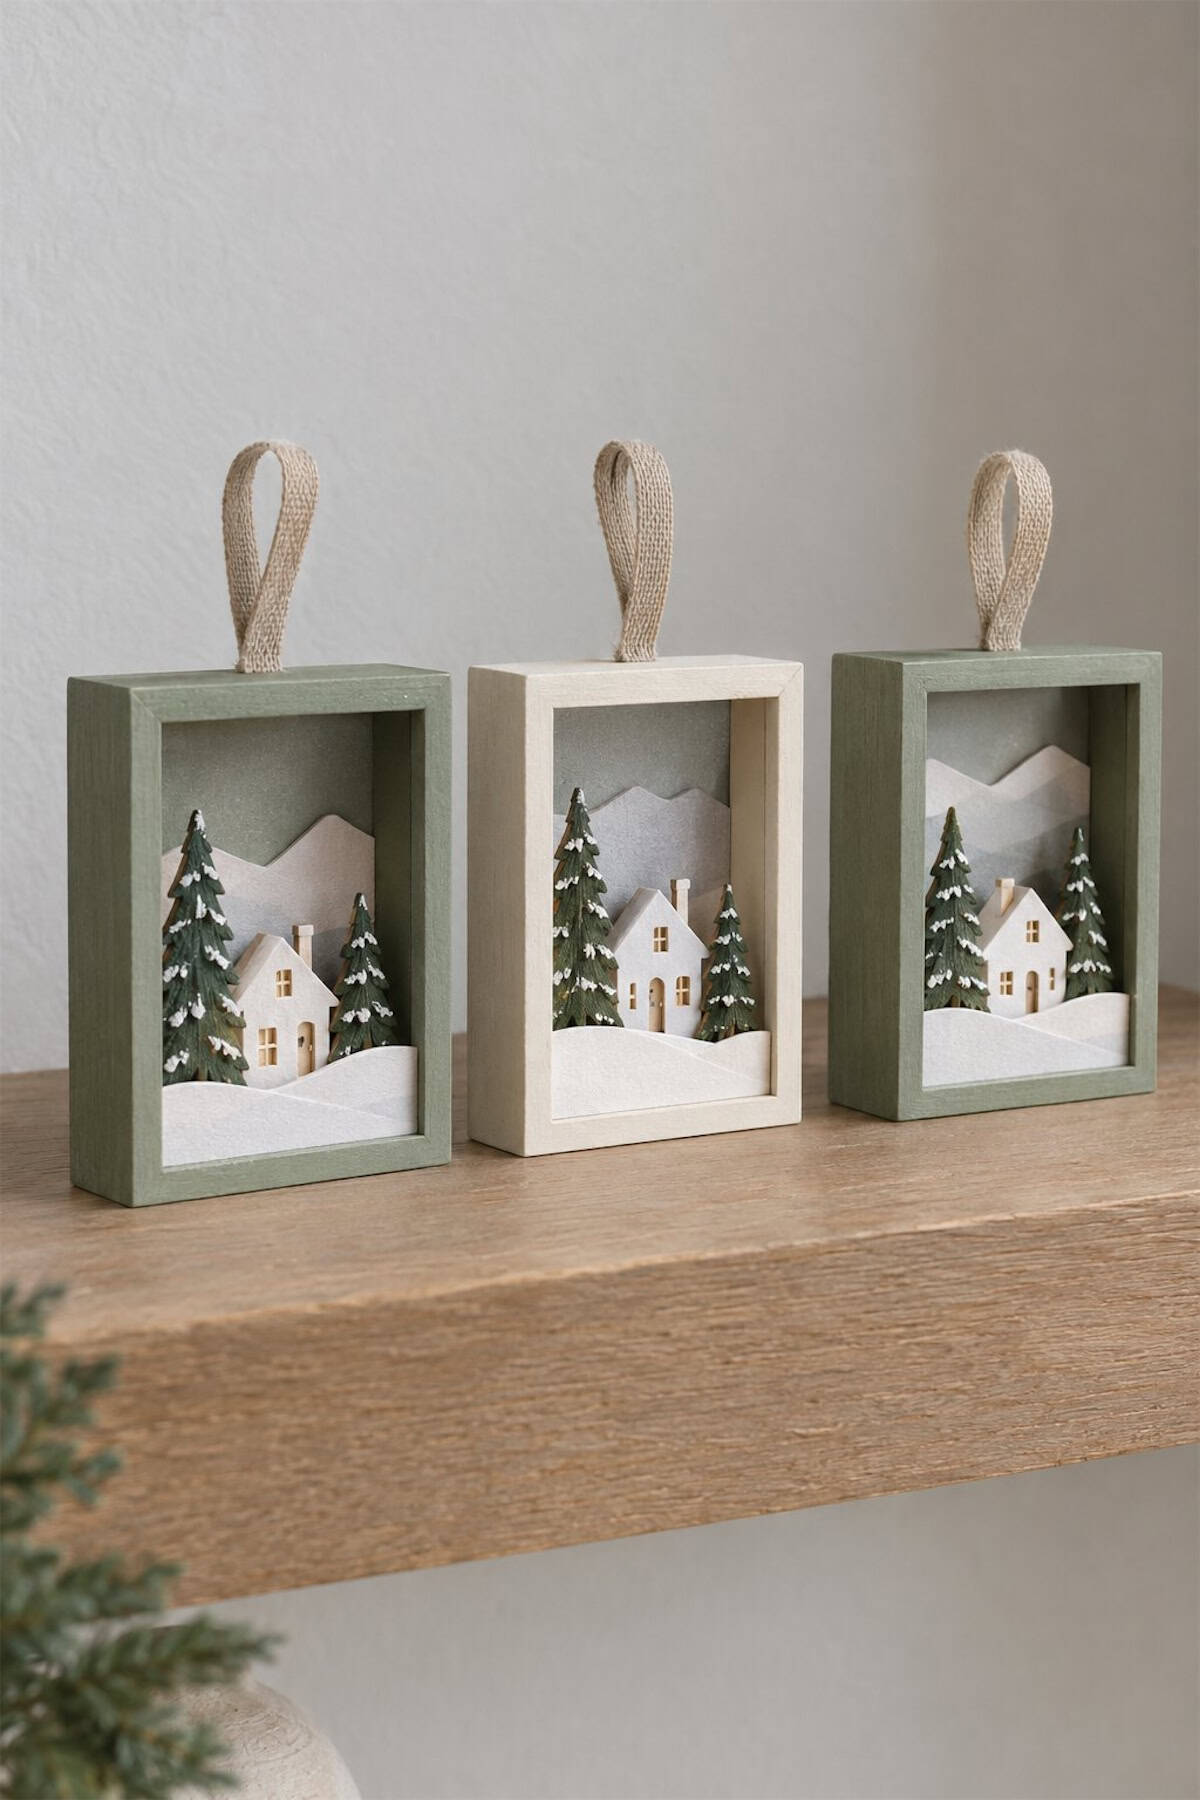
Give a tiny winter village depth by placing its pieces on separate layers. Glue paper hills against the back of a shallow craft box, then add miniature houses and trees farther forward. White felt or cardstock makes the snowy ground. Keep the contents lightweight and fix a ribbon loop securely to the box before it goes on a branch.
Needle-Felted Mushroom Ornaments
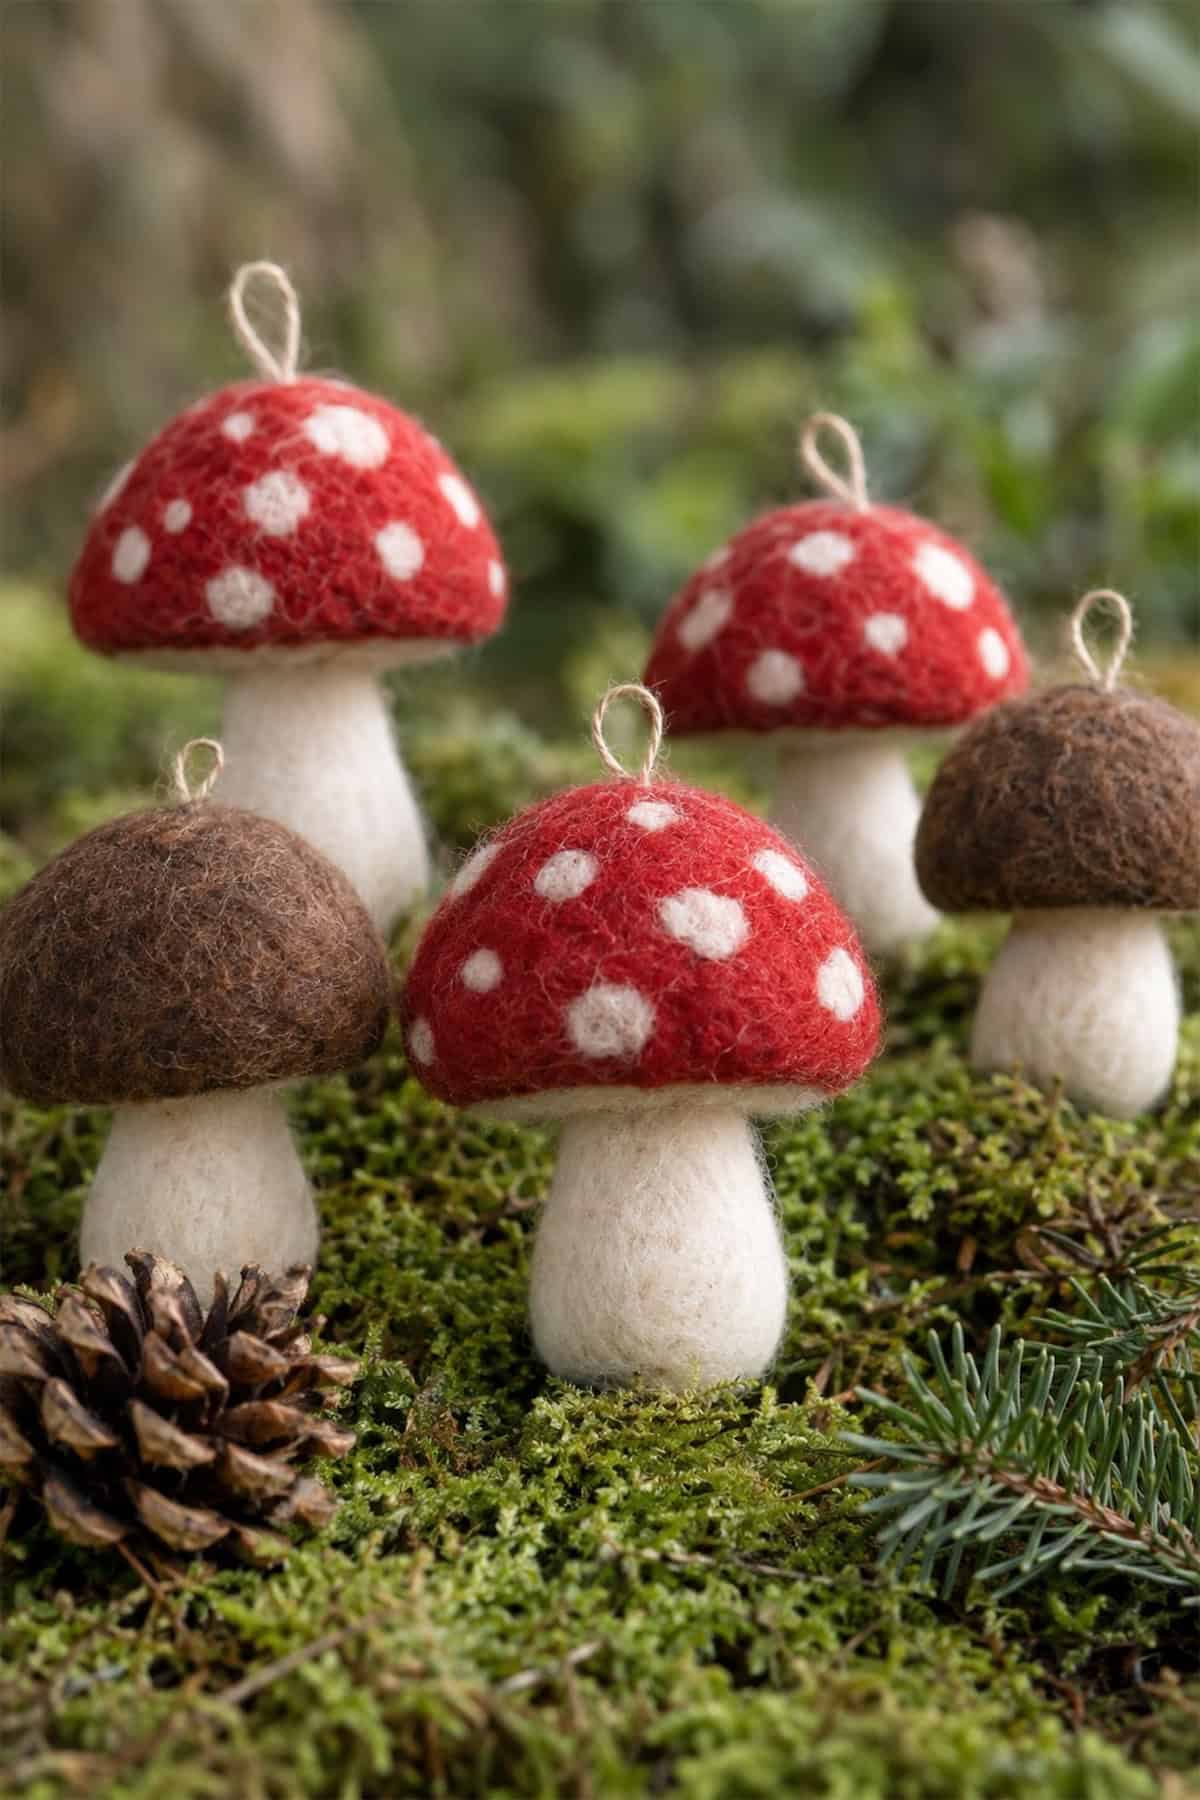 Start with the two basic shapes: a firm wool stem and a rounded cap. Felt each separately on a suitable pad, then join them with repeated needle strokes through the underside of the cap. Small wisps of white wool make the spots on the red mushrooms.
Sew the hanging thread through the finished piece rather than attaching it only to the surface fibers.
Oyster Shell Christmas Ornaments
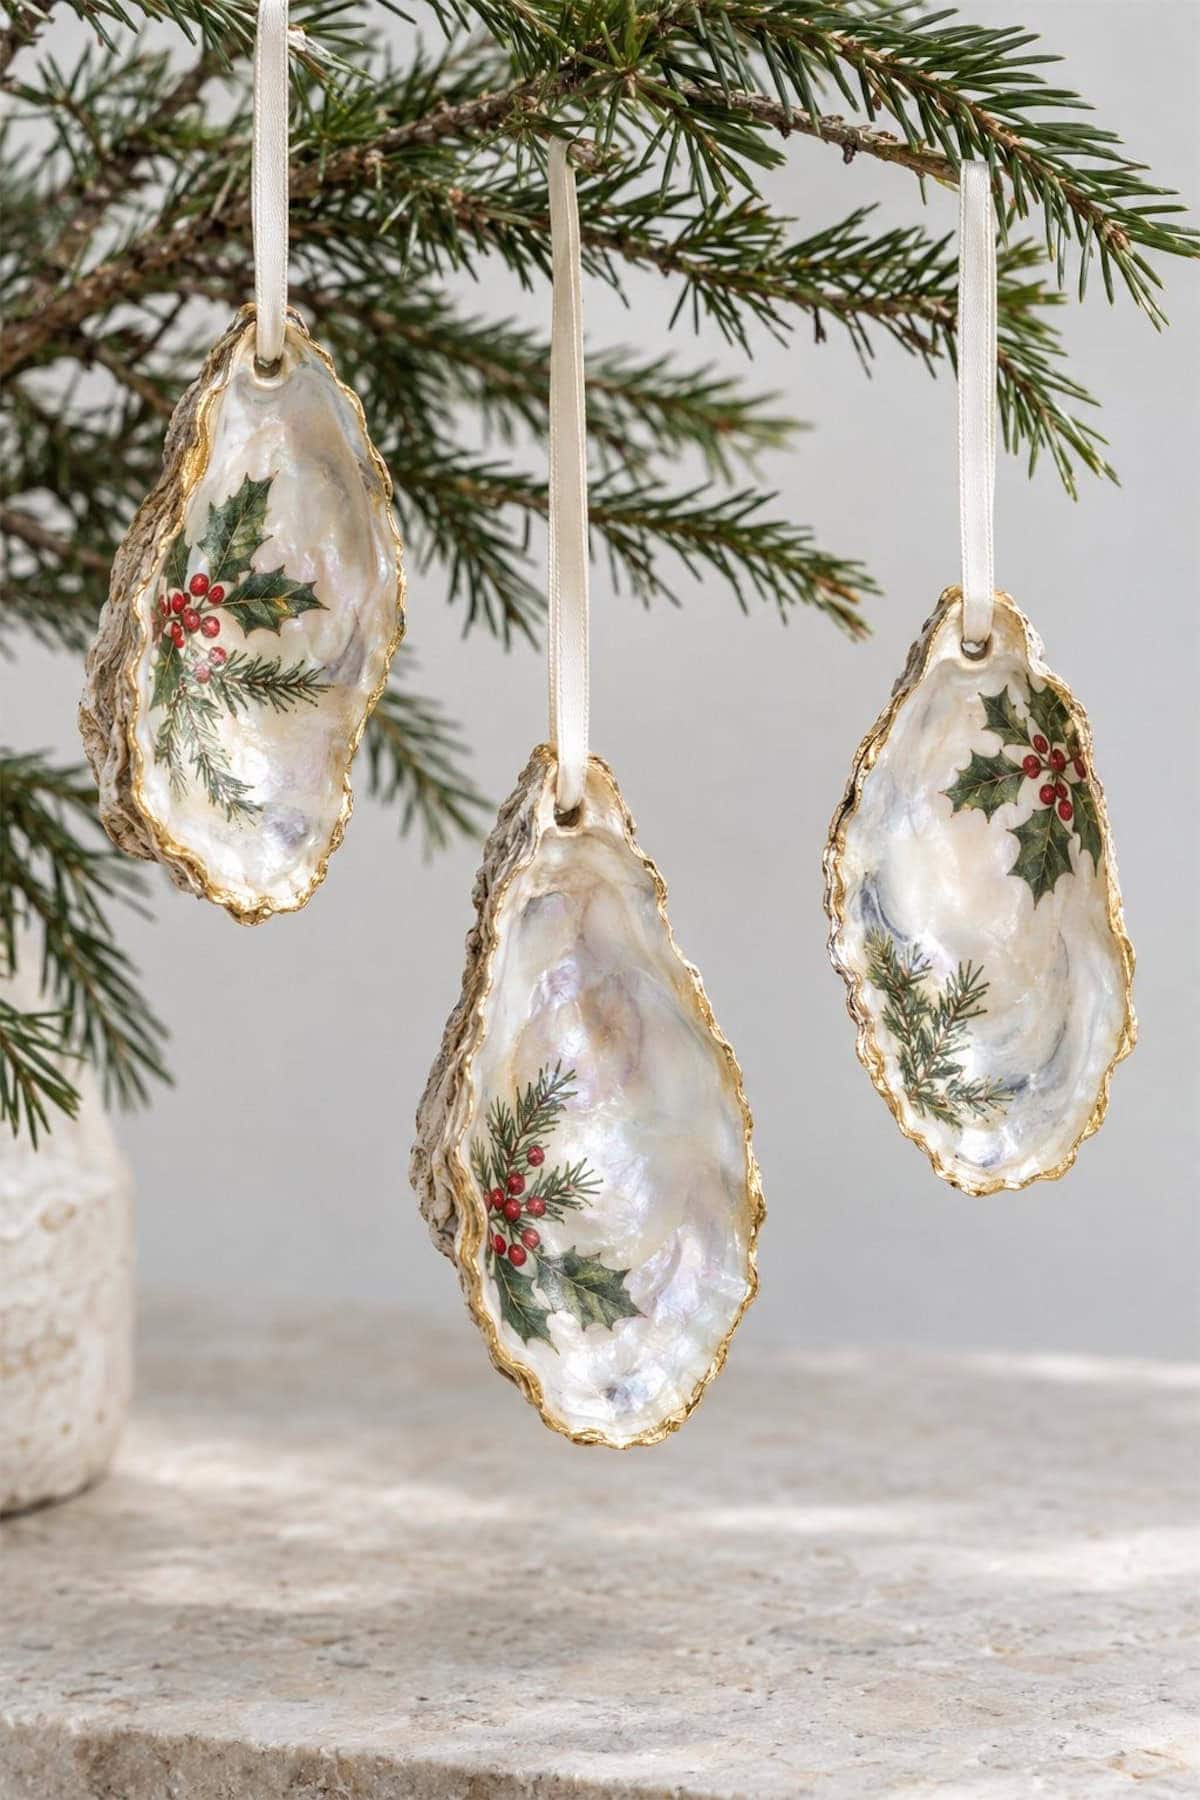
Clean and dry the shells thoroughly before decorating their inner surfaces. Attach tiny holly or evergreen motifs cut from thin napkins with decoupage medium, then paint gold around the uneven edges. For the hanger, choose predrilled shells or bond a jewelry bail to the back with an adhesive suited to shell.
Terracotta Bell Ornaments
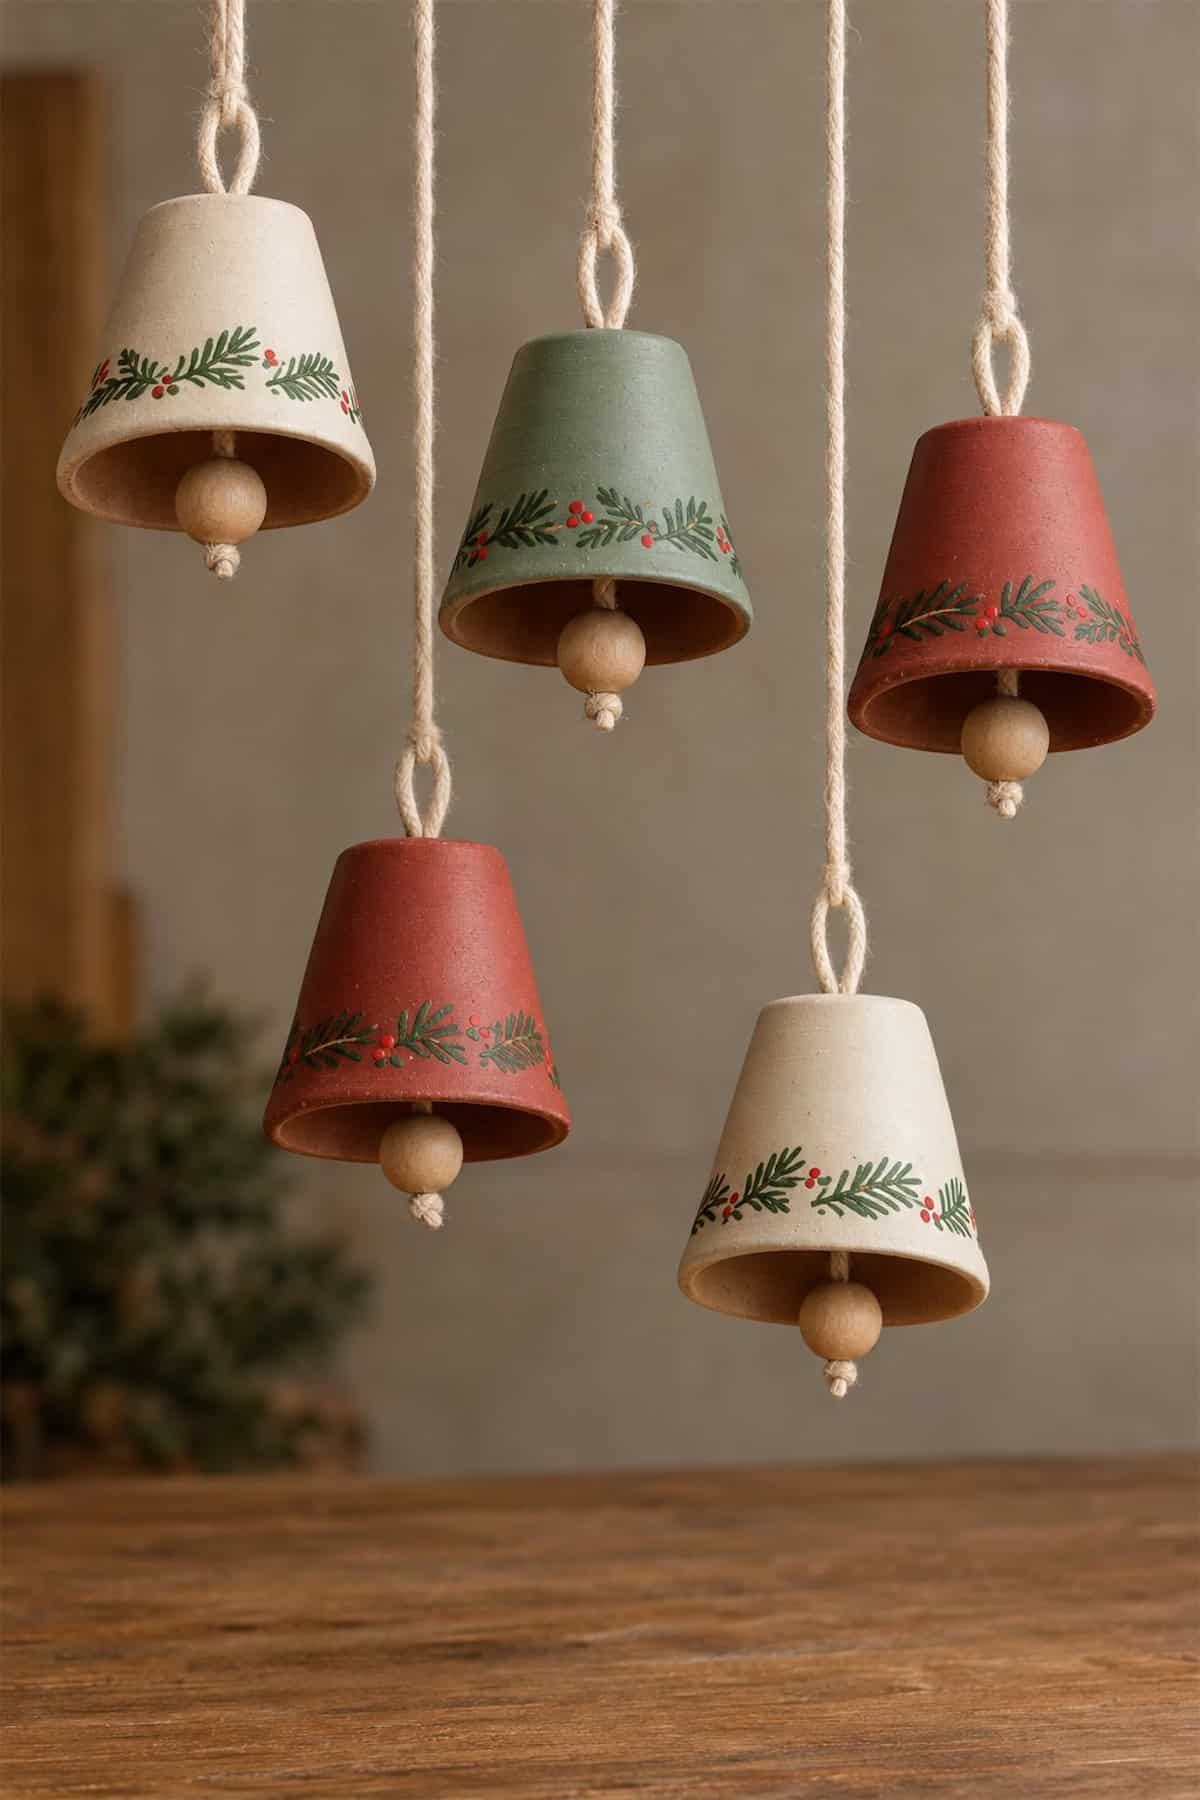
Turn miniature flowerpots upside down and thread a doubled cord through each drainage hole. Tie a wooden bead inside at the height you want the clapper to hang, with a larger knot or bead above it to support the pot. Paint the outsides before assembly; the narrow botanical borders are easier with a fine paint pen.
Painted Winter Village Baubles
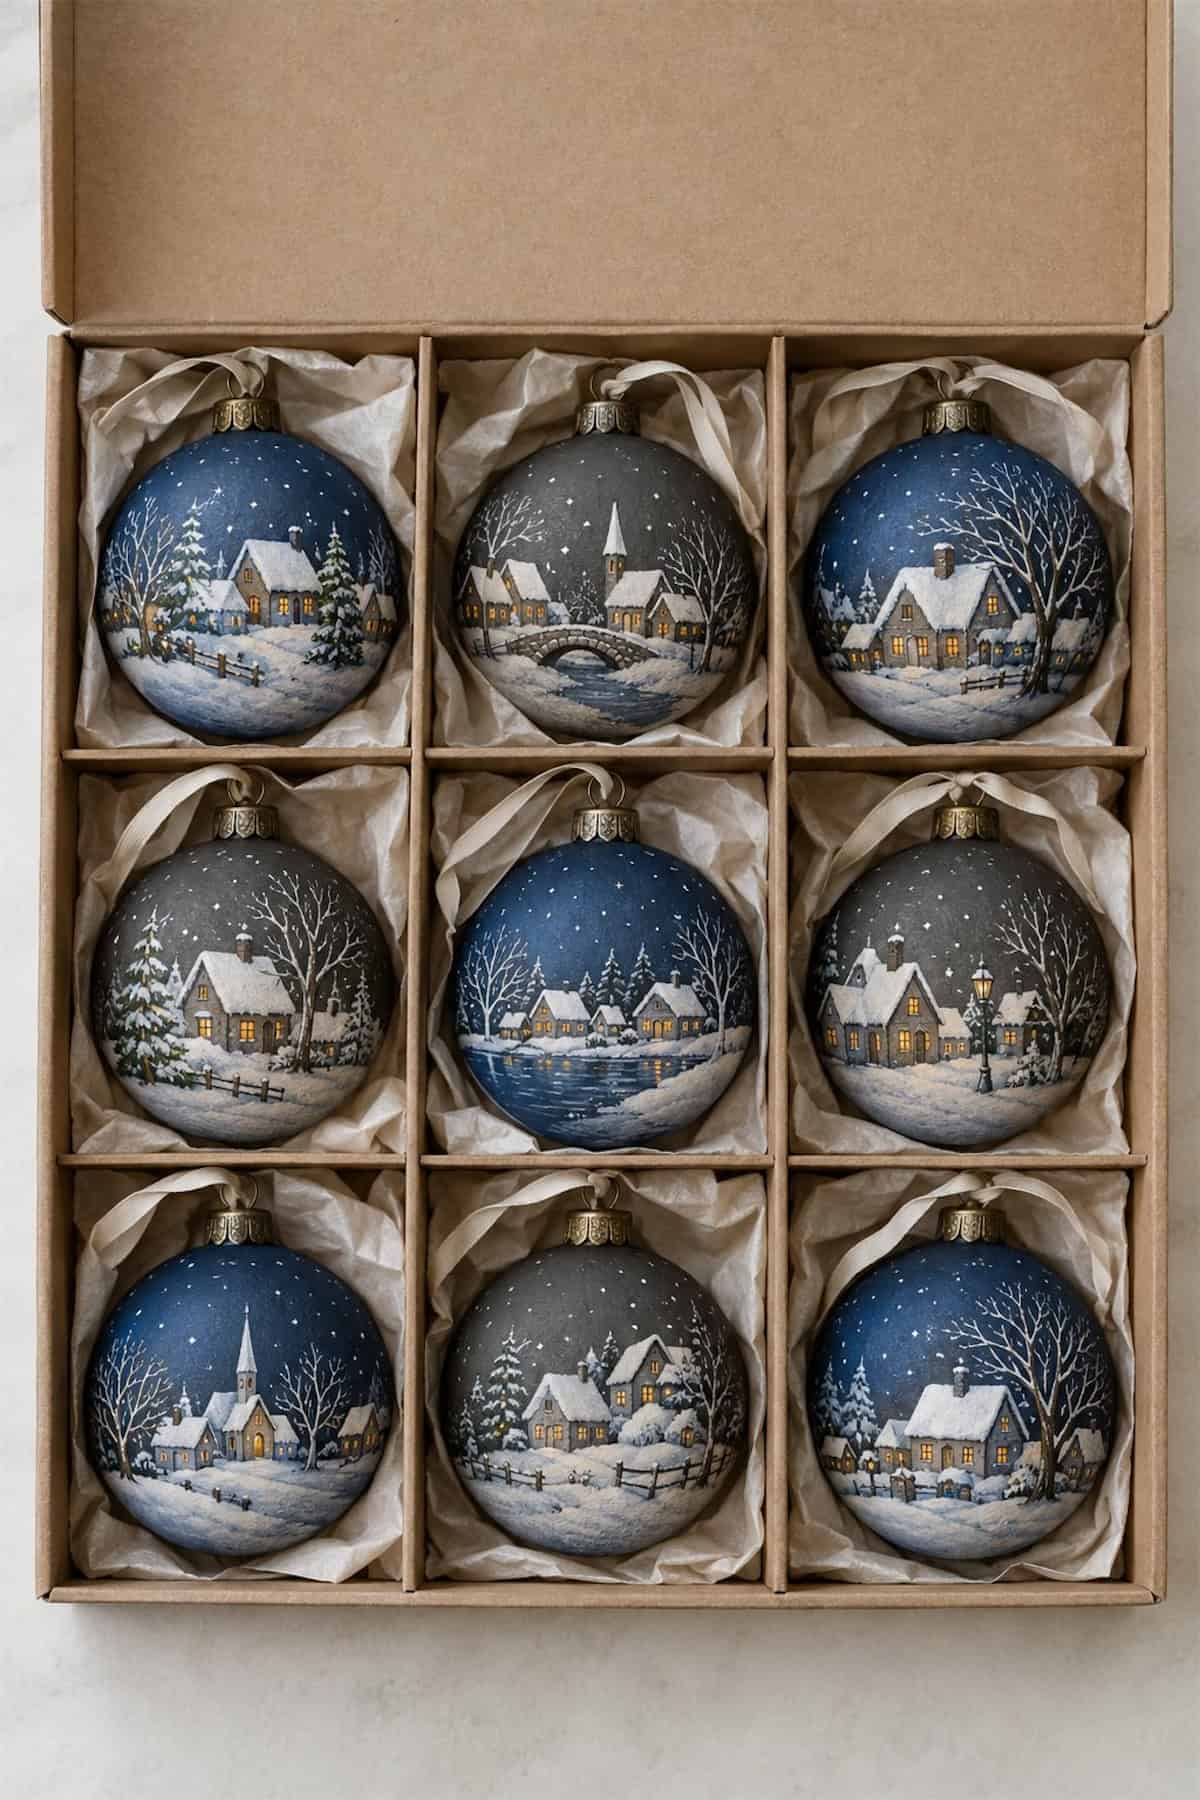
A dark blue or charcoal base helps white rooftops and snow stand out on these village ornaments. Paint a few simple house shapes around a shatterproof bauble, then add windows, bare trees, and snow with fine brushes.
Support the ornament in an egg cup between sections to avoid smudging. Add the smallest snow dots after the rest of the scene dries.
Pearl and Velvet Bow Ornaments
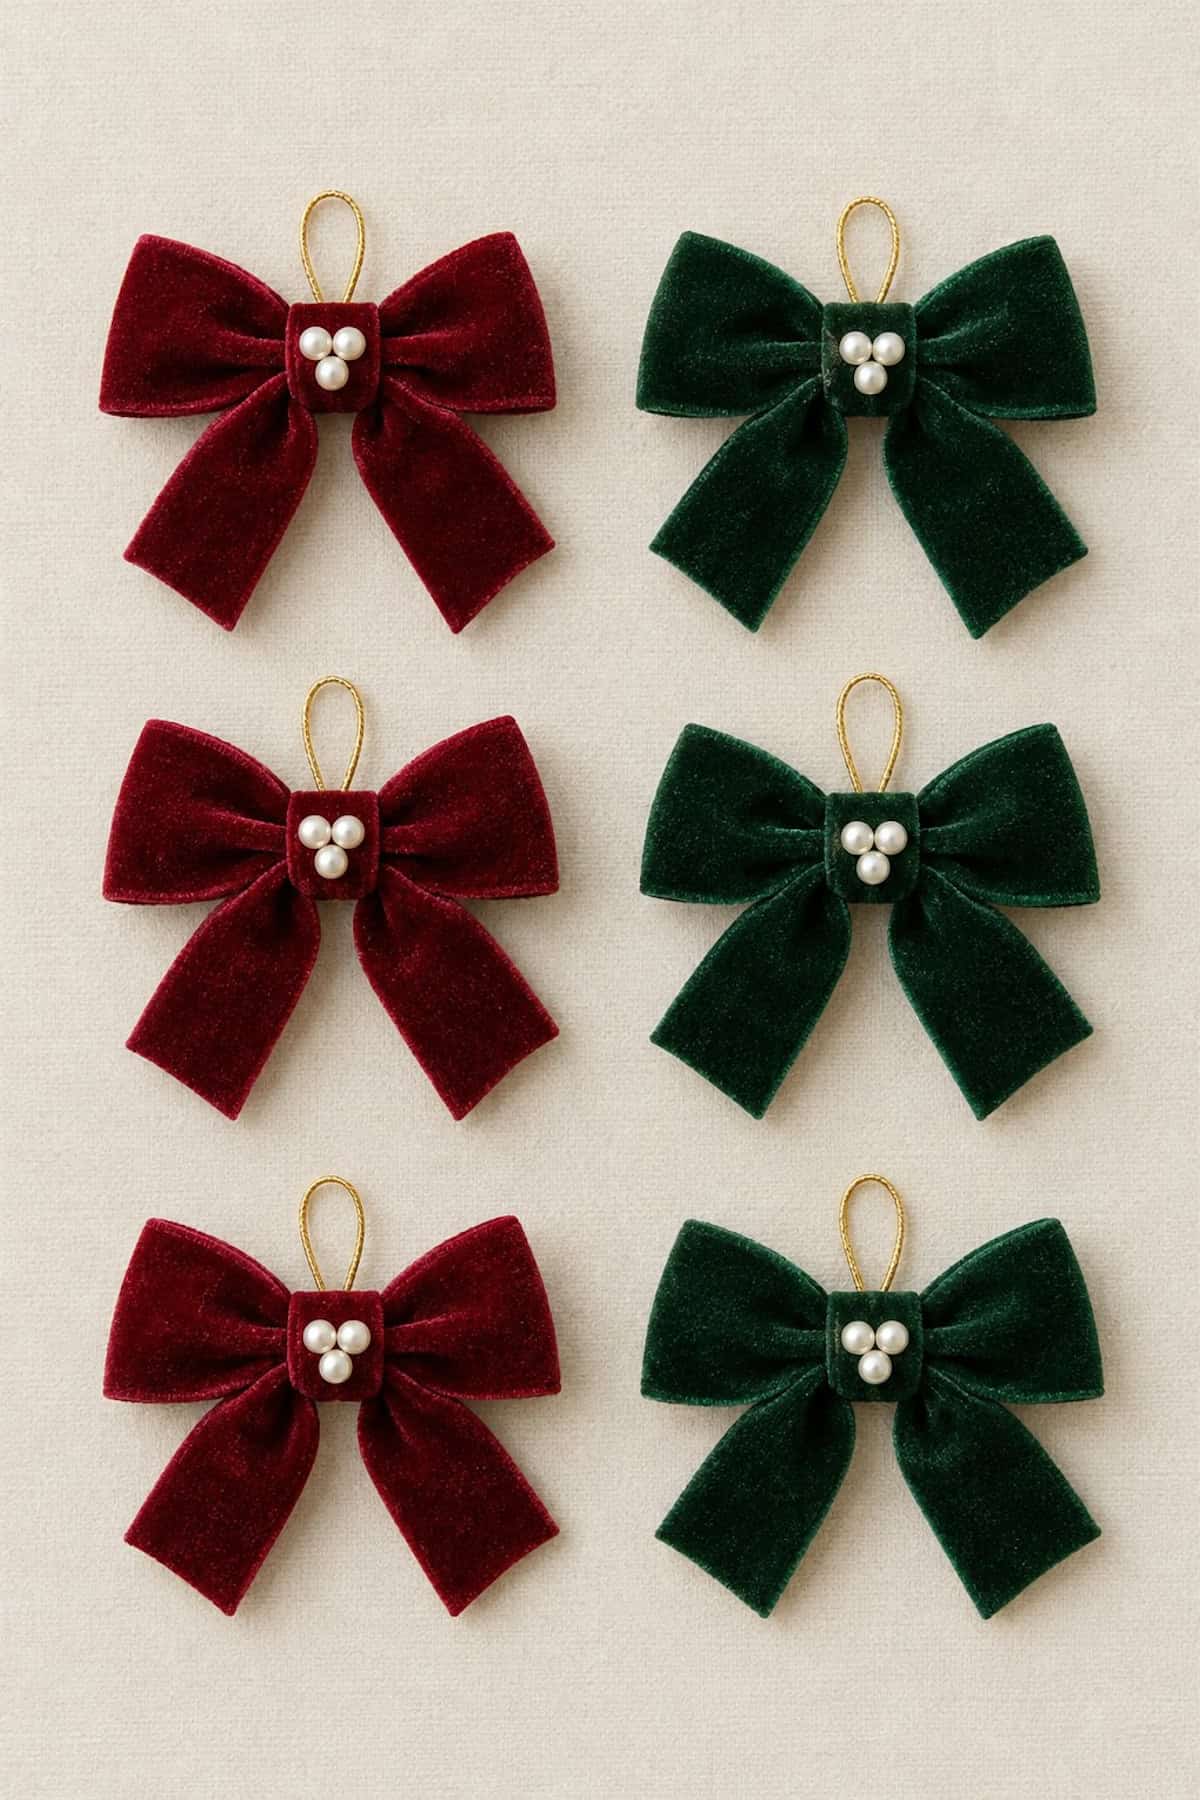
Wide velvet ribbon gives these bows enough body to hold their shape on a branch. Fold two loops, pinch the center, and bind it with thread before covering the binding with a narrow strip. Sew three faux pearls over the middle. A short gold cord loop tucked behind the bow keeps the hanger discreet.
Birth Flower Disc Ornaments
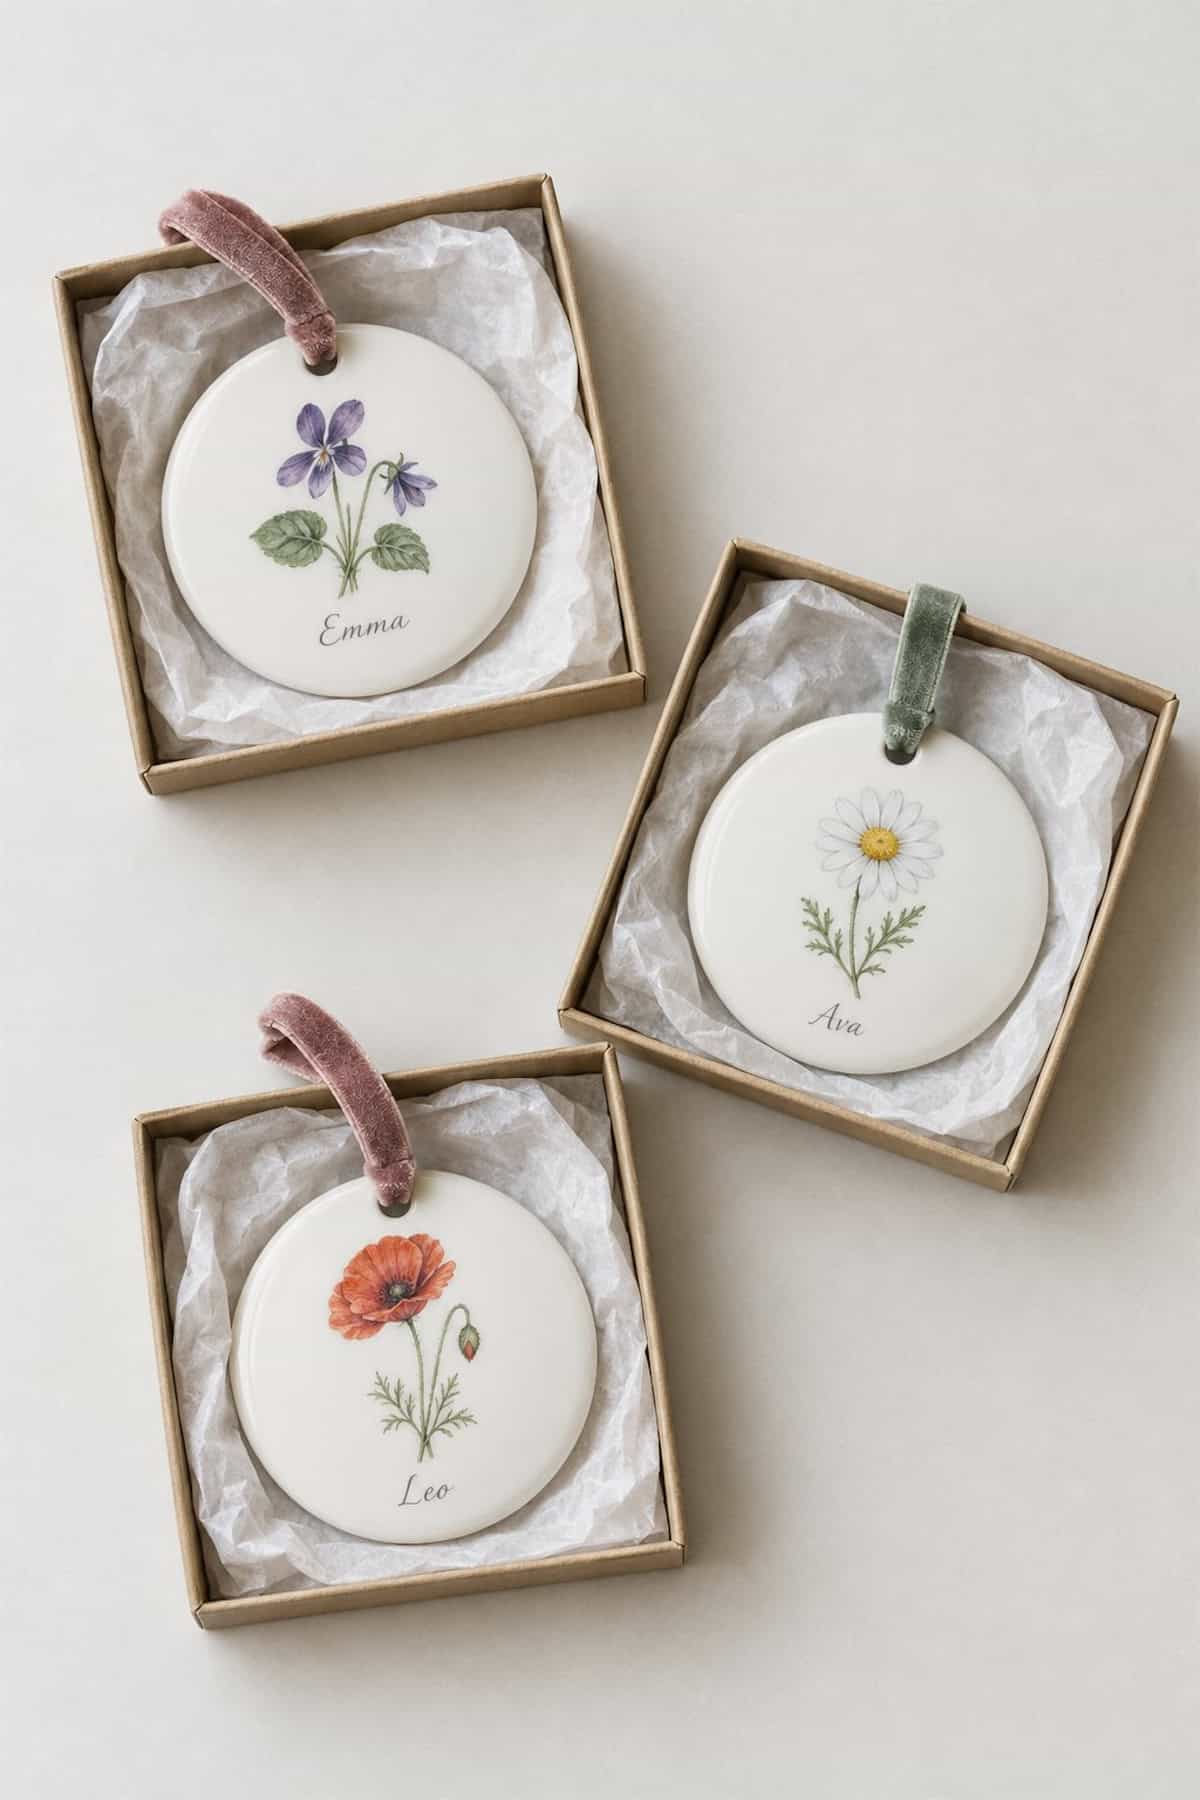
Choose the recipient’s birth flower and sketch a small stem onto a smooth clay disc. You can paint it by hand or use a suitable floral transfer for finer detail. Add their name or birth date on the back, leaving the flower alone on the front. A ribbon in a matching shade makes it ready for a small gift box.
Family Name Star Ornaments
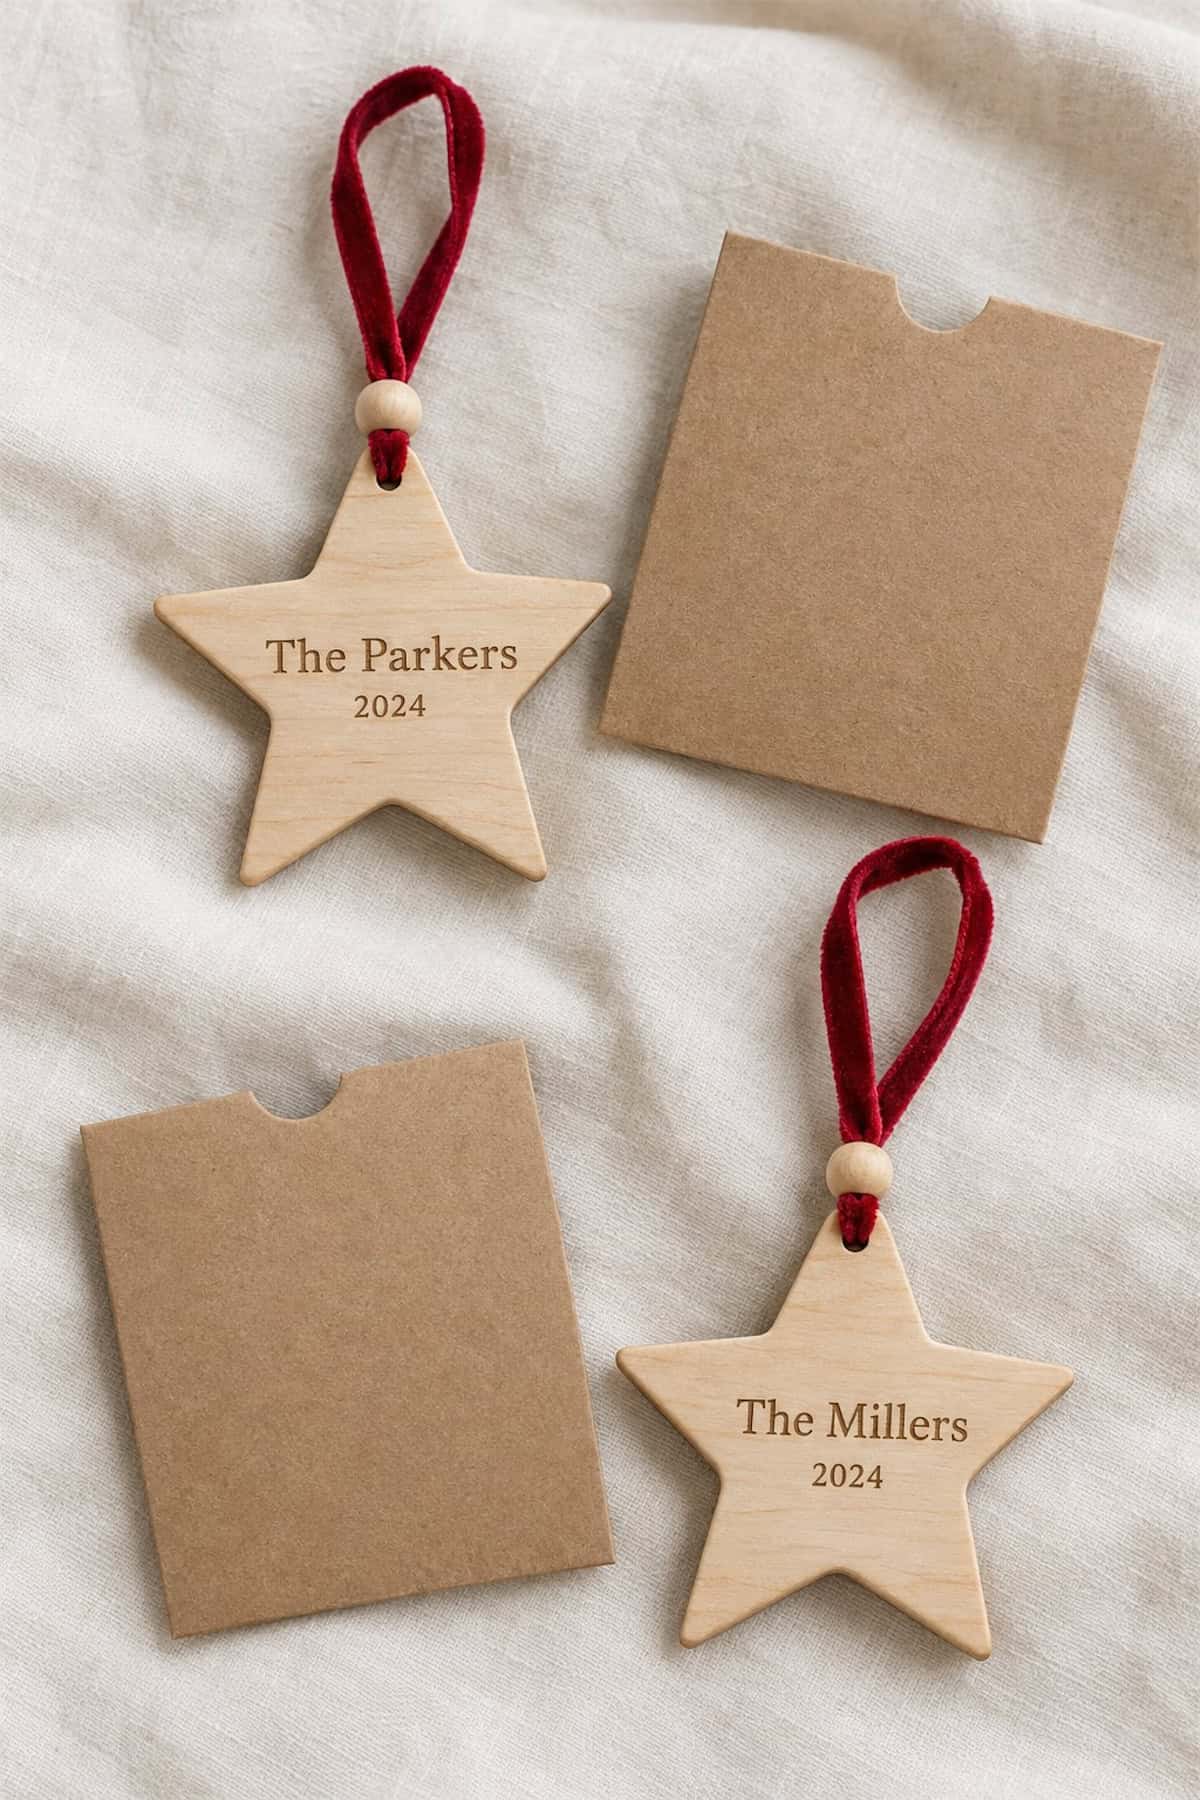
Plain wooden stars become personal gifts with a family name and year added to the front. Lightly pencil a centered guide, then letter it with a fine paint pen or apply a custom transfer.
Keep the text small enough to leave space around the points. Thread a bead onto the ribbon above the star for the finish pictured.
Wooden Pet Portrait Ornaments
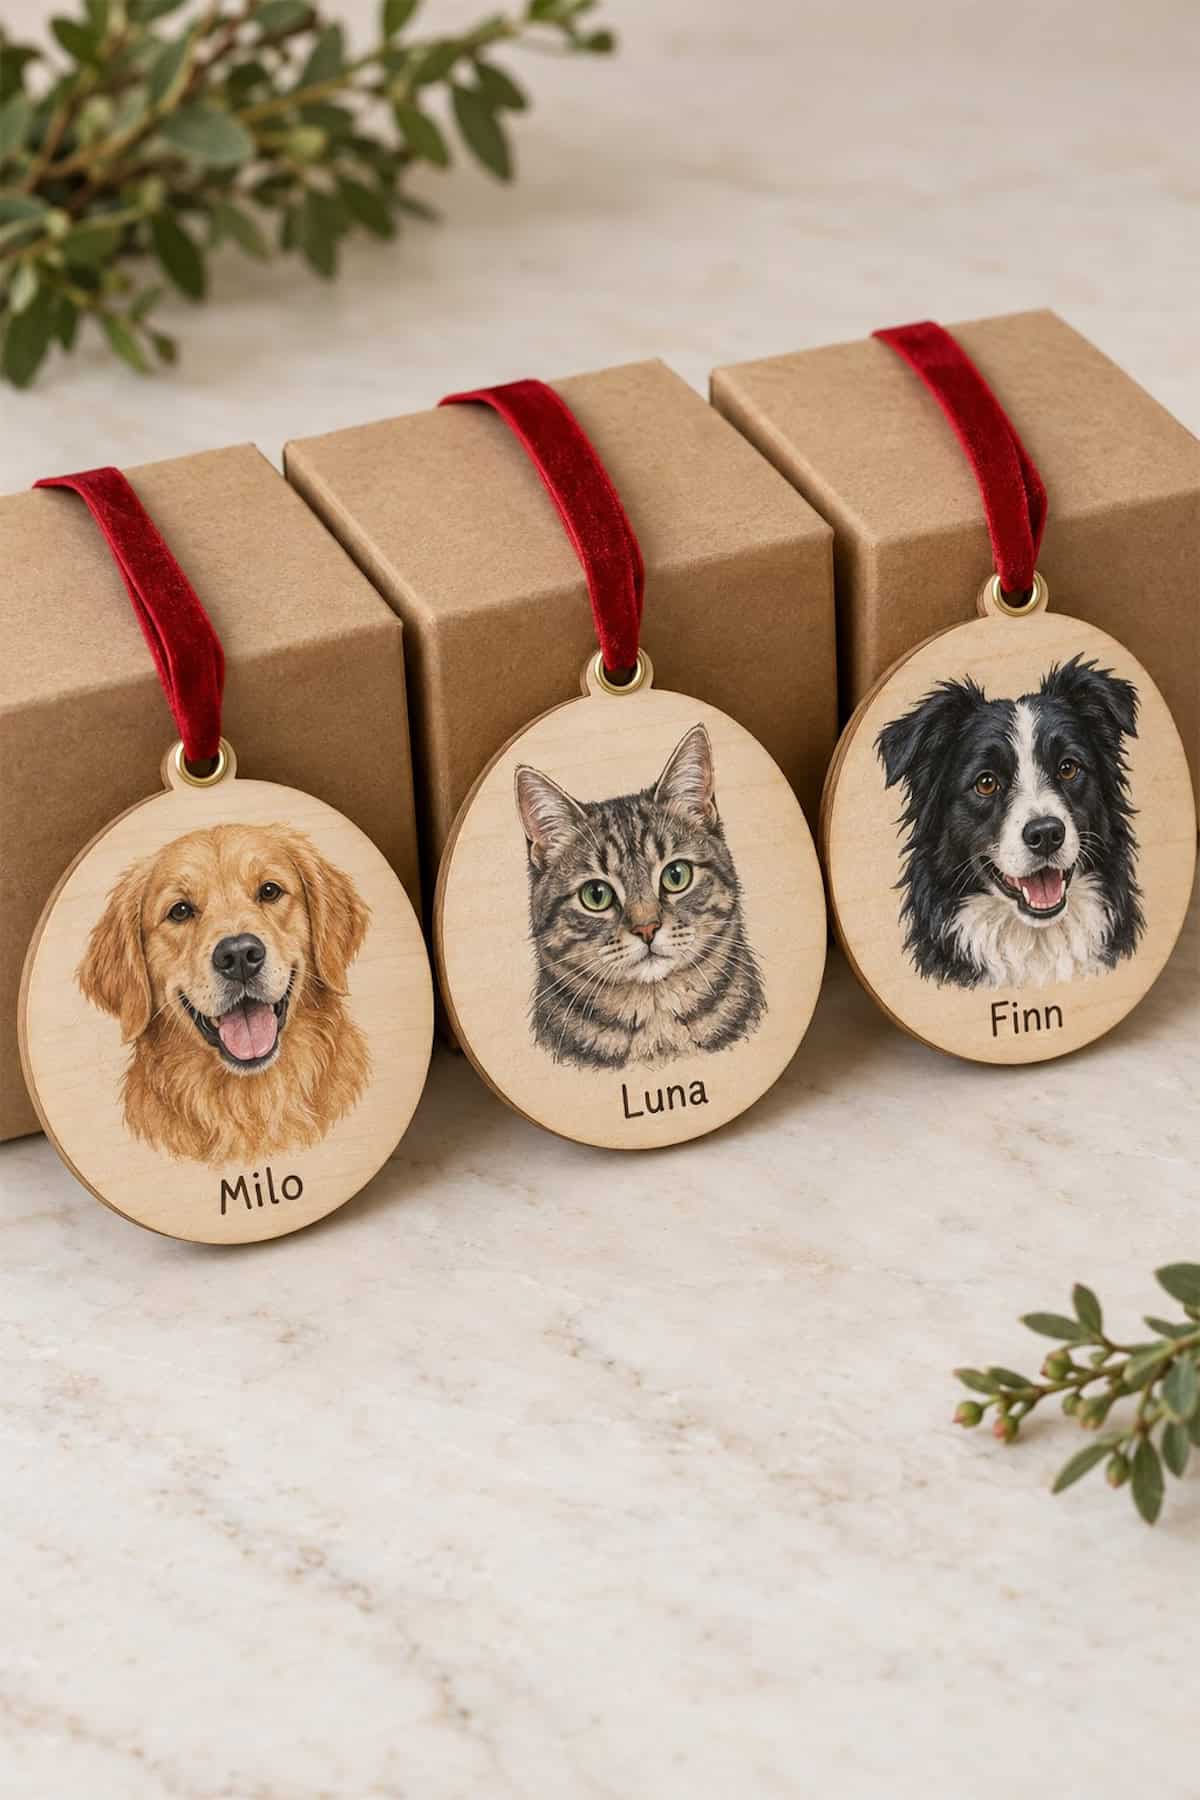
Pick a clear photo taken at your pet’s eye level, with the ears fully visible. Transfer a light outline onto a wooden disc and paint the main fur colors before adding eyes, nose, and individual markings. If portrait painting isn’t your craft, use a printed image transfer instead. Leave room beneath the face for the pet’s name.
Pressed Flower Glass Ornaments
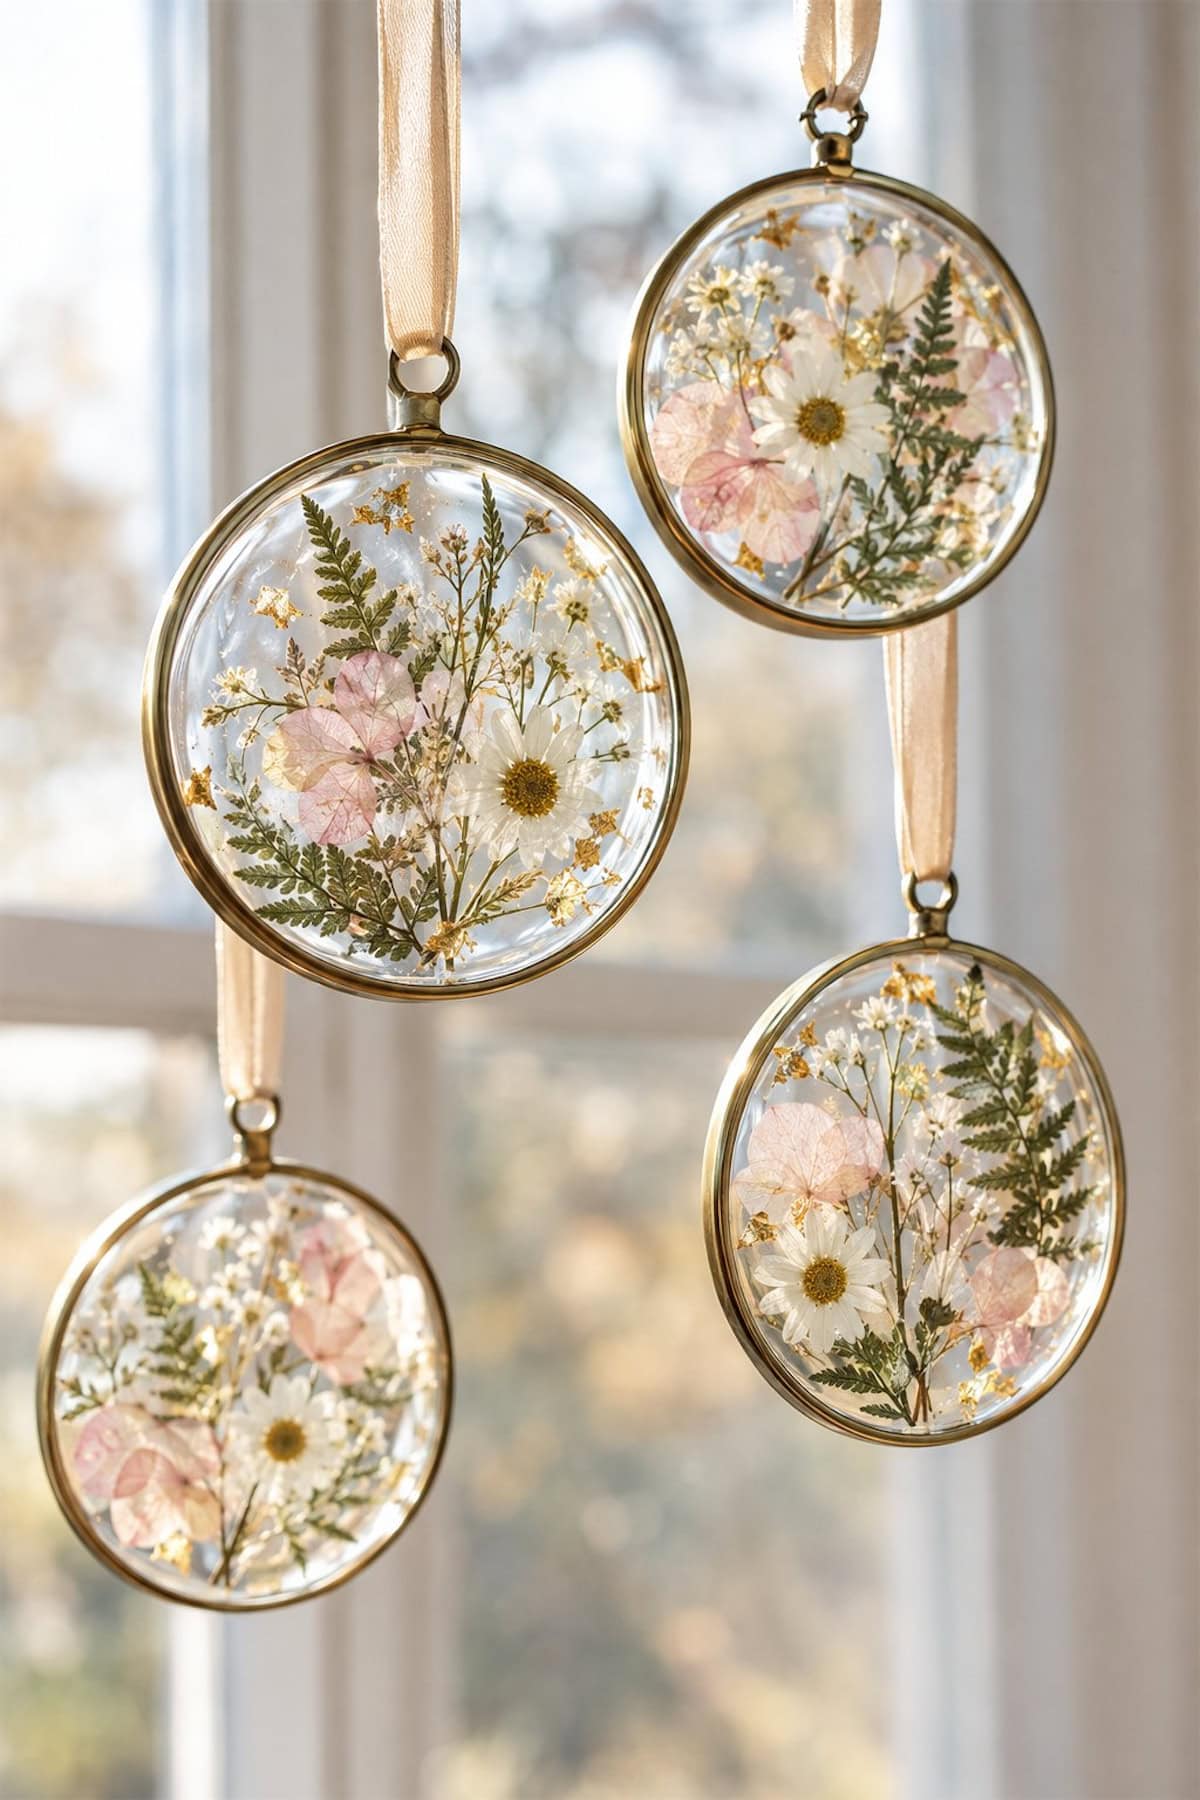
Small hinged glass frames make this project much easier than assembling loose panes. Arrange fully pressed flowers and fern pieces on one side, keeping them clear of the frame edges. Secure them with minimal transparent adhesive and close the frame.
Lift it toward the light before hanging; crowded flowers lose the airy effect of the examples here.
Quilled Paper Snowflakes
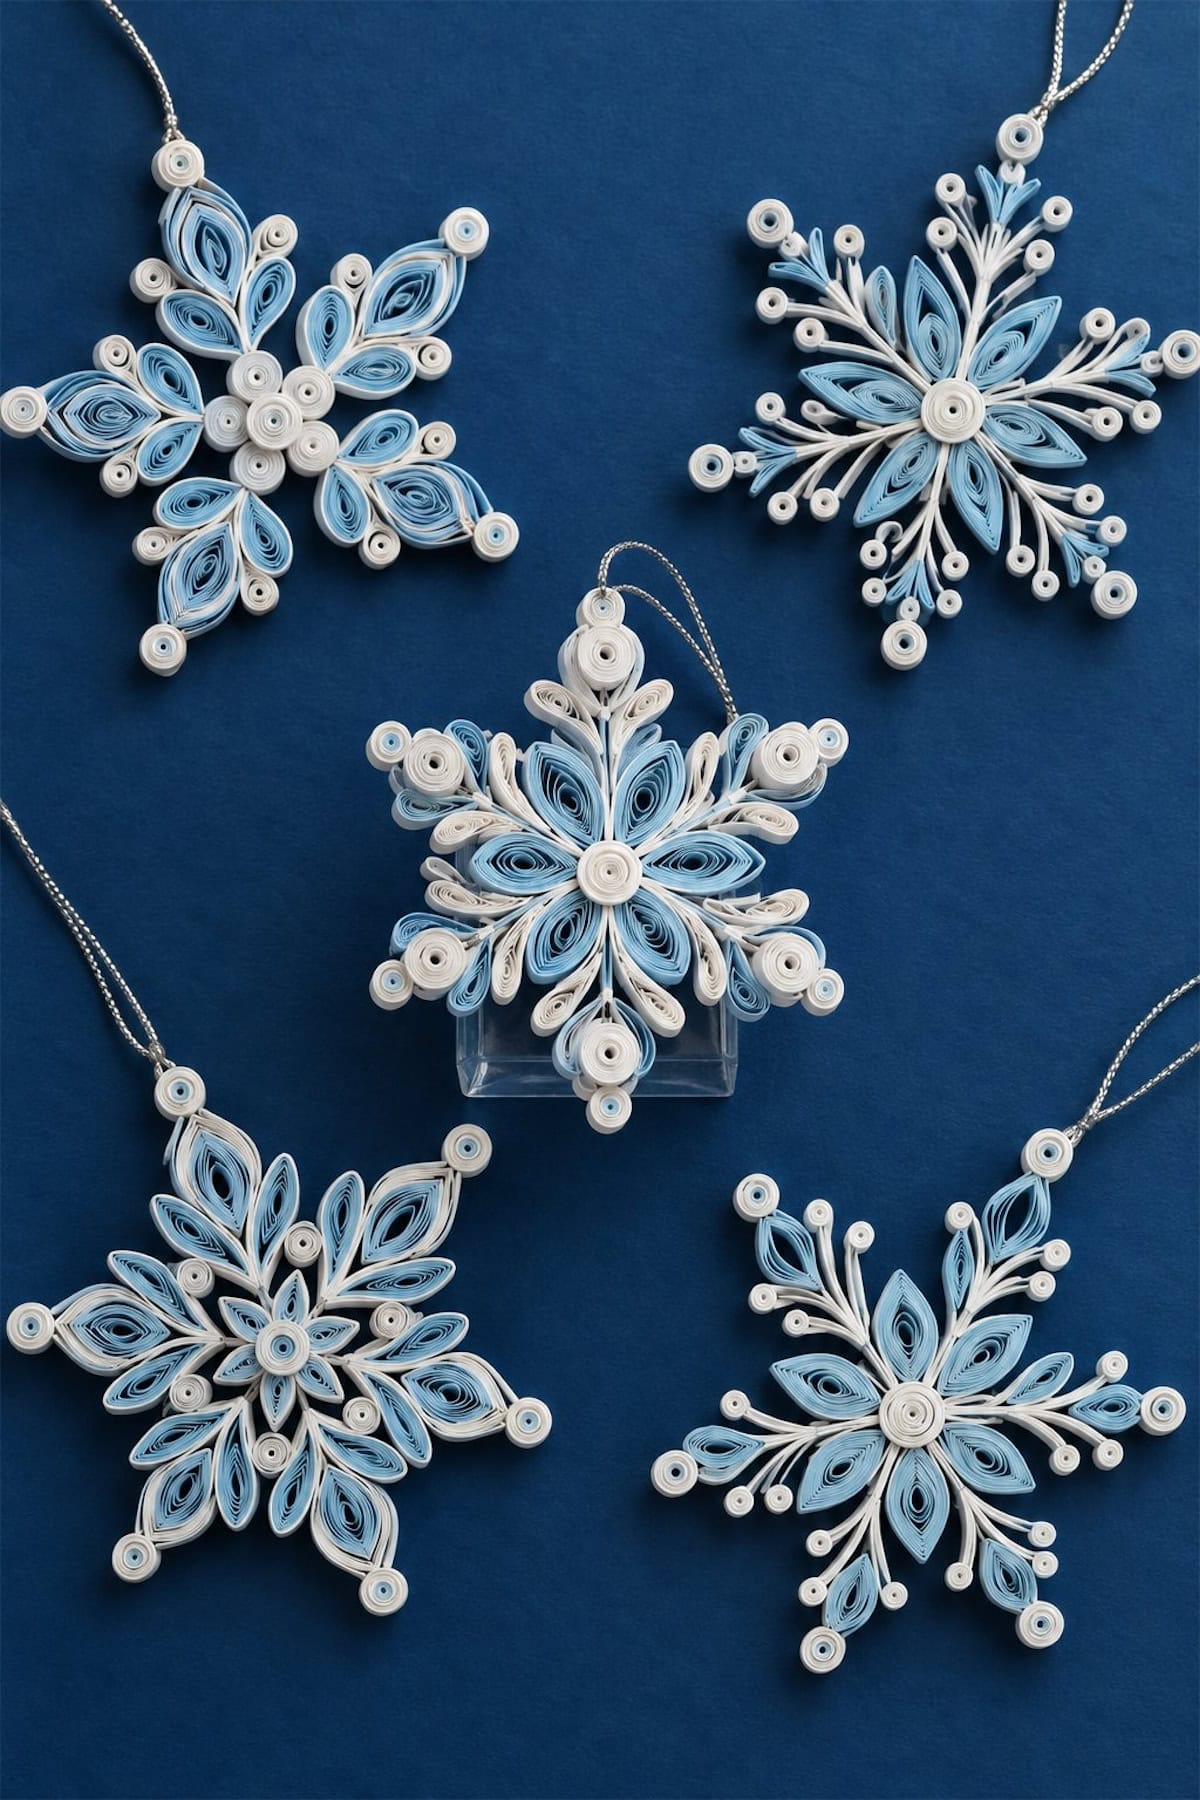
Roll narrow paper strips around a quilling tool, release them slightly, and pinch selected coils into teardrops or pointed leaves. Arrange six matching arms on a nonstick surface, then glue the touching edges together. The pale blue pieces can sit between white coils for definition. Allow the snowflake to dry flat before lifting it by its hanging thread.
Stuffed Fabric Star Ornaments
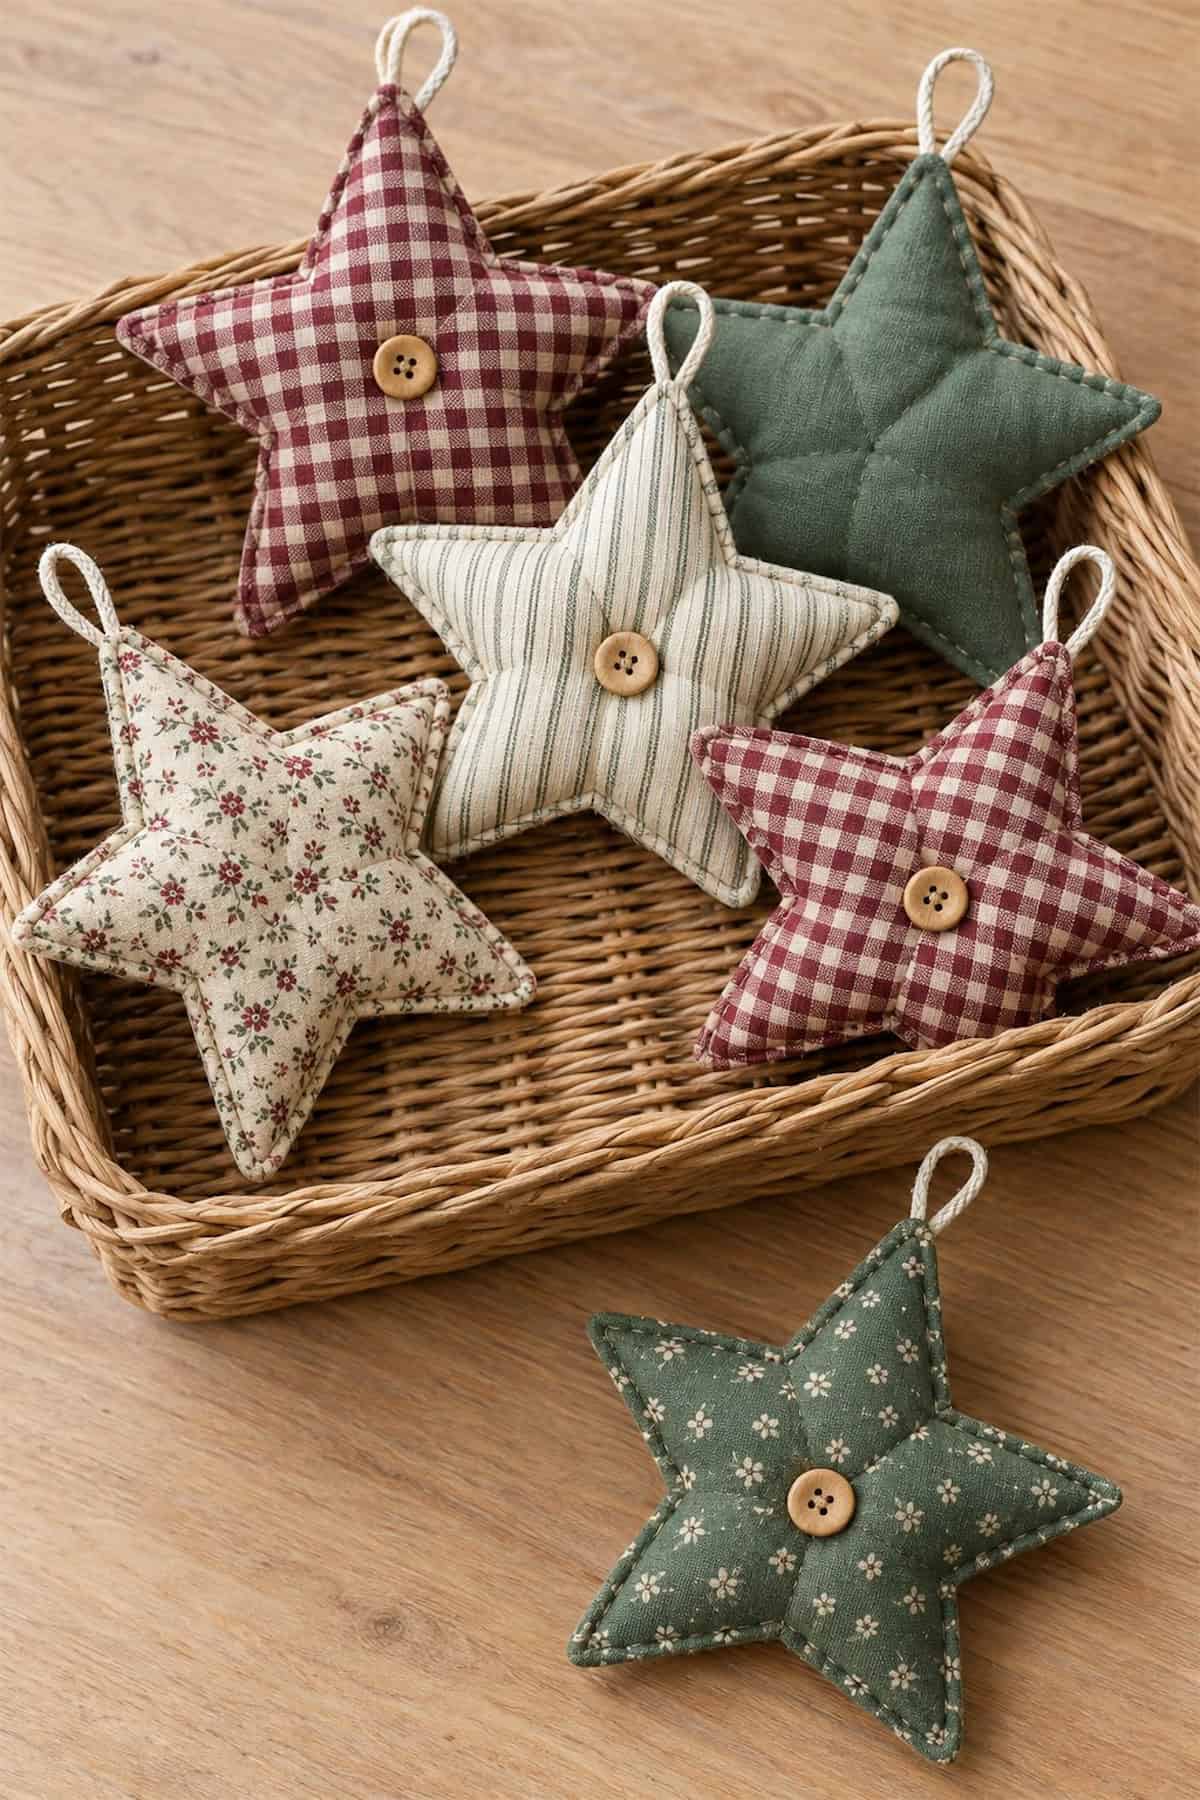
A little stuffing and a button turn fabric scraps into soft star ornaments. Sew two stars right sides together, clip carefully into the inner corners, and turn through a small gap. Fill lightly to preserve the points, close the opening, and stitch through the center to attach the button.
Red Felt Christmas Shapes
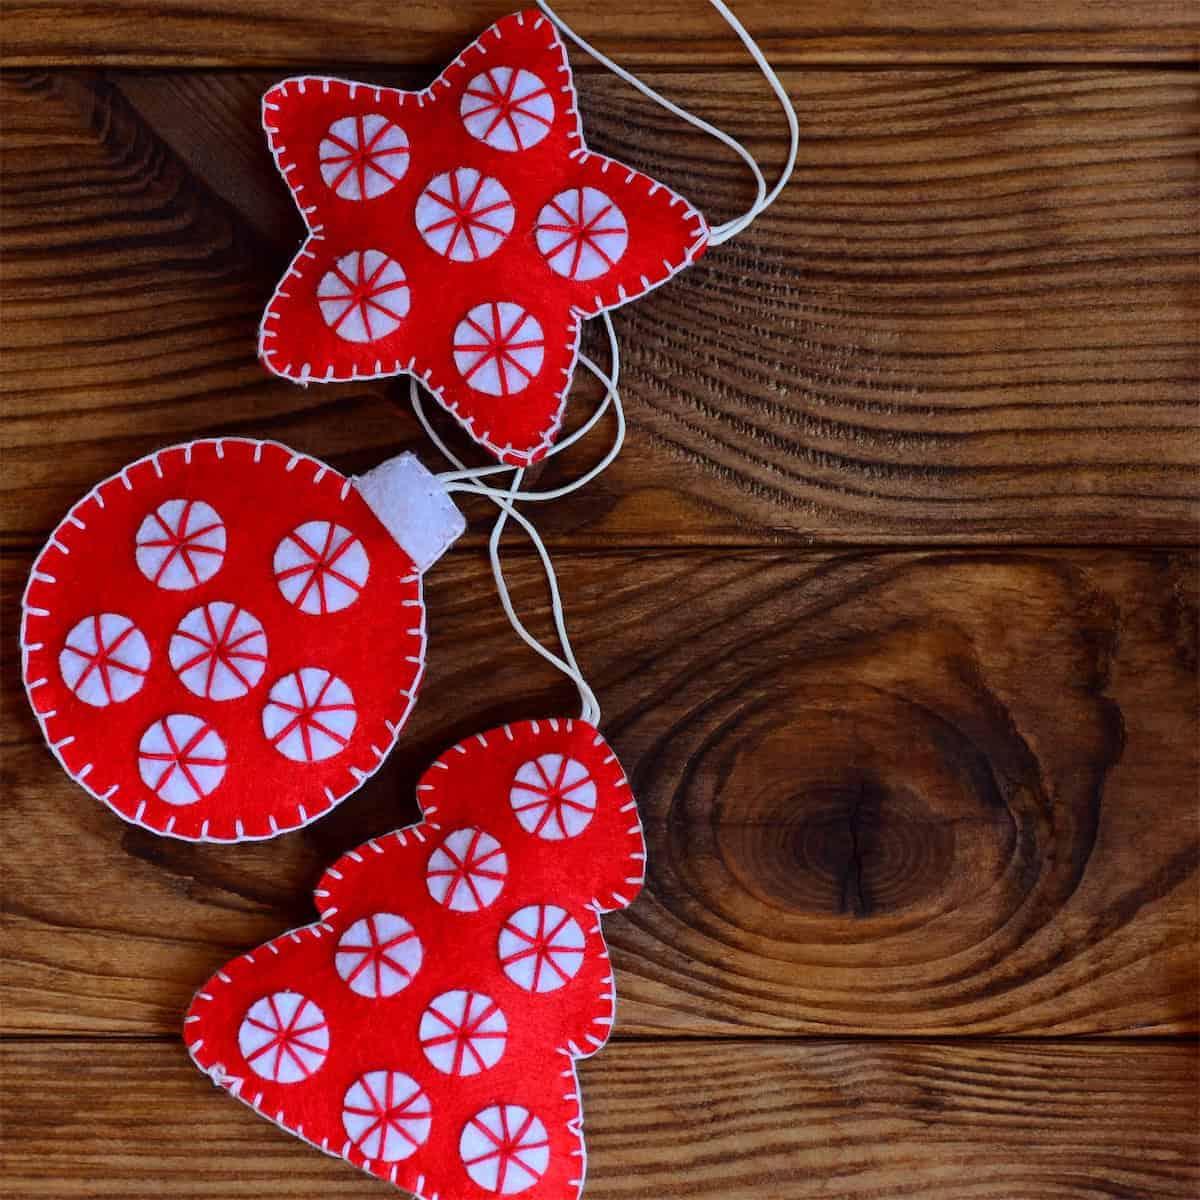
Cut stars, trees, and bauble shapes from red felt, with a matching back for each one. Decorate the fronts with small felt circles and contrasting stitches before joining the layers.
The visible blanket stitch is part of the design, so choose thread that stands out. Add just enough stuffing to lift the shape without stretching its edges.
Scrap Wood Christmas Trees
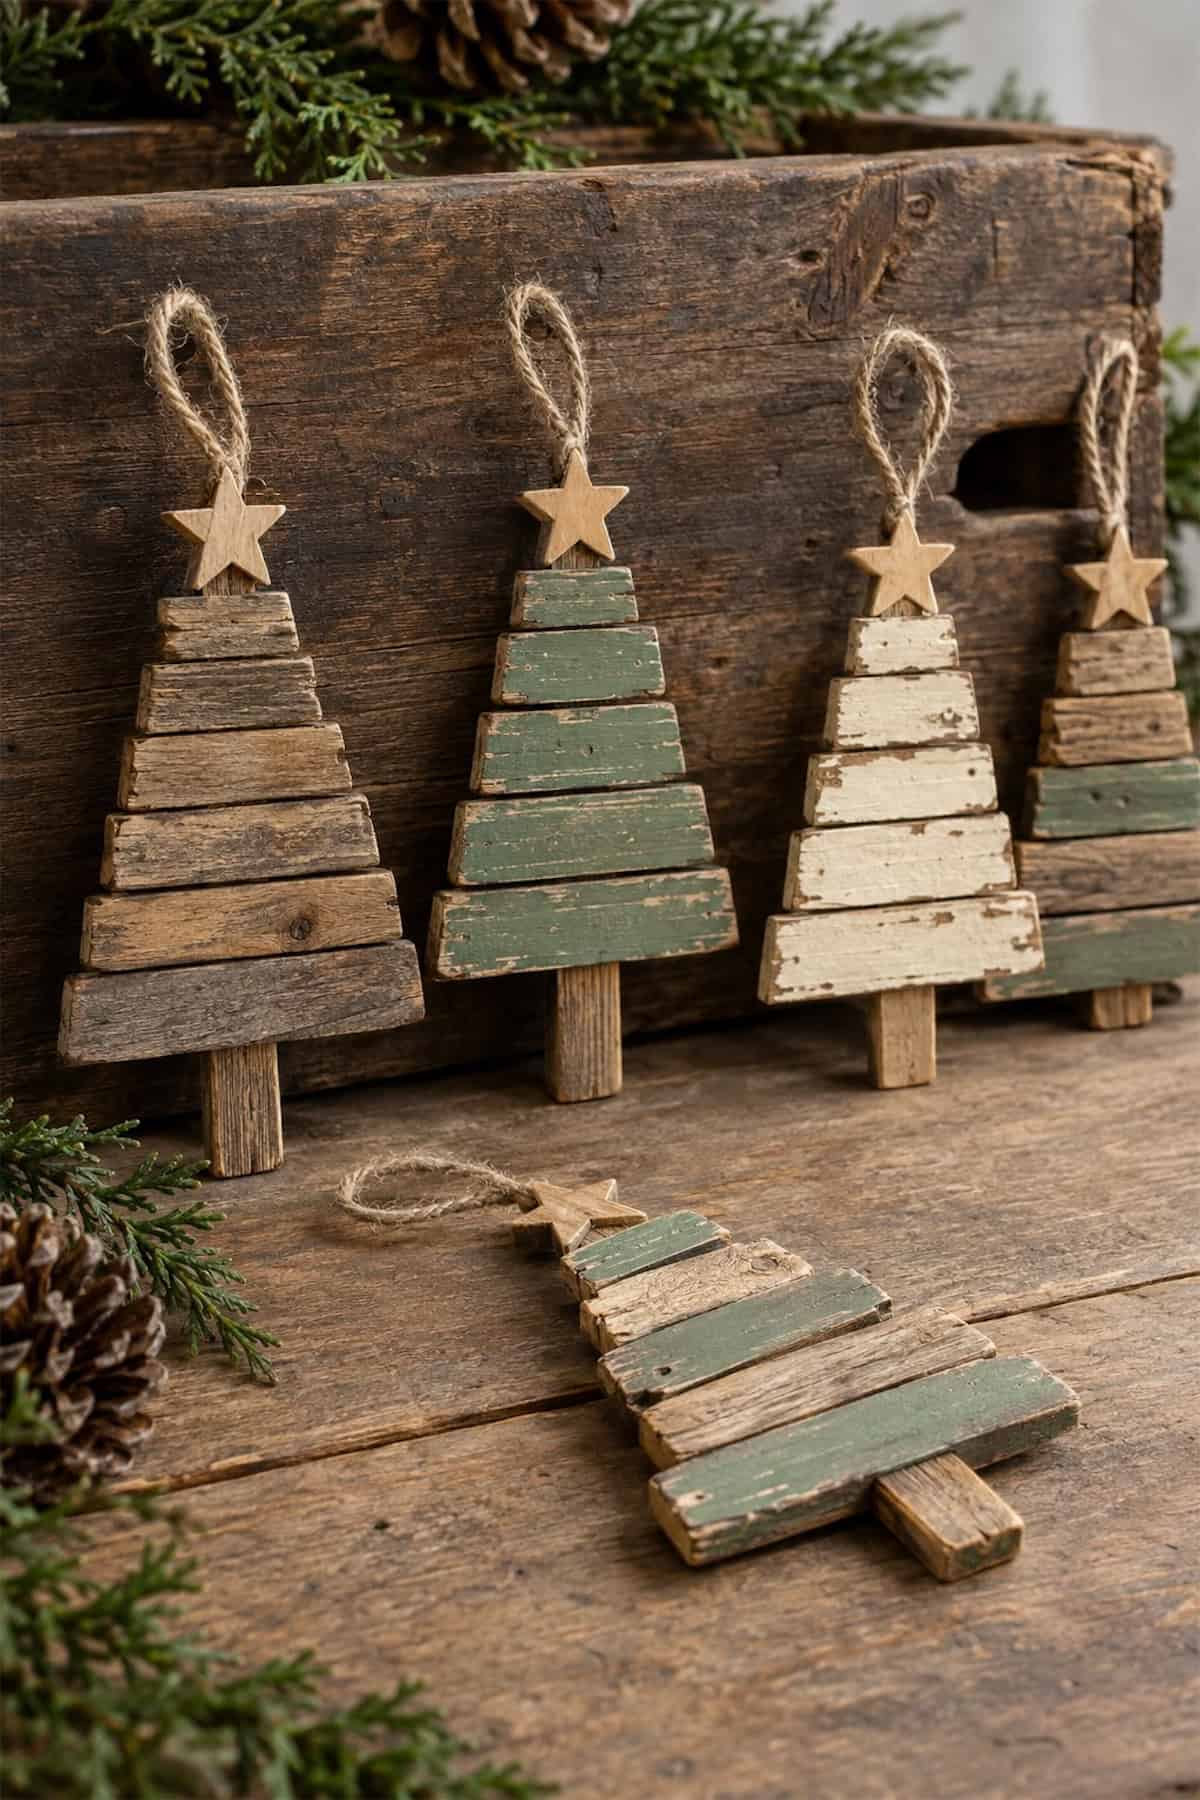
Arrange narrow wood offcuts across a vertical backing strip, then mark a triangular outline over the whole group. Cut and sand the pieces before gluing them back in order. Leave worn paint visible, as in these trees, or brush on a thin coat yourself. A small wooden star covers the top of the backing strip.
Peas in a Pod Ornament
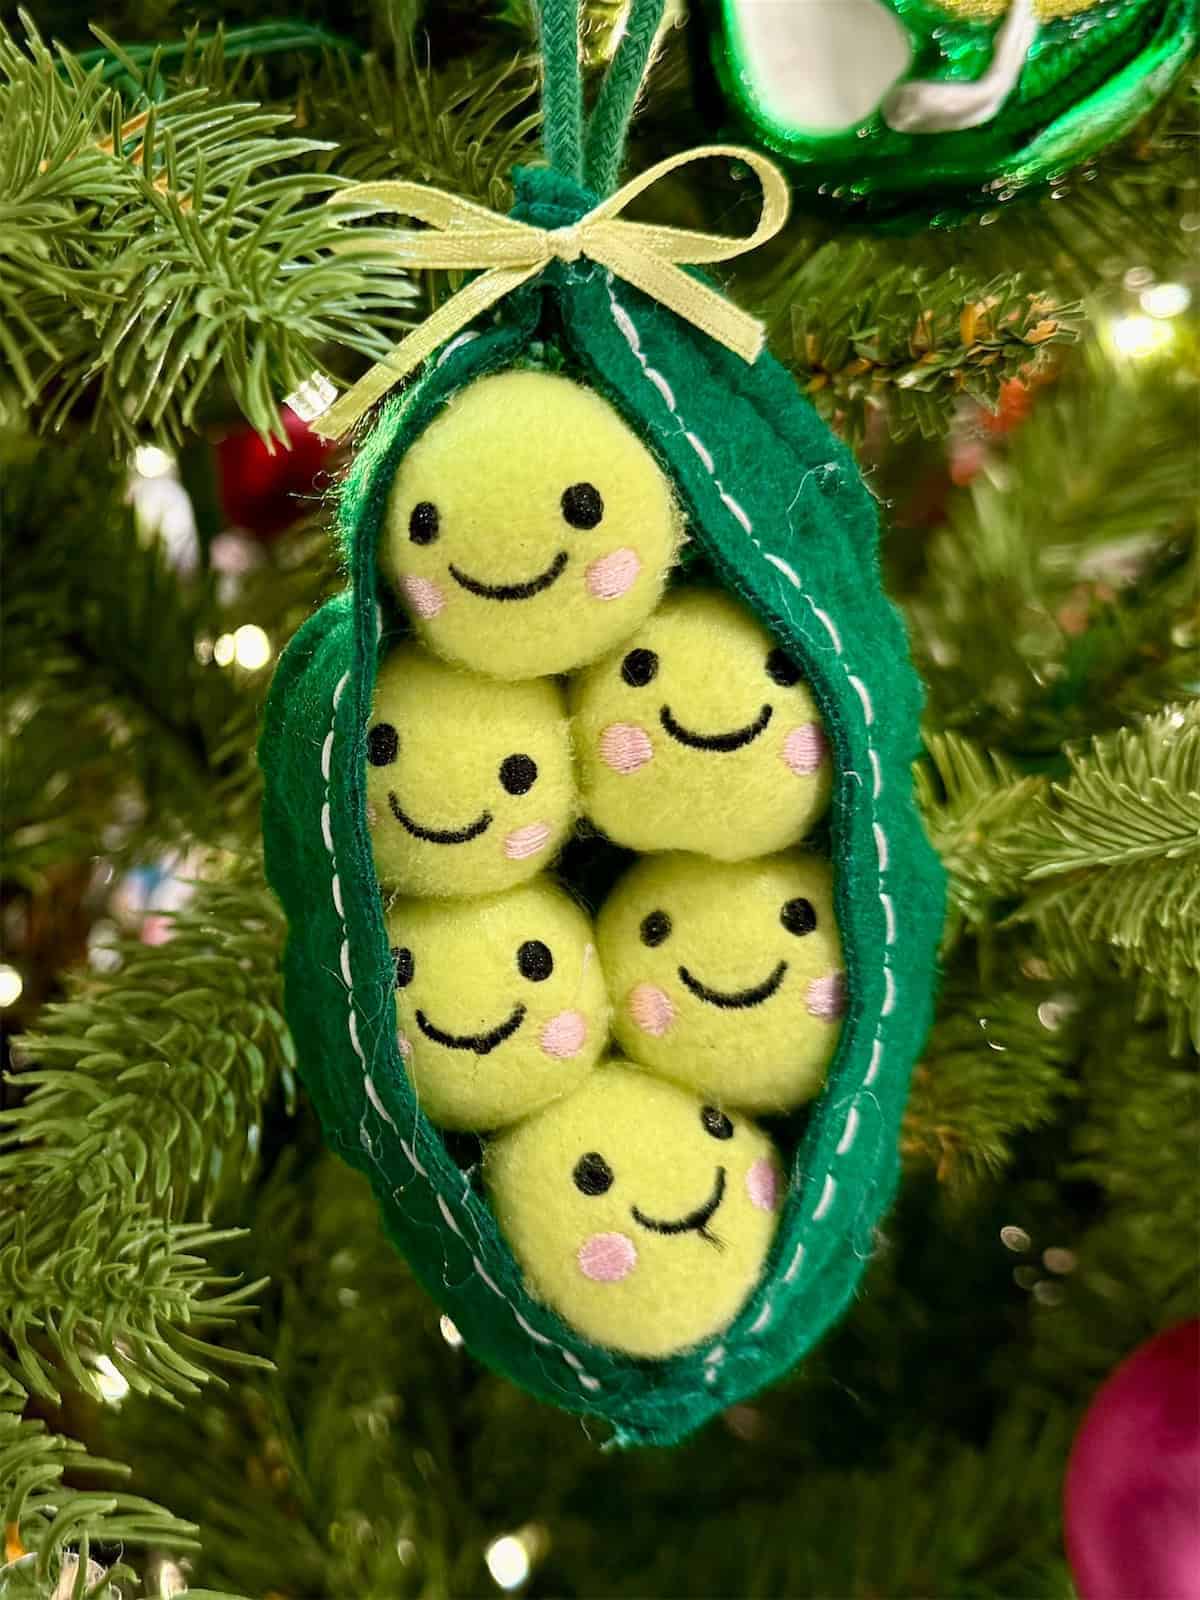
For a playful family ornament, give each pea its own expression. Embroider faces onto lime-green felt circles, gather and stuff them into little balls, then nestle them inside a dark green felt pod. Stitch the peas to the backing before closing the pod around them. You can adjust the number of peas to represent the people in your household.
Thread Snowman Ornament
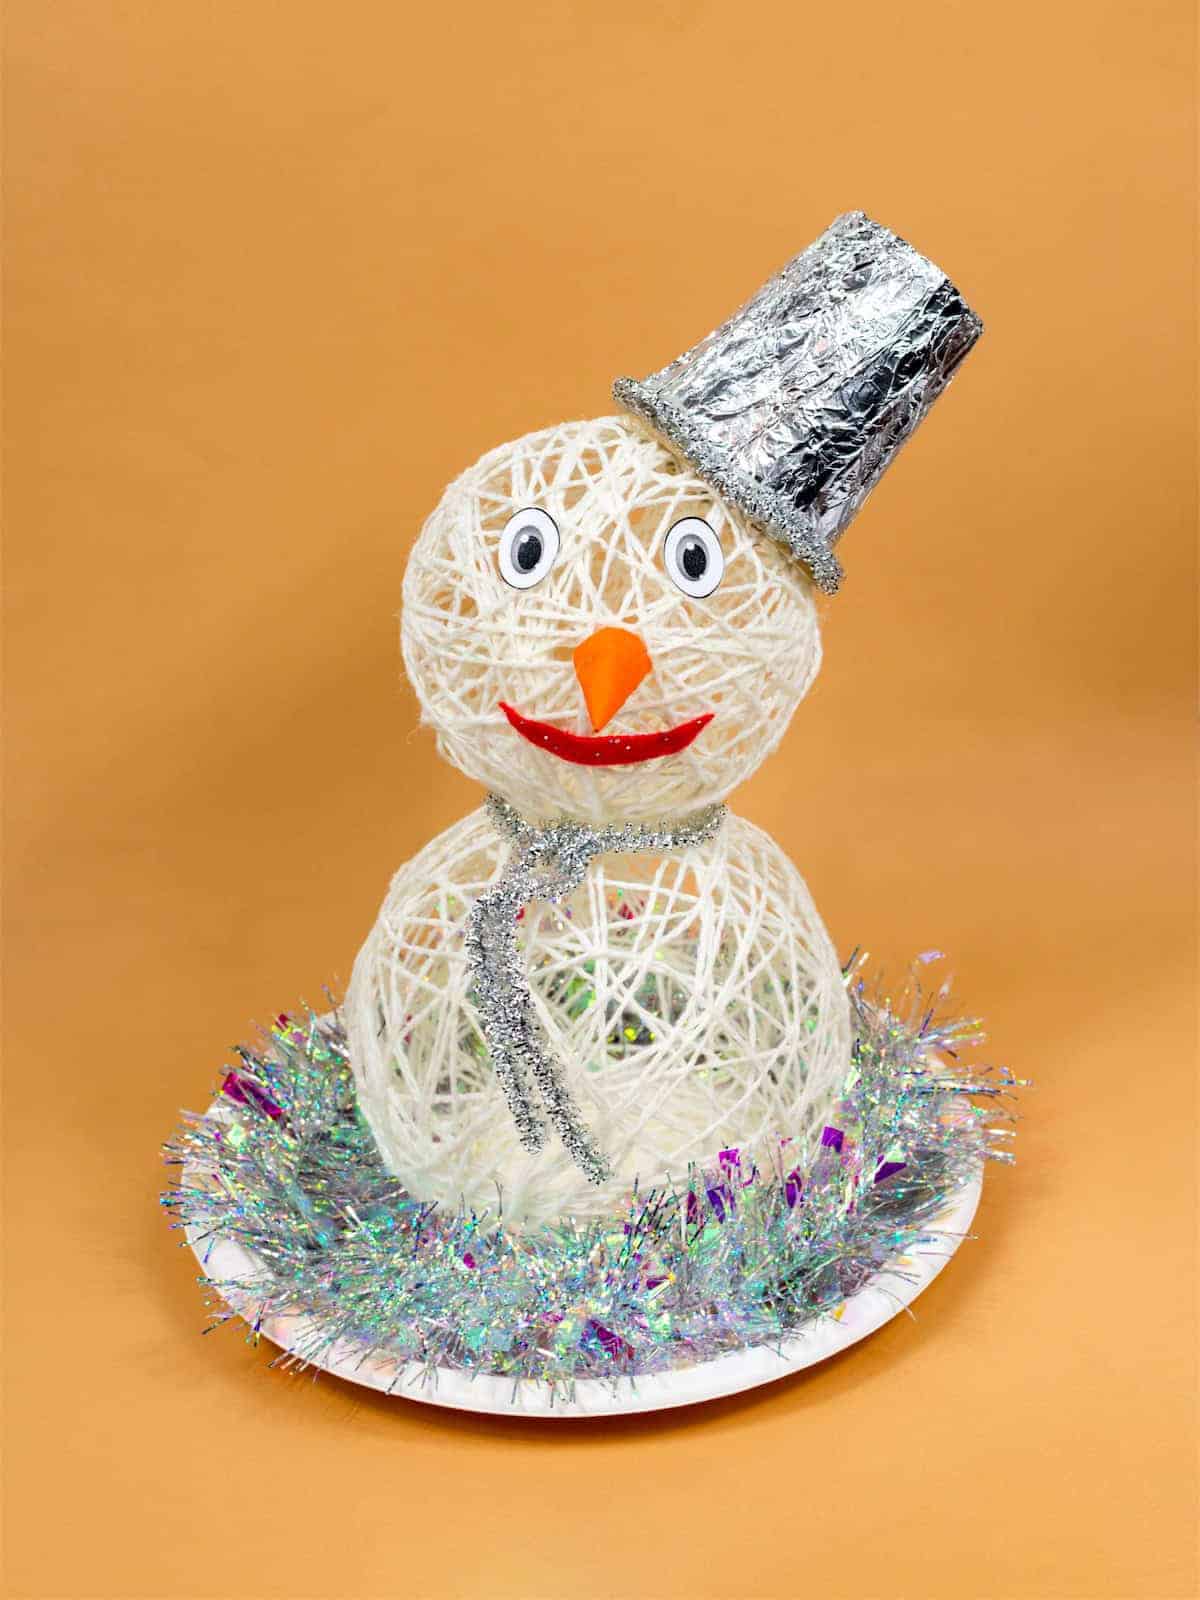
Wrap glue-coated cotton thread around two small inflated balloons, leaving gaps between the strands. Let the shells dry until rigid before deflating and removing the balloons, then join them into a snowman.
Use lightweight paper for the nose, mouth, and hat. The plate and tinsel in this version suit a tabletop display; omit the base and add a secure loop for a hanging ornament.
Stained Glass Style Christmas Trees
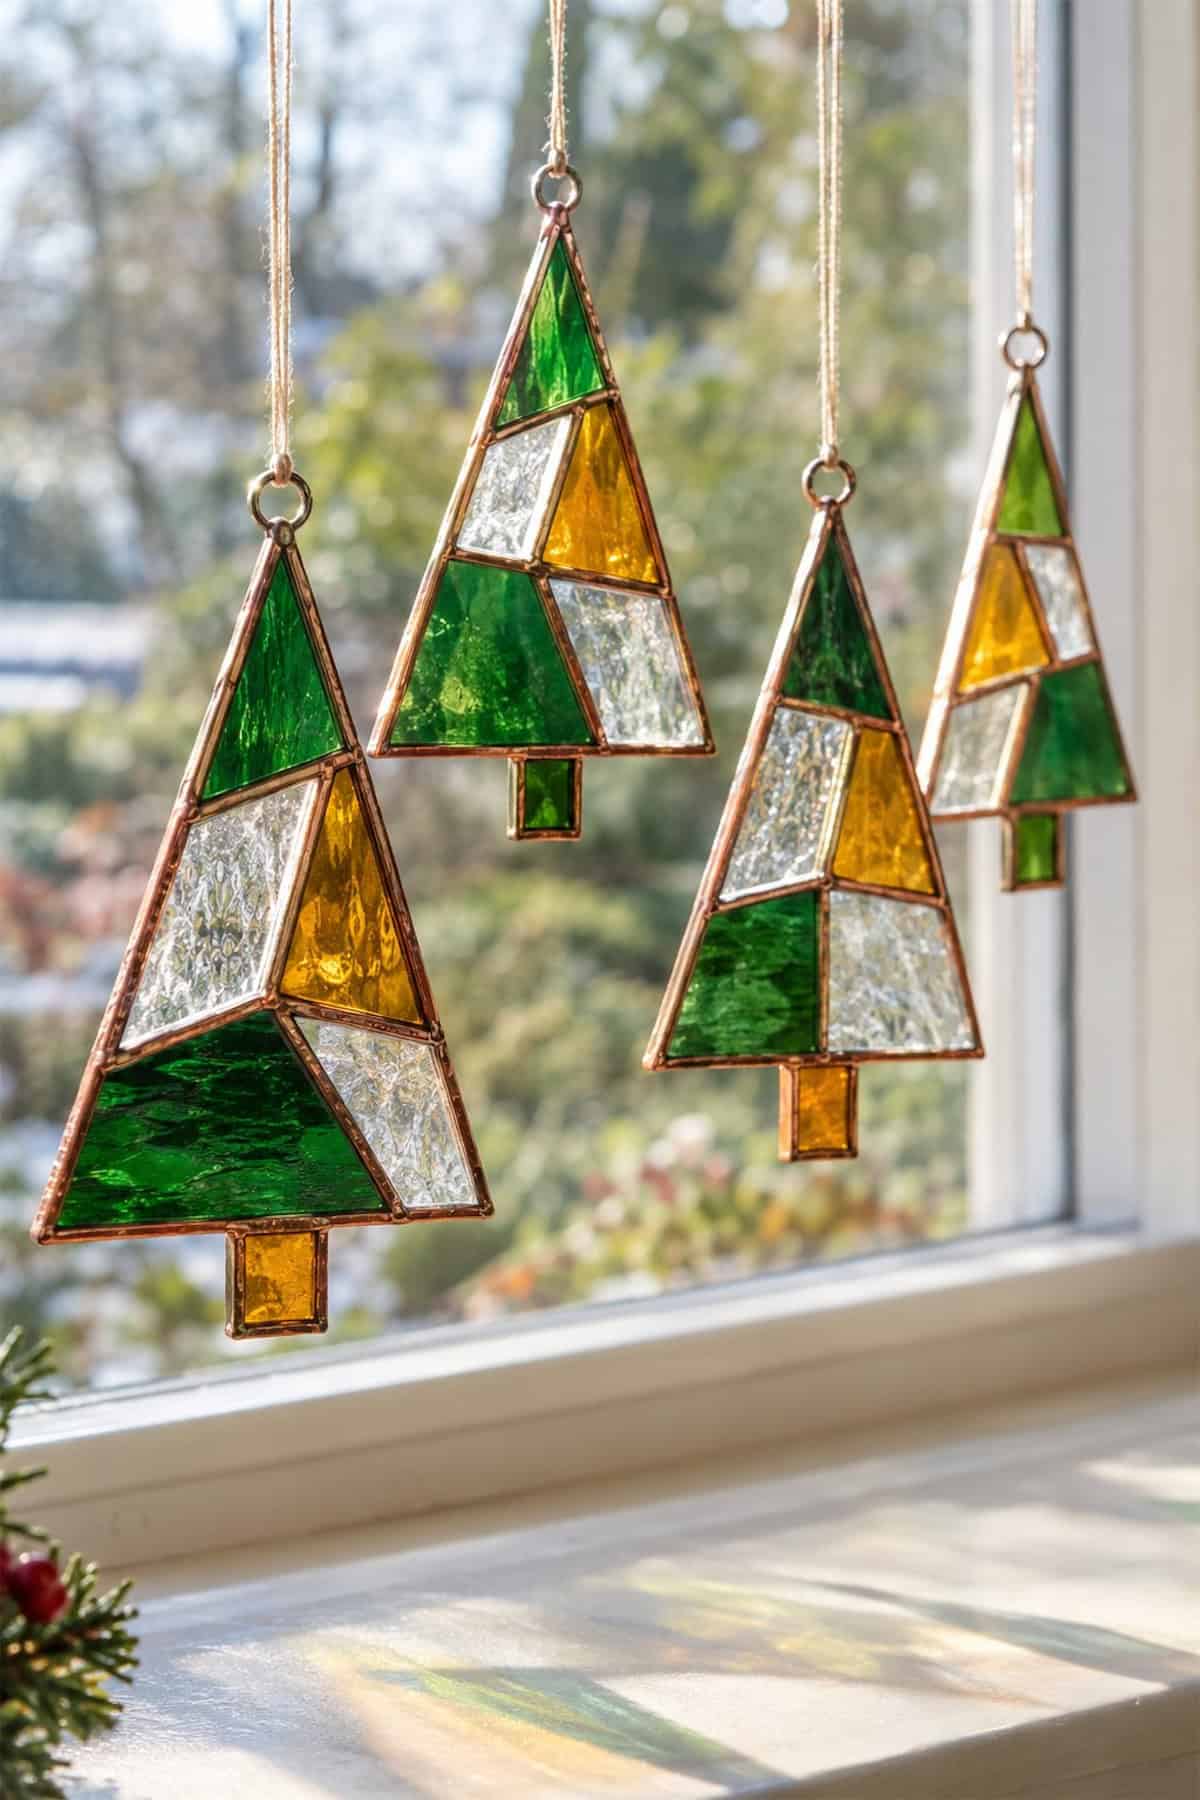
Recreate the green, amber, and clear sections with transparent craft plastic and compatible glass-effect paints. Draw enclosed sections with dimensional outliner, let it set, then fill each area with color. Once fully cured, cut around the tree and add a hanger. This gives you a similar window-light effect without the specialist tools needed for actual stained glass.
Tiny Book Stack Ornaments

Cut small rectangles of card for book covers and fill them with folded paper or layered cardboard pages. Wrap the spines in colored paper, then add fine gold lines with a paint pen.
Stack three little books, glue them together, and tie ribbon around the pile. Tuck the hanging loop beneath that ribbon before adding the tiny holly decoration.
Clay Cottage Ornaments
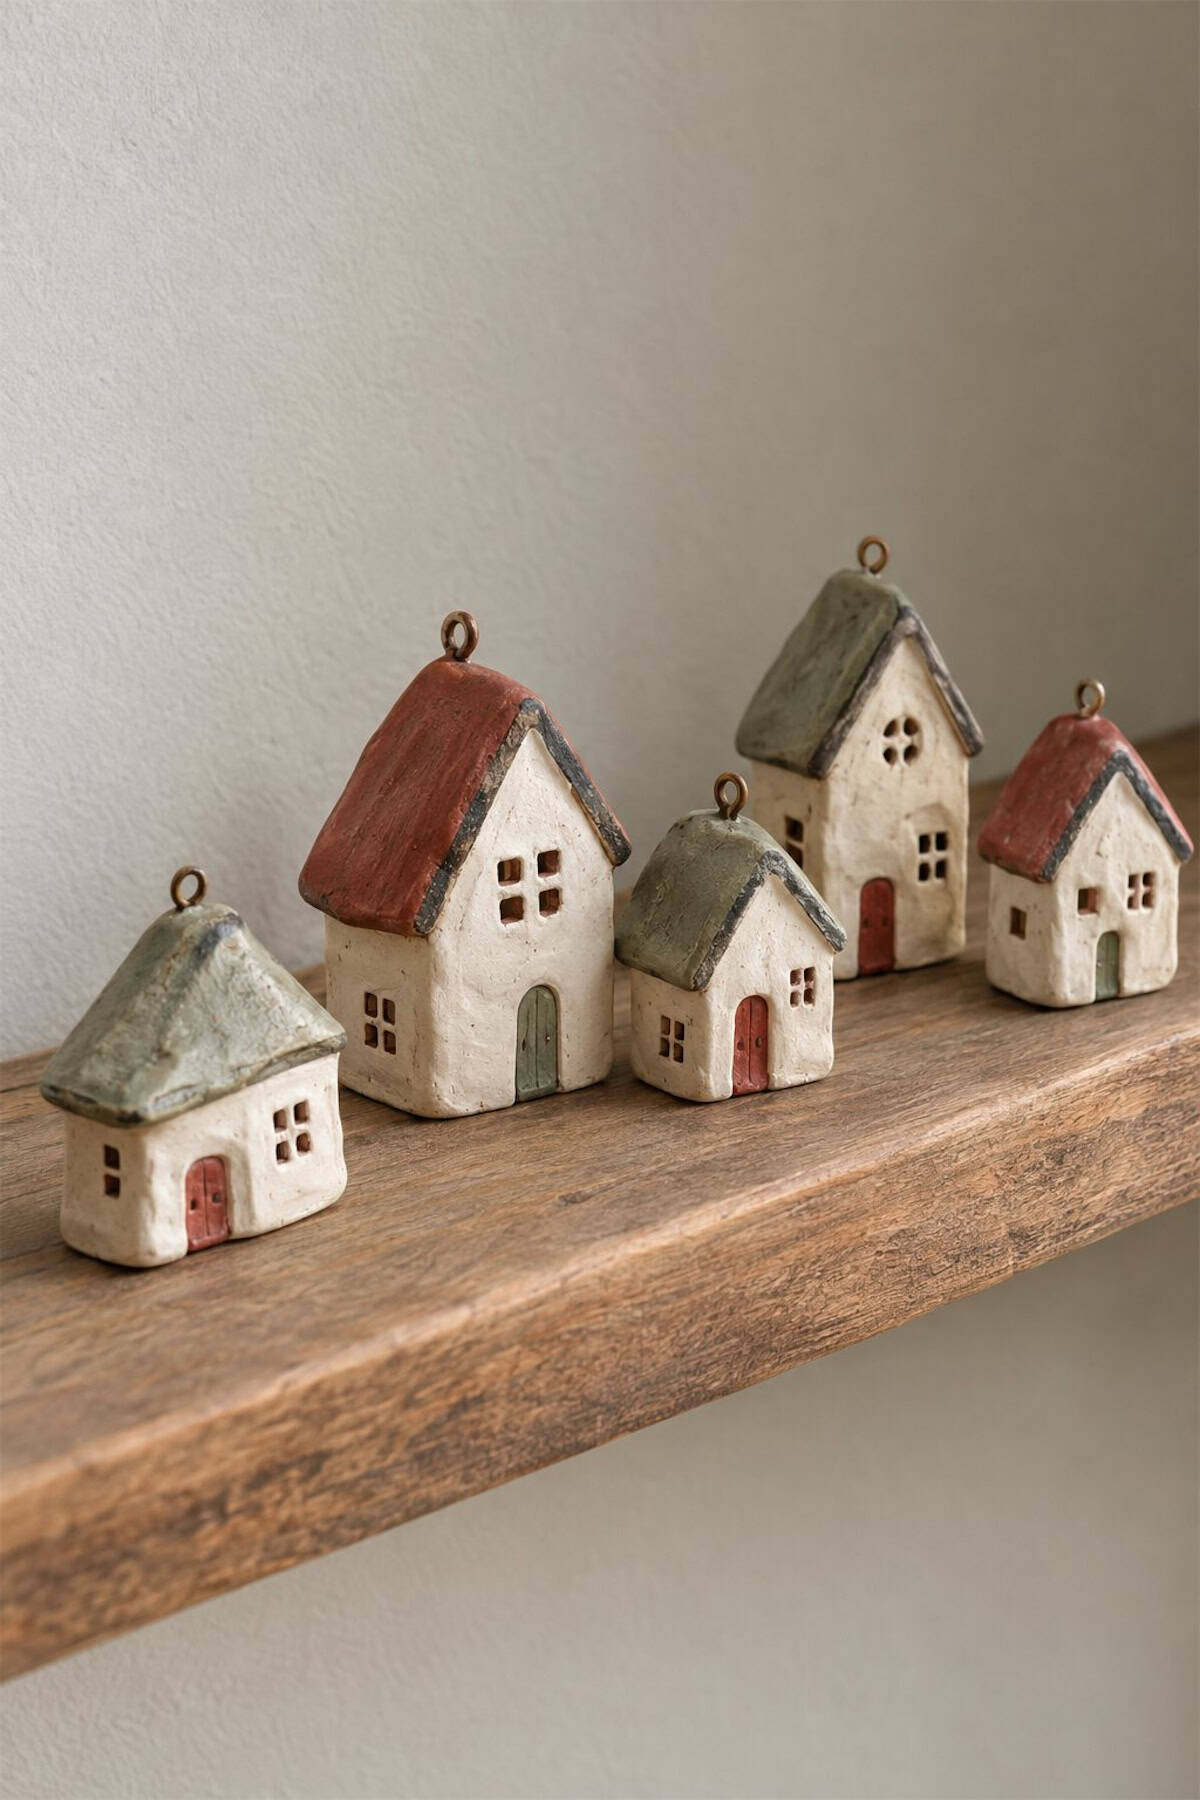
Shape small blocks of air-dry clay into houses and attach pitched roofs with the joining method recommended for your clay. Press in windows and doors while the surface is soft, and insert a wire eye at the roof peak. Paint after the cottages dry completely. Keep them hollow or small enough that their weight won’t pull down a tree branch.
Tiny Knitted Sweater Ornaments
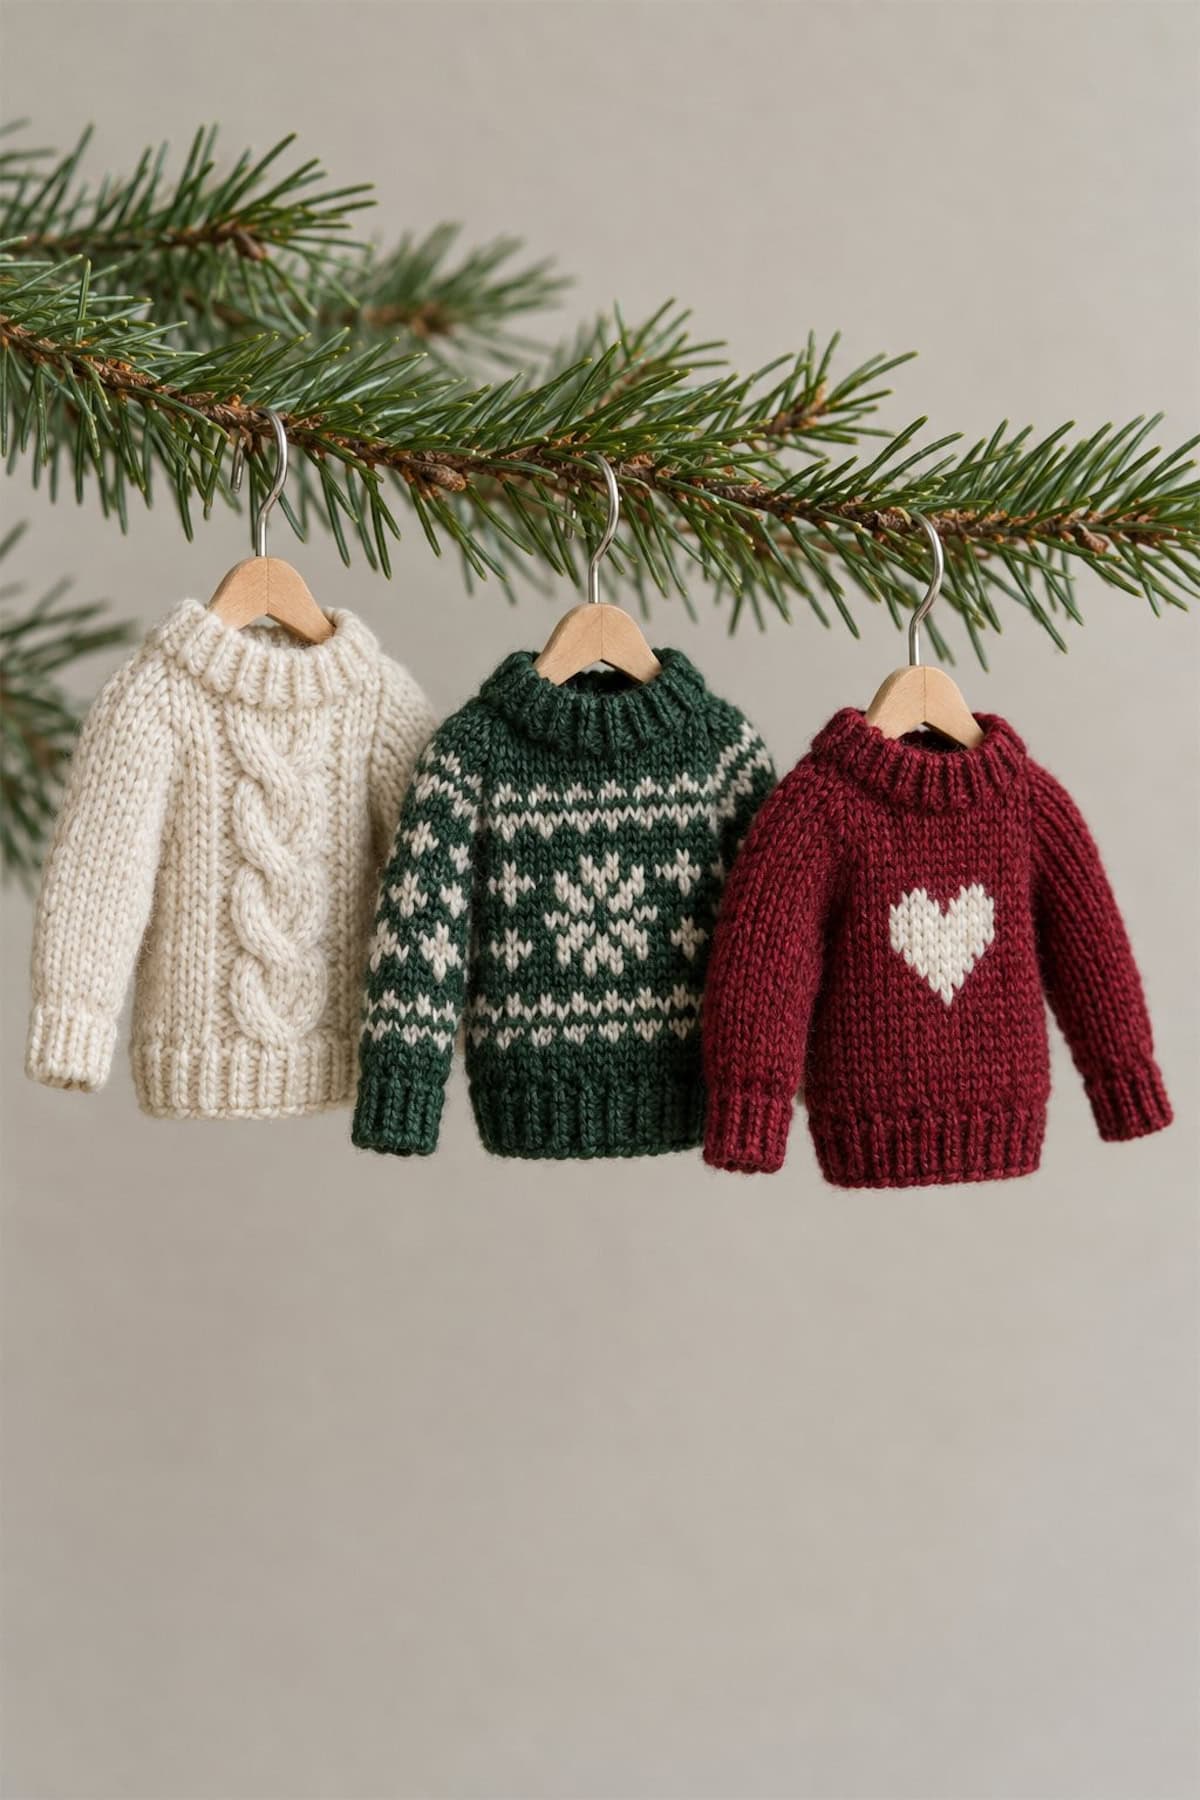
If you already knit, use leftover yarn for a miniature sweater with a ribbed hem and cuffs. Follow a small ornament pattern to keep the sleeves in proportion, then add a heart or snowflake motif with duplicate stitch. Slip the finished sweater onto a miniature hanger; a thin cord through the neckline also holds it without stretching the shoulders.
Velvet Acorn Ornaments
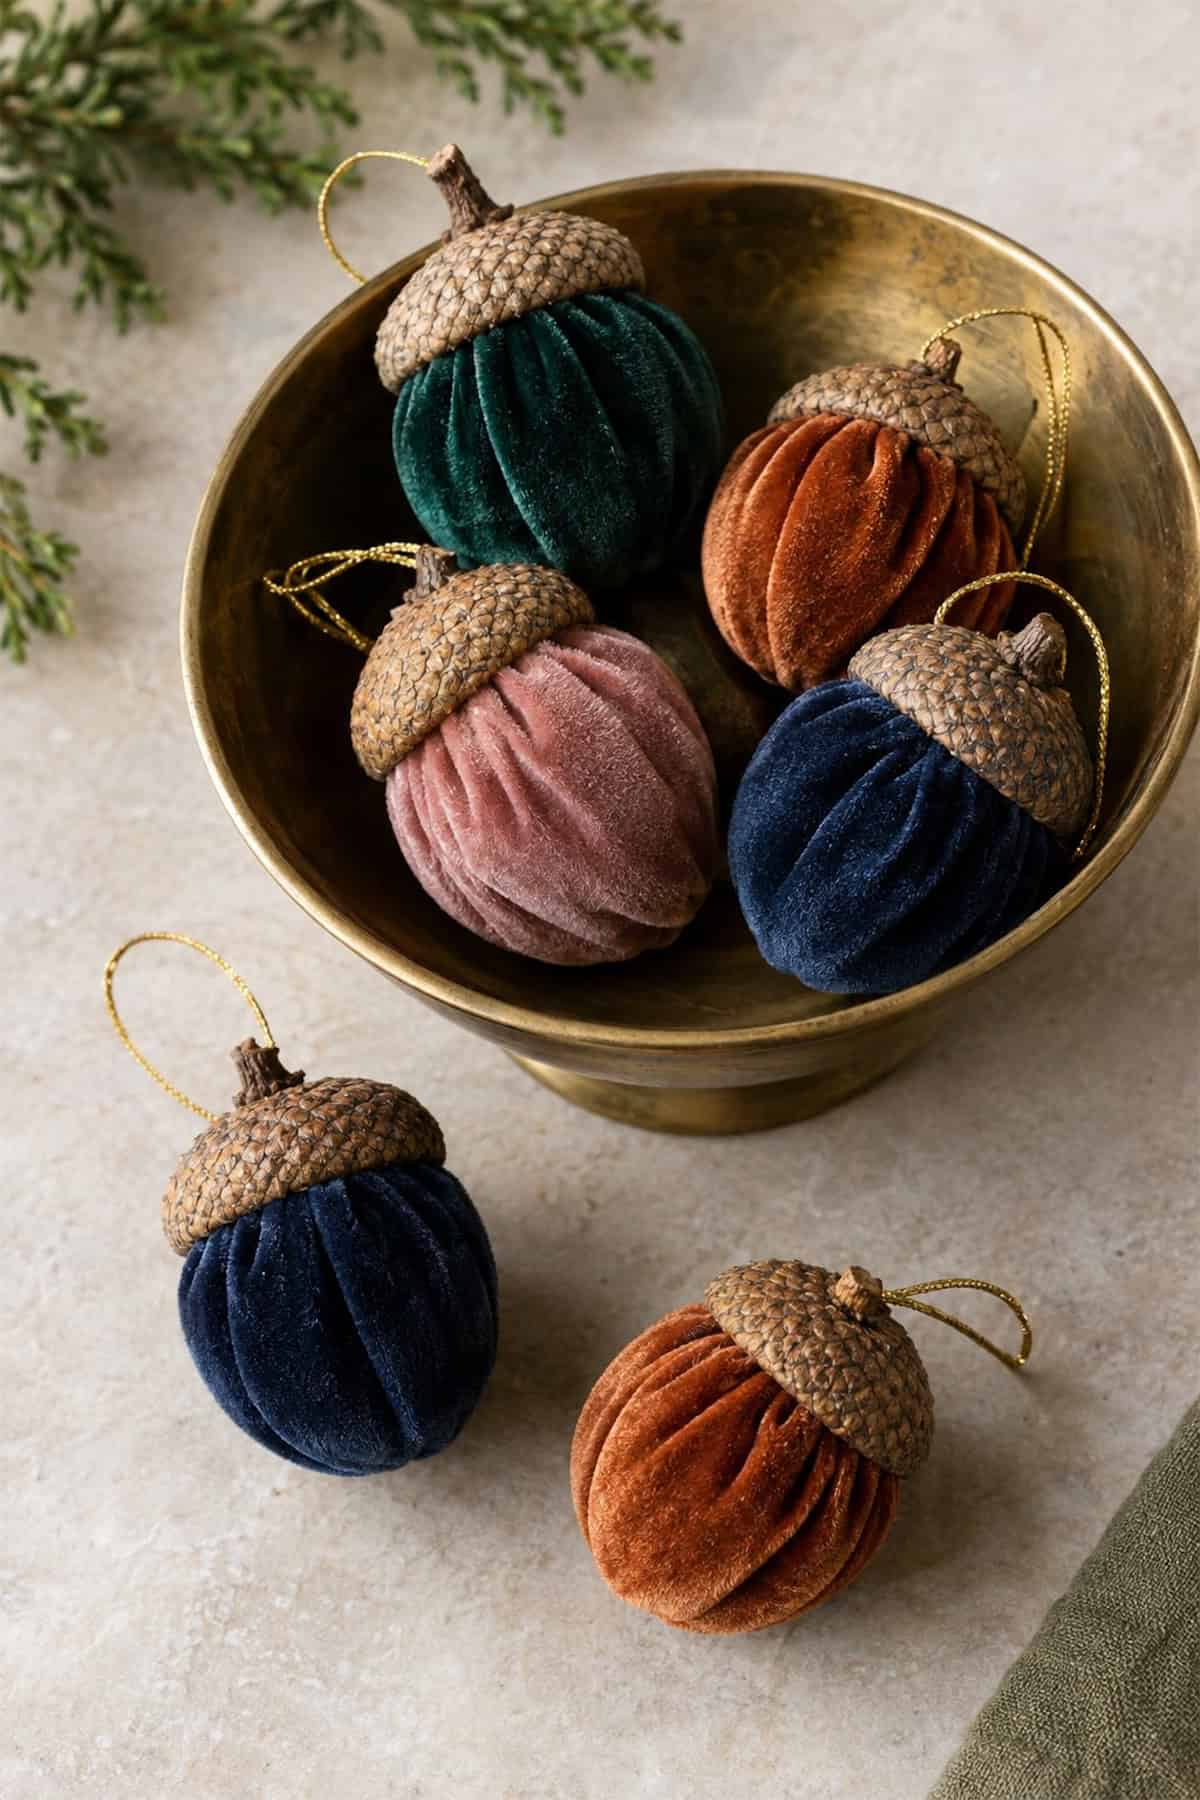
Gather a circle of velvet around a little stuffing, pull the stitches tight, and secure the opening. Glue a clean, dry acorn cap over the gathered edge, tucking a fine hanging loop beneath it.
Test the cap against the fabric body before gluing. A snug fit hides the stitches and gives the ornament its recognizable acorn shape.
Paper Rosette Medallions
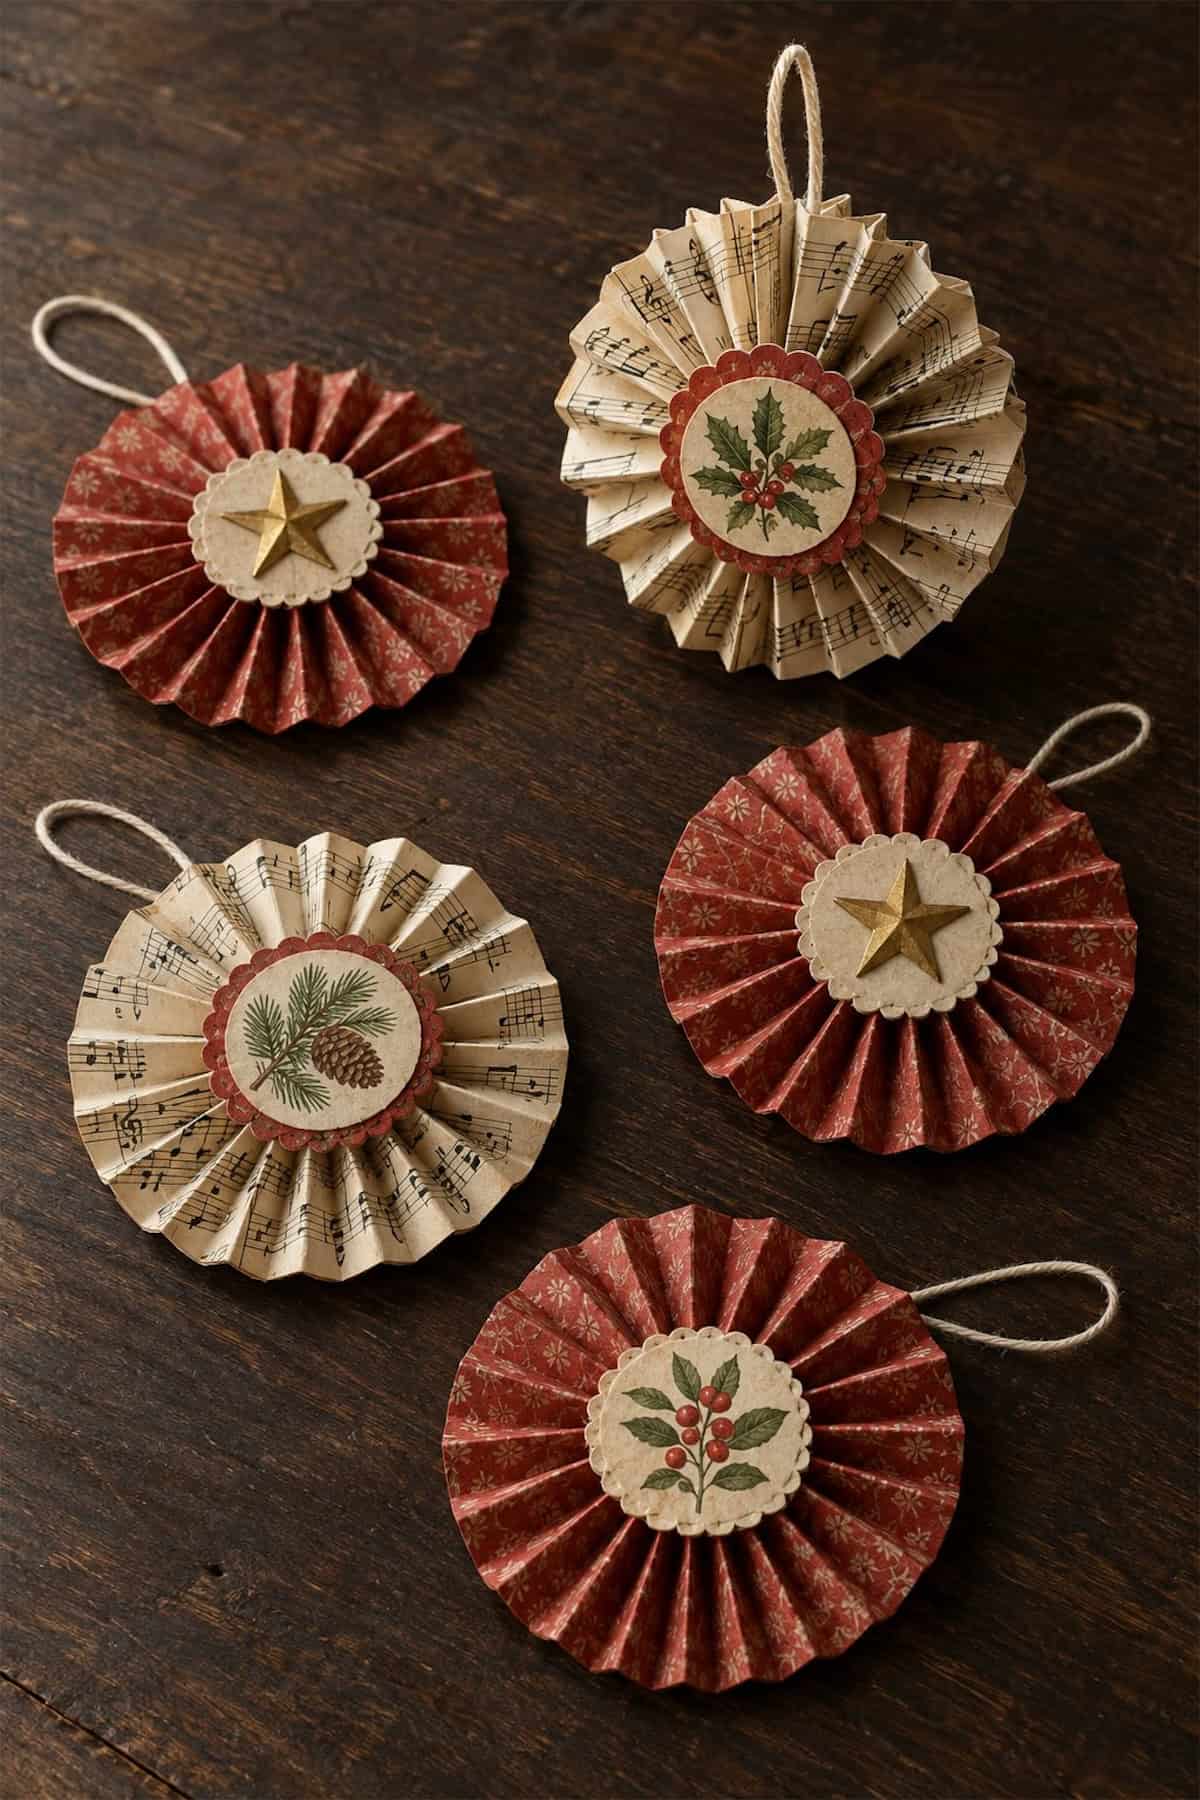
Accordion-fold a strip of sheet music or decorative paper, join the ends, and press the ring flat into a rosette. Glue card circles to the front and back to hold the center closed. A botanical cutout or raised paper star covers the front circle, while a twine loop can be secured beneath the backing disc.
Wooden Spool Snowmen
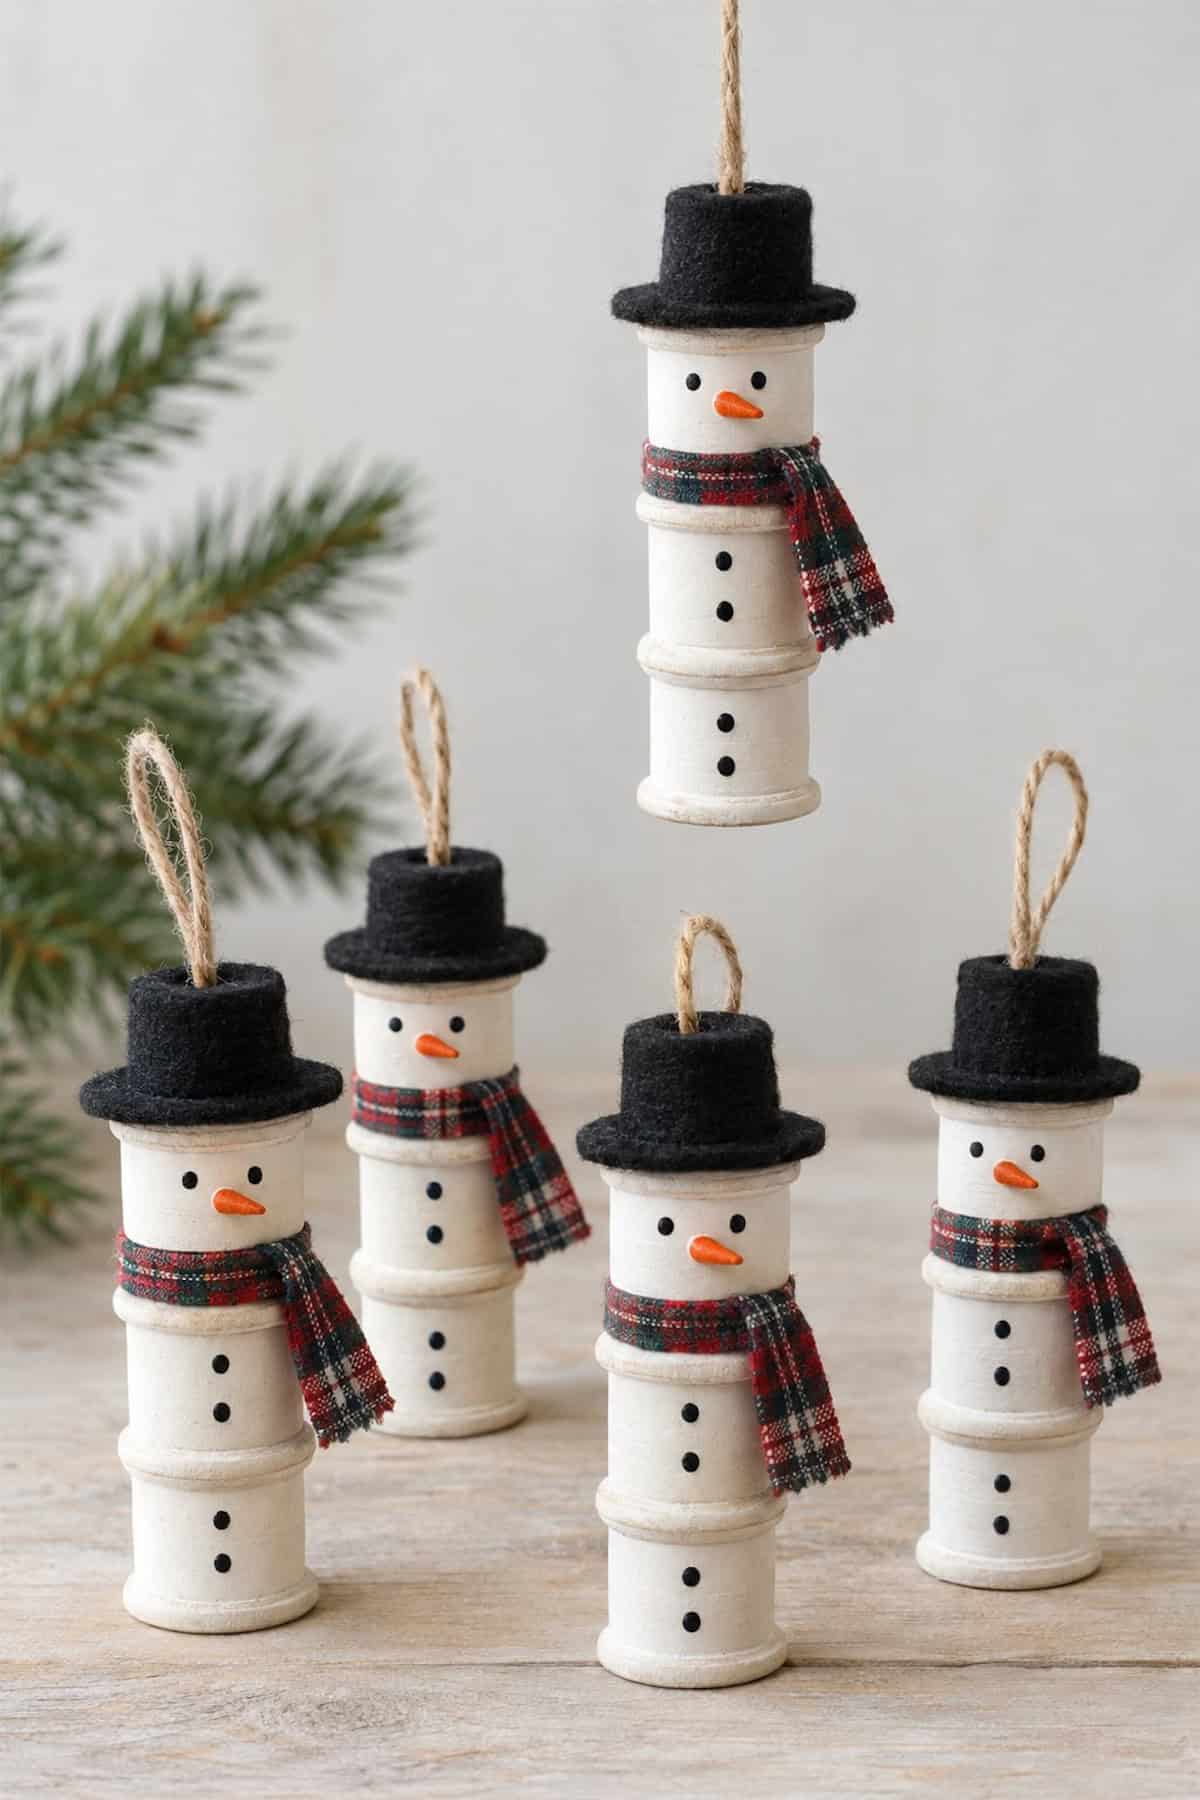
Stack two white-painted wooden spools beneath a small round wooden head, using a central cord or dowel to strengthen the joins. Add dot buttons and a painted face, then wrap plaid fabric around the neck. For the black hat, glue a short cylinder onto a felt brim. Run the hanging loop through the center before fixing the hat in place.
Woven Heart Ornaments
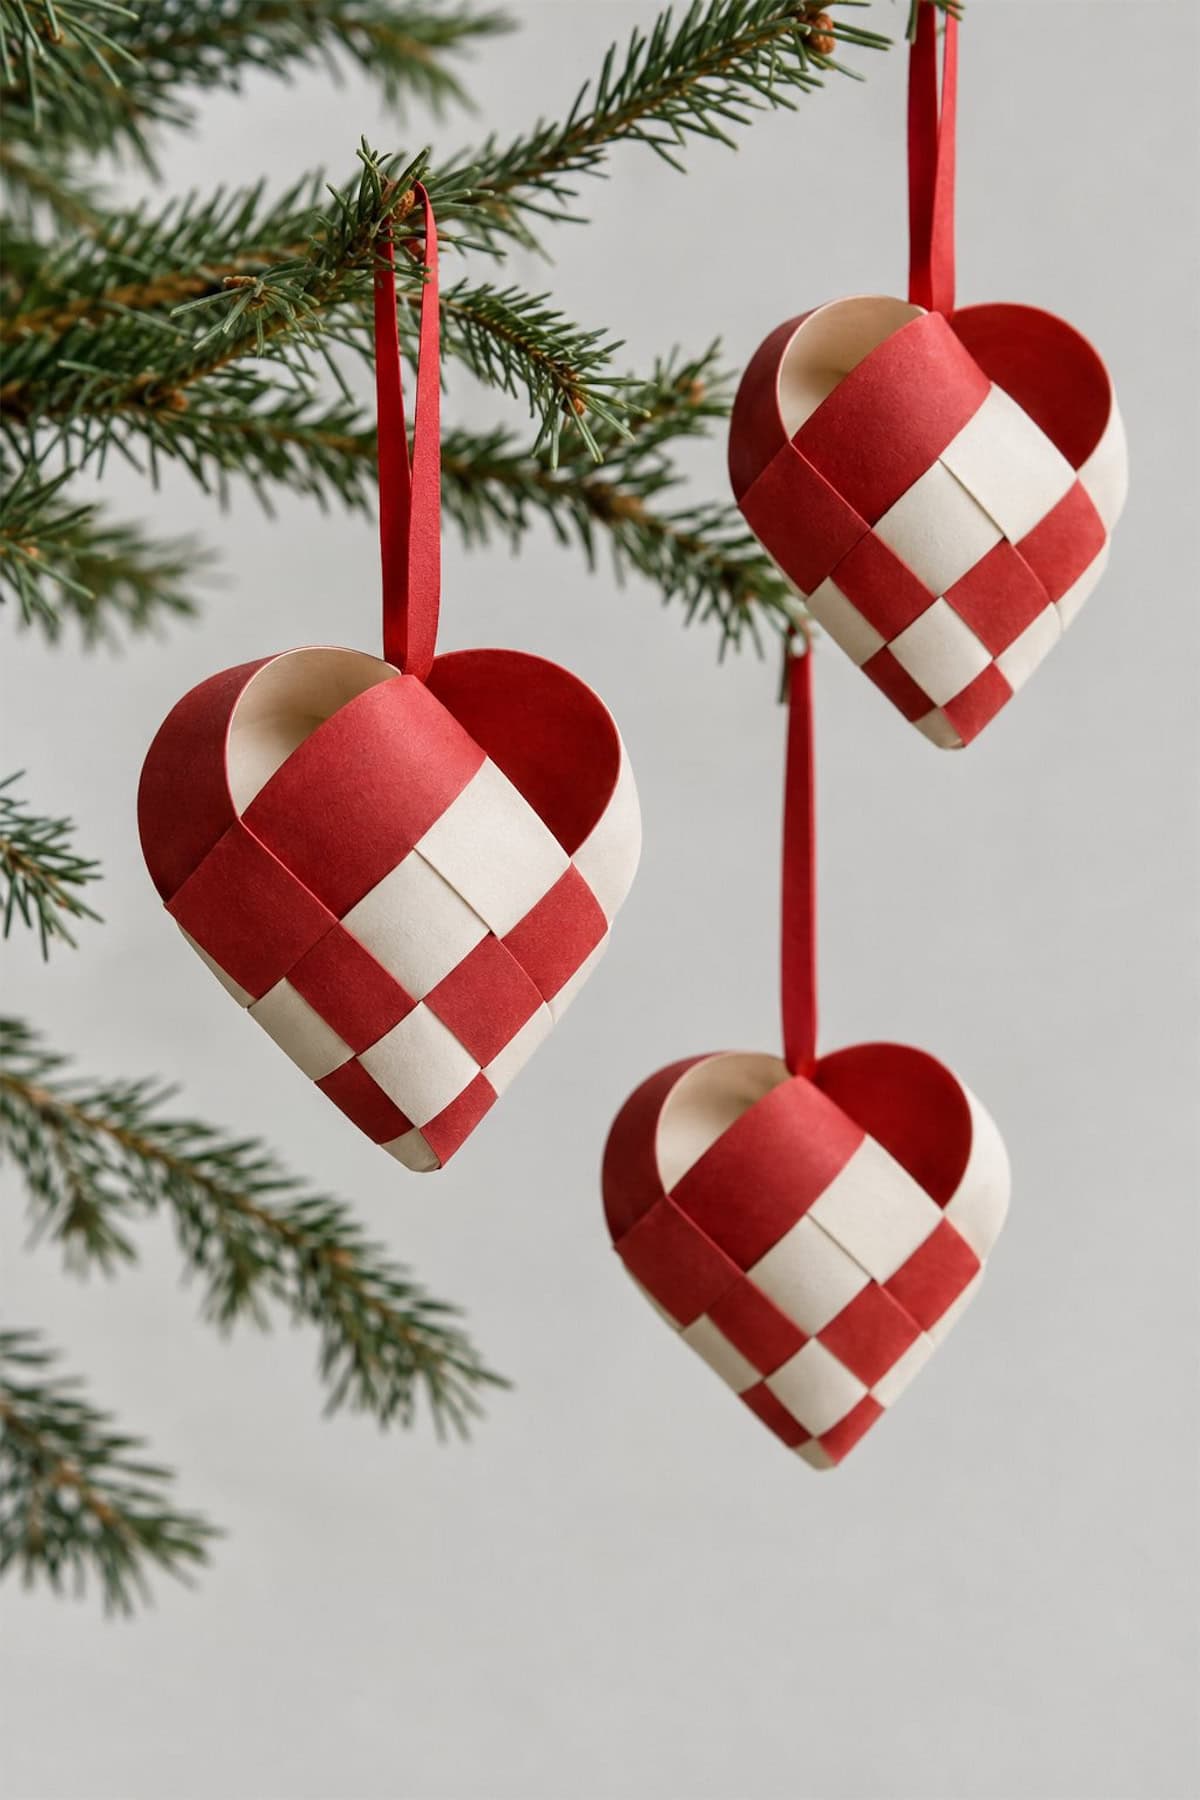
Use a Scandinavian woven-heart template to get the curved tops and slit lengths right. Cut the two folded pieces from contrasting paper, then weave their loops through one another to create the checked pocket. Satin ribbon needs stiffening and sealed edges if you want a fabric version.
Attach a narrow ribbon handle inside the top, where it won’t interrupt the red-and-cream weave.