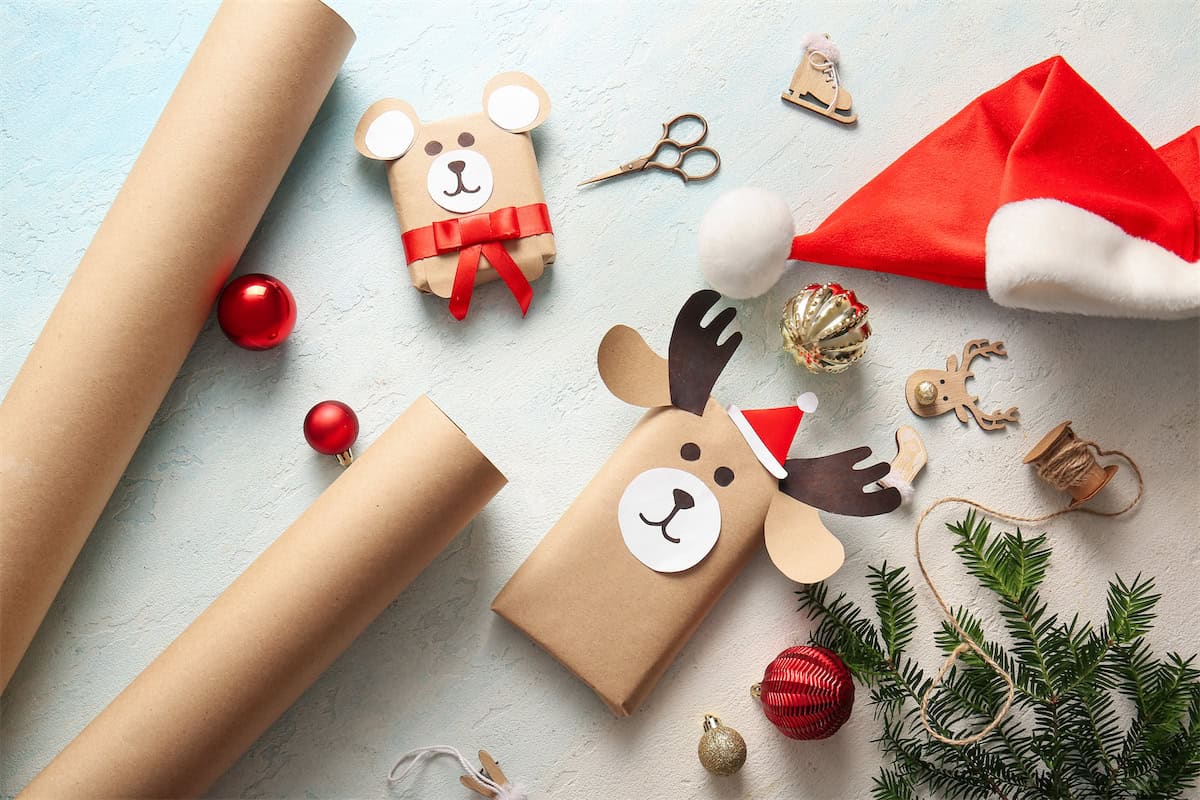
A handmade Christmas decoration carries a child’s pride long after the crafting ends. They remember the choices they made and the details they added themselves. Cute and approachable projects make those small achievements possible. Look through these 50+ ideas for activities they’ll be eager to finish themselves.
Table of Contents
- Red Paper Baubles with Lace Details
- Paper Plate Santa Face
- Popsicle Stick Christmas Tree
- Handprint Reindeer Card
- Cotton Ball Snowman Picture
- Paper Chain Christmas Garland
- Cardboard Tube Santa
- Cardboard Tube Reindeer
- Fingerprint Christmas Light Card
- Pom-Pom Christmas Tree
- Paper Snowflakes
- Pinecone Christmas Tree
- Pinecone Reindeer
- Paper Cup Snowman
- Paper Cup Christmas Tree
- Salt Dough Handprint Ornament
- Salt Dough Star Ornaments
- Felt Christmas Tree Ornament
- Felt Gingerbread Person
- Clothespin Reindeer Ornament
- Clothespin Christmas Tree
- Yarn-Wrapped Cardboard Tree
- Yarn-Wrapped Candy Cane
- Paper Bag Reindeer Puppet
- Paper Bag Santa Puppet
- Handprint Christmas Tree Painting
- Footprint Reindeer Artwork
- Fingerprint Snowman Family
- Q-Tip Painted Christmas Tree
- Sponge-Painted Christmas Tree
- Button Christmas Tree Card
- Ribbon Christmas Tree Card
- Cupcake Liner Christmas Tree
- Cupcake Liner Angel
- Egg Carton Christmas Tree
- Egg Carton Bell Ornament
- Craft Stick Snowman Ornament
- Craft Stick Santa Ornament
- Craft Stick Snowflake Ornament
- Paper Straw Christmas Tree
- Paper Straw Star Ornament
- Coffee Filter Snowflakes
- Coffee Filter Christmas Tree
- Tissue Paper Christmas Wreath
- Tissue Paper Stained Glass Ornament
- Paper Plate Christmas Wreath
- Paper Plate Christmas Tree
- Paper Plate Reindeer
- Paper Plate Christmas Elf
- Beaded Candy Cane Ornament
- Beaded Christmas Tree Ornament
- Cardboard Gingerbread House
- Pom-Pom Christmas Wreath Ornament
Red Paper Baubles with Lace Details
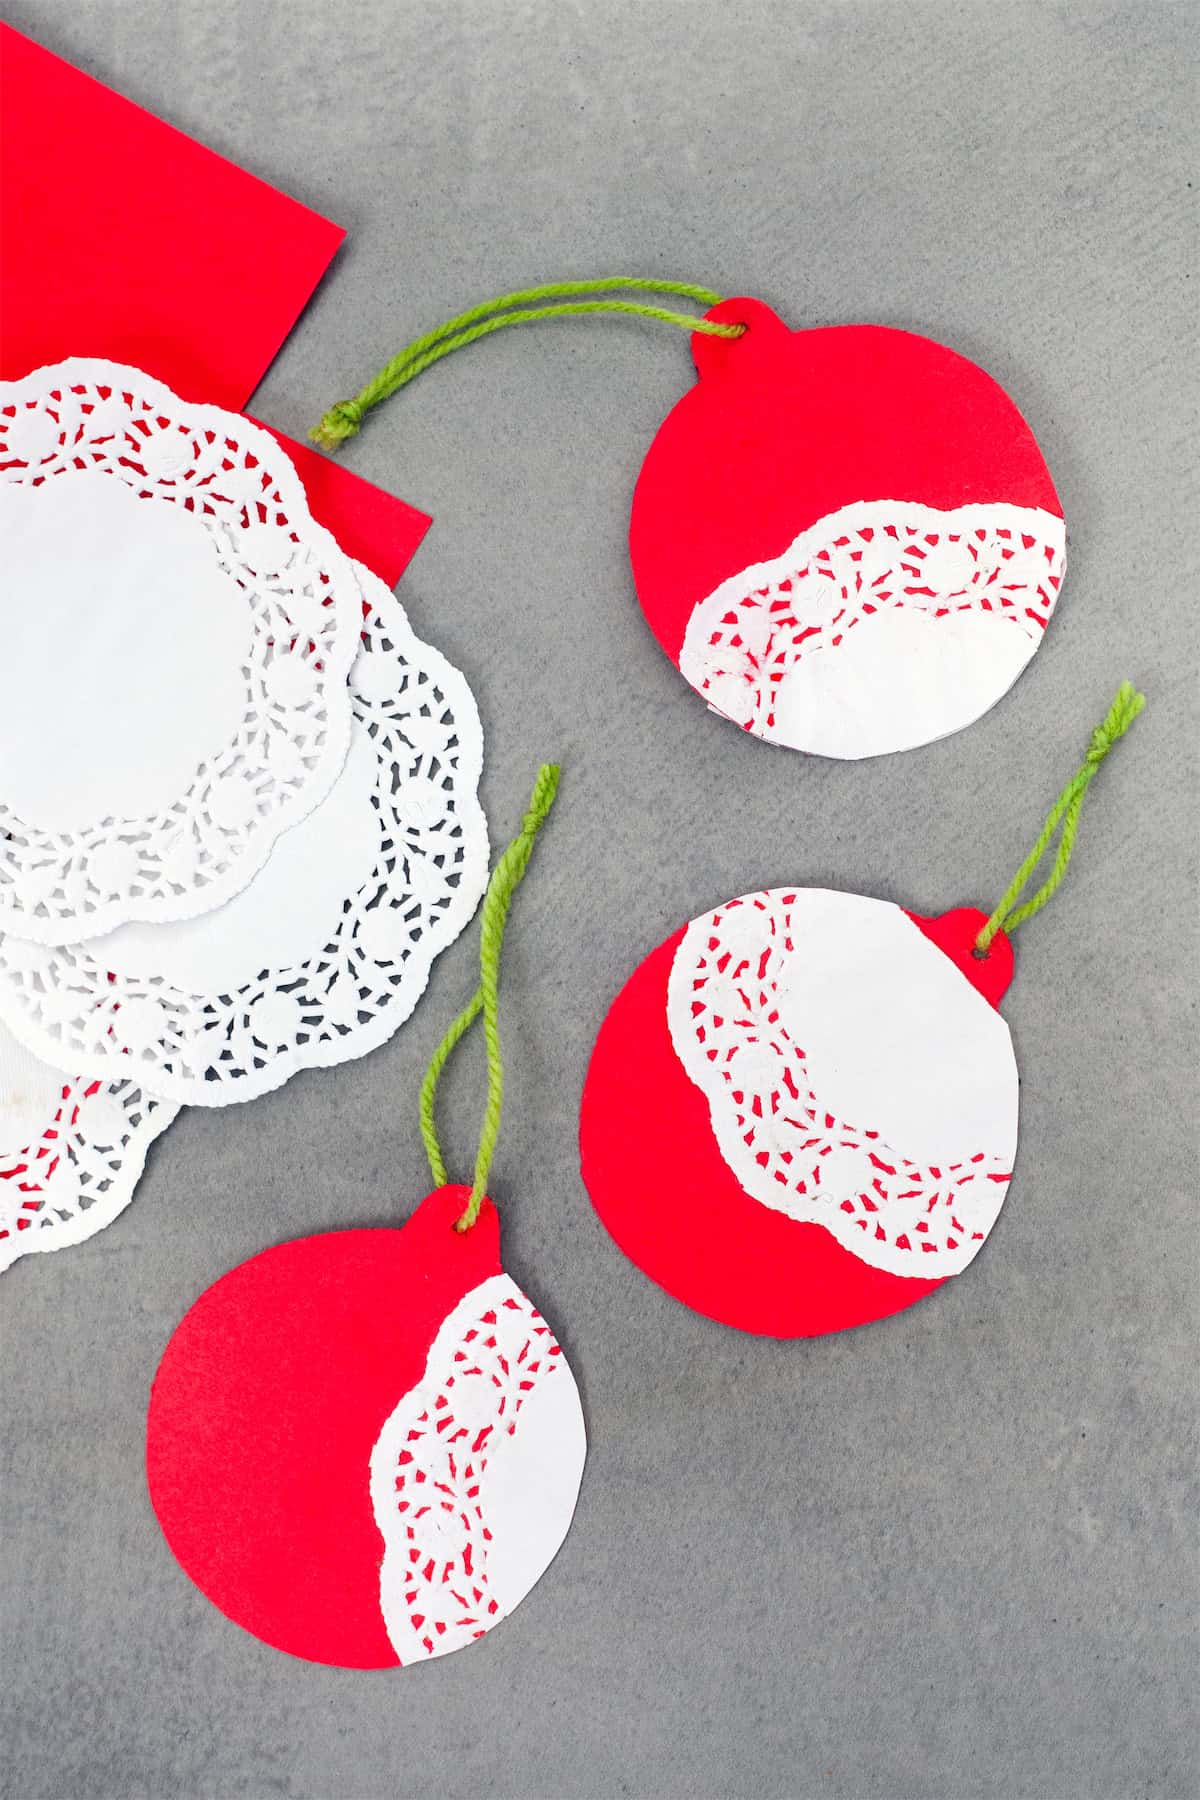
There’s no need to cut intricate paper shapes for these ornaments—the lace comes from paper doilies. Glue a section onto a red cardstock circle, then trim anything that extends past the edge. Try different placements, as shown here: across the bottom, through the middle, or along one side. Punch a hole and add string.
Paper Plate Santa Face
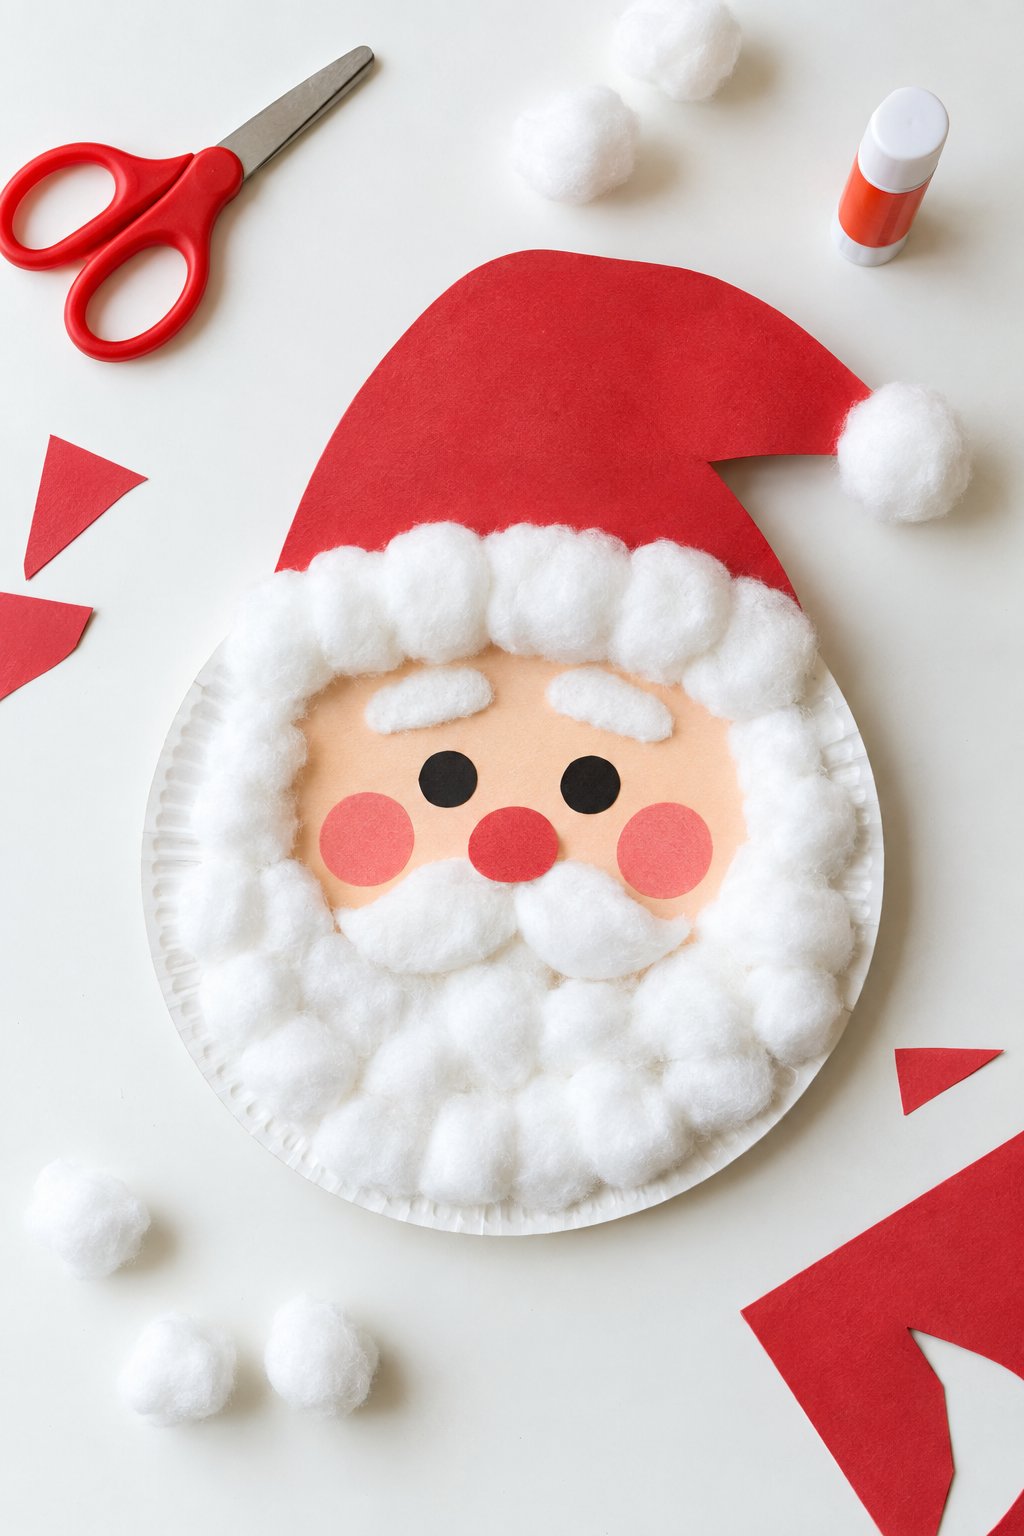
Cover the lower half of a paper plate with cotton balls for Santa’s thick beard, leaving space for a peach paper face above. His hat is a red cardstock cutout with more cotton along the brim and tip. The pink cheeks, round nose, and slightly crooked hat are details children can arrange themselves.
Popsicle Stick Christmas Tree
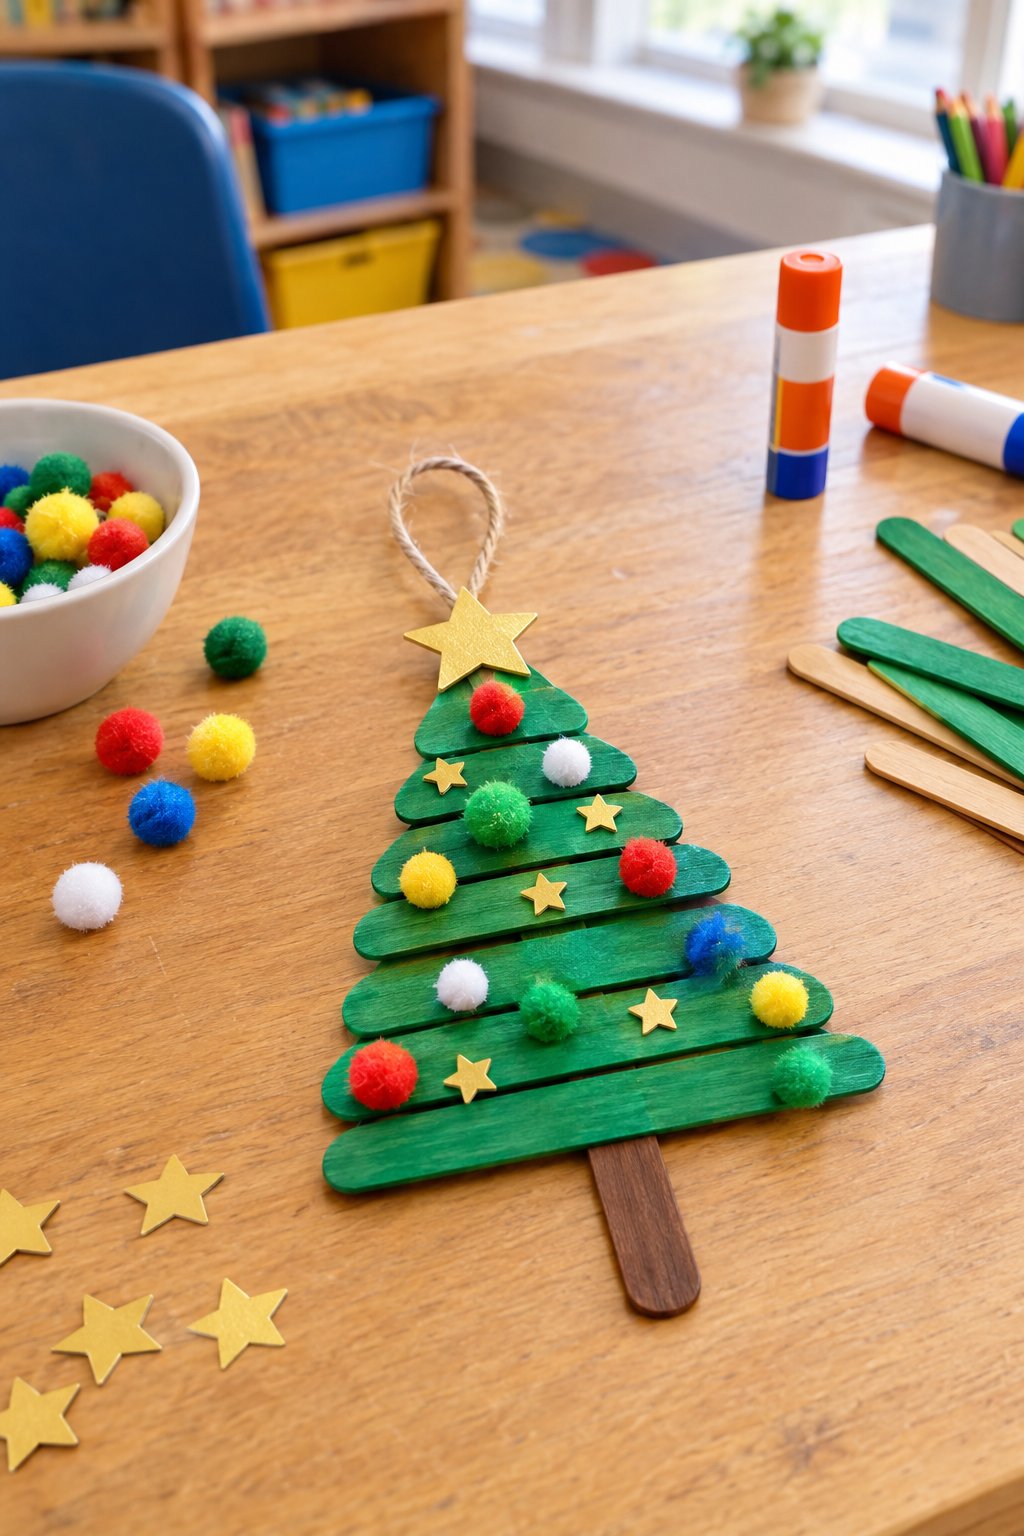
Set out the sticks from shortest to longest before reaching for the glue. Once arranged across a vertical craft stick, they should form a triangle with a short trunk beneath it. An adult can handle any trimming. Paint the branches green, let them dry, and let kids choose where the pom-poms and tiny stars belong.
Handprint Reindeer Card
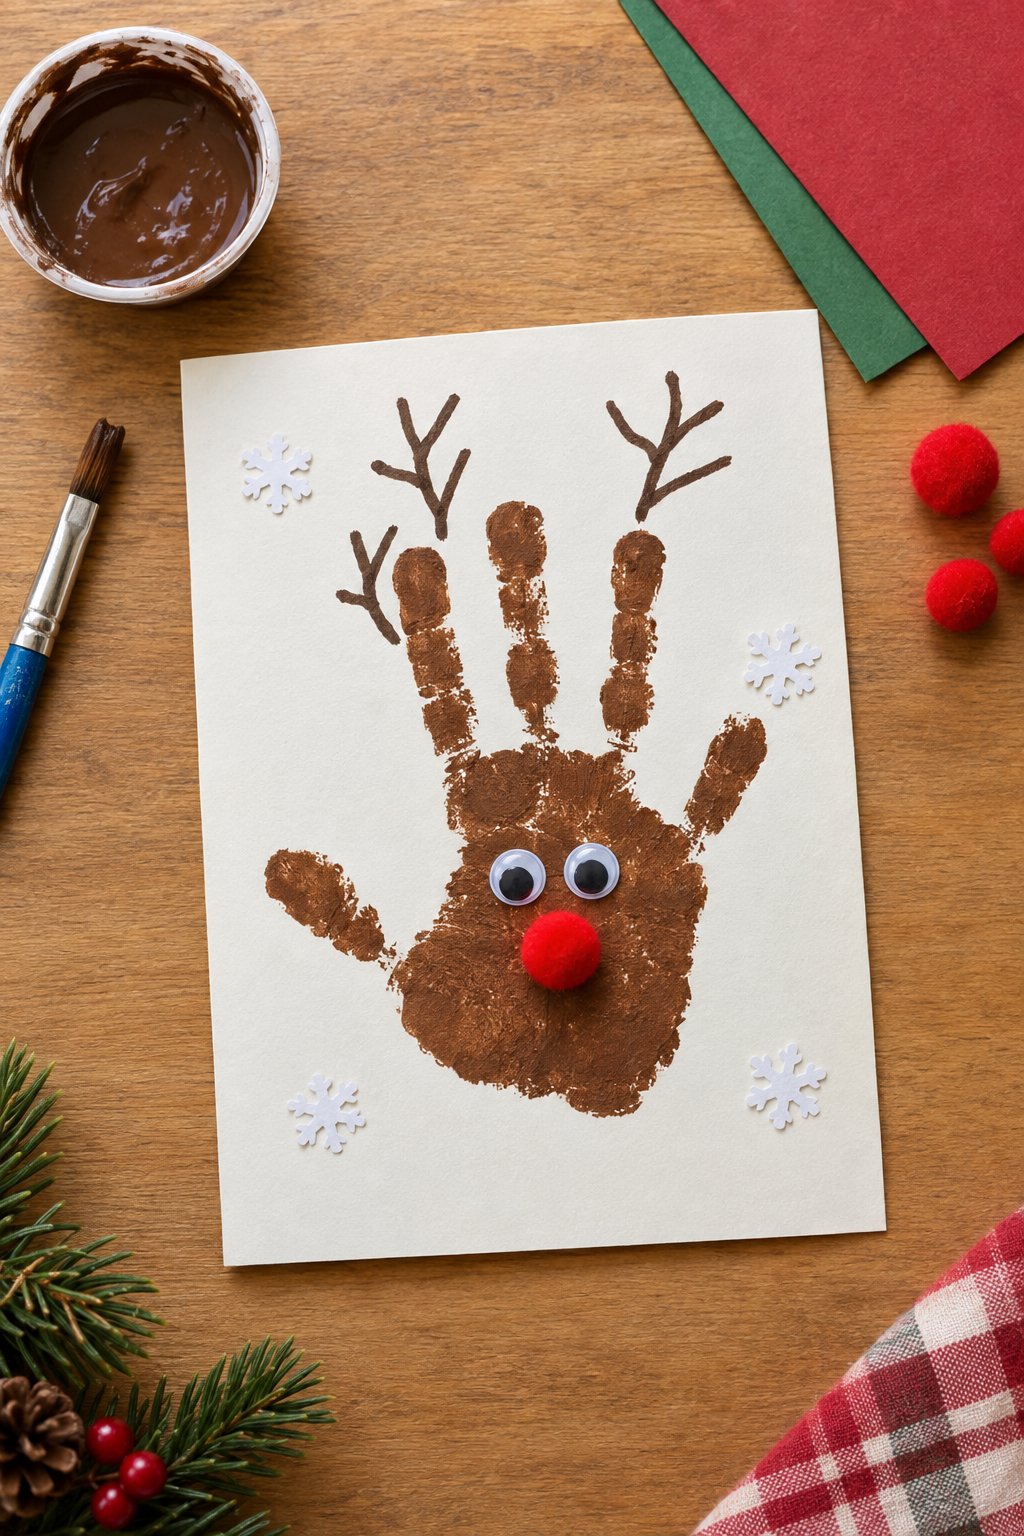
Whose handprint is that? Write your child’s name and the year inside the card before it goes to a grandparent. For the reindeer, press a hand coated in washable brown paint onto white cardstock. After it dries, draw antlers above the fingers and glue two eyes and a red pom-pom onto the palm.
Cotton Ball Snowman Picture
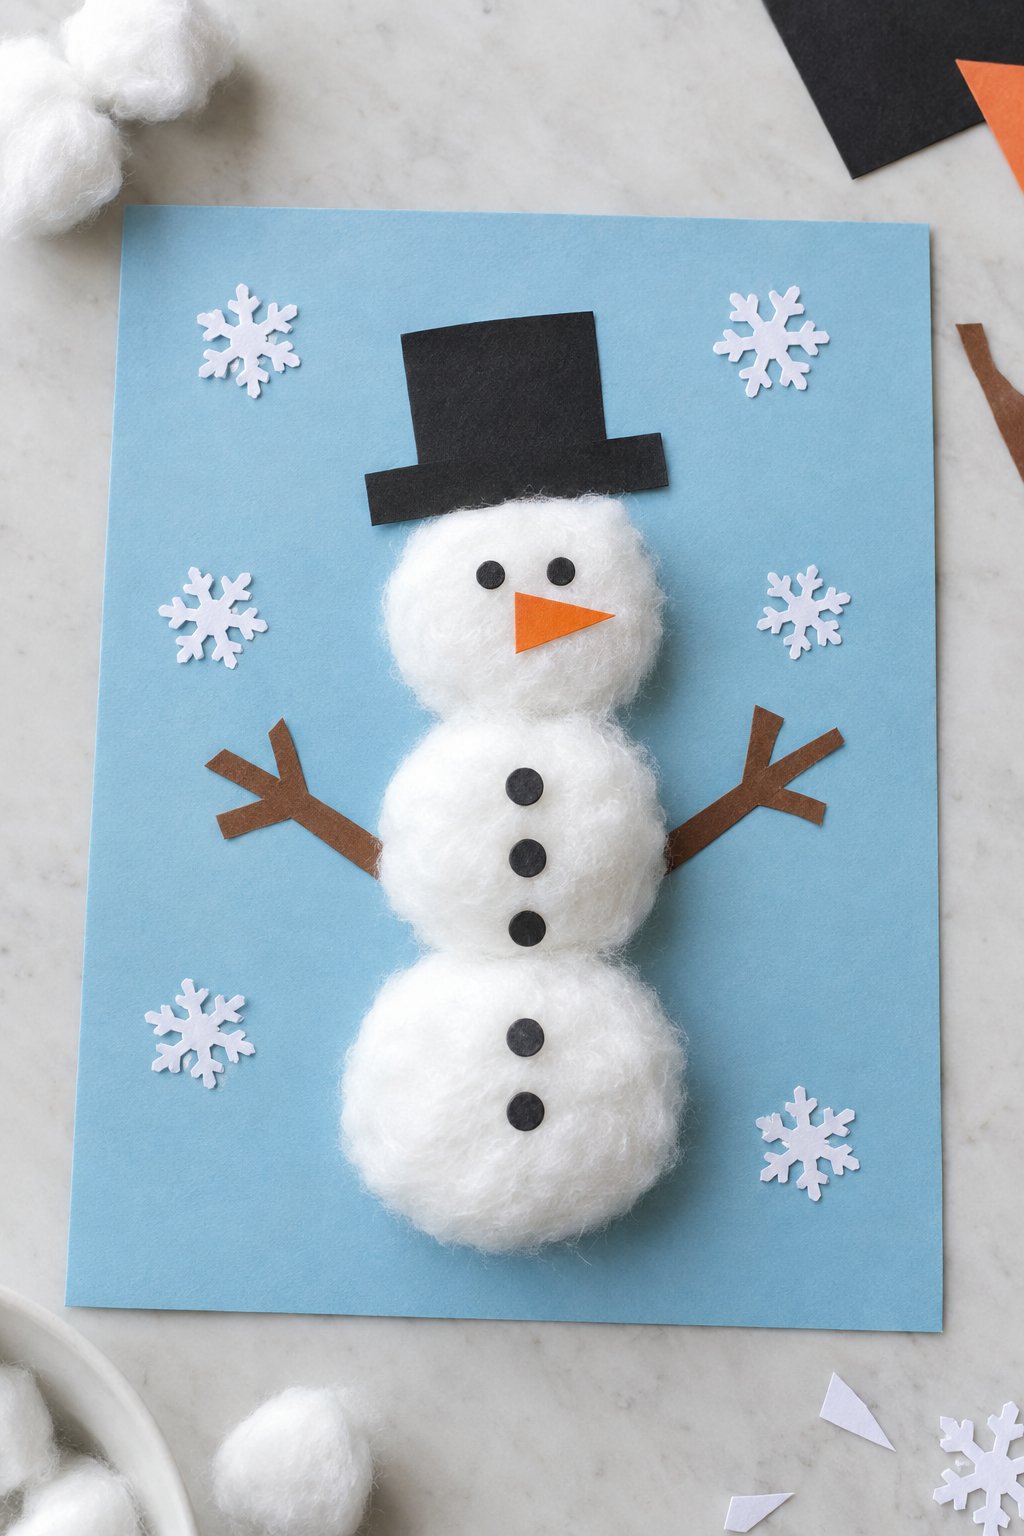
Instead of individual cotton dots, this snowman has three full, fluffy sections. Lightly draw stacked circles on blue cardstock, spread glue inside them, and press cotton into each outline. Keep the smallest circle for the head. Paper pieces supply the hat, carrot nose, and twig arms; black dots mark the eyes and buttons.
Paper Chain Christmas Garland
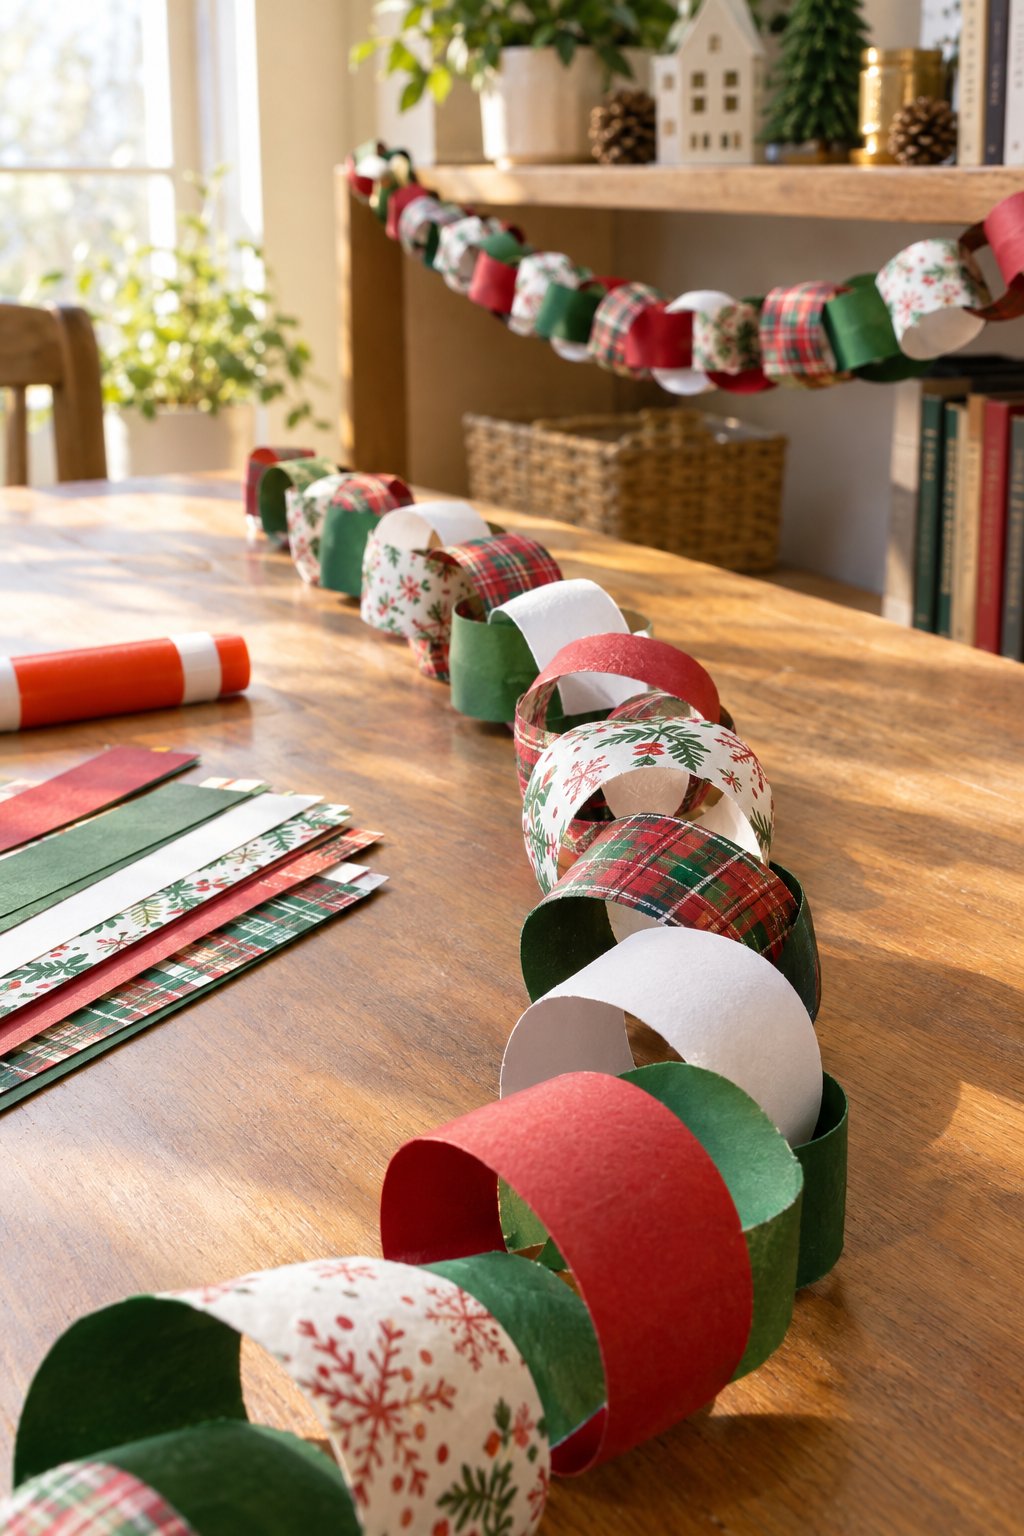
Leftover wrapping paper belongs in this project alongside the plain red and green sheets. Cut everything into similar-sized strips, glue the first into a ring, and pass the next strip through it before fastening the ends. Children can take turns adding links. Thin paper needs only a little glue to hold without becoming soggy.
Cardboard Tube Santa
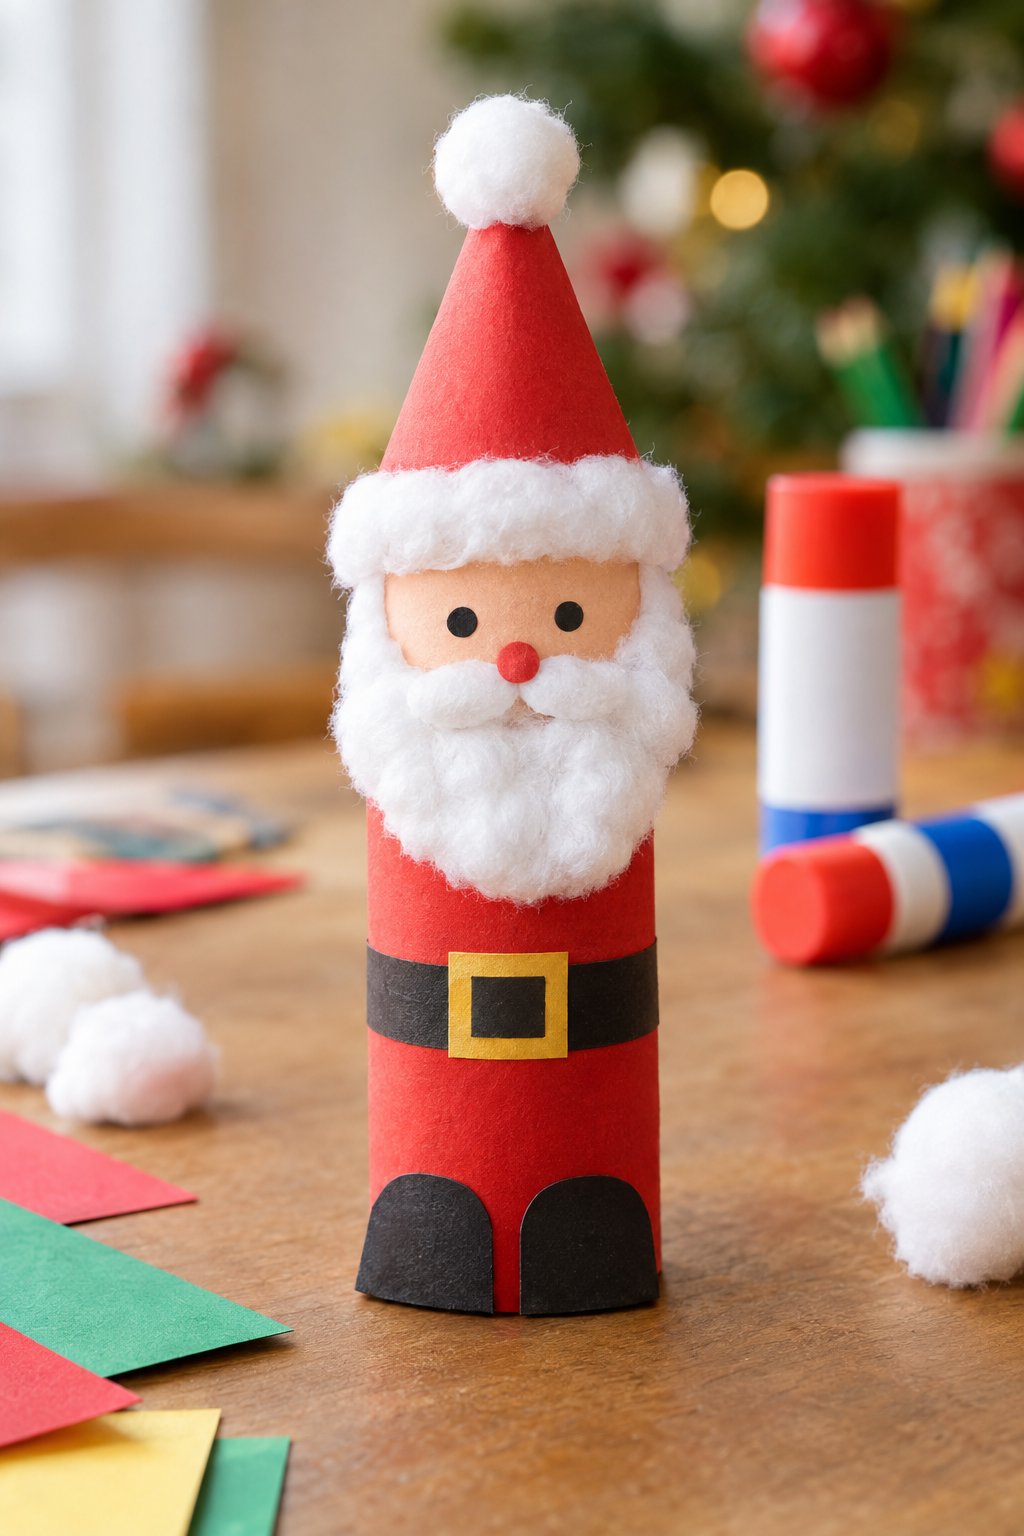
Look closely at Santa’s belt: it’s a black paper strip with a yellow square buckle and a smaller black center. Attach it around a tube wrapped in red paper, below a peach paper face. Cotton forms the beard and hat trim. Finish with a red paper cone hat and two black boots at the base.
Cardboard Tube Reindeer
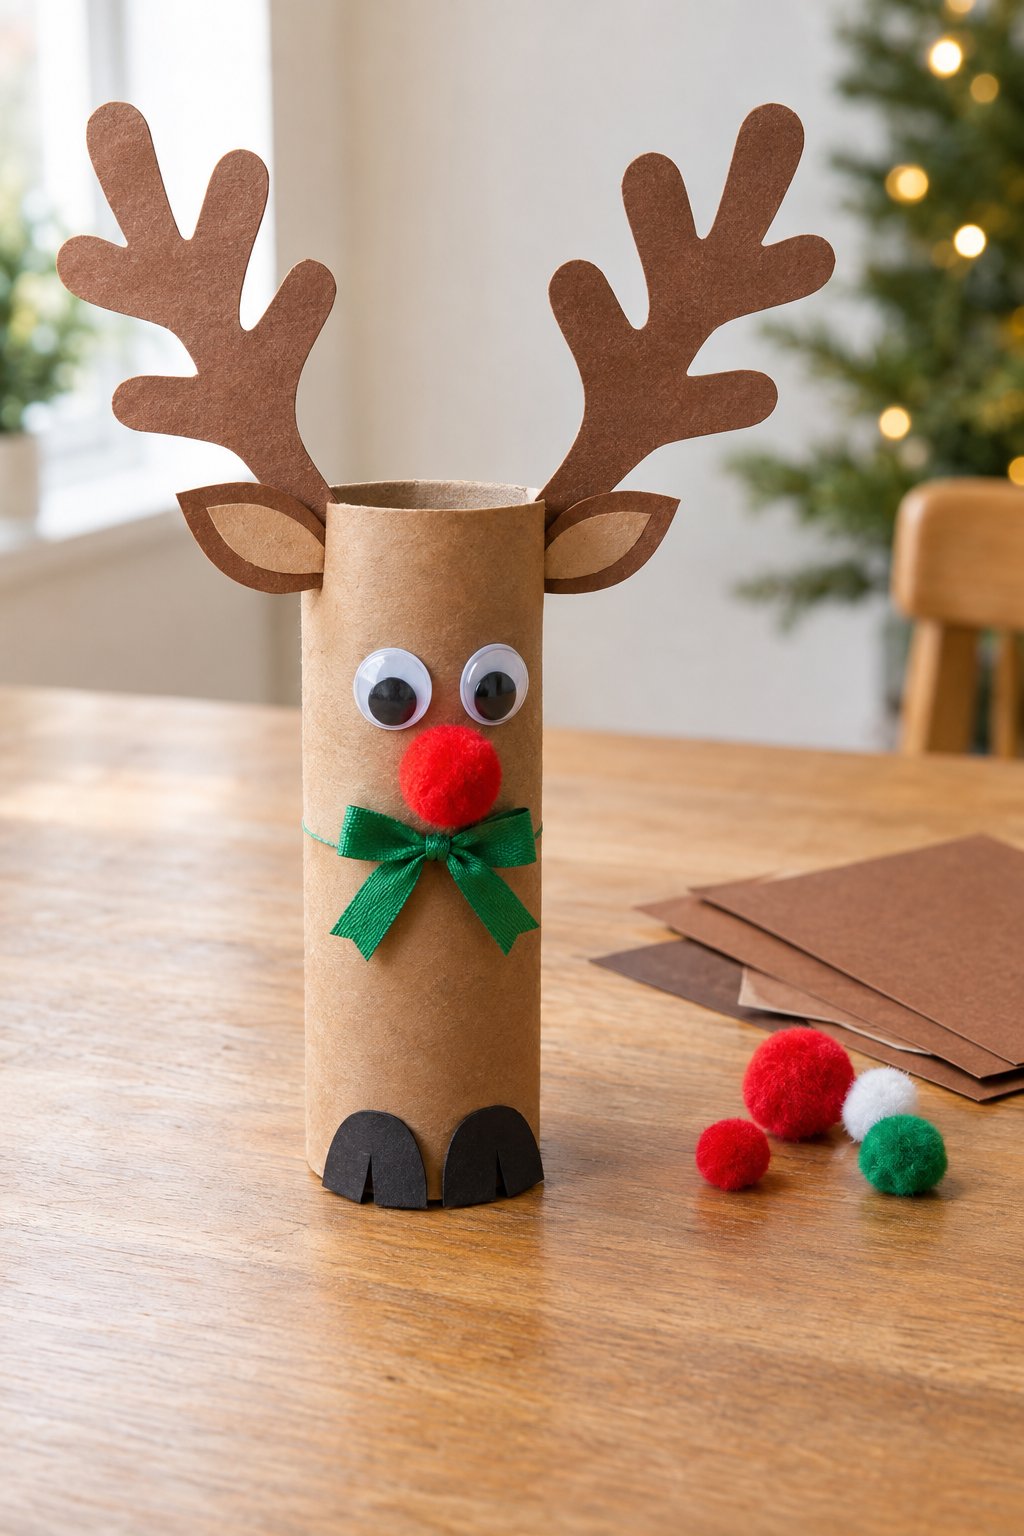
Save a cardboard tube for this reindeer; its natural brown surface needs no paint. Cut antlers from firm cardstock so they stay upright, then glue them inside the top rim. Fold small tabs at the bases of the ears to help attach them. A red pom-pom nose, green bow, and paper hooves complete the figure.
Fingerprint Christmas Light Card
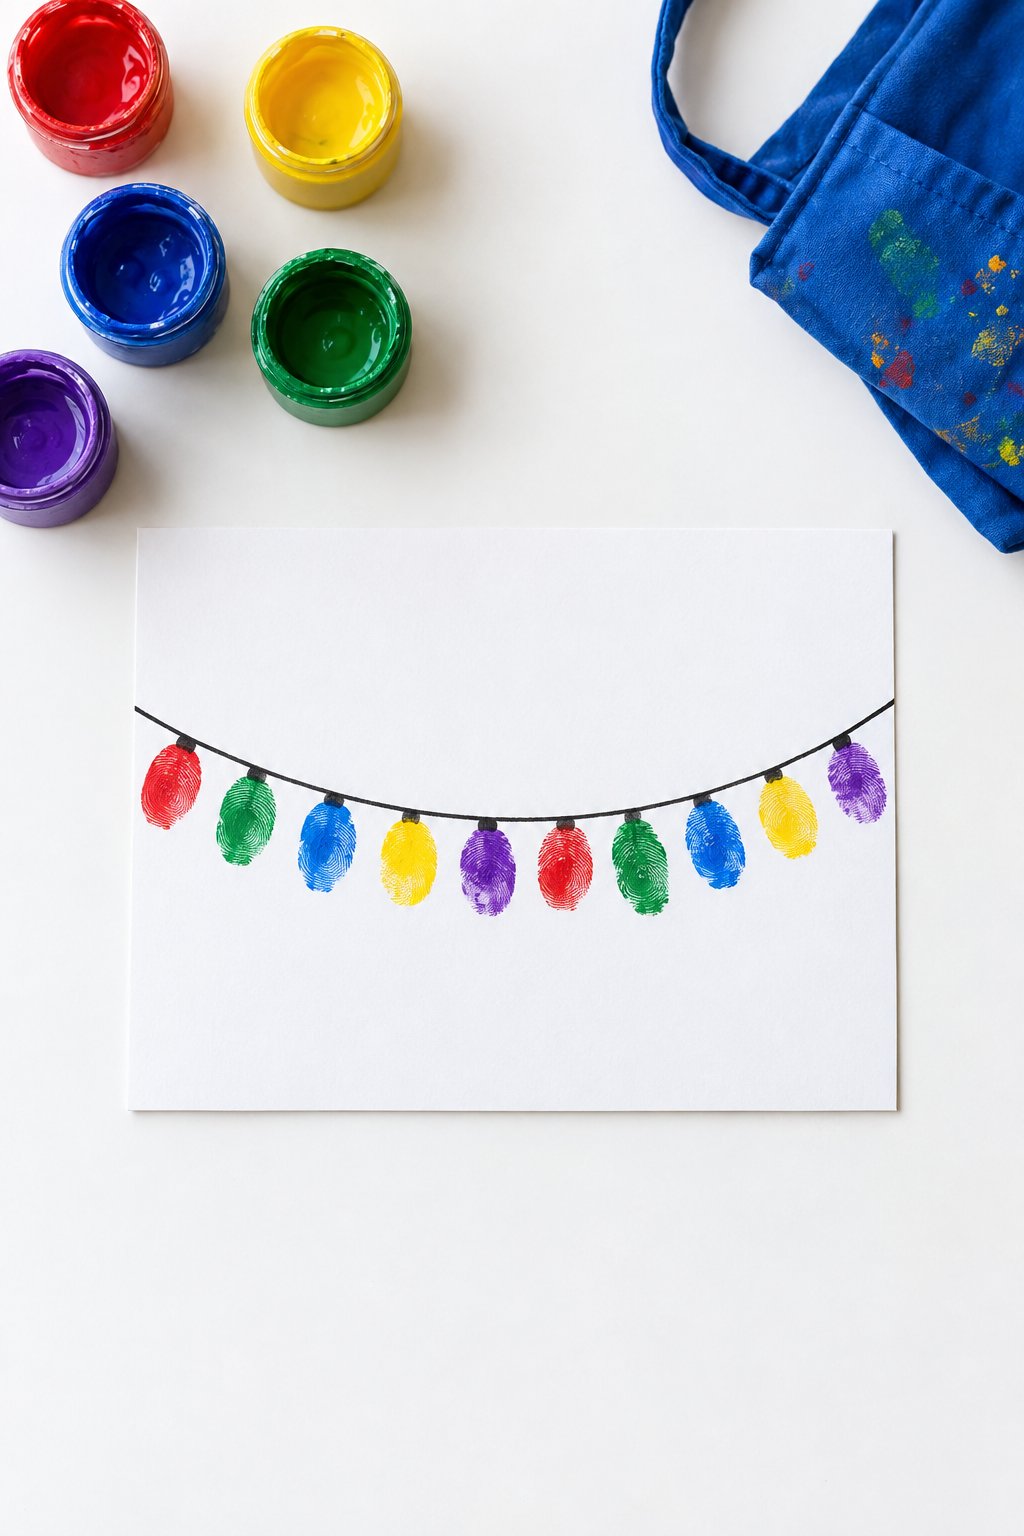
One finger and a few paint colors are enough for the bulbs on this card. Draw a curved black cord first, then stamp fingerprints just below it. Wipe fingers between colors to keep the prints clear. When dry, add tiny black connectors at the tops of the bulbs, leaving their uneven shapes as they are.
Pom-Pom Christmas Tree
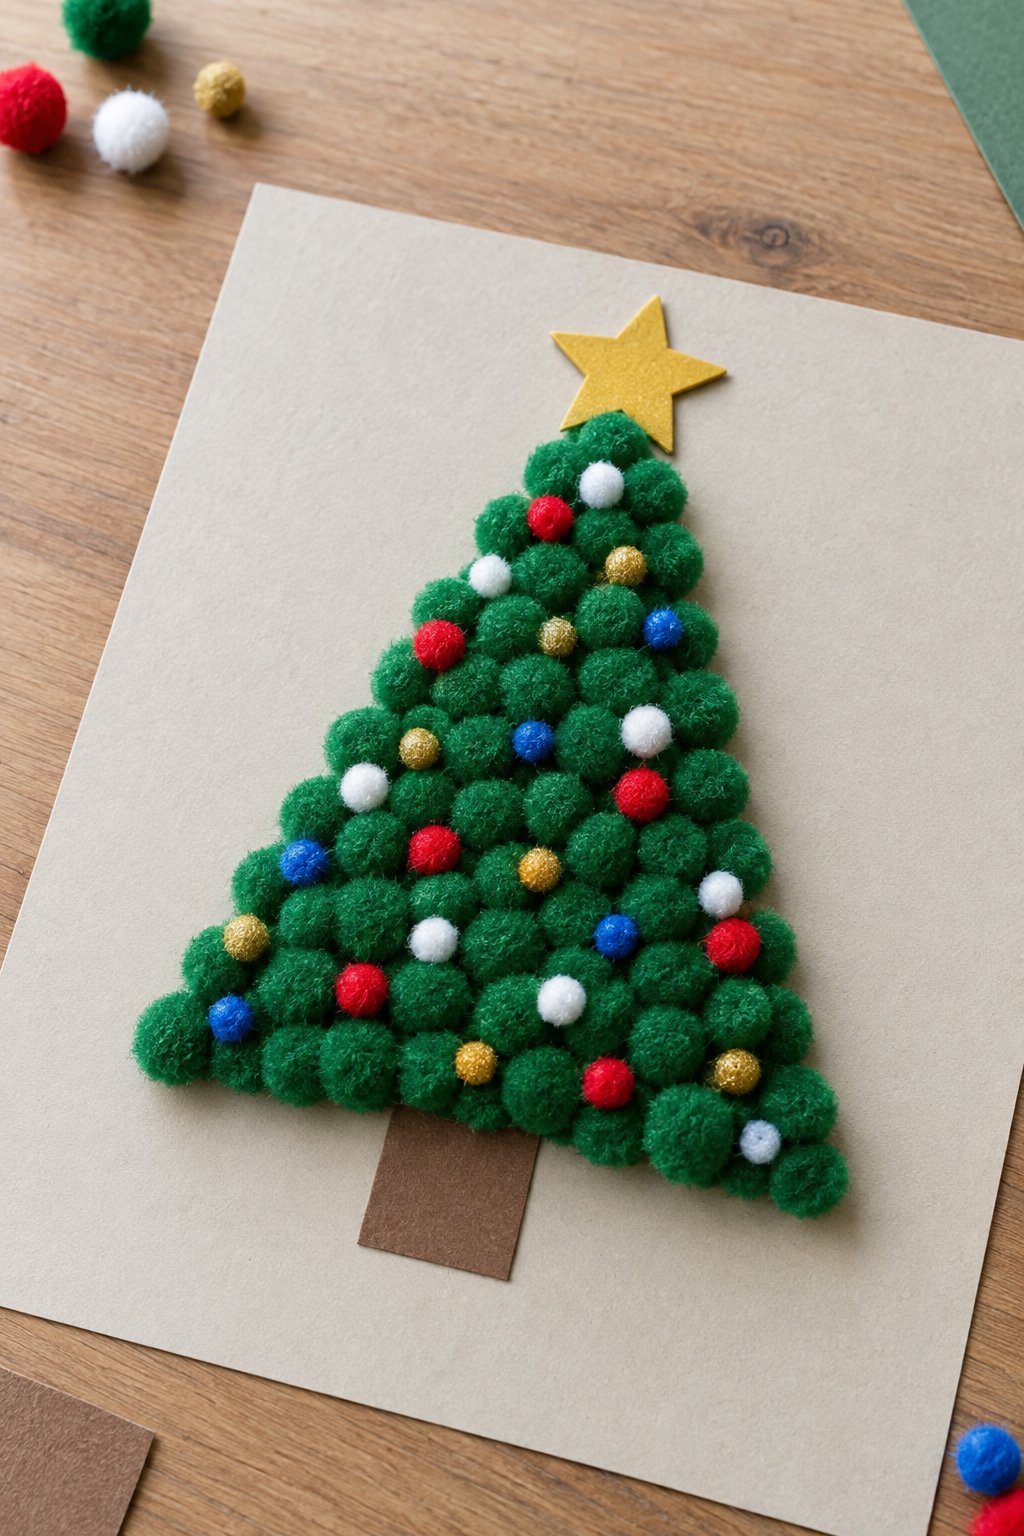
For a tree this densely covered, lay out the green pom-poms before gluing them down. Start with a wide bottom row and narrow each row toward the top. A sturdy card backing will support the weight. Fill gaps with smaller colored pom-poms, then attach the brown paper trunk and gold star.
Paper Snowflakes
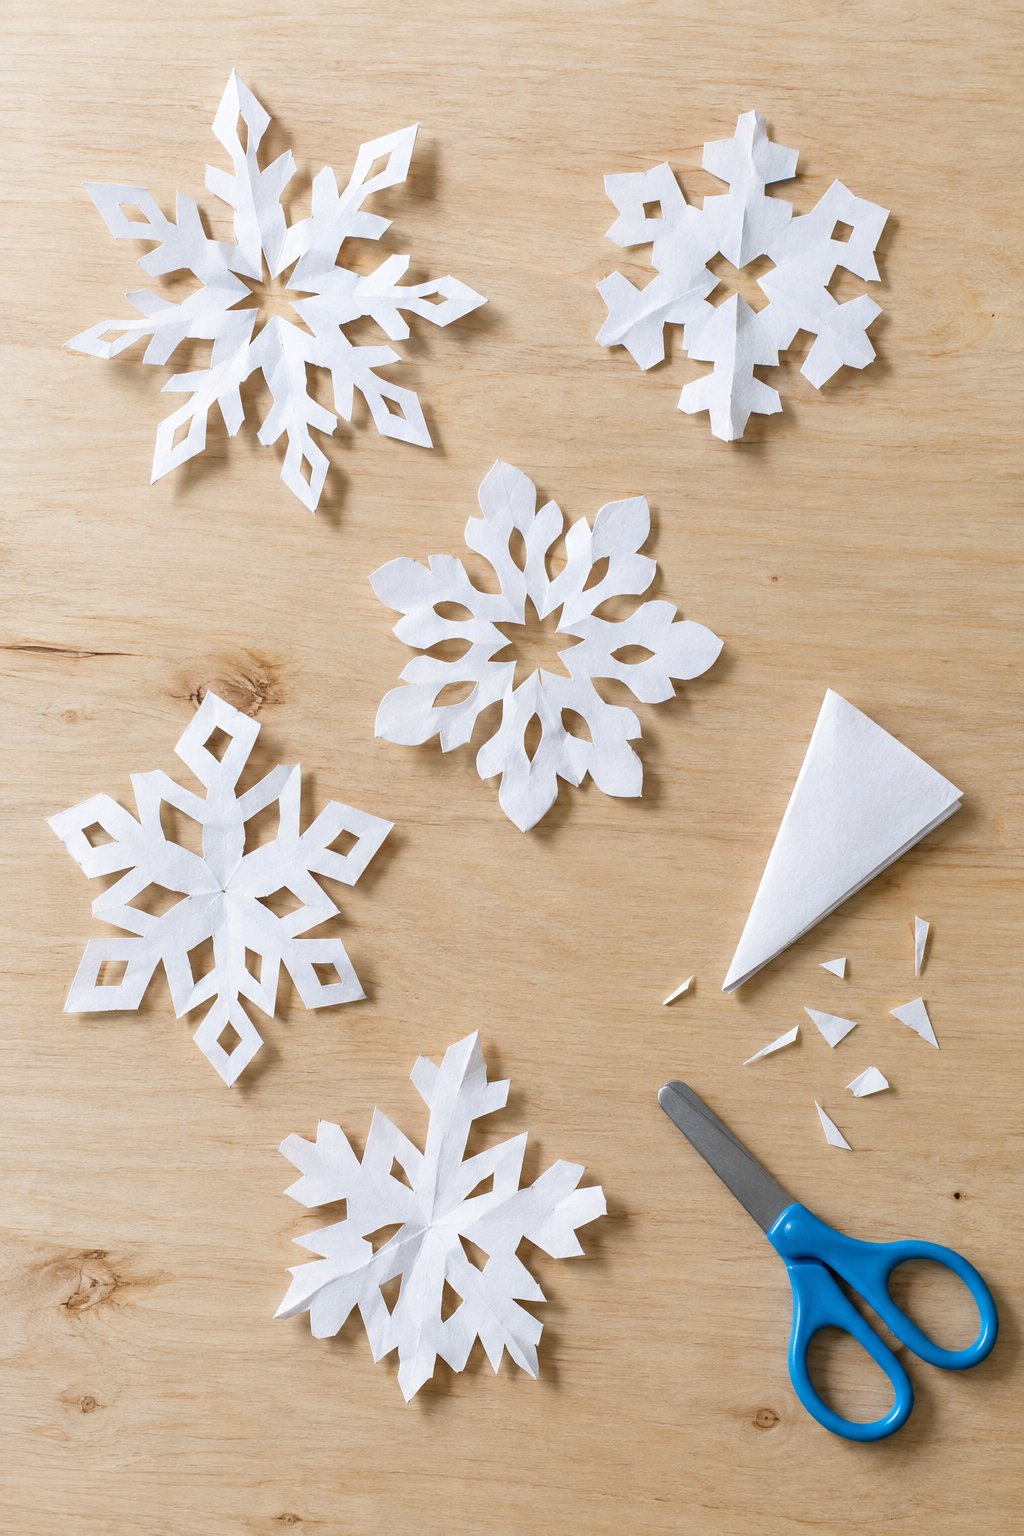
The surprise comes when children unfold the paper and see where their cuts have repeated. Start with a thin paper square folded diagonally twice, then fold the triangle into thirds and trim the uneven end. Snip small notches from the edges while keeping the folded piece connected. Open carefully and press flat beneath a book.
Pinecone Christmas Tree
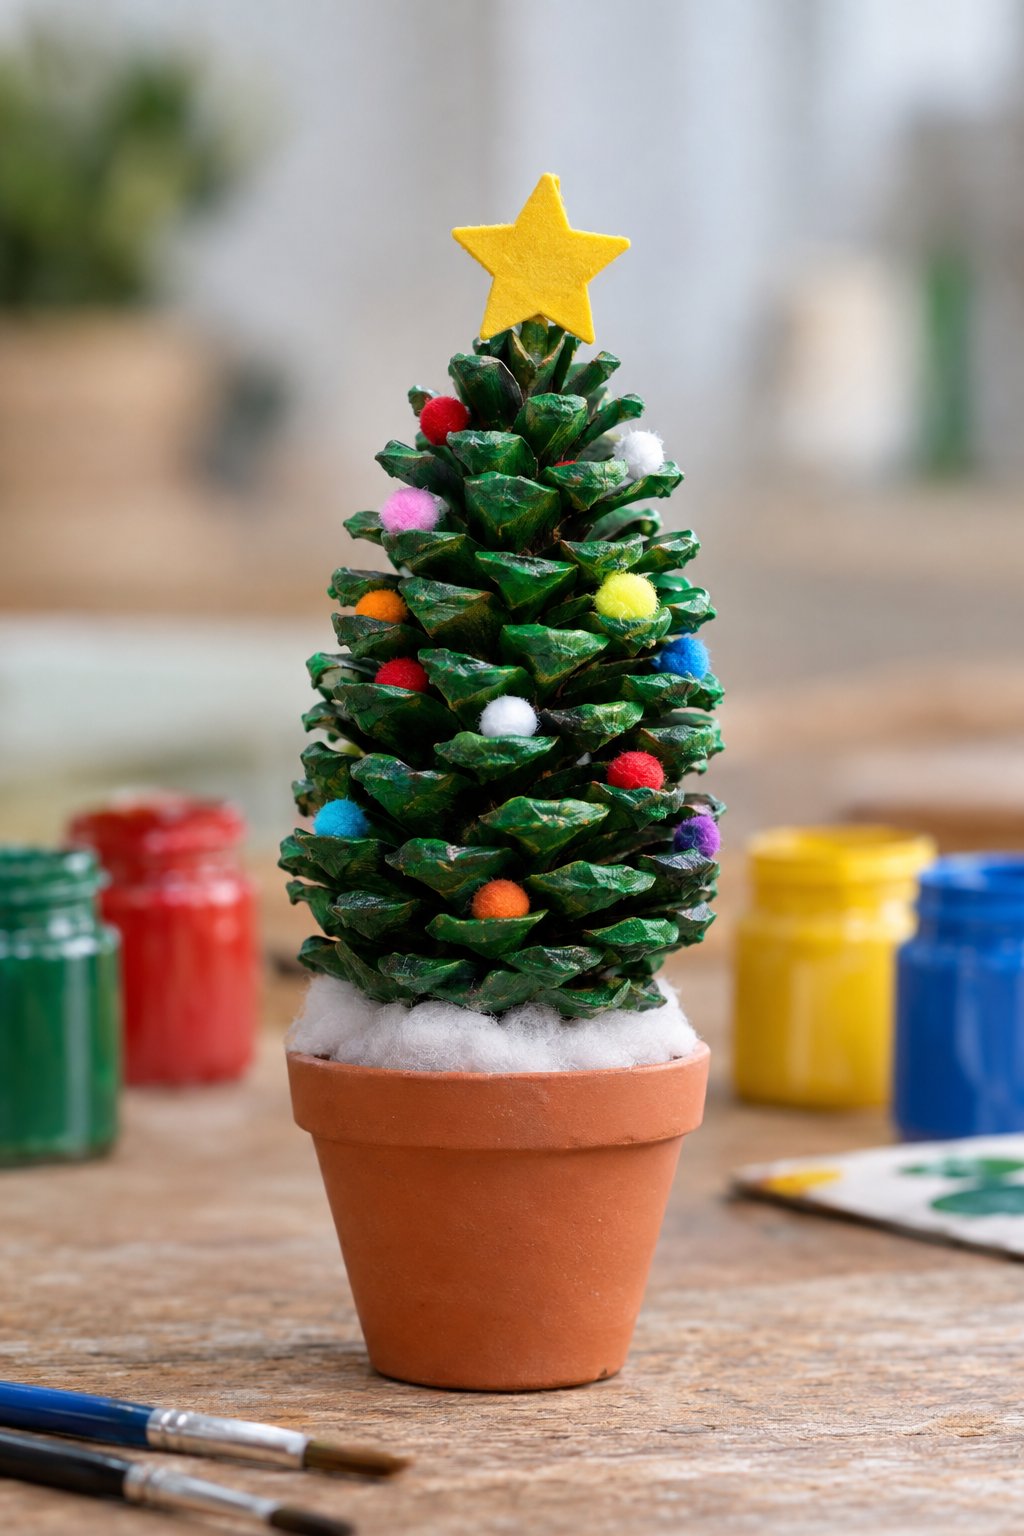
Choose a pinecone with open scales so there’s room to attach the tiny pom-pom ornaments. Paint it green, including the undersides of the tips, and leave it to dry. Glue the base securely into a small terracotta pot. Cotton hides the join beneath the tree, while a yellow star sits at the top.
Pinecone Reindeer
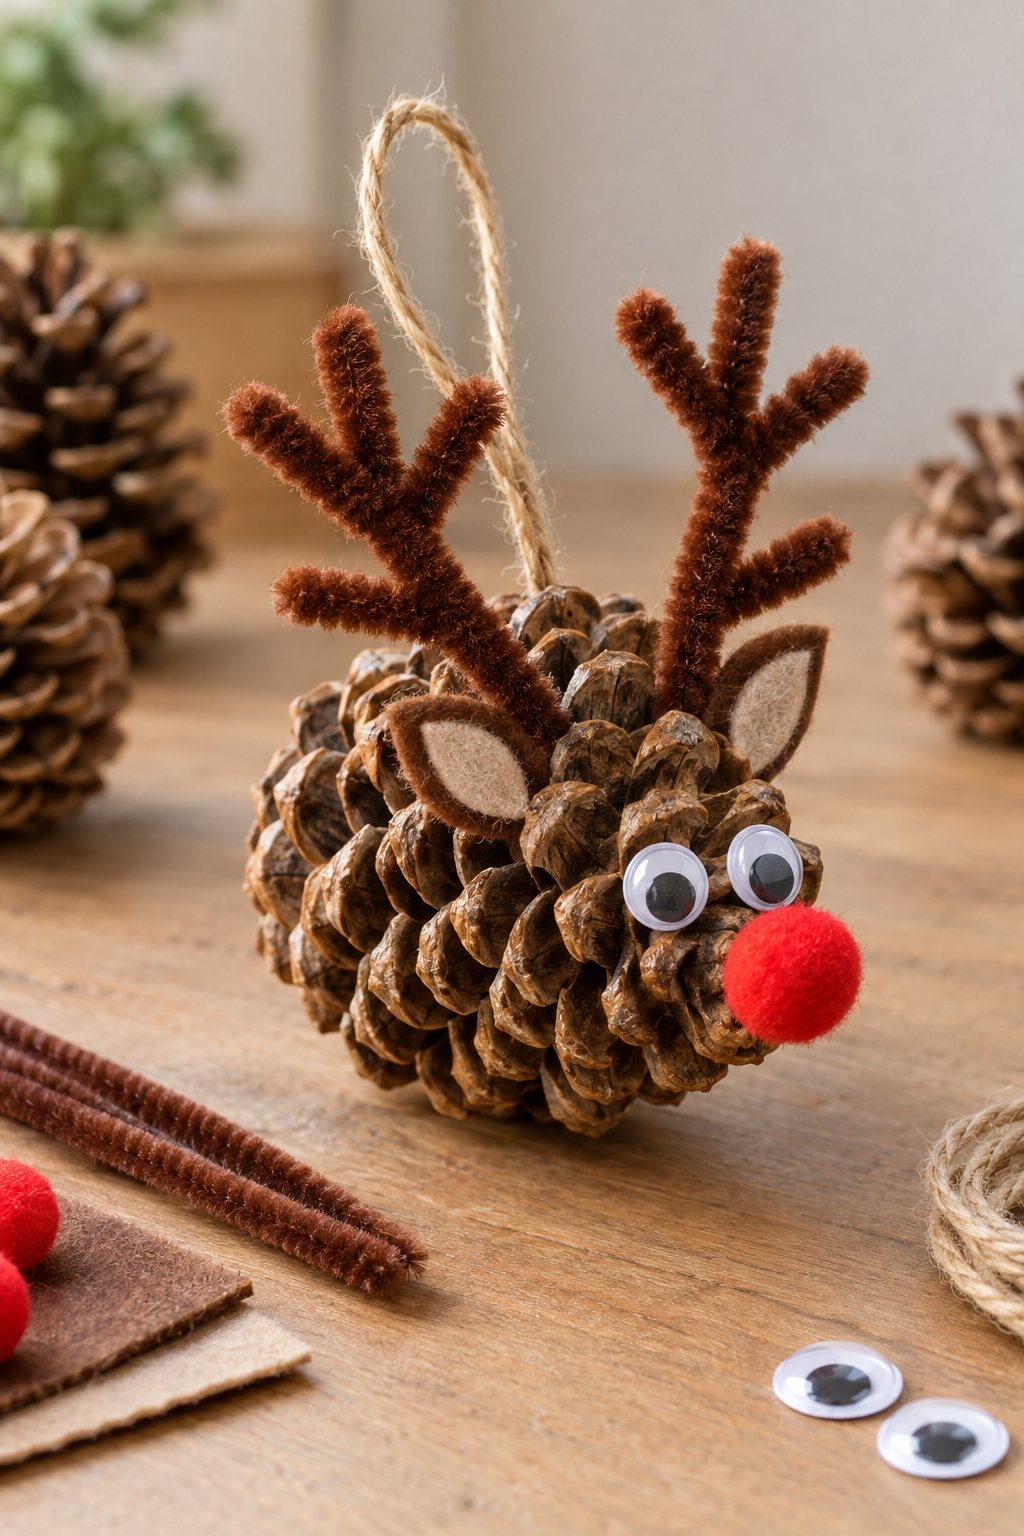
Here, the pinecone rests on its side, with the face at the narrower end. Test that position on the table before attaching anything. Glue on felt ears, googly eyes, and a red nose, then tuck brown pipe-cleaner antlers between the upper scales. Tie on a twine loop if you want to hang it.
Paper Cup Snowman
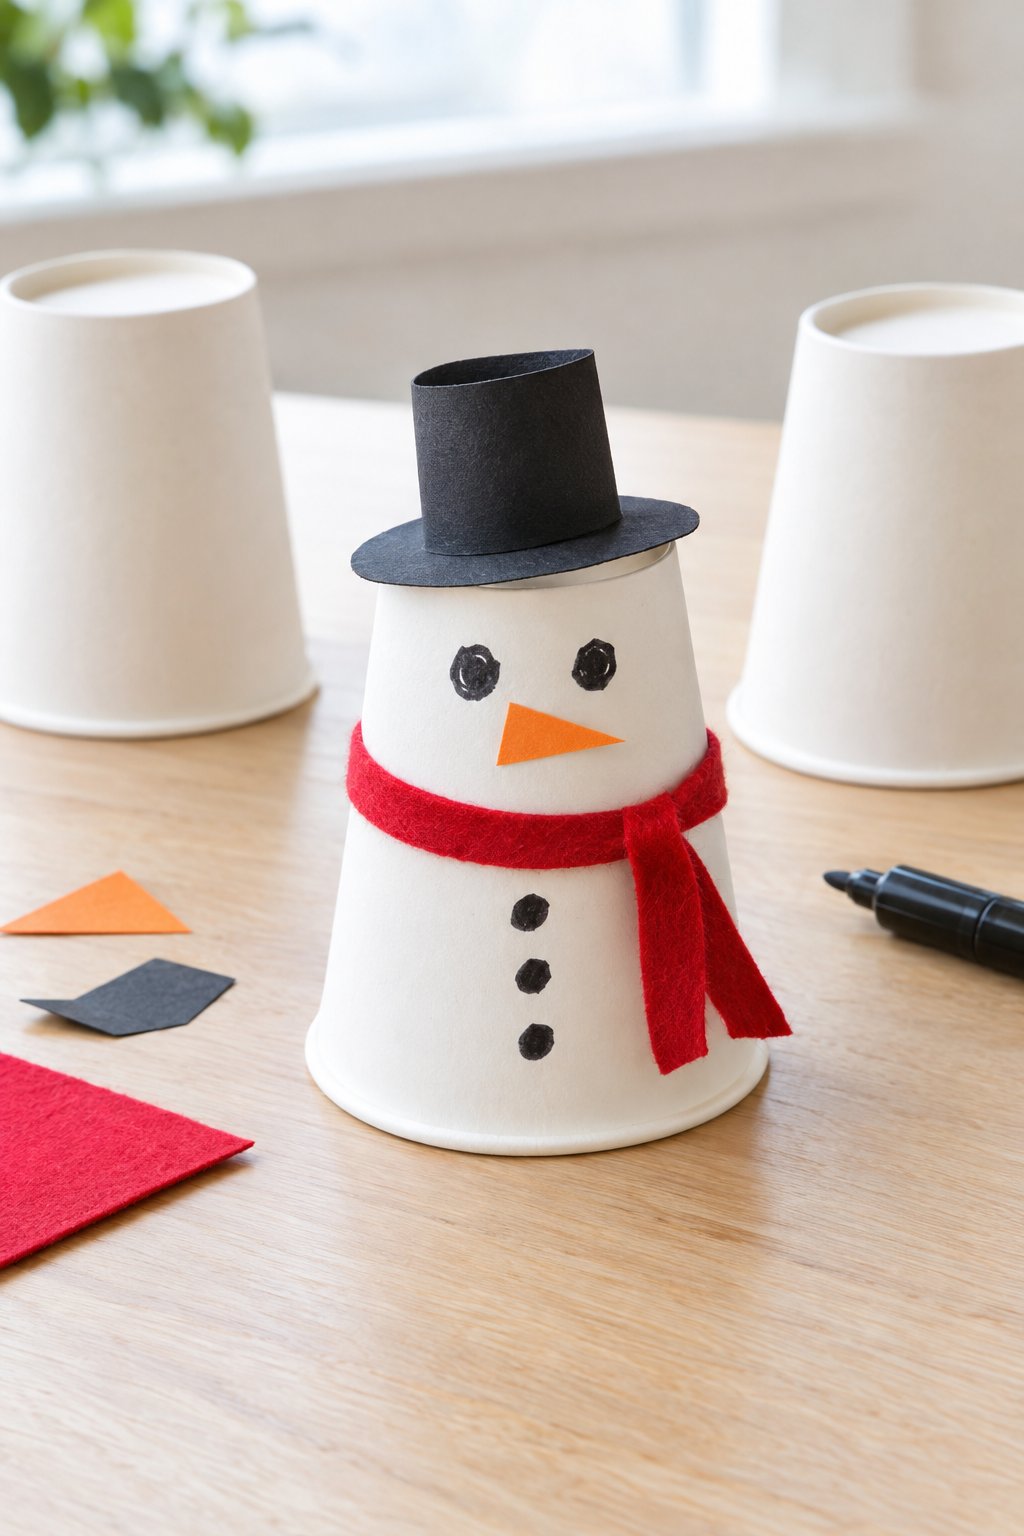
No white paint is necessary if you start with a plain white paper cup. Flip it upside down, draw the eyes and buttons, and attach an orange paper carrot nose. A red felt strip serves as the scarf. For the hat, glue a short black paper cylinder onto a wider cardstock circle, then secure it on top.
Paper Cup Christmas Tree
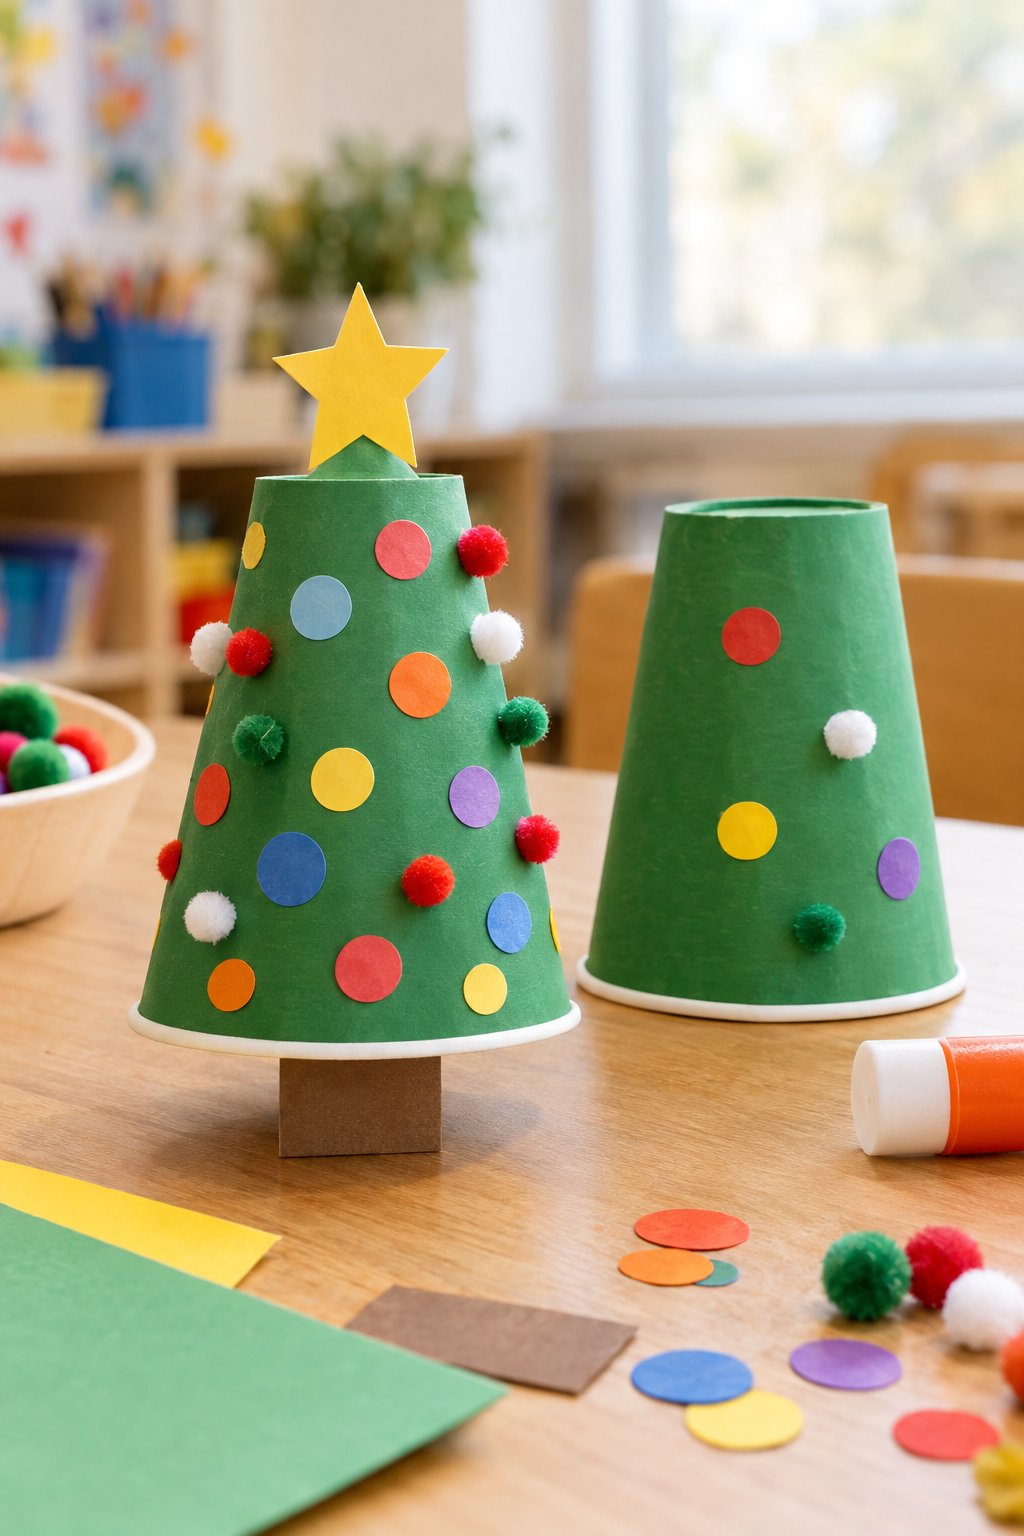
Let children decide how crowded their tree should be: a few paper dots or pom-poms all around. The base is an upside-down cup painted green and left to dry. Glue on the decorations, then attach a cardstock star above it. A short brown paper tab at the lower edge suggests a trunk.
Salt Dough Handprint Ornament
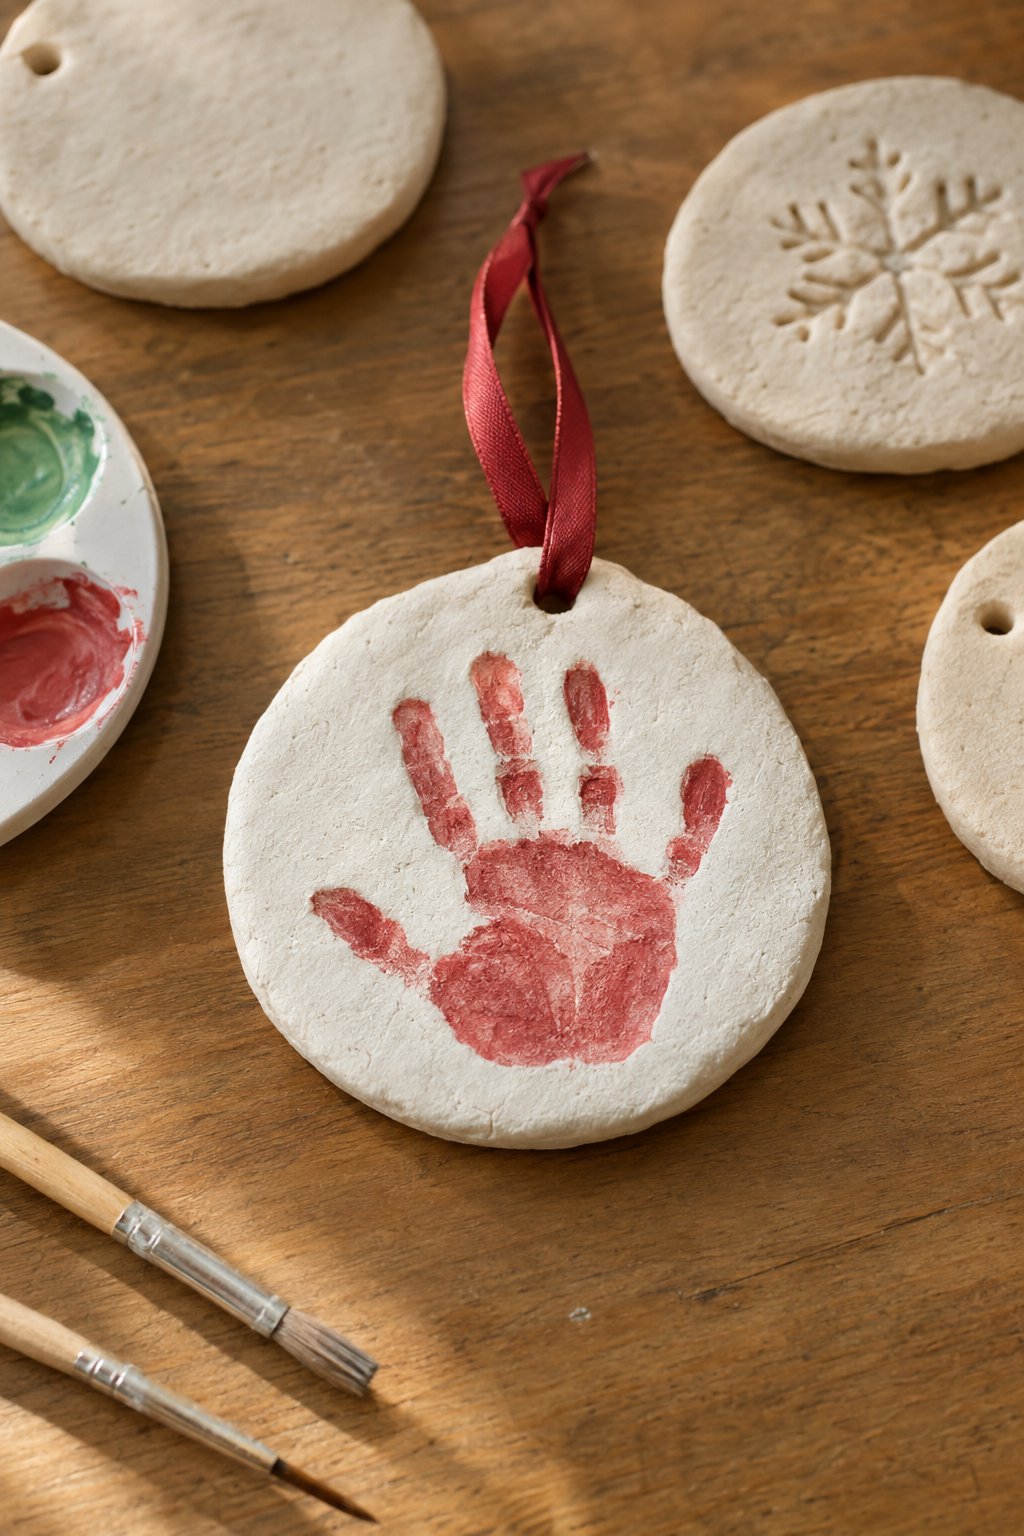
That little handprint is the detail to preserve, so press the palm and each finger gently into an evenly rolled salt dough disc. Use two parts flour to one part salt, with water added gradually until firm. Pierce a ribbon hole before drying completely. Paint the recessed print red, leaving the surrounding dough plain.
Salt Dough Star Ornaments
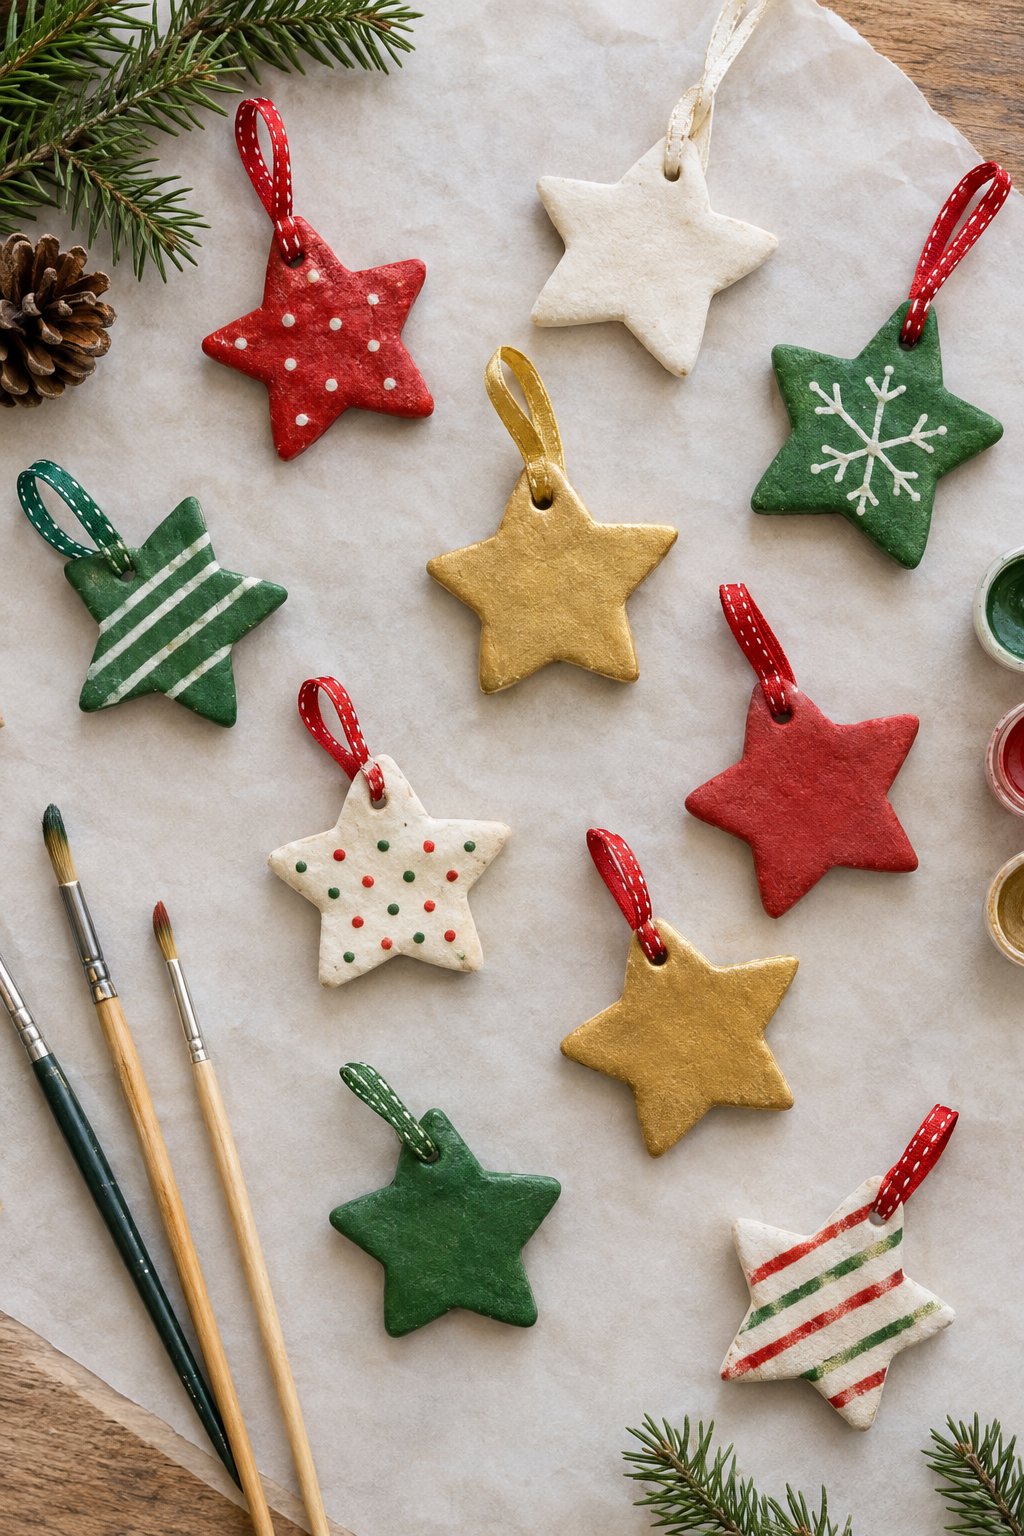
Stripes, dots, and a few fine white lines are enough to decorate this set—each star can be different. Prepare firm salt dough from two parts flour, one part salt, and water added gradually. Roll it evenly, cut stars with a cookie cutter, and pierce the ribbon holes. Dry thoroughly before painting either side.
Felt Christmas Tree Ornament
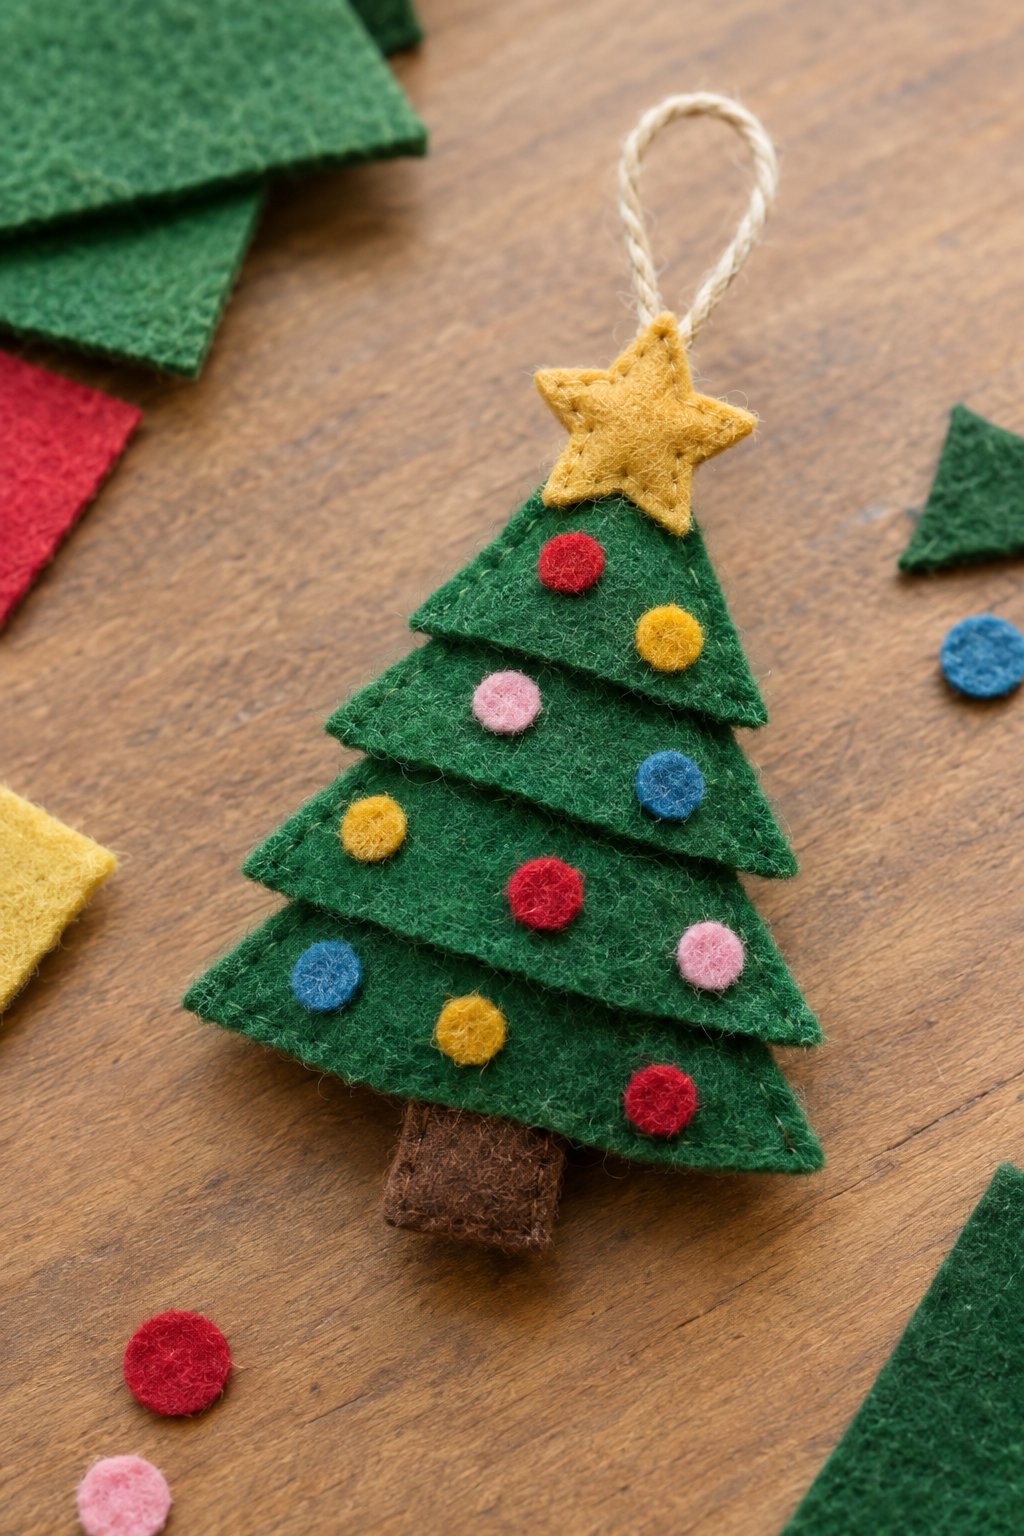
You can make a no-sew version of this layered felt tree with fabric glue. Cut three green sections, then overlap them on a felt backing with the largest at the bottom. Slip a brown trunk beneath the lowest layer. Small felt circles replace baubles, and a twine loop attaches behind the yellow star.
Felt Gingerbread Person
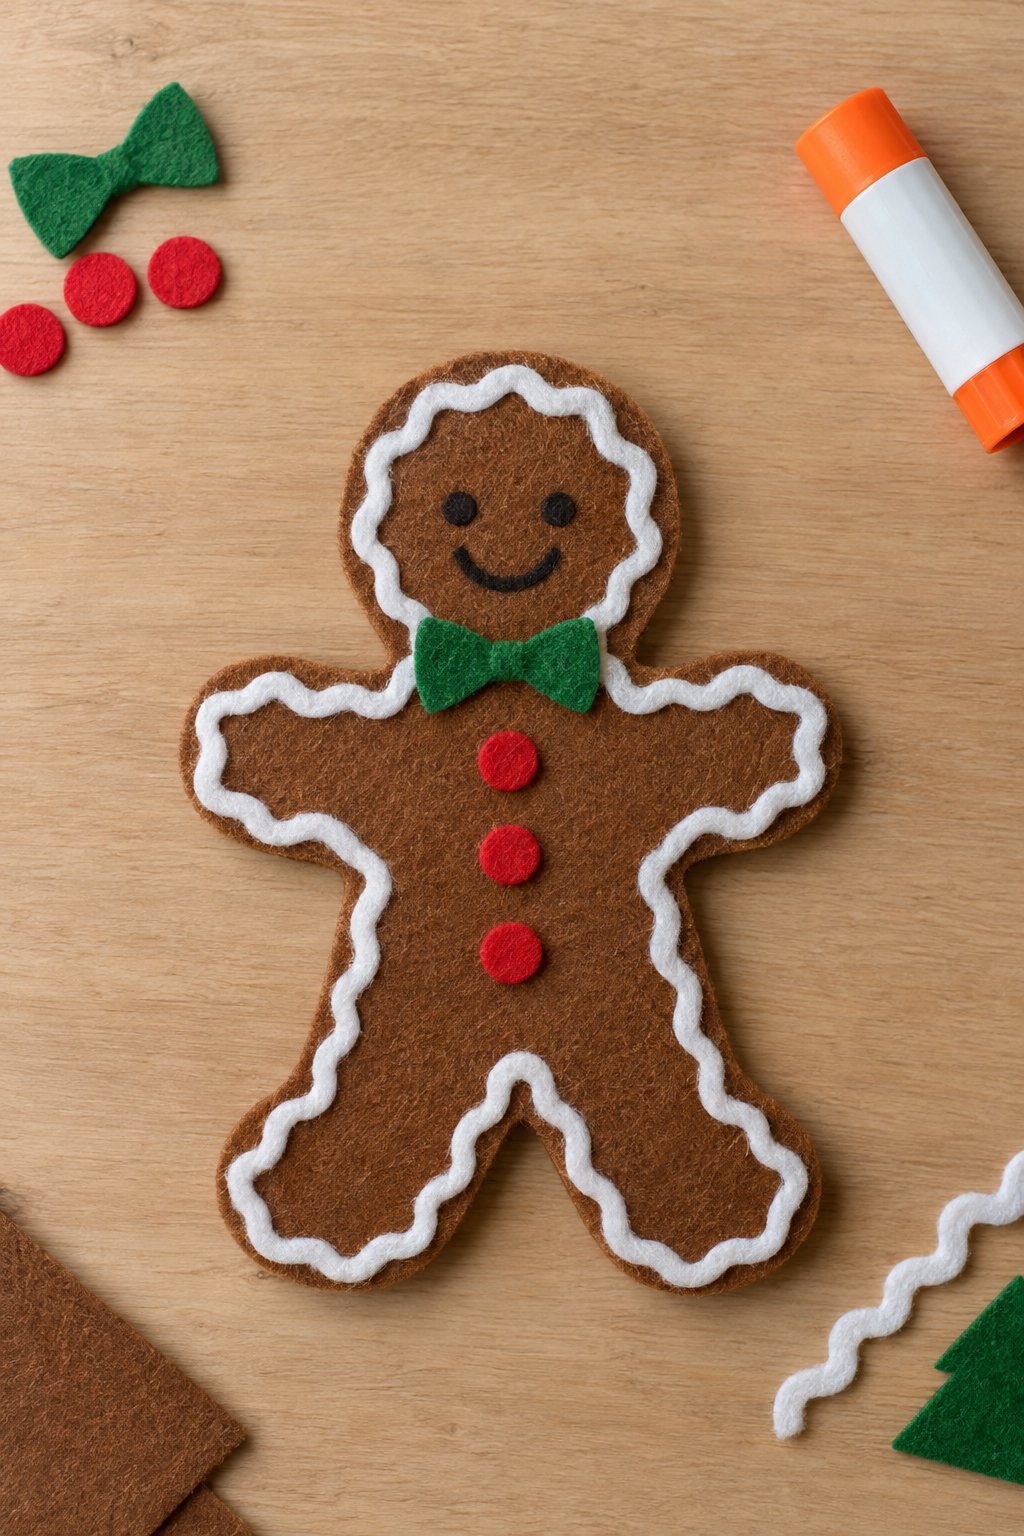
The white outline looks like icing, but yarn or ric-rac is much easier for small hands to position than wet paint. Glue it just inside the edge of a brown felt gingerbread cutout. Leave space for a smiling face, three red felt buttons, and a green bow. Fabric glue suits this project better than a paper glue stick.
Clothespin Reindeer Ornament
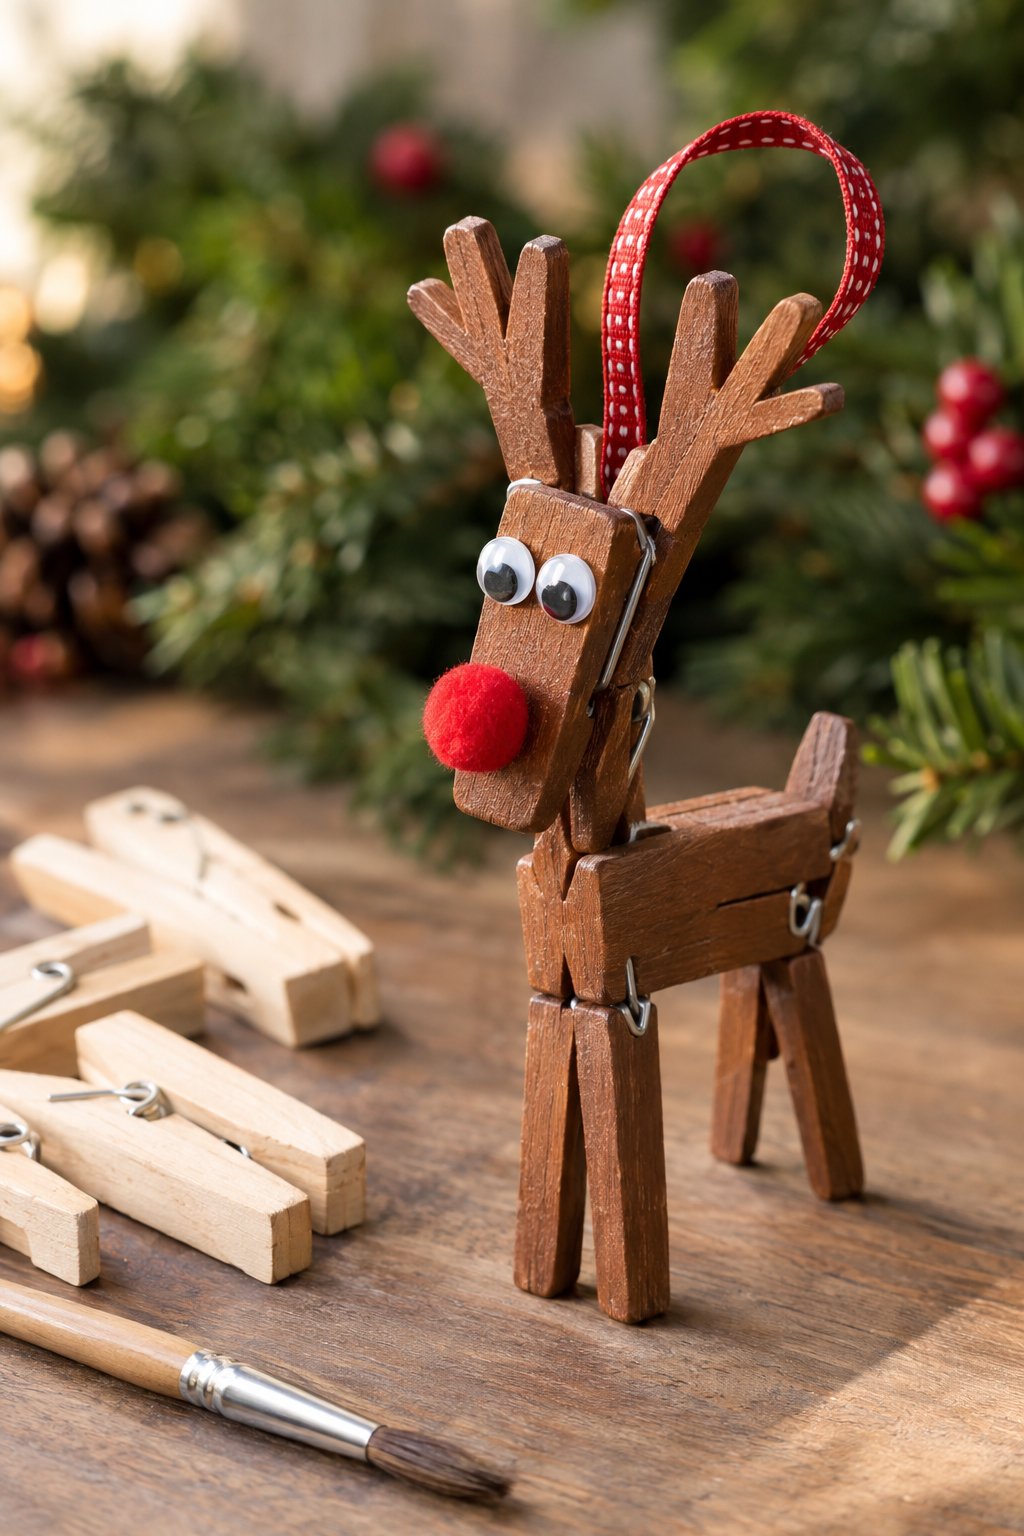
Assemble the clothespins before decorating, and check that all four legs touch the table. Two downward-pointing pins support the horizontal body, with another angled at the front for the head. Use wood glue and let the joins set fully. Then add brown paint, cardstock antlers, eyes, a red pom-pom nose, and the ribbon loop.
Clothespin Christmas Tree
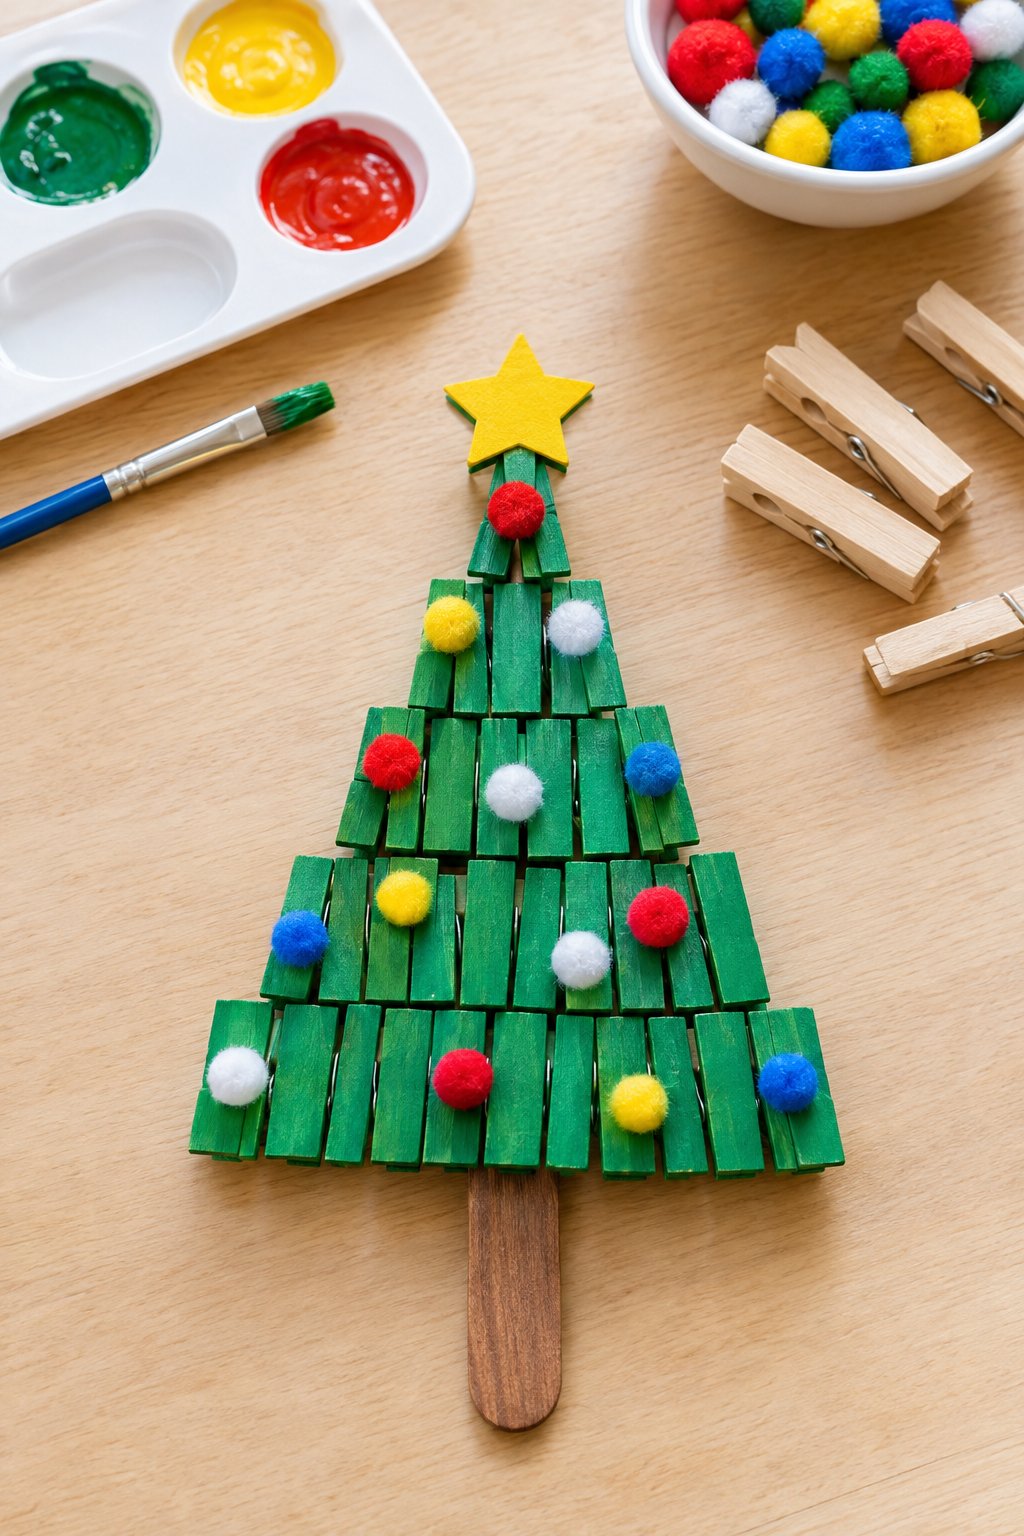
Arrange green-painted clothespin halves in rows, with fewer pieces toward the top. The narrow wooden sections create the ridged surface shown here. An adult can remove the metal springs and trim pieces where necessary. Glue the rows onto sturdy cardboard, attach a brown craft-stick trunk, and decorate with colorful pom-poms and a yellow star.
Yarn-Wrapped Cardboard Tree
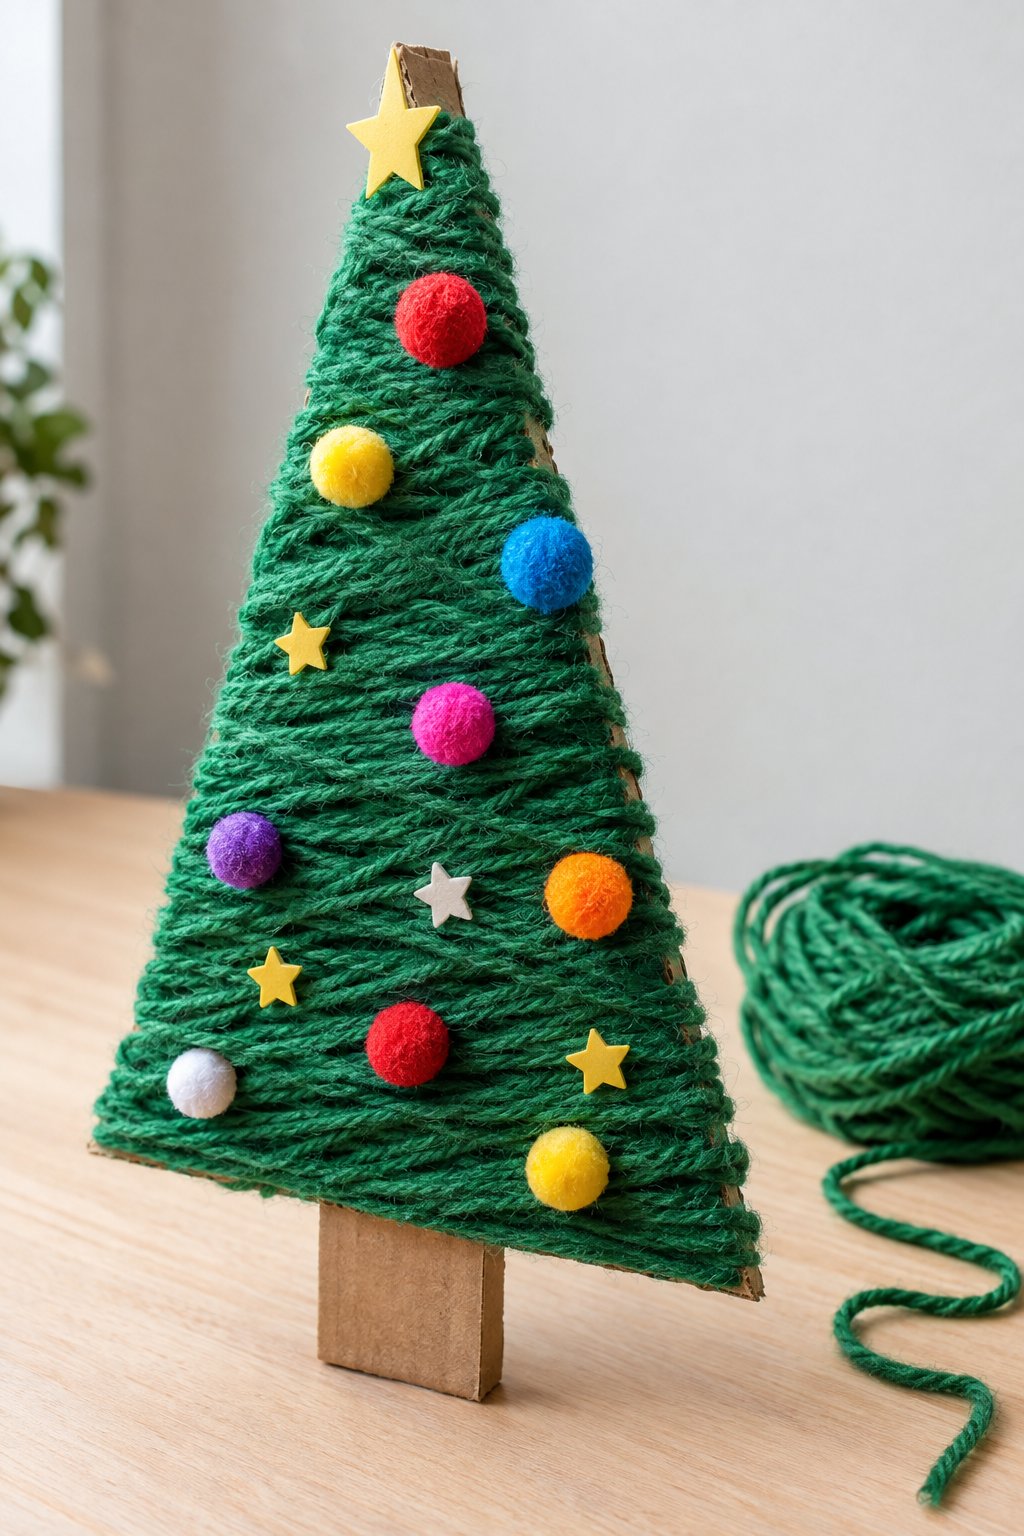
Don’t worry about perfectly straight wraps—the crisscrossed yarn is part of this tree’s texture. Cut a cardboard triangle with a short trunk below it, then secure one end of green yarn behind it. Wrap until most of the cardboard disappears, glue down the loose end, and attach pom-poms and small stars.
Yarn-Wrapped Candy Cane
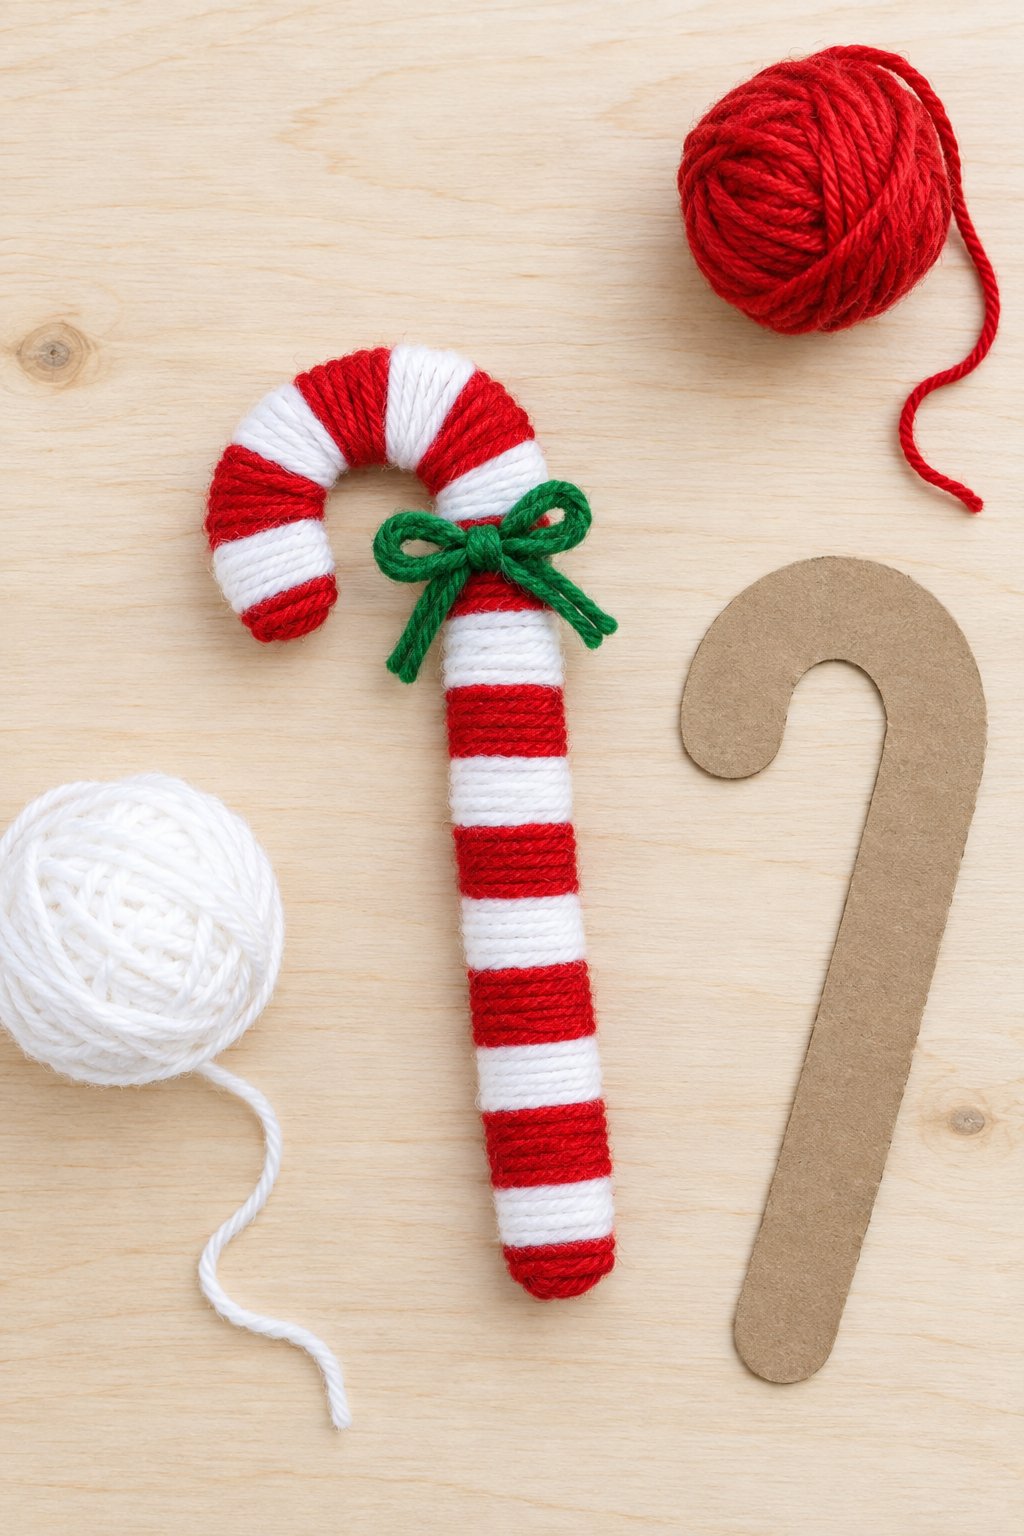
For those clear red-and-white stripes, wrap one short section at a time rather than winding both colors together. Start with a sturdy cardboard candy cane and secure the yarn ends with craft glue on the back. Keep each wrap close to the previous one to cover the edges. Tie a small green bow below the curve.
Paper Bag Reindeer Puppet
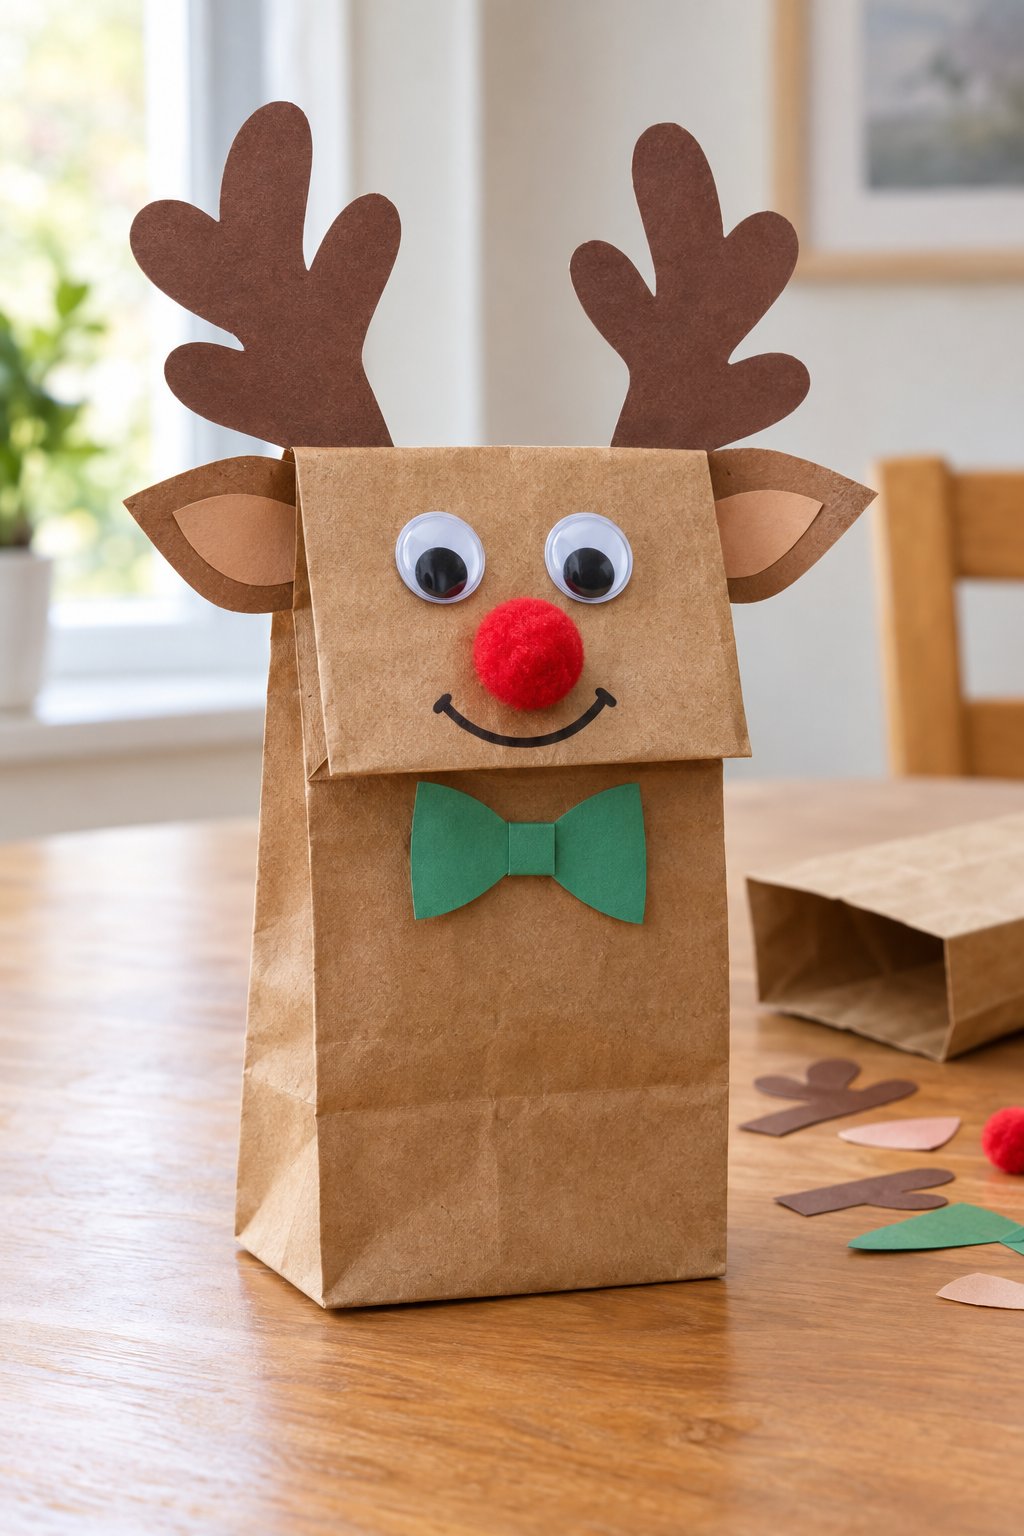
The bag’s folded bottom becomes the reindeer’s face, complete with a pom-pom nose and marker smile. Lay the bag flat with that flap facing up. Attach the eyes and nose to the flap, then glue paper ears and antlers behind it. Keep the flap free to move when you add the bow below.
Paper Bag Santa Puppet
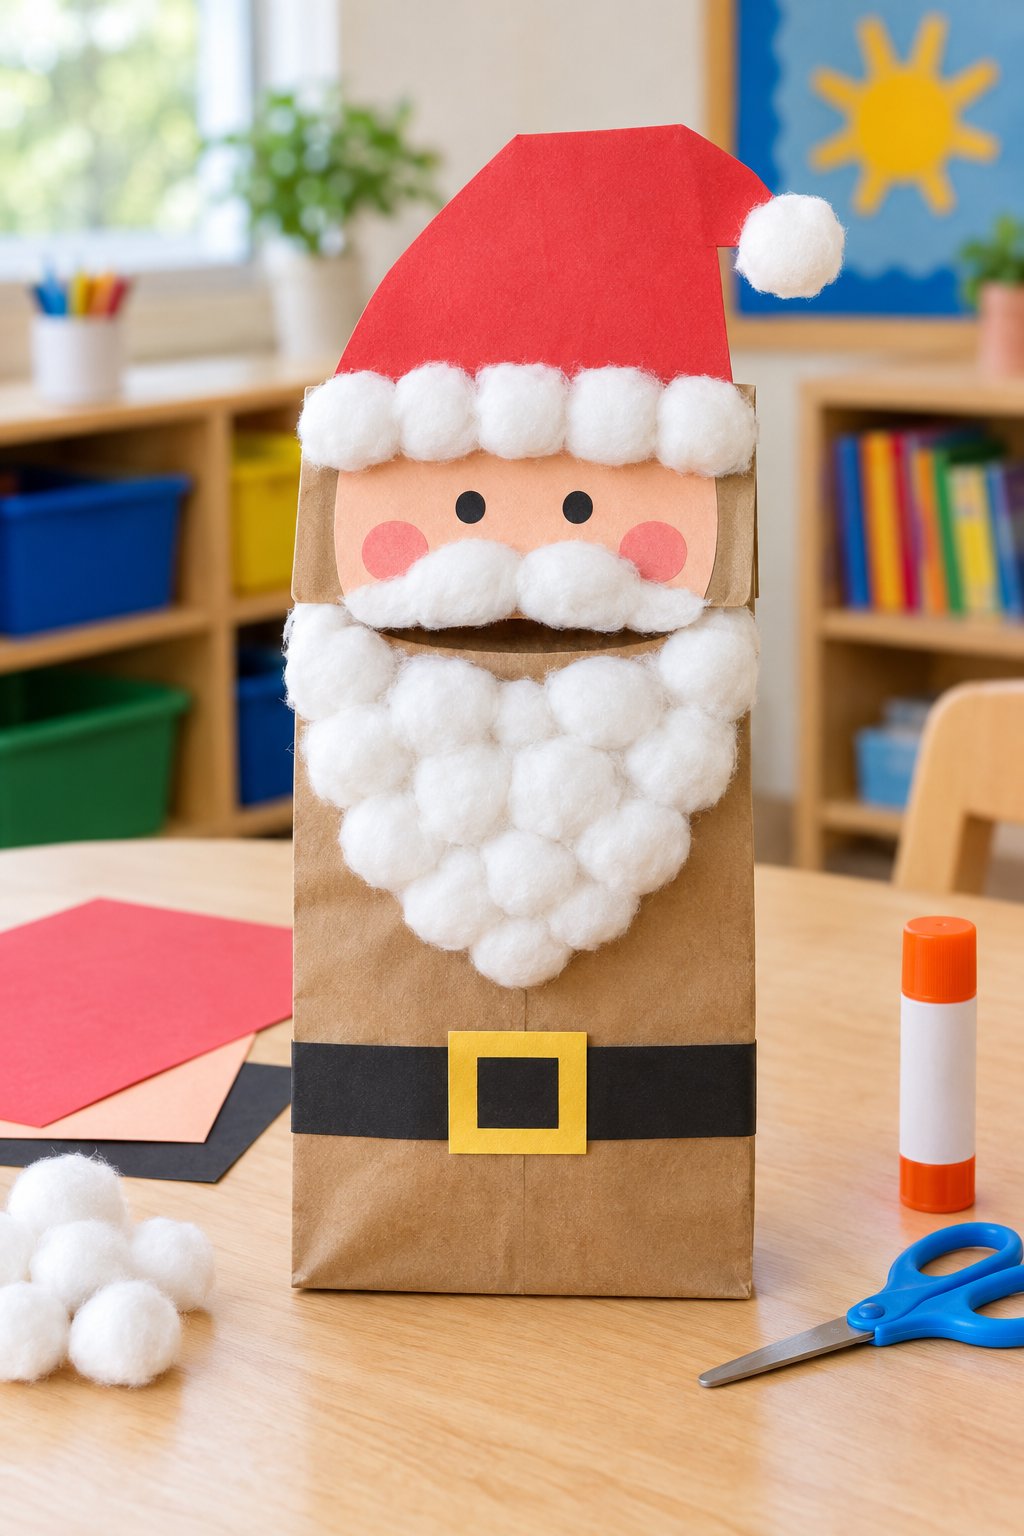
Before attaching Santa’s beard, check where the bag flap opens. Cotton glued across that opening would stop his mouth from moving. Place the peach paper face and cotton mustache on the flap, with the longer beard below it. His red paper hat needs a cotton brim and tip; a black strip and yellow buckle form the belt.
Handprint Christmas Tree Painting
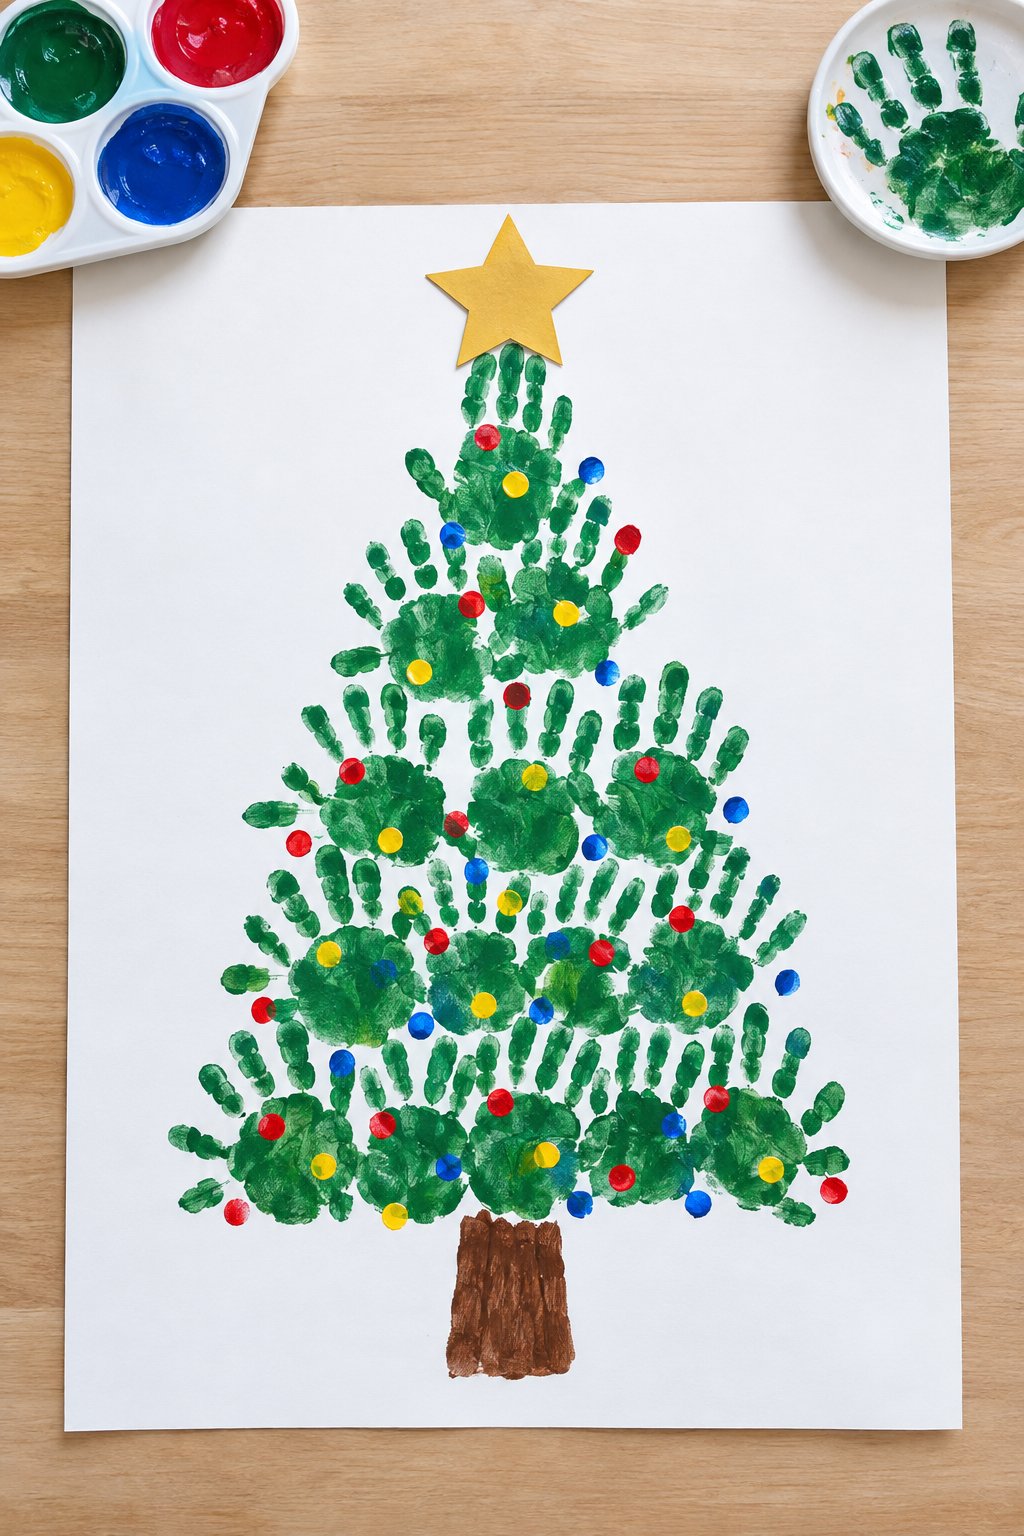
With fingers pointed upward and slightly outward, overlapping handprints resemble rows of branches. Begin with several green prints across the bottom of the sheet, then use fewer in each row above. Leave the paint to dry before adding colored fingertip baubles. A brown painted trunk and paper star mark the bottom and top.
Footprint Reindeer Artwork
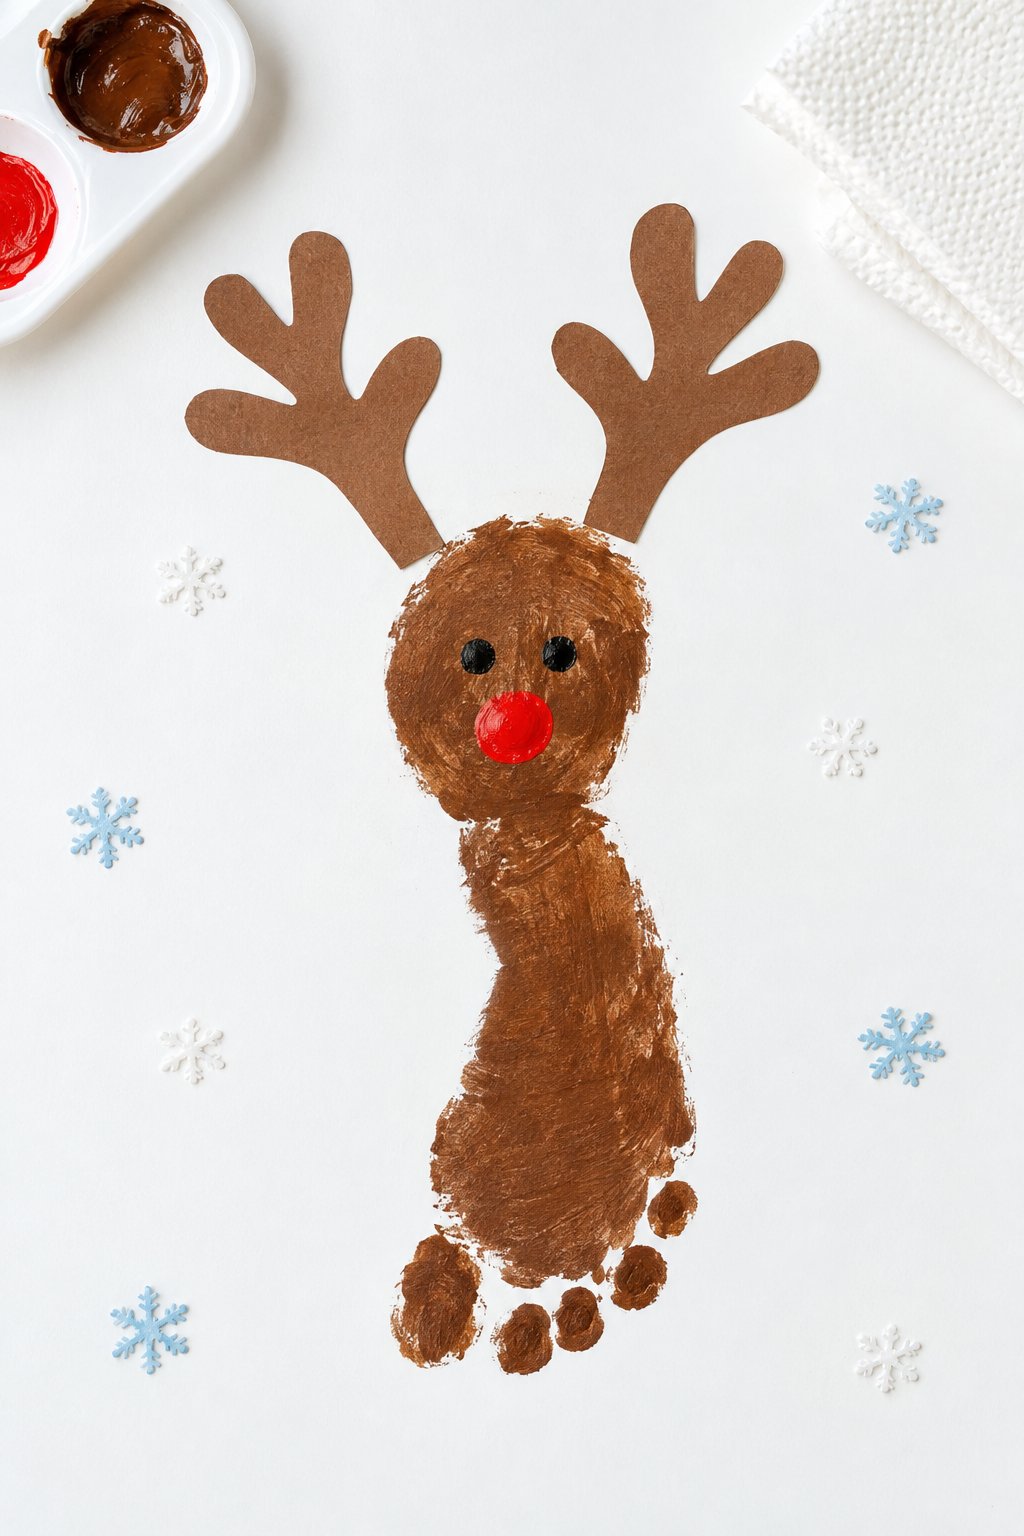
Here, the toes sit at the bottom of the picture, beneath a separate round reindeer face. Help your child press a foot coated in washable brown paint onto paper, then clean it before they stand up. Paint the head above the heel and add cardstock antlers, black eyes, and a red nose once dry.
Fingerprint Snowman Family
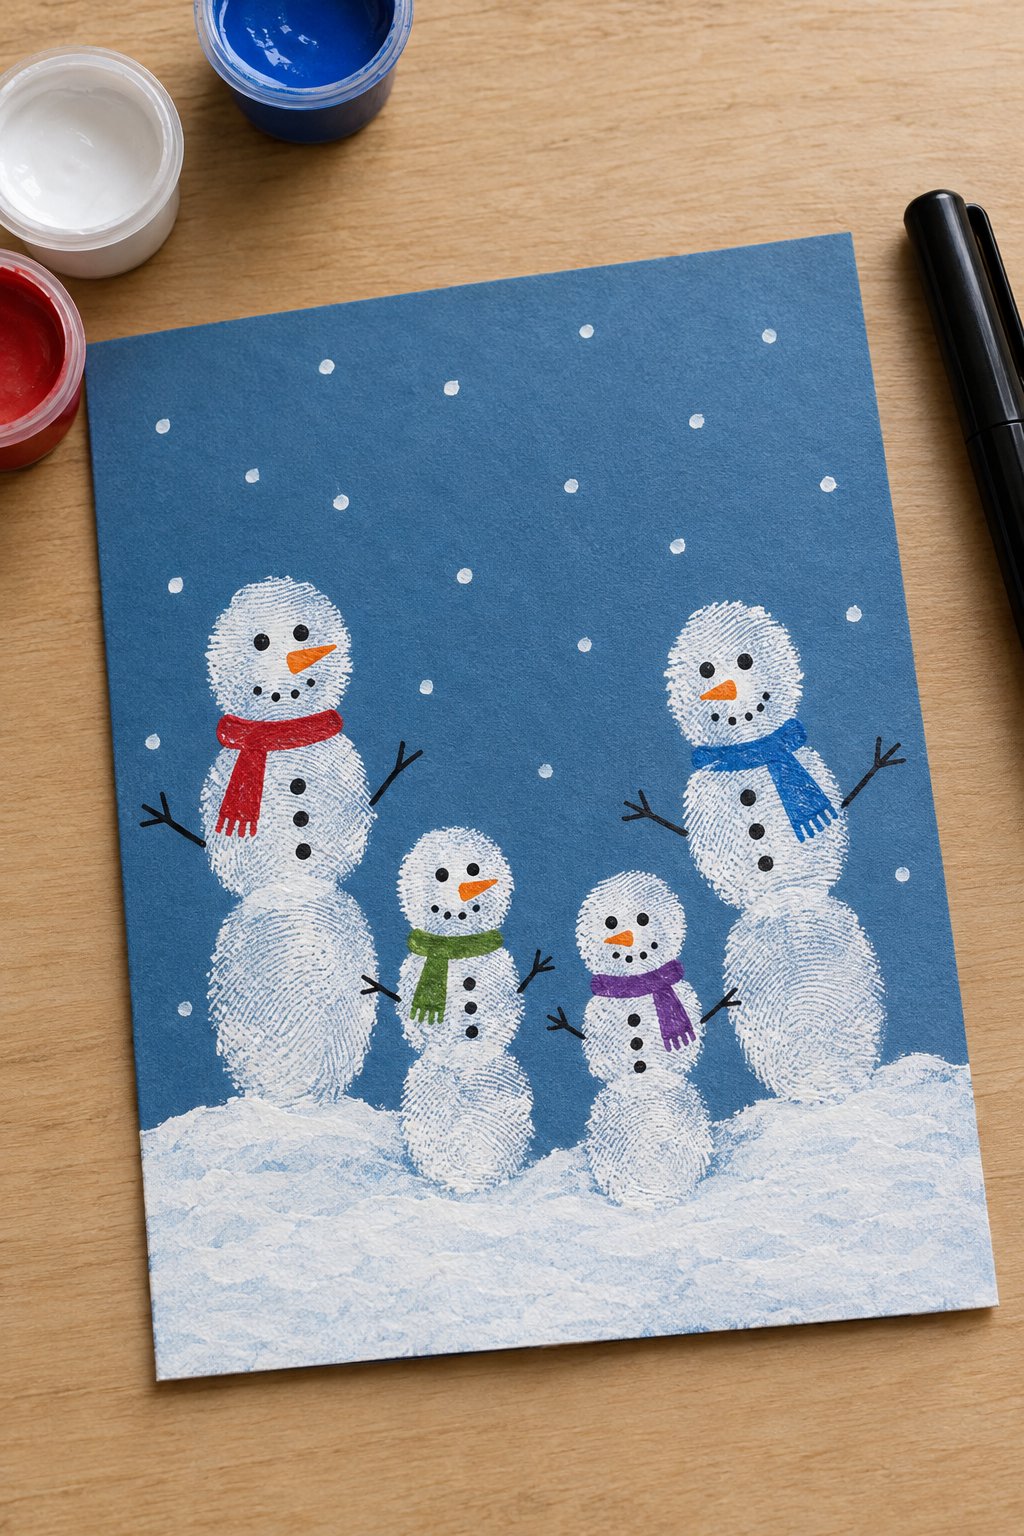
Try different fingers for the tall and short snowmen rather than making every figure the same size. Stack three white prints for each body on blue cardstock, leaving space between family members. Once dry, draw faces, buttons, twig arms, and colored scarves. Dab extra white paint along the ground and across the sky for snow.
Q-Tip Painted Christmas Tree
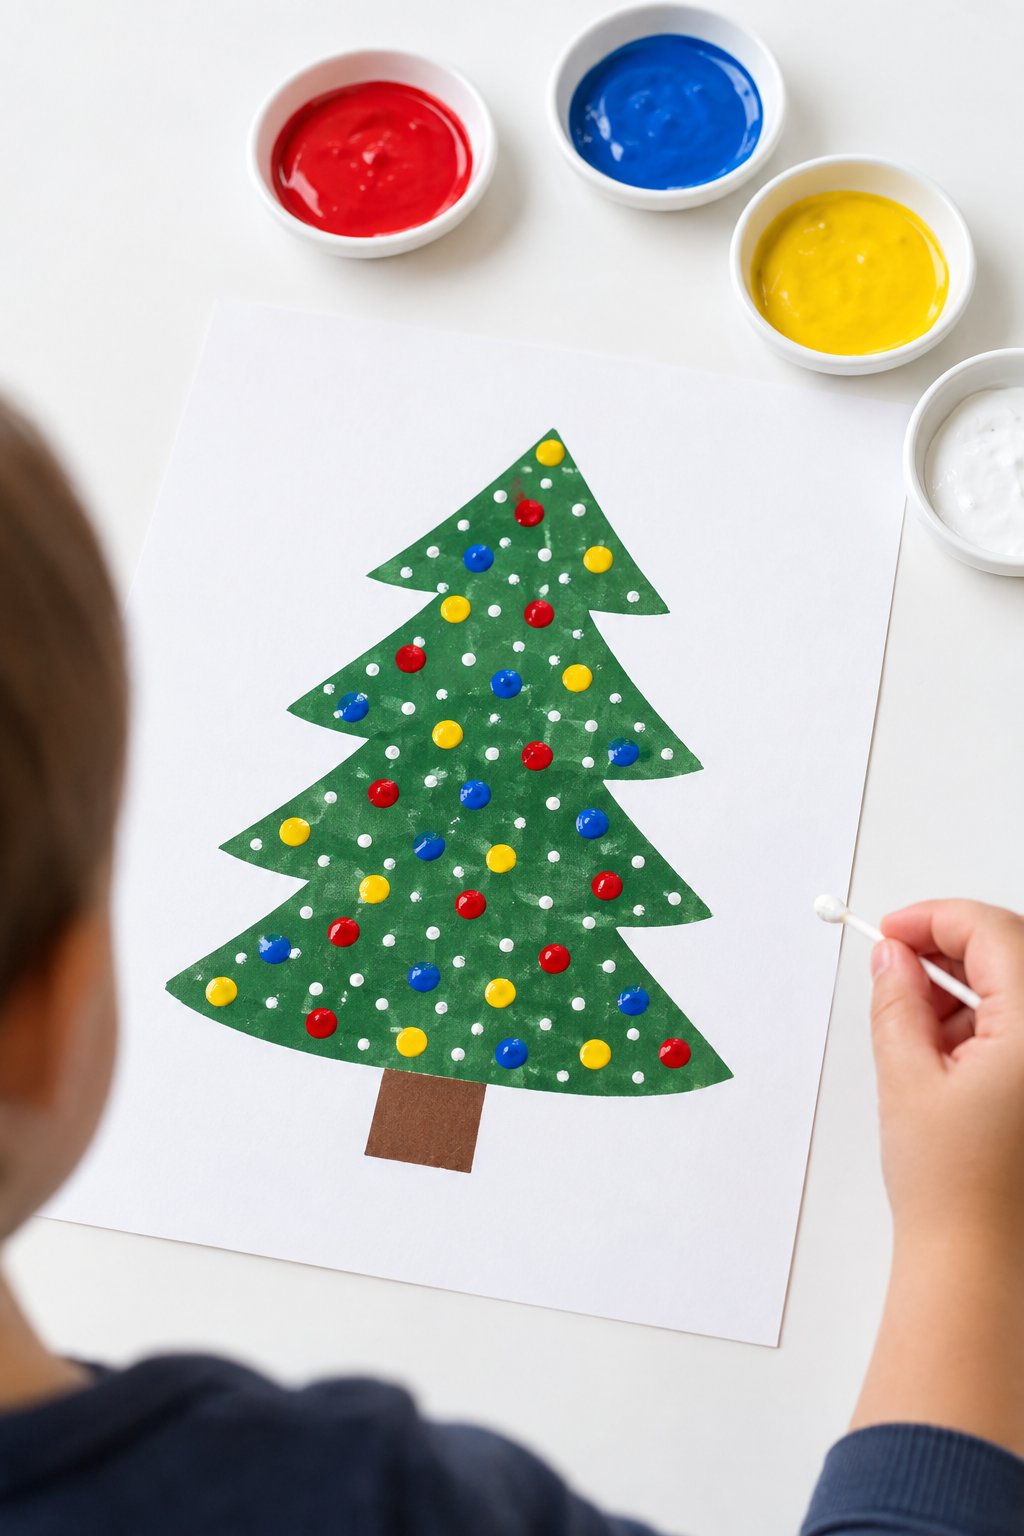
Tiny dots are easier to control with cotton swabs than a large paintbrush. Glue a green paper tree and brown trunk onto white card, then dip separate swabs into red, yellow, blue, and white paint. A light dab leaves a small, round ornament; pressing harder makes a wider spot. Space the colors across the branches.
Sponge-Painted Christmas Tree
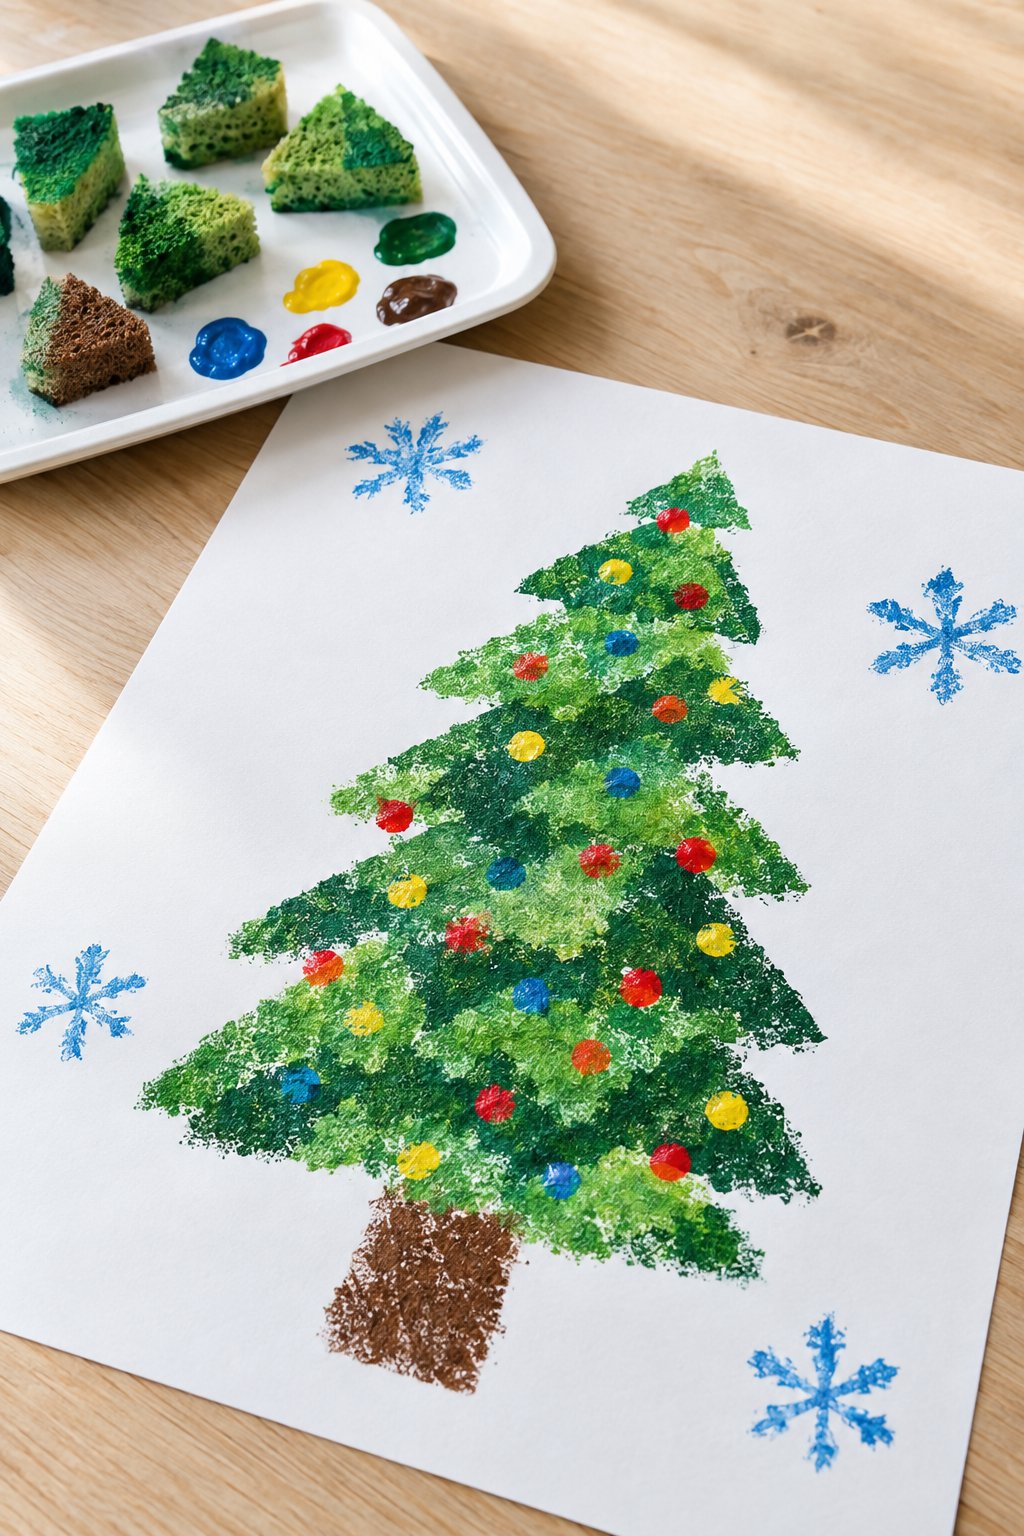
The patchy green surface comes from dabbing paint instead of brushing it smooth. Lightly sketch a tree outline, then fill it with a small sponge dipped in green paint. Use only a little paint to preserve the speckled texture. Once dry, add bright baubles, a brown trunk, and blue snowflakes around the tree.
Button Christmas Tree Card
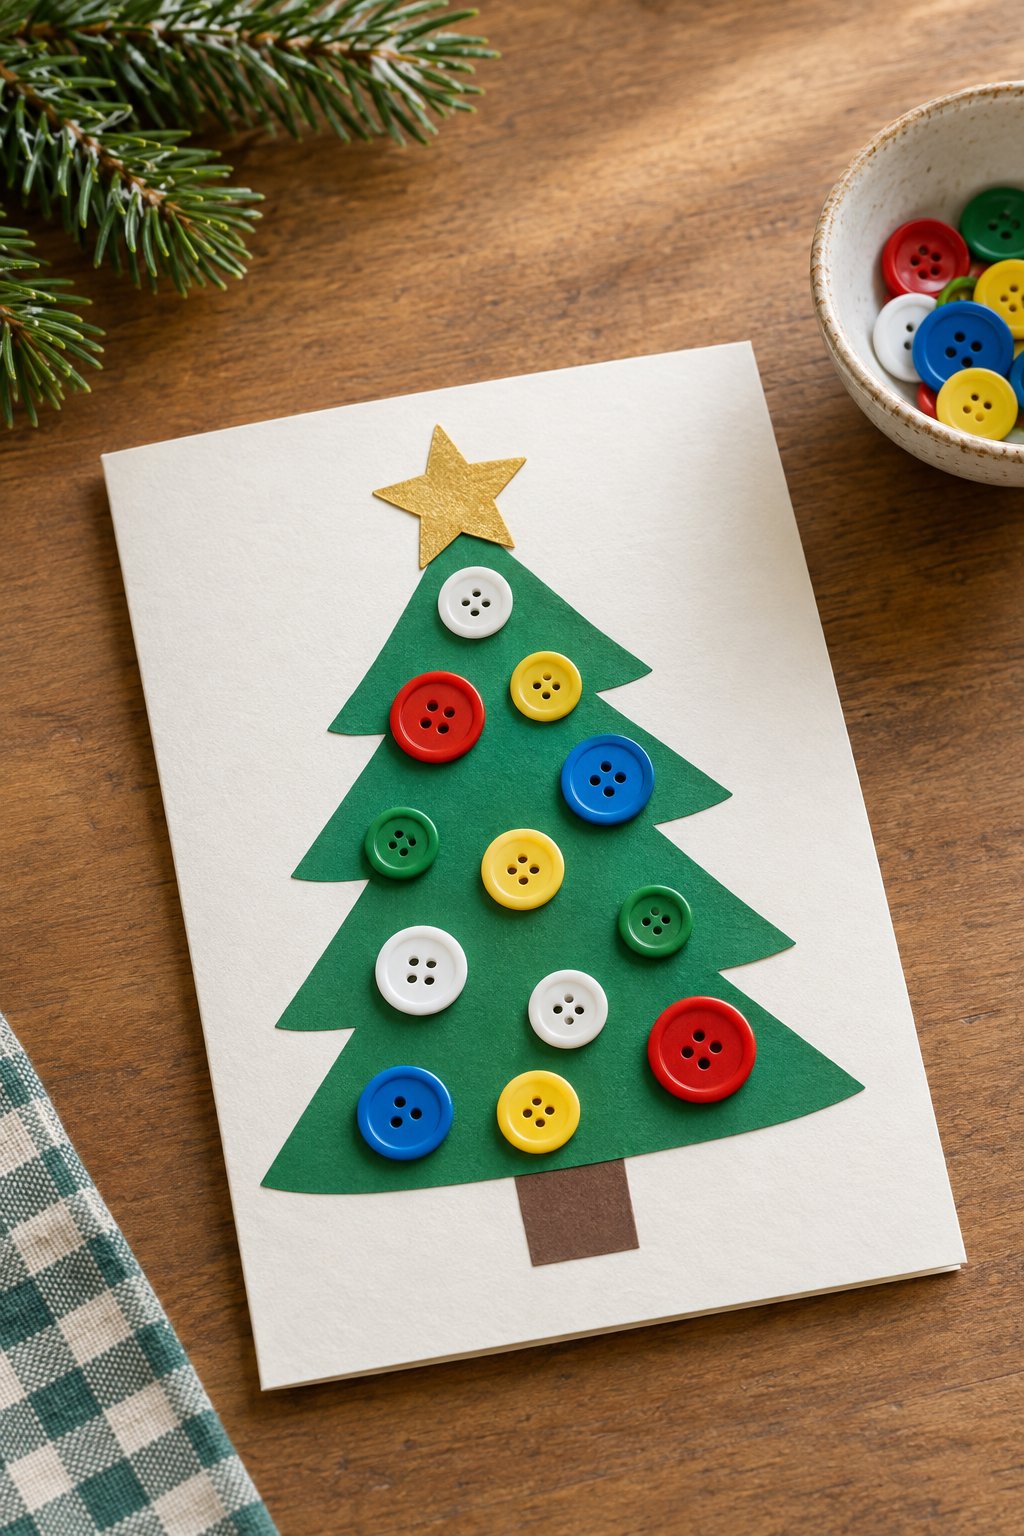
Search the button tin for different sizes before assembling this card. Against the plain green paper tree, the red, yellow, blue, and white buttons need no extra decoration. Arrange them first, then secure each with a small dab of tacky glue. Slip a brown paper trunk beneath the tree and place a gold star above it.
Ribbon Christmas Tree Card
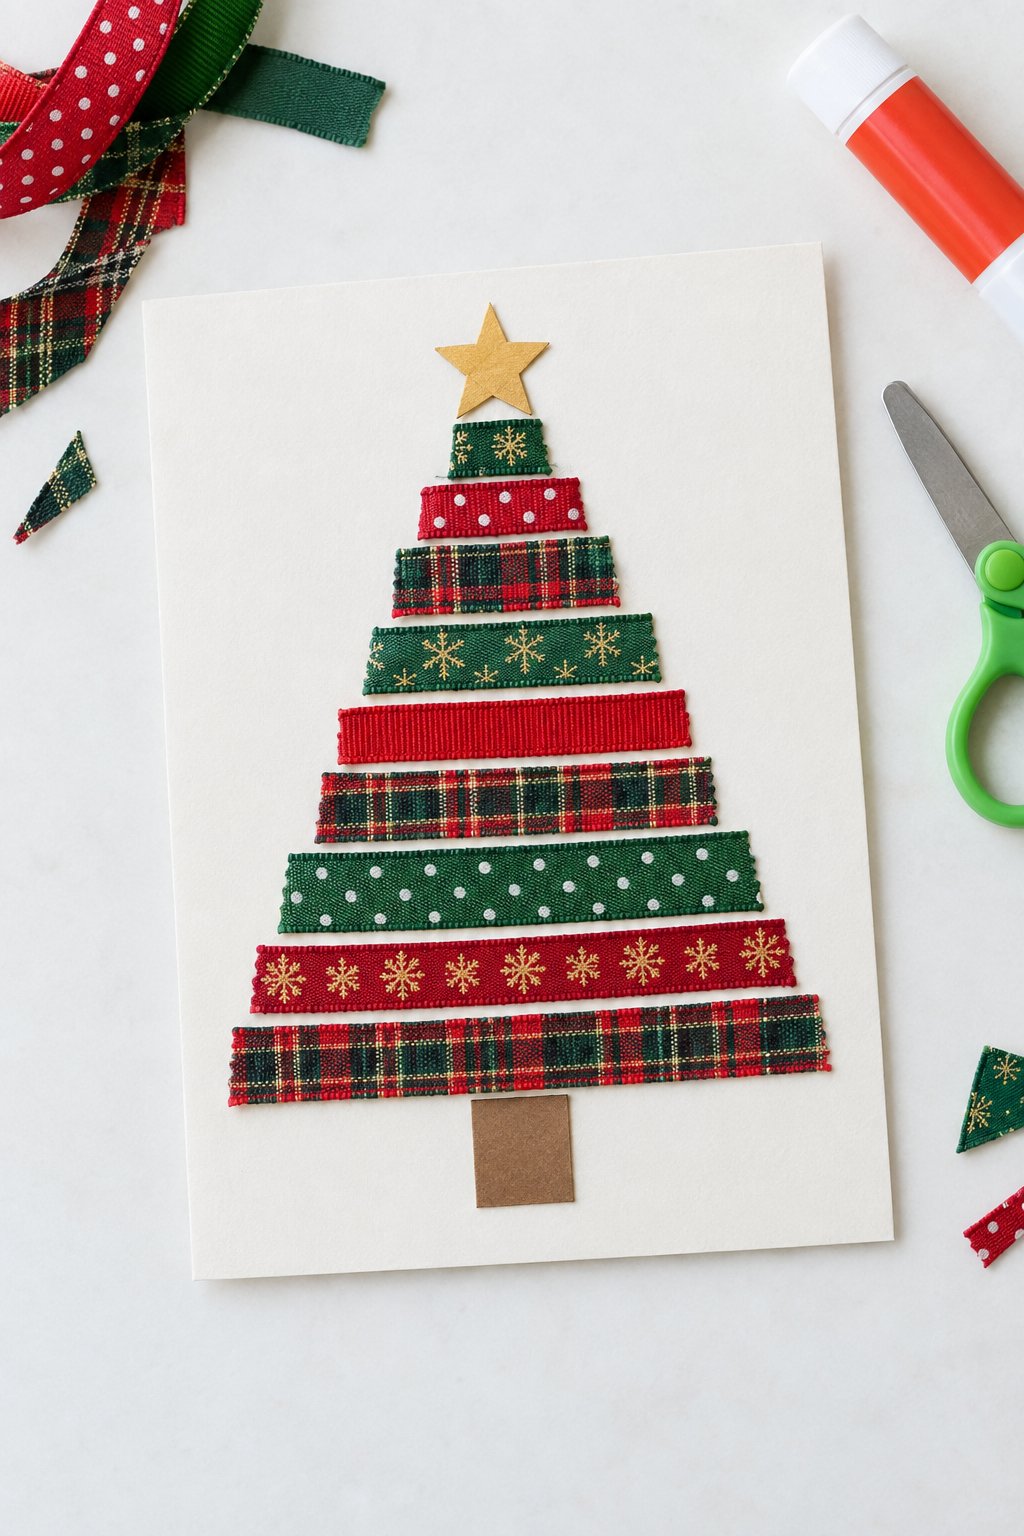
Even short ribbon scraps fit into this striped tree. Cut the longest piece for the bottom, then shorten each strip as you move upward. Arrange them on folded cardstock with small gaps between rows before gluing. Mix checks, dots, and plain ribbon as pictured, with a paper trunk below and a star at the tip.
Cupcake Liner Christmas Tree
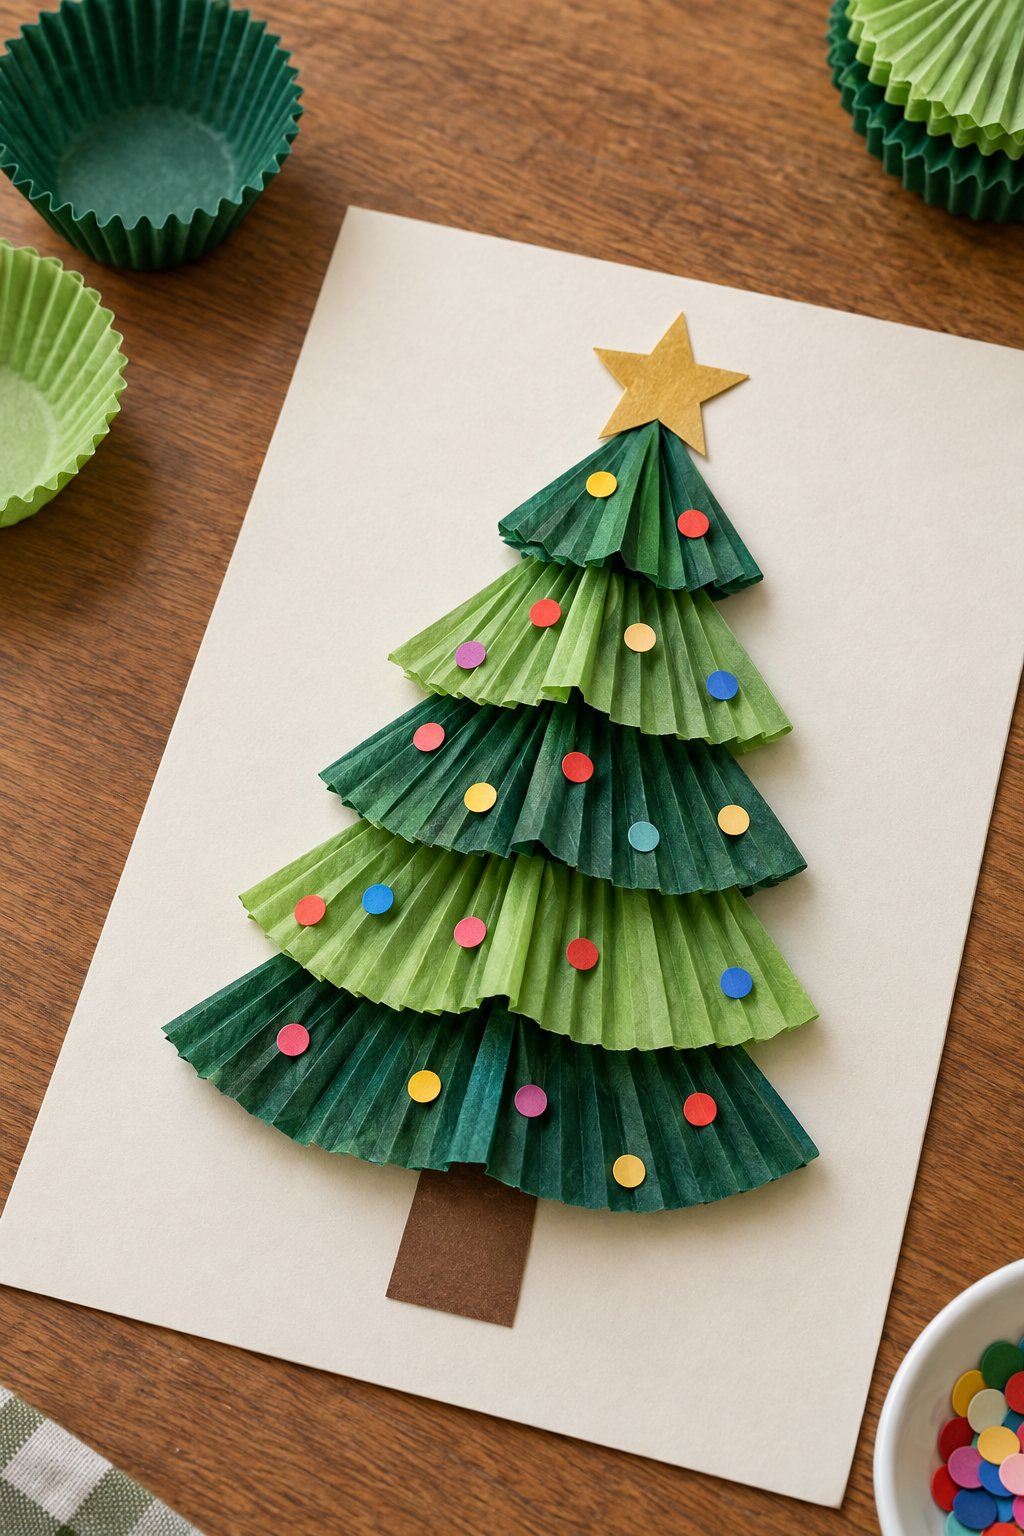
Keep the pleats intact when folding the cupcake liners; they’re what makes the branches stand away from the card. Fold green liners into fan-shaped wedges of different widths. Glue the widest at the bottom and overlap progressively smaller wedges above it. Decorate the folds with paper confetti, then attach a trunk and gold star.
Cupcake Liner Angel
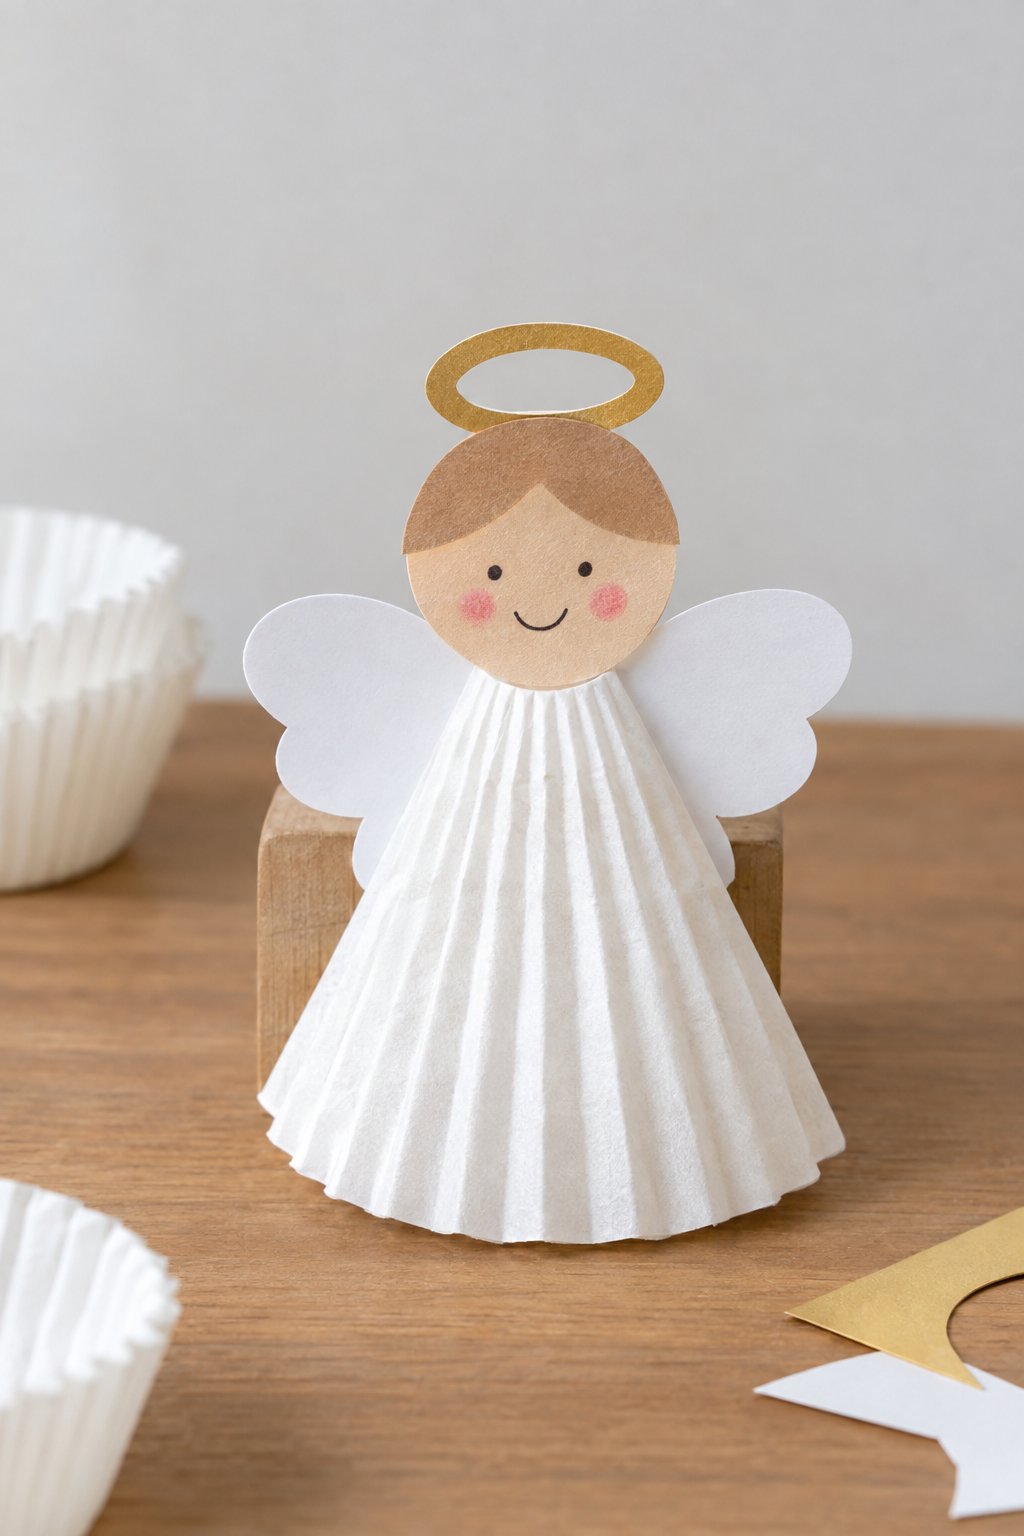
Under the angel’s pleated white dress, a small paper cone can support the figure. Wrap an opened cupcake liner around the cone and glue another folded liner near the top for the shorter layer. Attach a round paper face at the narrow end, with cardstock wings behind it and a gold paper halo above.
Egg Carton Christmas Tree
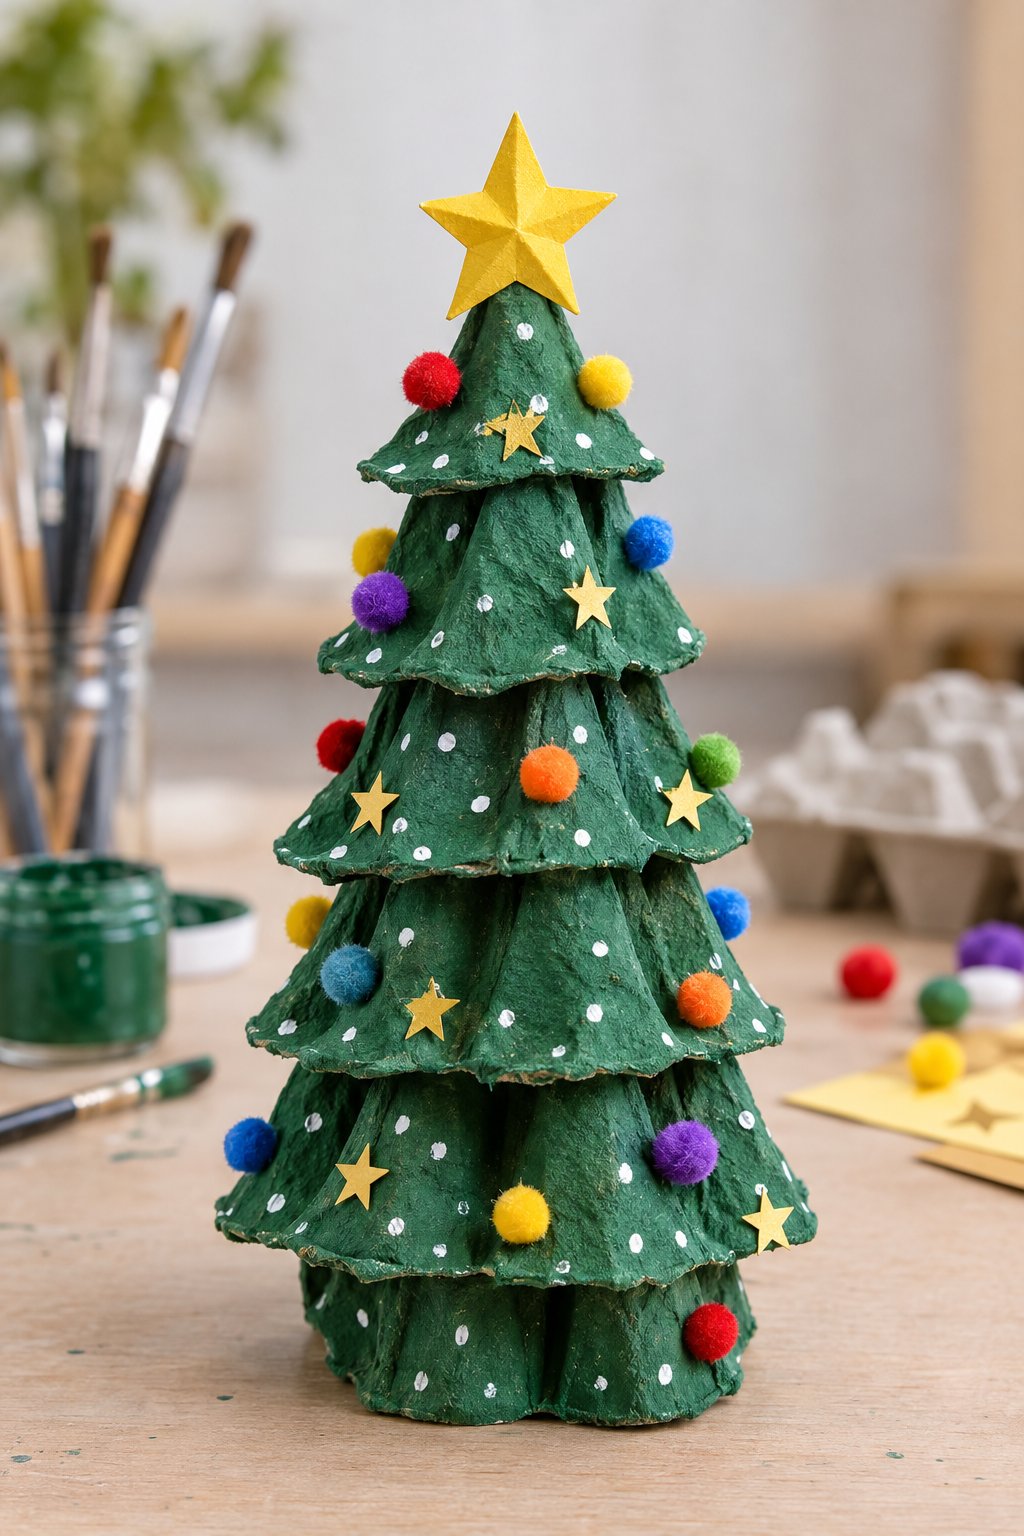
This tall tree needs a little preparation before children start decorating. An adult can cut egg-carton cups into flared sections and arrange them around a cardboard cone, widest rows first. Paint the assembled layers green and let them dry thoroughly. Pom-poms, paper stars, and tiny white paint dots sit across the uneven branches.
Egg Carton Bell Ornament
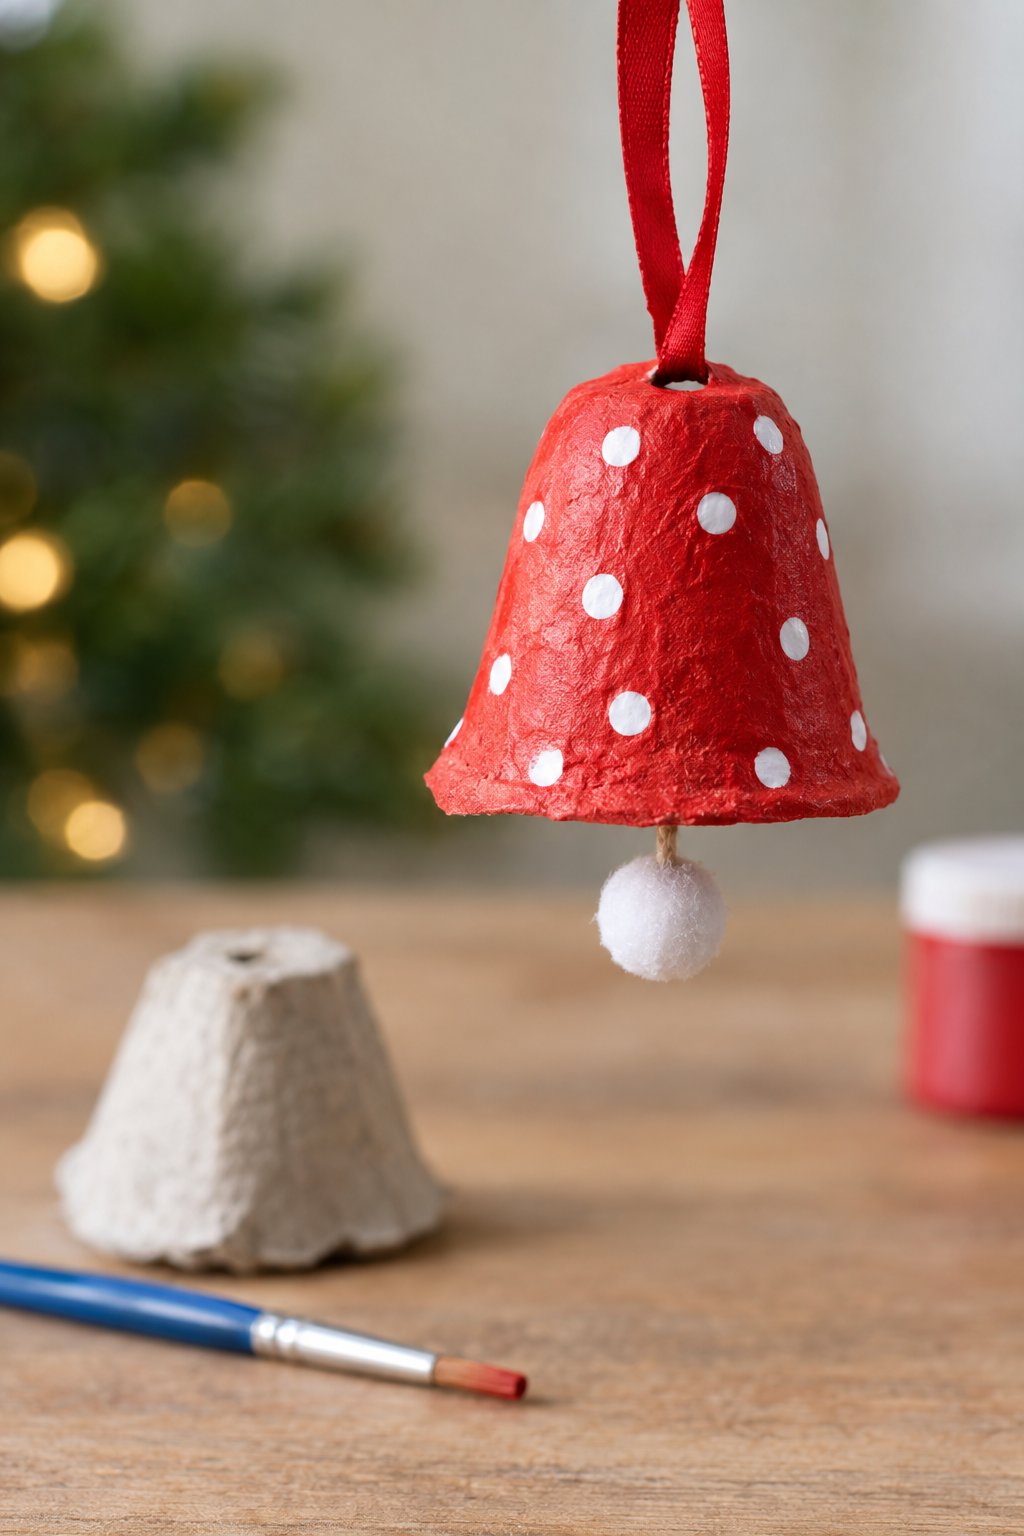
A white pom-pom hangs beneath this red bell where a clapper would normally sit. Cut out one egg-carton cup, neaten its rim, and have an adult pierce the closed end. Paint it red with white dots. Thread a ribbon loop through the hole, knot it inside, and suspend the pom-pom from a short piece of thread.
Craft Stick Snowman Ornament
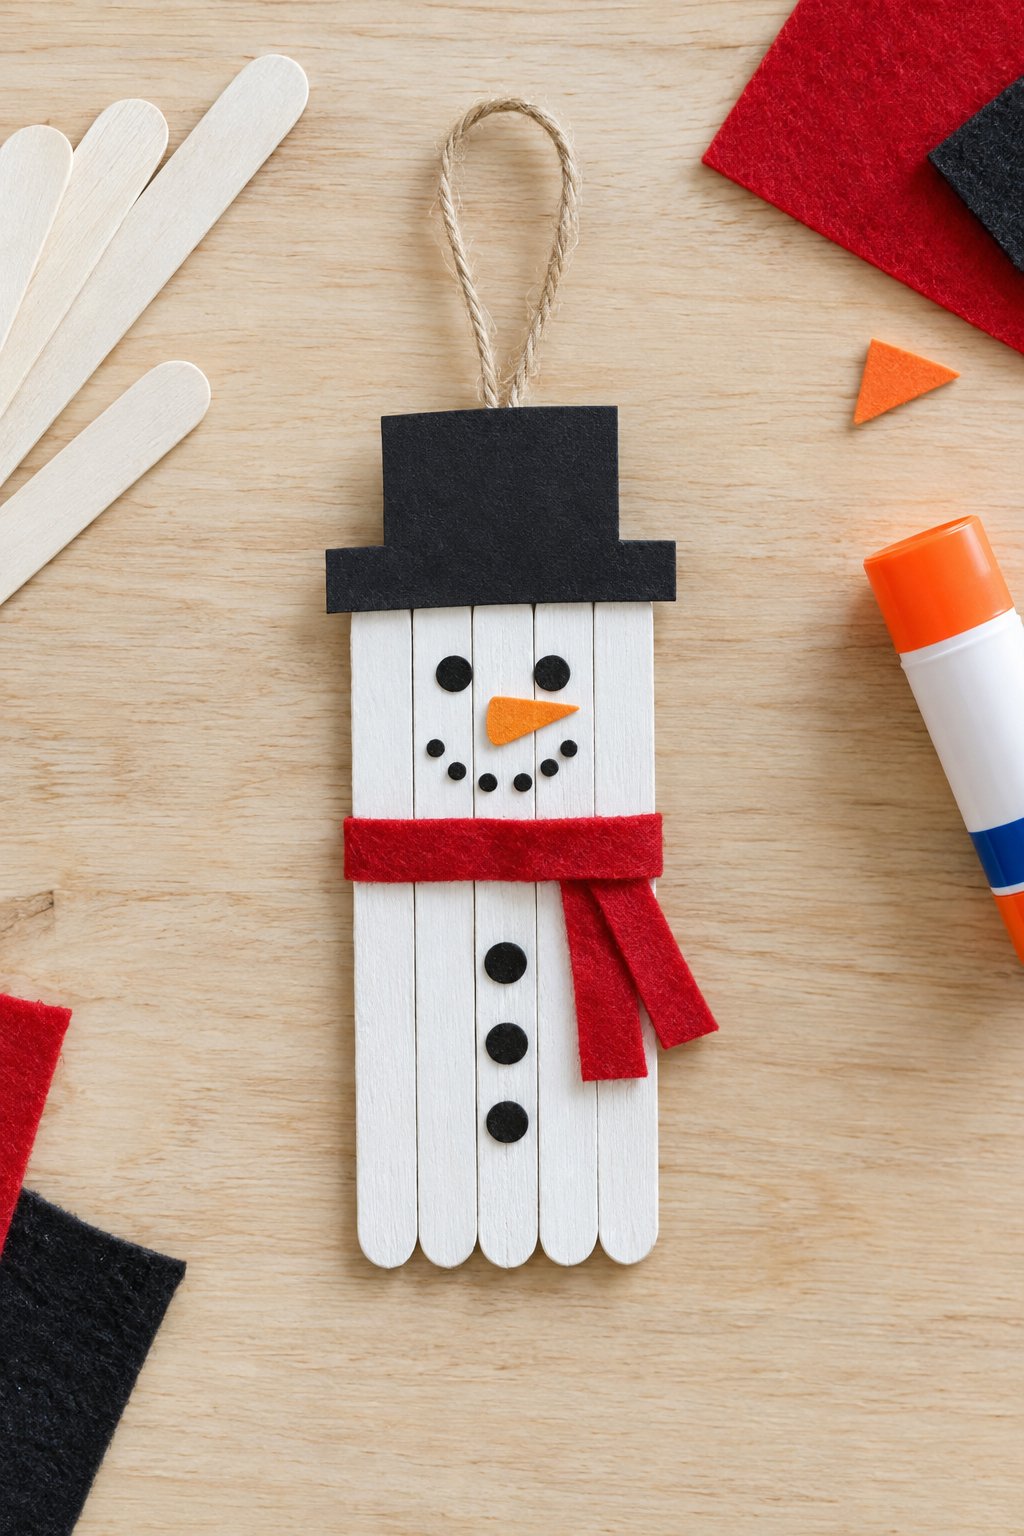
Lay five craft sticks side by side and glue two short crosspieces across their backs to hold them together. After the glue sets, paint the front white. This snowman wears a black cardstock hat and red felt scarf, with a small orange nose and dotted smile. Secure the twine loop behind the hat.
Craft Stick Santa Ornament
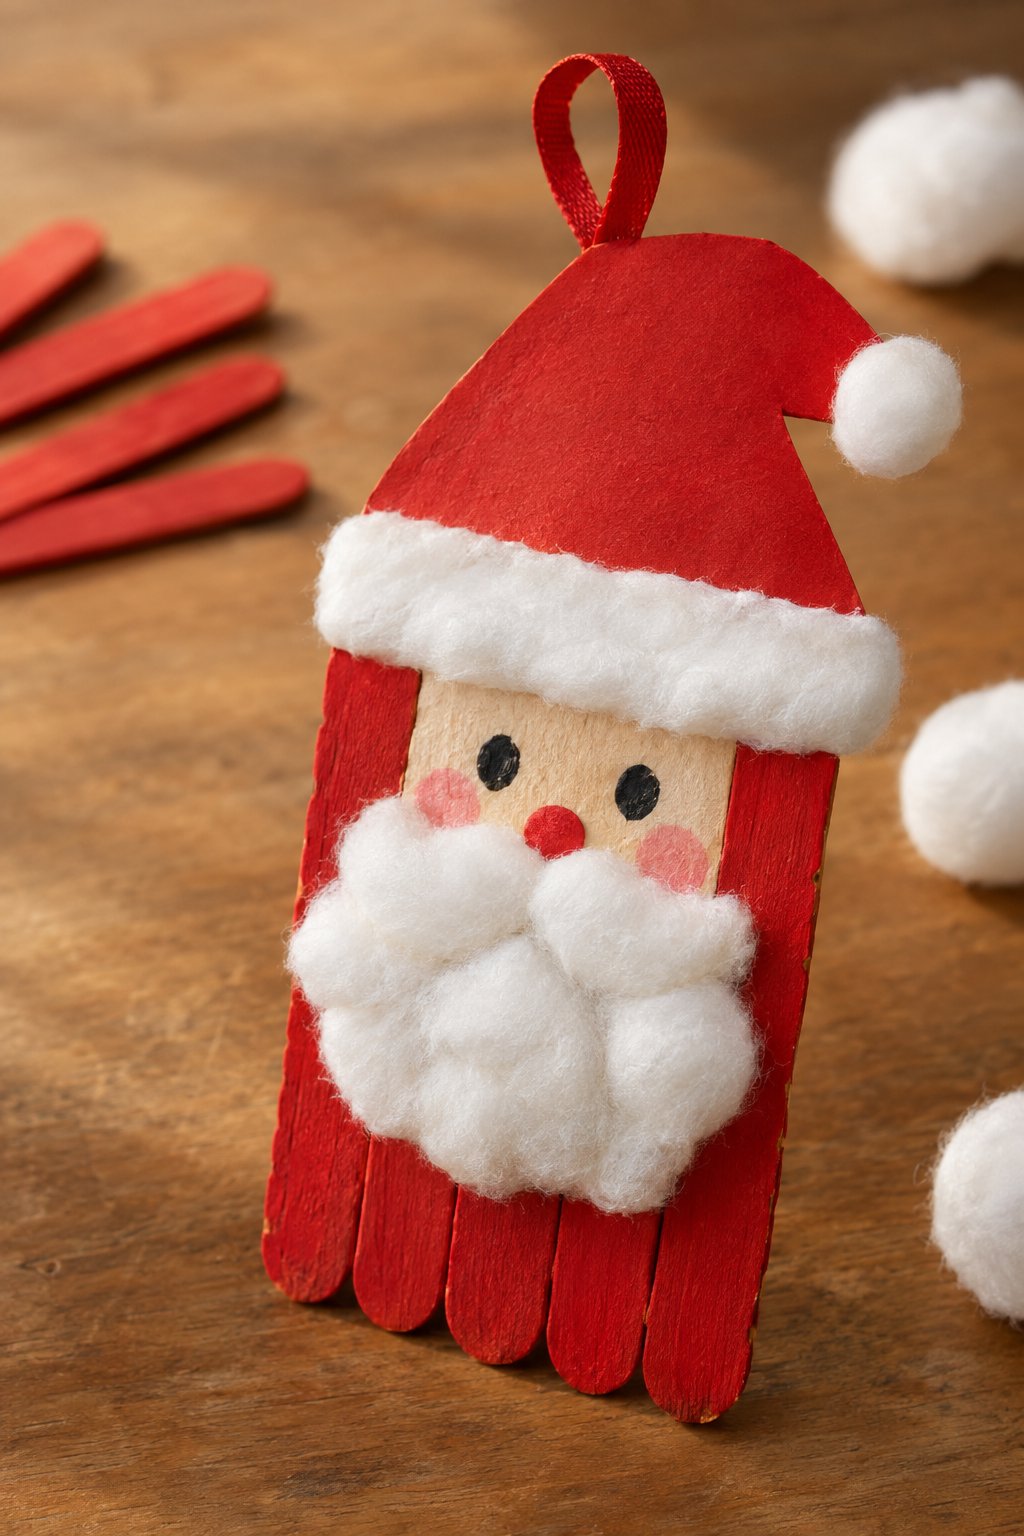
Leave a pale face area near the top when painting the joined craft sticks red. Once dry, mark the eyes, cheeks, and nose, then glue cotton beneath the face for Santa’s mustache and beard. A red cardstock hat overlaps the upper edge, with cotton trim across its base. Attach a ribbon loop to the back.
Craft Stick Snowflake Ornament
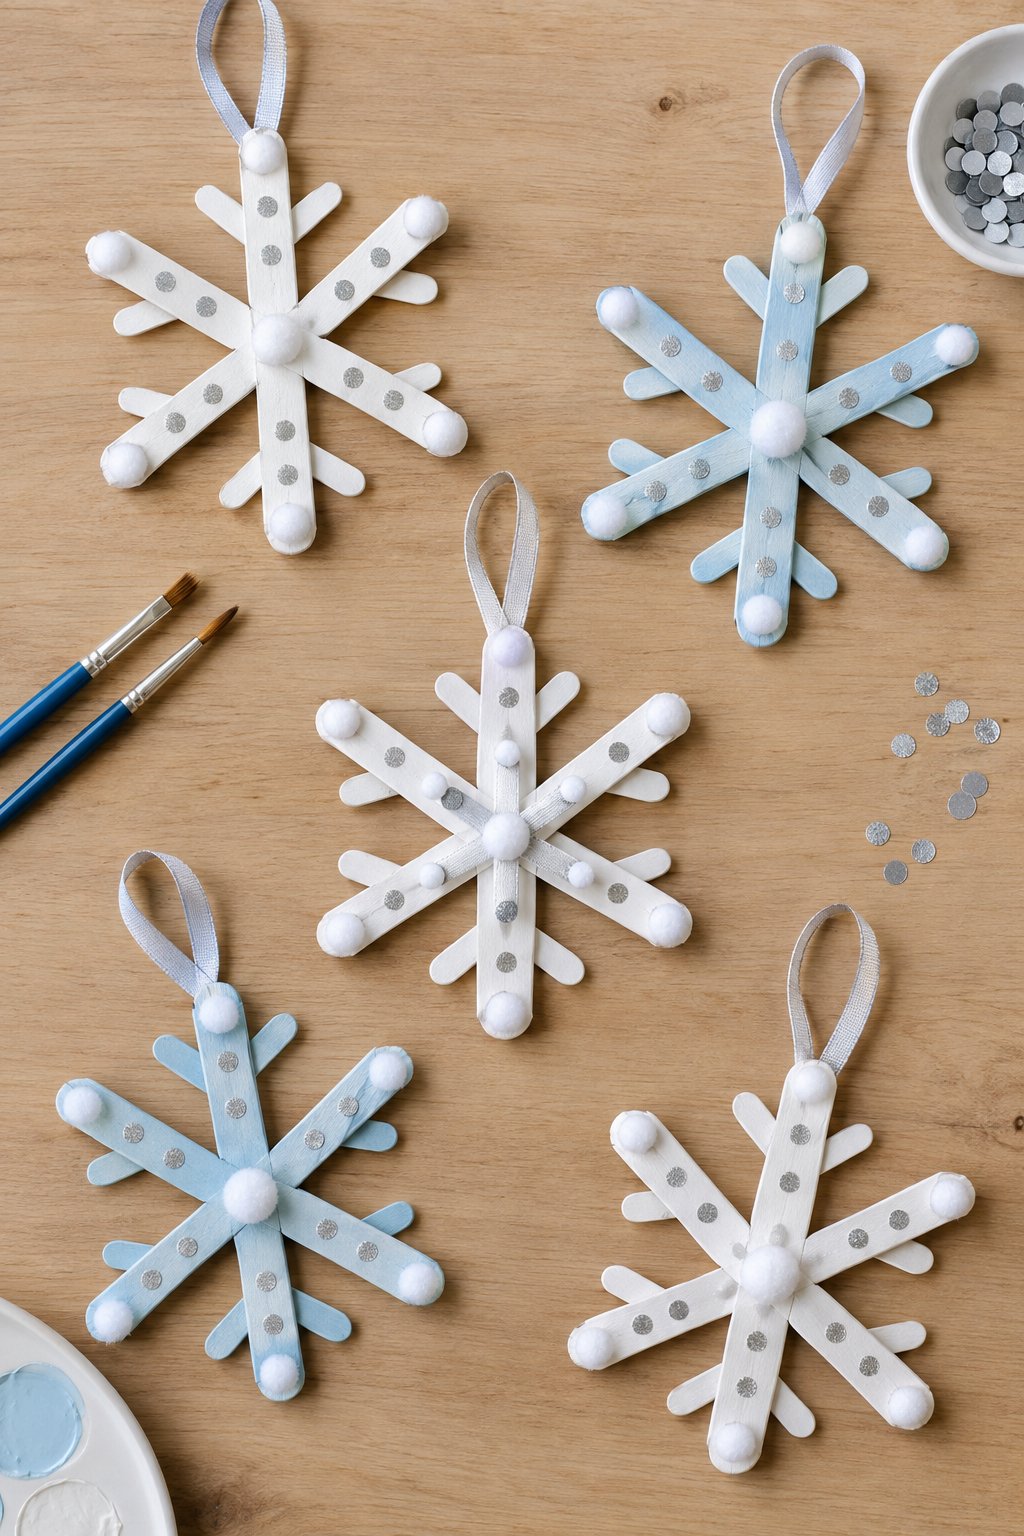
Three sticks crossed at their centers form the six arms of each snowflake. Glue them together, let the joins set, and paint them white or pale blue. The pictured ornaments have short branch pieces near the ends; an adult can trim these from spare sticks. Decorate with white pom-poms and silver sequins before attaching ribbon.
Paper Straw Christmas Tree
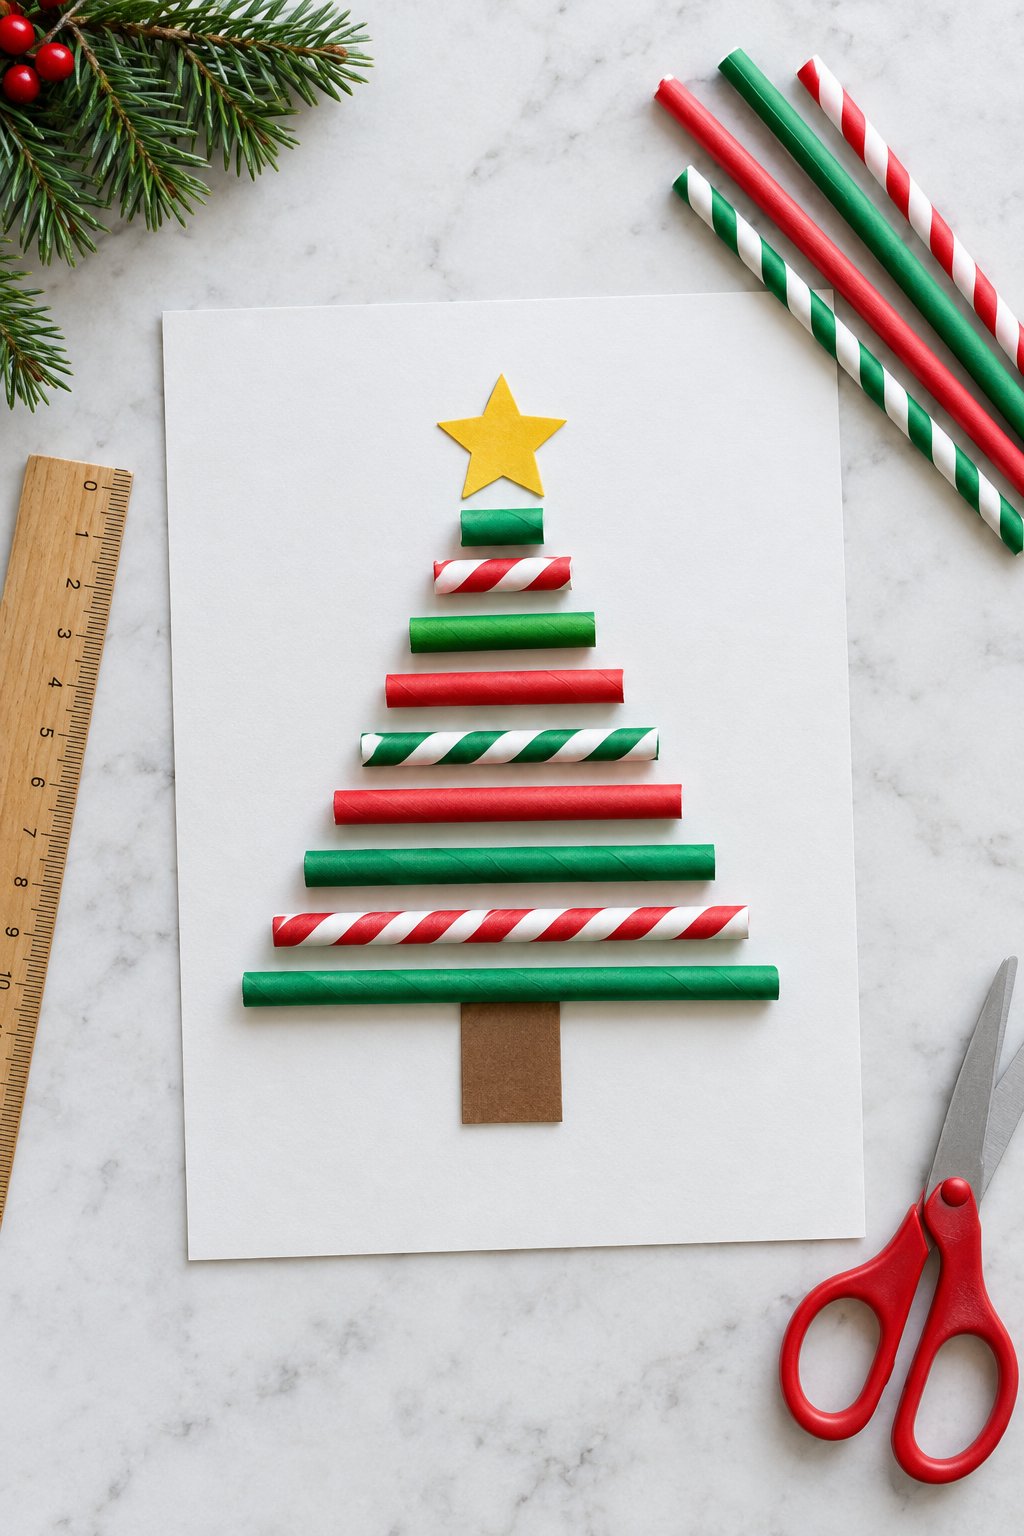
Measure and cut the straws before gluing so the rows narrow steadily toward the star. Alternate plain red and green pieces with striped ones, leaving a little white card visible between them. A small dab of tacky glue beneath each straw helps keep it in place. Finish with a brown paper trunk and yellow star.
Paper Straw Star Ornament

Red-and-white striped straws follow the outline of these hollow stars. To make one, cut ten equal straw pieces and thread them onto flexible craft wire. Bend the joints around a star template, alternating outer points and inner corners. An adult can twist and tuck away the wire ends before a child ties ribbon around the top point.
Coffee Filter Snowflakes
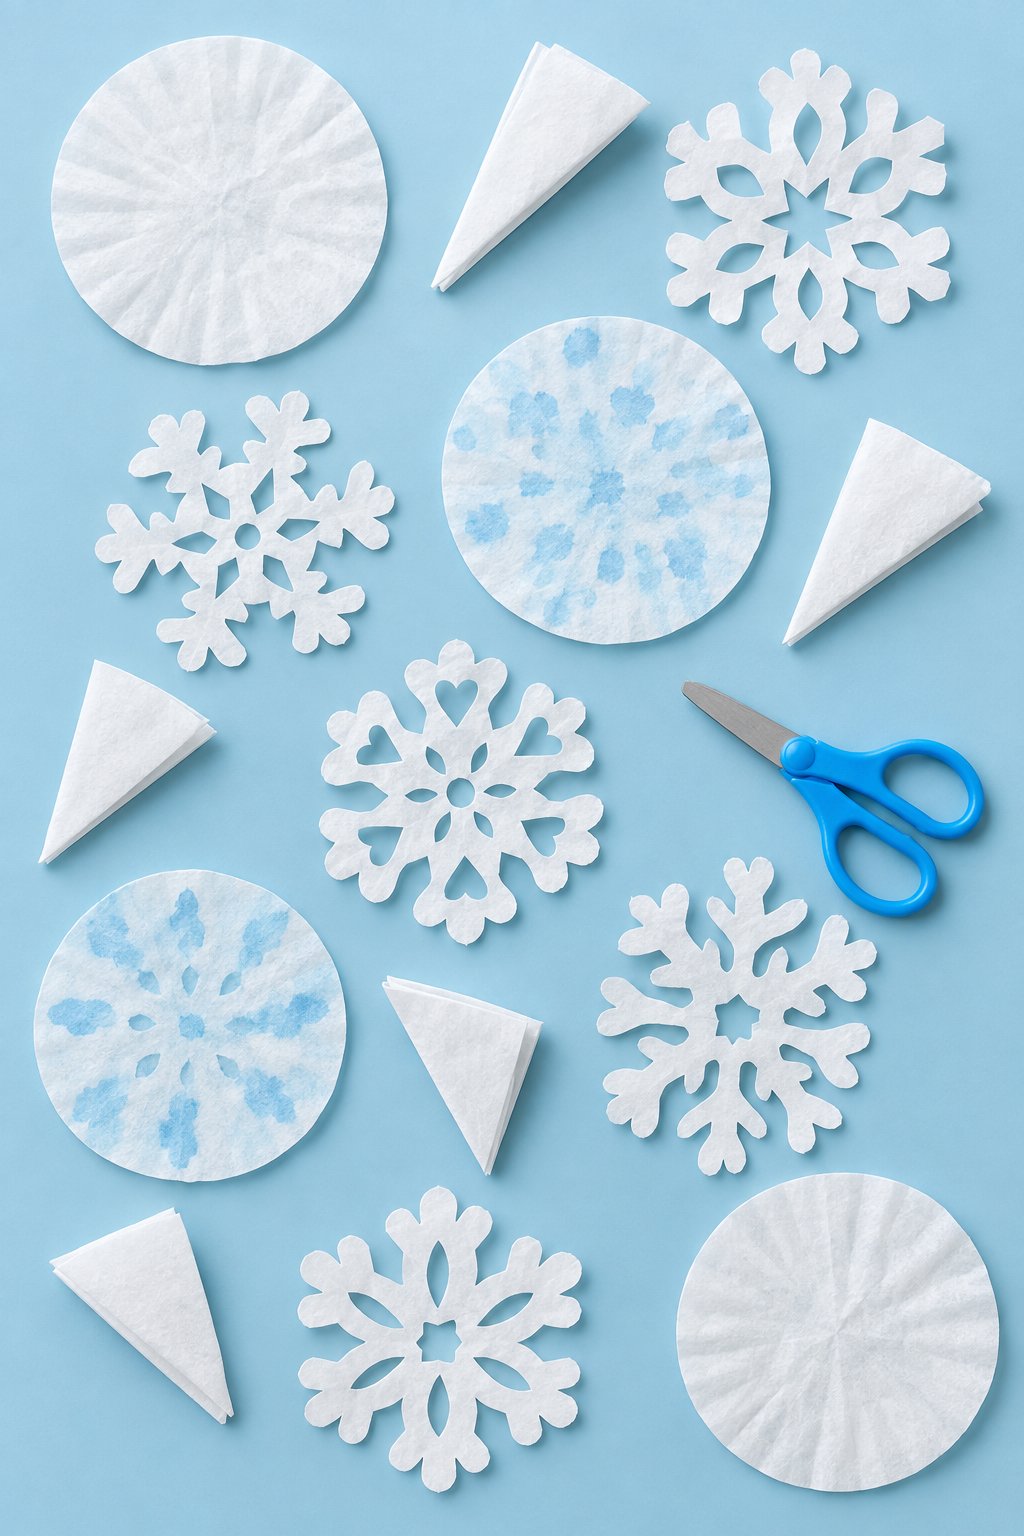
Thin coffee filters are easier to snip through than thick paper, especially after several folds. Fold a round filter in half, then into thirds and half again for a narrow wedge. Cut notches along both sides without severing the folded piece. Unfold gently; for the pale blue version, dab with diluted watercolor and dry flat before folding.
Coffee Filter Christmas Tree
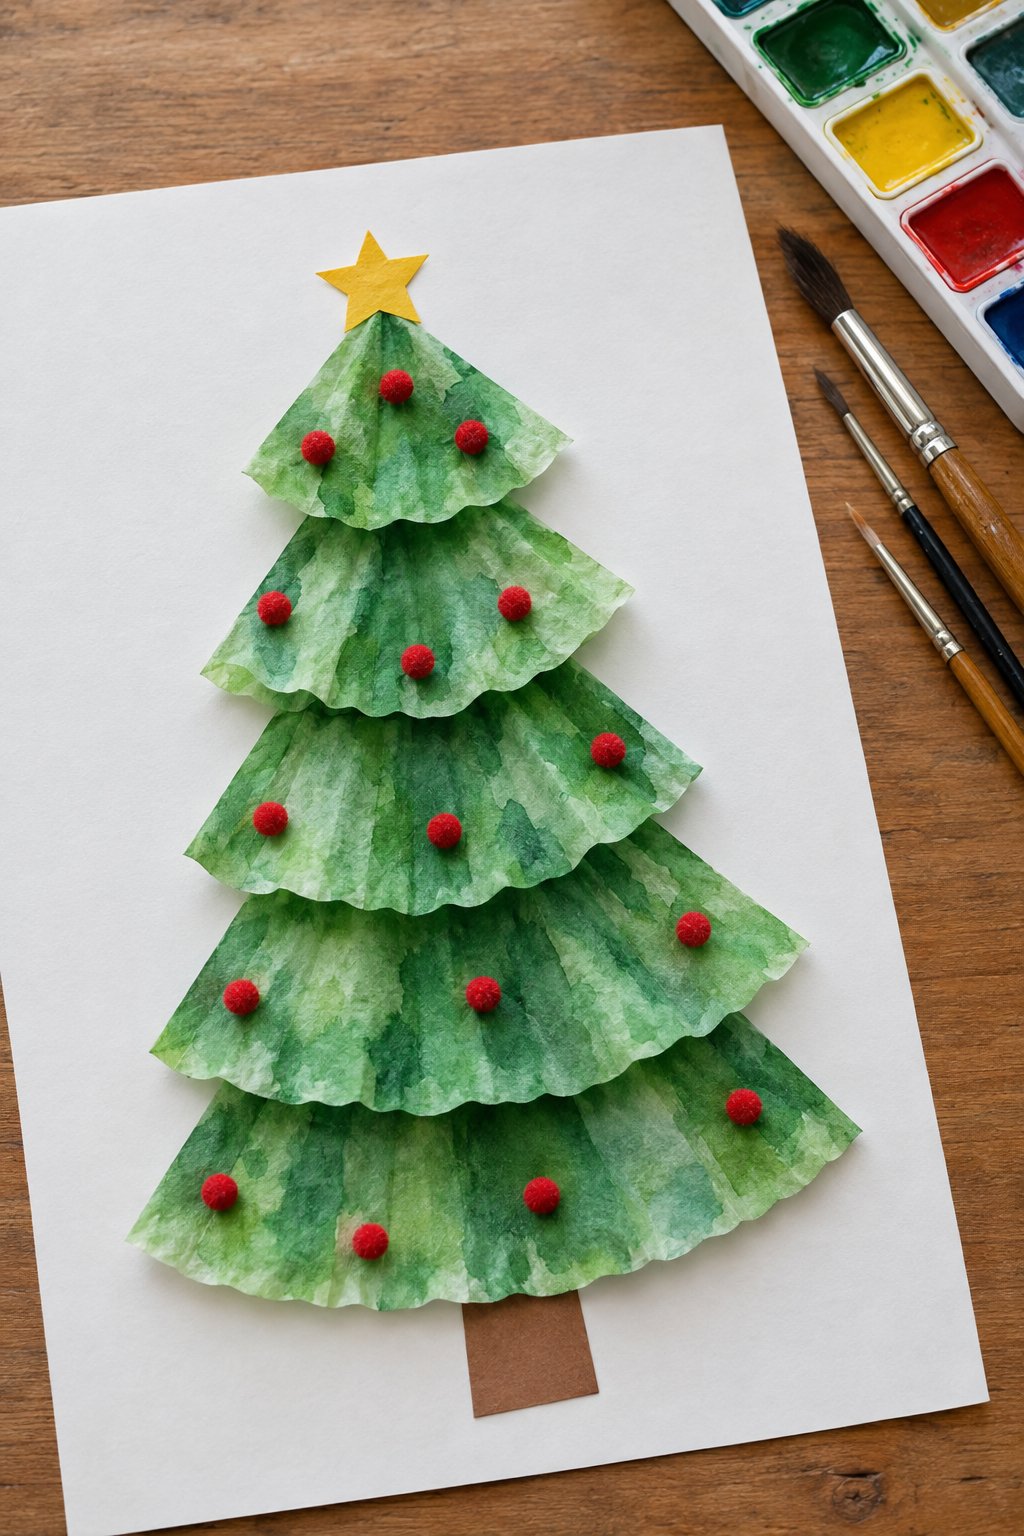
Let the green watercolor spread unevenly across the filters—the light and dark patches resemble those in this layered tree. Once dry, fold them into fan-shaped sections of different widths. Glue the widest section near the bottom of white cardstock and overlap smaller ones above it. Red pom-poms sit along the curved edges, beneath a yellow paper star.
Tissue Paper Christmas Wreath
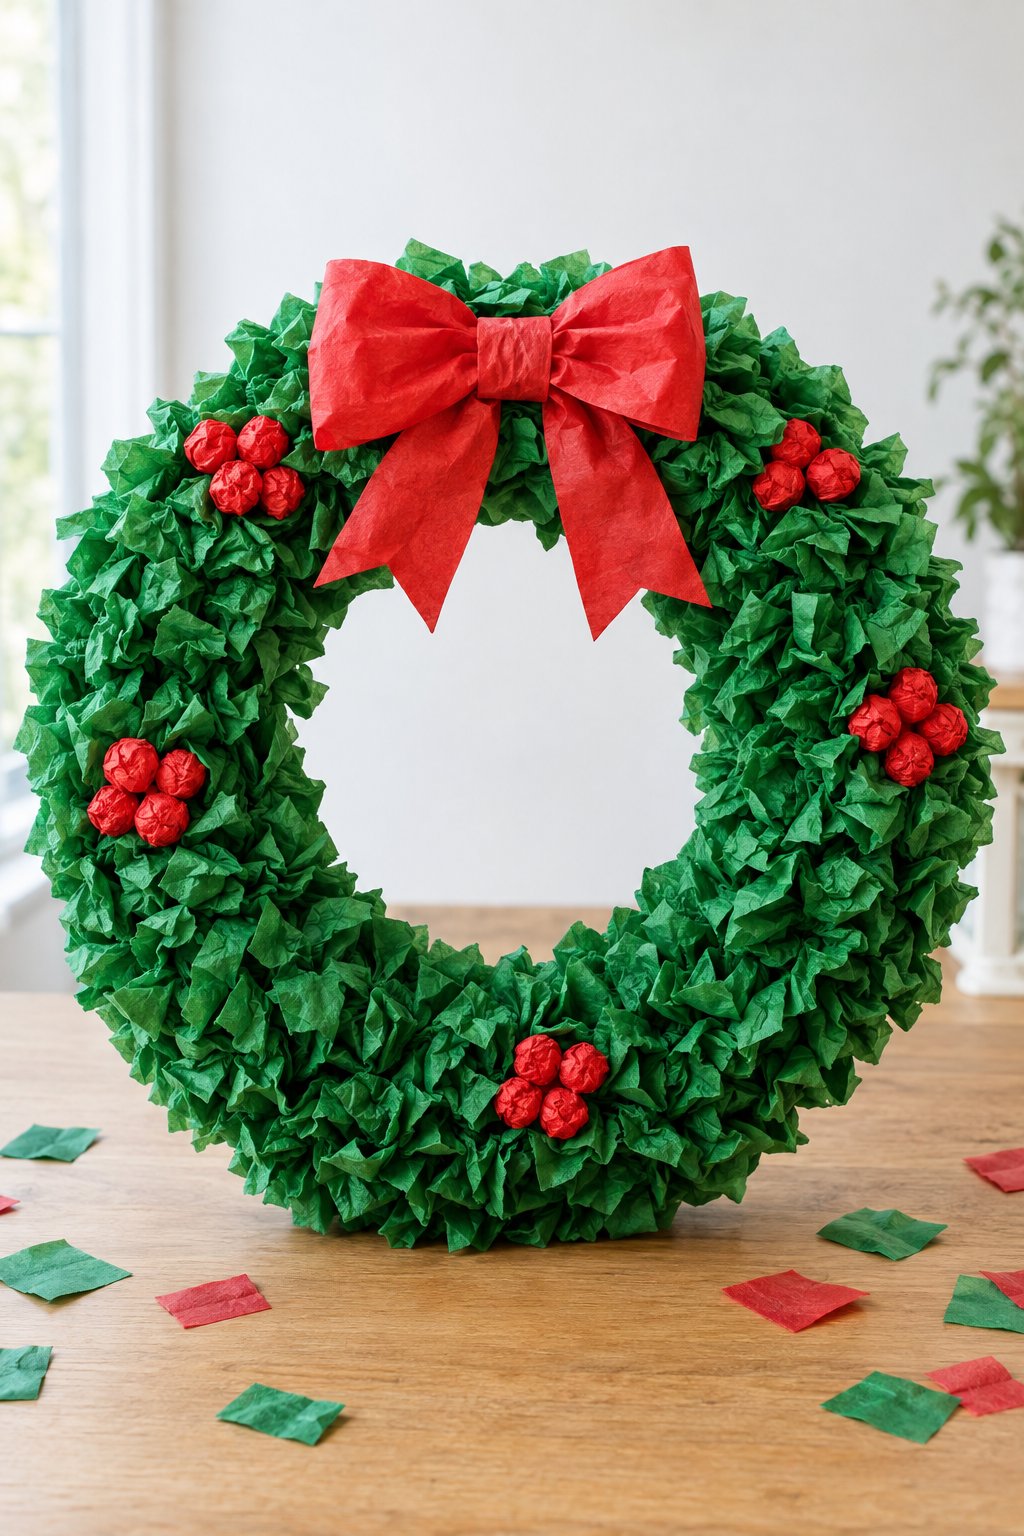
Scrunch small green tissue squares loosely rather than squeezing them into tight balls. Glued close together on a cardboard ring, their raised edges create the wreath’s leafy texture. Cover any visible gaps before attaching clusters of red tissue berries. For the large bow, pinch a folded rectangle of red tissue at its center and attach two tails beneath it.
Tissue Paper Stained Glass Ornament
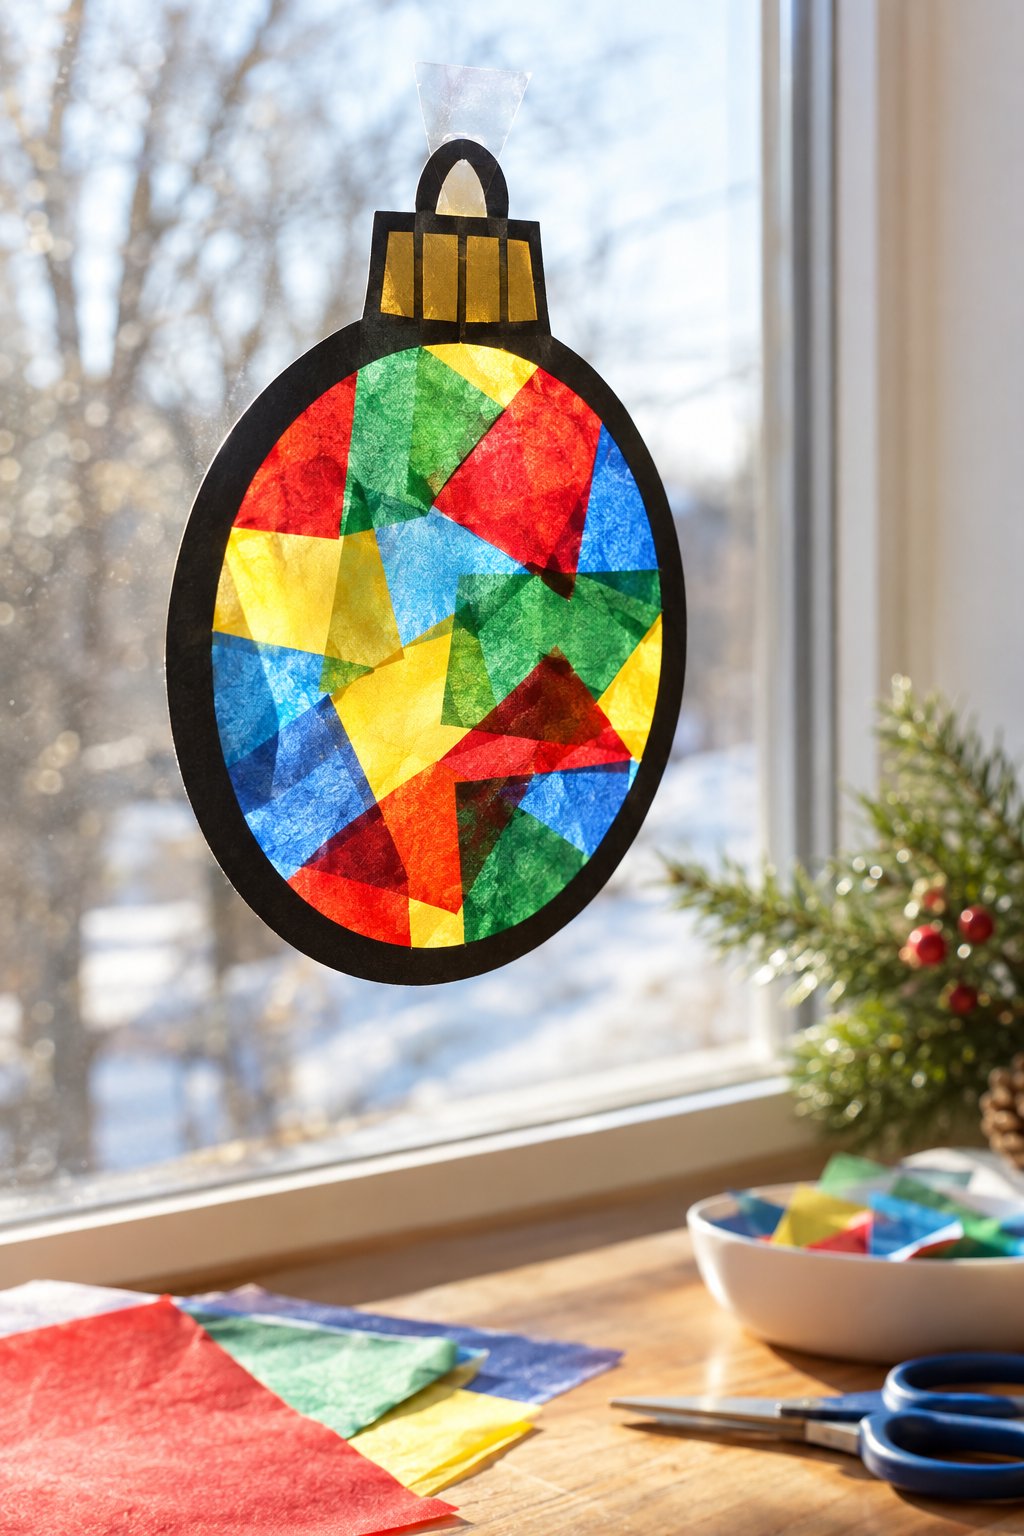
Against a sunny window, overlapping tissue scraps show patches of mixed color inside the black bauble outline. Cut the outline from cardstock and place it on clear adhesive film. Press colored tissue pieces into the open center, then cover with a second sheet of film. Trim around the frame and tape the ornament to the glass.
Paper Plate Christmas Wreath
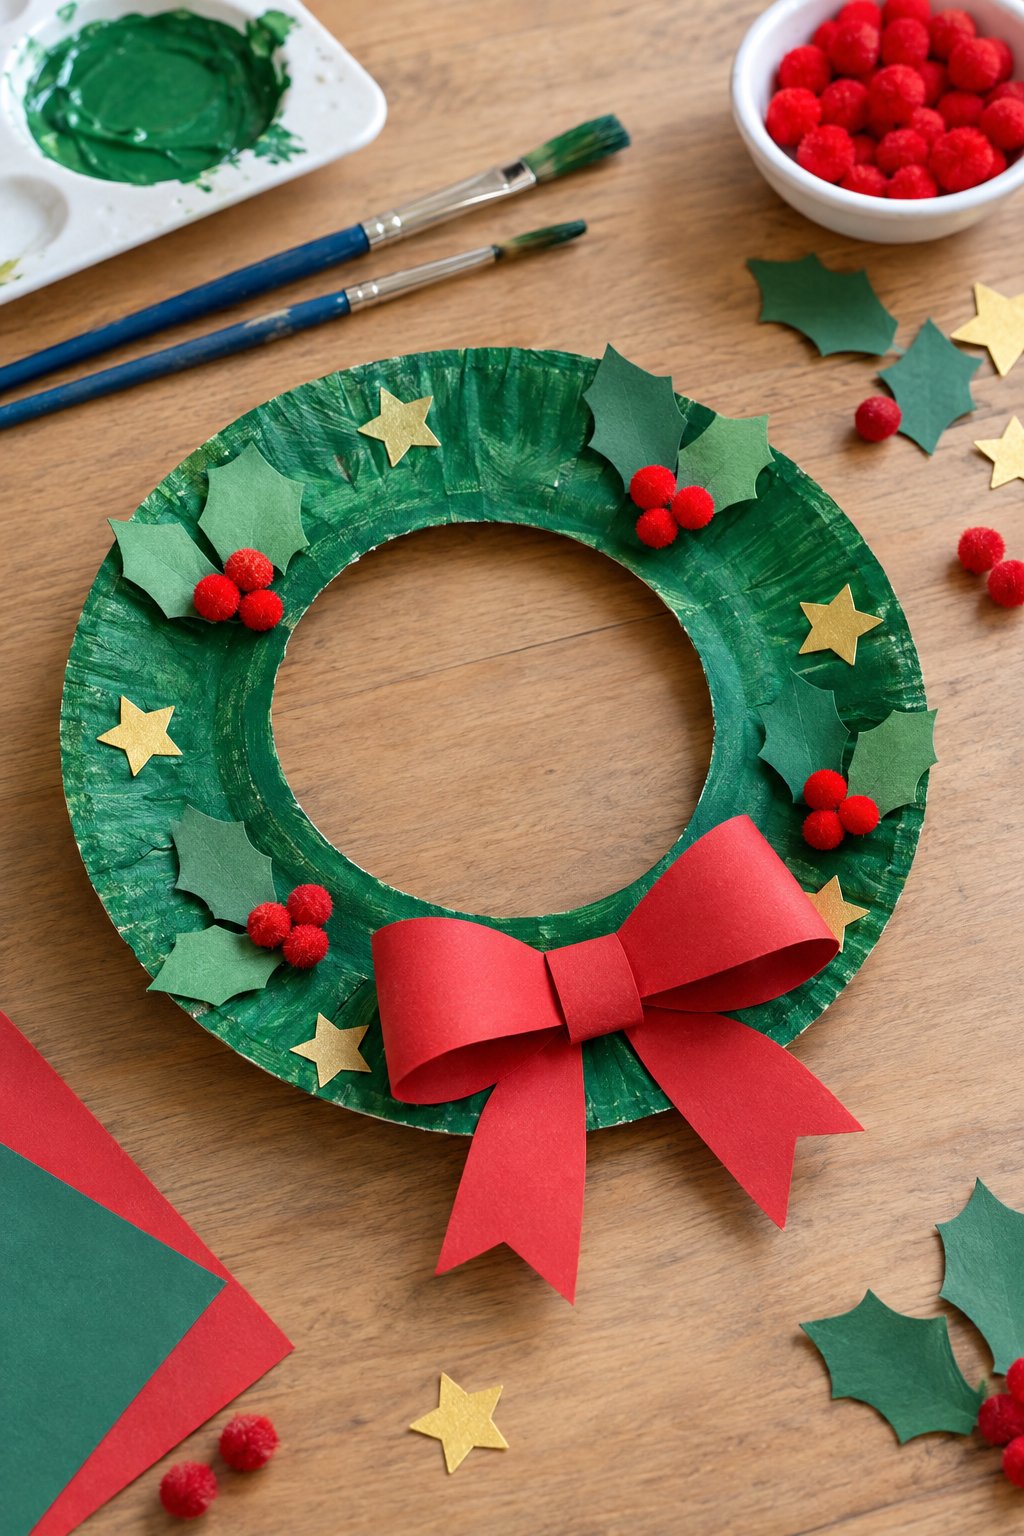
Keep the plate’s ridged rim when an adult cuts out the center; it forms the base of this wreath. Paint it green, then attach paper holly leaves and red pom-pom berries after it dries. The bow uses two looped paper strips with a narrow band around their join. Glue it near the bottom, between the gold stars.
Paper Plate Christmas Tree
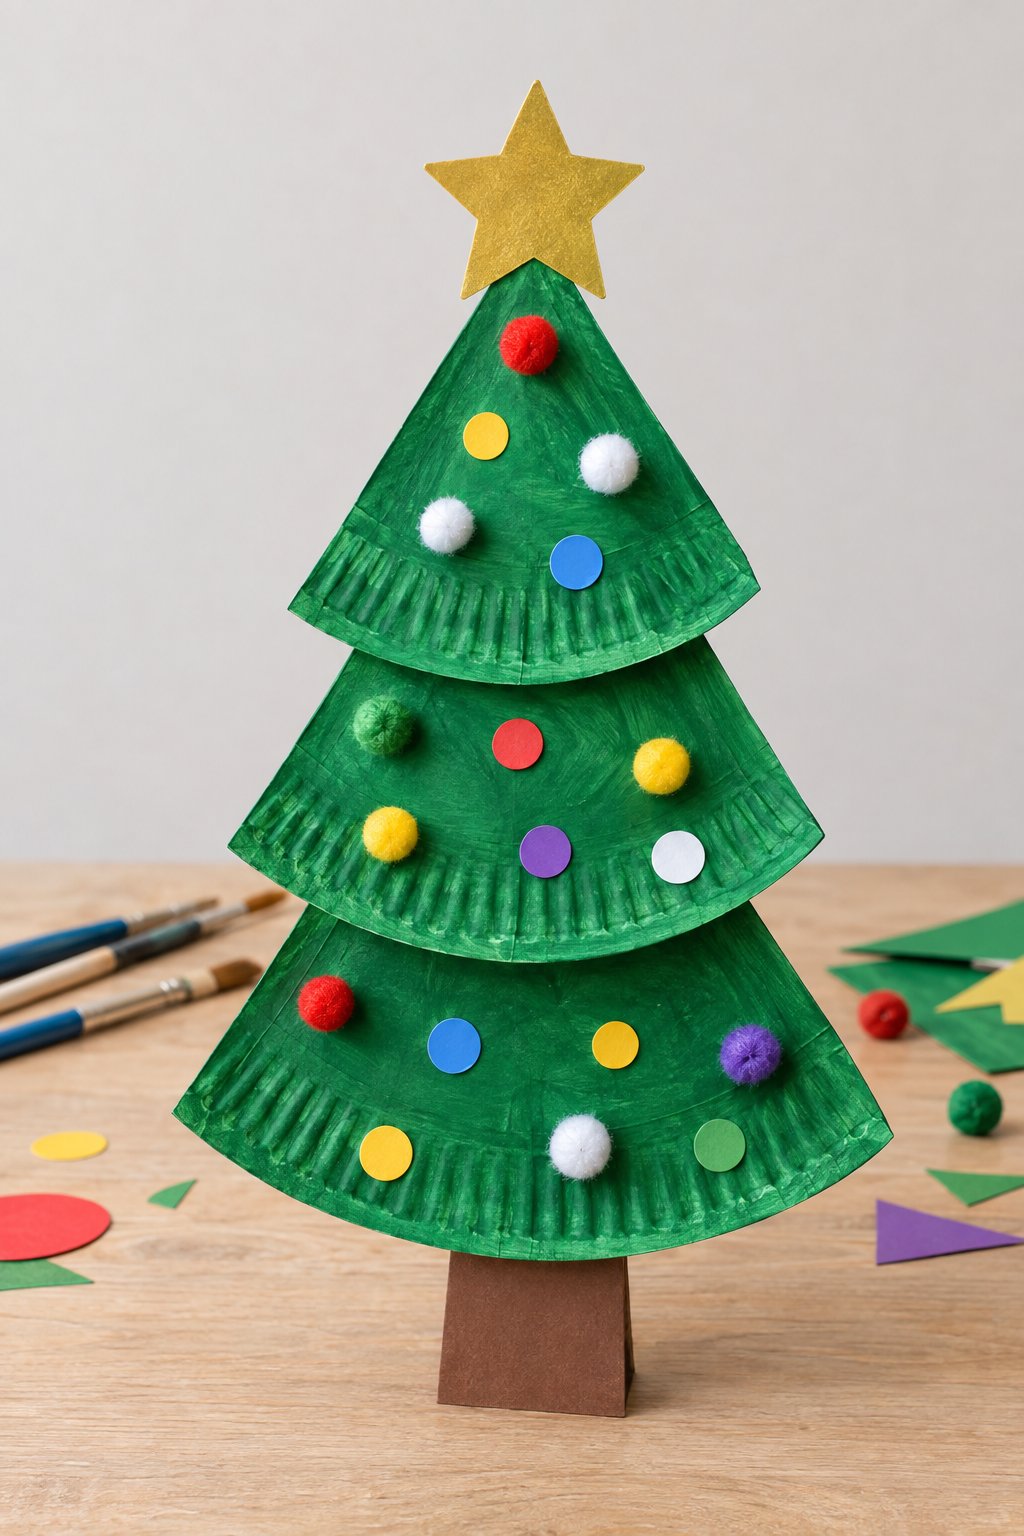
Three curved plate sections form the branches, with the smallest at the top. Cut wedges in graduated sizes, paint them green, and overlap their pointed ends on a sturdy cardboard strip. Glue on pom-poms, paper dots, and a yellow star. To stand the tree as pictured, attach a folded cardboard support behind the brown trunk.
Paper Plate Reindeer
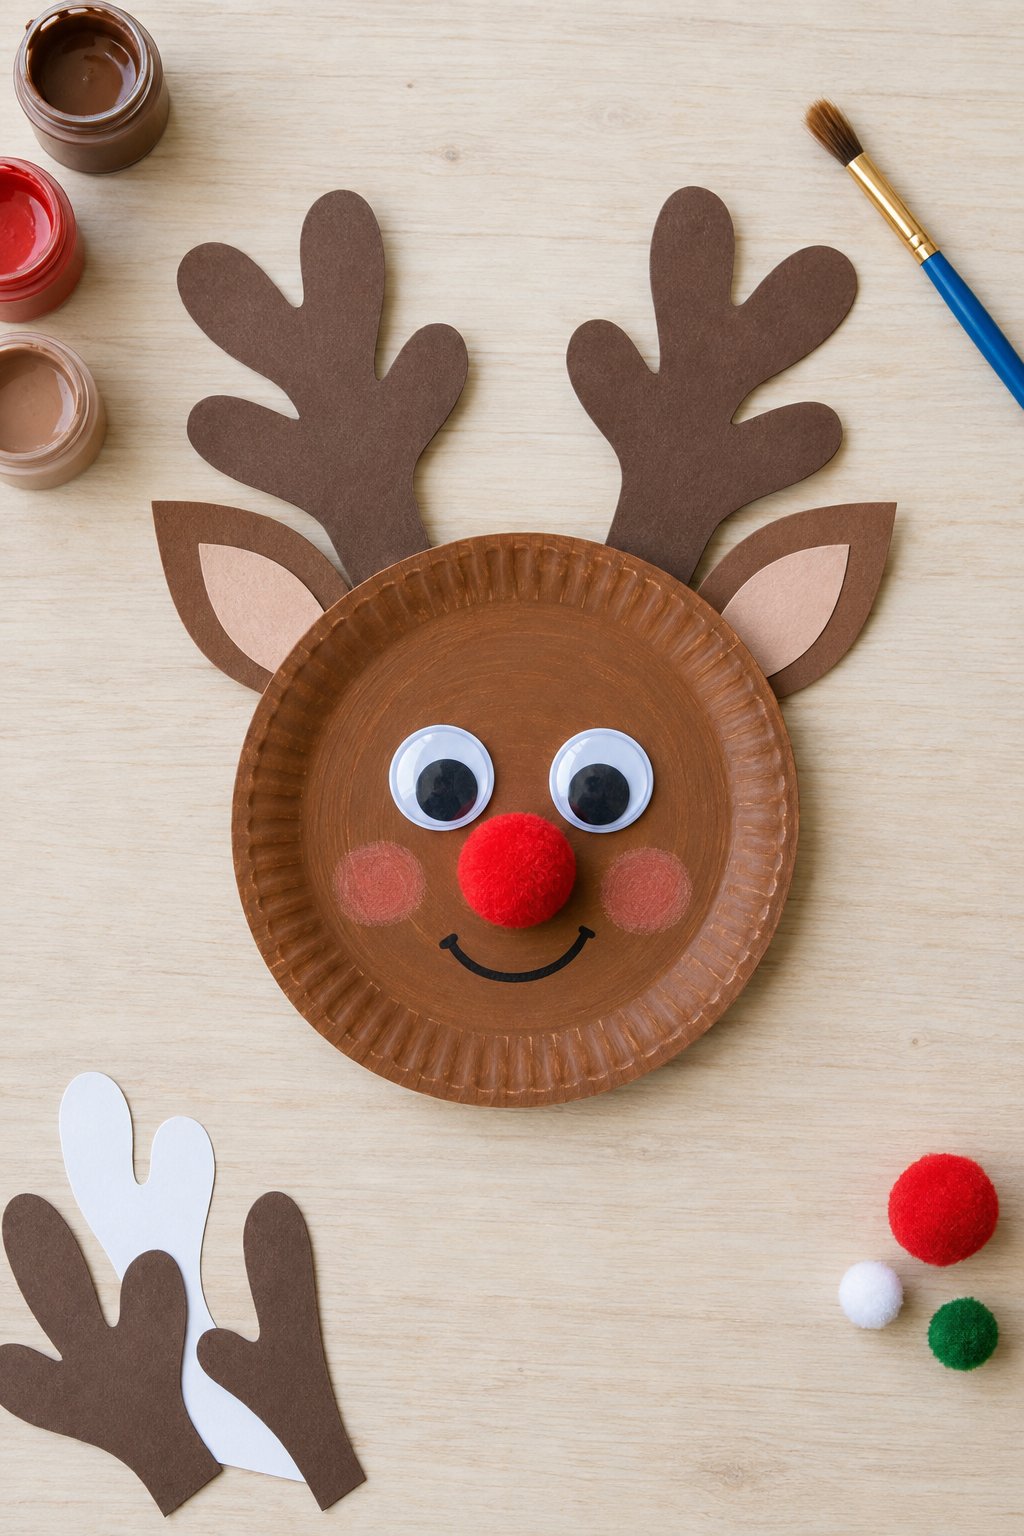
Those tall antlers need firm cardstock to stay upright above the plate. Cut them out with two ears while the brown paint dries, then glue their bases behind the upper rim. Pink paper inserts distinguish the ears from the antlers. Let children position the googly eyes and oversized red nose before drawing the smile and rosy cheeks.
Paper Plate Christmas Elf
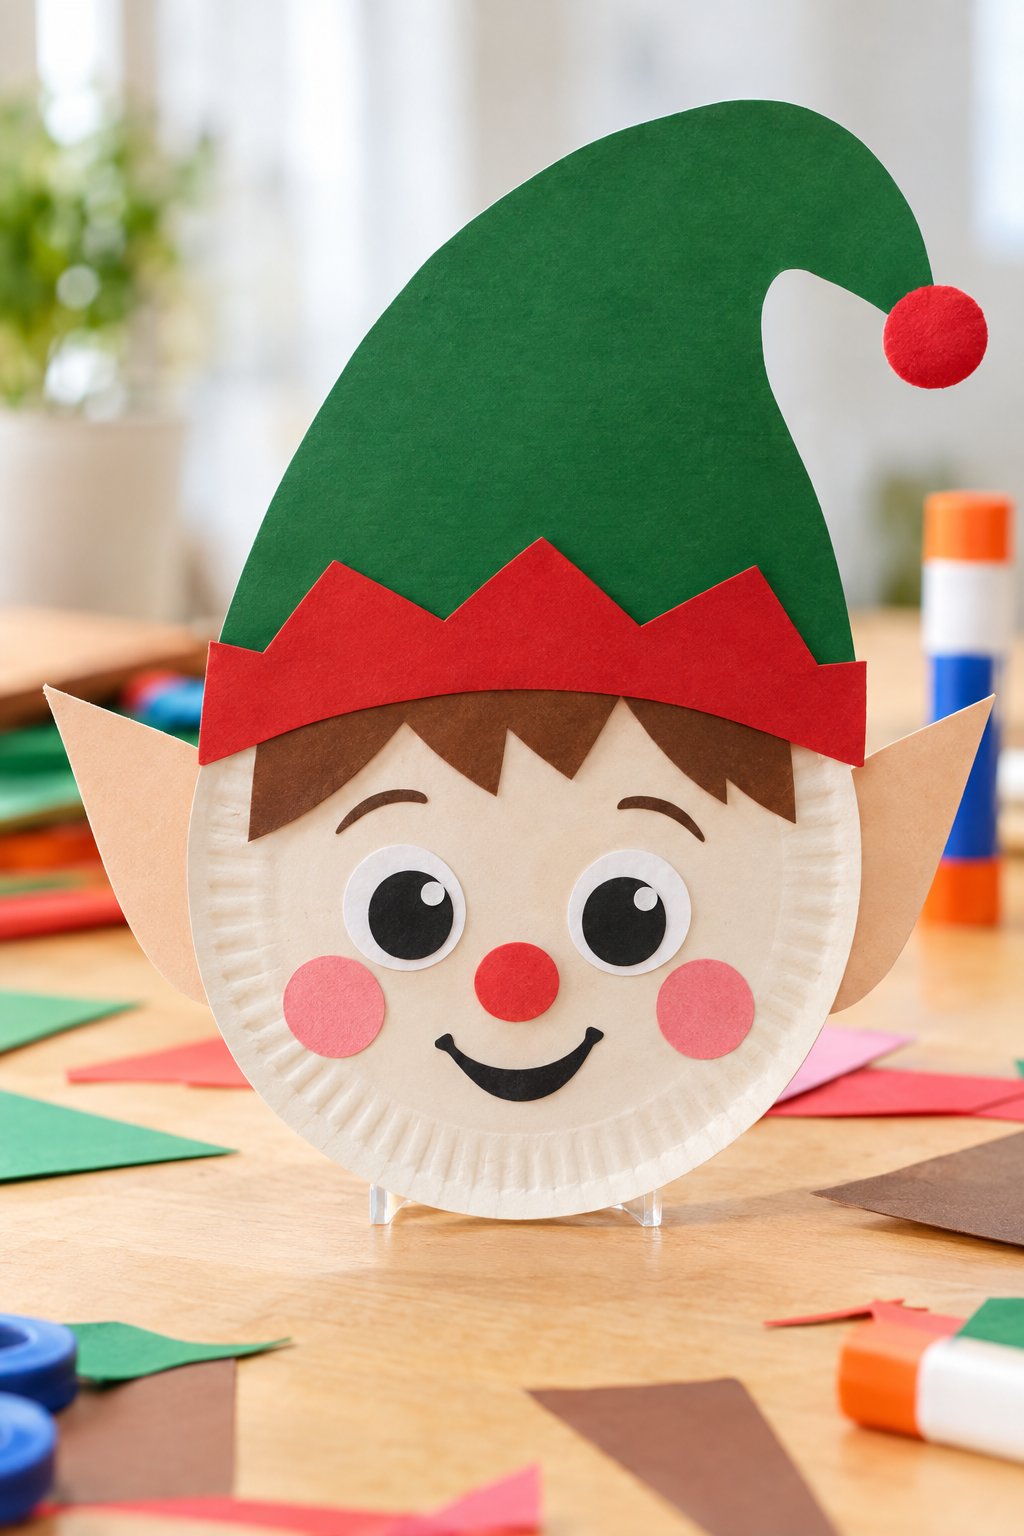
A bent green hat and pointed ears distinguish this elf from the other plate characters. Start with a cream-colored plate, then attach brown paper fringe across the forehead. Fit the green hat above it with a zigzag red brim. The face needs large paper eyes, pink cheeks, and a curved black smile; a red pom-pom marks the hat’s tip.
Beaded Candy Cane Ornament
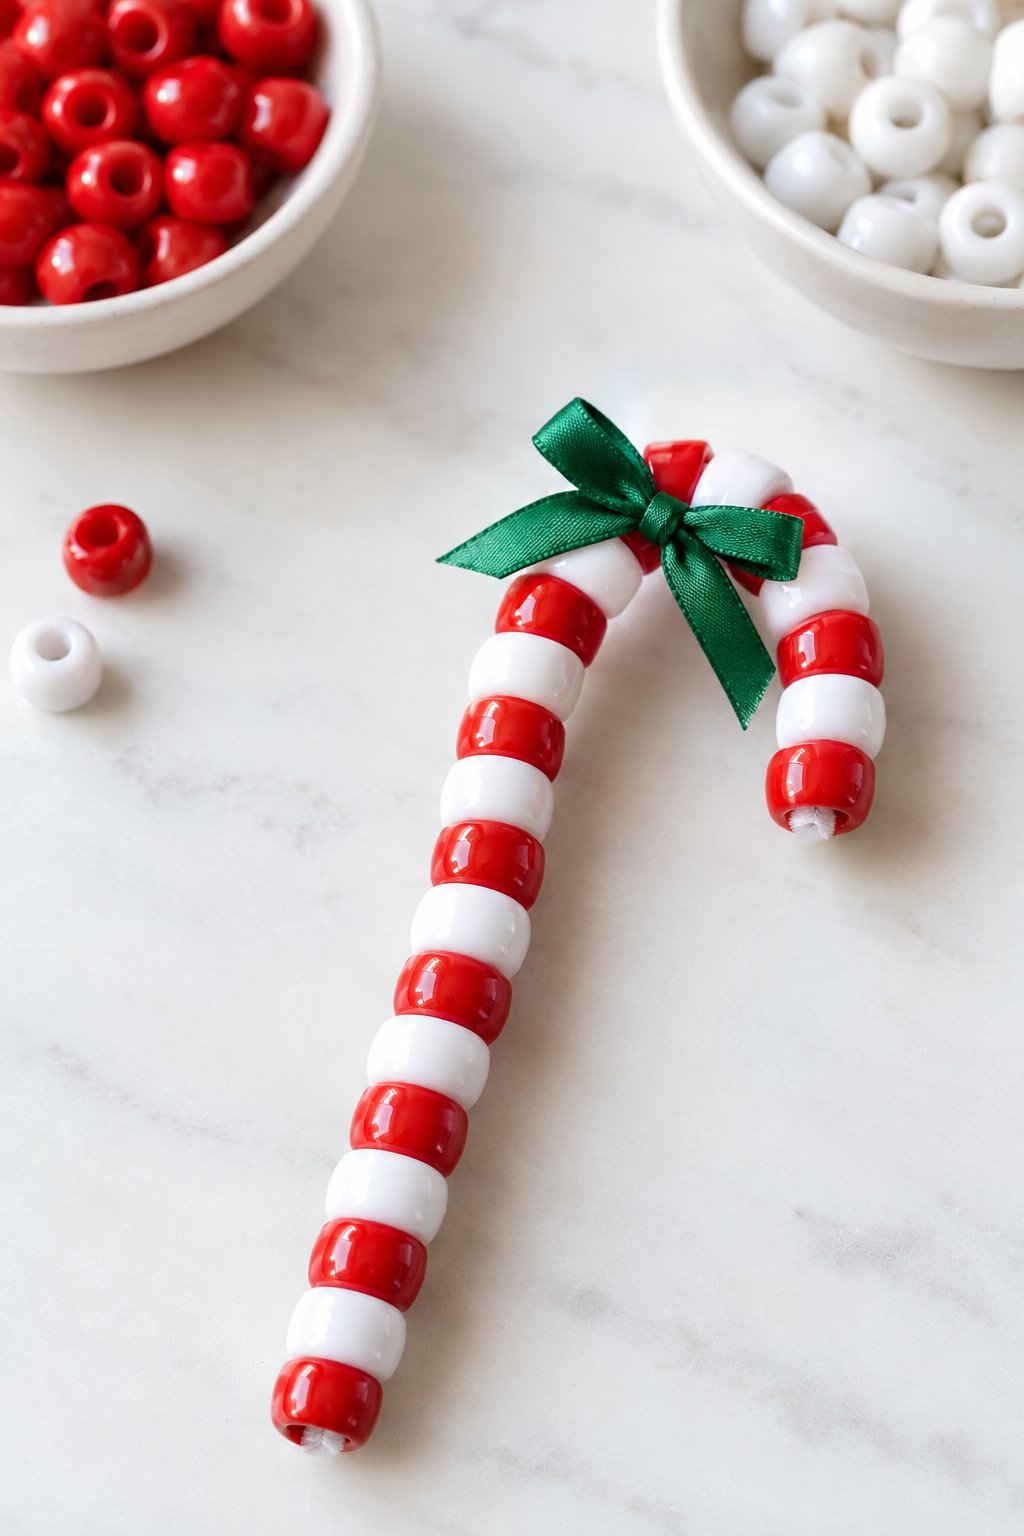
Alternate one red bead with one white bead along a pipe cleaner, after folding its first end into a small stop. Leave enough bare stem at the other end to fold back securely around the final bead. Gently bend the upper section into a hook. The small green ribbon bow sits just below the candy cane’s curve.
Beaded Christmas Tree Ornament
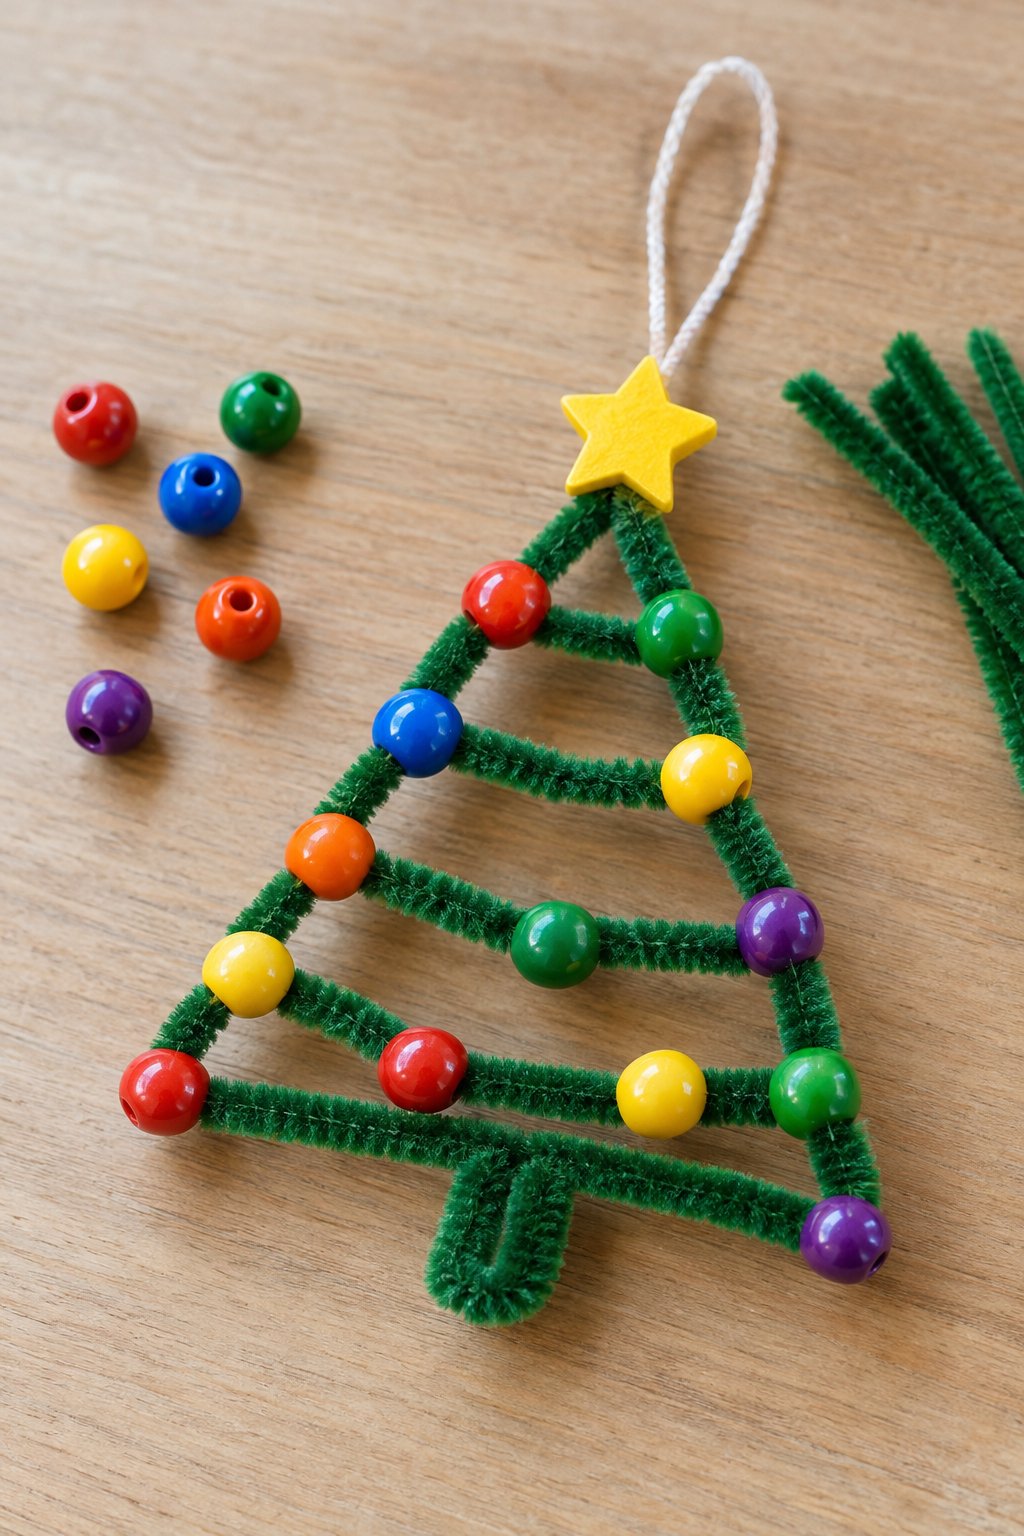
Unlike a solid paper tree, this ornament has open spaces between its beaded branches. Shape green pipe cleaners into a triangular frame, then stretch shorter pieces across it in staggered rows. Slide colorful beads onto each piece before twisting the ends around the frame. A small loop below forms the trunk, while a yellow star covers the top join.
Cardboard Gingerbread House
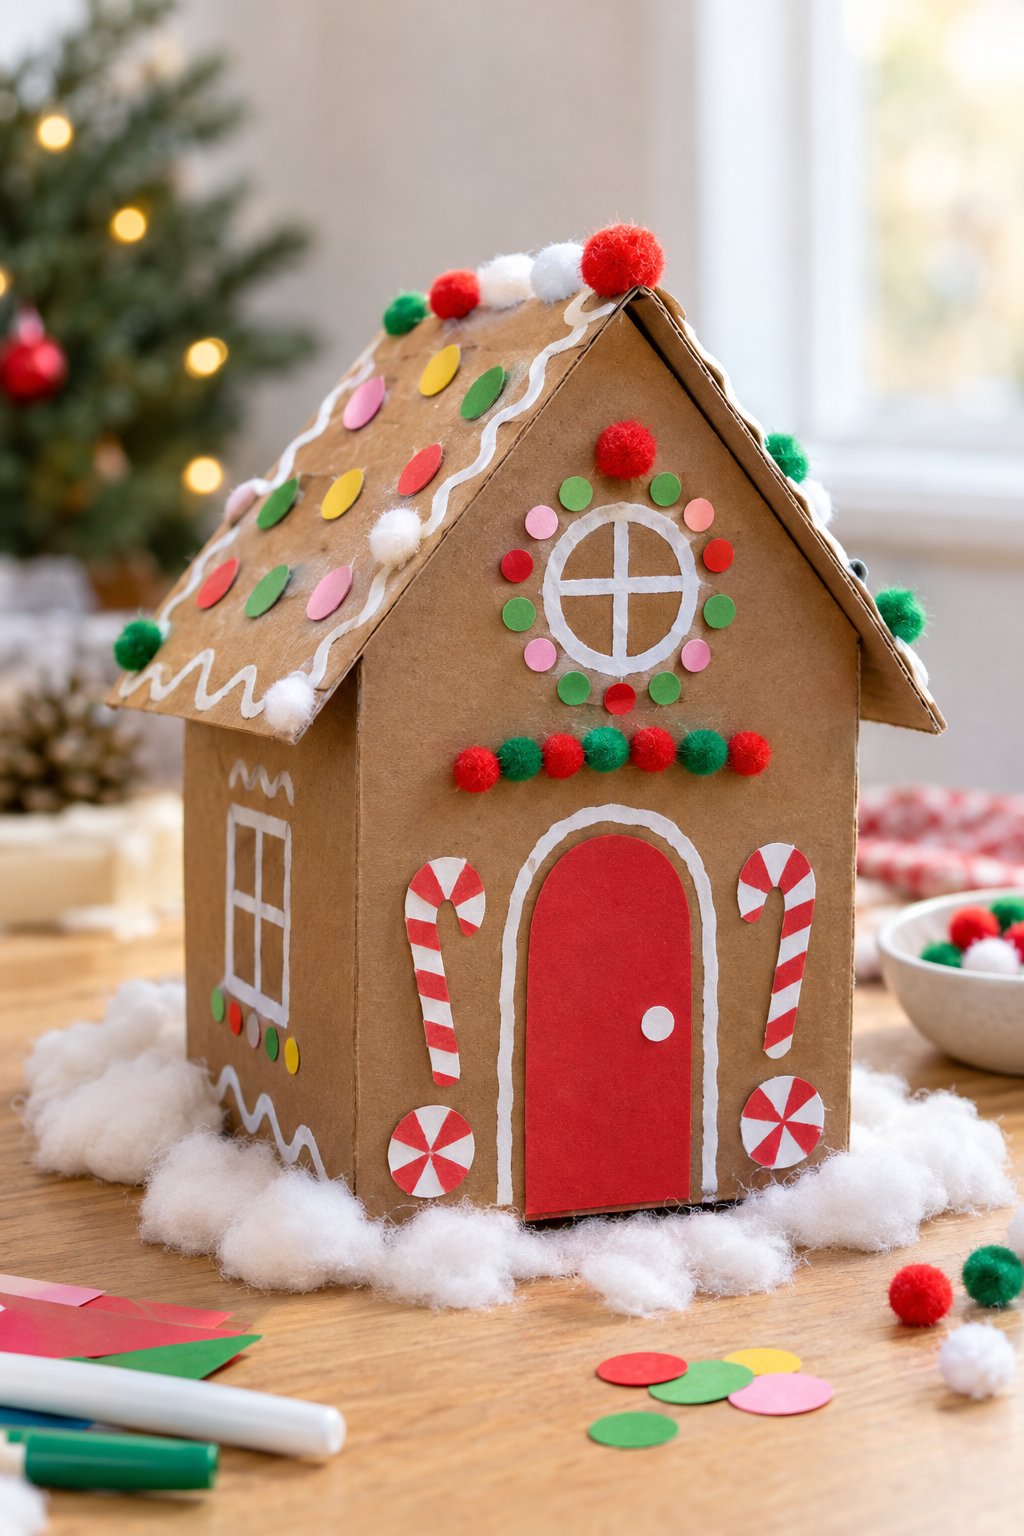
Decorate the walls while they’re flat; the white window lines and candy-cane stripes will be easier to draw. An adult can cut two house-shaped ends, two side walls, and two roof panels from corrugated cardboard. Assemble with glued tabs after decorating. Paper sweets, pom-poms, and cotton snow complete the house without any icing or baking.
Pom-Pom Christmas Wreath Ornament
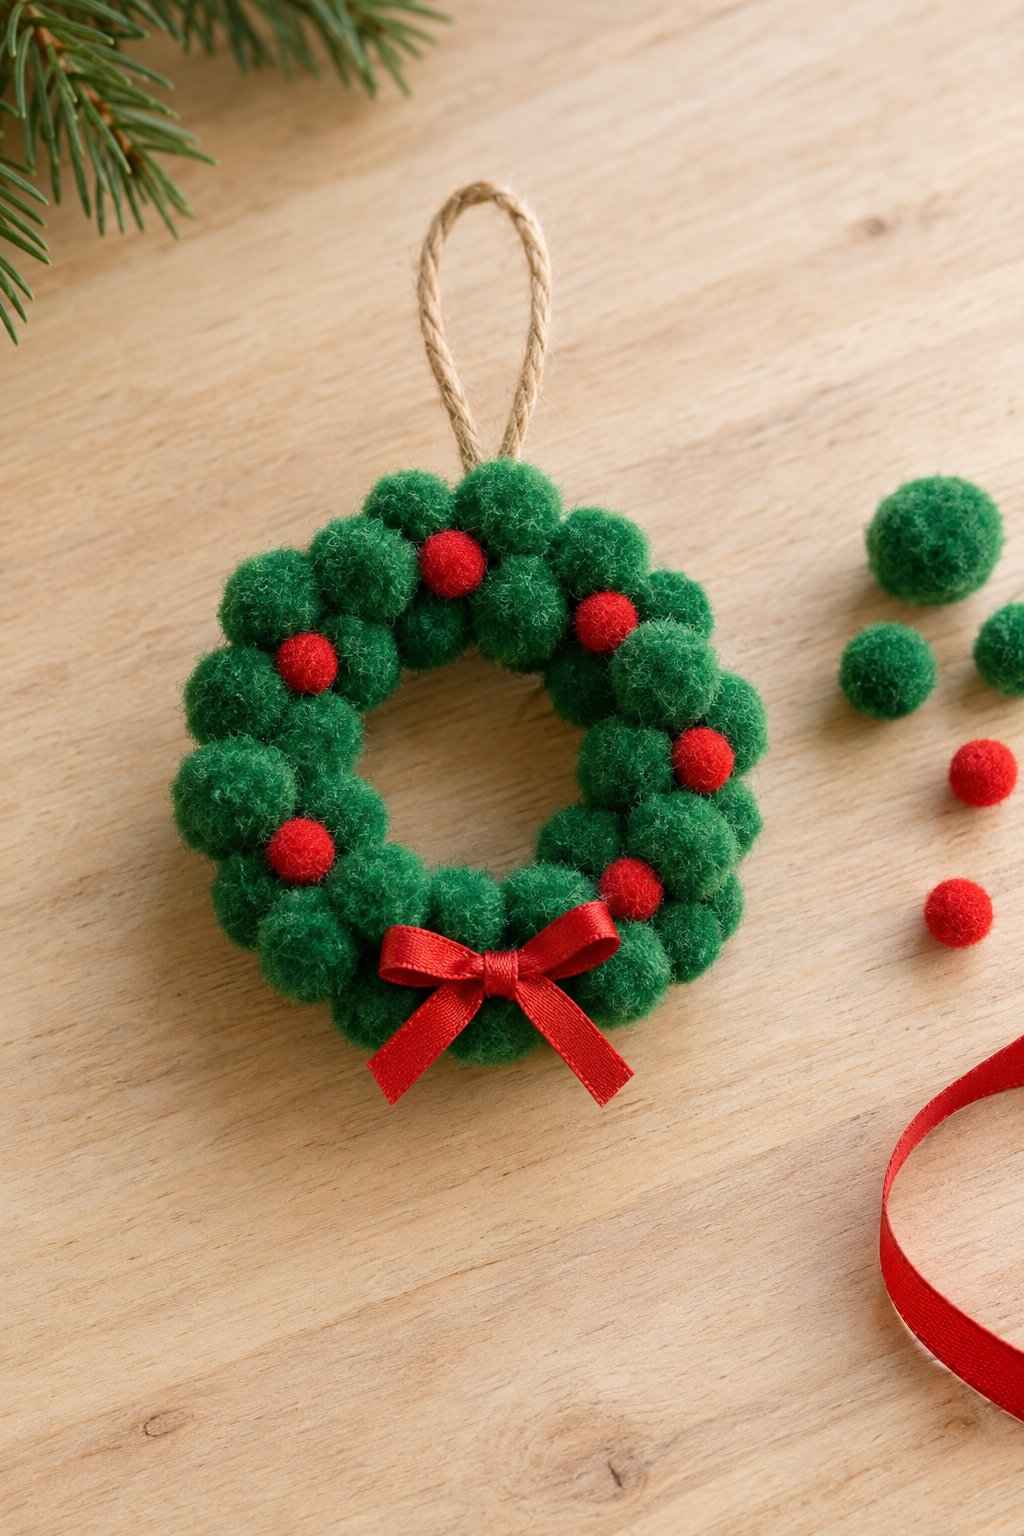
For this small wreath, cut a cardboard ring narrow enough to hide beneath two rows of green pom-poms. Glue them closely around both edges, with smaller red ones tucked into the gaps. Secure the twine loop to the back and a red ribbon bow at the bottom. Leave it flat until the glue has set.