
A quiet hour with a Christmas craft has its own appeal during a packed November or December. You are deep into the process, and the decoration gradually takes shape. Each step keeps your attention on the joy of making.
From cute Christmas crafts to creative holiday decorations and personalized gifts, find plenty of festive inspiration here for your next project, whether you do it on your own or with your kids.
Table of Contents
- Yarn Christmas Tree Gift Wrap
- White and Gold Christmas Ornaments
- Wall-Mounted Tinsel Christmas Tree
- Popsicle Stick Christmas House Ornaments
- Dried Orange Slice Garland
- Stamped Clay Christmas Ornaments
- Macramé Christmas Tree Wall Hanging
- Cinnamon Stick Candle Wrap
- Mini Pinecone Wreath
- Painted Wooden Bead Garland
- Sweater Sleeve Candle Holders
- Twig Star Ornaments
- Felt Christmas Tree Garland
- Pressed Botanical Christmas Cards
- Decoupage Christmas Baubles
- Folded Book-Page Christmas Trees
- Snowy Glass Jar Lanterns
- Wine Cork Reindeer
- Fabric Scrap Christmas Trees
- Wood Slice Photo Ornaments
- Embroidery Hoop Christmas Wreath
- Pom-Pom Christmas Tree
- Wooden Spoon Christmas Characters
- Stamped Kraft Paper Gift Wrap
- Christmas Potpourri Jars
- Chunky Yarn Mini Wreaths
- Pinecone Christmas Trees
- Rope Christmas Trees
- Christmas Wax Sachets
- Terracotta Pot Snowmen
- Mason Jar Christmas Centerpiece
- Hand-Painted Wooden Ornaments
- Bell Cluster Door Hanging
- Linen Napkin Christmas Trees
- Sheet Music Christmas Tree
- Faux Gingerbread Clay Ornaments
- Evergreen Hoop Ornaments
- Dry Snow Globe Jars
- Velvet Ribbon Ornament Bows
- Scrap Fabric Rag Garland
- Painted Terracotta Christmas Pots
- Christmas Candle Centerpiece
- Button Christmas Tree Art
- Painted Wooden Christmas Sign
- Felt Mistletoe Hanging
- Wine Cork Christmas Tree Art
- Wooden Bead Snowflake Ornaments
- Faux Stained Glass Christmas Ornaments
- Bottle Brush Tree Display
- Christmas Scented Candles
- Rope-Wrapped Christmas Baubles
- Hand-Stamped Christmas Tea Towels
- Mini Wreath Place Cards
- Christmas Tree String Art
- Handmade Evergreen Swag
- Simple Christmas Village Houses
Yarn Christmas Tree Gift Wrap
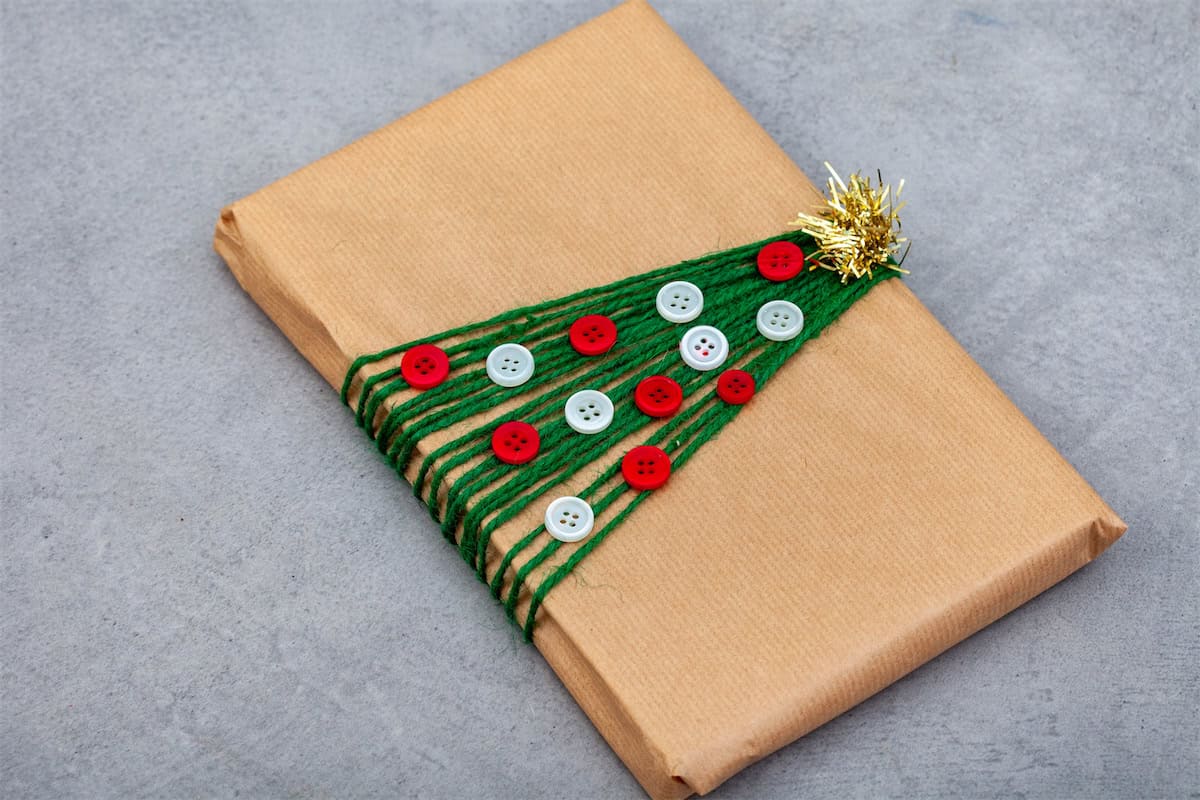
Skip the gift bag and decorate a kraft-paper parcel with a yarn tree. Glue green yarn across the front in rows that get shorter toward the top. A few spare buttons become ornaments, and a gold star finishes the tip. Keep the glue on the paper rather than the gift.
White and Gold Christmas Ornaments
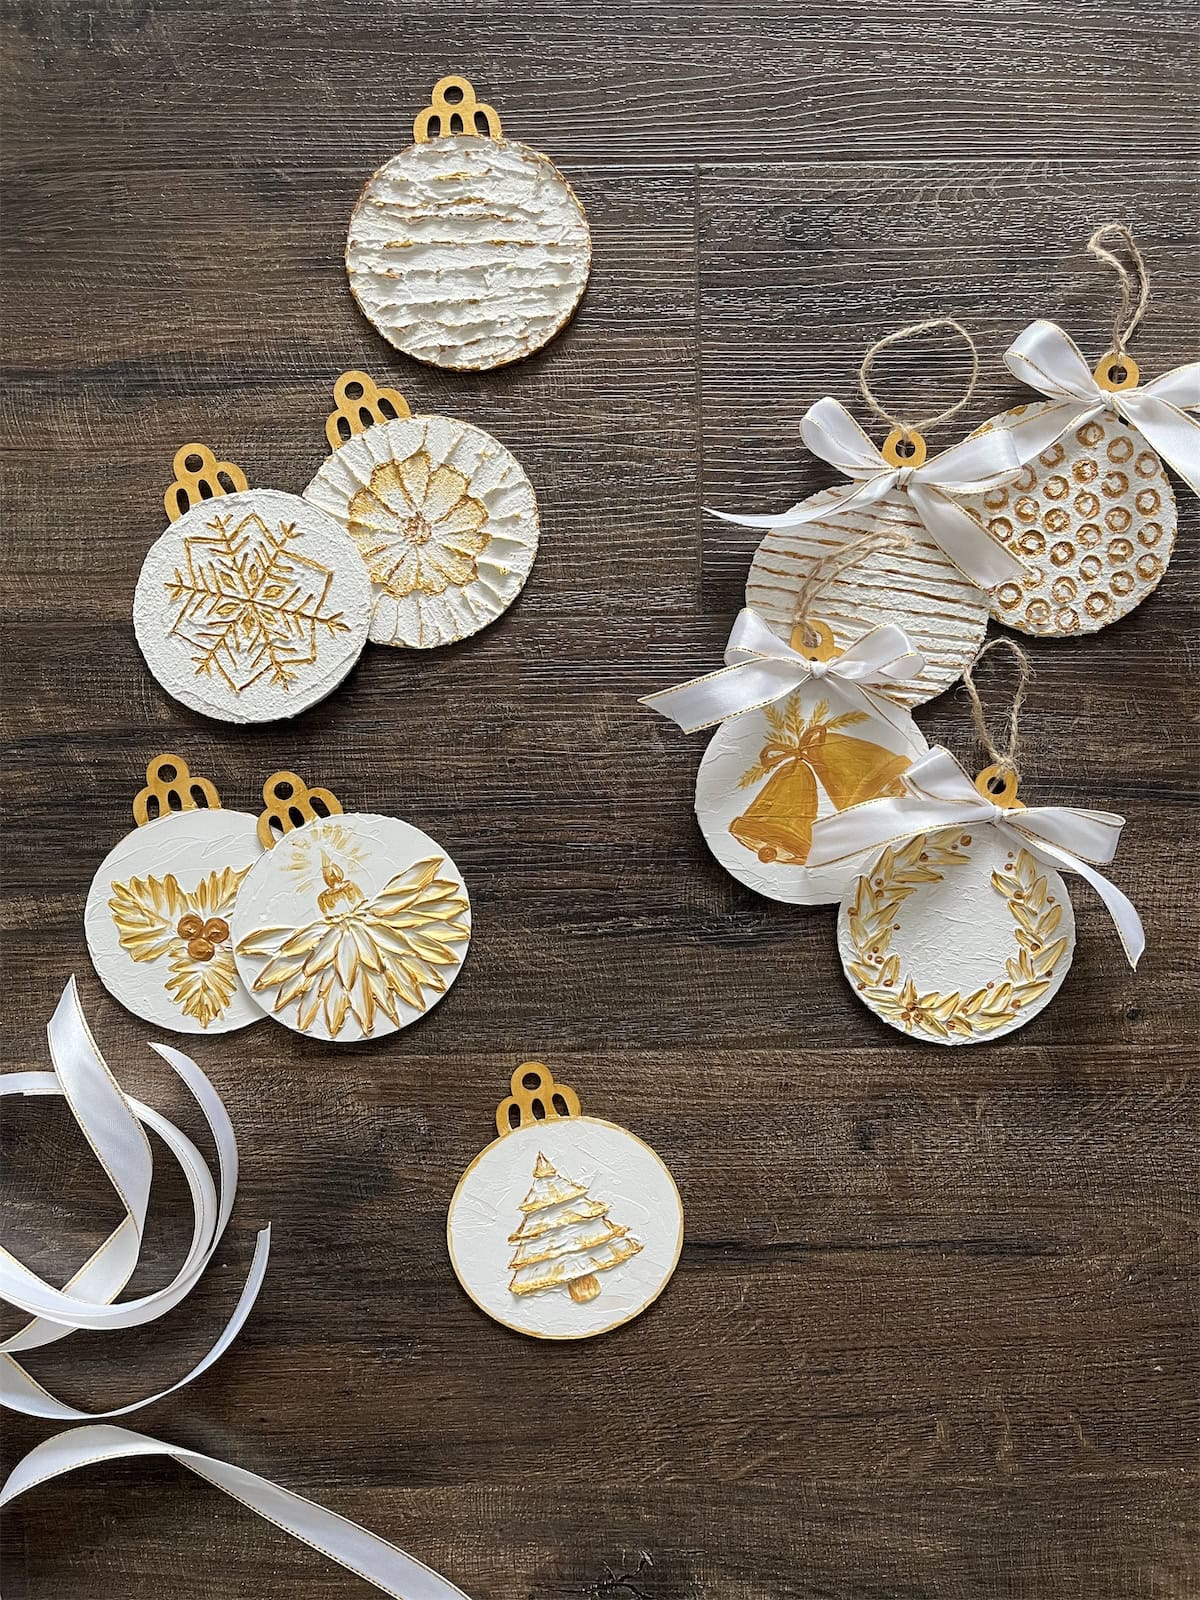
Press lace or a textured stamp into rolled air-dry clay before cutting out these round ornaments. Pierce the hanger holes while the clay is soft. After drying, a light brush of gold paint will pick out the raised details; leave the recessed areas white for contrast. Thread with ribbon once the paint has set.
Wall-Mounted Tinsel Christmas Tree
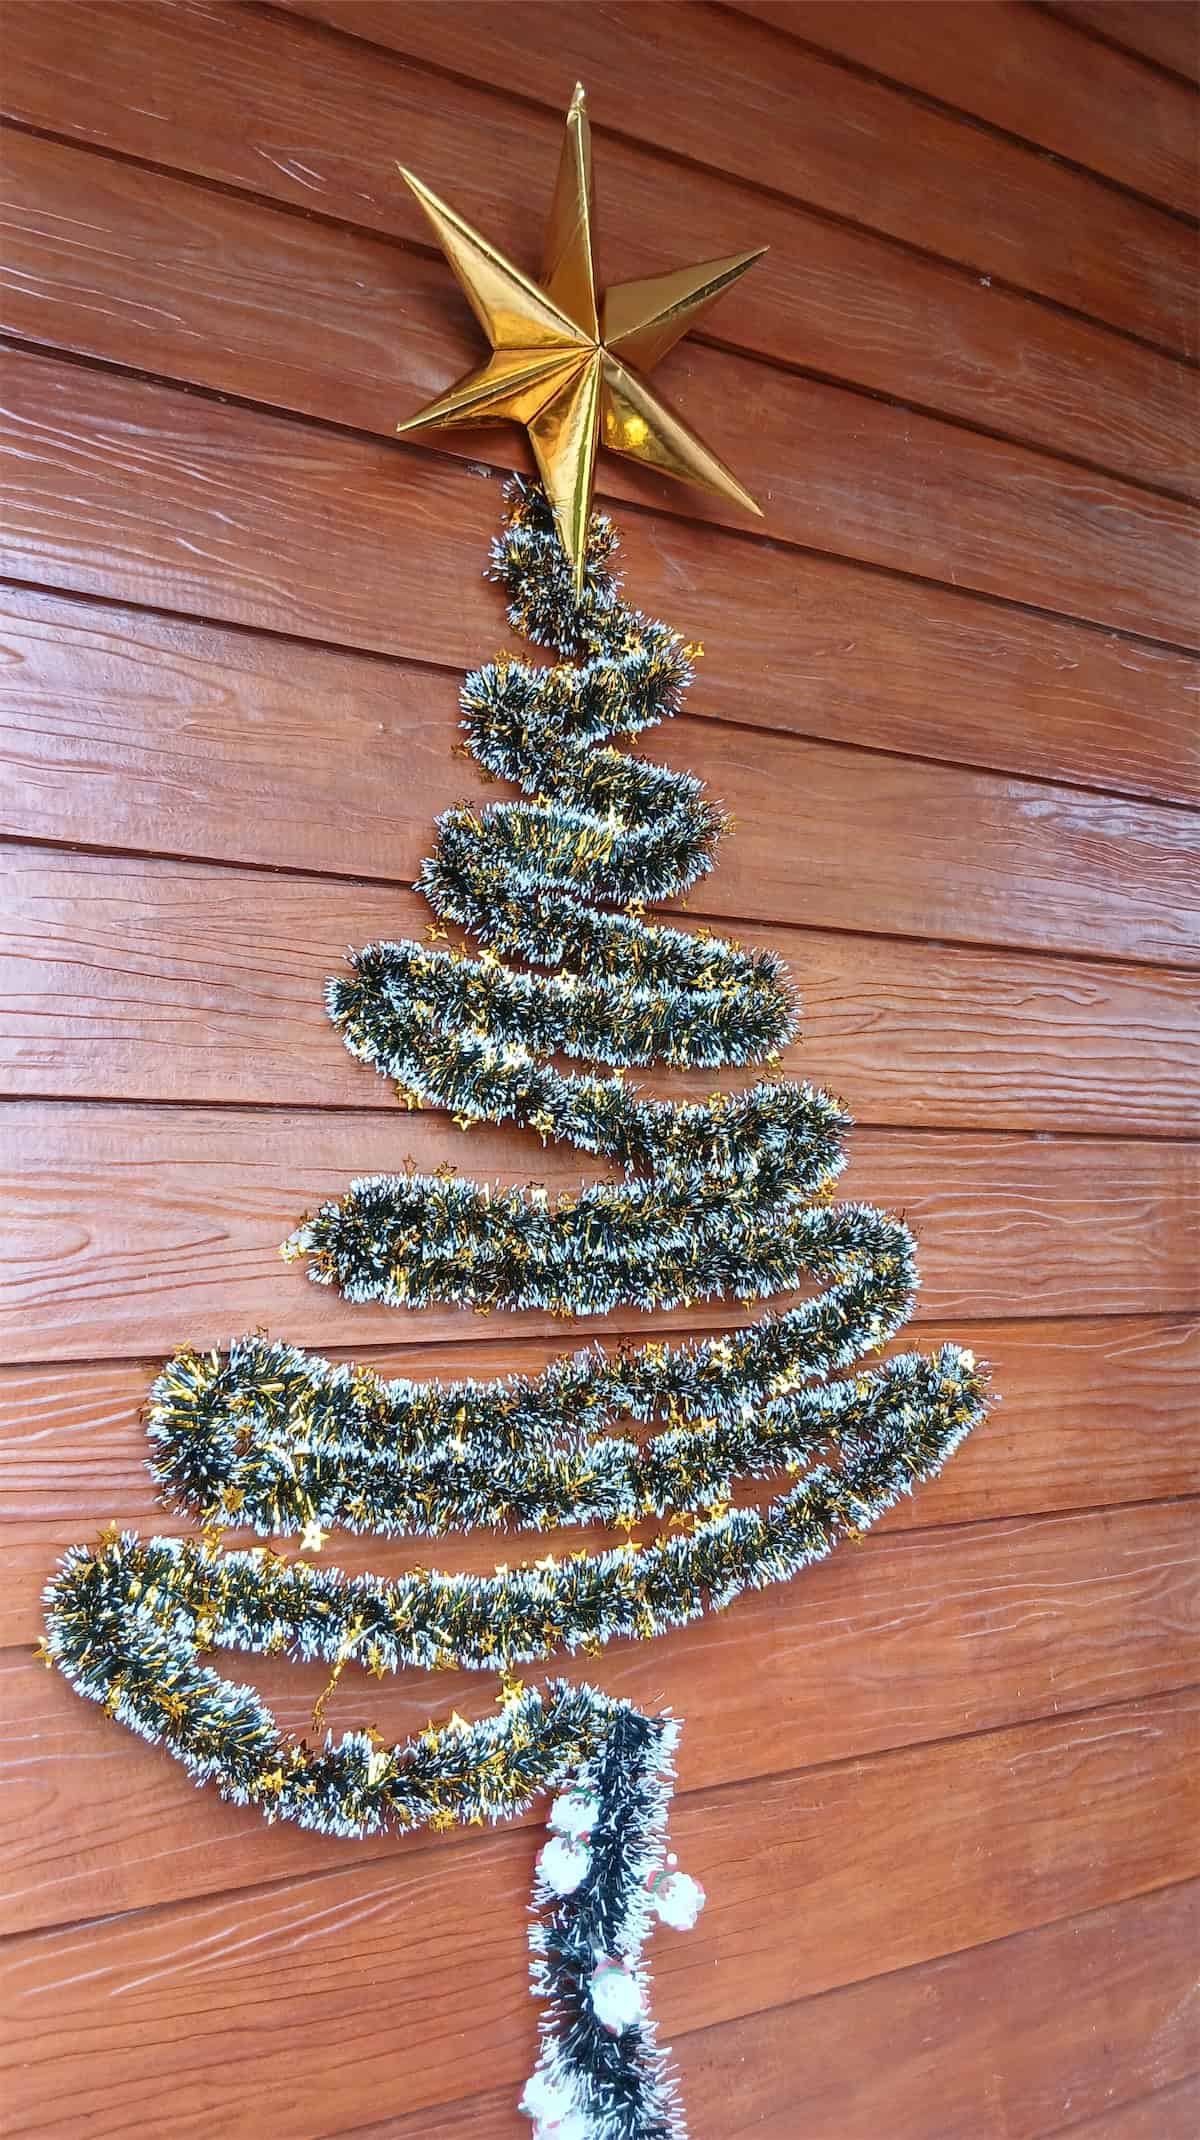
No room for another tree on the floor? Drape tinsel across removable wall hooks, starting with short rows near the star and widening each row below. A final vertical length forms the trunk, and the whole arrangement packs away into a small box after Christmas.
Popsicle Stick Christmas House Ornaments
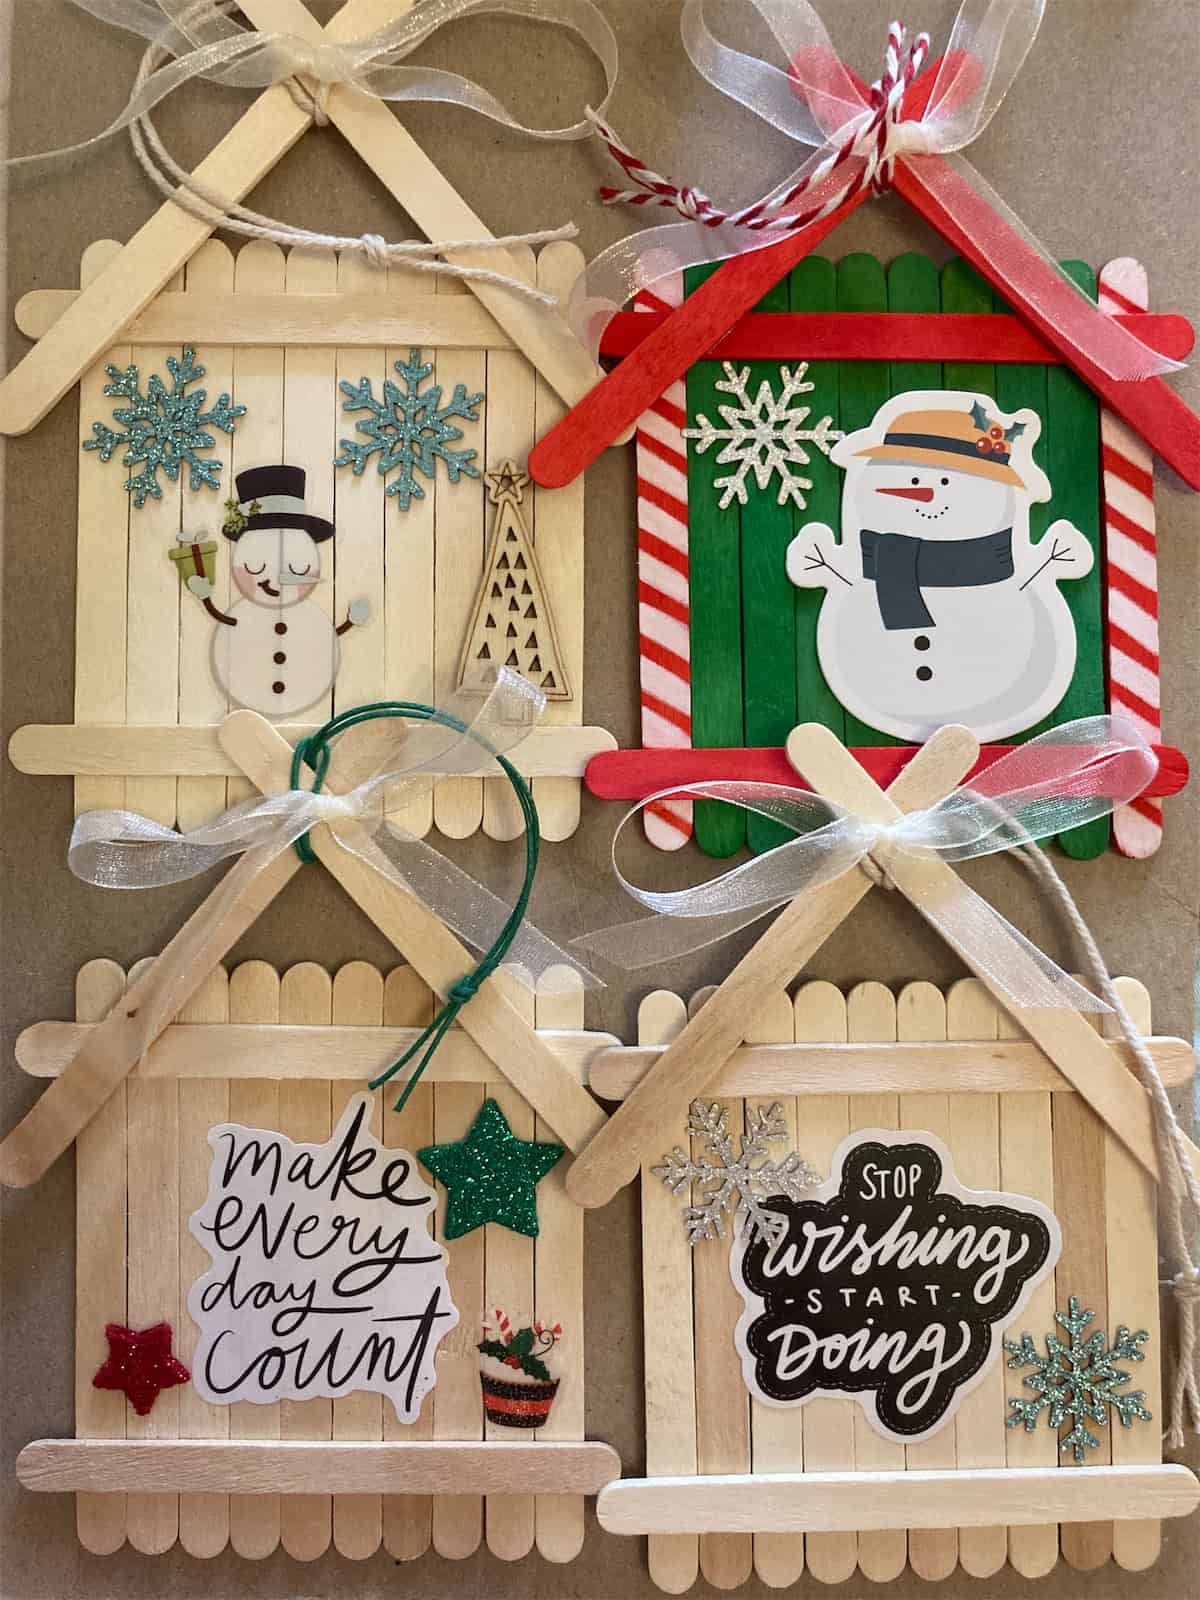
These little houses leave plenty of room for personal touches: a child’s name, a Christmas message, or a favorite snowman sticker. Assemble the walls from craft sticks glued onto two horizontal supports, then add an angled roof.
Paint before attaching paper decorations, and fasten a ribbon loop securely behind the roof peak.
Dried Orange Slice Garland
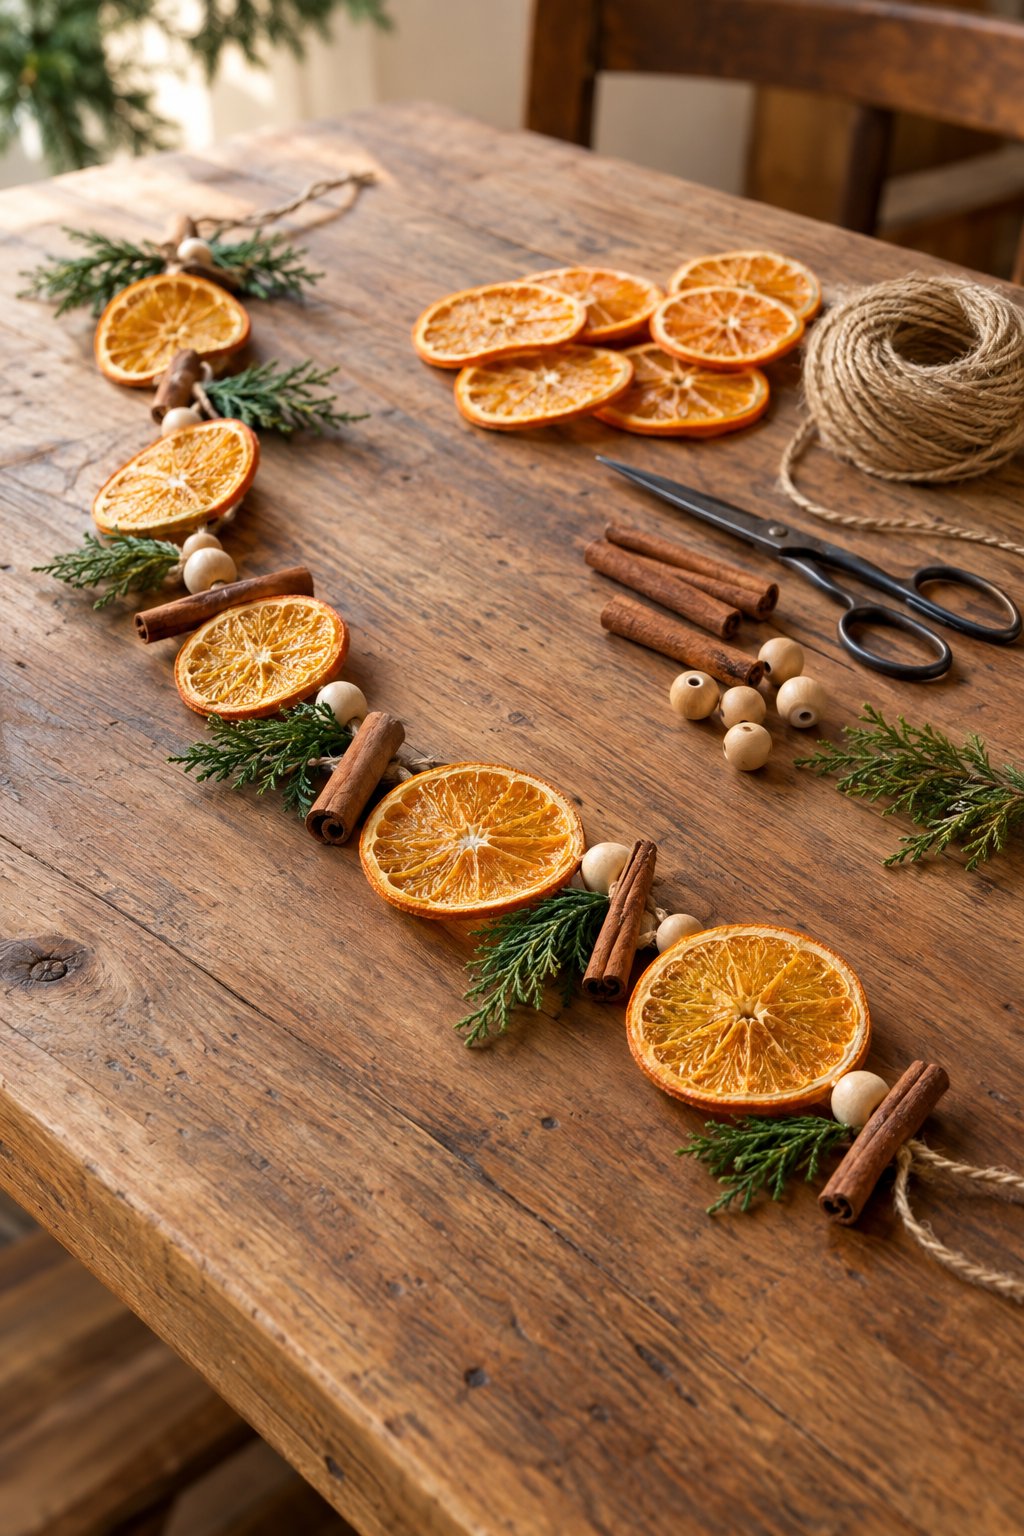
Slice oranges evenly and dry them completely in a dehydrator or low oven, then thread them onto twine with a needle. Tie cinnamon bundles and short evergreen sprigs between the slices. Against a mantel or window, daylight brings out the orange color without any extra decoration.
Stamped Clay Christmas Ornaments
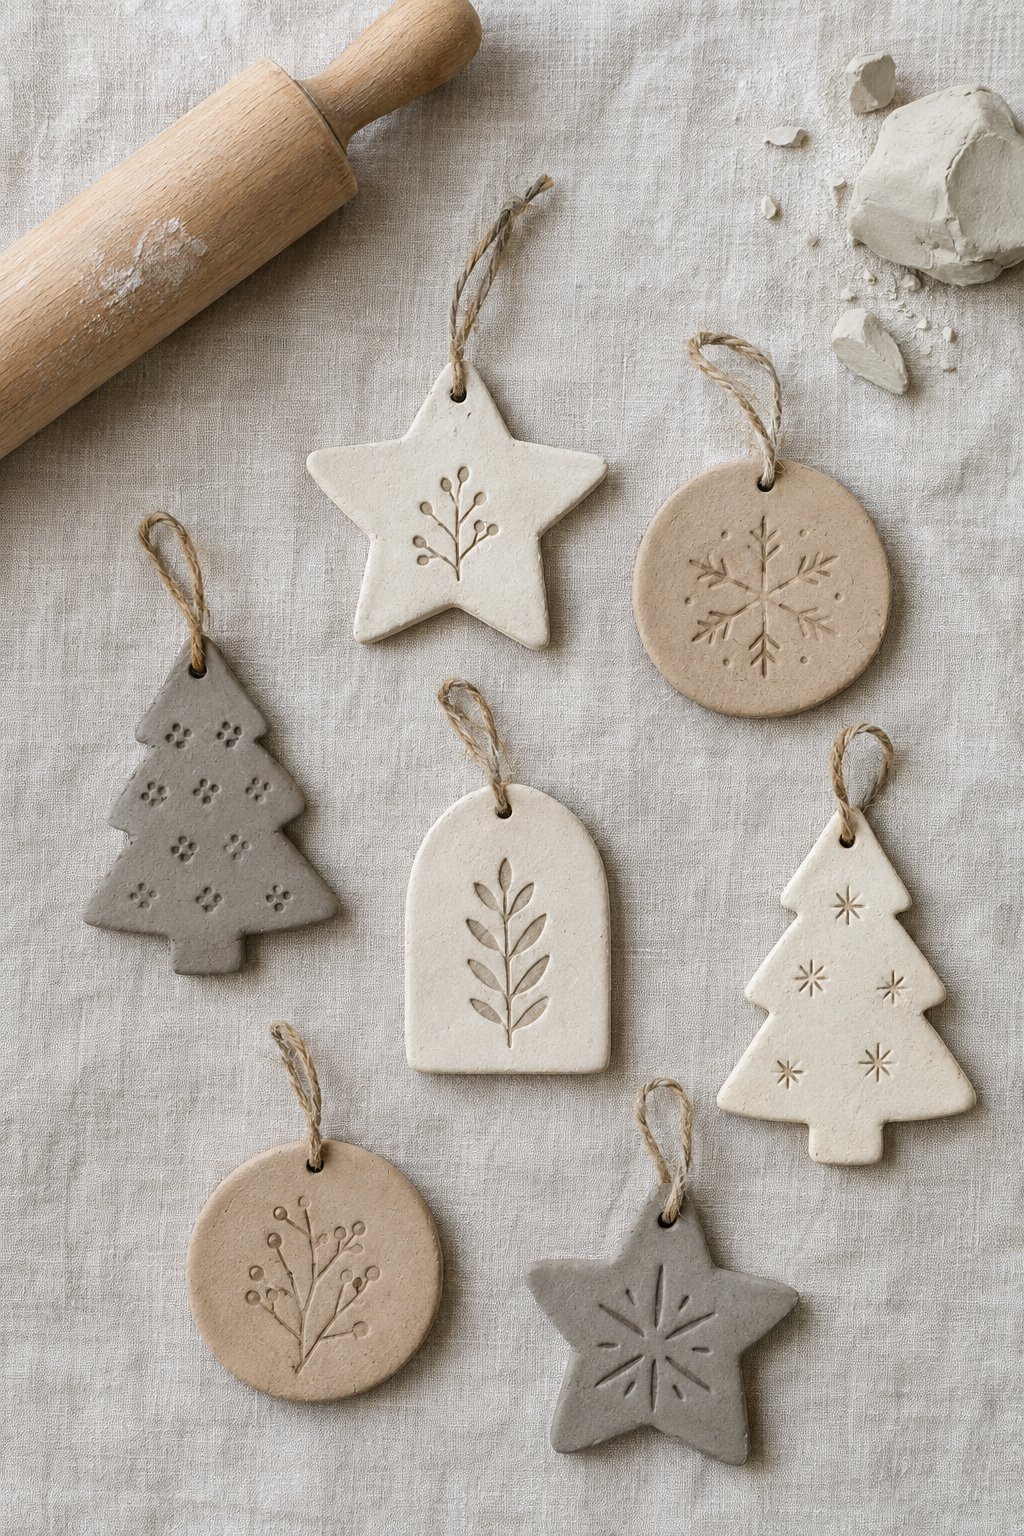
A leaf pressed into soft clay gives you a detailed ornament without much painting. Roll the clay evenly, cut out trees, stars, or circles, and make a small hole near the top.
Let the pieces dry flat, turning them as the clay manufacturer recommends. Smooth any rough edges before adding twine; the muted colors in this set suit a plain, unpainted finish.
Macramé Christmas Tree Wall Hanging
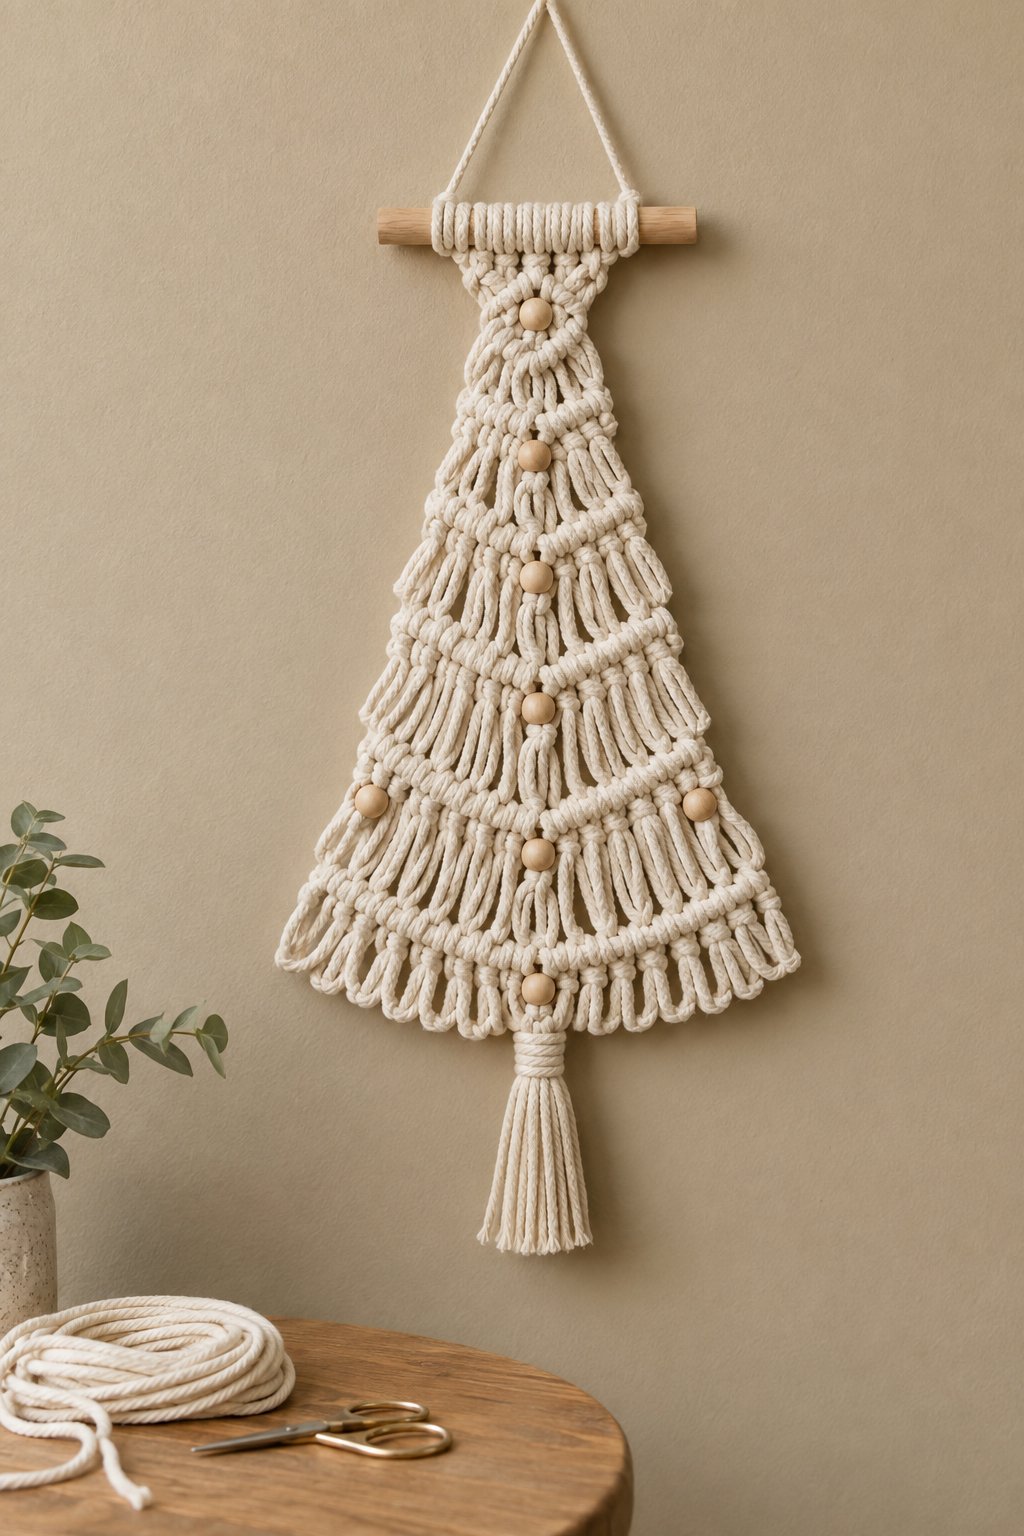
For this project, use a beginner macramé tree pattern rather than guessing the cord lengths—knots consume more cord than you might expect.
Attach cream cotton cord to a short dowel and build rows that widen toward the bottom. The loose fringe and single tassel give the tree its shape, so check their lengths before making the final cuts.
Cinnamon Stick Candle Wrap
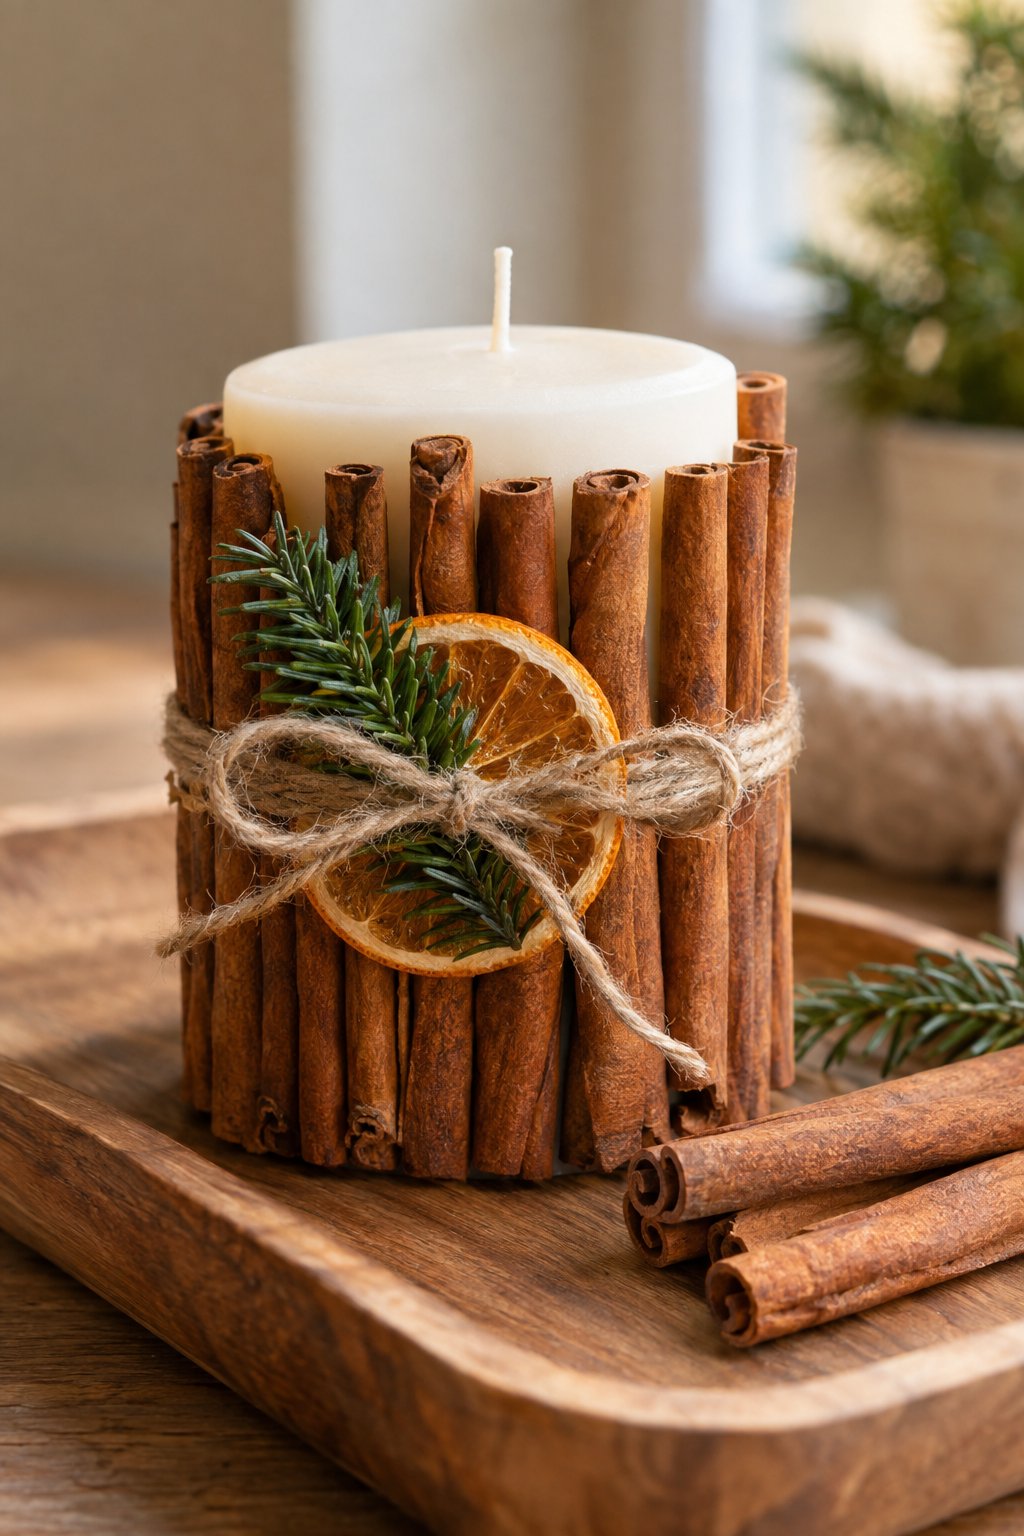
Choose a flameless pillar candle for the cinnamon-stick cover shown here. Attach sticks of roughly equal height around its sides, then bind them with twine. Slip a dried orange slice and a small evergreen sprig beneath the bow.
Mini Pinecone Wreath
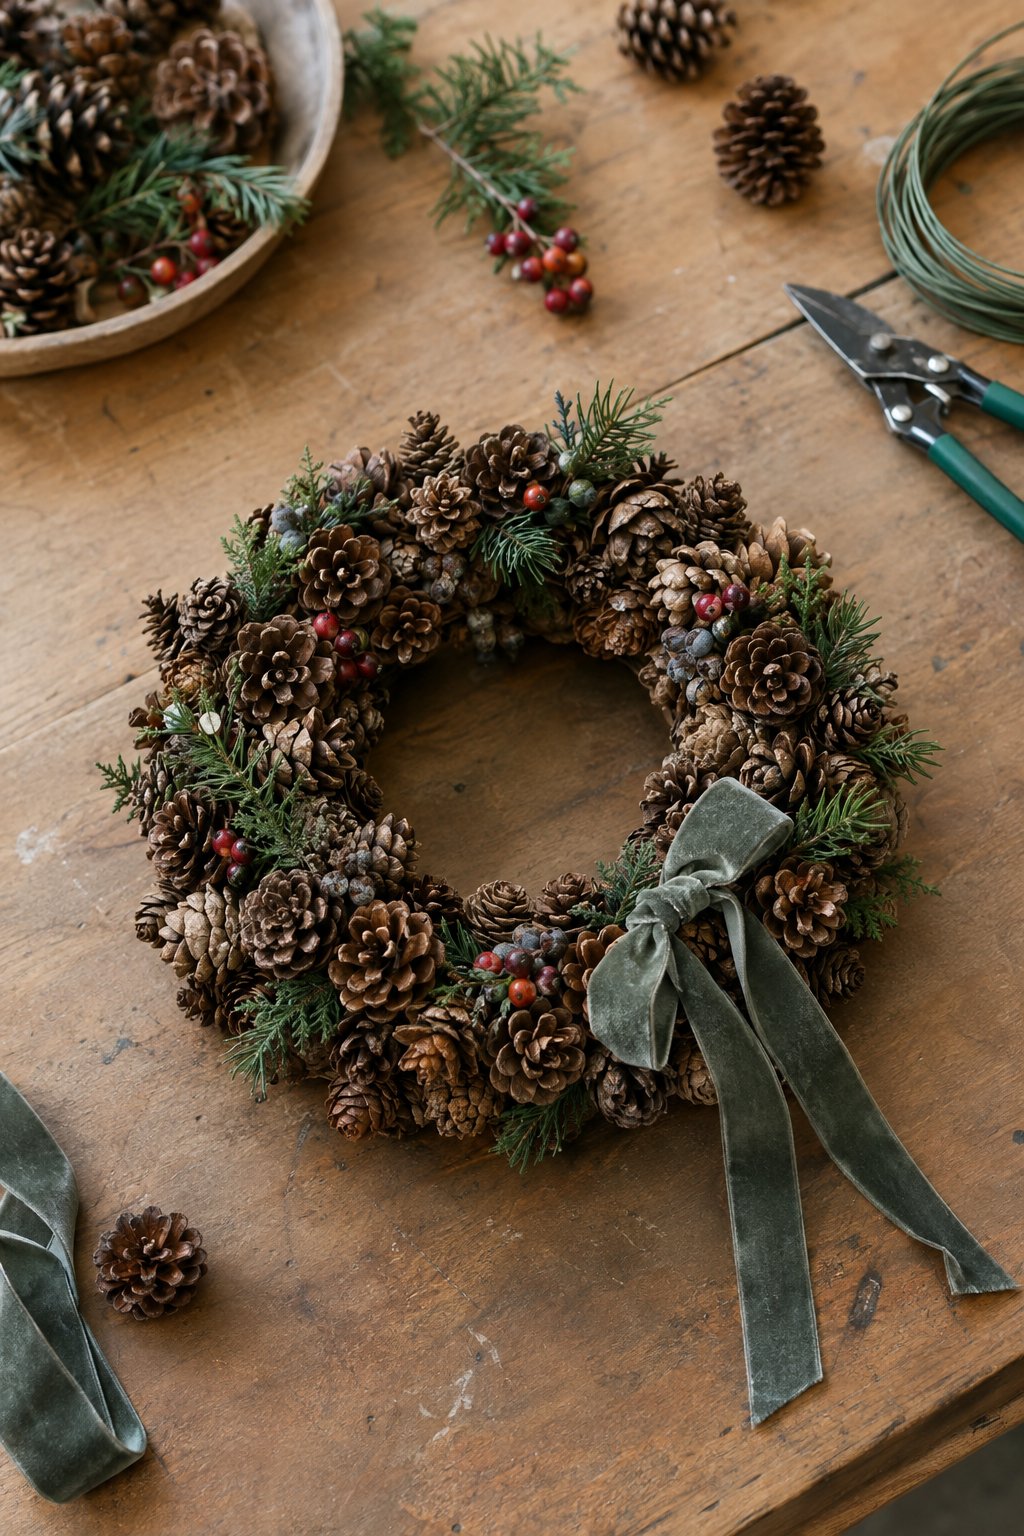
Small pinecones are easier to fit around a wreath ring than large, heavy ones. Arrange them on a grapevine base before gluing, turning each cone until the gaps shrink. Short pieces of greenery can cover the remaining spaces. The dark ribbon sits off to one side here, leaving most of the pinecones exposed.
Painted Wooden Bead Garland
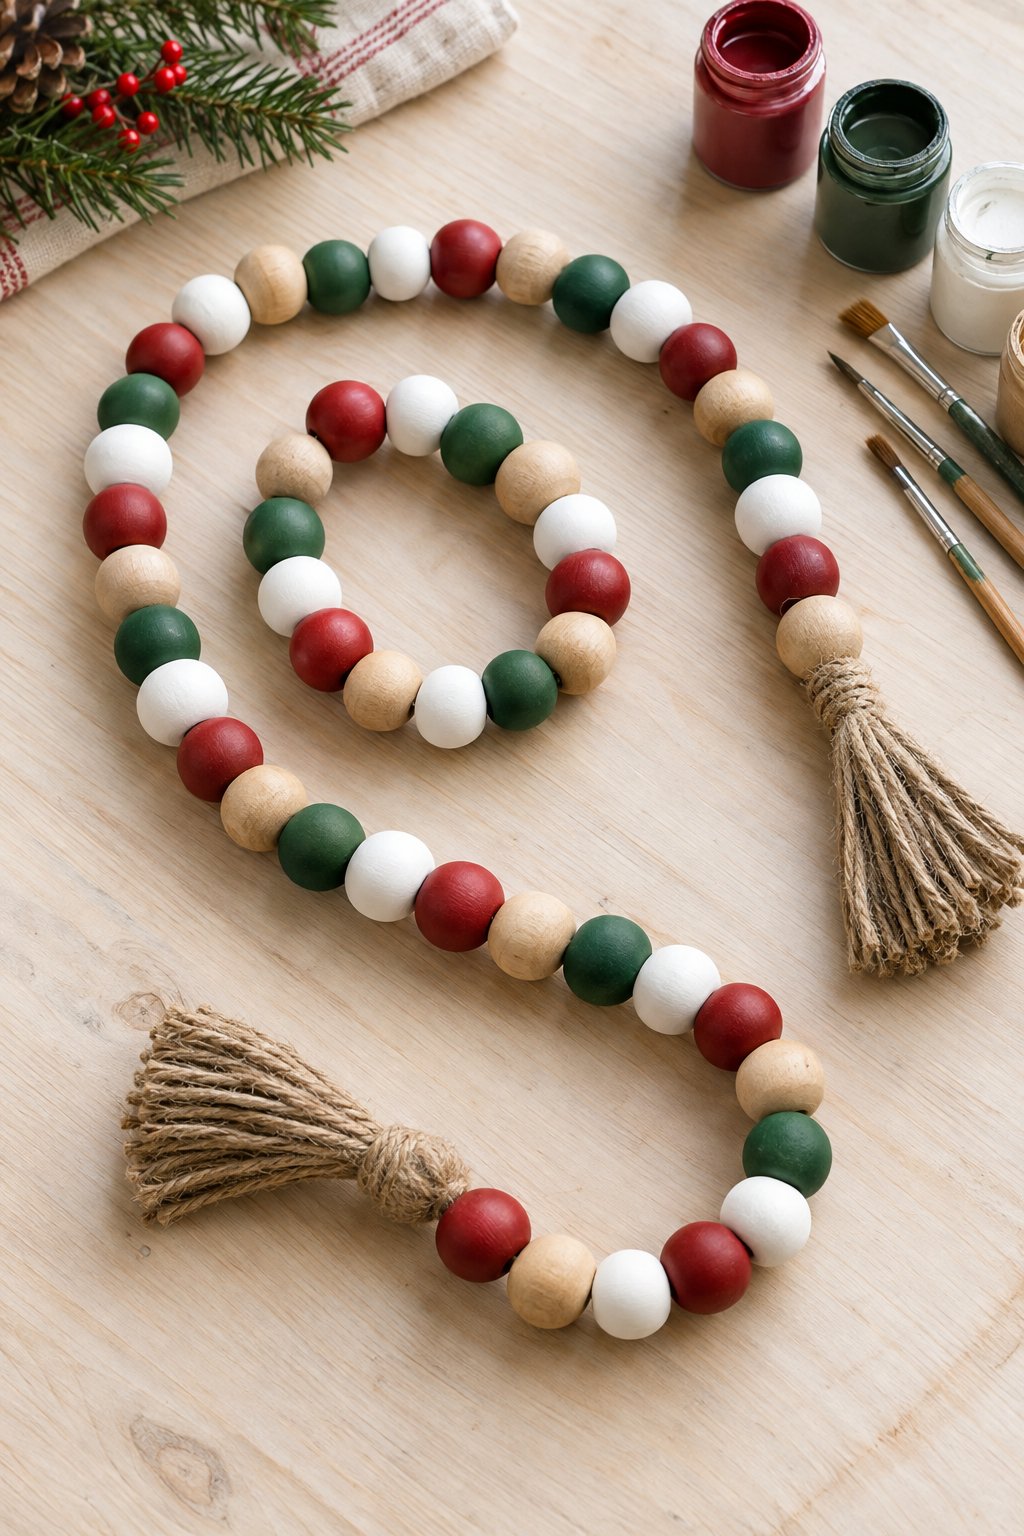
Use the paint you already have to color a handful of unfinished beads red, green, and cream. Leave others bare for the mixed finish in the photo. Skewers make handy drying stands and keep paint out of the holes.
Once dry, thread the beads onto strong cord and knot a twine tassel at each end.
Sweater Sleeve Candle Holders

An old cable-knit sleeve can cover a glass jar with very little sewing. Cut it to fit below the rim, turn the raw edges inward, and secure them with fabric glue; a button or twine bow hides the join. Use battery-operated candles inside, especially with fabric wrapped around the glass.
Twig Star Ornaments
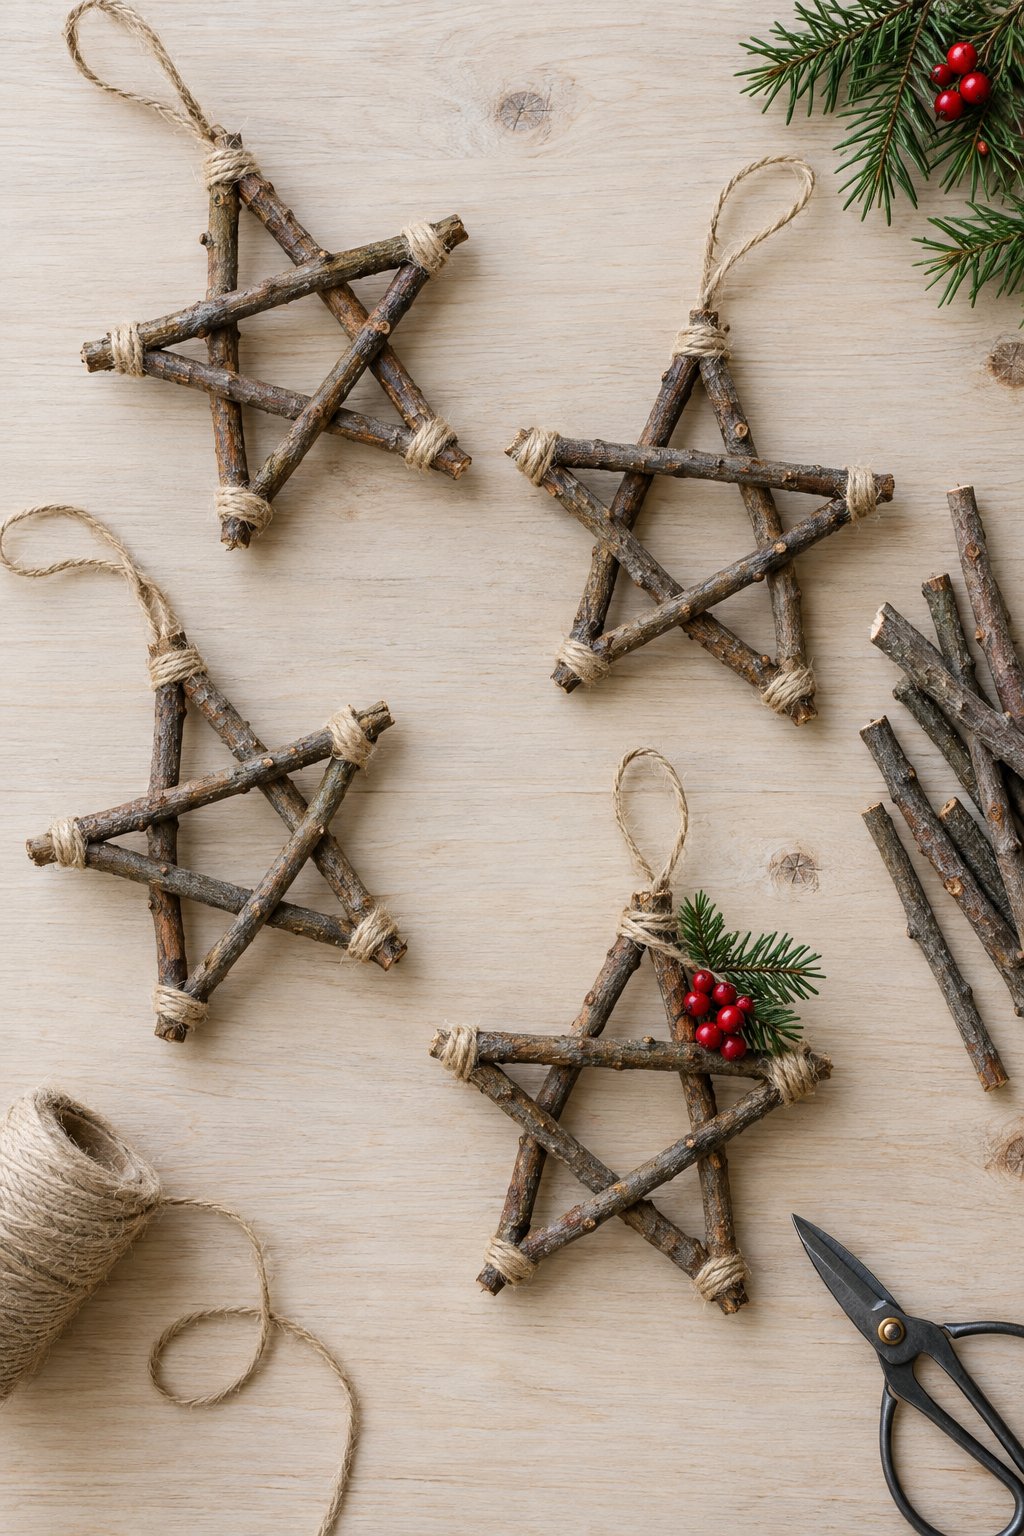
Lay five straight twigs into a star before trimming anything. When the proportions look right, glue the crossings and wrap them with thin twine to reinforce the joints.
The uneven bark is part of the appeal. Keep the decoration small—a short evergreen tip and a few berries are enough for the version pictured.
Felt Christmas Tree Garland
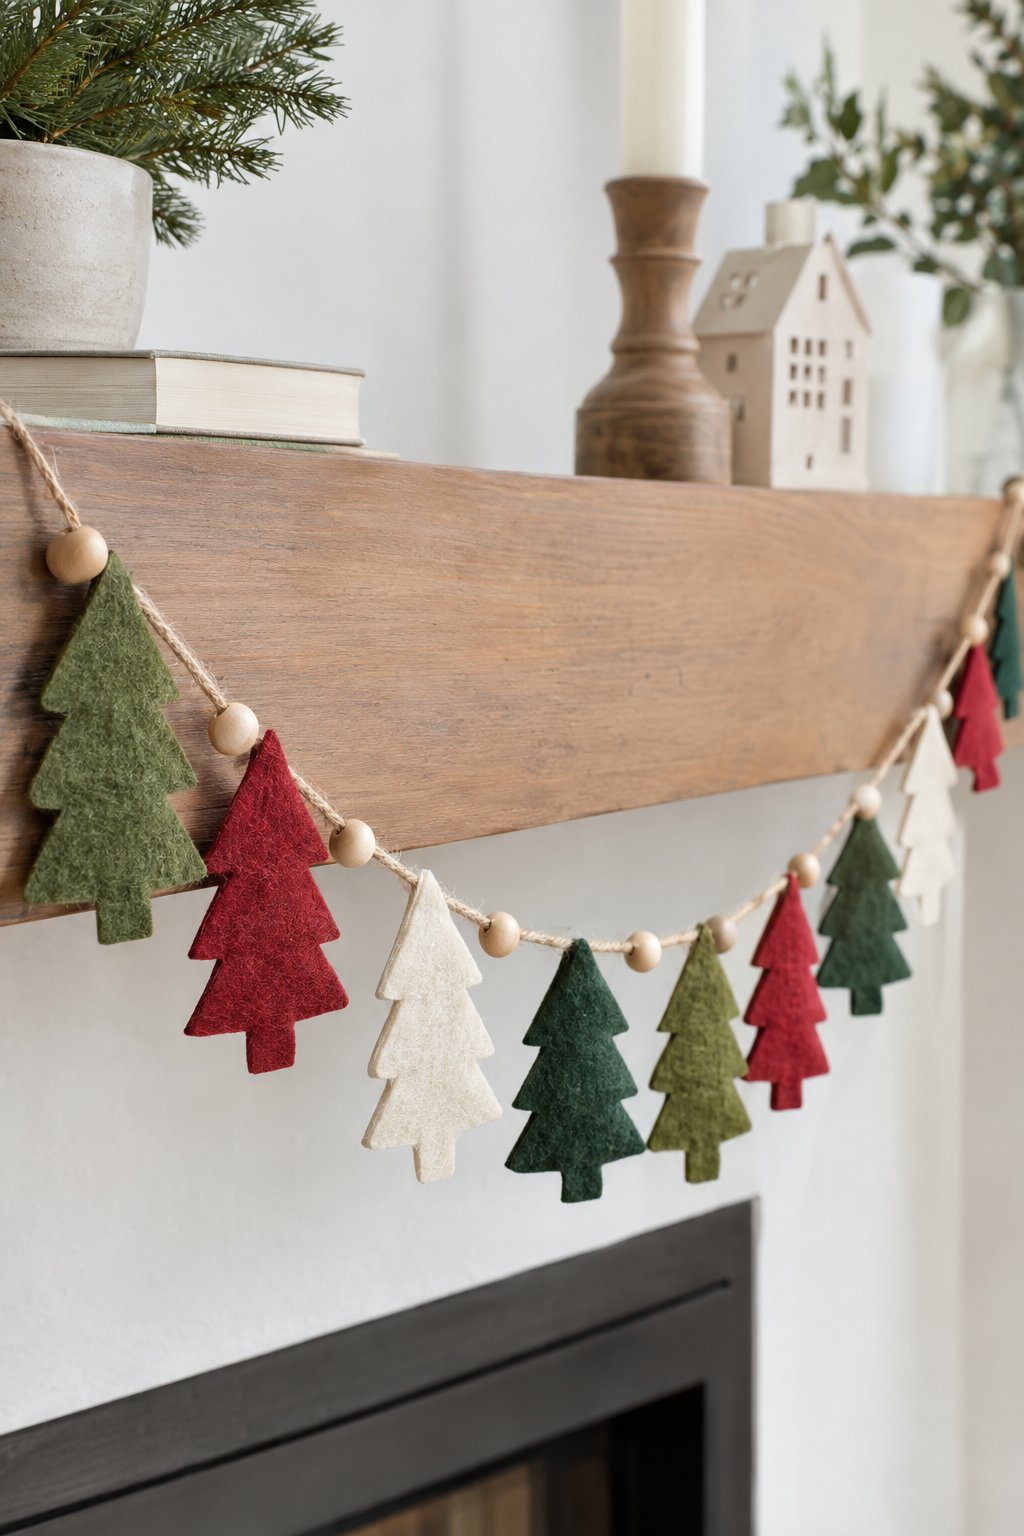
One cardboard template will keep all these felt trees the same size, even when you switch colors. Cut matching front and back pieces, then glue them together with the garland cord between their upper branches. Arrange the red, cream, and green trees along the full cord first so you can adjust the spacing before anything sticks.
Pressed Botanical Christmas Cards
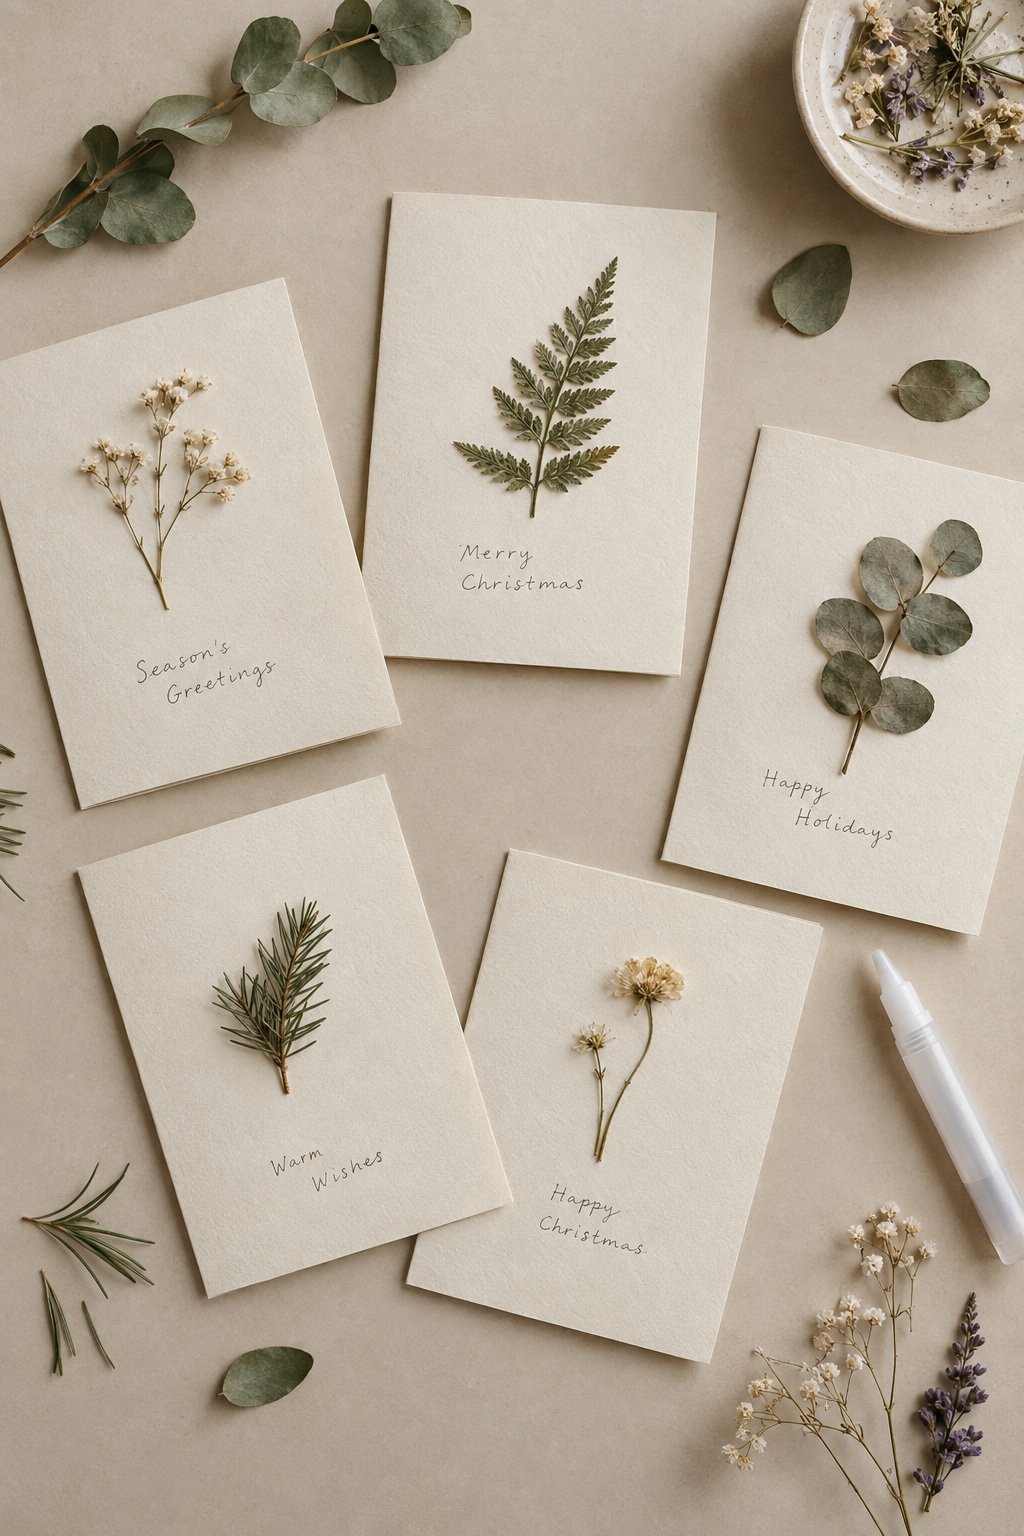
Make the pressed foliage the main detail rather than crowding the card with embellishments. Dry leaves and flowers between absorbent paper beneath a heavy book, then attach them to thick folded cardstock with tiny dots of clear-drying glue. A short handwritten greeting beneath each stem leaves enough blank space to show its shape.
Decoupage Christmas Baubles
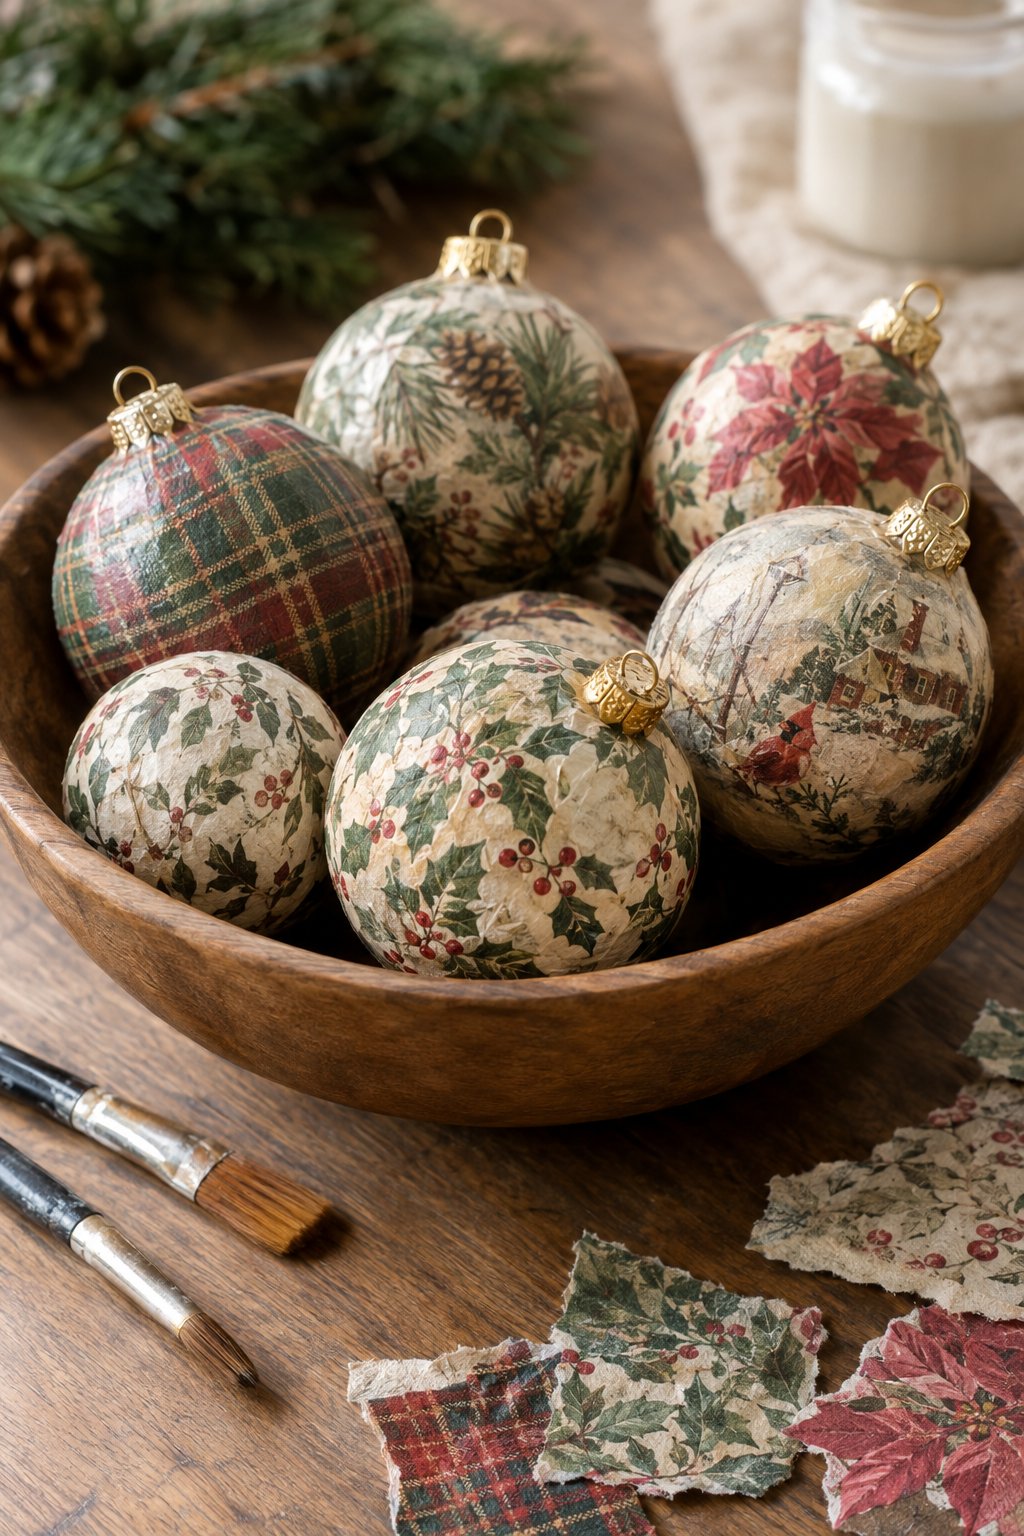
Scratched baubles can disappear beneath scraps of floral napkins, tartan paper, or old botanical prints. Thin paper fits the curves best; tear it into manageable pieces and attach with decoupage medium.
Smooth each piece from the middle outward. Let the surface dry before sealing it, and keep the ornament cap clear so it still fits properly.
Folded Book-Page Christmas Trees
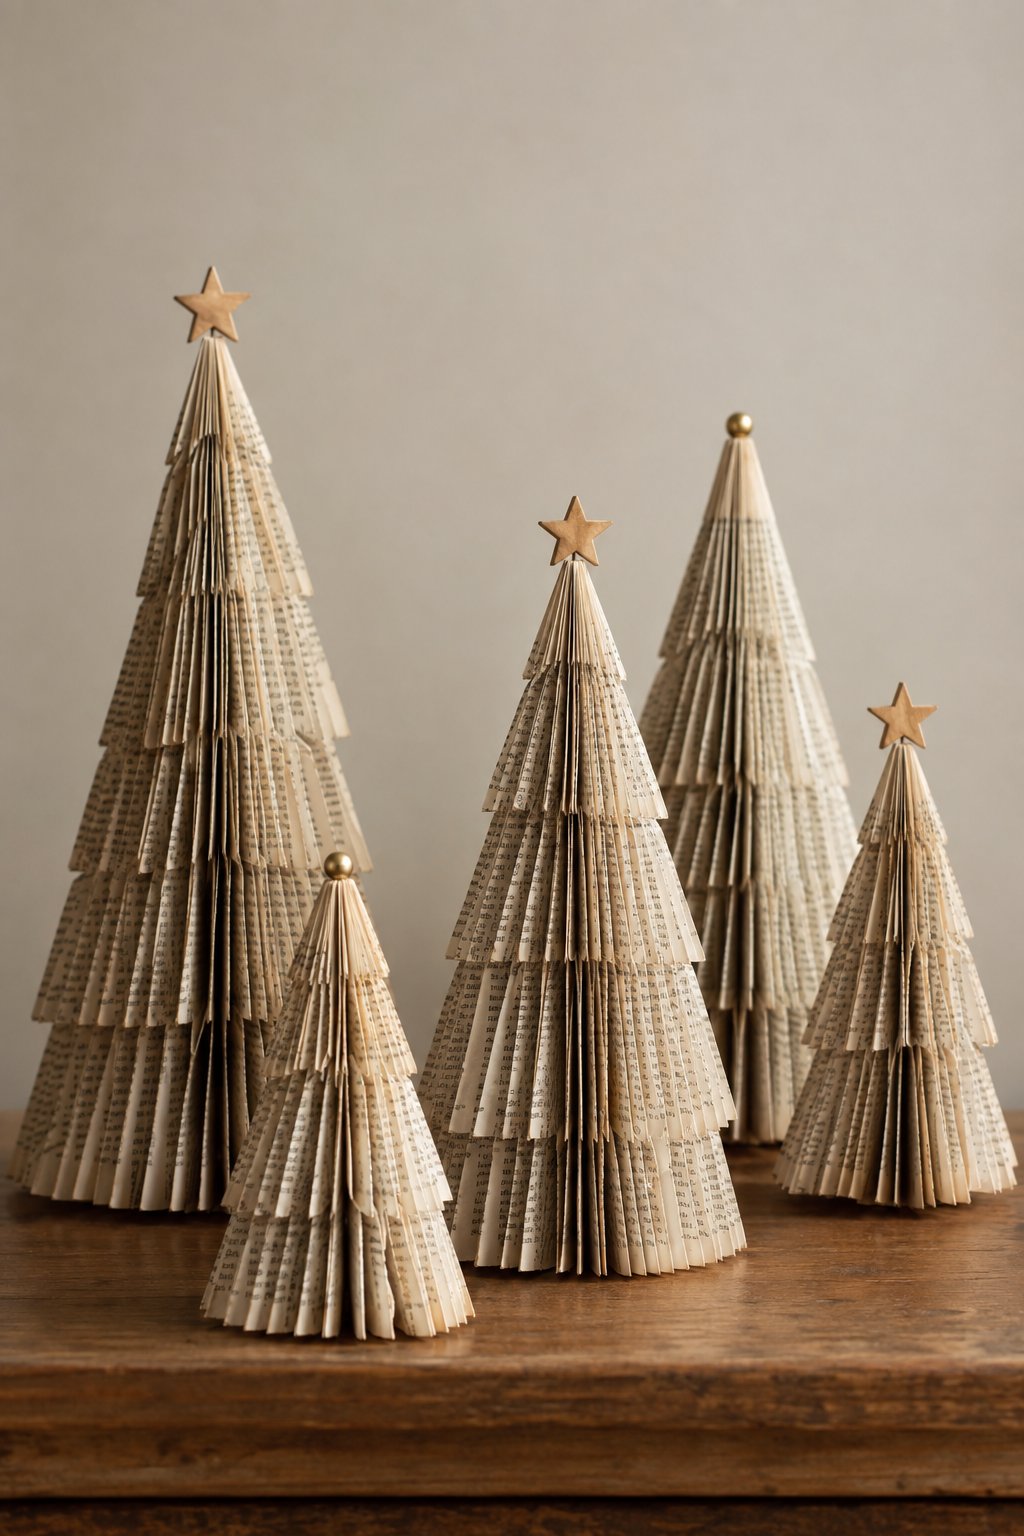
The ridged tiers take a little more patience than a plain paper cone, but you can make them from a damaged paperback. Accordion-fold paper strips, join the ends, and gather the upper edges into tapered rings. Stack graduated tiers around a skewer fixed into a base, with the widest underneath. Try the arrangement without glue first to check the tree’s proportions.
Snowy Glass Jar Lanterns
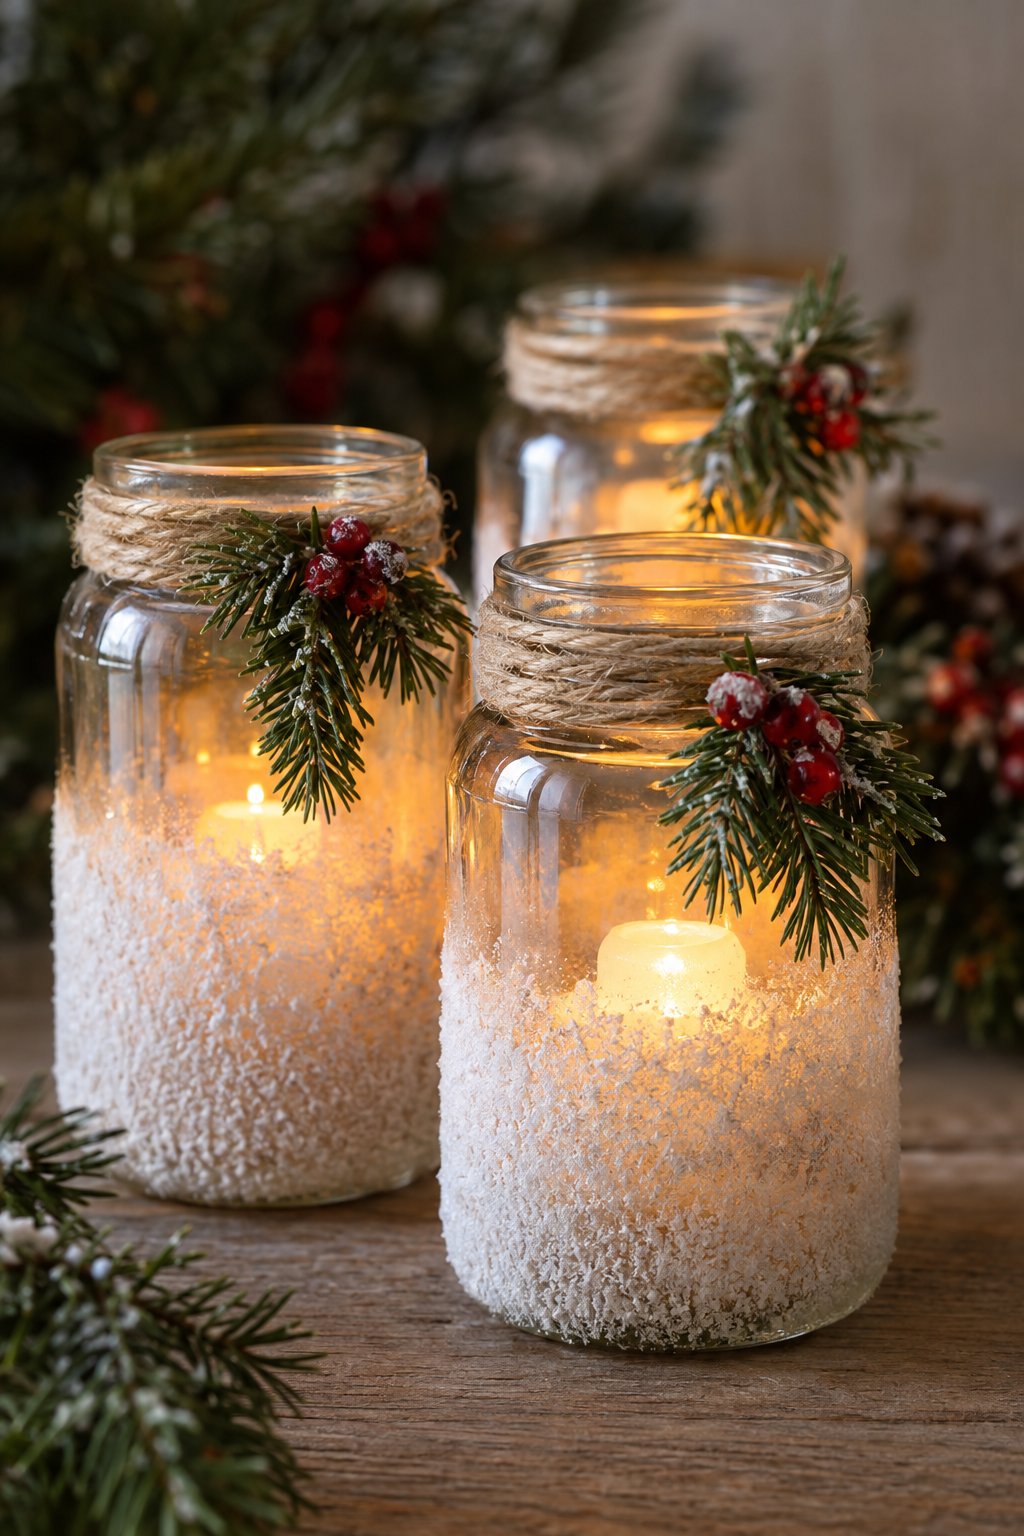
Brush glue around the lower part of a clean jar and sprinkle artificial craft snow over the wet surface. Keeping the top clear lets more light through. Once dry, tie greenery around the neck and place an LED tea light inside.
Wine Cork Reindeer
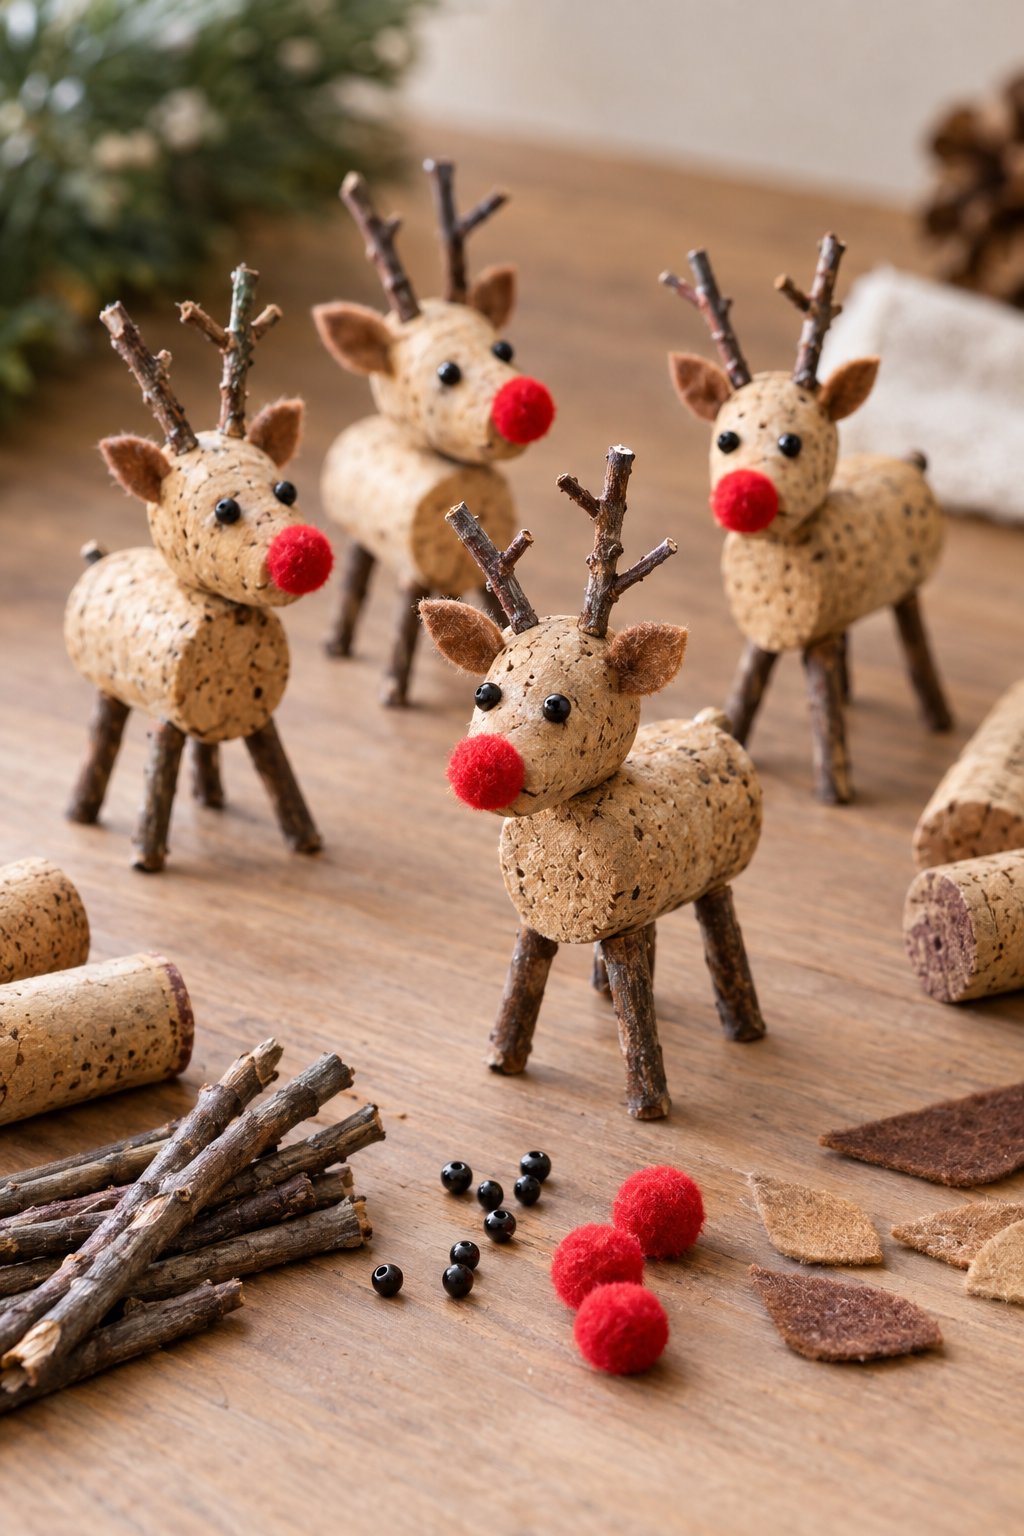
Save the straightest twigs for legs so your cork reindeer can stand without wobbling. A whole cork forms the body, while a shorter piece becomes the head; join them with a small dowel and glue. Make pilot holes for the legs and antlers before inserting them. Felt ears and a red pom-pom nose finish the face without fiddly painting.
Fabric Scrap Christmas Trees
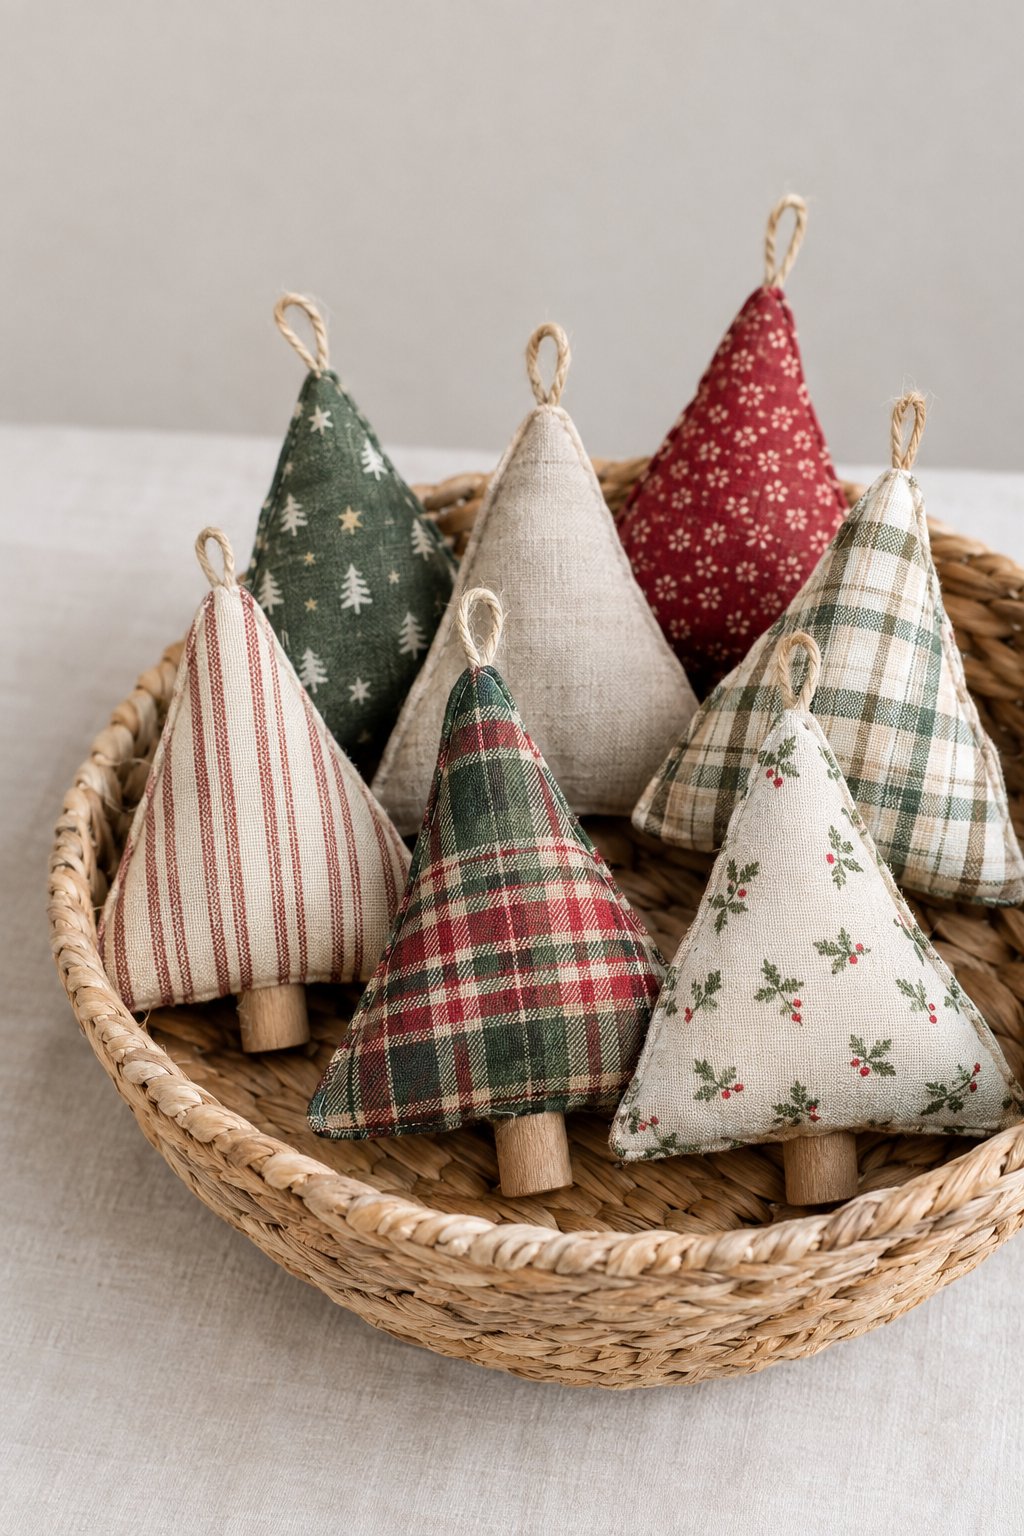
Small offcuts are ideal for these plump fabric trees, especially checks and stripes that might otherwise go unused. Sew two tree shapes with their right sides together, leaving a gap underneath. Turn out, stuff lightly, and close the base around a short wooden trunk.
For tree ornaments, stitch a loop into the top seam before assembly.
Wood Slice Photo Ornaments
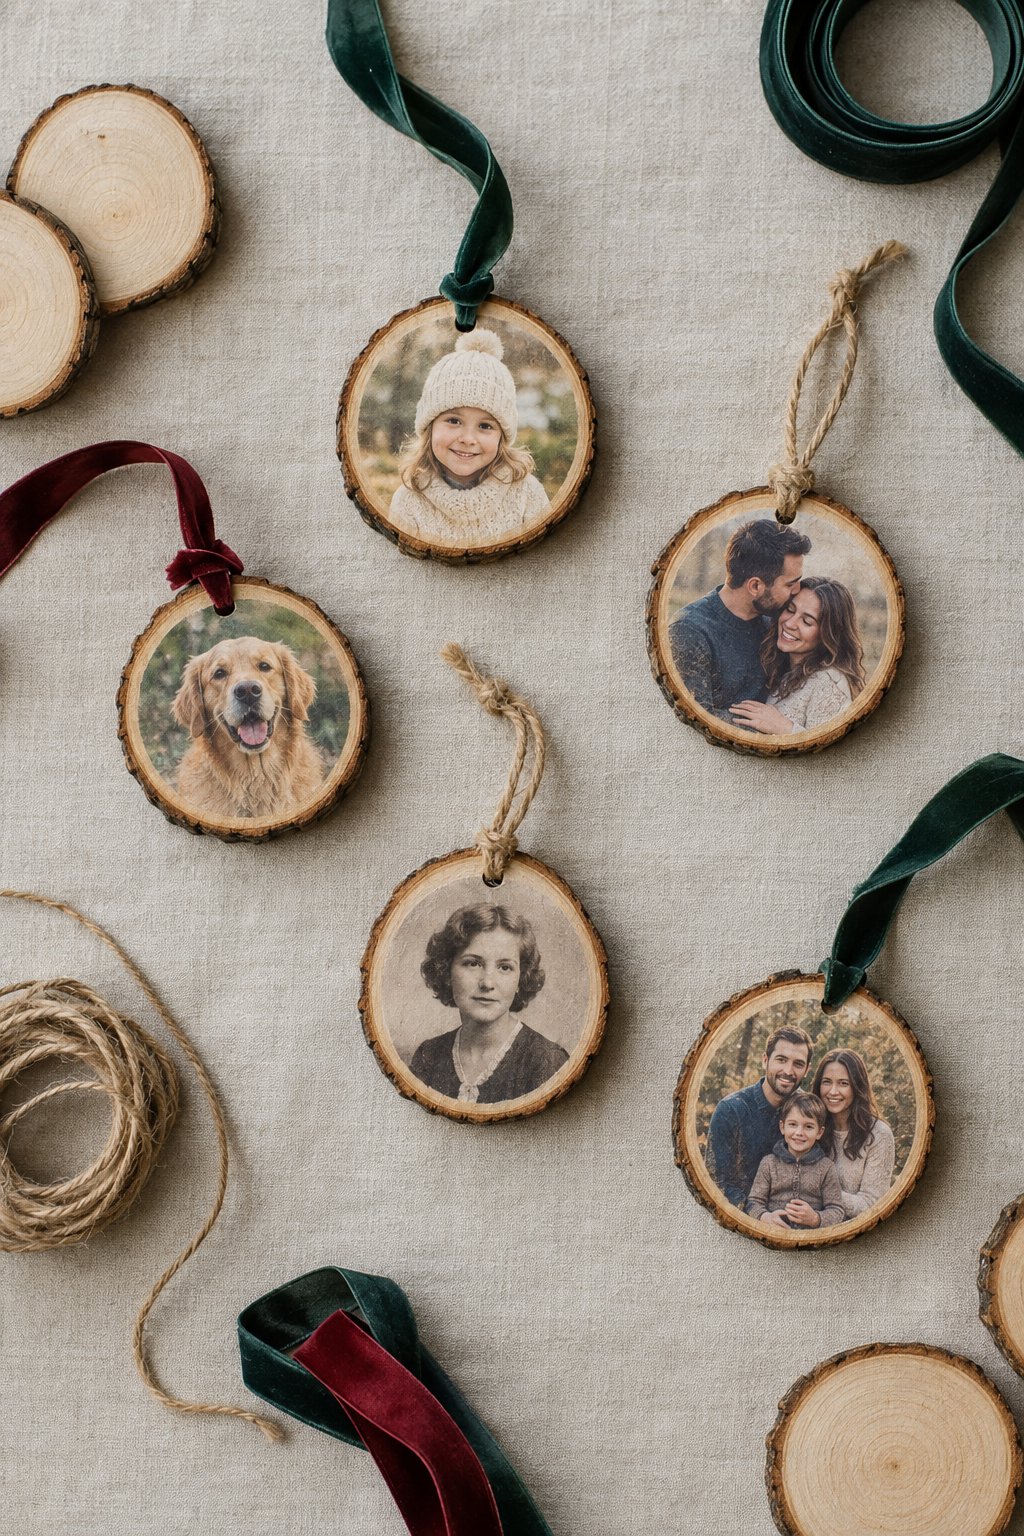
Choose close-up photographs so the faces remain clear at this small size. Print paper copies and trim them to fit inside each wood slice’s bark edge, then glue and seal with products suitable for photo decoupage. A ribbon through a drilled hole turns the finished piece into a keepsake you can date on the back.
Embroidery Hoop Christmas Wreath
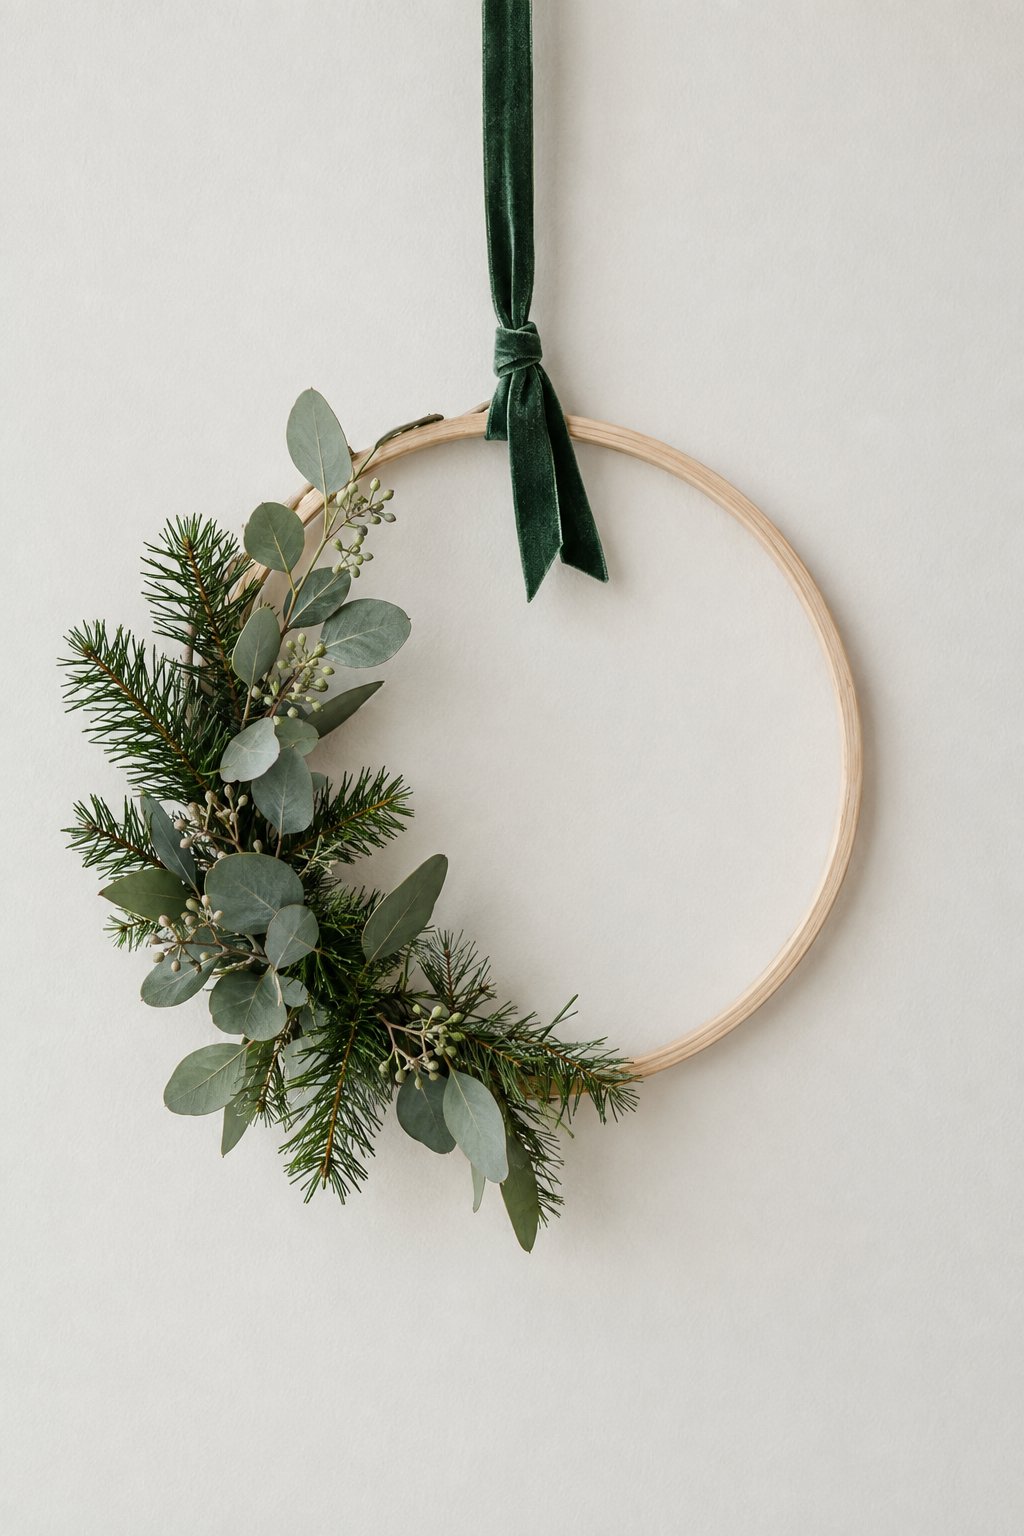
You can make this wreath with just a few stems because most of the wooden hoop stays uncovered. Wire the longest pieces along one lower side, then layer shorter foliage over their cut ends.
Check it upright before adding the hanging ribbon. Stems that look balanced on a table may droop differently once suspended.
Pom-Pom Christmas Tree
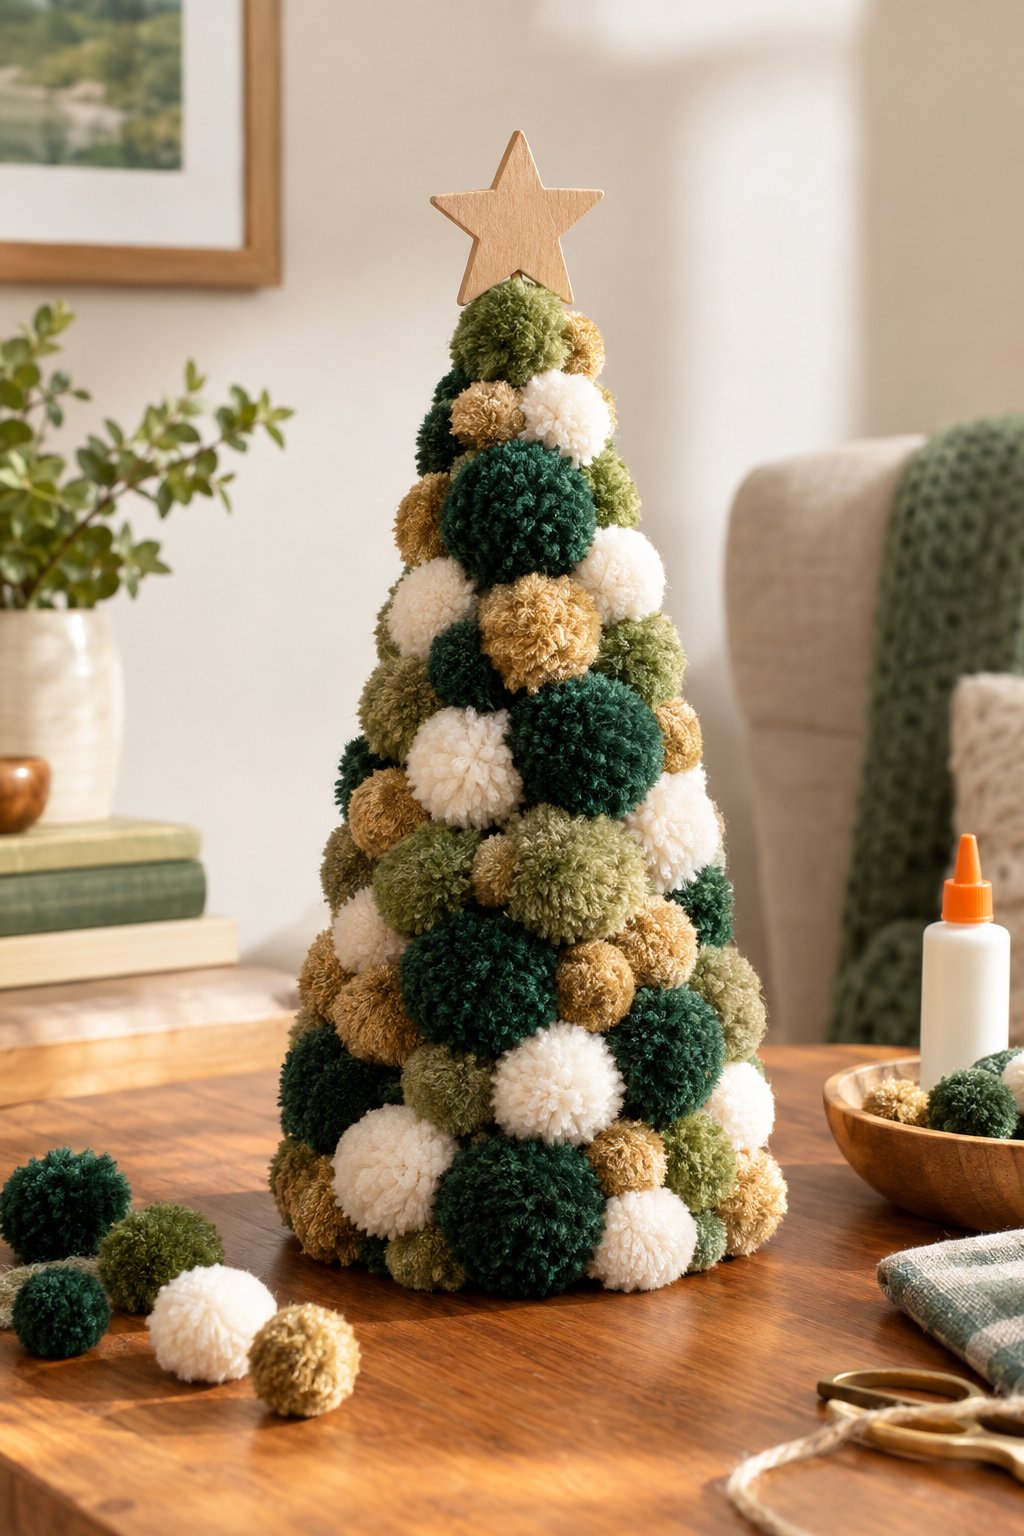
Cover a craft cone with pom-poms, starting with larger ones around the base and fitting smaller ones into the gaps. The mix of dark green, cream, and mustard gives this version depth without beads or tinsel. Keep checking for exposed patches of cone as you move upward, then attach the star after the final row.
Wooden Spoon Christmas Characters
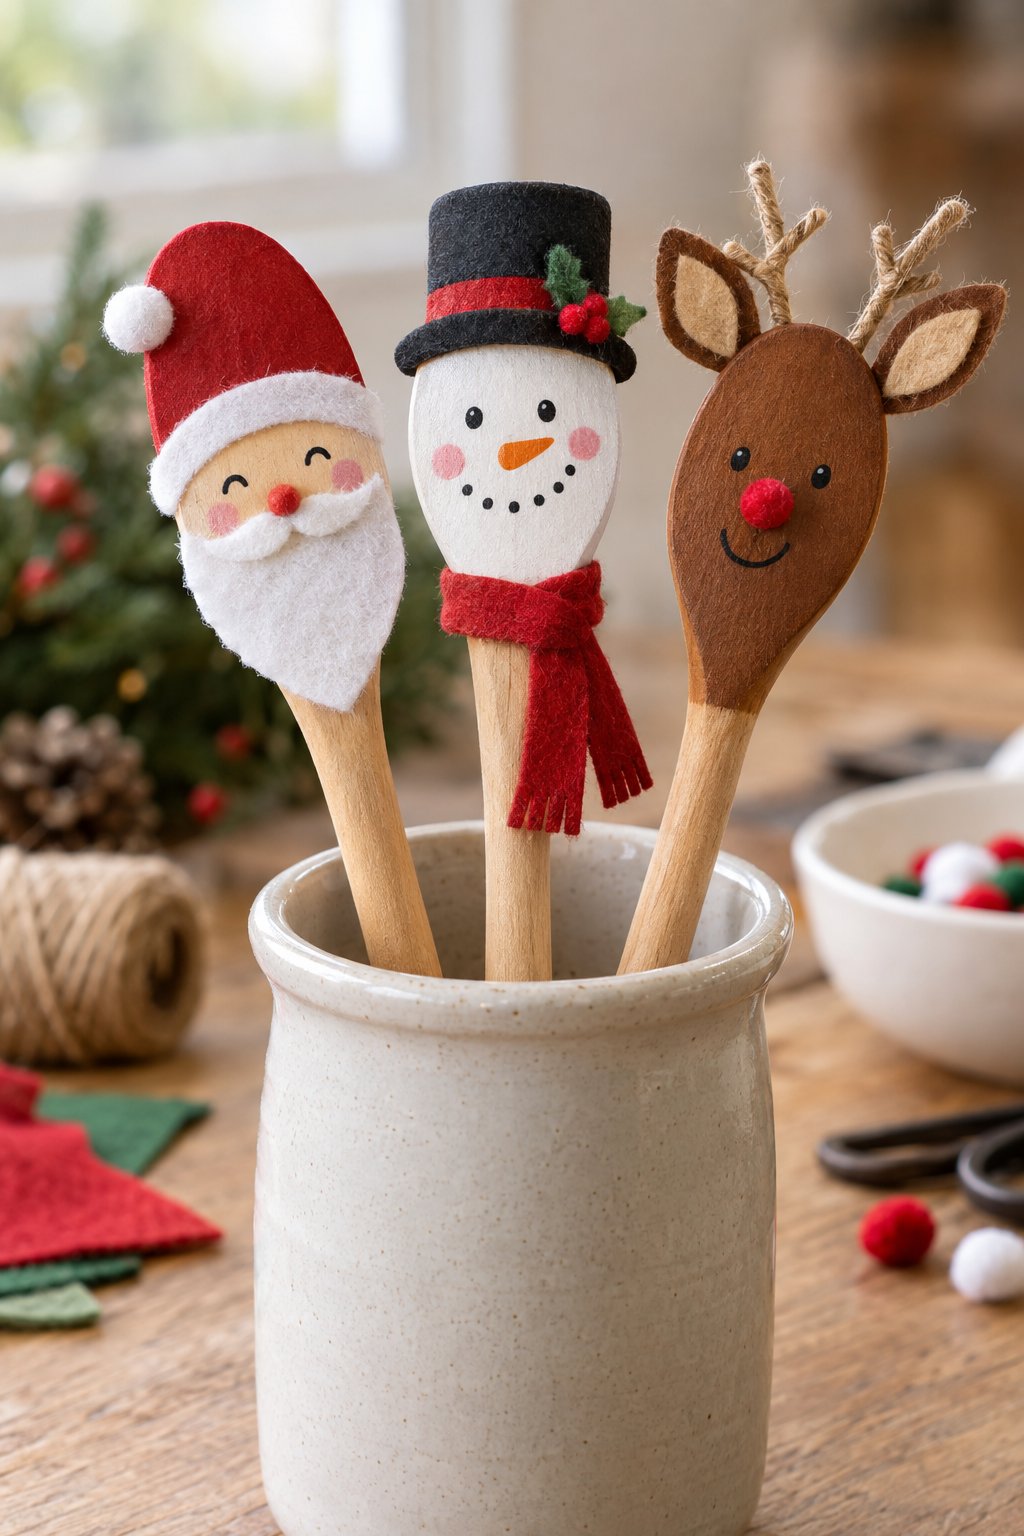
Let the spoon’s rounded head guide the face: white paint for the snowman, a peach-colored patch for Santa, and brown for the reindeer. Add felt hats, scarves, and ears after the paint dries. Twig antlers need a firm dab of glue behind the reindeer’s head.
Display the finished spoons in a pot and keep them for decoration rather than cooking.
Stamped Kraft Paper Gift Wrap

Spread kraft paper across the table and test your stamps on an offcut before decorating the whole sheet. Too much paint will blur the little trees and stars, so apply a thin coat. Vary the direction and distance between impressions, then let the paper dry before wrapping. Twine and a small sprig are all the finished parcels need.
Christmas Potpourri Jars
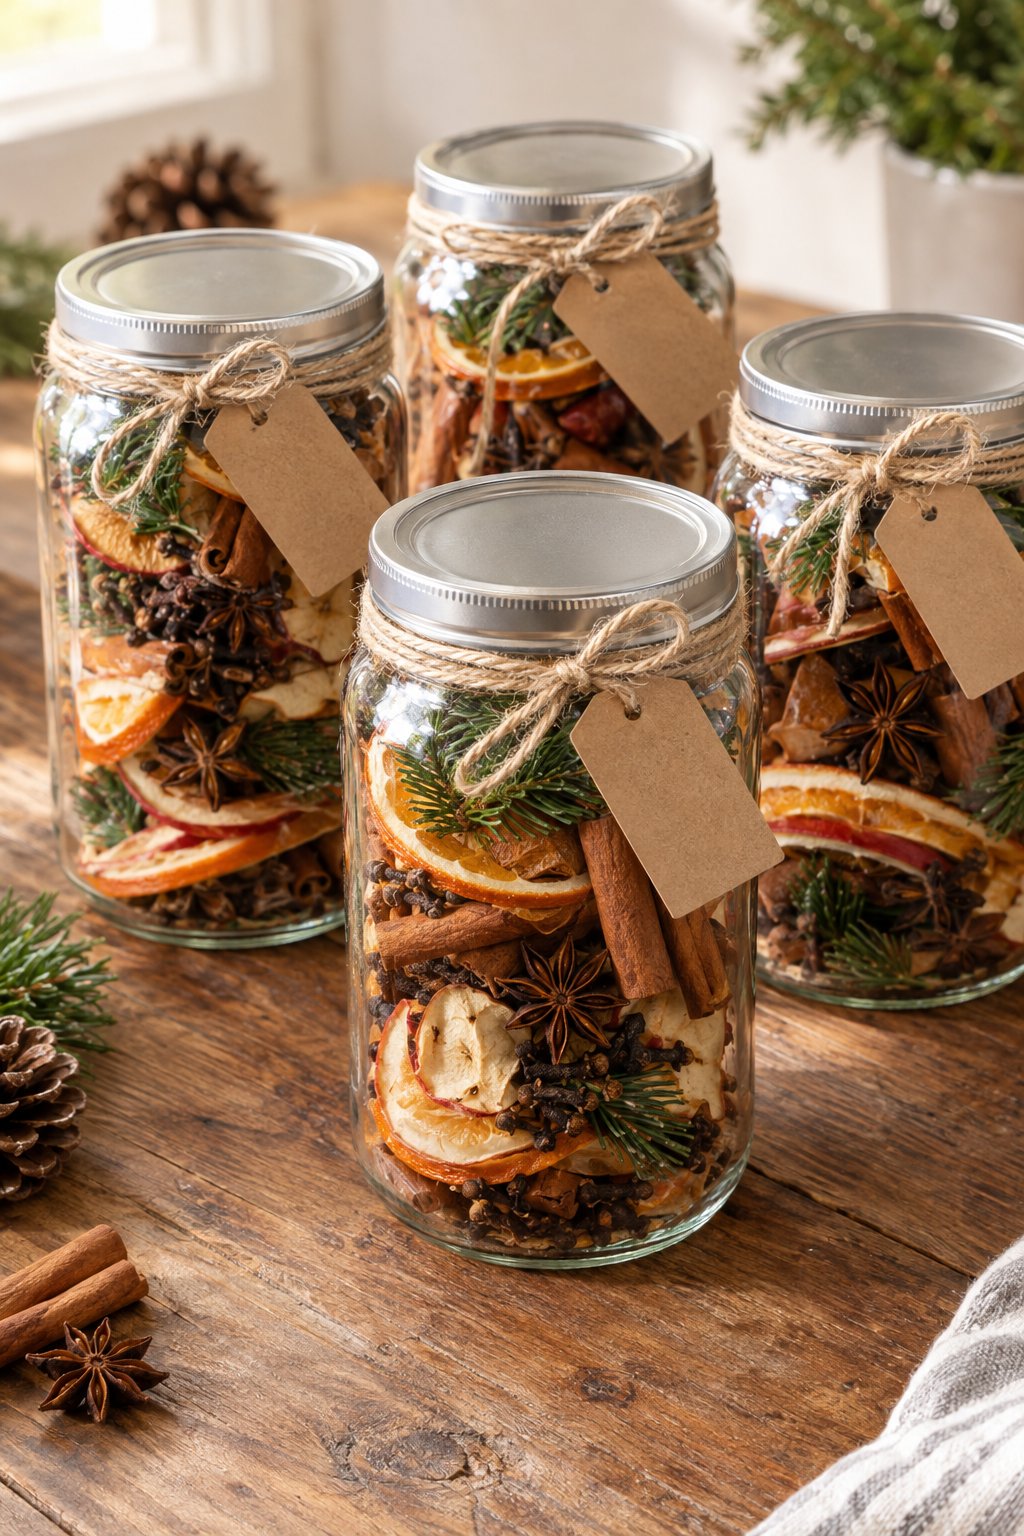
For an inexpensive batch gift, fill clean jars with fully dried citrus slices, cinnamon, star anise, and dried greenery. Place a few orange slices against the glass where they’ll show. Add a tag explaining that the contents should be tipped into an open bowl for fragrance.
Chunky Yarn Mini Wreaths
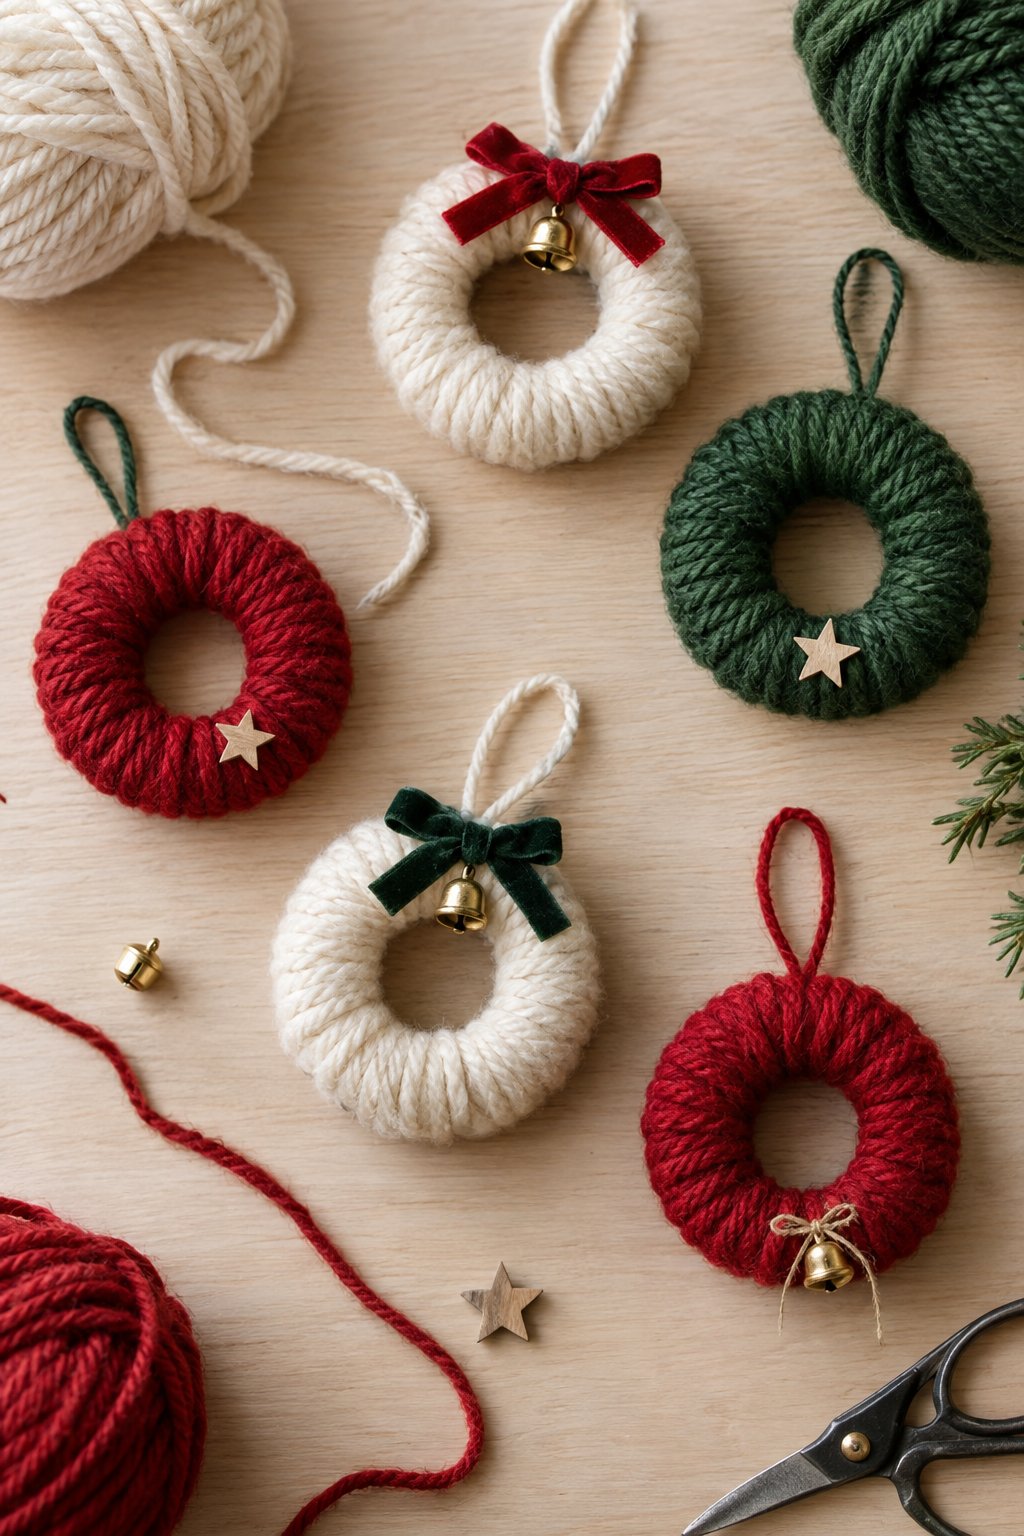
Thick yarn covers a small wreath ring quickly, making this a manageable project for an evening. Wrap closely enough to hide the base and tuck the yarn end beneath the back.
Try one before cutting yarn for a whole batch. A tiny bow, bell, or wooden star gives each wreath a different finish without much extra material.
Pinecone Christmas Trees
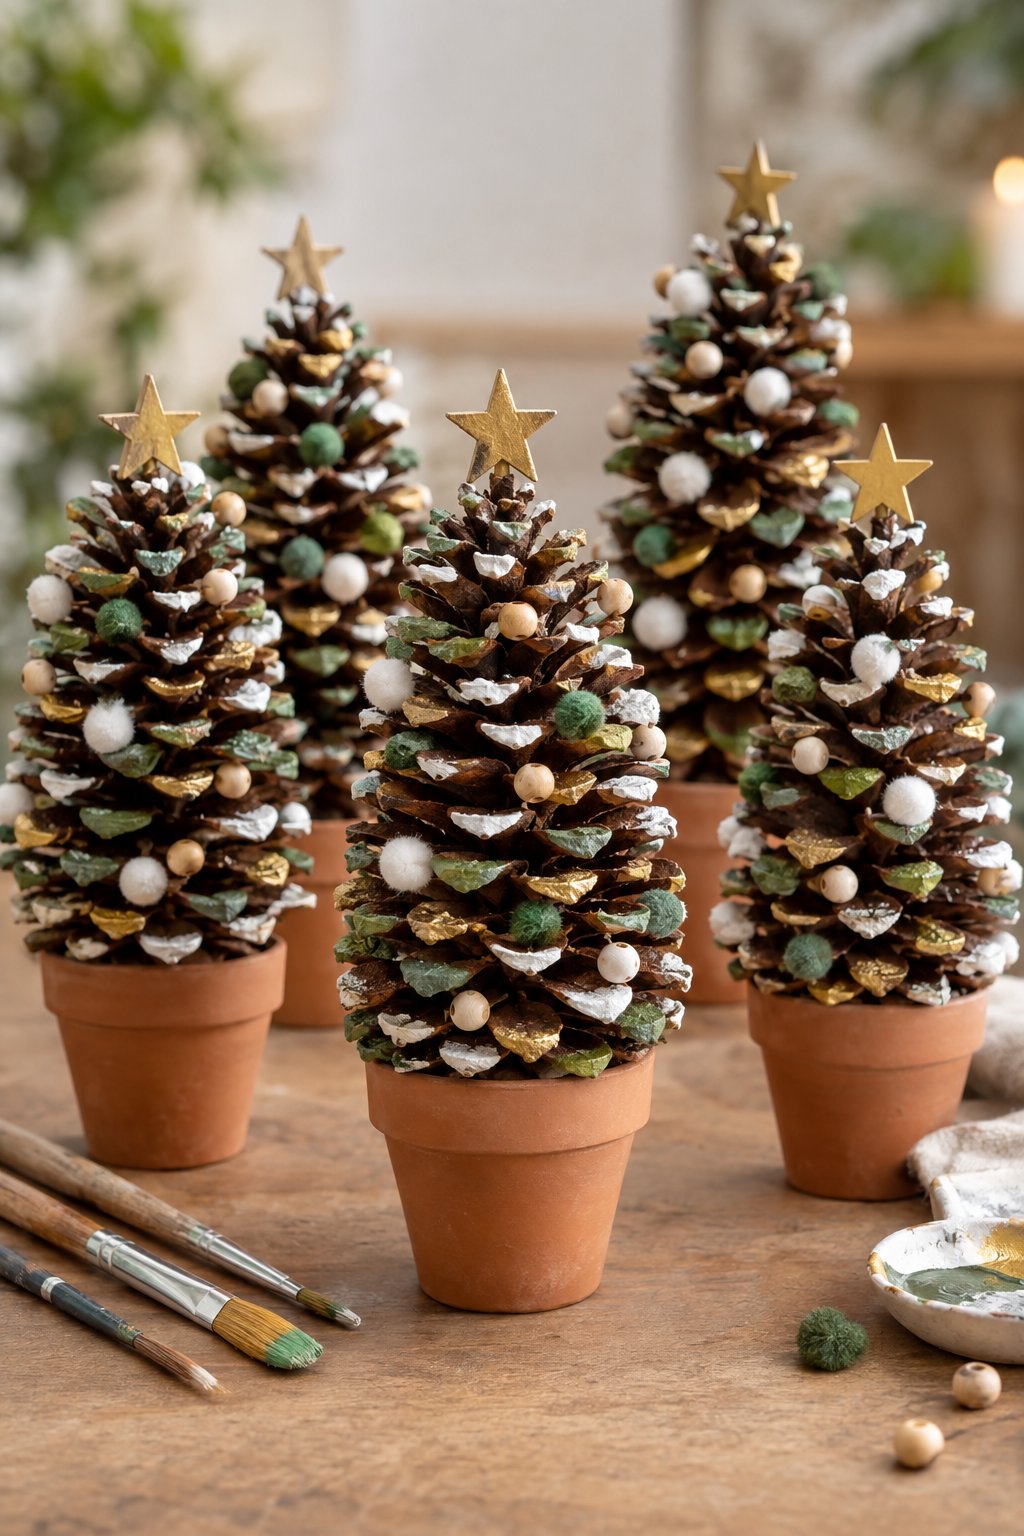
Look for pinecones with a broad base and a clear pointed top. Brush the scales green, dab white onto the tips, and let the paint dry before attaching tiny bead ornaments. Glue each cone onto a support inside a miniature pot. The support should sit low enough to keep the tree from becoming top-heavy.
Rope Christmas Trees
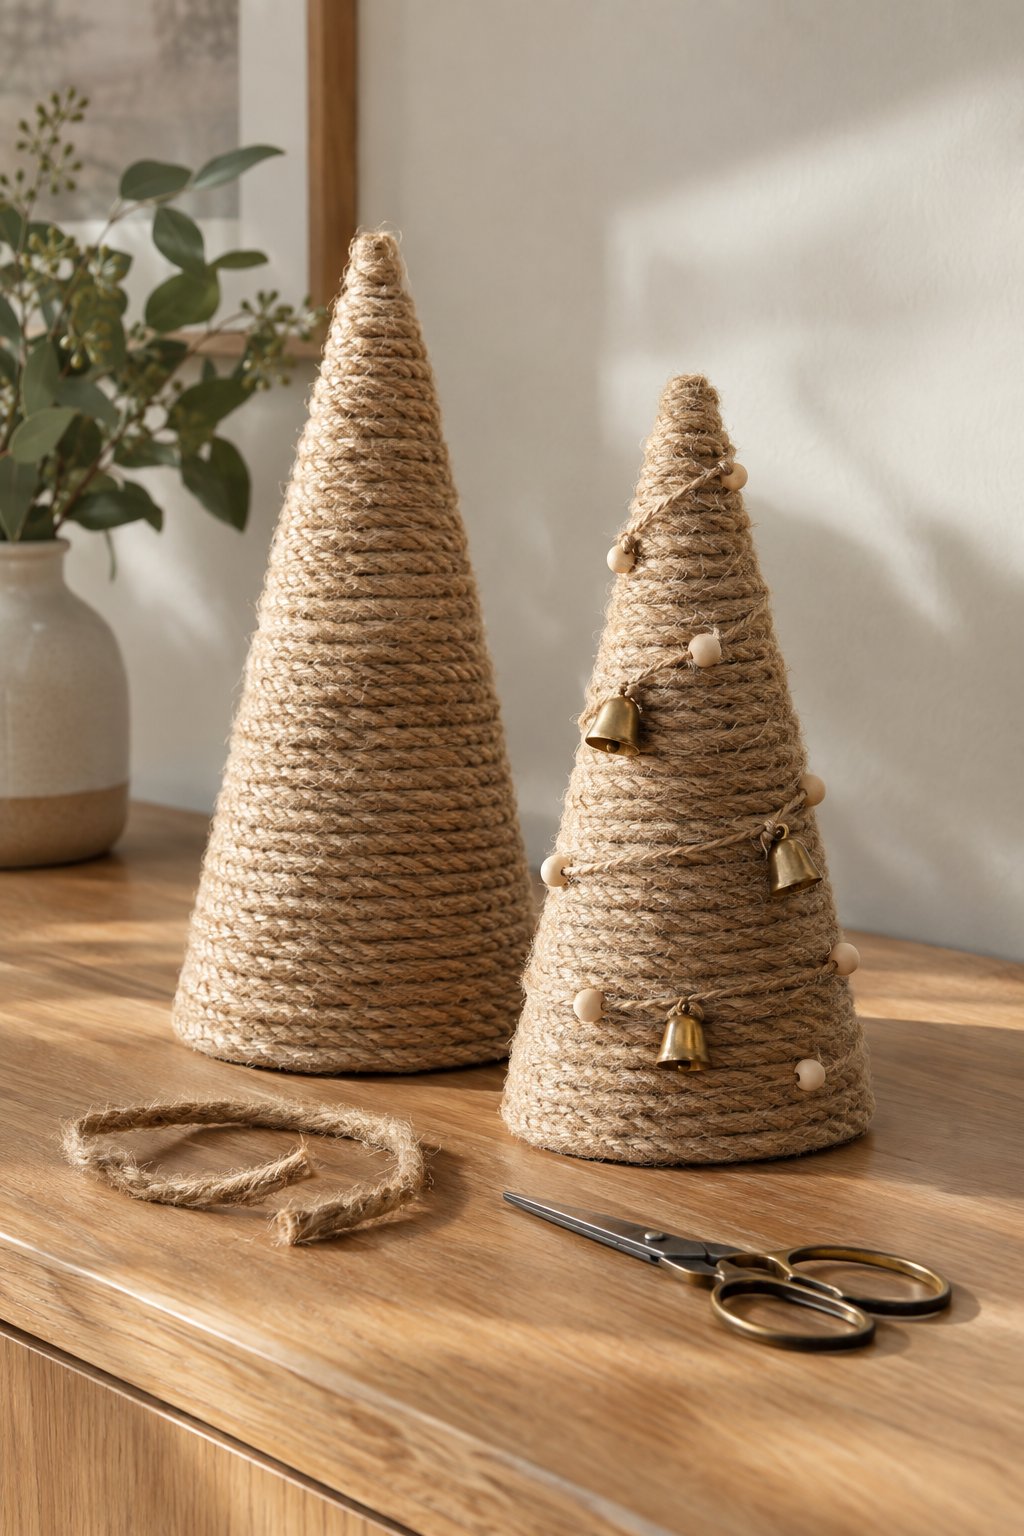
Start at the bottom of a craft cone and coil rope upward, gluing only a short section at a time. Press each row against the one below so the base doesn’t peek through. The plain tree can stay undecorated; for the second version, attach a few little bells after the rope is secure.
Christmas Wax Sachets

Use wax intended for decorative sachets and follow its melting instructions. Pour into silicone molds, then wait until the surface begins to thicken before adding dried orange, spices, and botanical pieces—otherwise they may sink.
Make the ribbon hole before the wax hardens completely. Hang the finished sachets somewhere cool, away from fabrics that could stain.
Terracotta Pot Snowmen
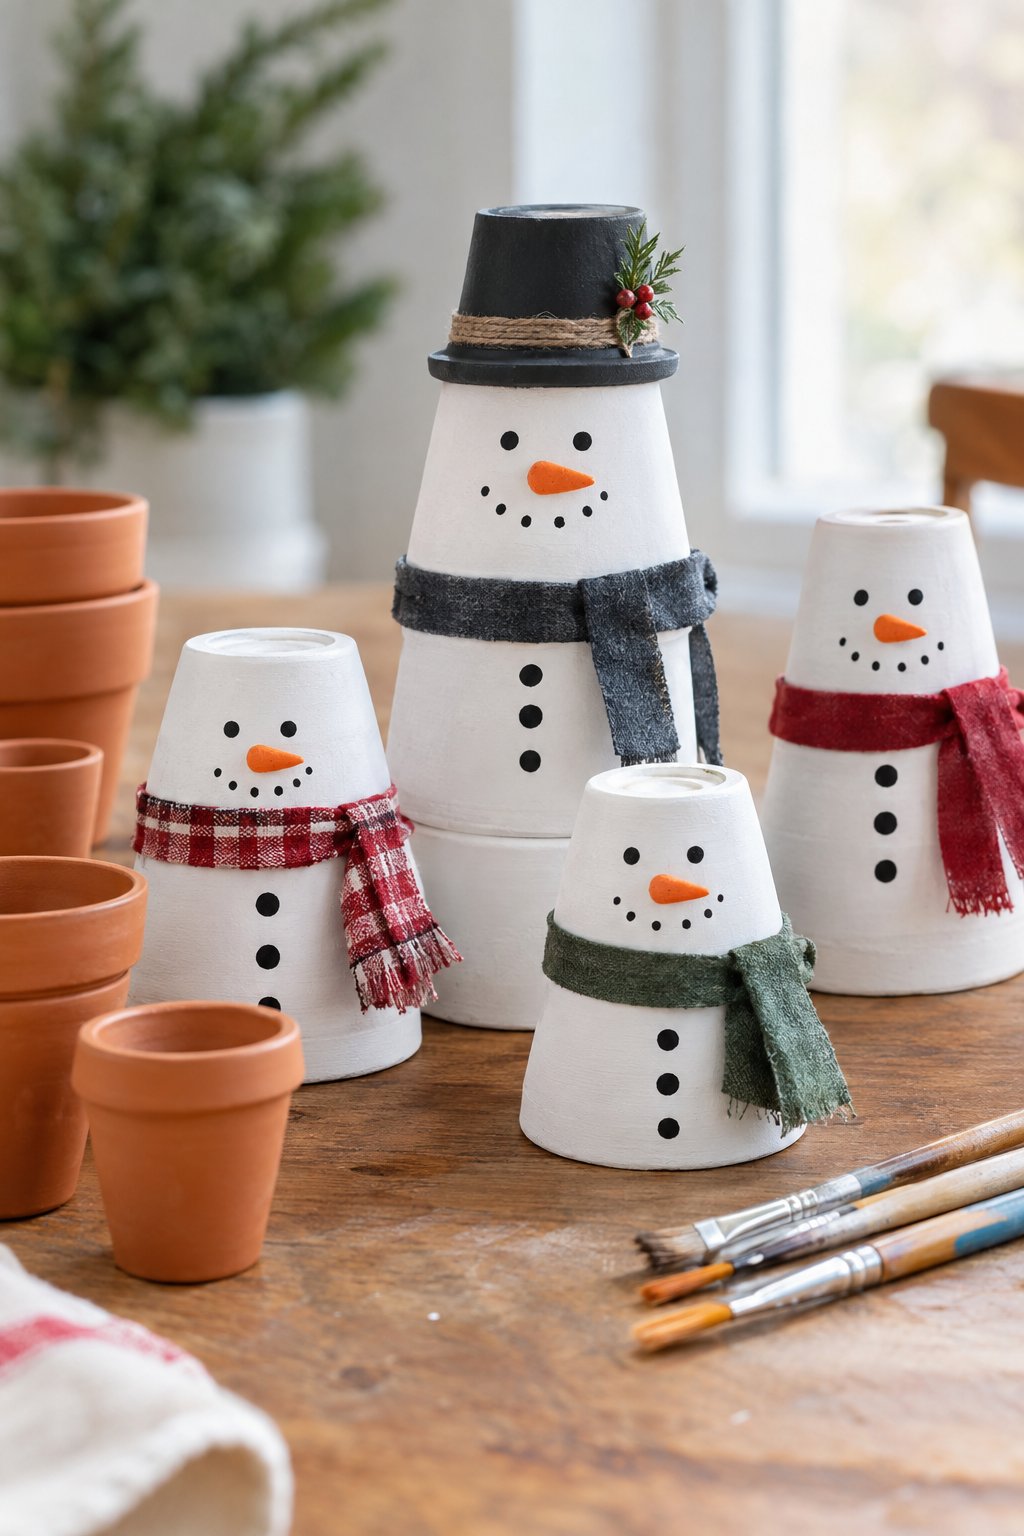
Test the arrangement of your pots first, choosing sizes that stack securely into a snowman. Paint them white before assembly, then glue them together and add the faces with a fine brush. A strip of plaid fabric covers the join as a scarf, while a tiny black-painted pot becomes the hat.
Mason Jar Christmas Centerpiece
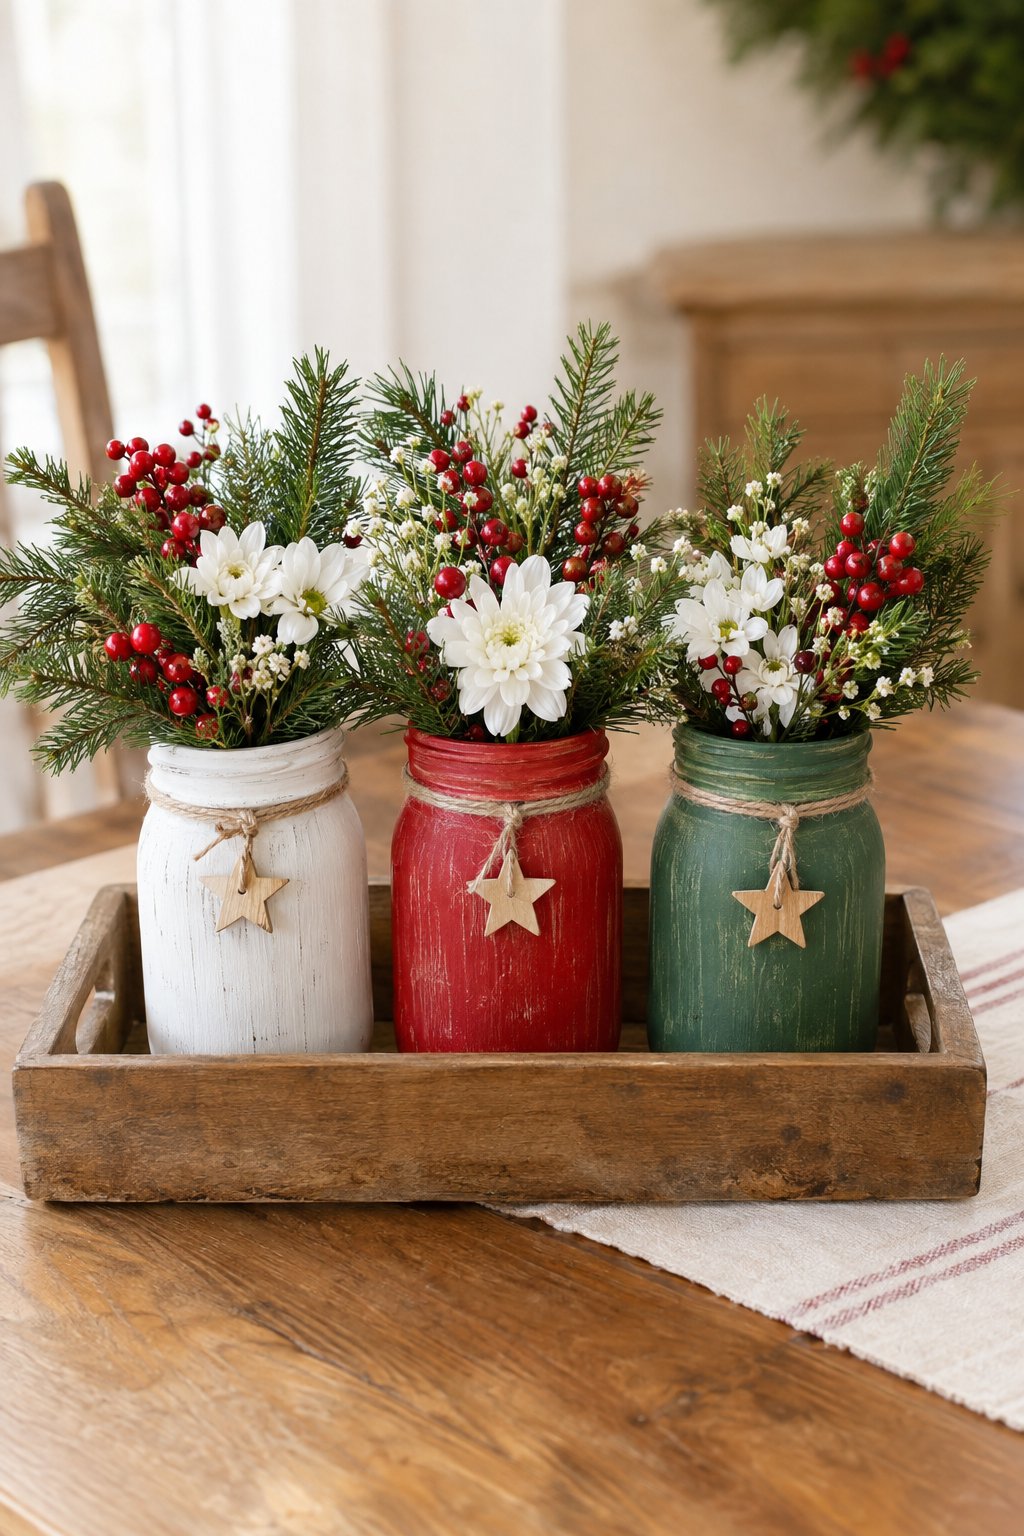
Three jars and a shallow tray are enough to pull this centerpiece together. Paint the jar exteriors red, green, and white, leaving the interiors clean for water. Tie on small wooden stars, then fill with flowers, berries, and evergreen stems.
Trim the arrangements low enough that guests can still see across the table.
Hand-Painted Wooden Ornaments
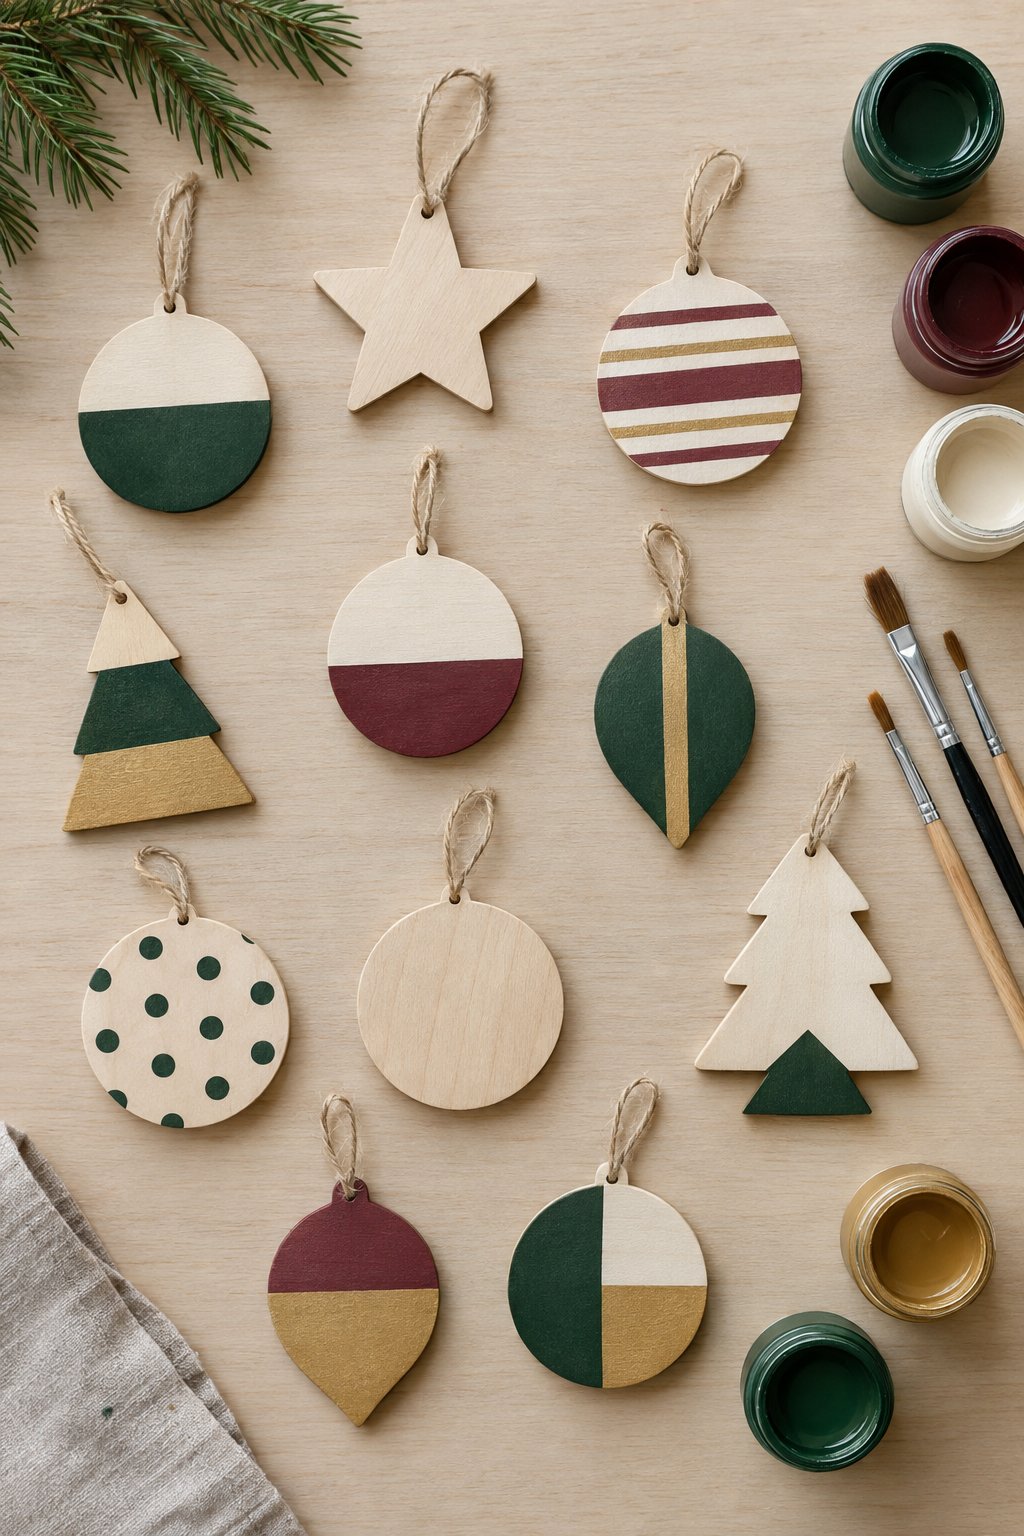
Painter’s tape handles the straight color divisions on these wooden ornaments; a brush handle dipped in paint makes the dots. Start with sanded blanks and apply thin acrylic coats, allowing each color to dry before masking another section. You don’t have to repeat the same design across the set.
Bell Cluster Door Hanging

Cut separate ribbon lengths for the bells so they fall at staggered heights. Tie them into one sturdy hanging loop, then cover the upper knot with evergreen sprigs and a velvet bow. Lift the cluster before trimming the tails—you may want to adjust a bell that disappears behind the others.
Linen Napkin Christmas Trees
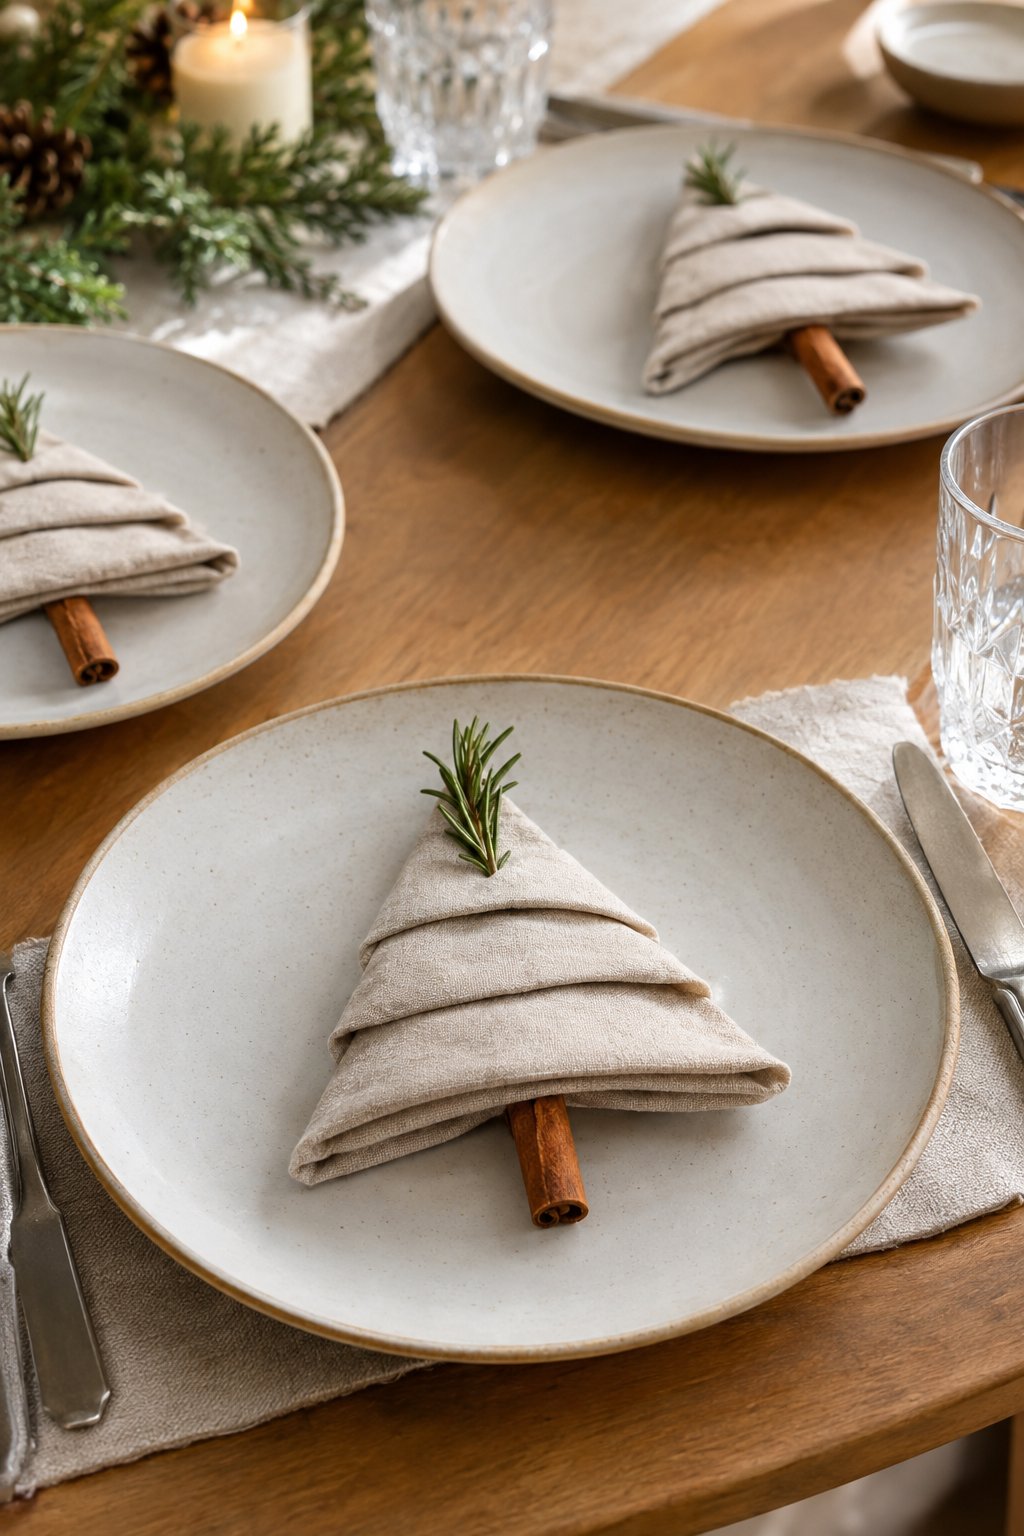
Practice with one square napkin before folding the rest for dinner. Fold it into quarters and lift the loose corners upward in staggered layers. Turn it over, bring the sides inward, then flip it back and tuck the tips beneath the folds above.
A cinnamon stick slipped underneath supplies the trunk, with a small herb sprig near the top.
Sheet Music Christmas Tree

Photocopies of a favorite carol give this tree a personal connection without sacrificing the original music. Cut the paper into strips, curl the lower edges around a pencil, and glue overlapping rows onto a cone from the bottom up. Each row should cover the attachment points below it, leaving the curled edges free.
Faux Gingerbread Clay Ornaments

These look like iced cookies, but brown air-dry clay makes them reusable. Cut festive shapes and pierce the hanging holes before drying. Then draw the icing with a white paint pen: a dotted border, a few buttons, or curved lines across a tree.
Evergreen Hoop Ornaments
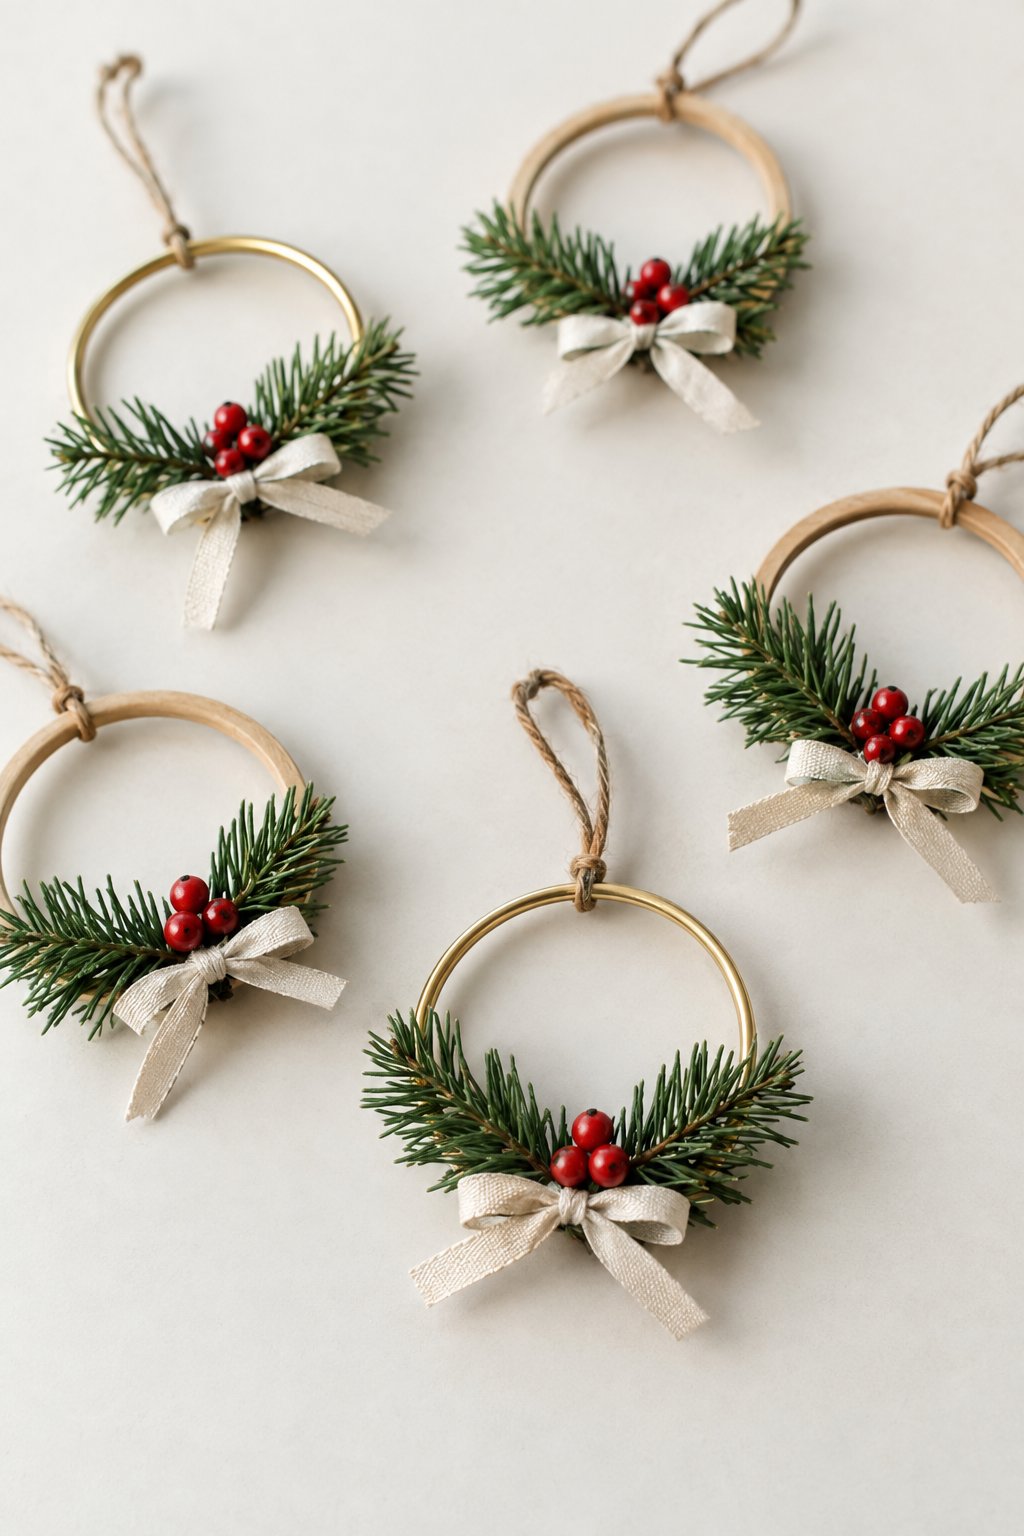
Use foliage offcuts to decorate the bottom of small metal or wooden hoops. Fasten the stems with fine wire, overlapping the tips to soften the outline. The little cream bow hides the binding, while a few red berries provide enough color. Keep the upper half clear, as shown, so the hoop remains visible.
Dry Snow Globe Jars
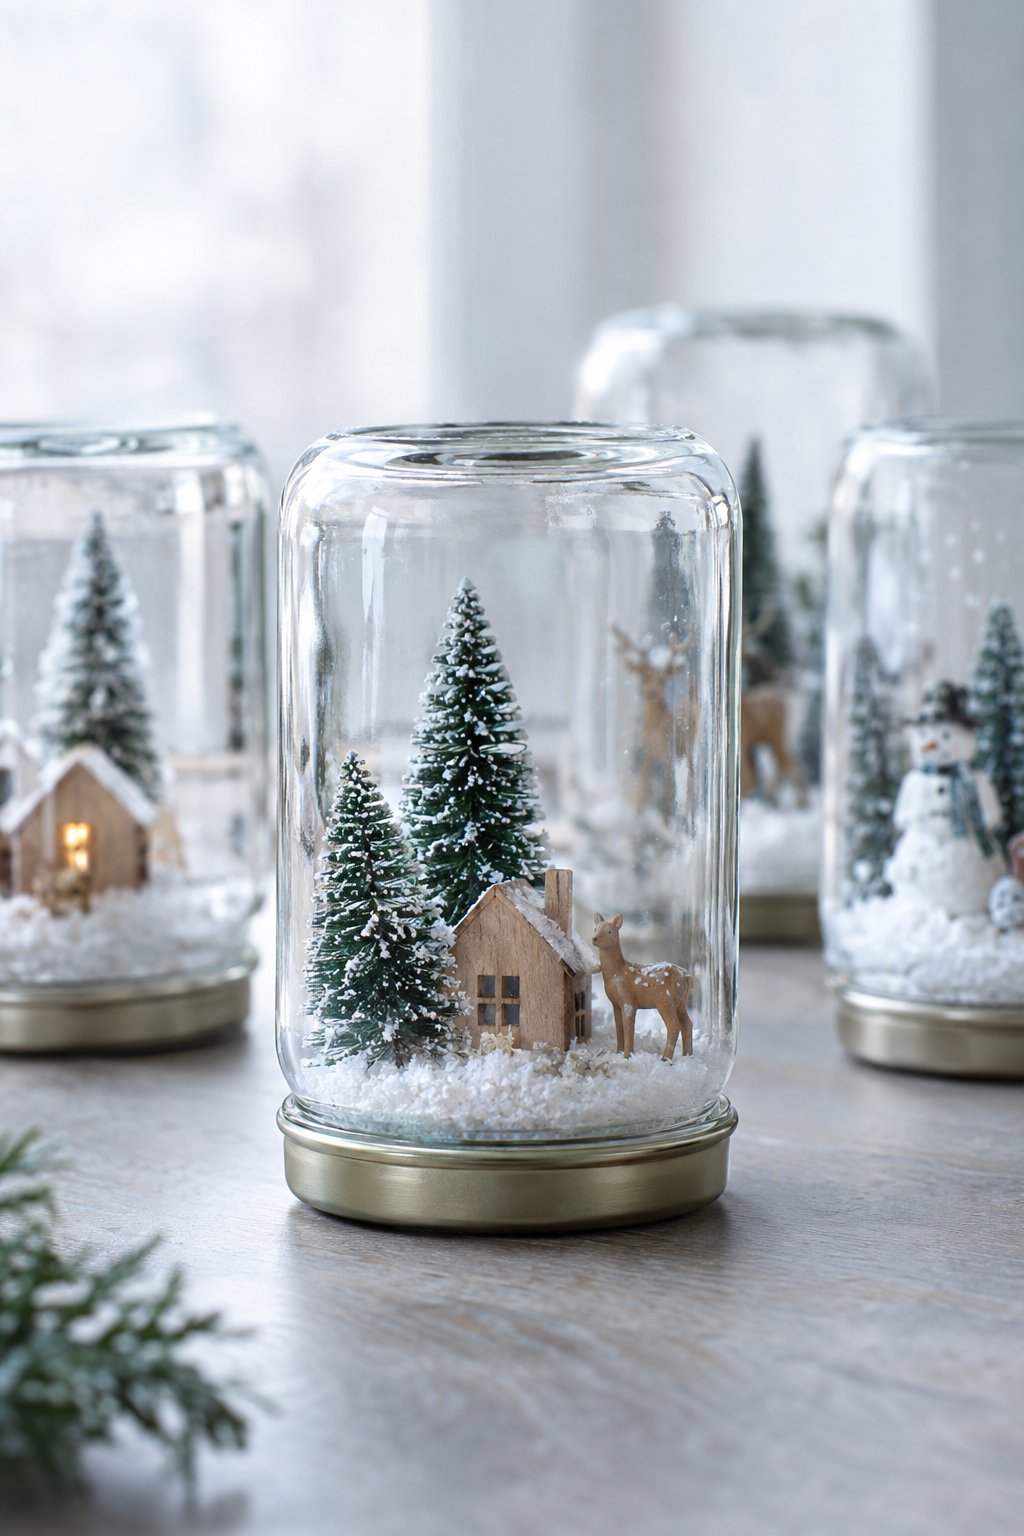
Check that your chosen tree and house fit beneath the jar before gluing them to the inside of its lid. Leave room around the lid’s edge so it can still close. Once the adhesive cures, add a little artificial snow and screw the jar into place.
This is a dry display, so there’s no water mixture to prepare.
Velvet Ribbon Ornament Bows
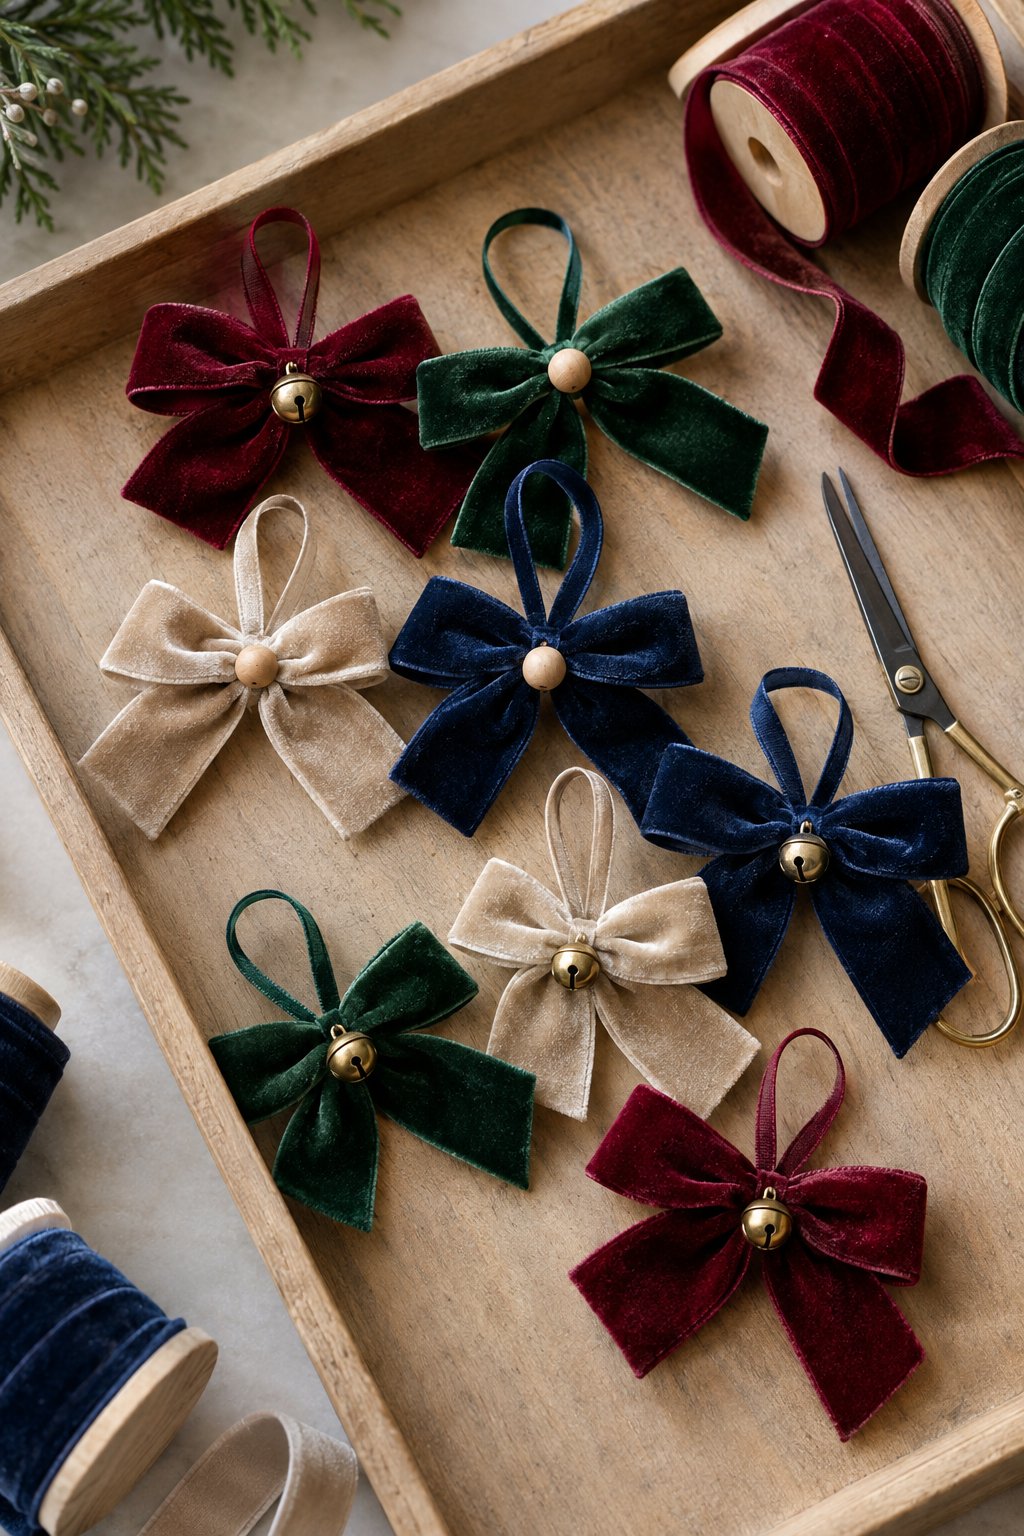
A short length of velvet ribbon makes a bow that can hang on the tree or top a gift. Fold the ends into loops, pinch the middle, and secure it with thread. Cover that thread with a narrow ribbon strip and stitch on a bead or bell. Add the hanger behind the center to keep the front tidy.
Scrap Fabric Rag Garland
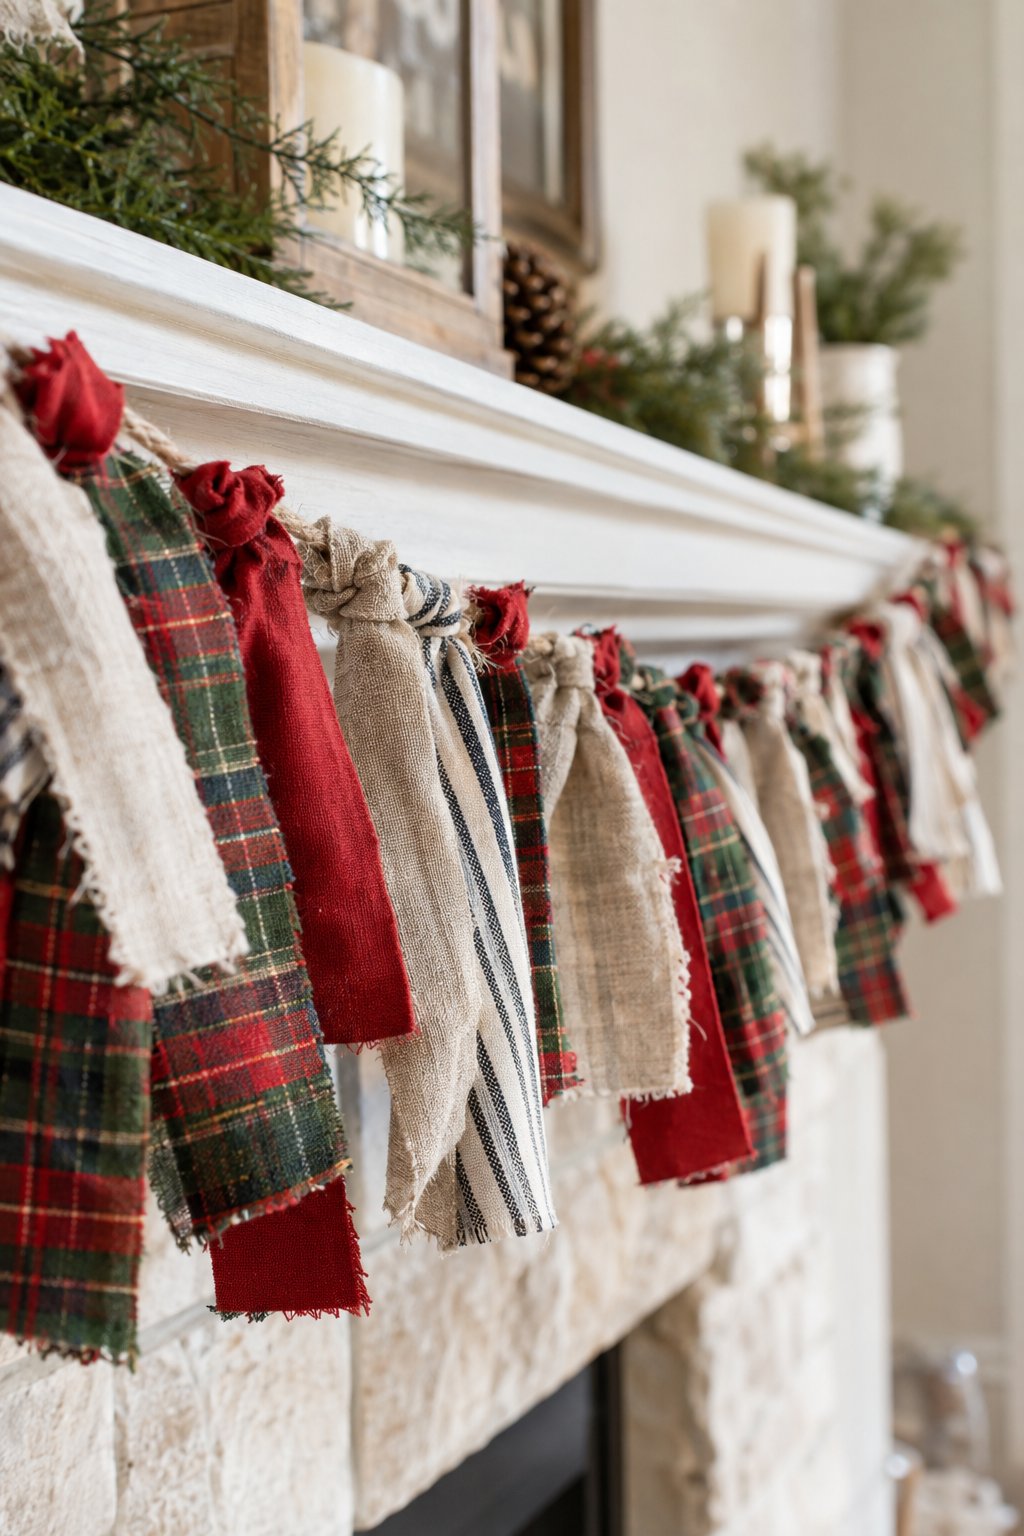
Slightly frayed edges suit this garland, so your fabric strips don’t need precise cuts. Fold each strip around a sturdy cord and pull the ends through its loop, then tighten and slide it into position.
Keep adding scraps until the garland looks full. Mix the plaid pieces throughout rather than using them all at one end.
Painted Terracotta Christmas Pots
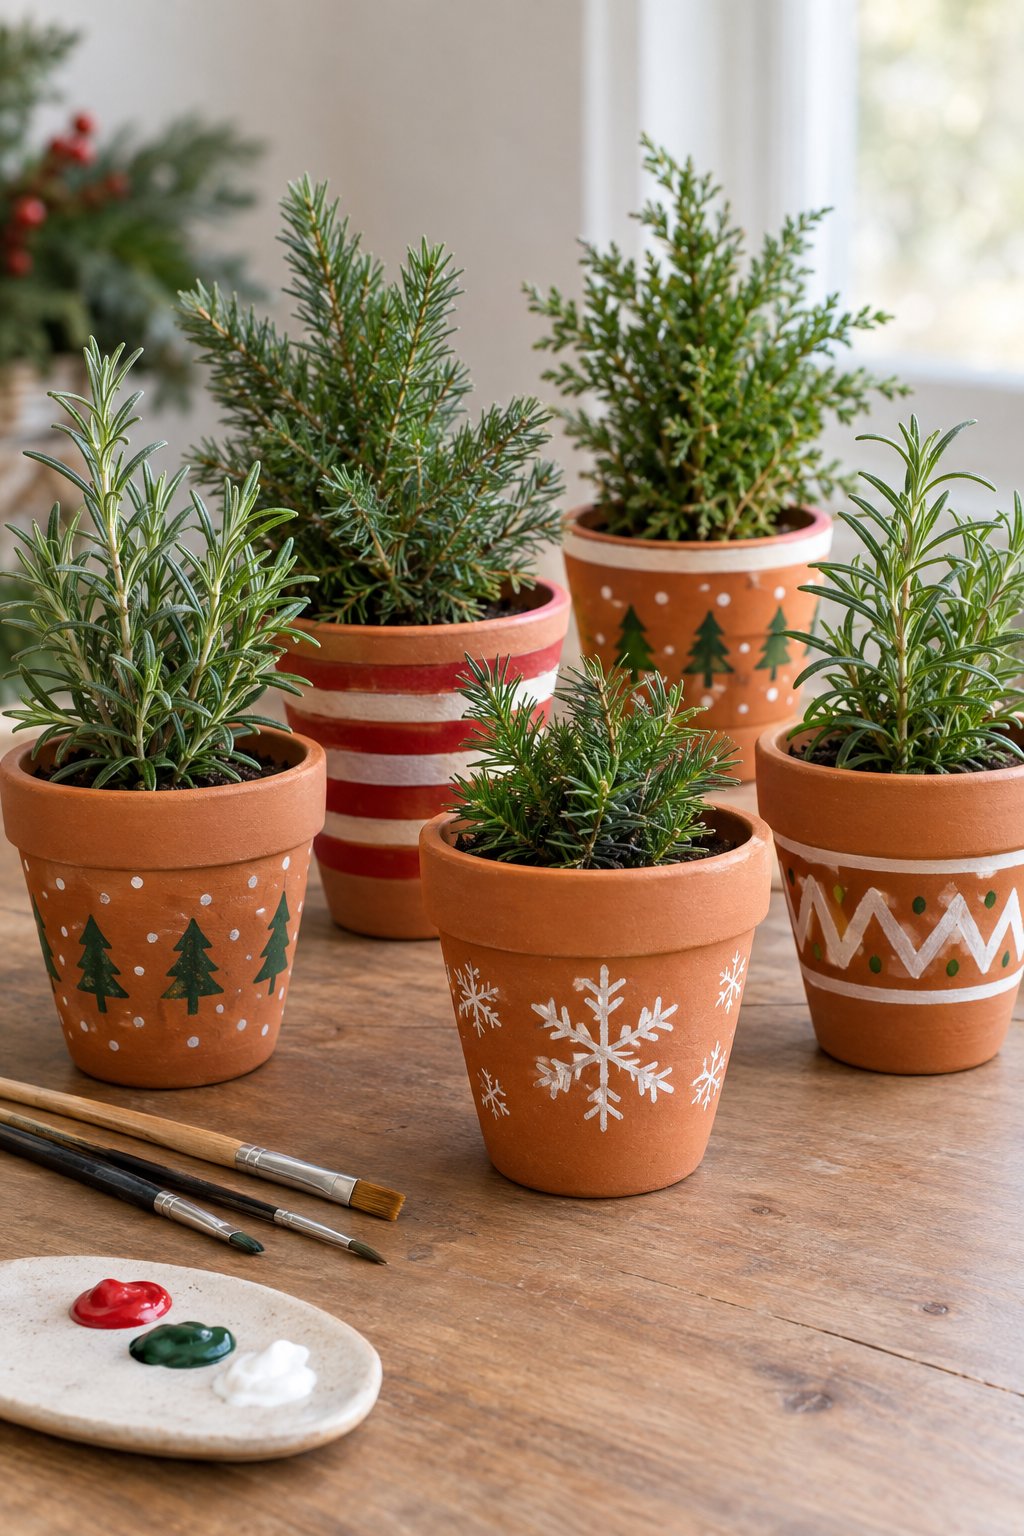
Give plain terracotta pots a seasonal border with stripes, tiny trees, or white snowflakes. Clean and dry them thoroughly before painting the outsides with acrylics. Protect the cured design with an appropriate sealer, and use removable nursery pots inside to simplify watering.
Christmas Candle Centerpiece
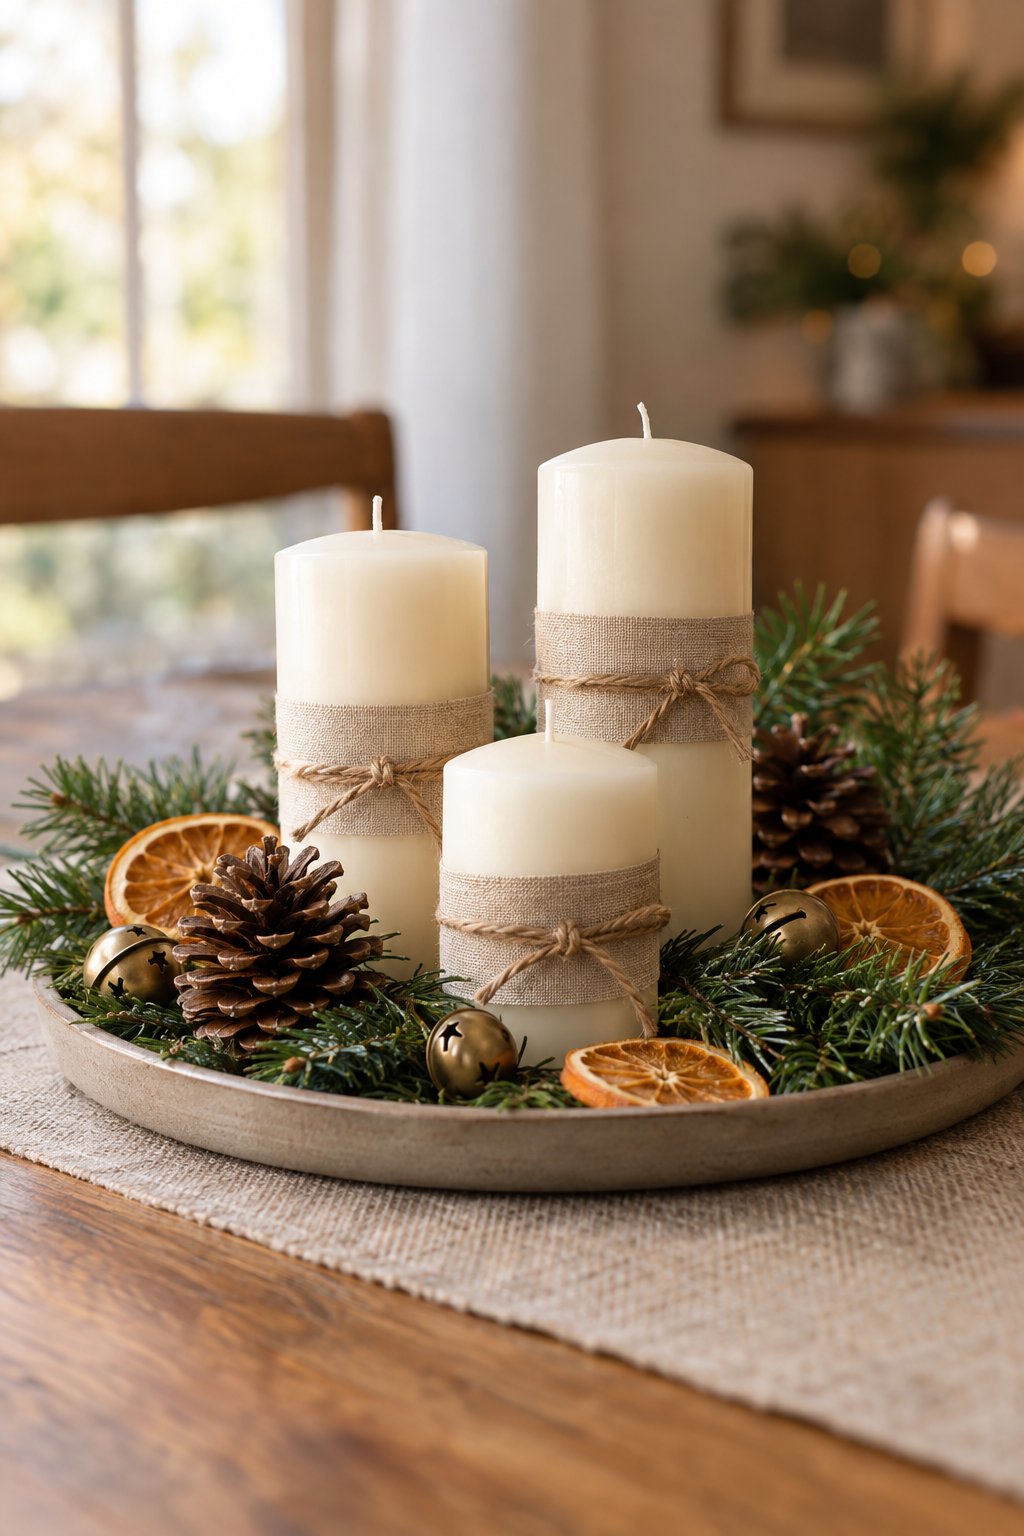
Place three flameless candles of different heights on a shallow tray, then build the greenery around them. Pinecones and dried orange slices fill larger gaps; small gold baubles fit between the stems.
Keep the arrangement within the tray’s edge so you can lift it off the table in one piece.
Button Christmas Tree Art
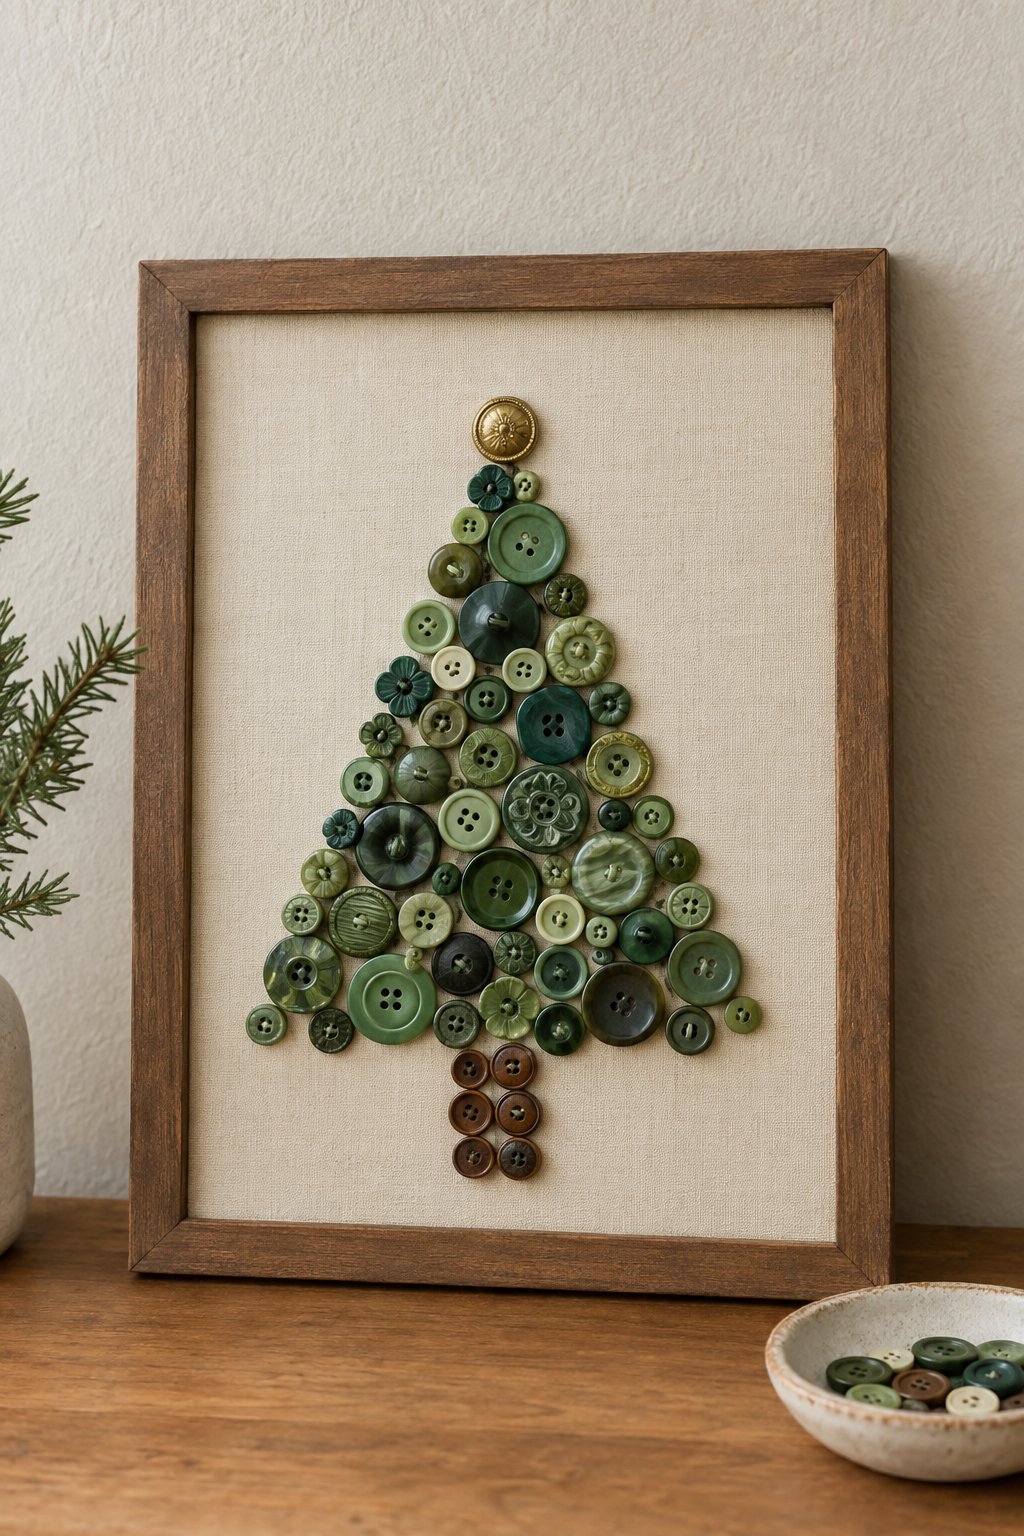
Before buying supplies, look through your spare buttons for shades of green and a few brown ones. Arrange them into a tree on fabric-covered board, starting with the larger buttons and filling gaps with smaller sizes. Check the outline before gluing anything down. A gold button at the top replaces a star.
Painted Wooden Christmas Sign
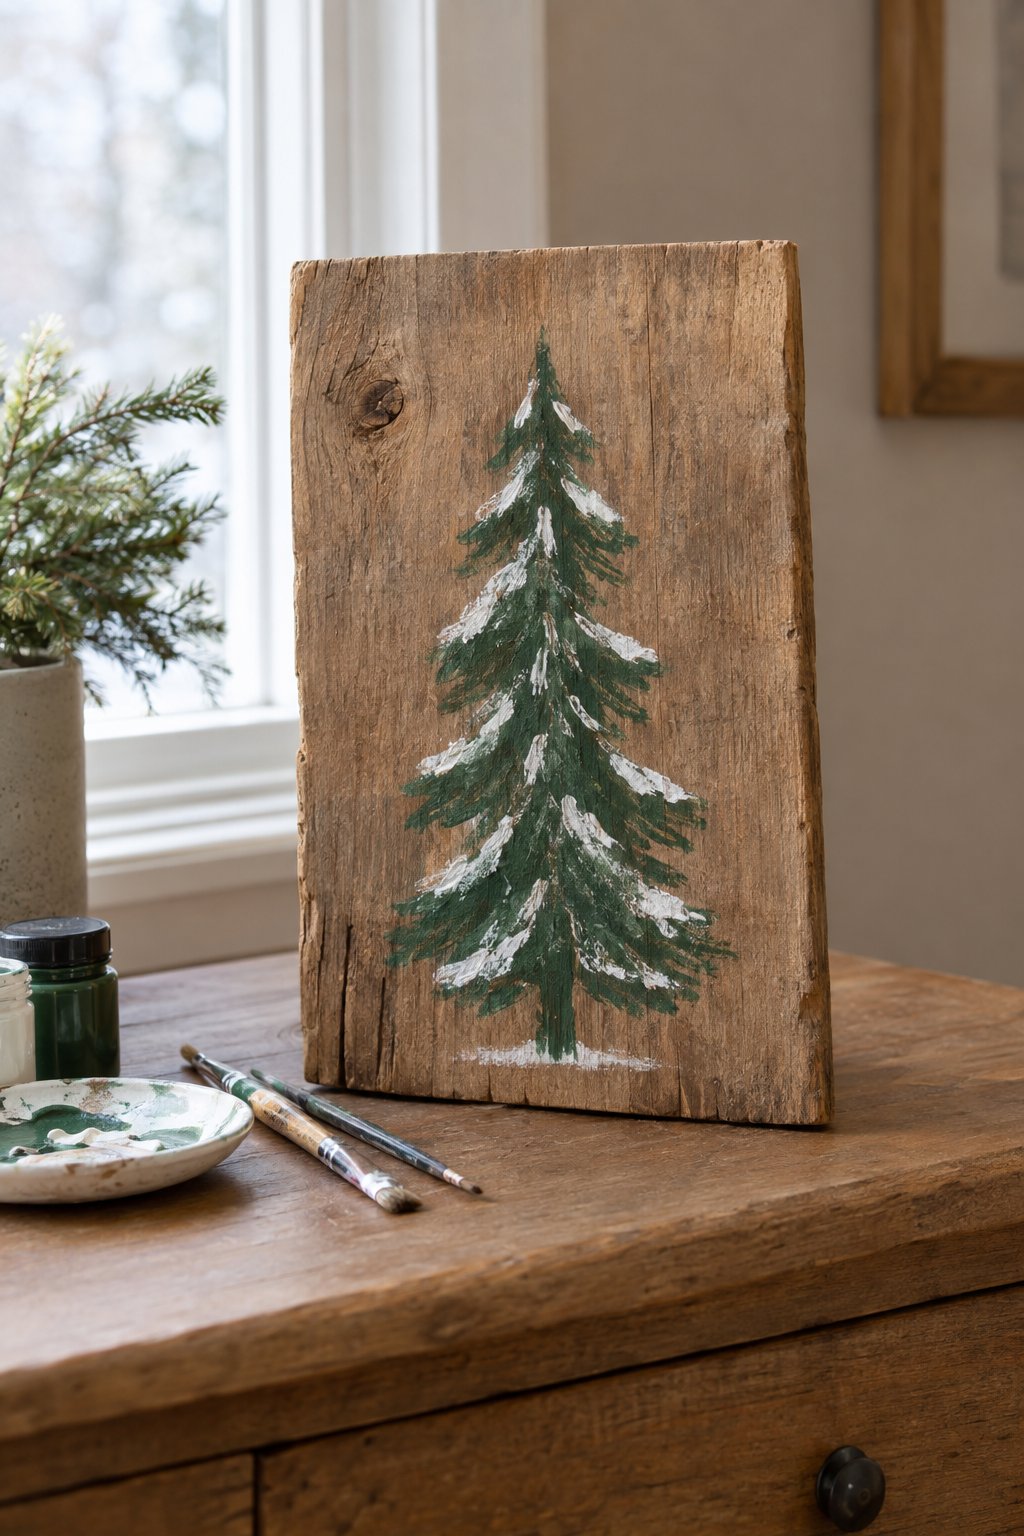
You don’t need to paint every branch accurately for this sign. On a sanded board, mark a thin trunk and brush short green strokes outward, widening them toward the bottom. Once dry, dab white across selected branches for snow; leaving plenty of bare wood around the tree keeps the rough surface part of the design.
Felt Mistletoe Hanging
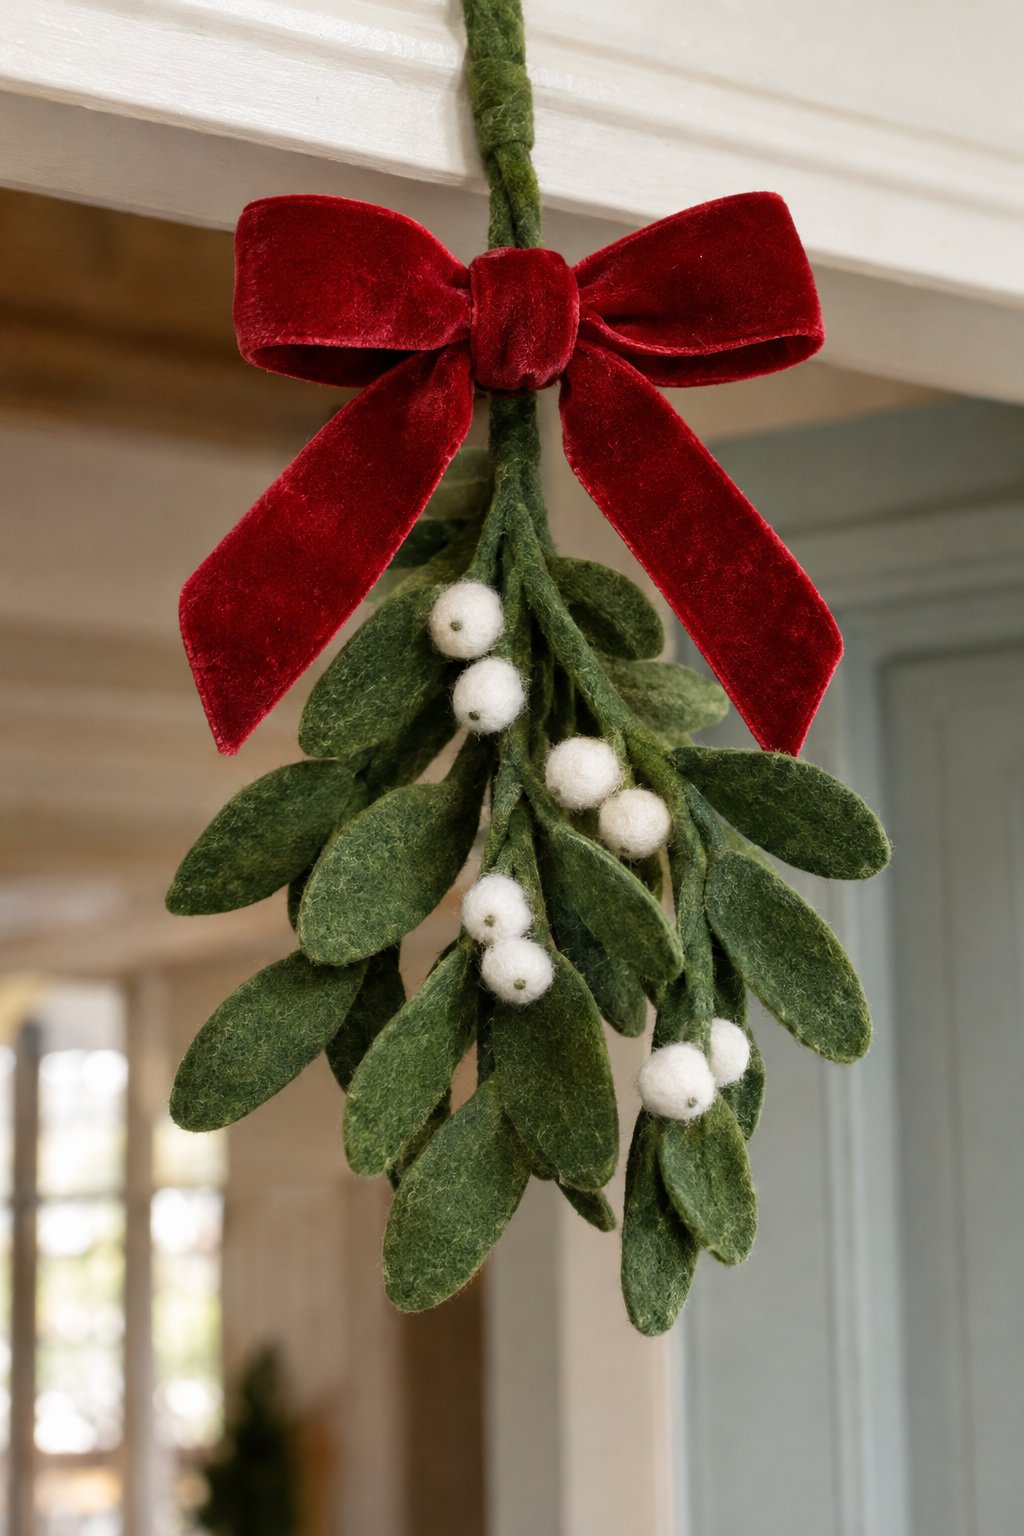
Cut oval leaves from green felt and glue them along thin floral wires. Gather the stems loosely so the leaves fall at different heights, then add white felt balls for berries. Wrap the upper stems with floral tape.
The large velvet bow covers that binding and supplies most of the color, so the foliage needs little else.
Wine Cork Christmas Tree Art
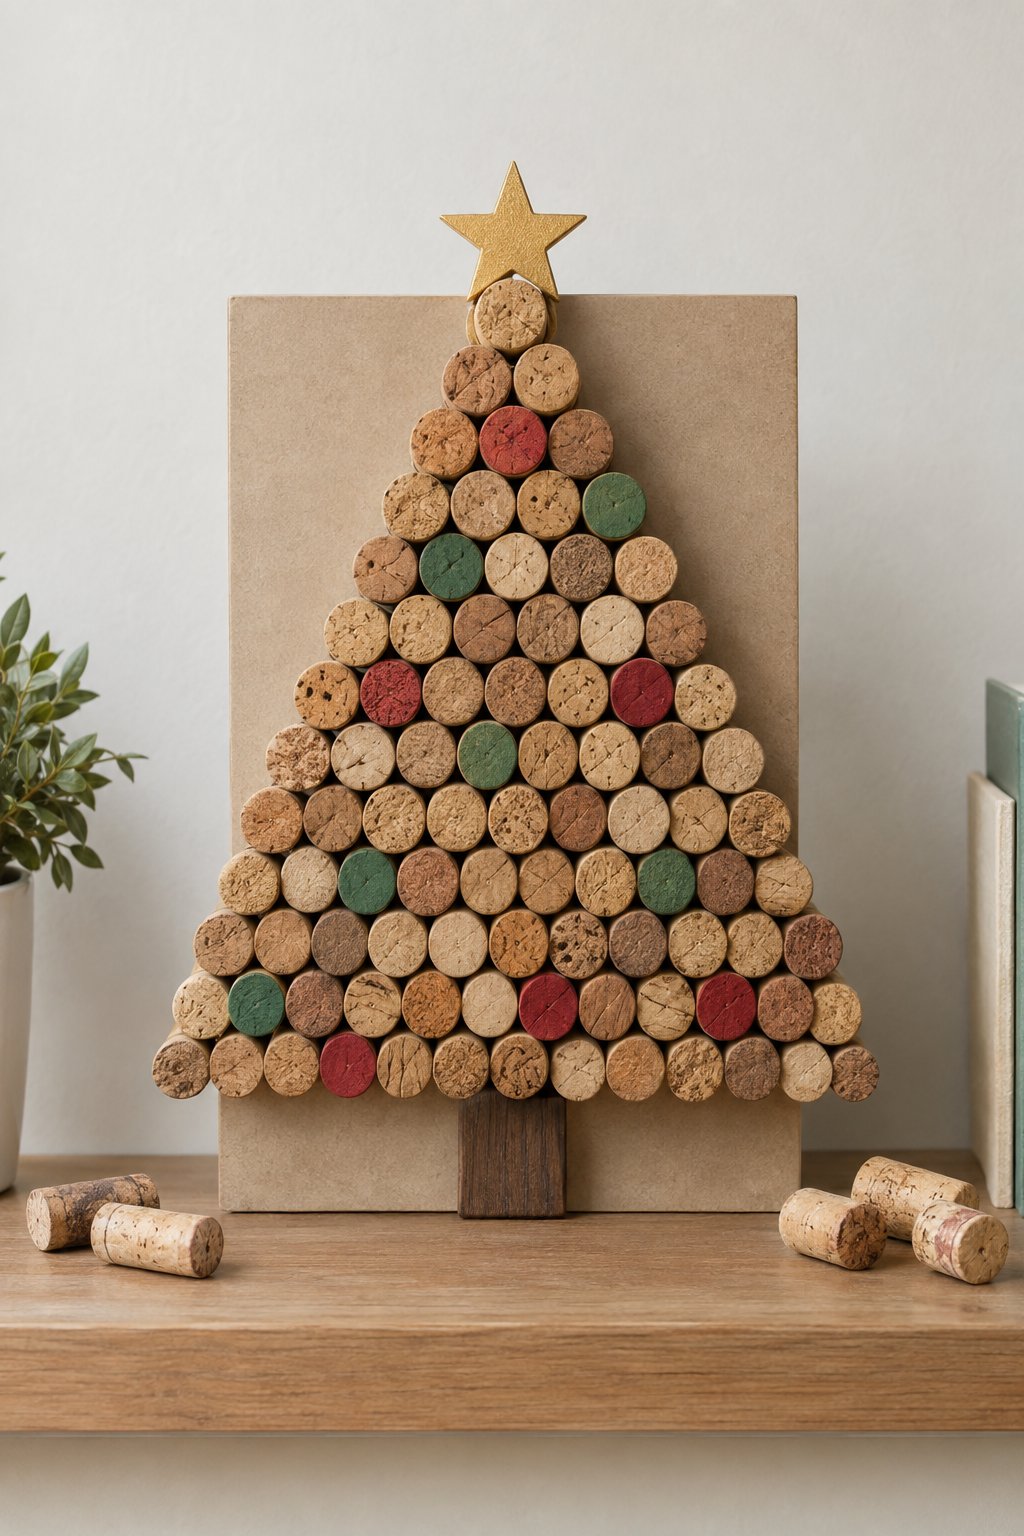
Set cork slices on the backing board without glue first, building broad rows at the bottom and narrowing toward the star. Use slices of similar depth so none jut out too far. Paint selected faces red and green, then attach the finished layout with a suitable craft adhesive. Let it cure flat before standing the board up.
Wooden Bead Snowflake Ornaments
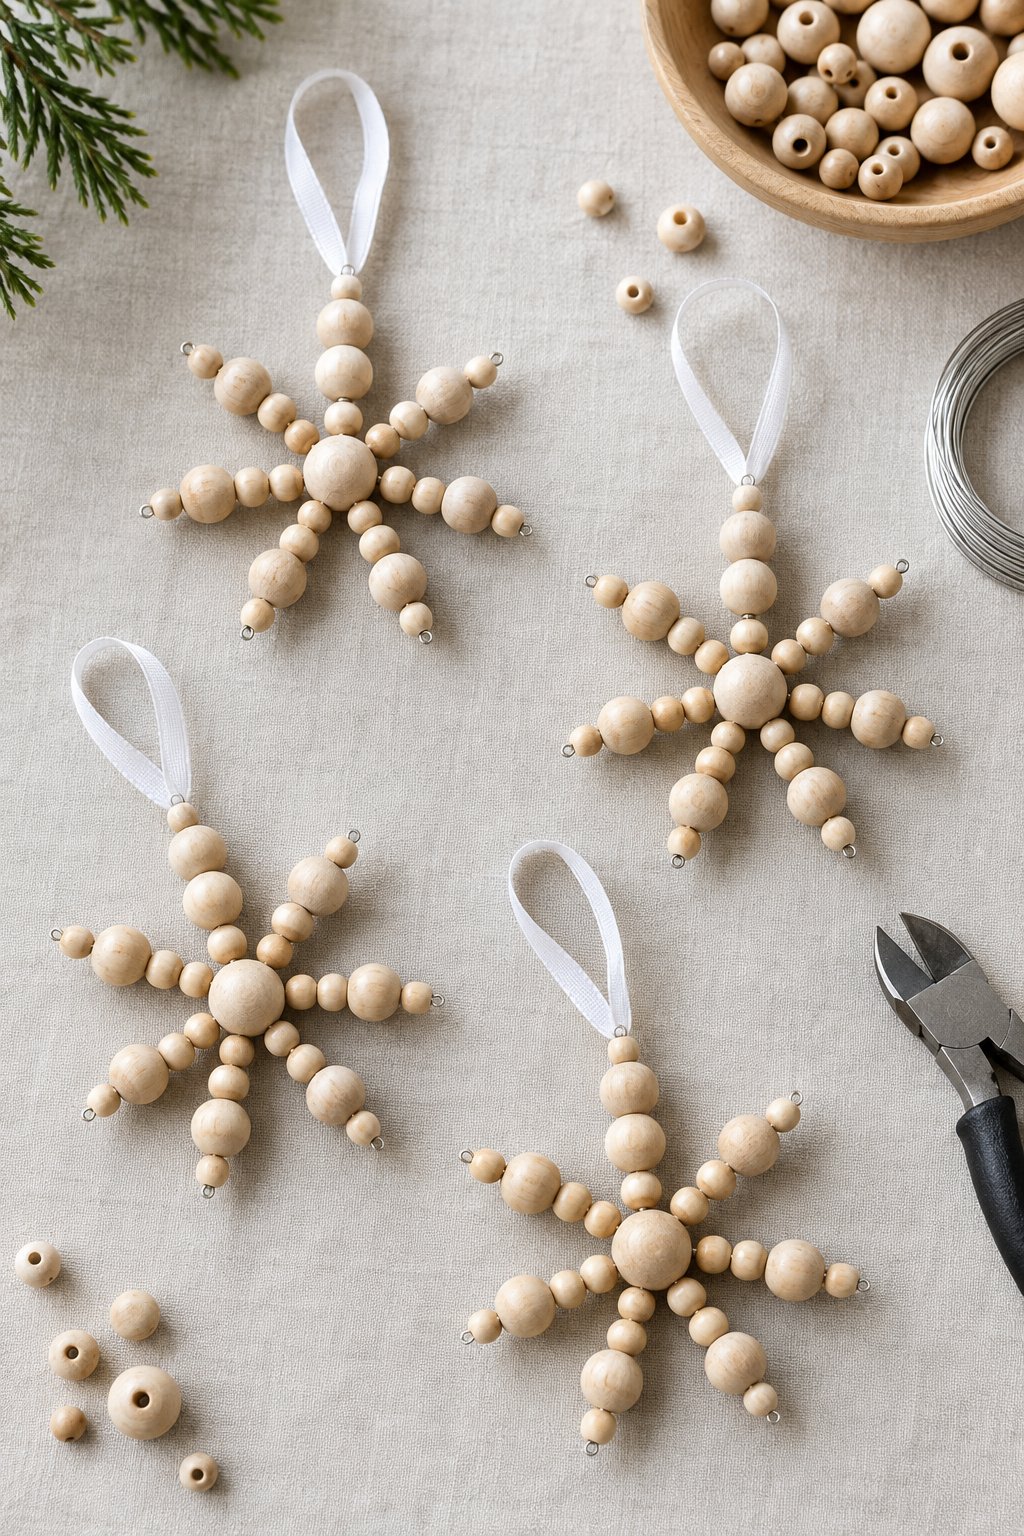
Twist three equal pieces of craft wire together at their centers to create six spokes. Thread each spoke with wooden beads, then curl the exposed wire ends into closed loops using pliers. Those loops keep the beads in place, and one also holds the ribbon hanger.
Faux Stained Glass Christmas Ornaments
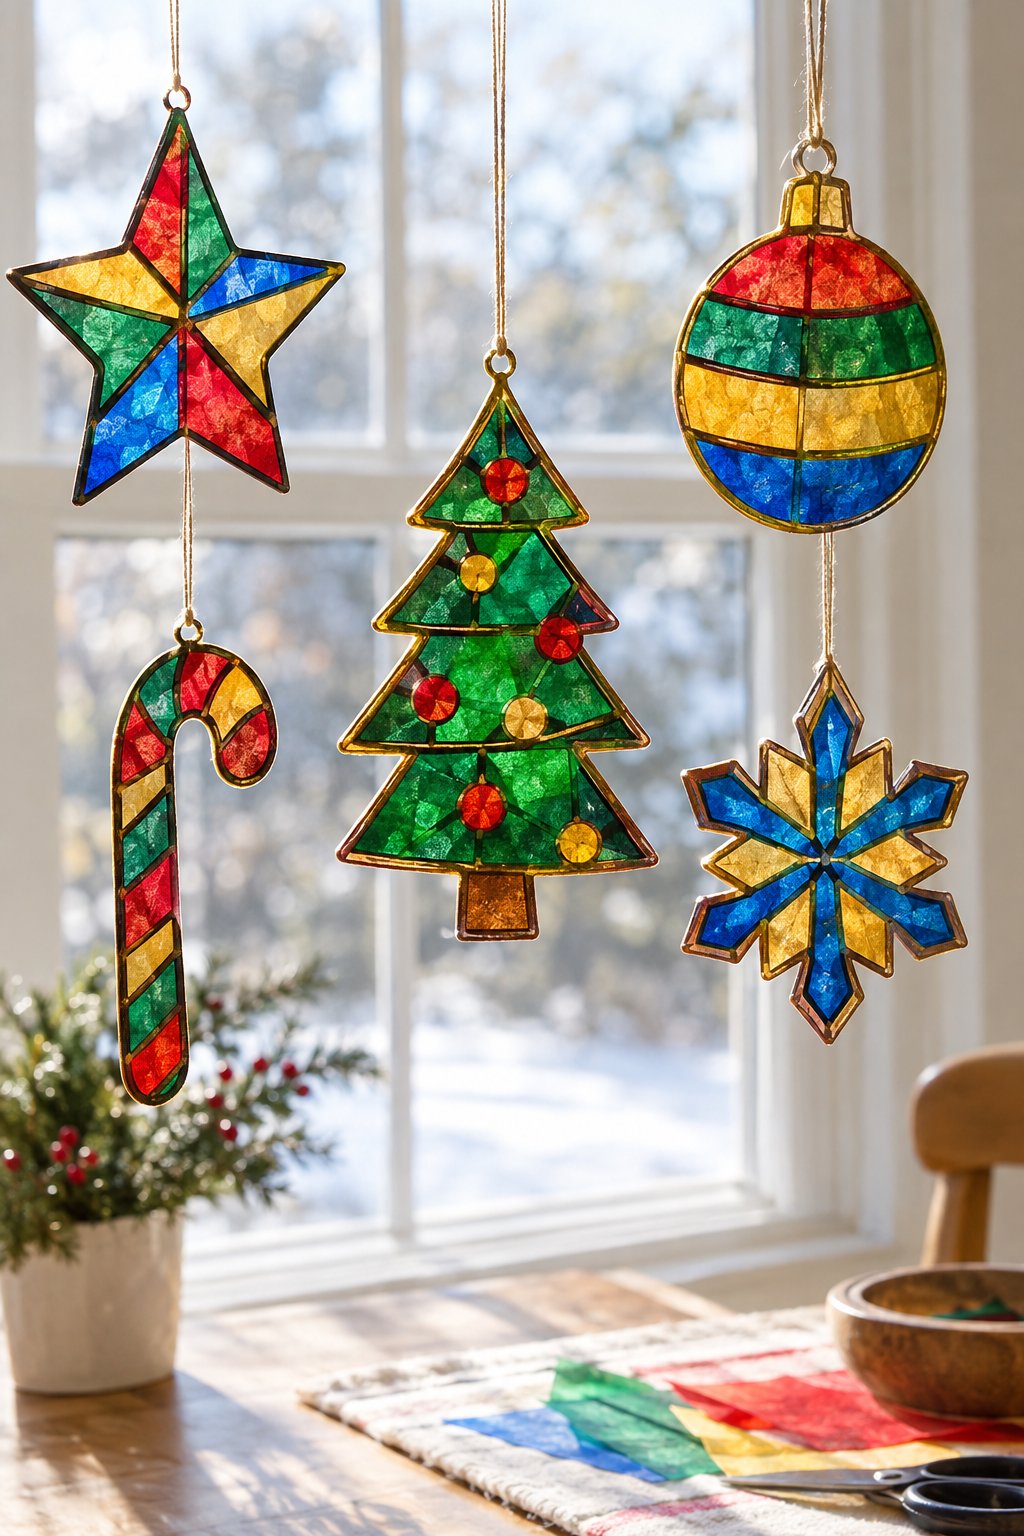
Clear craft plastic gives you the window-light effect without glass cutting. Draw the outlines with black dimensional paint, leaving each colored section enclosed. After the outlines dry, fill them with translucent paint compatible with the plastic.
Let the colors cure completely before cutting out the shapes. A small hole near the top takes the hanging ribbon.
Bottle Brush Tree Display
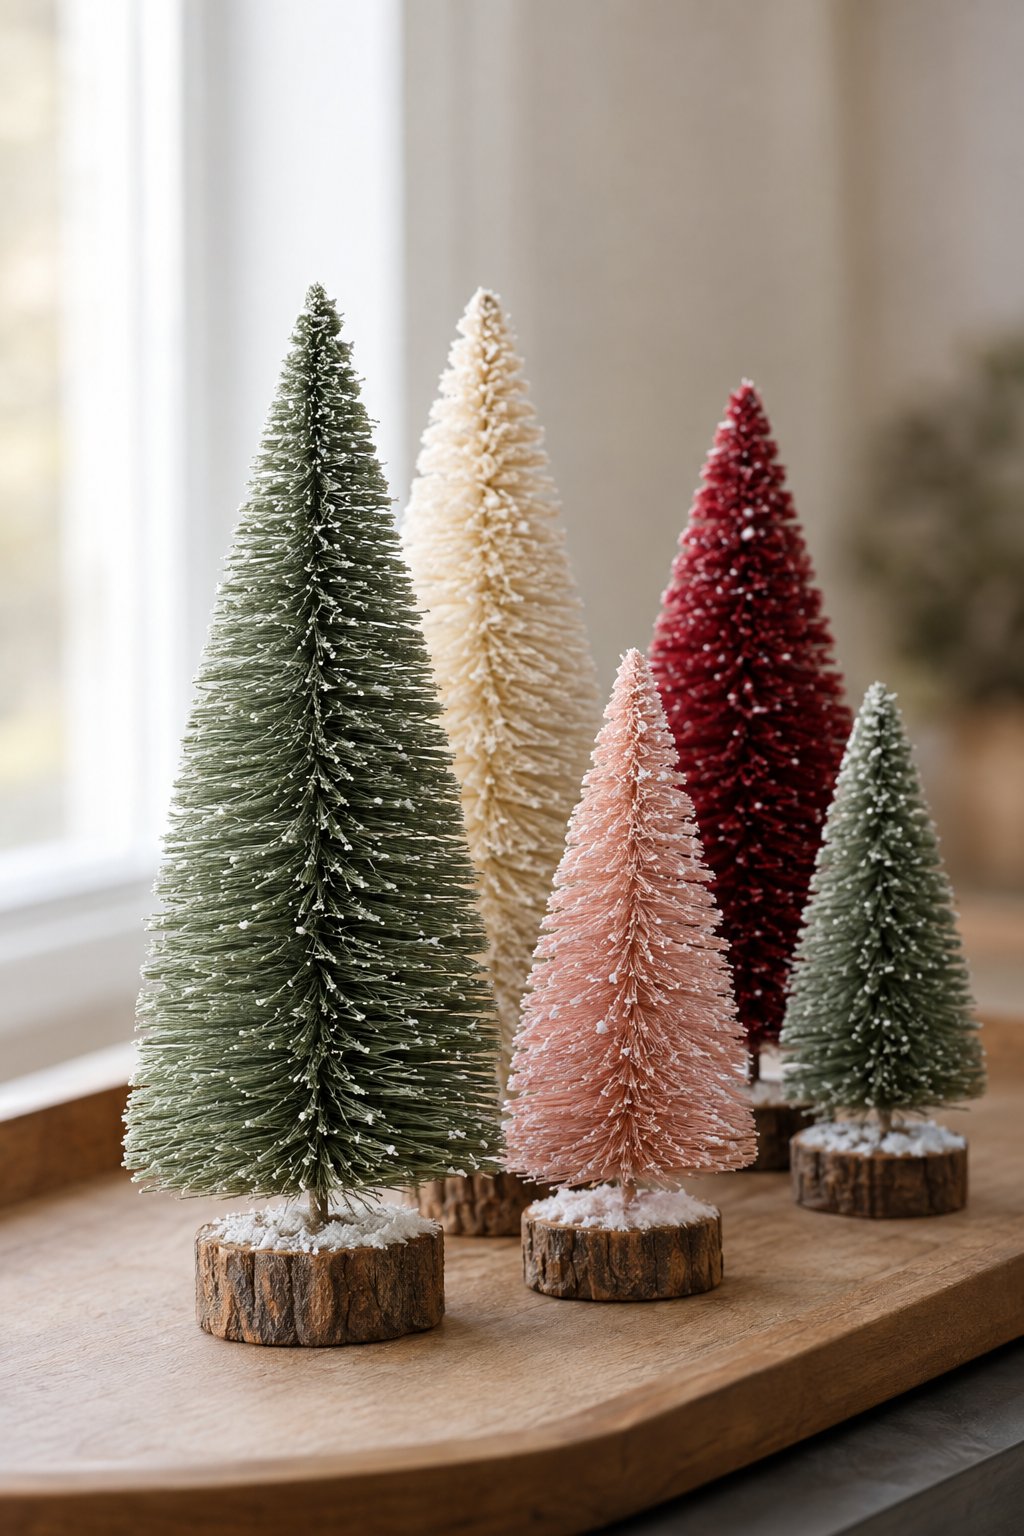
Make bought bottle brush trees feel more handmade by replacing their stands with wood slices. Drill a small hole in each slice and glue the wire trunk into it. For a display like this one, vary both the tree heights and colors, placing shorter trees where they won’t disappear behind taller ones.
Christmas Scented Candles
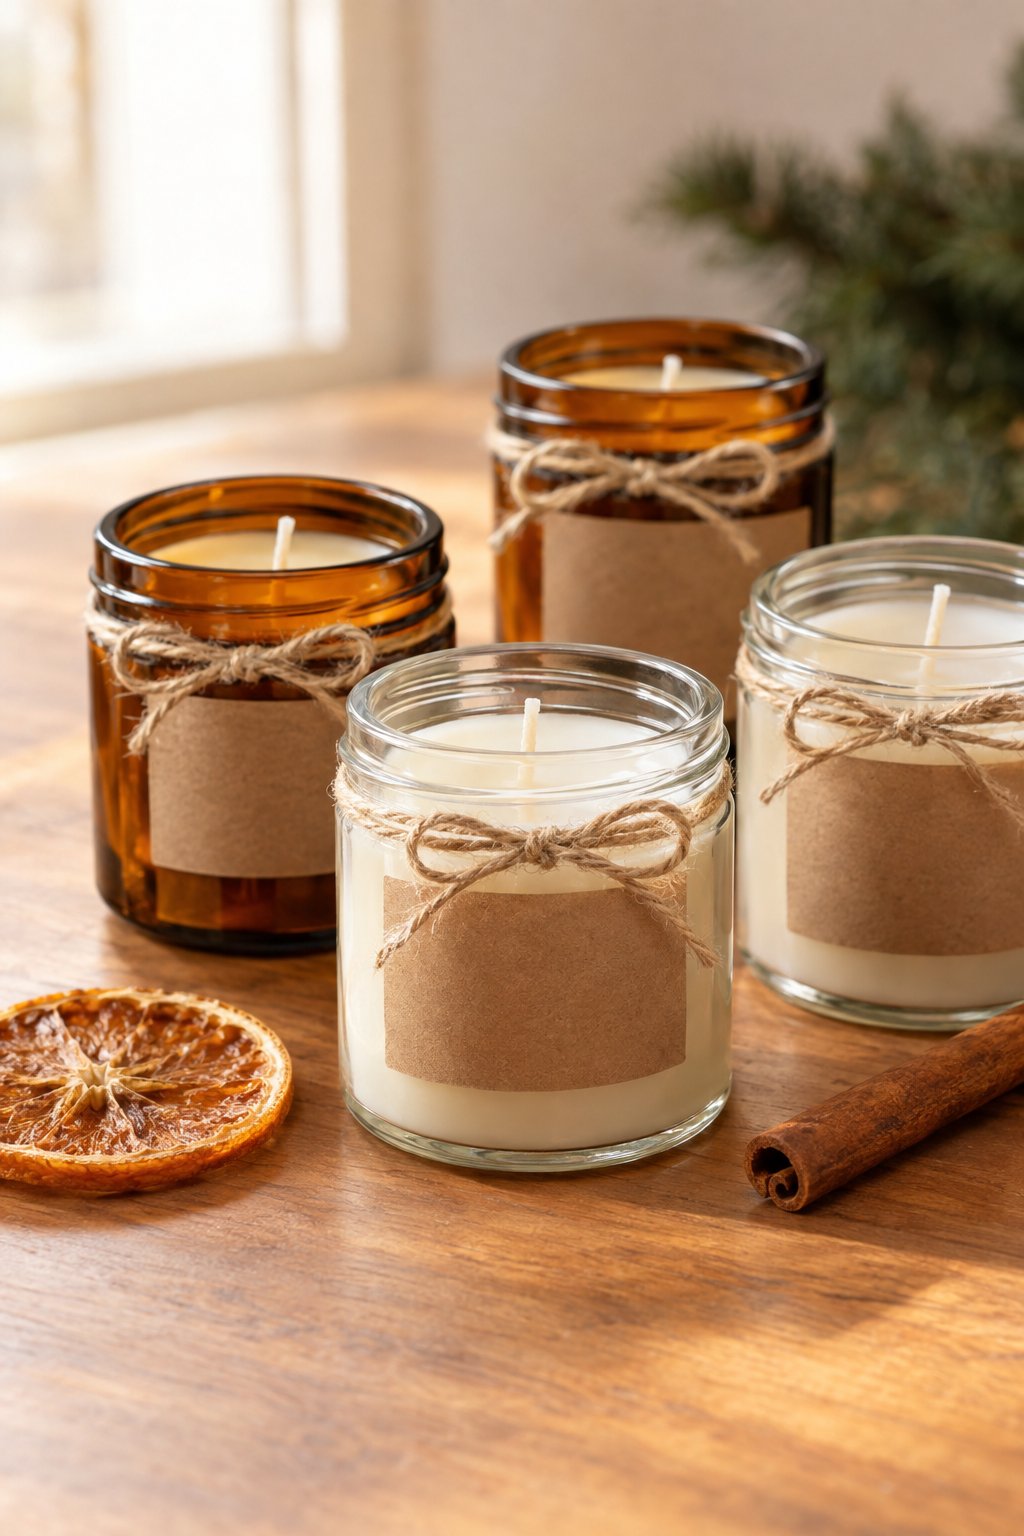
Choose a candle-making recipe matched to your wax and container size rather than estimating the wick or fragrance amount. Secure the wicks in candle-rated jars, melt the wax, and add candle fragrance at the specified temperature.
Pour and leave undisturbed for the recommended curing time. Kraft labels and twine can go on afterward, with the scent name and burn instructions.
Rope-Wrapped Christmas Baubles
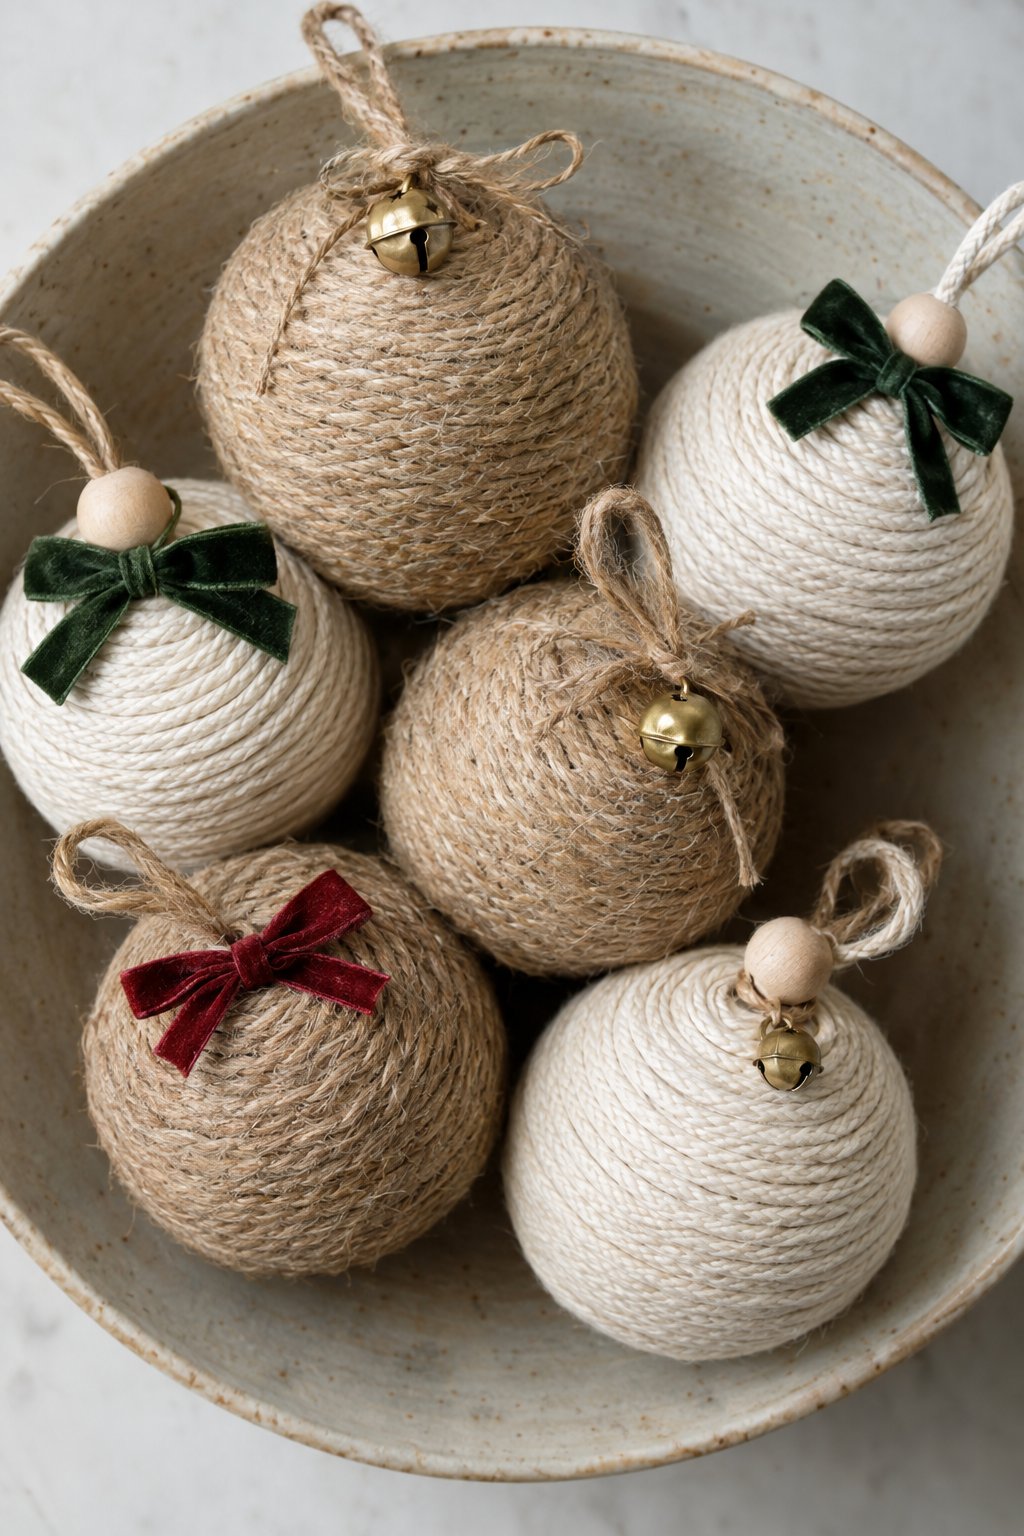
Hide an old bauble’s finish beneath tightly coiled jute or cotton cord. Begin near the cap and glue short sections around the curve, pressing the rows together as you go. Tuck the final end underneath the ornament; a small velvet bow near the hanger completes the version pictured.
Hand-Stamped Christmas Tea Towels
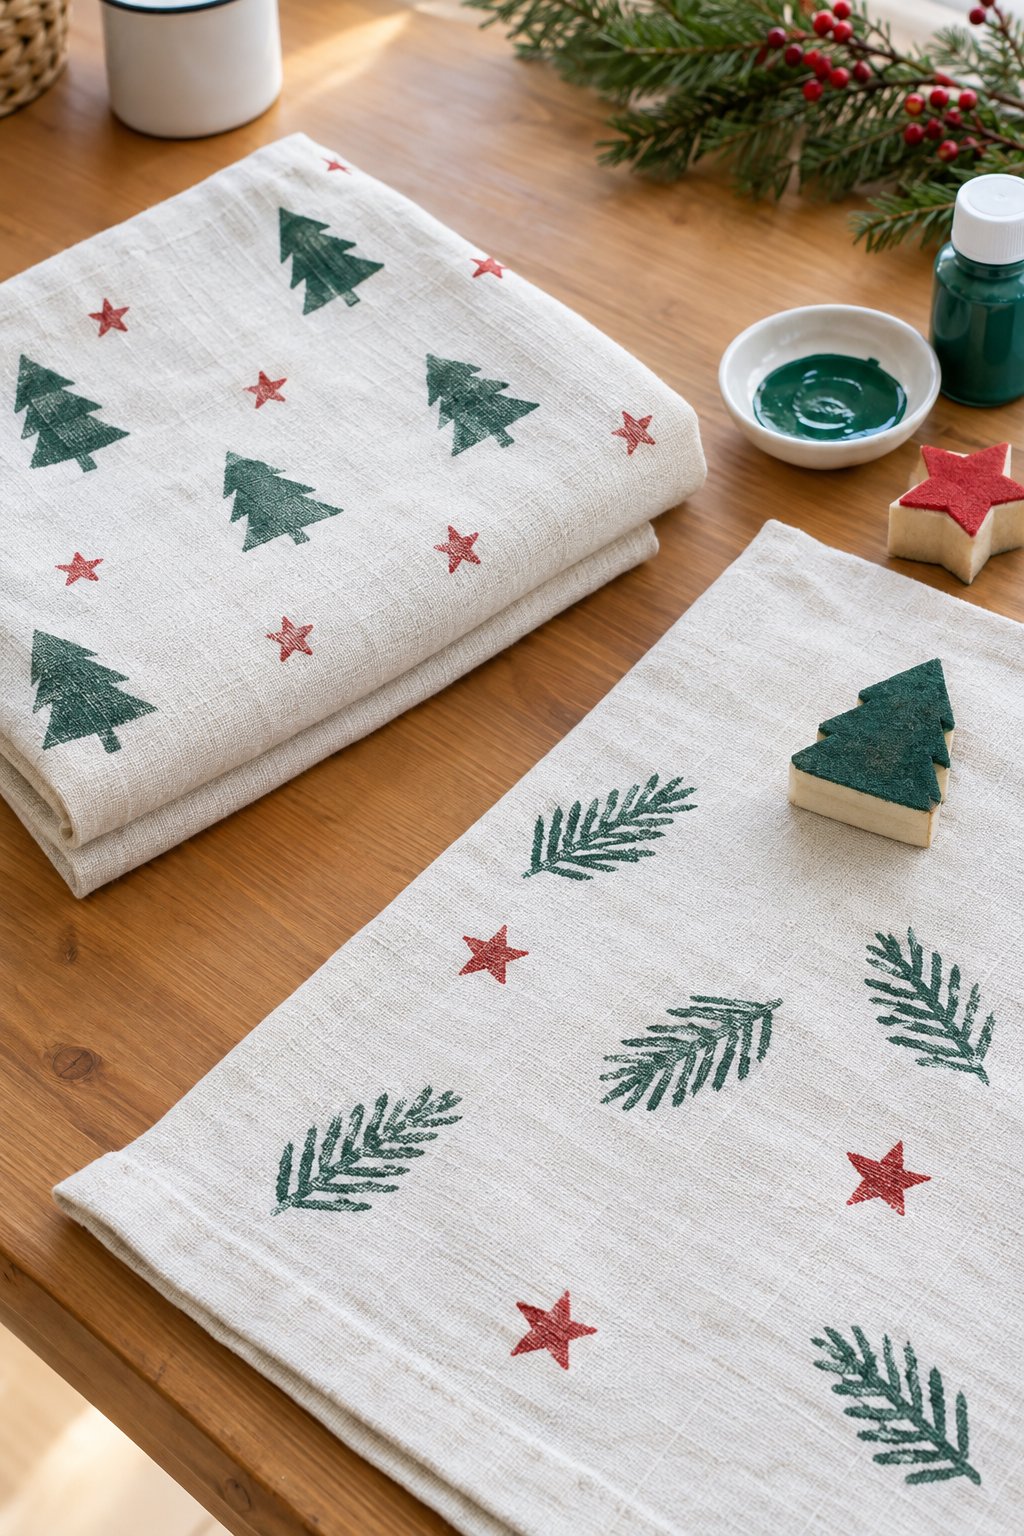
Wash and iron plain cotton towels before stamping so the fabric lies flat and any manufacturing finish is removed. Place cardboard beneath the cloth, apply fabric paint sparingly to your stamp, and press straight down. Test on scrap fabric first to judge the pressure. Follow the paint’s drying and heat-setting instructions before using or washing the towels.
Mini Wreath Place Cards
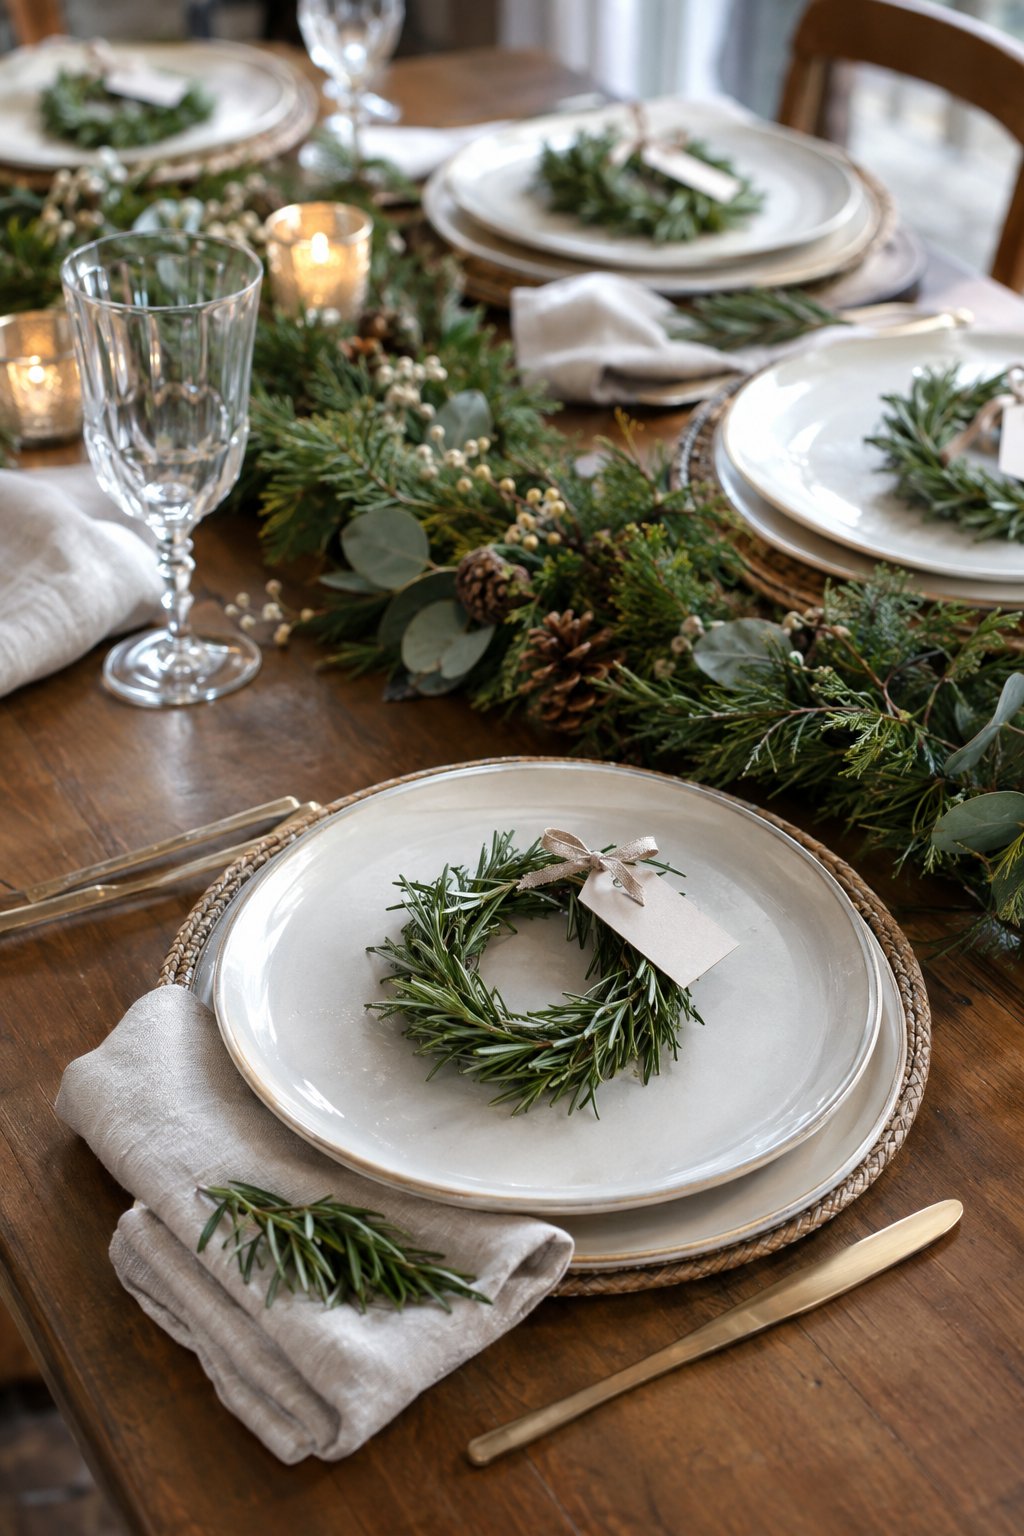
Fresh rosemary bends into small wreaths and adds fragrance to each place setting. Fasten short sprigs around a wire ring, overlapping their cut ends, then attach a handwritten name tag with narrow ribbon.
Make them close to the meal so the foliage looks fresh when guests sit down.
Christmas Tree String Art
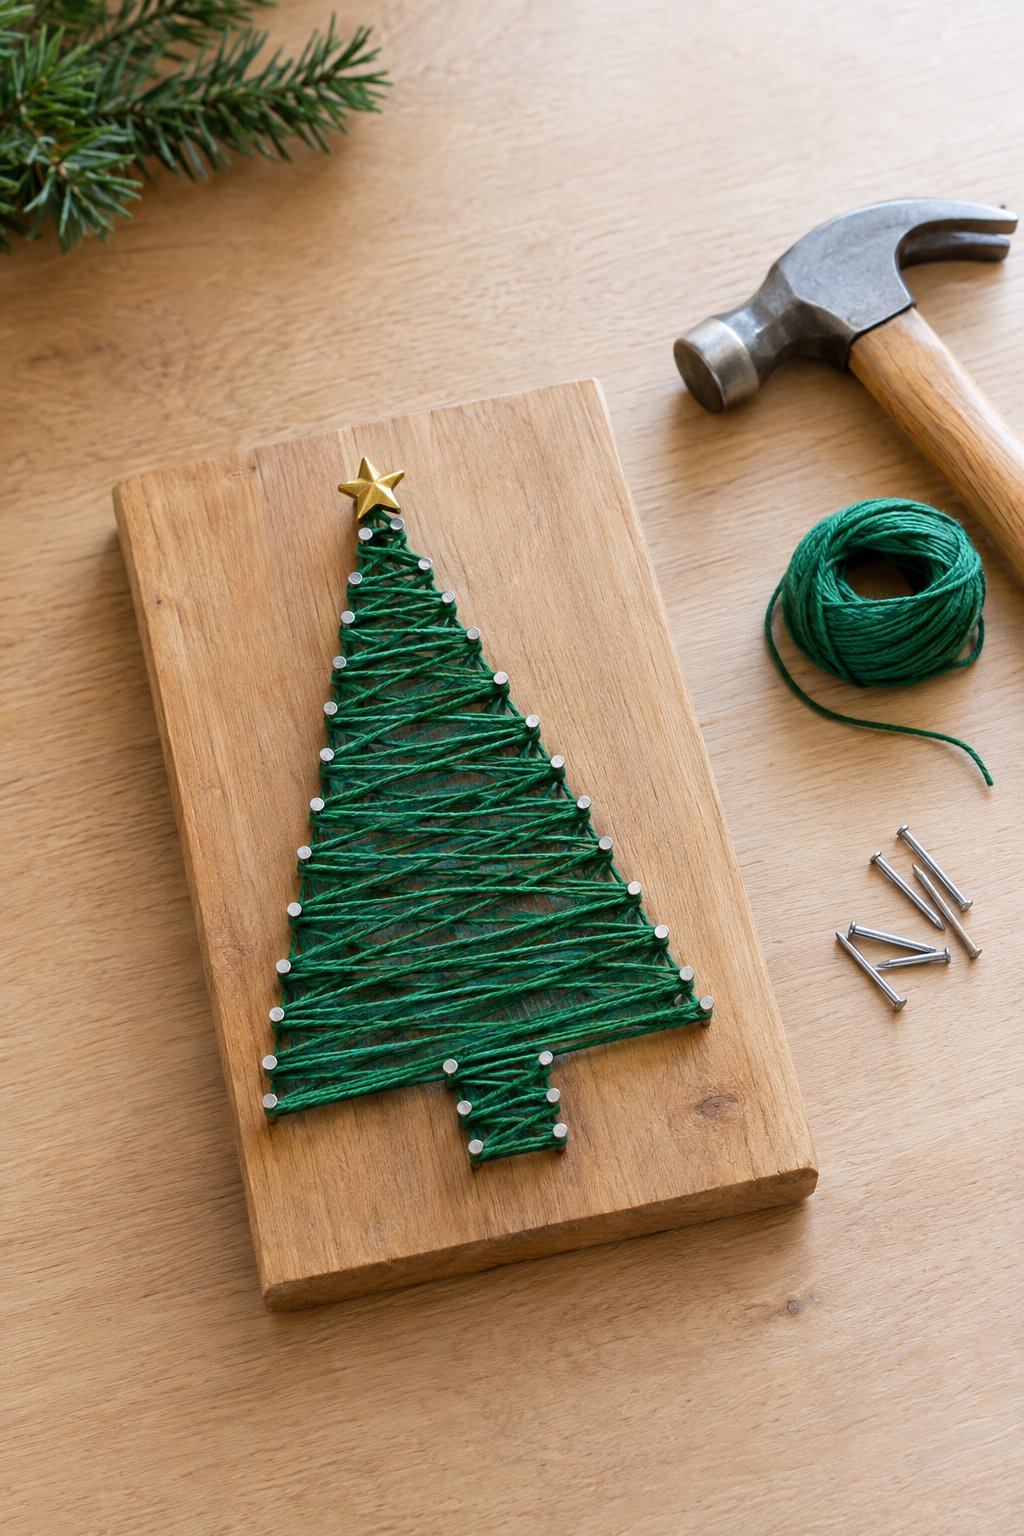
Tape a simple tree template onto a wooden board and hammer small nails around its outline at even intervals. Remove the paper, knot green thread onto one nail, and stretch it back and forth across the shape. Trace the edge with thread last to define the branches and trunk. Leave the nails slightly exposed so the thread stays securely beneath their heads.
Handmade Evergreen Swag
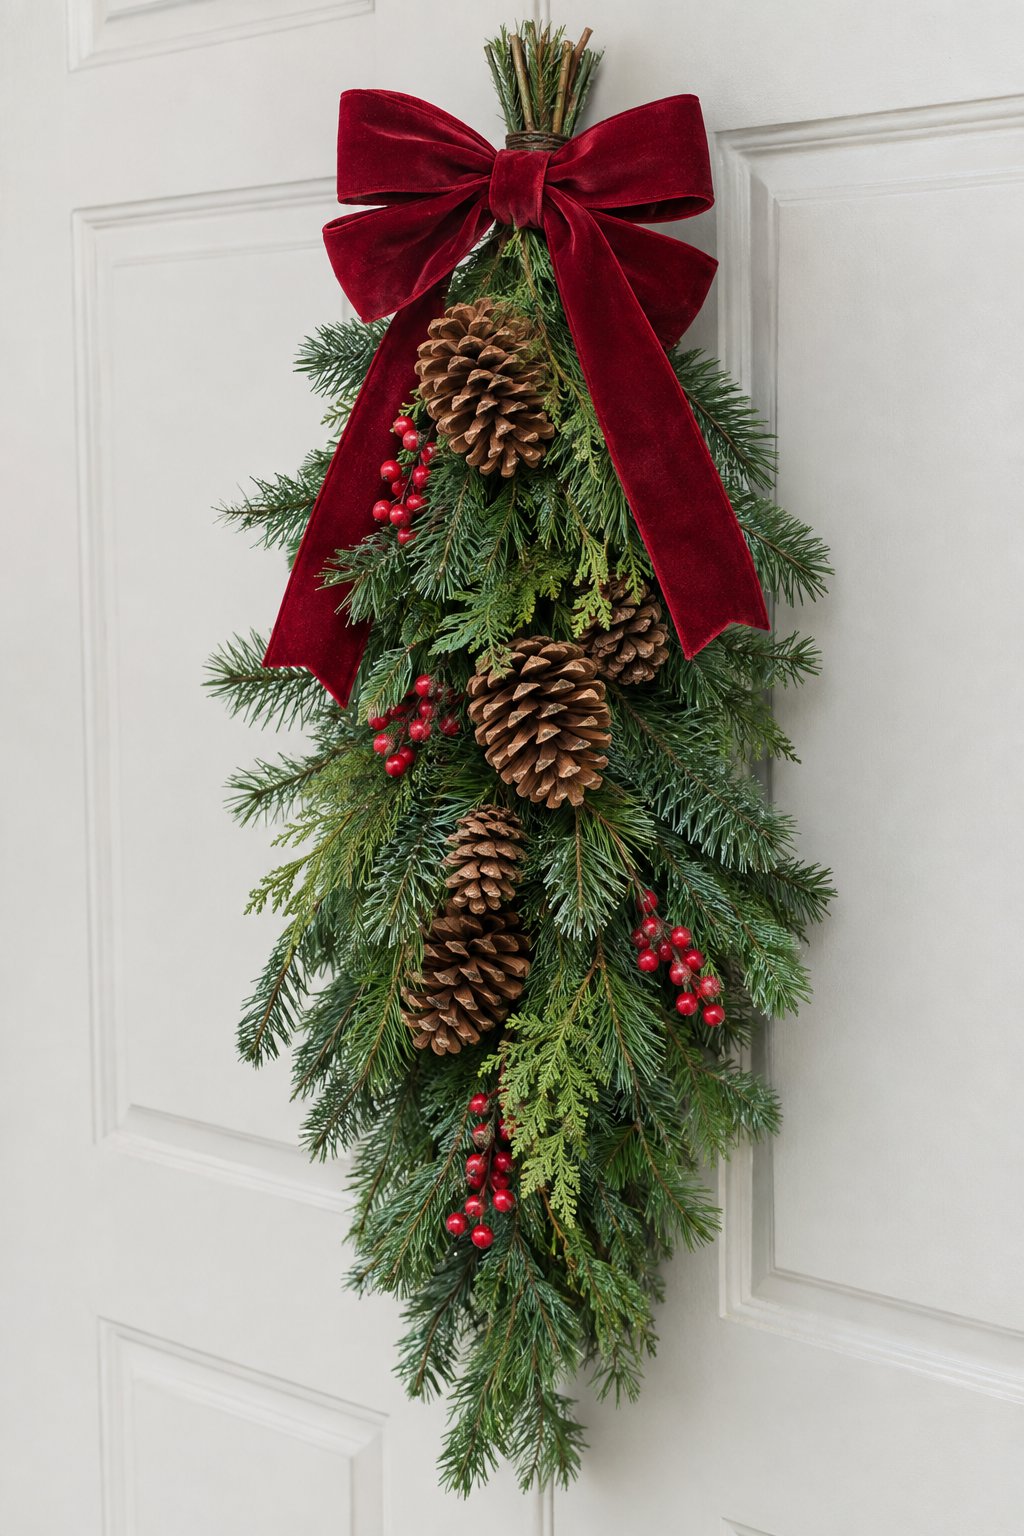
Build this on a table with the longest evergreen branches underneath and progressively shorter pieces on top. Bind the stems firmly with floral wire, then attach pinecones and berry stems down the front.
Lift it by its hanging loop to check that everything stays in place. The red bow goes over the binding once the branches are secure.
Simple Christmas Village Houses

Use unfinished wooden house blanks if you’d rather spend your time decorating than constructing tiny buildings. Paint selected walls and roofs white, leaving a few houses natural to match the pictured village. Small windows are easiest with a fine paint pen.
Arrange the houses and miniature trees in a shallow tray, then scatter artificial snow around their bases.