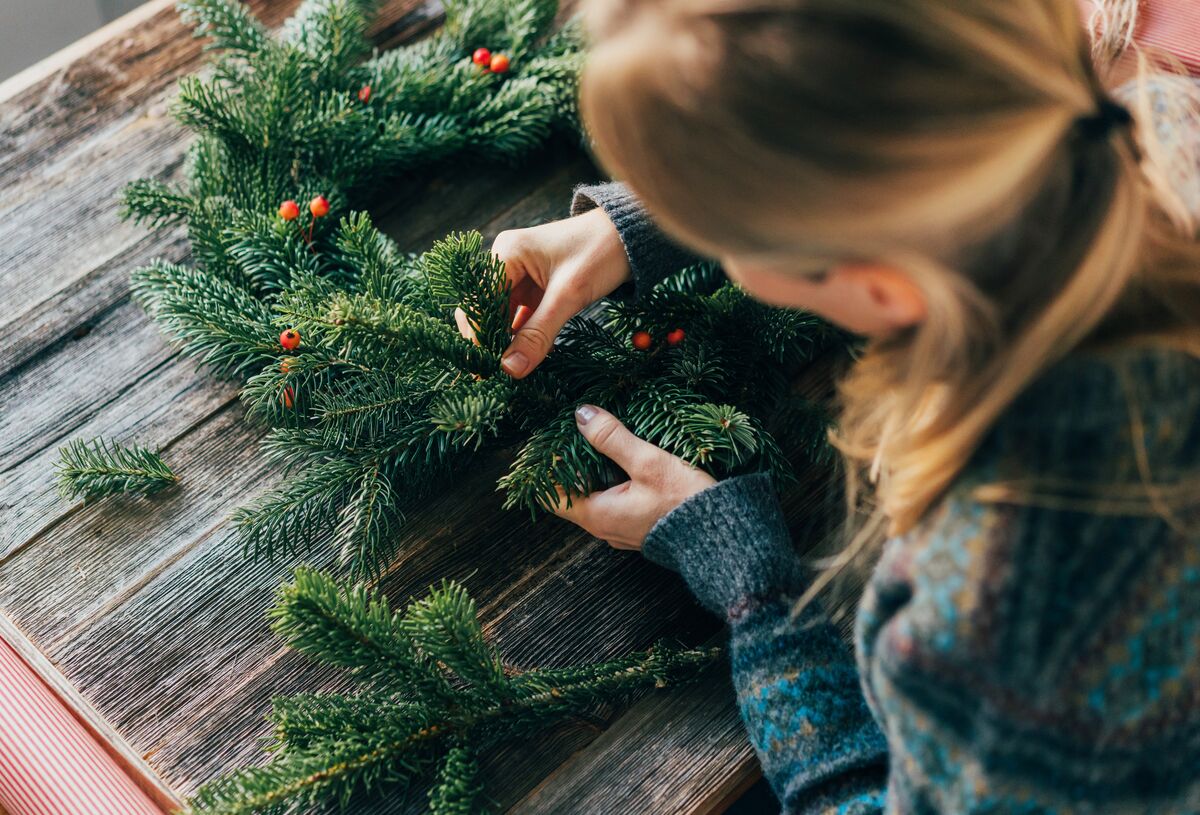
January empties the calendar and leaves the evenings wide open. That quiet stretch is when a basket of yarn or a bag of backyard pinecones starts to look like a plan.
Grown-up crafts for this season lean slow and hands-on, and most of them end up on a mantel, a windowsill or a friend’s doorstep. Thirty-five of our favorites are waiting below, each one ready for a cold weekend.
Table of Contents
- Burlap-Wrapped Pinecone Wreath
- Frost-Tipped Pinecones
- Grapevine Wreath with Straw Stars
- Evergreen Wreath Chandelier
- Twig Window Star
- Wood Slice Coasters
- Wood-Burned Snowflake Ornaments
- Birch Log Tea Light Holder
- Dried Orange Slice Garland
- 3D Paper Snowflake Star
- Cut-Paper Window Snowflakes
- Doorway Snowflake Garland
- Linocut Winter Cards
- Hand-Bound Winter Journal
- Crochet Granny Square Blanket
- Chunky Knit Throw
- Hand-Knit Wool Socks
- Sashiko Visible Mending
- Pinecone Macrame Wall Hanging
- Yarn Wreath with Felt Flowers
- Pom-Pom Mantel Garland
- Snowy Felt Ball Garland
- Felt Mitten Garland
- Needle-Felted Wool Animals
- Punch Needle Hoop Art
- Rolled Beeswax Candles
- Teacup Soy Candles
- Cinnamon Stick Candle
- Beeswax Food Wraps
- Mason Jar Fairy Light Lantern
- Mason Jar Snow Globe
- Balloon Ice Lanterns
- Botanical Ice Lantern
- Snow-Dyed Cotton Napkins
- Pinecone Fire Starters
Burlap-Wrapped Pinecone Wreath
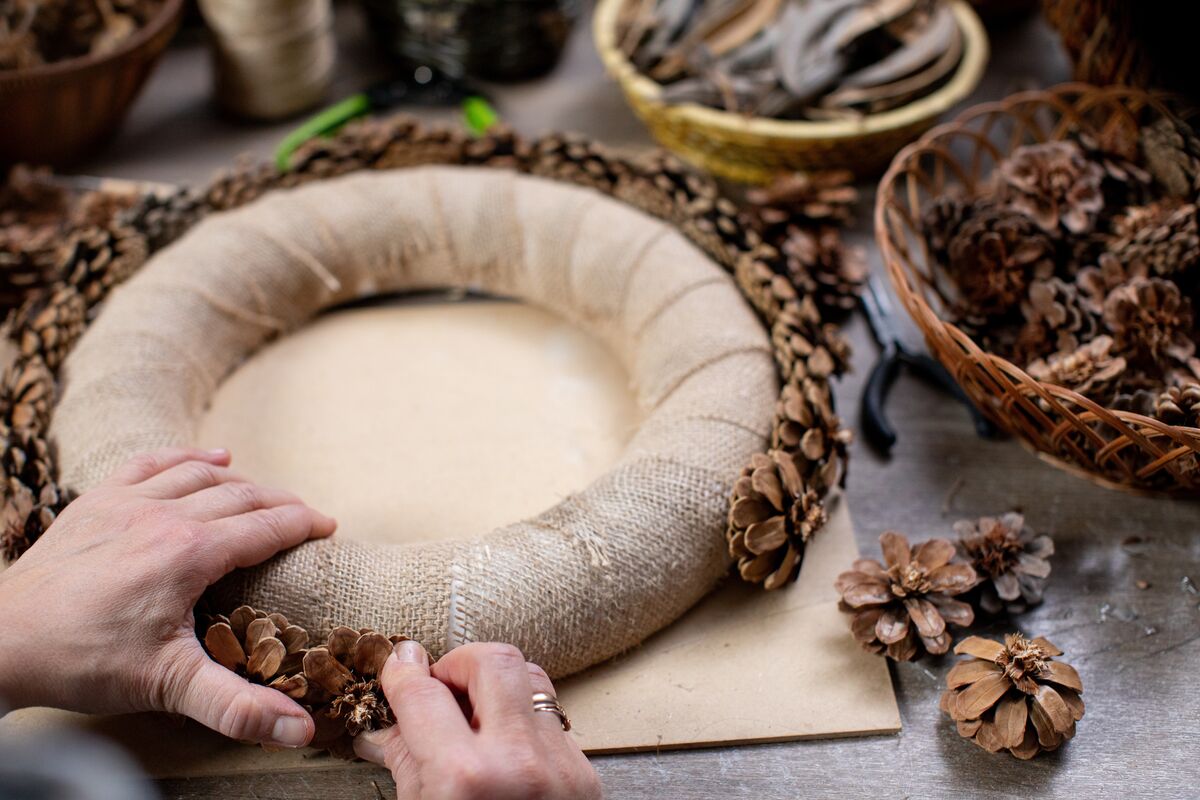
A burlap-wrapped form hides the gaps between cones and grips hot glue far better than bare foam or straw. Gather 40 to 60 pinecones in mixed sizes, then bake them at about 200°F for 30 minutes so the scales open and any hidden insects are cleared out.
Big cones go on first, angled outward, and smaller ones plus a handful of acorn caps fill the holes. Plan on two or three hours at the glue gun. The wreath ends up heavier than it looks, so hang it from a sturdy door hook or above a mantel mirror.
Frost-Tipped Pinecones
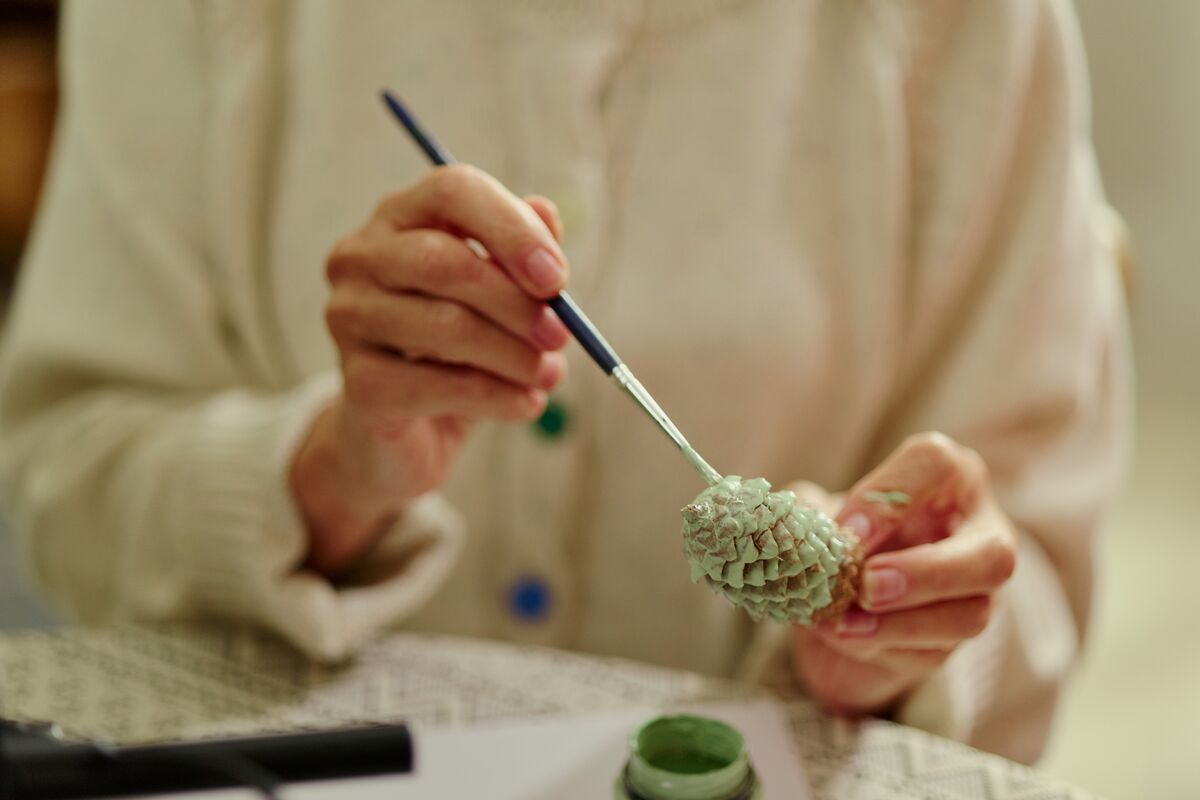
Because frost settles on the very edges of things first, that is exactly where the paint goes. Dip a small brush in white or pale sage acrylic, blot most of it onto a paper towel, then skim lightly across the tips of each scale.
Heavy coats fill the gaps and flatten the whole cone. A pinch of fine iridescent glitter on the wet paint catches lamplight at night. Pile the cones in a wooden dough bowl, tuck them into garland, or set three on a tray around a pillar candle.
Grapevine Wreath with Straw Stars
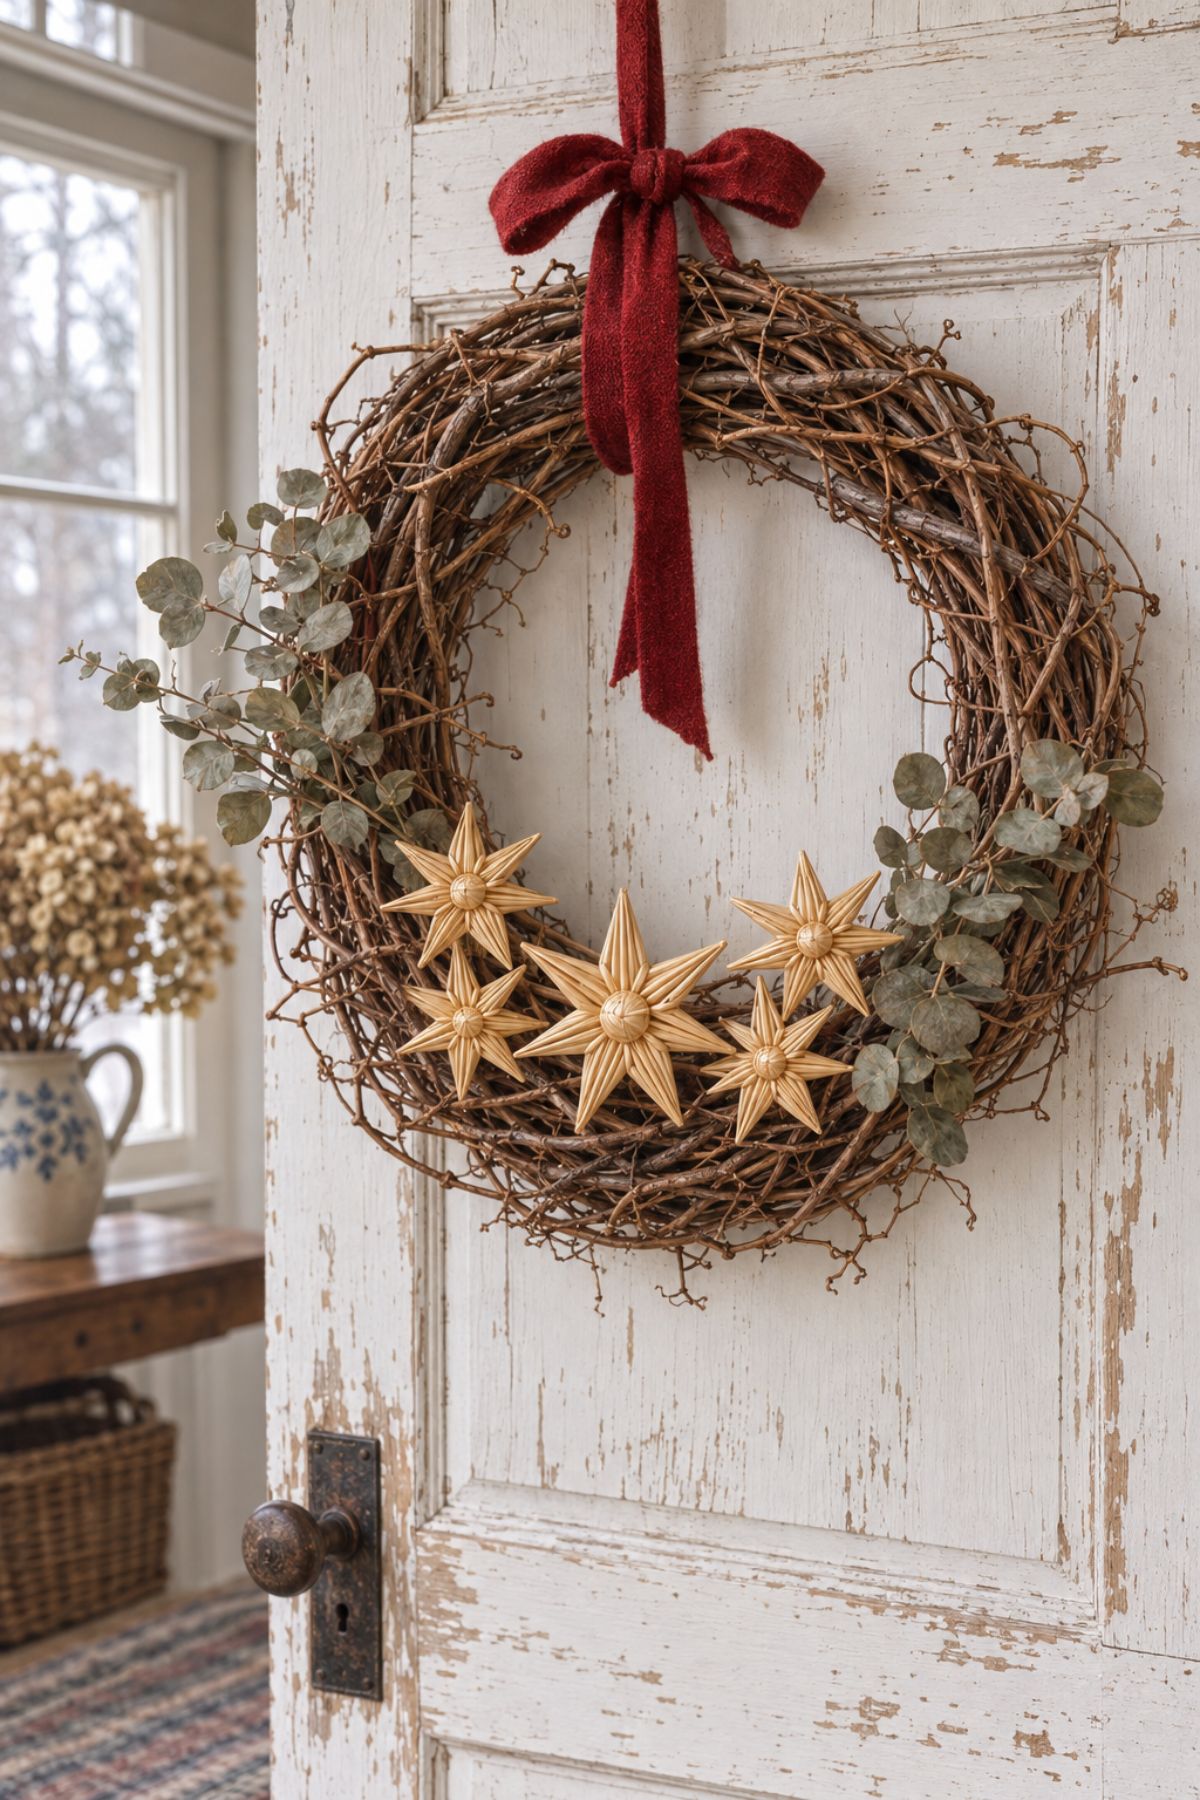
At a craft store, grapevine wreaths come pre-twisted, and their loose, tangled weave holds decorations with no glue at all. Straw stars, a Scandinavian holiday tradition, slip between the vines and hold by friction alone.
Clusters of three or five stars along the lower third look balanced. Spread evenly around the ring, they look busier. Add a sprig of dried eucalyptus and a red wool ribbon at the top.
The whole wreath comes together in under an hour, hangs nicely on an interior door, and is light enough to mail as a gift.
Evergreen Wreath Chandelier
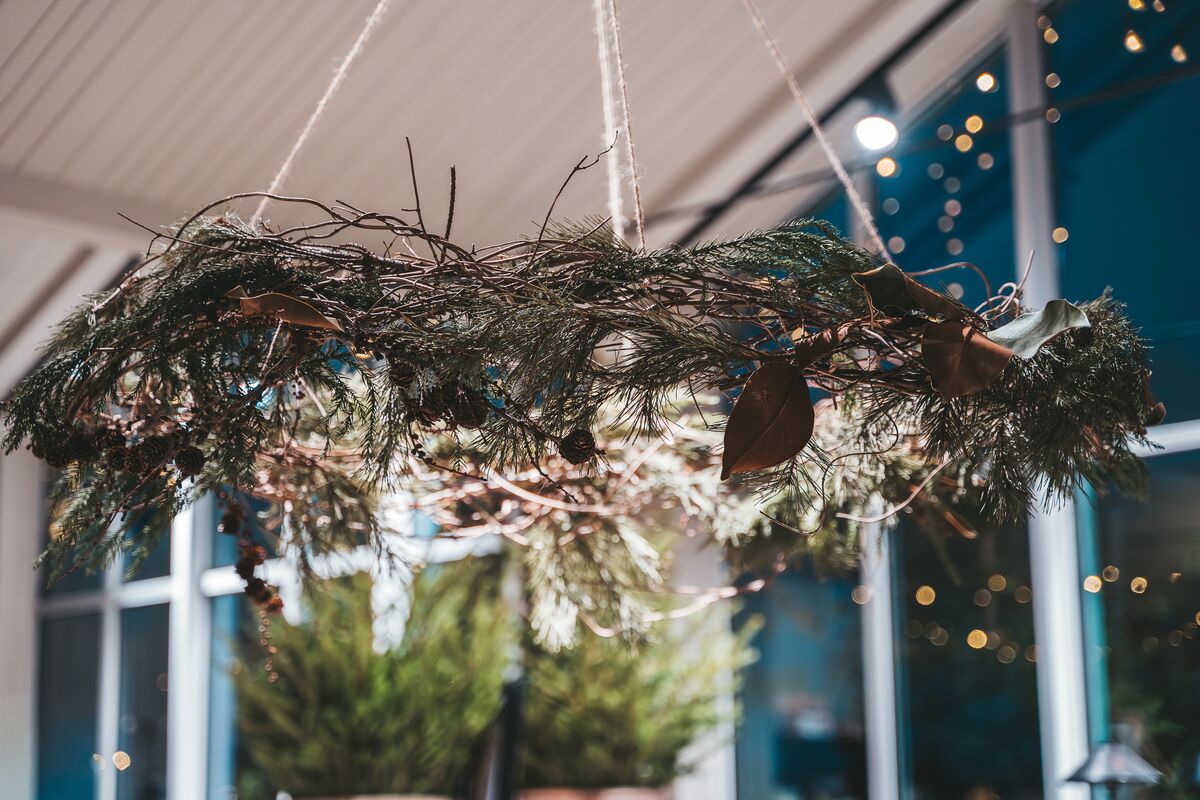
Suspended horizontally over a dining table, a wreath reads as a seasonal chandelier and puts greenery at eye level for seated guests. Build the base from a metal wreath ring wrapped with bundled birch or willow twigs, secured with green floral wire.
Tuck in fresh cedar, pine, or juniper sprigs, then attach three or four equal lengths of ribbon or jute to a single ceiling hook. Careful measuring lets the ring hang level.
Fresh greens dry out within a couple of weeks indoors. Mist them every few days. Real candles near dry needles are a fire risk, so swap in battery fairy lights.
Twig Window Star
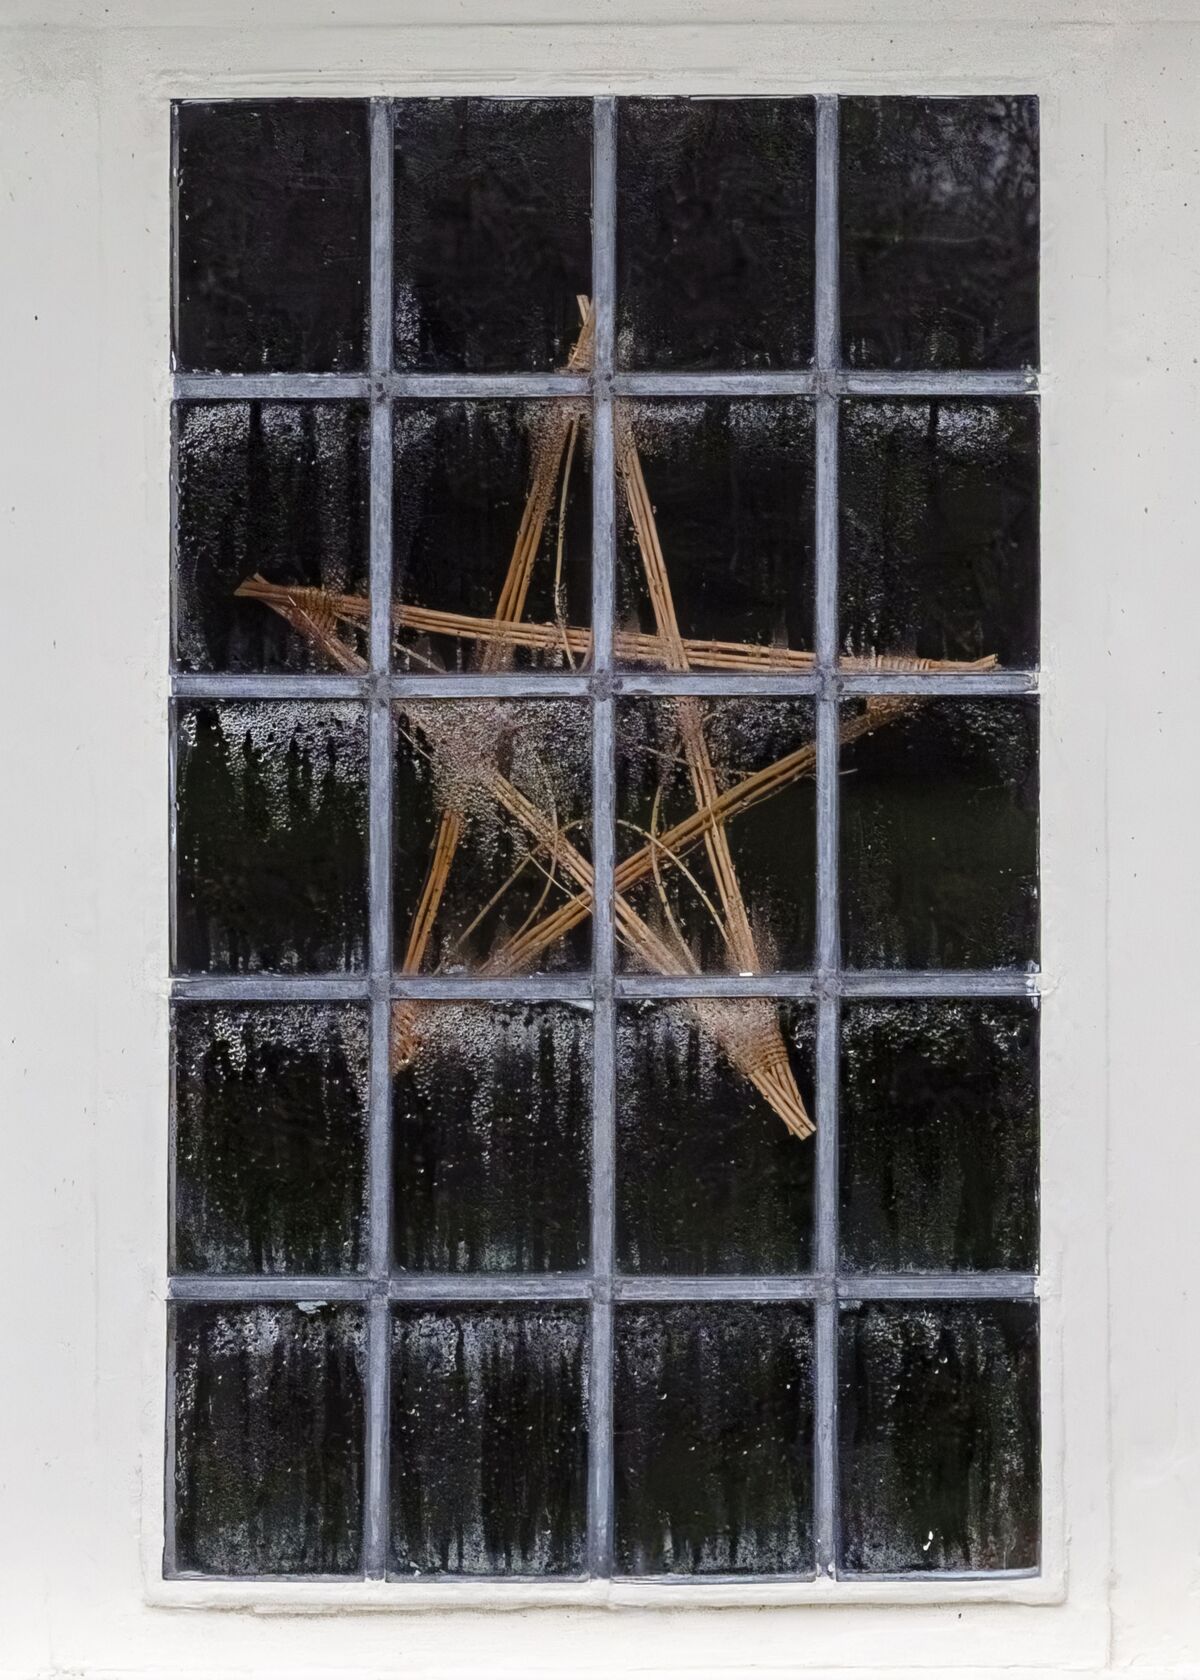
Five straight sticks of equal length are all the frame requires. Lay them in a classic five-point star, lash each crossing with jute twine in a tight figure-eight, and add a dab of wood glue under the wraps for stiffness.
Branches about pencil thickness and 18 to 24 inches long are stiff enough to hold a crisp shape. Wrap a strand of warm-white micro lights around the frame for evening glow.
Hung from a suction hook inside a front window, the star throws a crisp silhouette against snowy daylight. Most crafters finish one in about 45 minutes.
Wood Slice Coasters
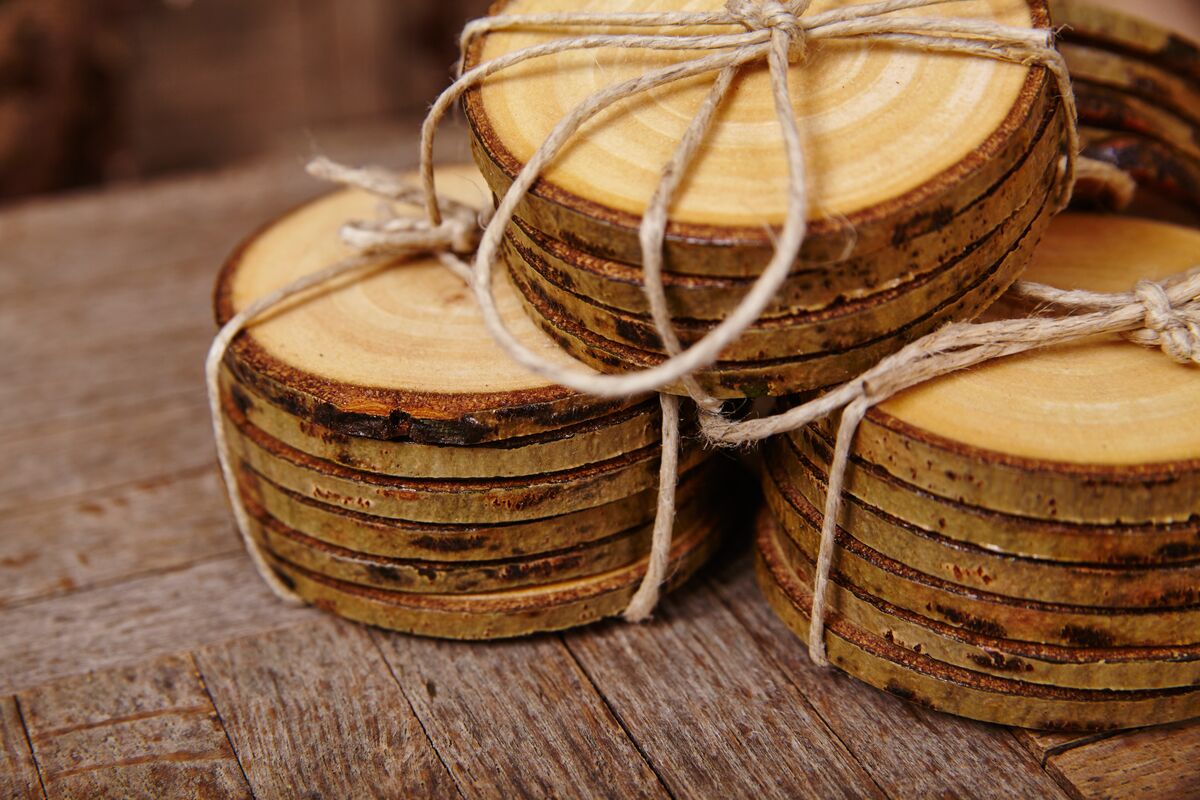
Since fresh-cut wood slices crack as they dry, buy kiln-dried rounds about 4 inches across or let homemade cuts season for several weeks. Both faces then get sanded smooth, with a final pass of 220 grit.
Two or three coats of a water-resistant finish such as polyurethane protect the tops, and each coat needs to cure fully before the next. Felt dots on the bottom save table finishes.
Stack four coasters, wrap the bundle in natural twine, and tuck in a cinnamon stick or a sprig of rosemary. It makes a hostess gift that pairs nicely with stoneware mugs.
Wood-Burned Snowflake Ornaments
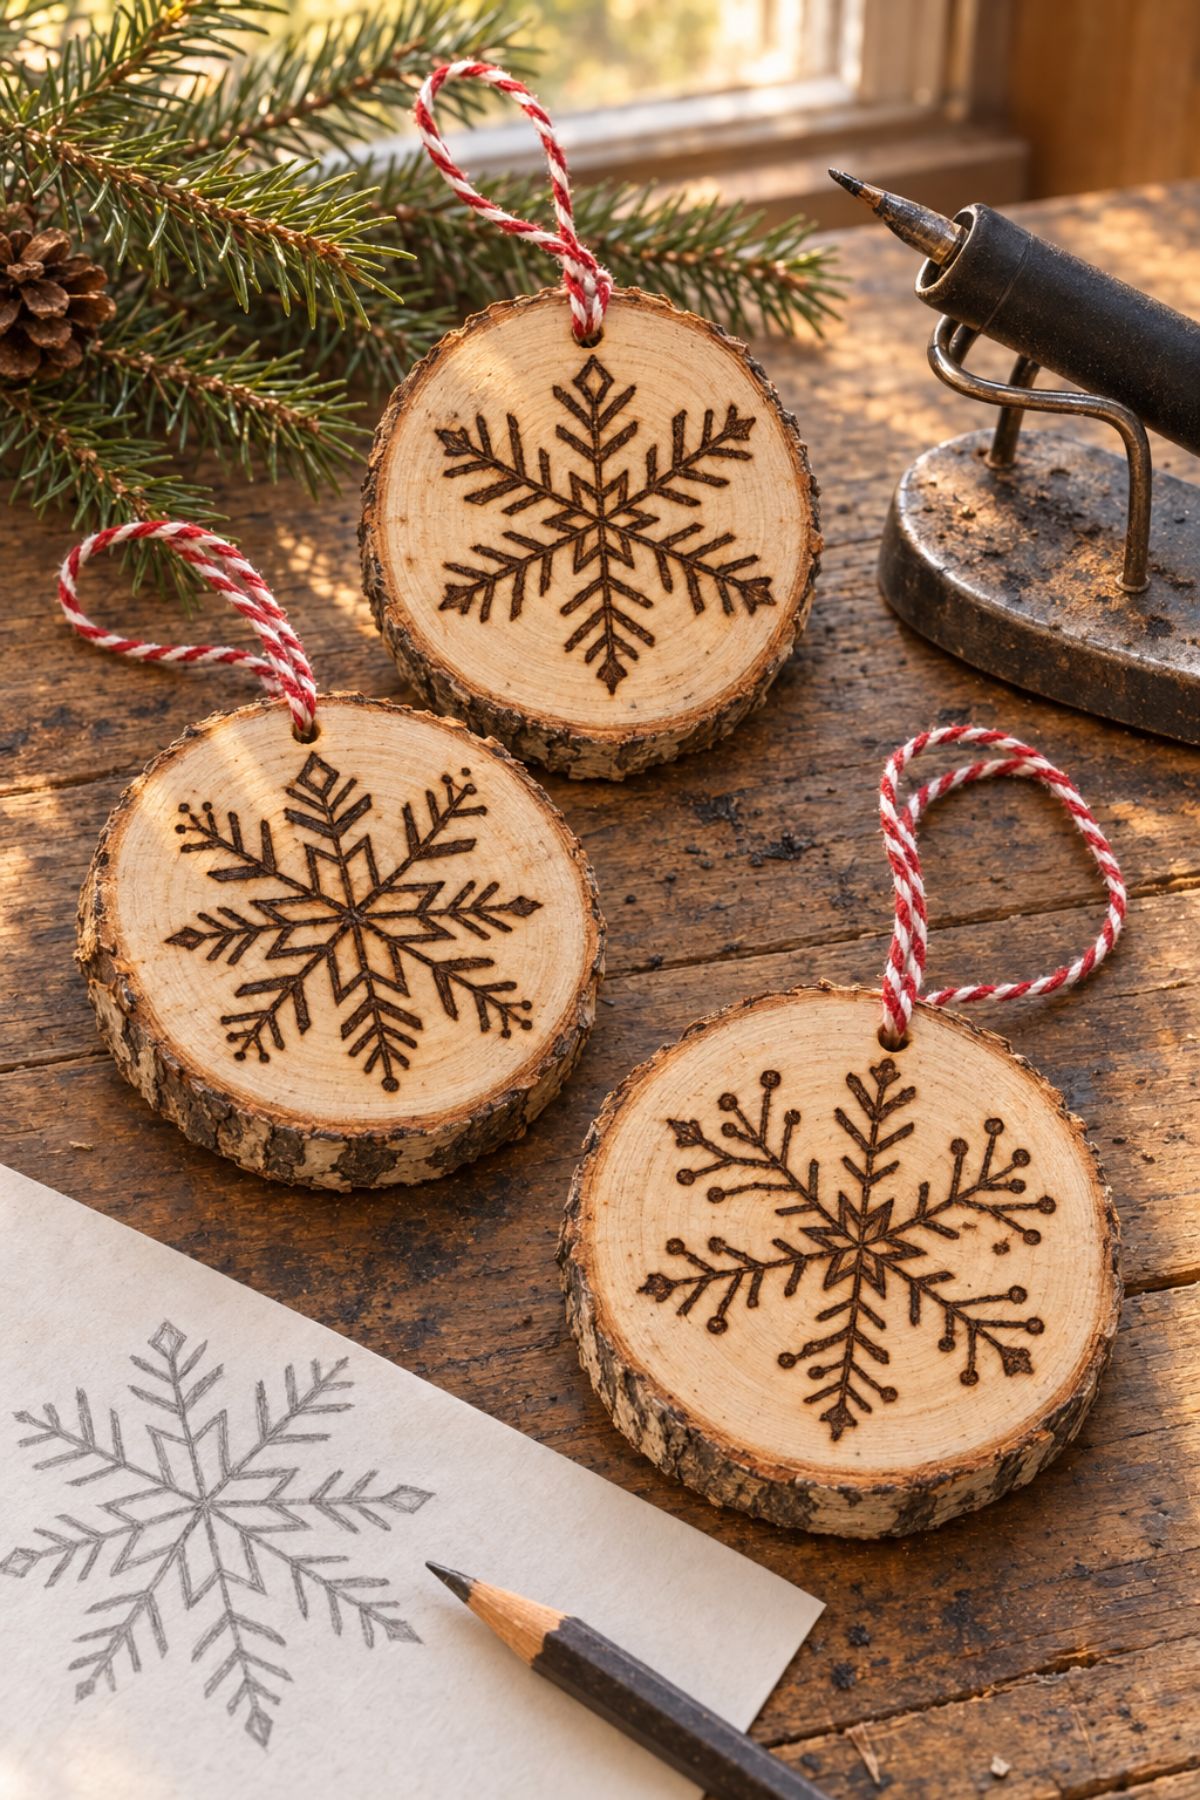
Pyrography rewards patience more than drawing skill. Trace a snowflake design onto a smooth 3-inch wood slice with graphite paper, then go over the lines with a wood-burning pen using a fine universal tip.
Slow, even strokes produce darker, cleaner lines than pressing hard. Practice on scrap first. Burn in a ventilated room, and always return the hot pen to its stand between strokes.
Drill a small hole near the top before burning, thread baker’s twine through, and add initials or a year on the back for a personalized tree ornament.
Birch Log Tea Light Holder
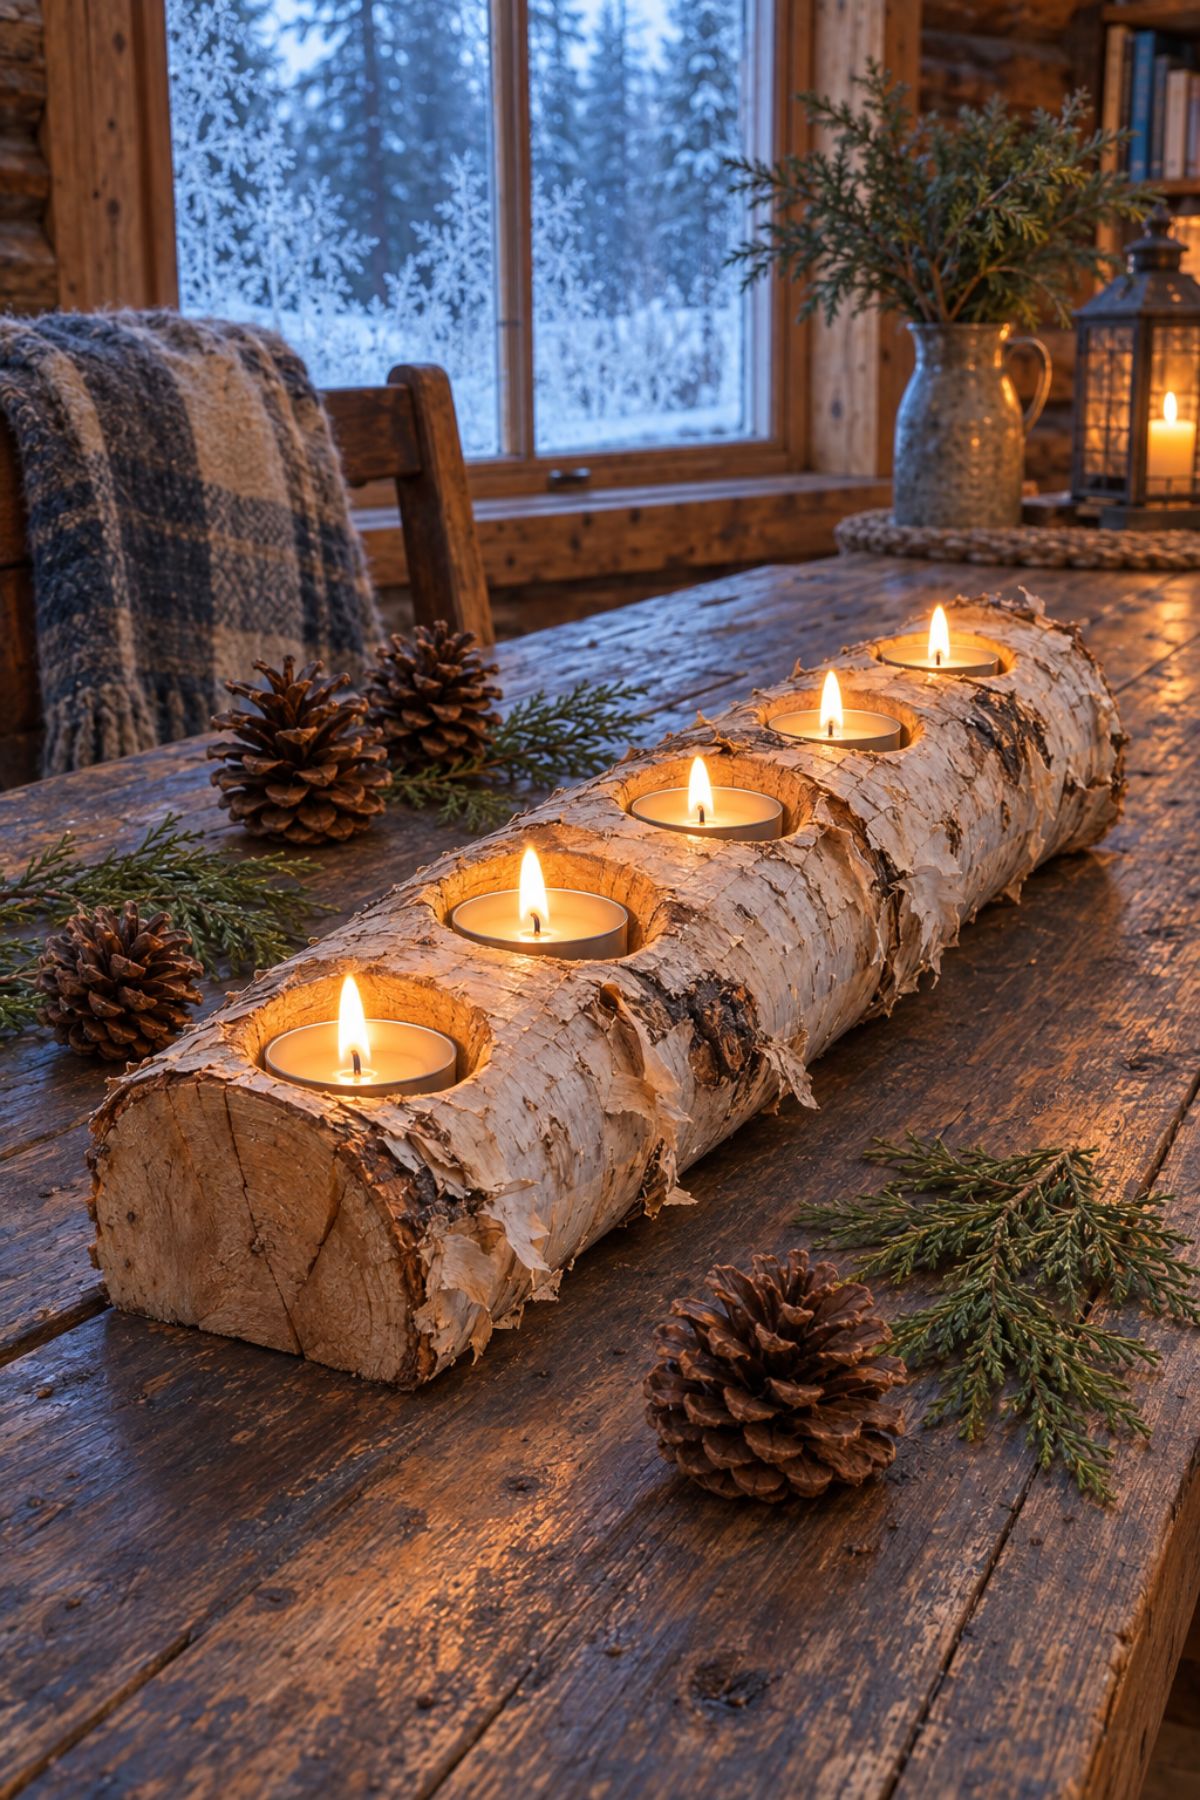
Sized to a standard tea light at about 1.5 inches, a forstner bit drills clean, flat-bottomed pockets in a birch log. A split log or one cut flat on the bottom sits steady.
Space pockets 3 to 4 inches apart along the top. Clamp the log firmly and drill to a depth that lets the tea light sit flush or slightly recessed.
Because the cups rest directly in wood, real flames call for metal-cupped tea lights and constant supervision. LED tea lights remove that worry entirely. A single log centered on a long table holds four or five lights.
Dried Orange Slice Garland
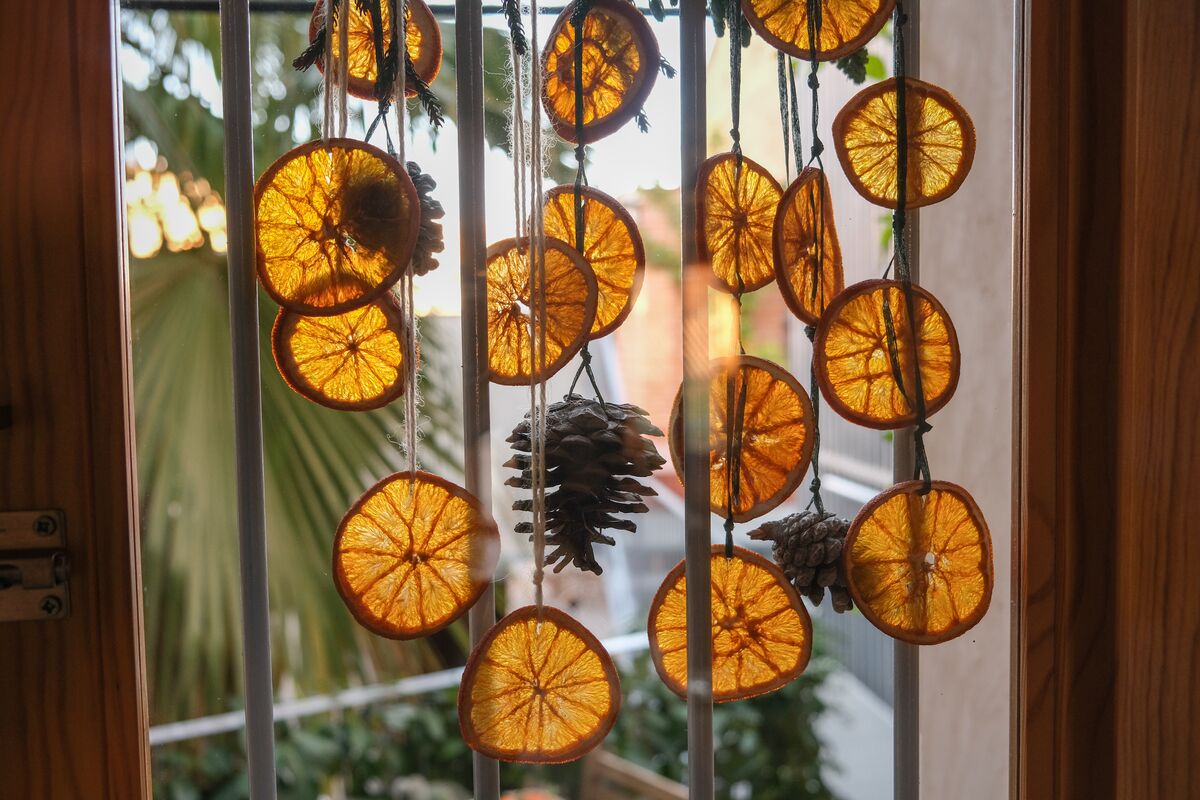
Cut oranges about a quarter inch thick, blot them dry, and lay them on a parchment-lined sheet in a 200°F oven for three to four hours. Low heat and time do most of the job, and an hourly flip lets the slices dry evenly and never brown.
Overnight on a rack, the slices cool completely. Pierce each one near the rind with a large needle and thread them on twine between bay leaves or cinnamon sticks.
Hung in a south-facing window, the segments glow like stained glass. Stored dry, the slices last for years.
3D Paper Snowflake Star
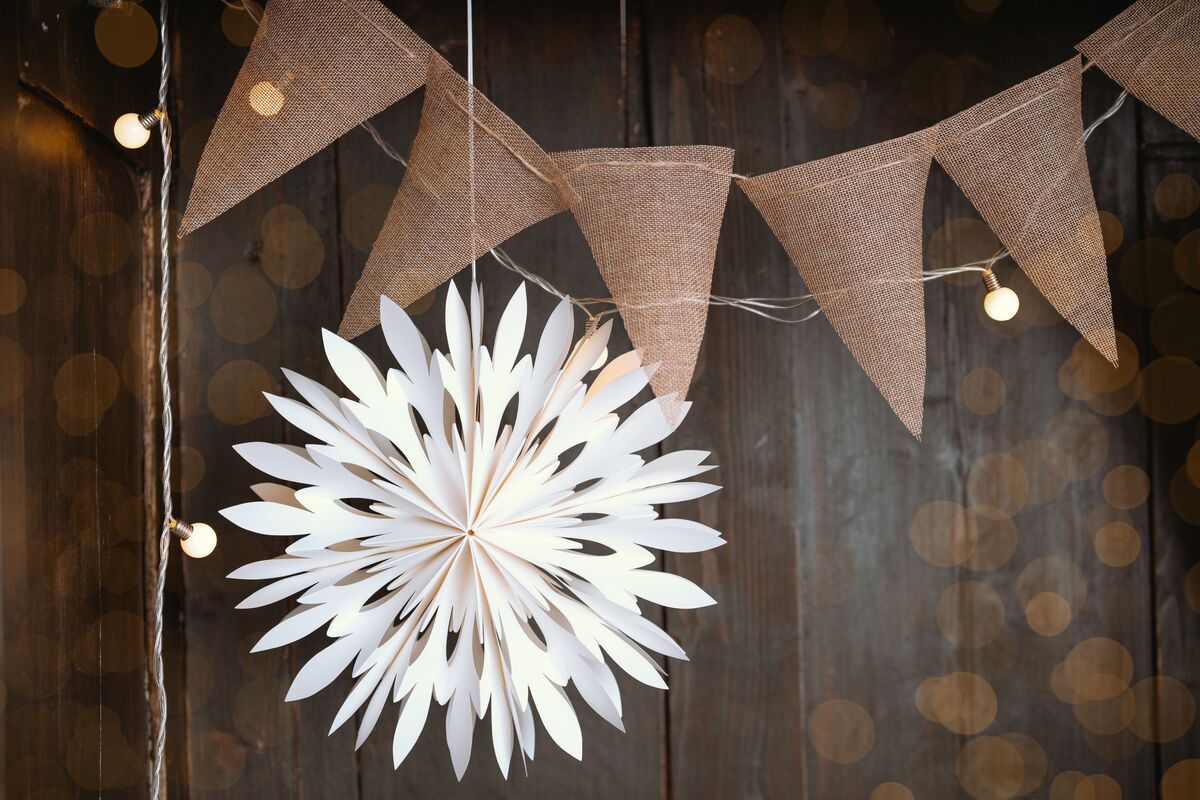
Six identical folded modules glue together point to point into a dimensional star that looks like a snowflake from the front. Kraft paper or heavier cardstock holds crisp folds best.
Each module starts as a square folded into a kite shape, with inner flaps tucked to form a pointed petal. Line up the points precisely before the glue sets, since small misalignments compound around the circle.
Expect about an hour for the first one and half that once the folds are memorized. Hang several at staggered heights in a stairwell or from a curtain rod with clear fishing line.
Cut-Paper Window Snowflakes
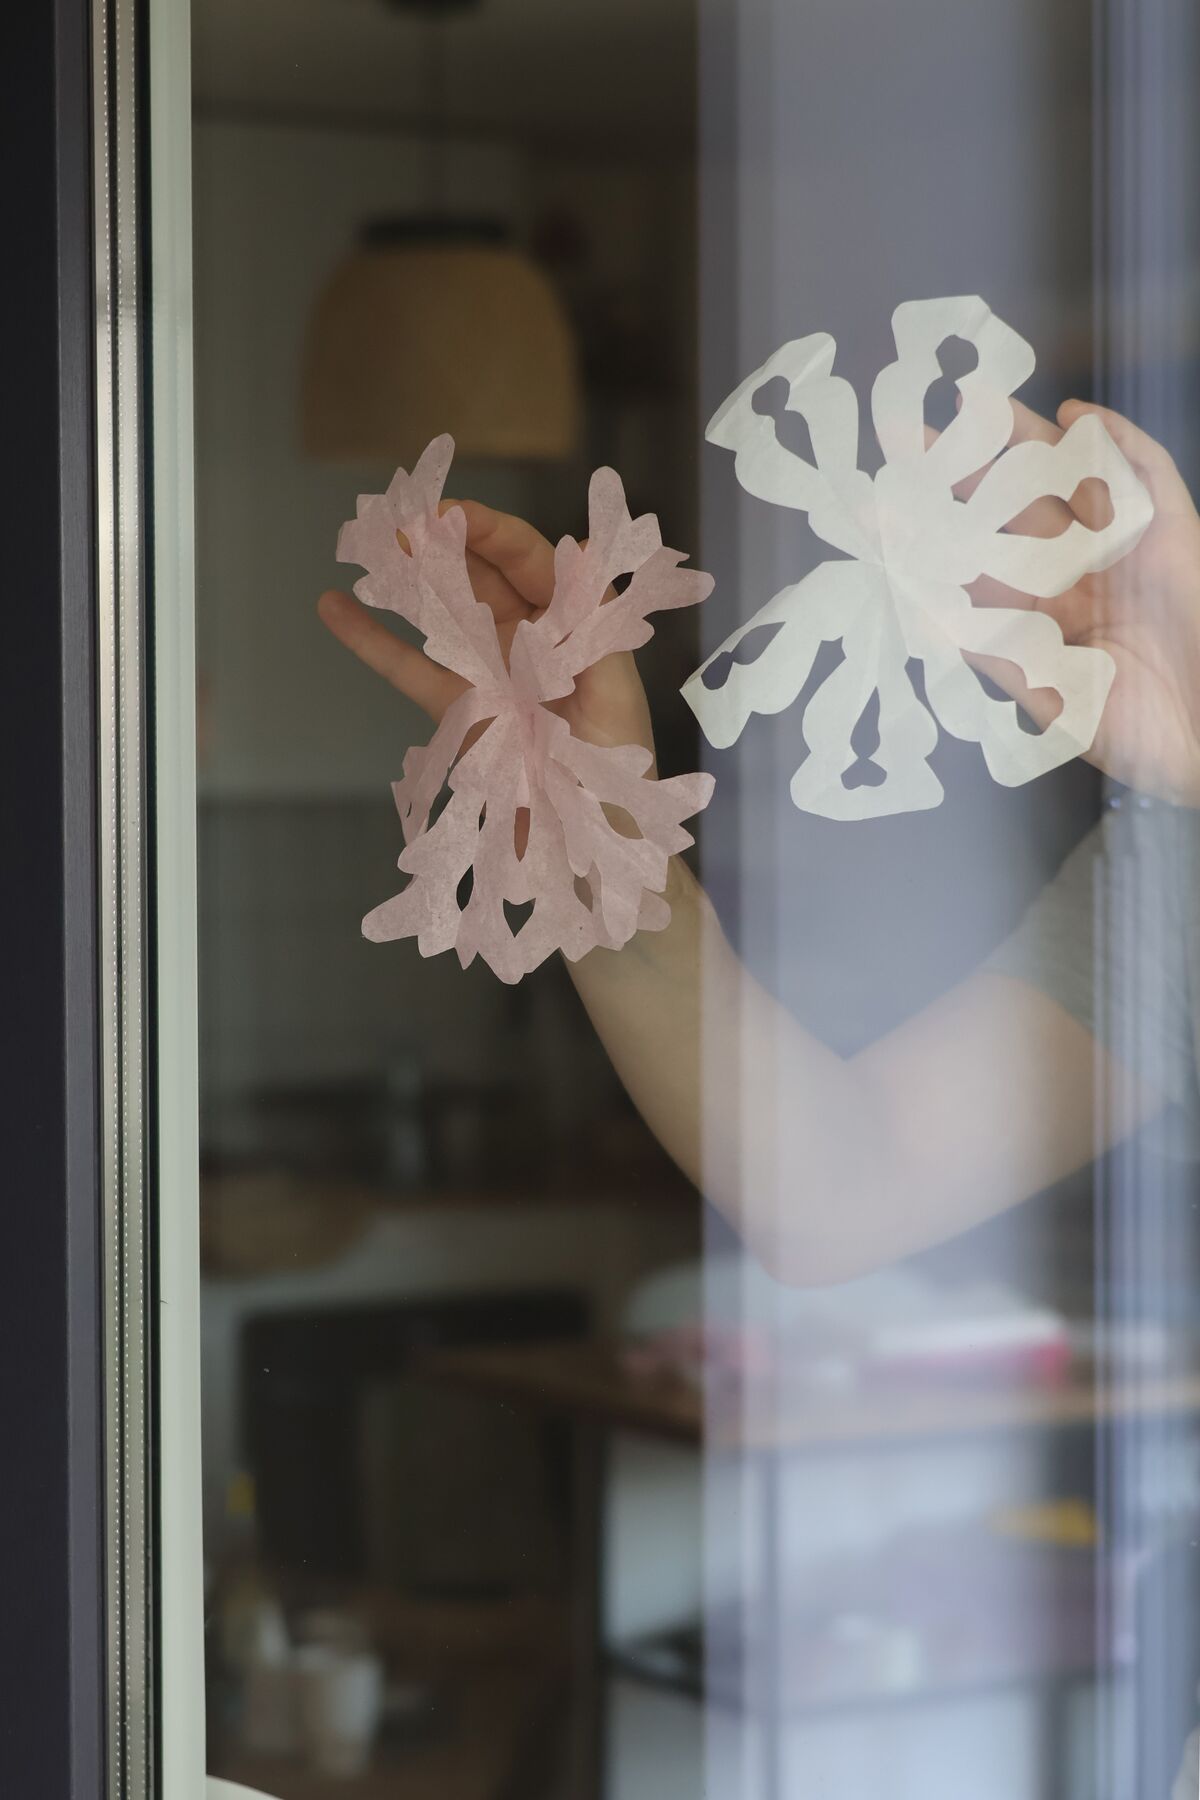
Because real snowflakes have six arms, a paper copy gets them from the fold. Start with a square of thin paper such as printer paper, an origami sheet or even a coffee filter, fold it into a triangle, then fold that into thirds before any cutting begins.
Small embroidery scissors handle delicate notches better than kitchen shears. Cut away more paper than seems sensible, since open designs look lacier once unfolded.
A night under a heavy book flattens them. A drop of diluted dish soap or a small loop of washi tape holds each flake to the glass and leaves no residue.
Doorway Snowflake Garland
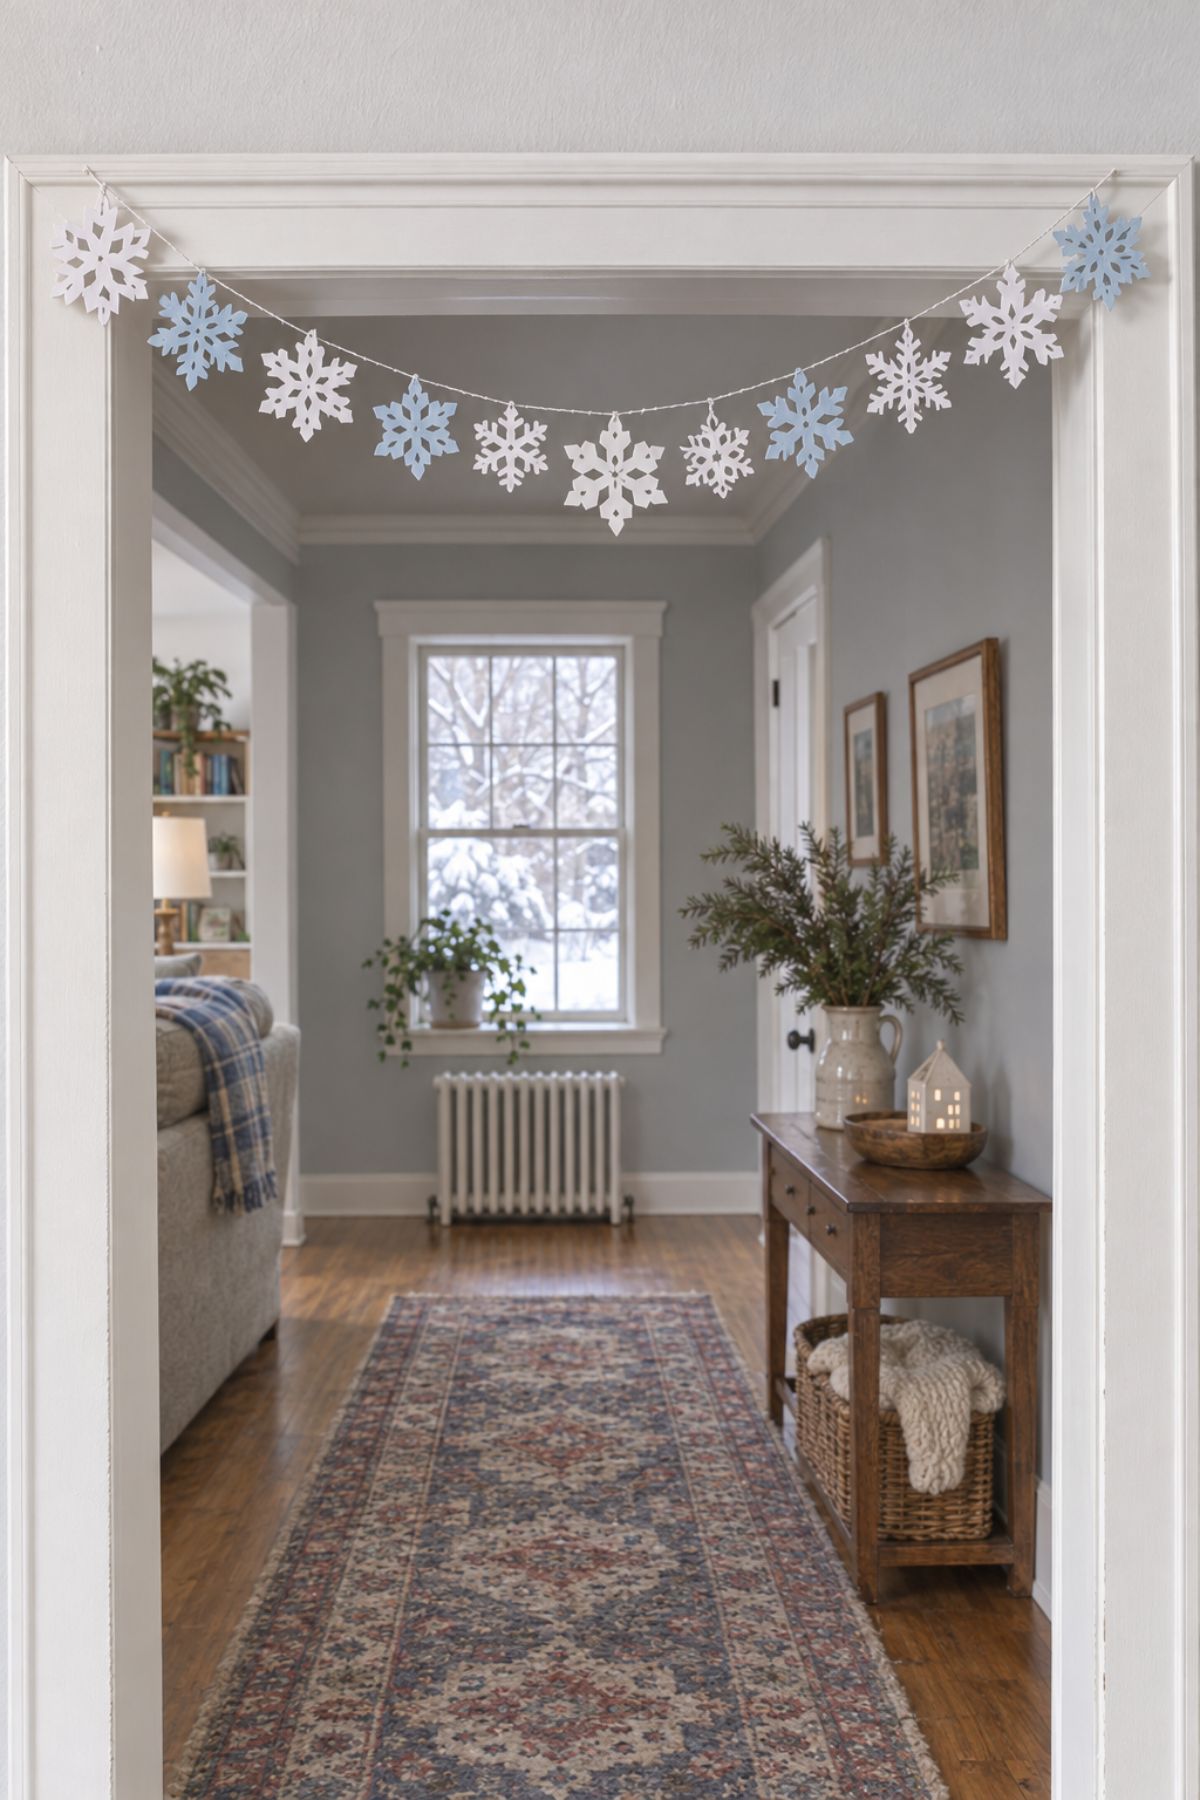
In a doorway, a garland hangs right where people walk underneath, which shows off both sides of every flake. Cut 15 to 25 small paper snowflakes, about 3 to 4 inches across, in white or pale blue.
Run one long thread through a sewing machine on a long stitch and feed the flakes through one after another with a small gap between each. A needle and thread by hand takes longer and looks just as sweet.
Drape the strand in a gentle swag and anchor each end with removable adhesive hooks at the top corners of the frame.
Linocut Winter Cards
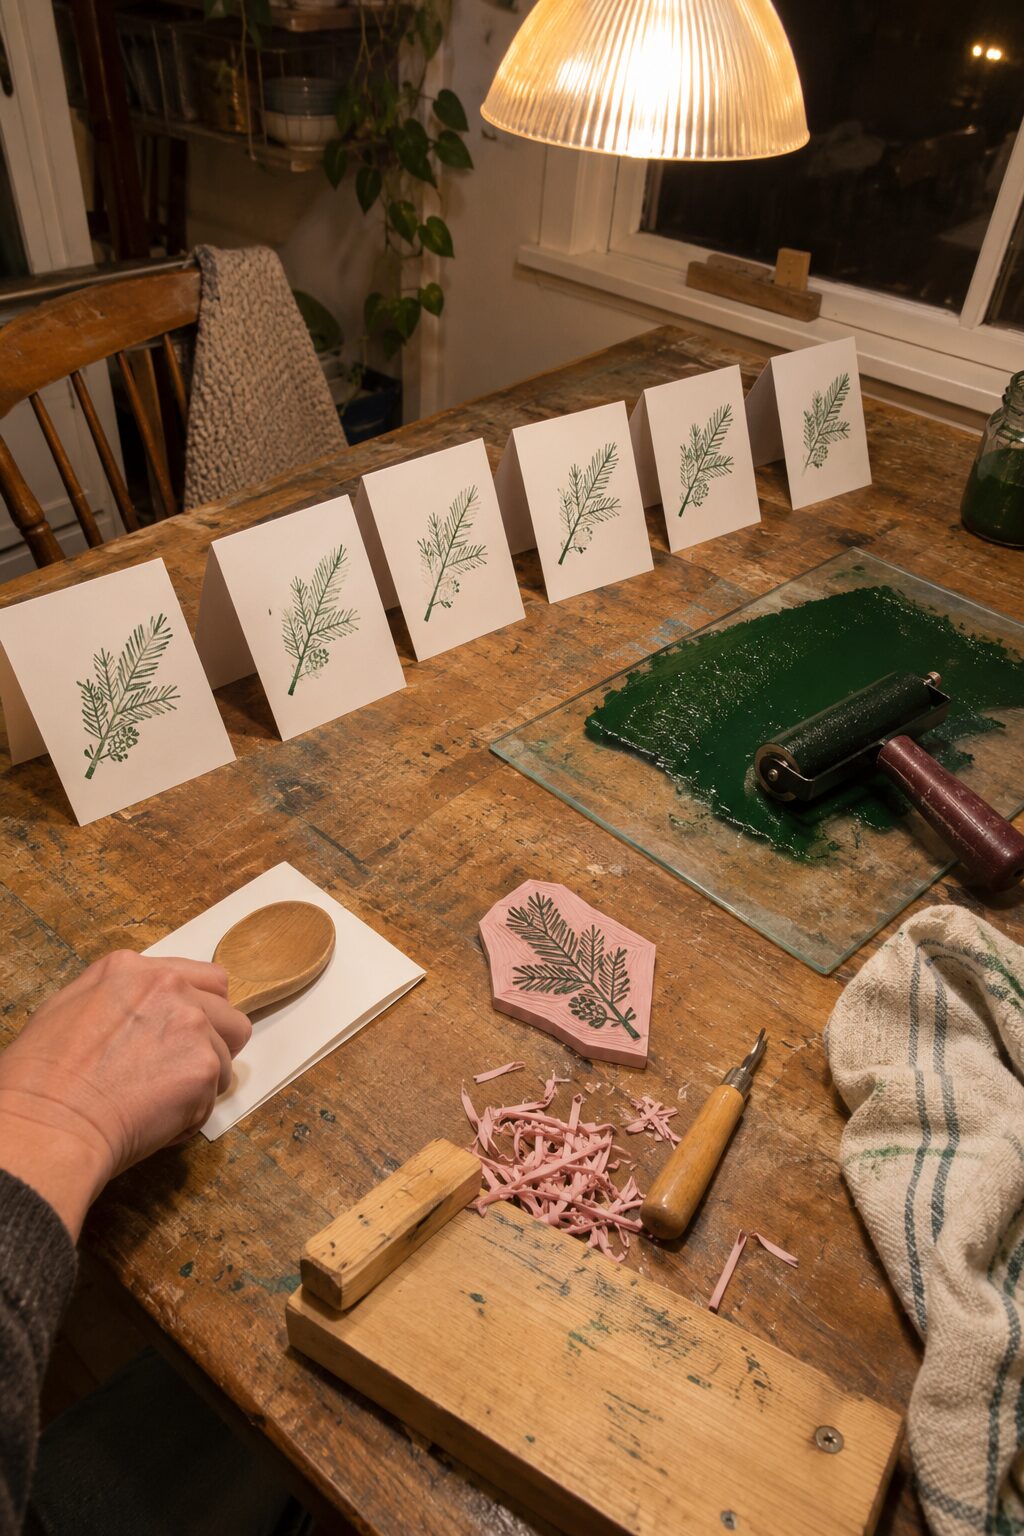
Carved once, a soft block prints dozens of matching winter cards in an afternoon. Sketch a simple motif, like a pine sprig, a cardinal or a snowy cabin, and transfer it to the block in reverse, since every print comes out mirrored.
Lettering especially needs flipping. Soft-cut rubber blocks carve with far less force than traditional battleship linoleum.
Push the gouge away from the body, and brace the block against a bench hook so the free hand sits behind the blade. Roll water-based block printing ink thin with a brayer, press a folded card on top and rub the back with a wooden spoon.
A run of 10 to 20 cards dries flat overnight, ready for envelopes.
Hand-Bound Winter Journal
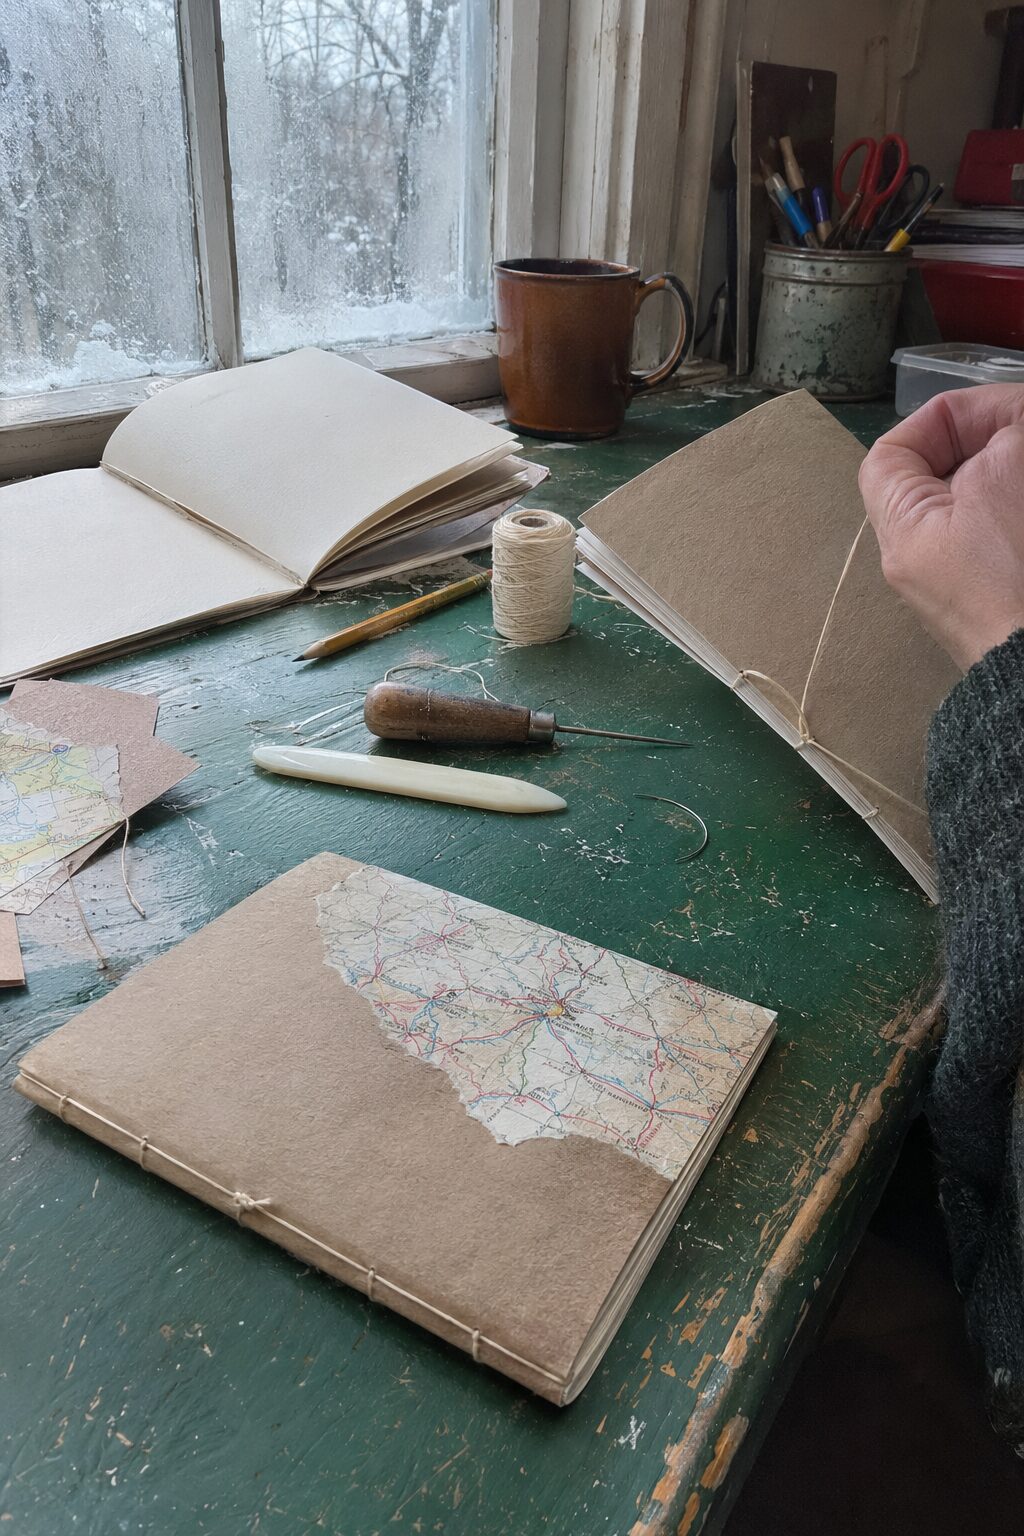
Over one evening, a stack of paper and a length of waxed linen thread become a sewn journal. Fold 8 to 10 sheets of letter paper in half, nest them inside a kraft or cardstock cover and crease the spine with a bone folder.
Five holes punched along the fold with an awl guide a simple pamphlet stitch. The thread starts at the center hole, travels up and down through the outer holes and returns to the center, where a square knot over the long stitch locks it.
A scrap of handmade paper or an old map glued to the front sets each cover apart. Two or three thin journals tied with twine make a small, useful gift for list makers and winter walkers.
Crochet Granny Square Blanket
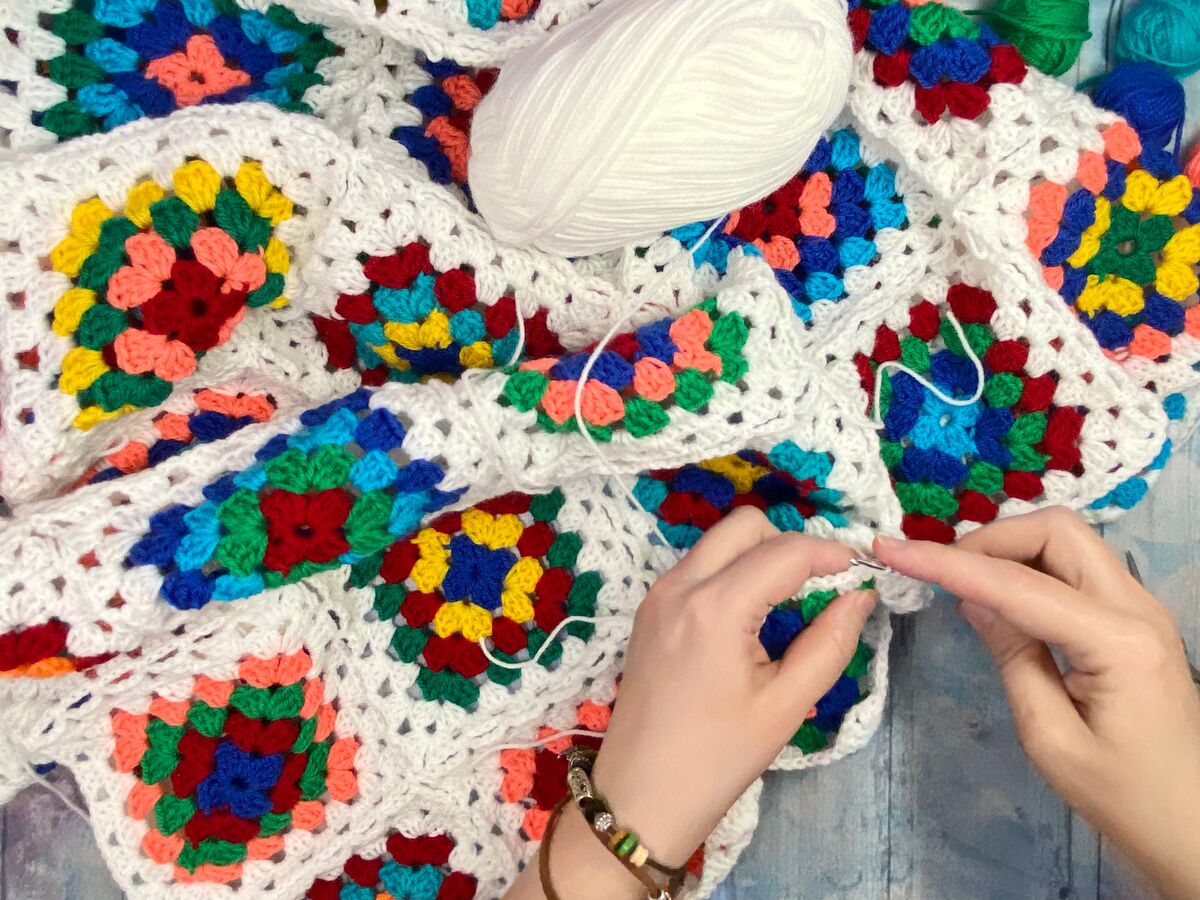
Broken into small, portable pieces, a granny square blanket lets a confident beginner finish each square in under half an hour. Choose worsted-weight acrylic or wool in three or four colors for a cohesive blanket.
The basic double-crochet cluster and the chain-two corner are the only stitches to learn, and the pattern repeats from there. Weave in ends as each square is completed to avoid a dreaded pile at the end.
Join squares with a slip-stitch or whip-stitch seam. A throw-sized blanket of roughly 50 by 60 inches takes several weeks of evenings and drapes beautifully over a reading chair.
Chunky Knit Throw
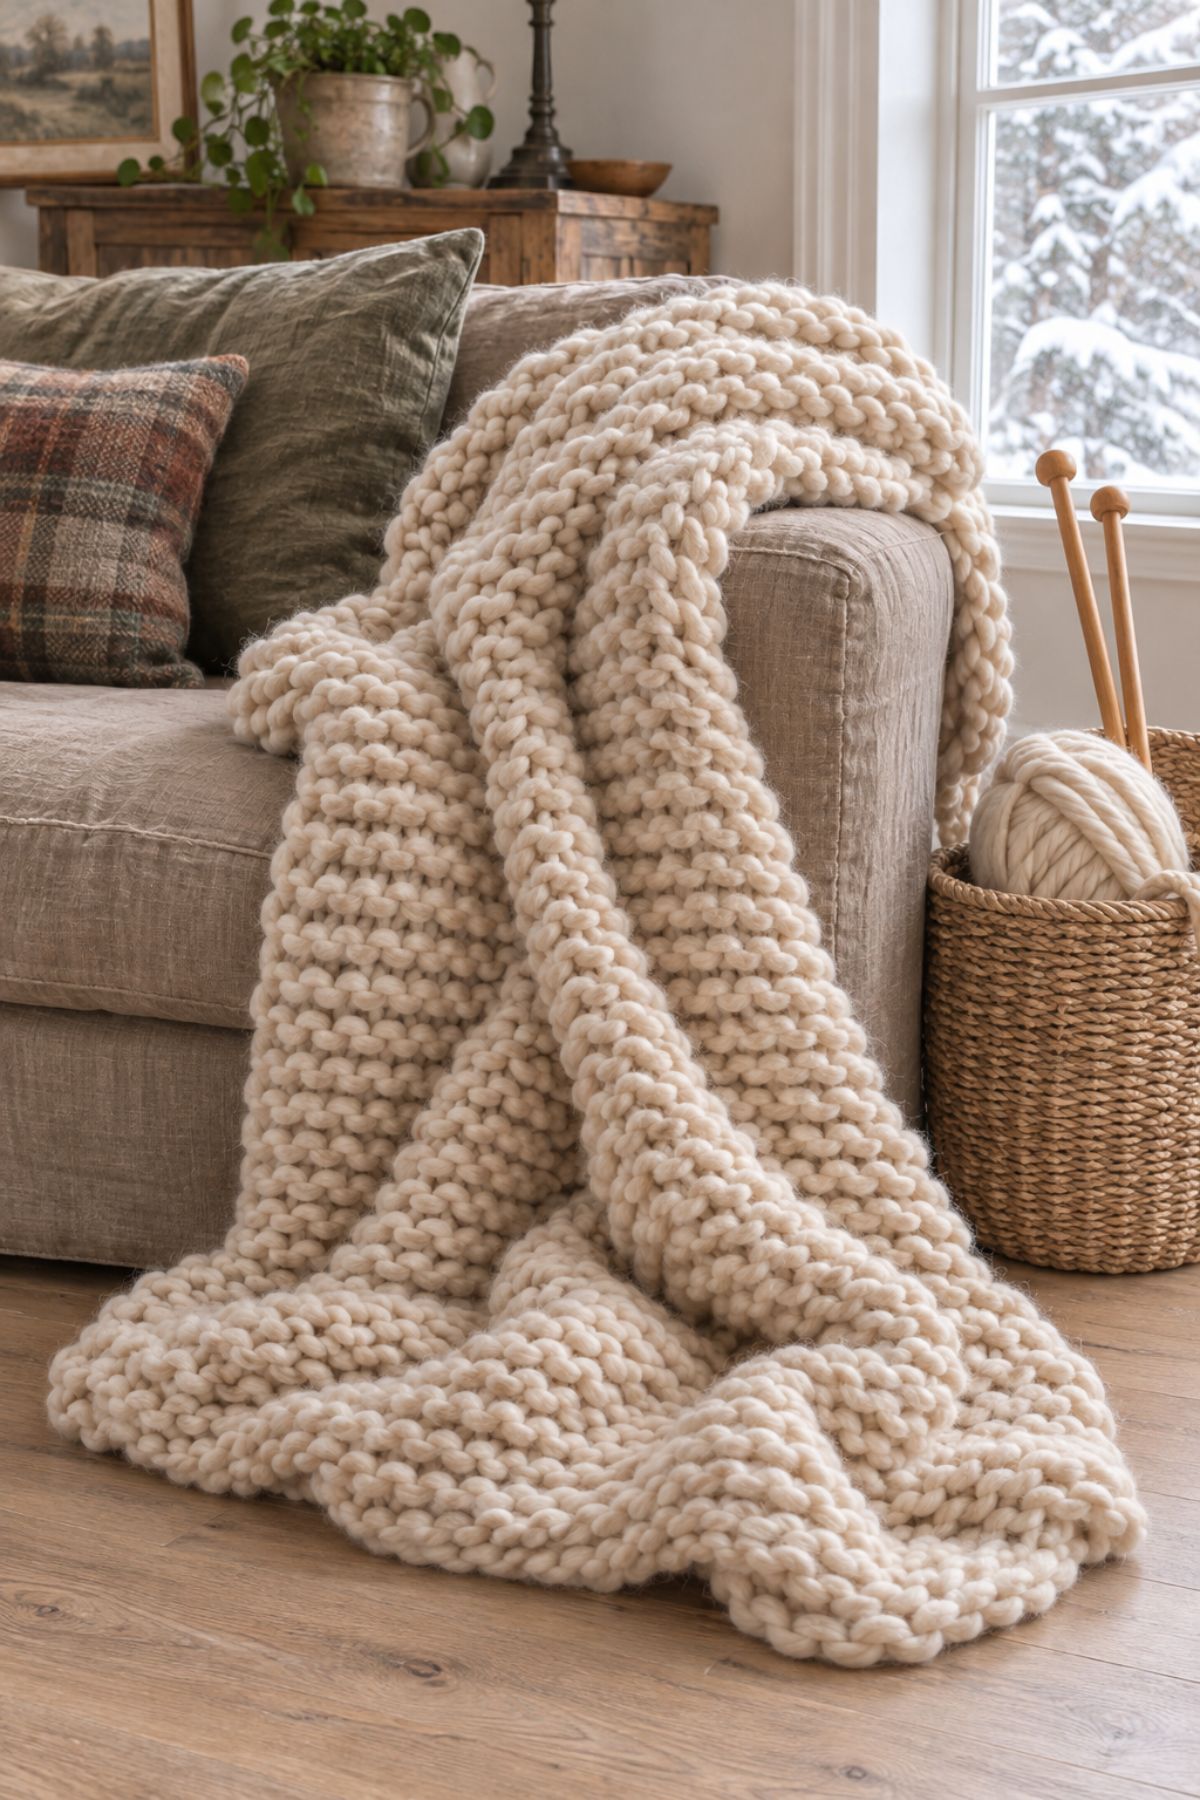
Super-bulky yarn and size 15 to 19 needles cut a throw blanket down to a handful of evenings. Circular needles with a long cable carry the weight of the growing fabric better than straight ones.
Garter stitch, which simply means knit every row, lies flat and reverses well. Seed stitch adds a bumpy, nubby surface once the basics are comfortable.
Plan on roughly 8 to 12 skeins depending on yarn yardage and desired size. Folded at the foot of a bed or tossed over a sofa arm, a chunky throw handles cold nights and is a generous handmade gift.
Hand-Knit Wool Socks
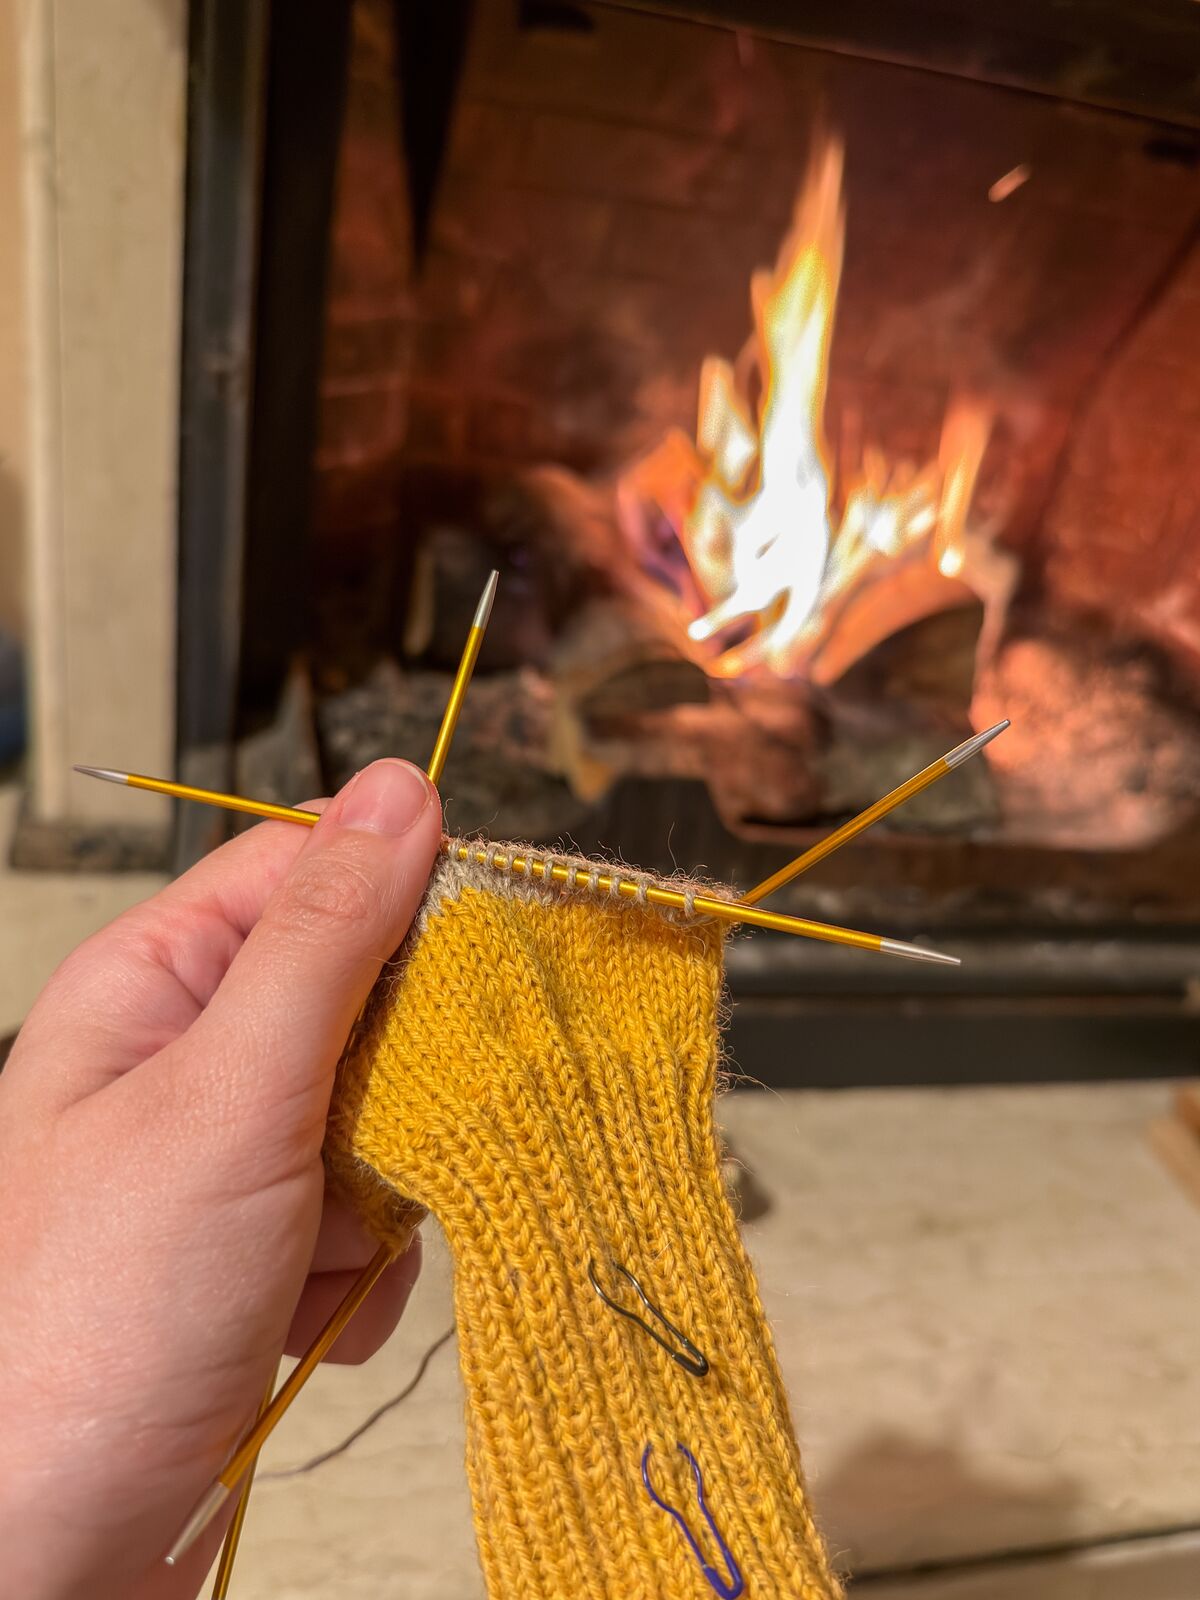
Blended with a little nylon, wool in fingering weight holds up to wear on the heels far longer than pure wool. Most sock patterns use double-pointed needles or a long circular needle with the magic-loop method.
A plain top-down pattern with a ribbed cuff and heel flap is the classic first sock. The heel looks intimidating on paper, yet most knitters get through it on the first try if they follow each row exactly.
One pair takes several weeks. Before knitting a pair as a gift, measure the recipient’s foot. A snug fit stops slouching at the ankle.
Sashiko Visible Mending
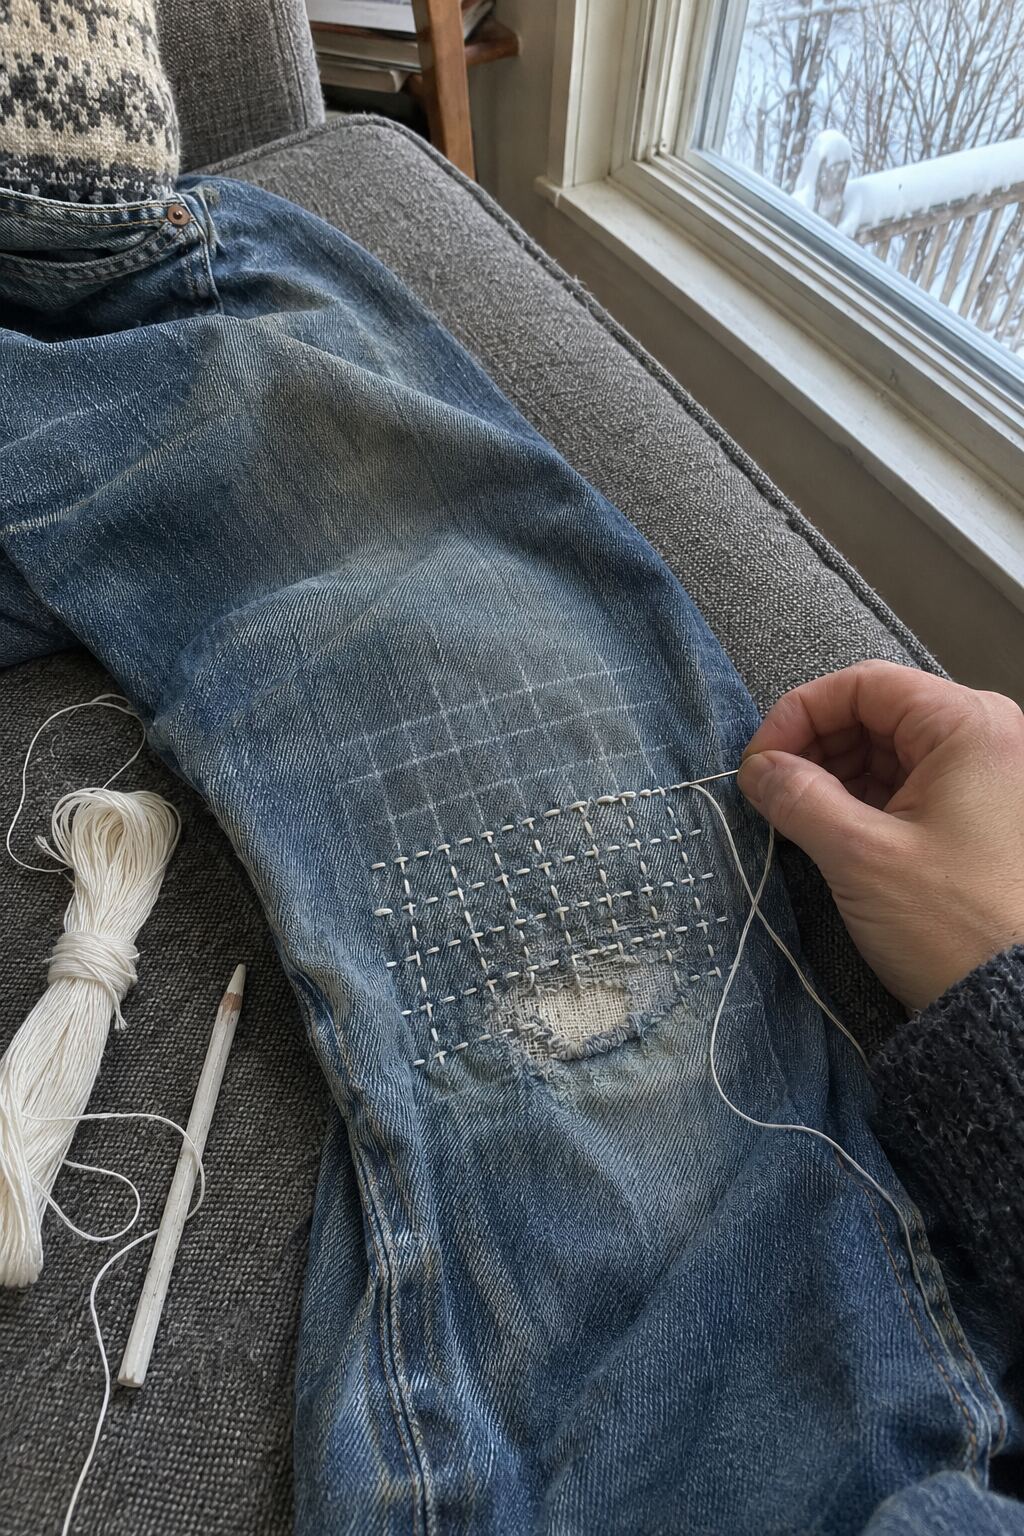
Once a jeans knee or a canvas jacket wears thin, sashiko stitching makes the repair the best part of the garment, since it is meant to show. Pin a cotton patch about an inch larger than the hole behind the fabric, then mark a grid of lines a quarter inch apart with a chalk pencil.
Sashiko thread is thicker and less twisted than embroidery floss. A long sashiko needle loads several running stitches at once, which speeds up each row.
Even stitches about the length of a grain of rice look tidy, and a little slack at the end of each row stops the fabric from puckering. White thread on indigo denim is the classic look, while red or mustard thread on faded black jeans stands out more.
Pinecone Macrame Wall Hanging

Since square knots and spiral half-knots form the foundation of most beginner macrame pieces, learn those two first. Both pick up quickly with a short video and a few practice cords. Hang 3mm to 5mm cotton cord from a driftwood or birch dowel.
Cut each cord about four times the finished length. Once the knotting pattern is complete, trim the fringe evenly and comb it out for a soft, brushed edge.
Small pinecones attach to the lowest knots with thin wire or a dab of hot glue. The hanging fits above a bed or in a narrow entry wall, where a framed print would look crowded.
Yarn Wreath with Felt Flowers

After an hour of steady wrapping, a foam wreath form disappears under chunky cream or heather-gray yarn, with a dab of hot glue at the start and end. Wrap tightly with each pass touching the last so no foam shows.
Each felt flower starts as a simple circle. Snip it into a spiral strip, roll it inward from the outer edge, and glue the base. A few cut felt leaves finish each bloom.
Cluster the blooms on one side of the wreath for an asymmetrical look. It weathers poorly outside, so hang it indoors on a bedroom door or above a console.
Pom-Pom Mantel Garland
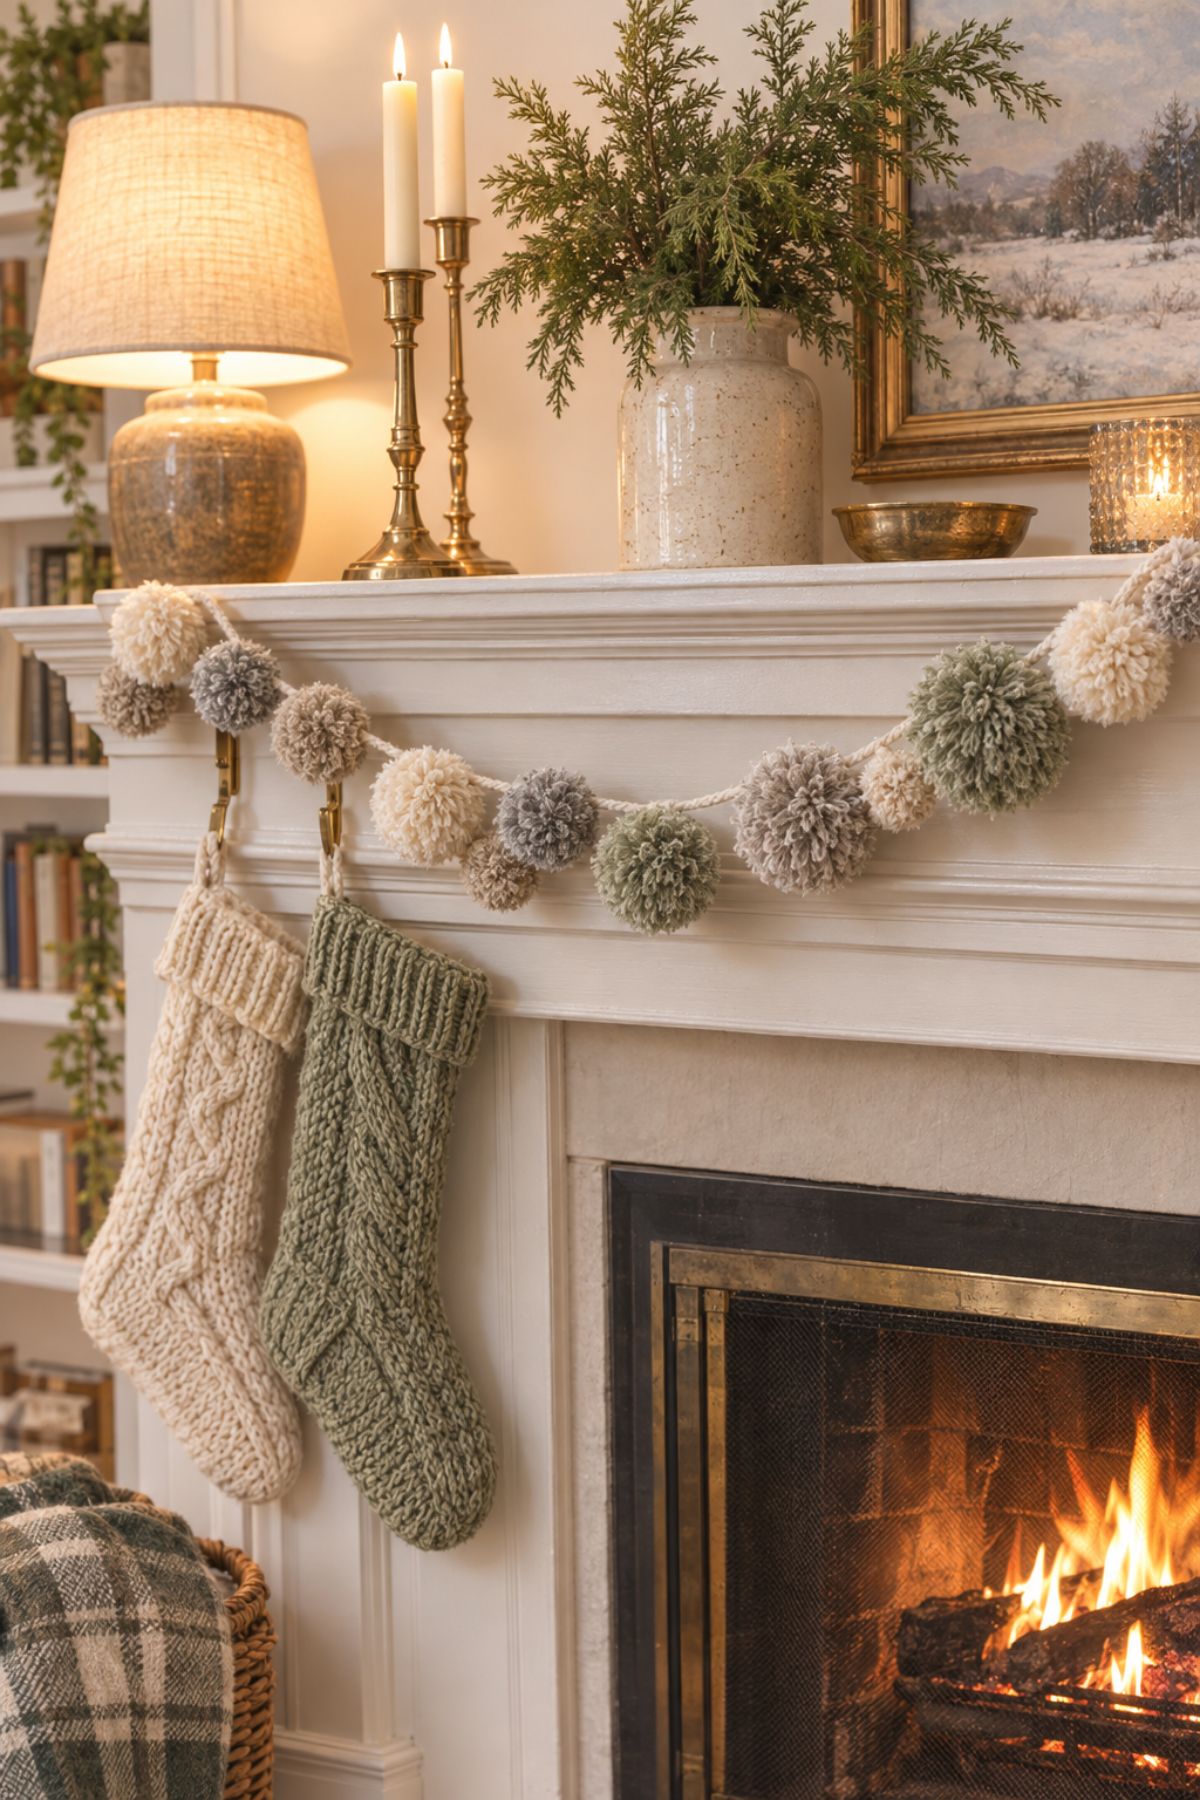
Pom-pom makers, sold in several diameters, produce rounder, denser puffs than the fork or cardboard method. Wool or wool-blend yarn trims cleanly and fluffs up more than acrylic.
Wrap generously before tying off; thin pom-poms look ragged on a garland. Each one needs a careful haircut with sharp scissors to even out the shape.
String 20 to 30 pom-poms on a long length of yarn a few inches apart, with a knot on each side to hold them in place. Draped across a mantel, the garland matches knit stockings and wool throws in the room.
Snowy Felt Ball Garland
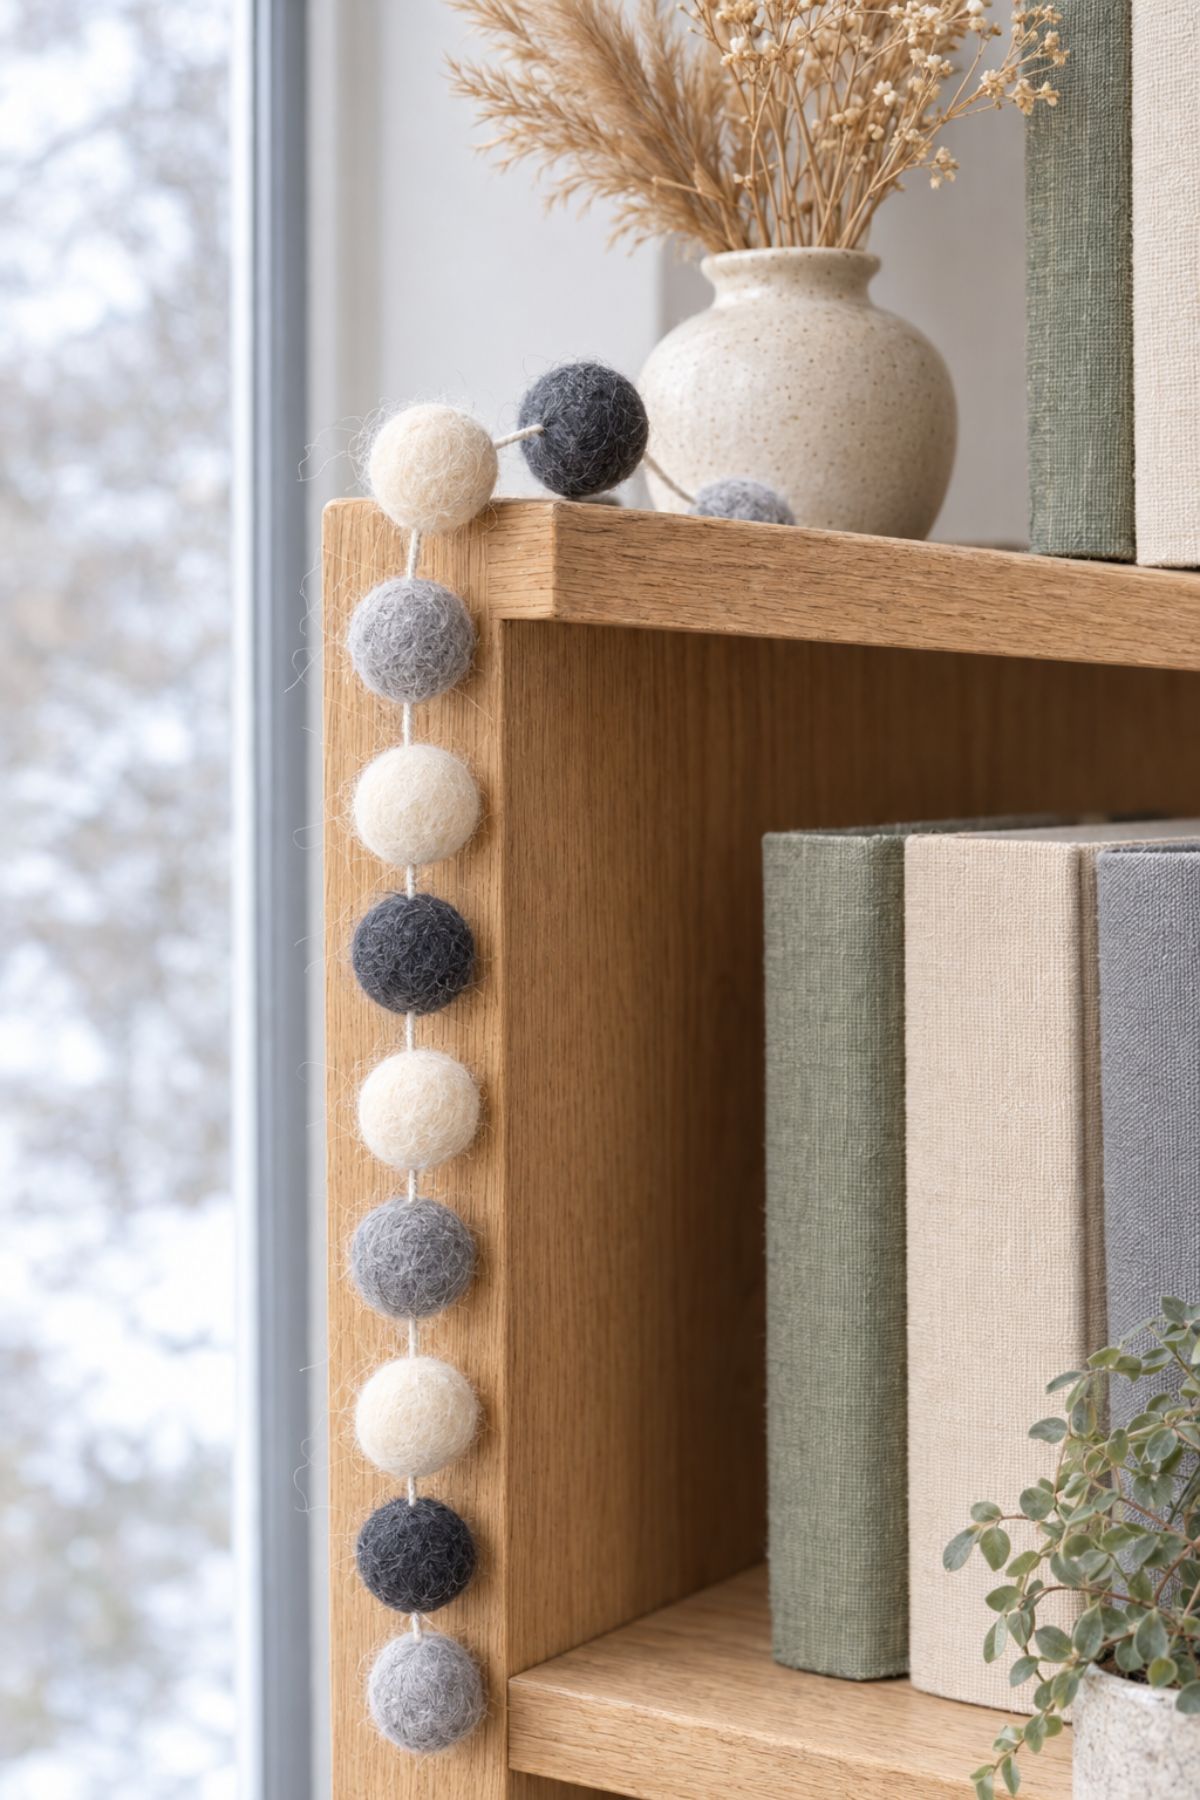
Skip the felting step with pre-made wool felt balls, sold in bulk in 2cm sizes, and go straight to threading. A limited palette of white, ivory, light gray, and charcoal reads wintry yet never shouts Christmas.
Use a long, sharp tapestry or doll needle and sturdy embroidery floss. Pushing the needle through dense felt takes force; a thimble or a pair of small pliers saves sore fingertips.
With no red or green in the mix, the garland hangs comfortably from late November through February. Try it along a bookshelf, bunk bed rail, or tree branch.
Felt Mitten Garland
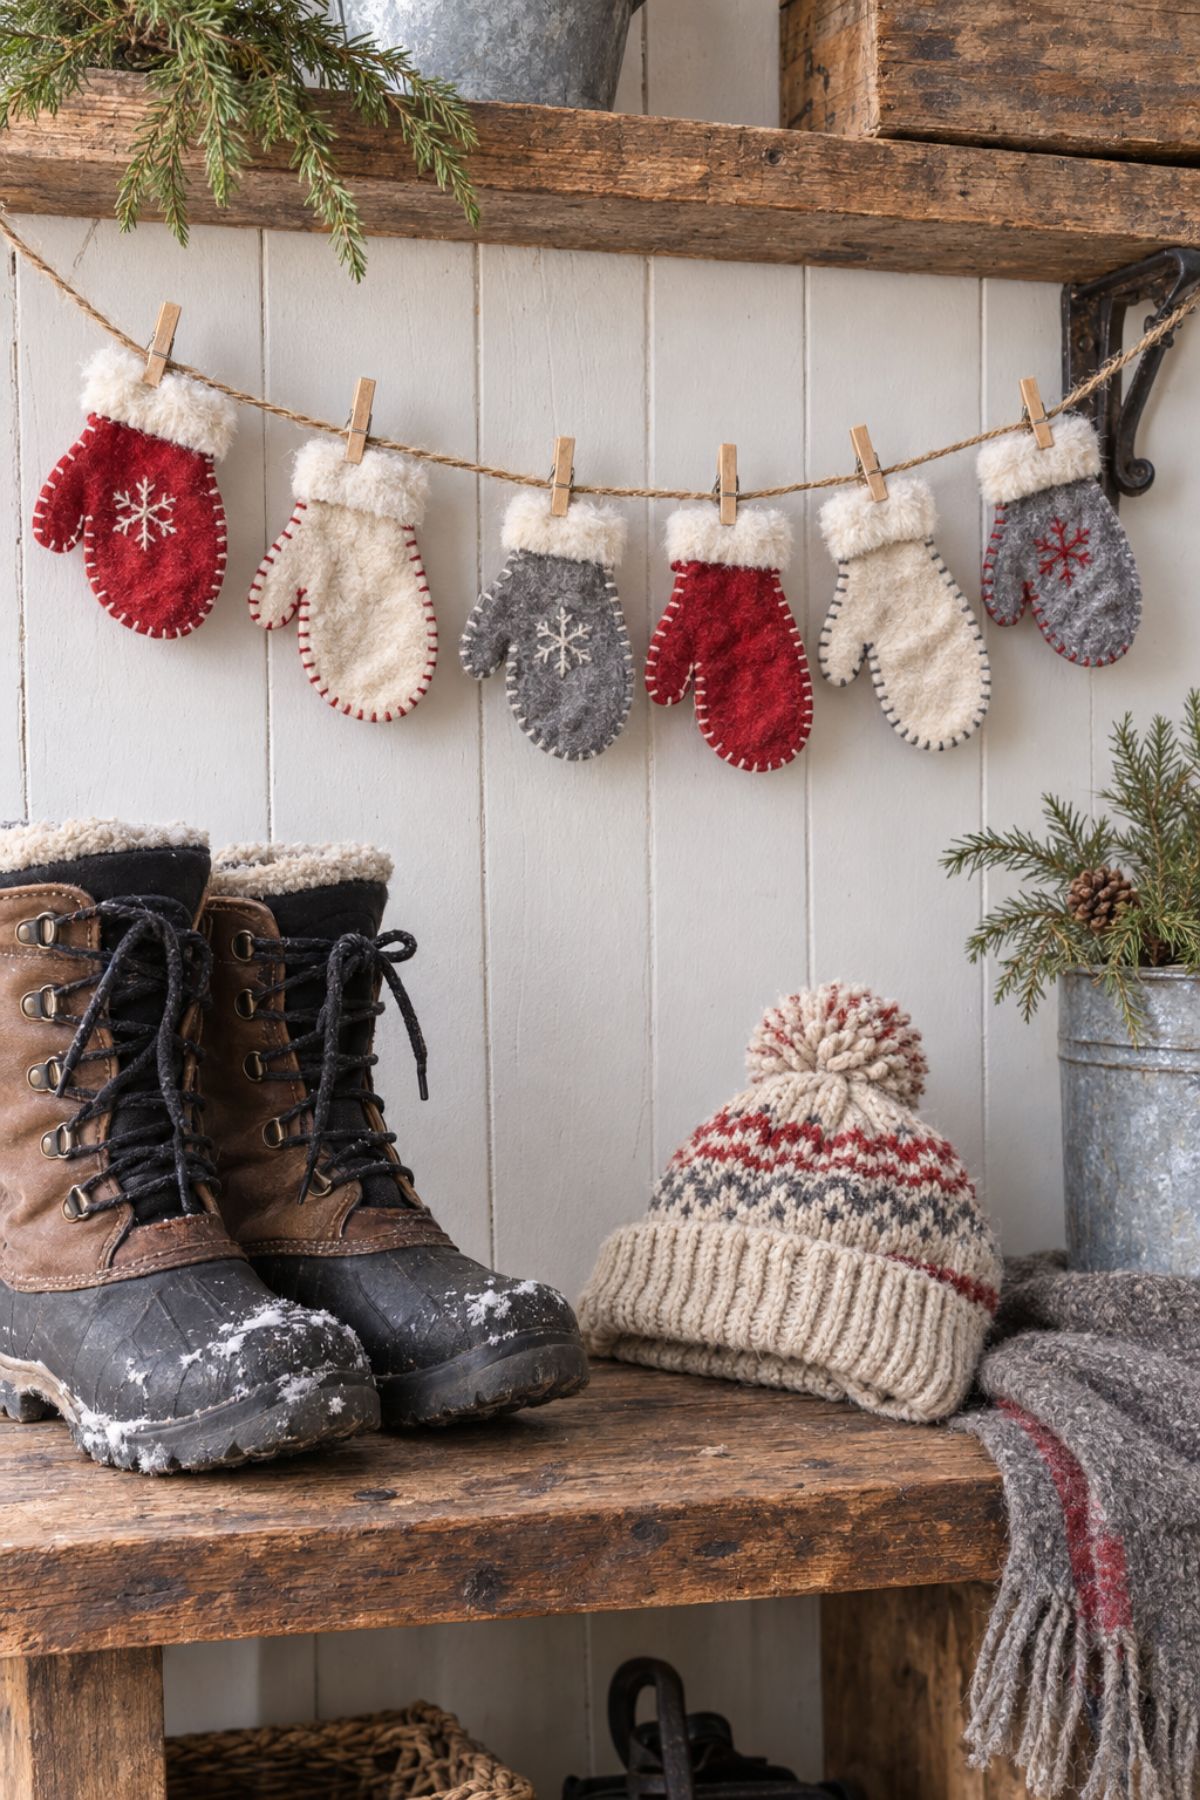
Shaped from wool-blend felt, mittens hold their shape and resist fraying at the edges. Trace a mitten template onto the felt, cut two pieces per mitten, and sew around the edge with a blanket stitch in contrasting embroidery floss.
Add a strip of white felt or faux fur at each cuff, and a tiny snowflake or heart in running stitch for detail. A light stuffing of polyester fiberfill makes them puffy.
Mini wooden clothespins hold the finished mittens on twine. Strung across a mudroom or a mantel, the garland echoes real winter gear hung up to dry.
Needle-Felted Wool Animals
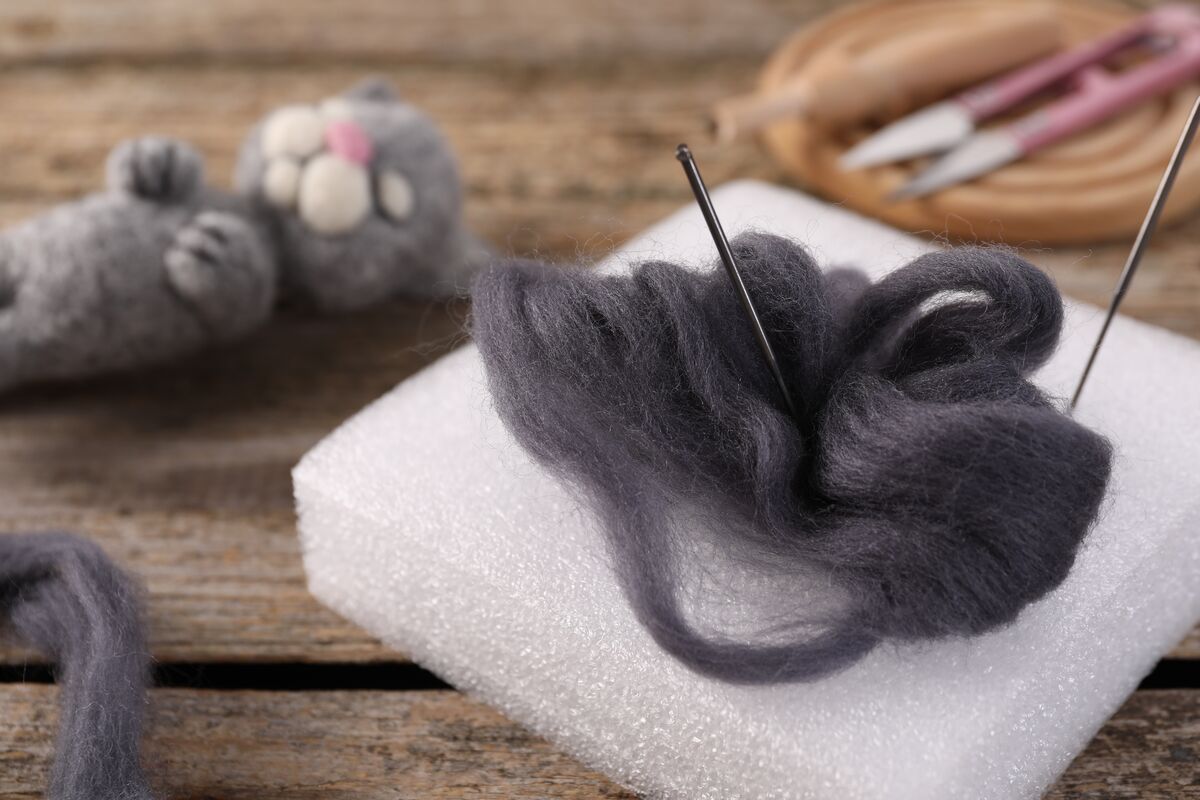
Repeated stabbing with a barbed felting needle tangles loose wool roving into firm, sculptable shapes. A foam pad underneath protects the table and the needle tip.
Beginner kits for small animals like foxes, hedgehogs, or snowy owls include roving and pre-measured portions. Felt in short, straight jabs and watch your fingers; the needles are very sharp and snap if bent sideways.
A small figure takes one to three hours. Tuck finished figures into a winter centerpiece, hang them as tree ornaments, or arrange a small woodland scene on a windowsill.
Punch Needle Hoop Art
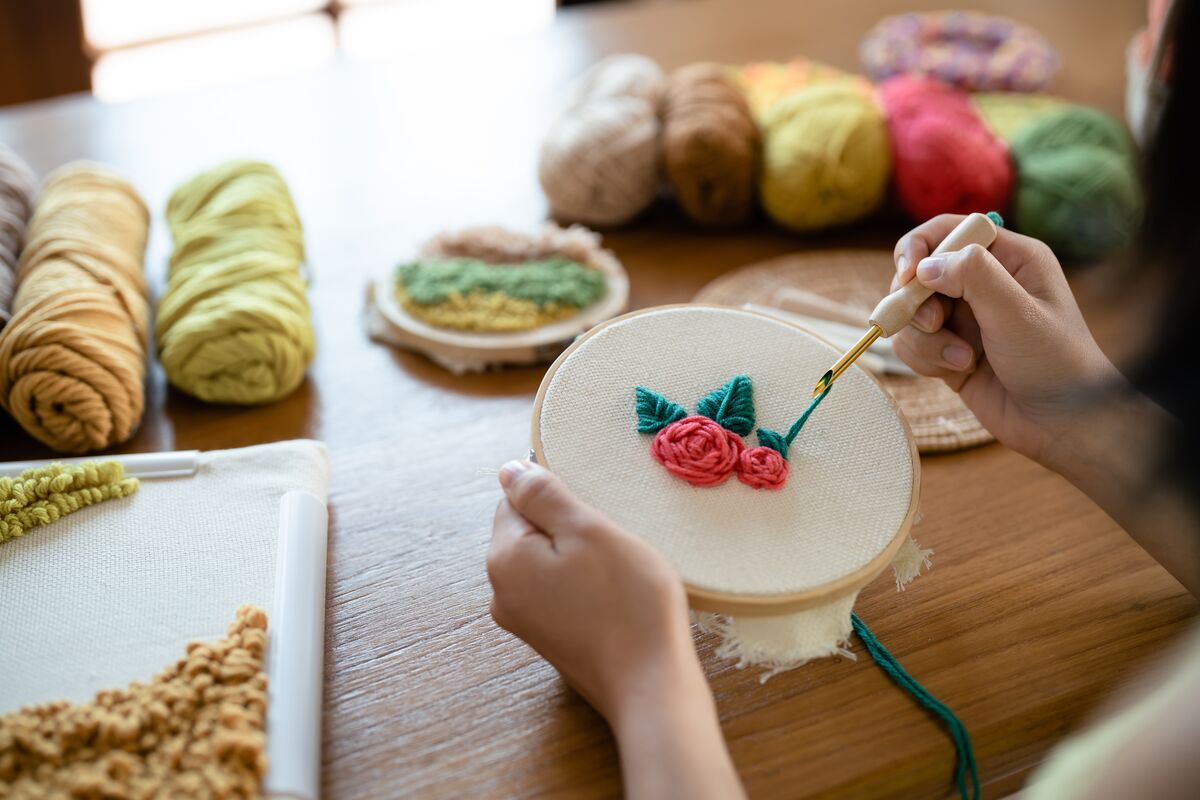
Before the first loop, stretch monk’s cloth drum-tight in a gripper strip frame or locking hoop. Loose fabric lets loops pull back out.
Transfer a simple design, like a mitten, snowy cabin, or pine branch, onto the fabric. Punch from the back with the needle bevel facing the direction of travel. Short, even steps produce consistent loop height.
Display the finished piece right in the hoop on a gallery wall, or trim and back it as a pillow front. A small design takes an evening or two.
Rolled Beeswax Candles
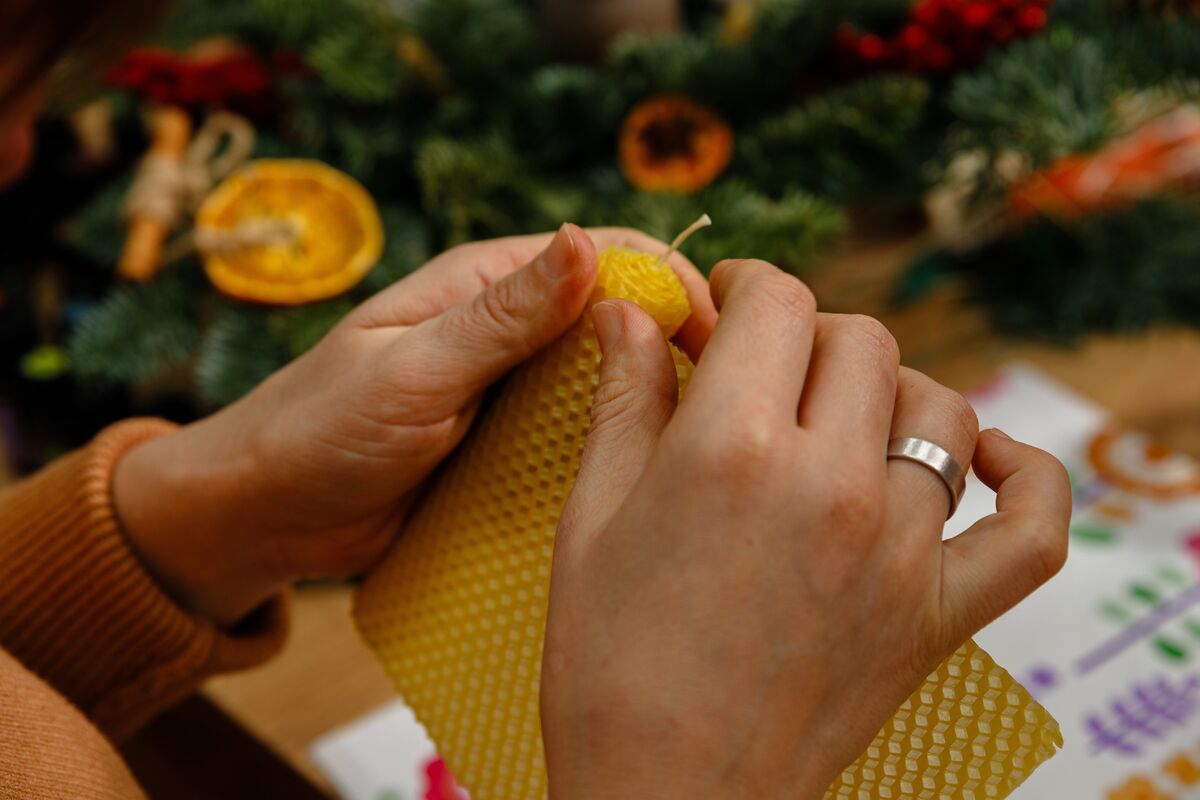
Honeycomb beeswax sheets roll into candles with no melting at all, which makes this one of the safest wax crafts around. A quick pass with a hair dryer softens the sheets so they bend and never crack.
Lay a primed cotton wick along one edge, press the wax firmly around it, and roll slowly and evenly. Tight first rounds prevent the air gaps that make candles burn unevenly.
One sheet produces a single pillar or two tapers in a few minutes. Tie a pair with twine and a sprig of evergreen for an easy gift with a faint honey scent.
Teacup Soy Candles

At a thrift store or estate sale, mismatched vintage teacups make charming candle vessels, as long as the porcelain is free of cracks. Wash and dry them thoroughly.
Melt soy wax flakes in a double boiler, never directly over a burner, and never leave the pot unattended. Add fragrance oil at the temperature listed by the wax manufacturer, then pour once it cools slightly.
Secure each wick with a wick sticker and hold it centered with a clothespin or wick bar while the wax sets. Paired with its saucer, the candle makes a gift that sits neatly on a nightstand.
Cinnamon Stick Candle

Glued around the sides of a pillar candle with dabs of hot glue, upright cinnamon sticks cut to its height form a fragrant sleeve. A wide, sturdy pillar at least 3 inches across is the right base.
Wrap a band of jute or a strip of burlap around the center and tie it with a bow. A dried orange slice or star anise finishes the knot.
Because the sticks sit close to the flame line, burn the candle only with supervision and extinguish it once the wax pool nears the edge. Many households use this one with an LED pillar.
Beeswax Food Wraps
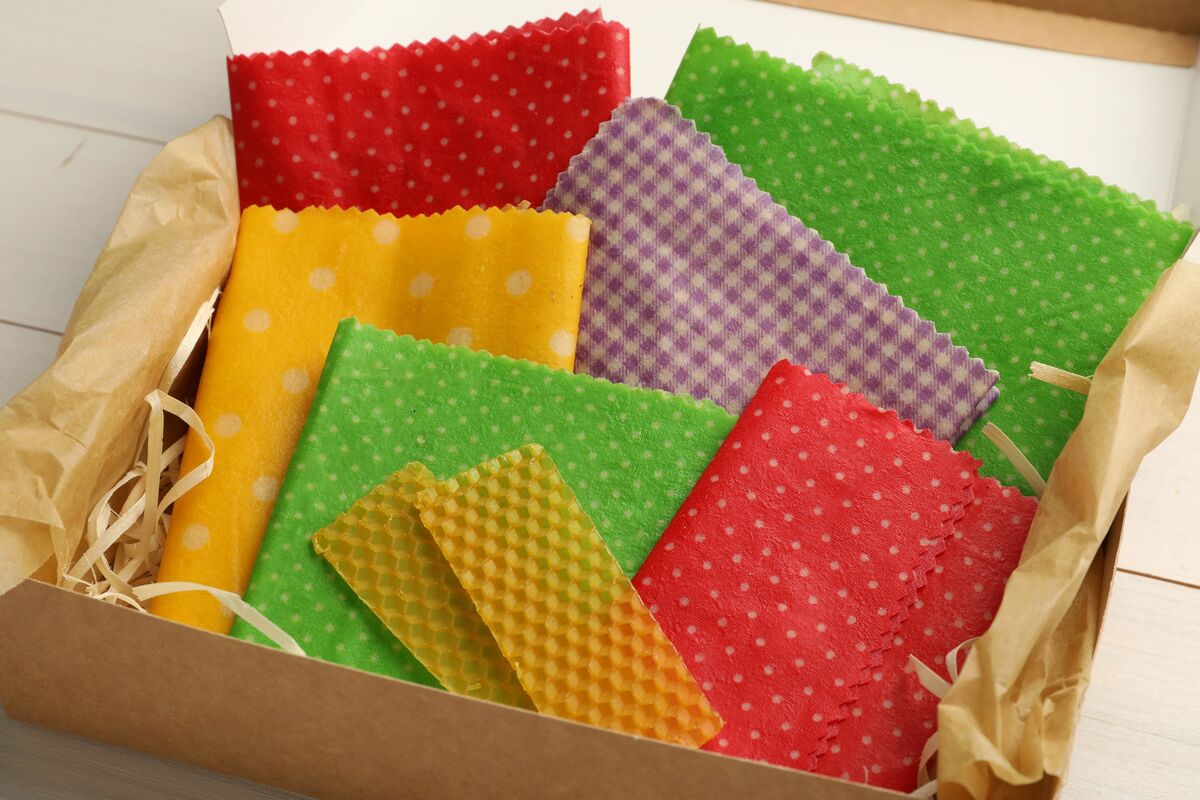
Three or four beeswax wraps in a kitchen drawer replace a roll of plastic wrap for covering bowls and wrapping cheese or bread. Beeswax alone cracks and barely clings, so Mother Earth News settled on 2 parts beeswax to 1 part pine resin and 1 part jojoba oil after testing several blends.
Melt the mix in a glass jar set in simmering water, and brush it thinly over squares of 100% cotton laid on parchment.
Three to five minutes in a 185°F oven melts the coating evenly into the weave. Lifted and waved for a few seconds, each wrap cools dry, and pinking shears stop the edges from fraying.
Cool water and mild soap clean them. Never use the wraps on raw meat or in the microwave, since heat melts the wax.
Mason Jar Fairy Light Lantern
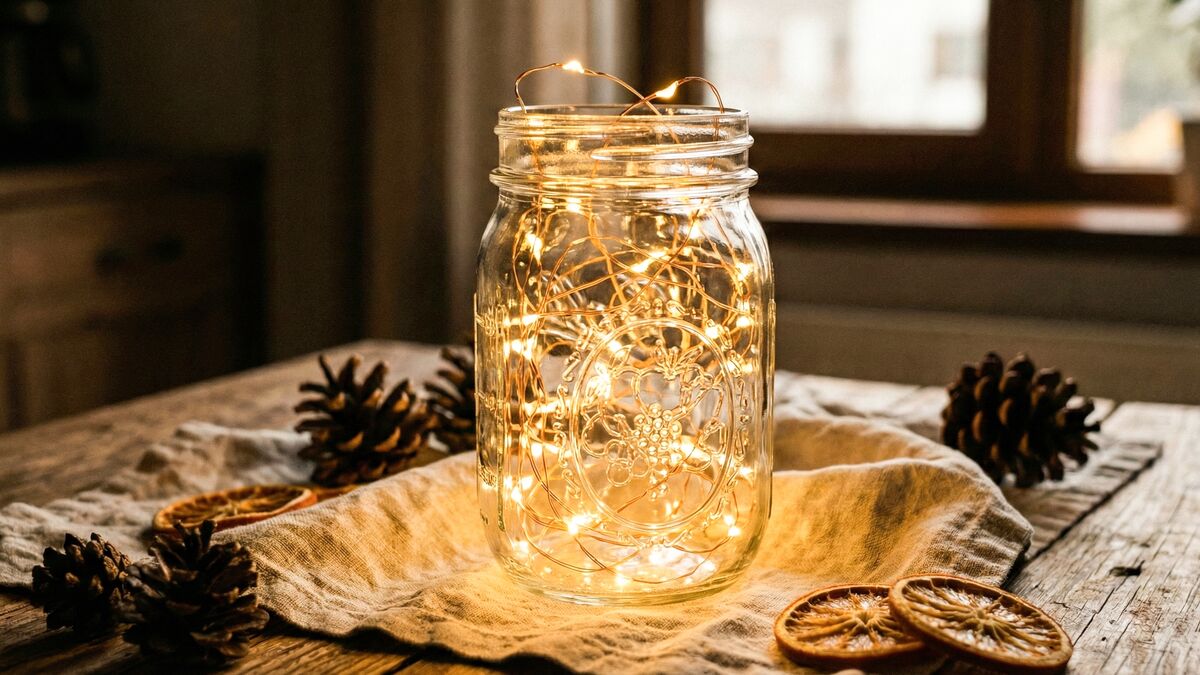
Inside a quart mason jar, battery-powered copper-wire fairy lights coil easily with zero heat risk. Layer a few small pinecones at the bottom, then tuck in a string of lights with the battery pack hidden in the lid.
A handful of faux snow or Epsom salt at the base makes a frosted floor. Wrap the jar neck with twine and attach a wire handle for hanging.
Lined along a porch rail, on stair treads or across a dinner table, a few lanterns glow all evening. Lights with a built-in timer switch on at dusk each evening.
Mason Jar Snow Globe
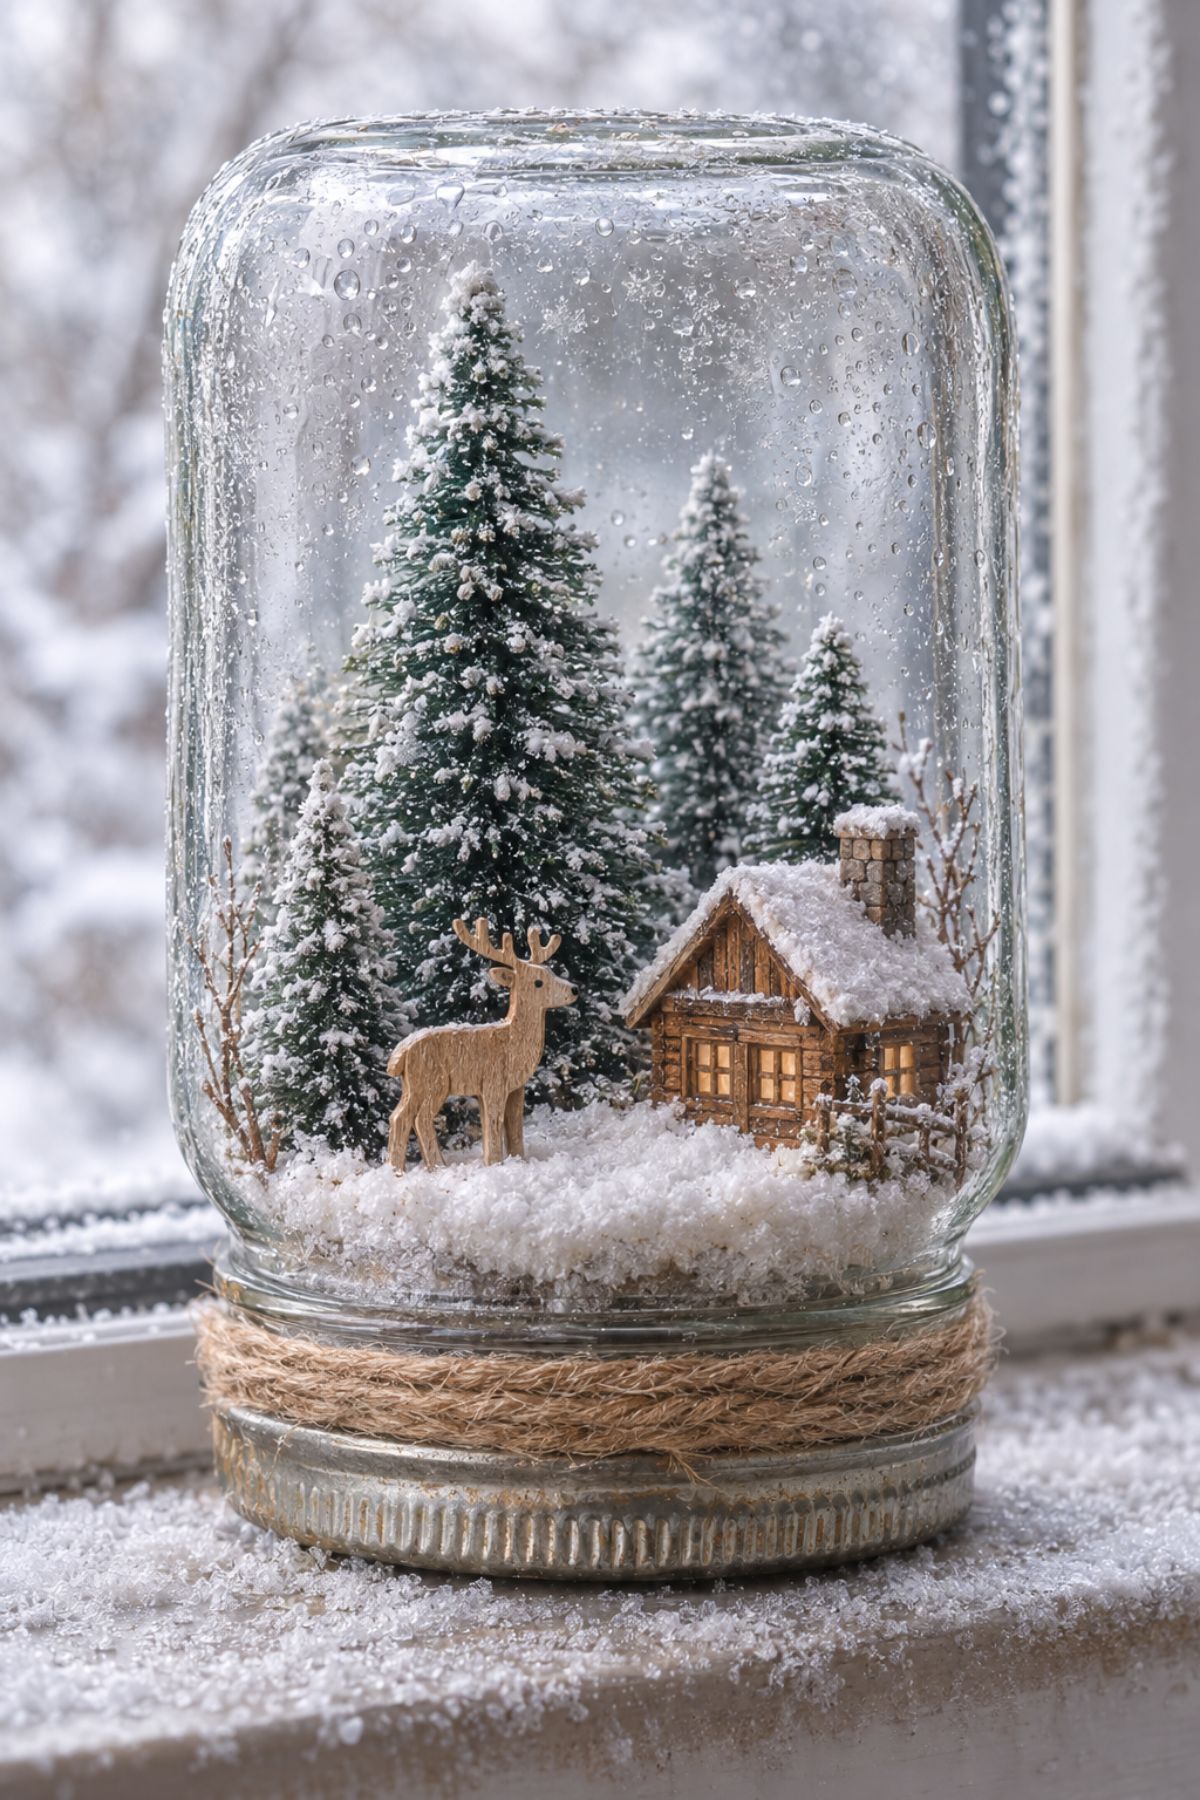
Once a miniature scene is glued inside a jar lid, the flipped jar puts everything under glass like a terrarium. Glue bottle-brush trees, a tiny wooden deer, and a mini cabin to the lid with strong craft adhesive.
Next, a few inches of faux snow go into the jar. Screw the lid on and stand it upside down so the scene rises out of the snowdrift. A light spray of fake snow on the trees adds frost.
Line several jars of different sizes on a windowsill or shelf, or wrap a single jar as a teacher gift.
Balloon Ice Lanterns
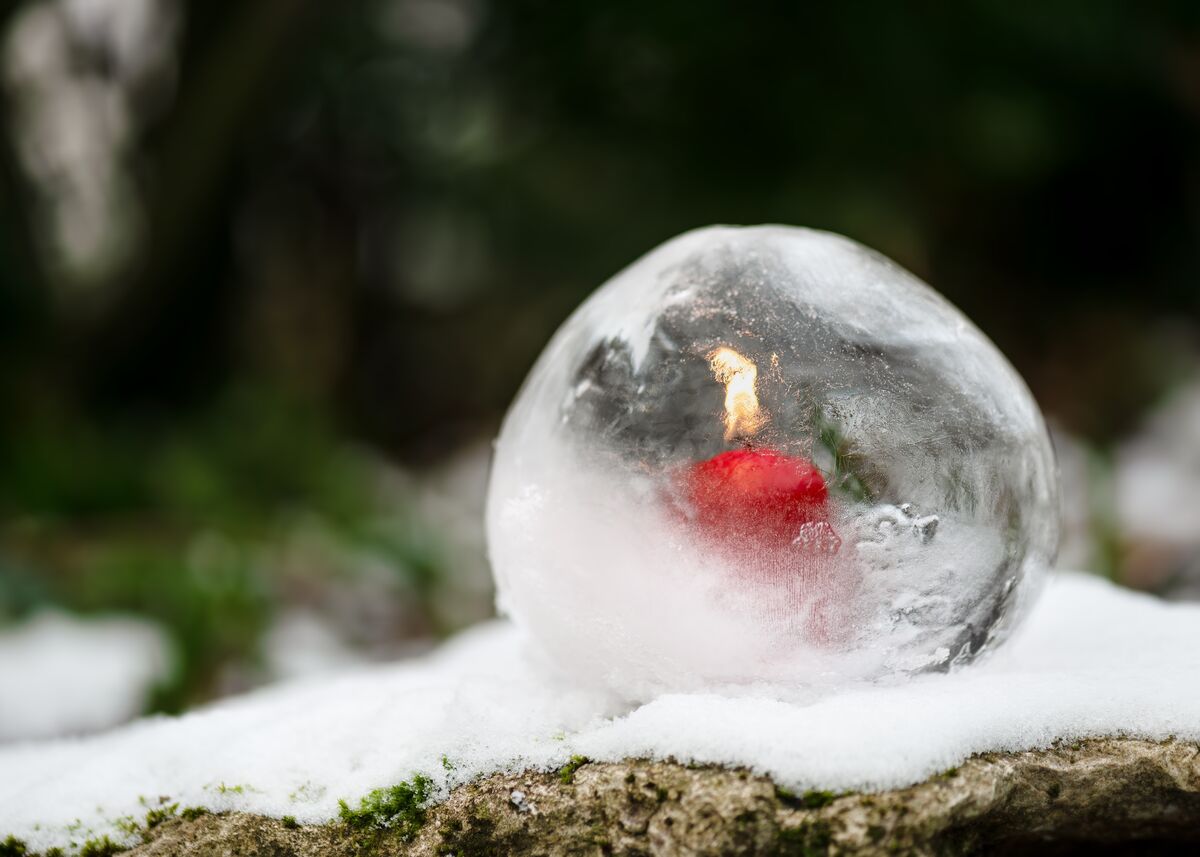
On a night forecast well below freezing, a fresh, sturdy party balloon filled with water, tied off and set in a bowl outside becomes an ice lantern. A roomy freezer does the same job.
Check after 12 to 24 hours. The goal is a thick shell with water still liquid inside. Peel off the balloon, chip a small opening in the top with a screwdriver, and pour out the unfrozen center.
Drop a tea light or LED candle inside and set the globes along a walkway or on porch steps. They last as long as the cold holds.
Botanical Ice Lantern
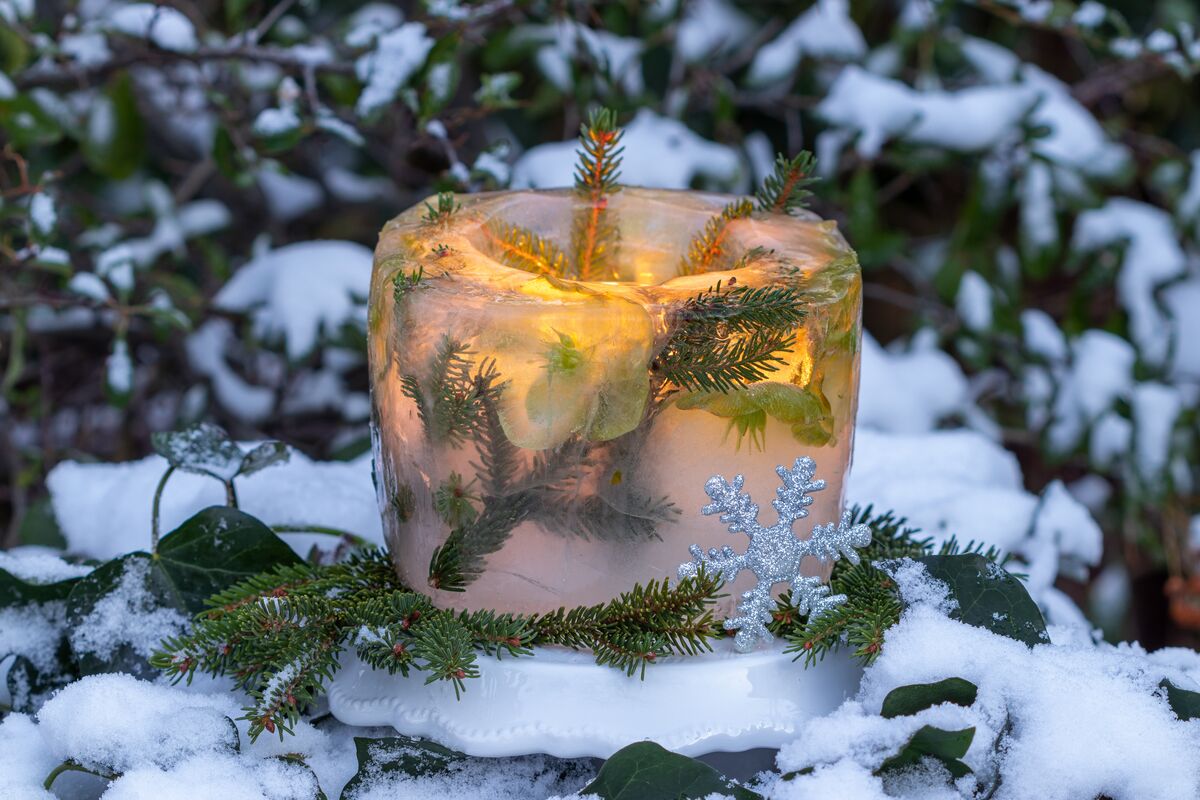
Nest two containers, such as a large plastic tub with a smaller cup inside or a bucket holding a smaller one, to produce a hollow ice lantern with clean walls. Weigh the inner container down with stones.
Before freezing, slip cranberries, evergreen sprigs, citrus slices, or dried flowers into the water between the walls. Freeze outside overnight in below-freezing weather or in a chest freezer.
Run lukewarm water over the containers briefly to release the ice. Place the lantern on a plate or tray near the front door with a candle inside to greet evening guests.
Snow-Dyed Cotton Napkins
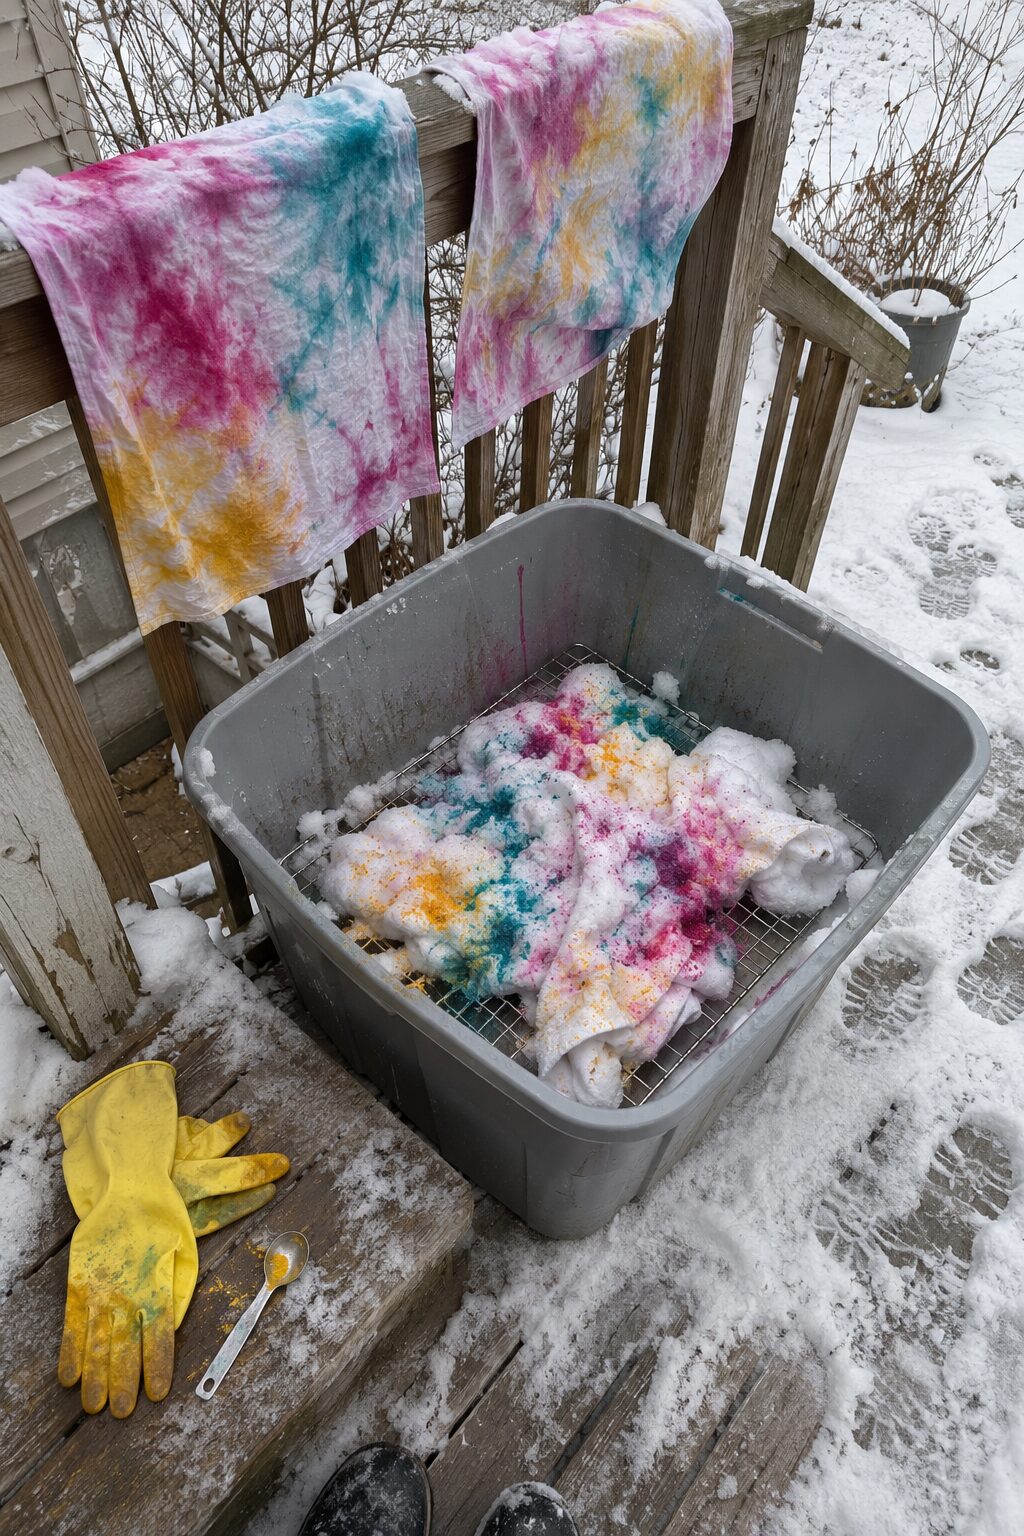
After a fresh snowfall, a tub of snow and two or three colors of fiber reactive dye produce napkins with soft, watercolor patterns, each one unlike the last. Soak plain white cotton or linen napkins for about 20 minutes in a soda ash solution of 1 cup per gallon of warm water, then wring them until just damp.
Scrunched or folded, the napkins sit on a wire rack inside a plastic tub.
A thick layer of snow goes on top, and Procion MX dye powder gets sprinkled over it from a spoon. As the snow melts over the next day, the colors split and bleed into the fabric.
Rinse in cold water until it runs clear, then wash hot with a textile detergent. Wear gloves and a dust mask around dye powder and soda ash, and never reuse the tub or spoons for food.
Pinecone Fire Starters
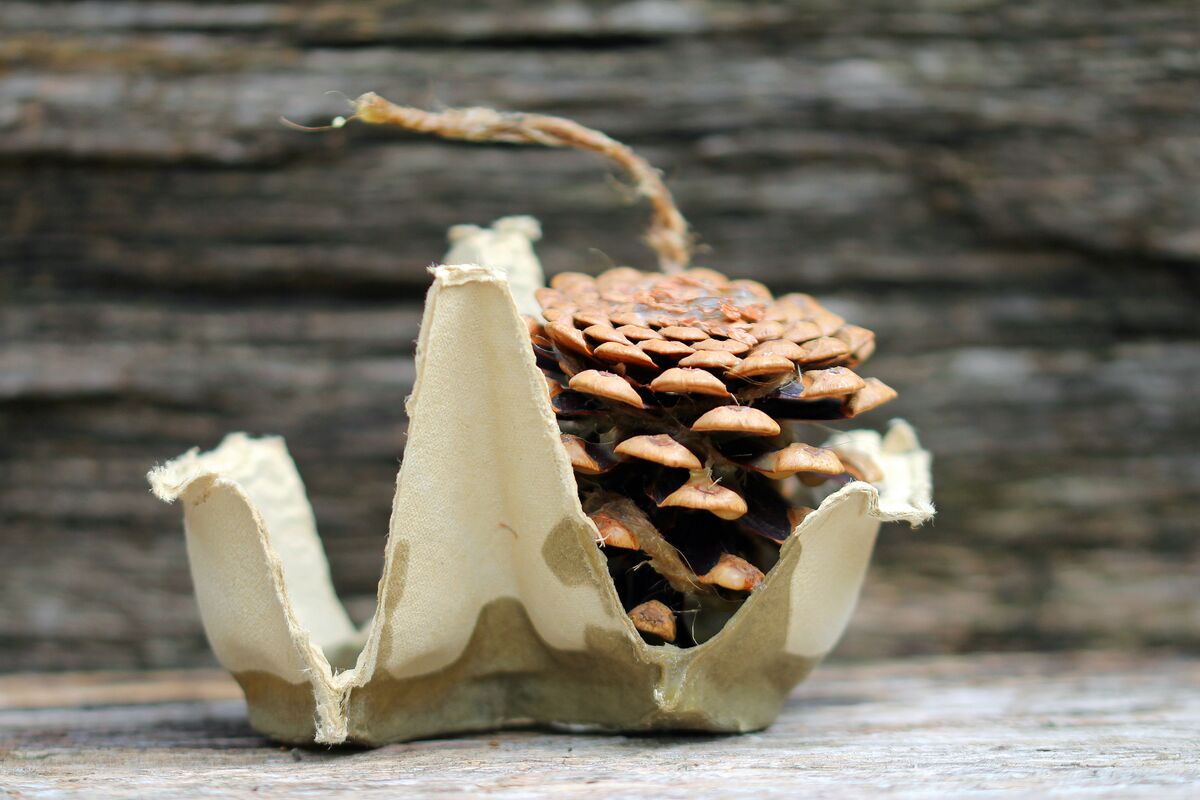
Cardboard egg cartons hold a dozen fire starters at once and burn along with them. Tuck a small pinecone into each cup, add a little dryer lint or wood shavings, and pour melted wax over the top.
Melt leftover candle wax in a double boiler and never walk away from the pot. Pressing a short piece of cotton wick into each cup helps with lighting.
Once set, cut the cups apart. Use these only in fireplaces, wood stoves, and outdoor fire pits. A dozen tied with twine makes a practical gift for anyone with a wood-burning stove.