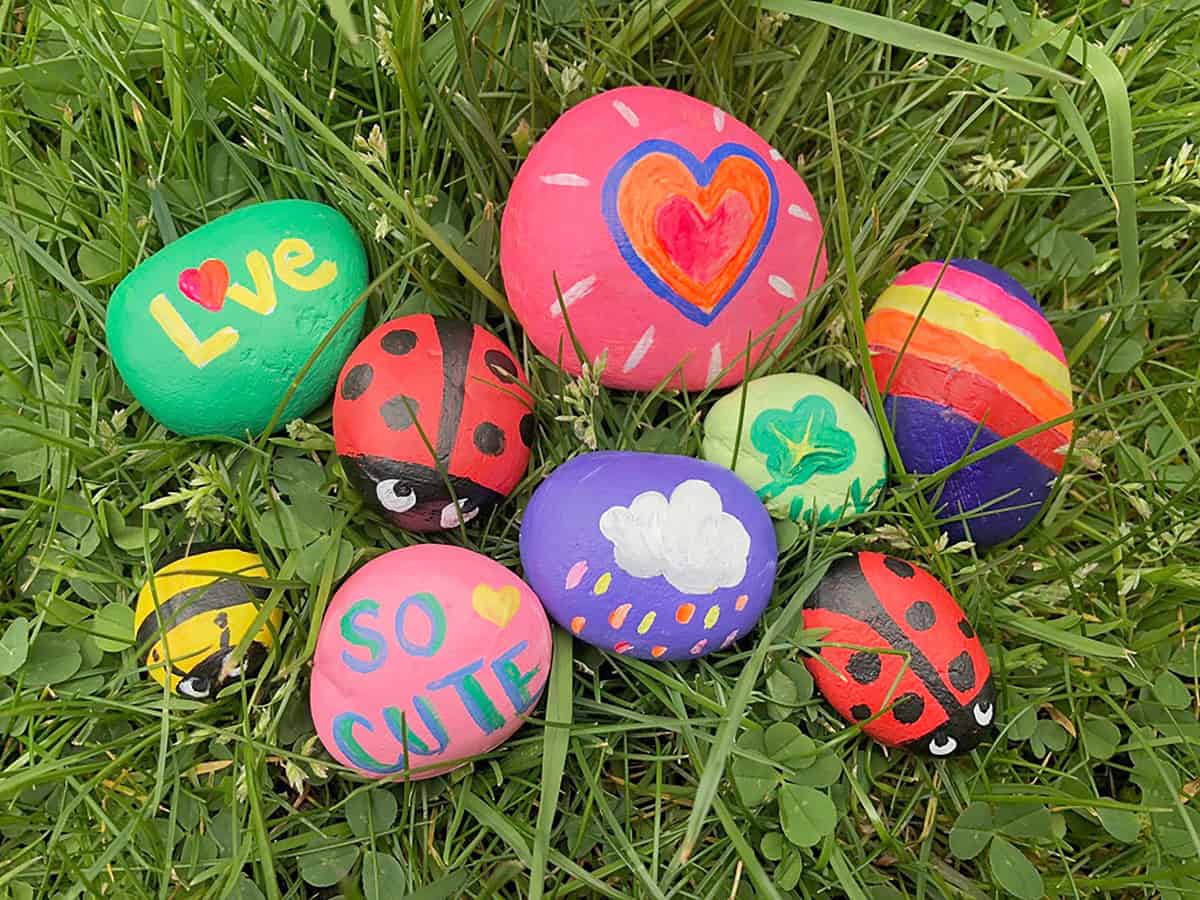
A smooth stone and a few bottles of paint are all you need for an enjoyable afternoon project. Painted rocks work beautifully as garden accents, shelf decorations, handmade gifts, or cheerful surprises left around the neighborhood. Beginners and experienced painters can both adapt the designs to match their skills.
Take a closer look at these 37 ideas and find one you’ll enjoy painting.
Table of Contents
- Rock Painting Ideas
- You Are My Sunshine Rock
- Painted Rock House Village
- Pet Memorial Stone
- Glow-in-the-Dark Firefly Rocks
- Boho Rainbow Quote Rock
- Camping Scene Rock
- Ocean Wave Rocks
- Vegetable Garden Marker Rocks
- Underwater Sea Turtle Rock
- Tiny Cottage Village
- Tiny Book Cover Rocks
- Sunflower Field Stone
- Strawberry Garden Rocks
- Storybook Mushroom Houses
- Snowman Family Stones
- Sleeping Woodland Fox
- Realistic Animal Portrait Rocks
- Rainbow Weather Rocks
- Painted Stone Tic-Tac-Toe Set
- Painted Rock Succulents
- Miniature Food Rocks
- Ladybug Family Rocks
- Koi Fish Pond Rocks
- House Number Welcome Rock
- Halloween Character Rocks
- Galaxy and Constellation Stones
- Friendly Monster Rocks
- Four Seasons Tree Set
- Floral Sugar Skull Stones
- Detailed Butterfly Rocks
- Colorful Mandala Stones
- Christmas Nativity Rocks
- Cactus Rock Stones
- Bumblebee Garden Rocks
- Blue Floral Folk-Art Rocks
- Black Cat Moon Rocks
- Bee and Wildflower Meadow
- Hot-Air Balloon Painted Rock
- Charming Pig Face Rocks
- Colorful Character Face Rocks
- Colorful Fruit Painted Rocks
- Creative Studio Helper Rocks
- Desert Sunset Painted Rocks
- Gnome Planter Rock Decorations
- Hand-Painted Koi Pond Rock
- Jack-O’-Lantern Painted Rocks
- Modern Mountain Landscape Rock
- Monkey Family Painted Rocks
- Positive Message Painted Rocks
- Simple Sailboat Painted Rock
- Smiling Ice Cream Cone Rocks
- Sports Ball Painted Rocks
- Tiger Family Painted Rocks
- Two-Stone Yin-Yang Design
Rock Painting Ideas
These 37 projects range from three-color beginner designs painted freehand in twenty minutes to layered mandala stones and realistic animal portraits that reward a slower hand. Expect specific palettes, brush and dotting-tool recommendations, and placement suggestions for gardens, shelves, gift boxes, and kindness rock drops.
You Are My Sunshine Rock
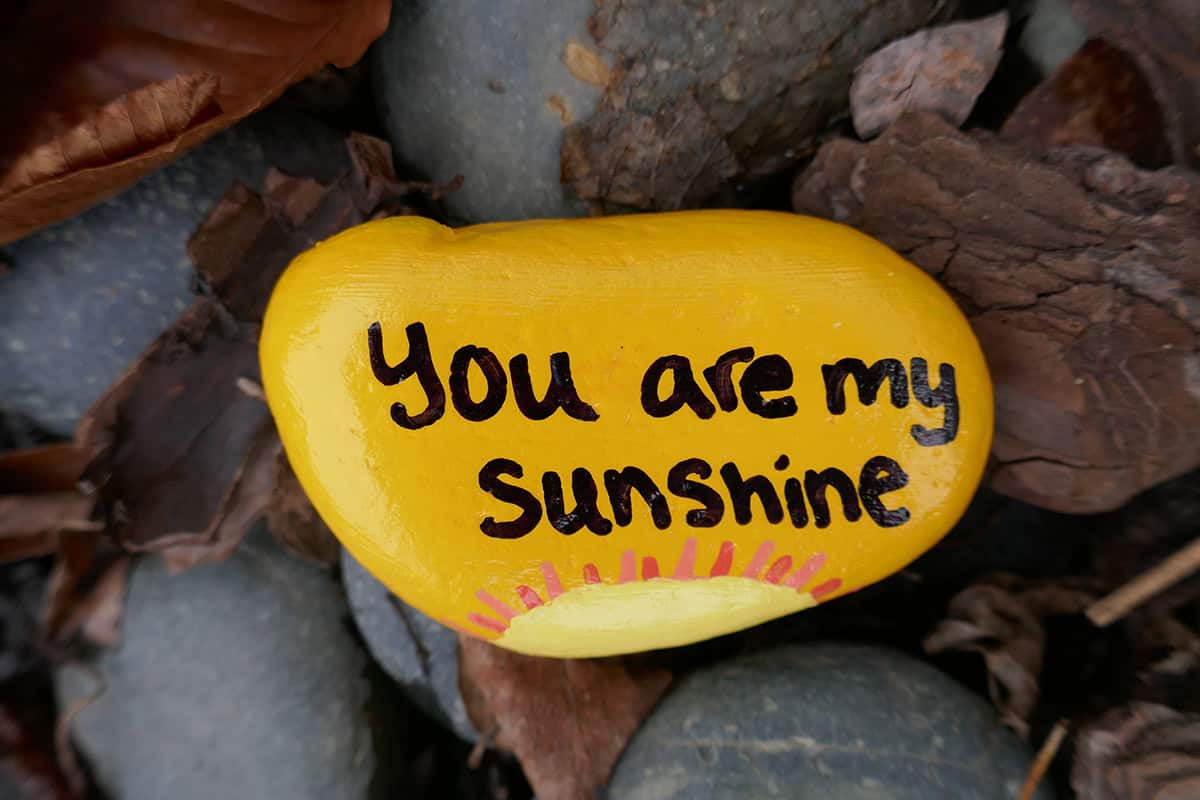
Start with a warm yellow base and let it dry completely before adding anything else. A chunky sun with wavy rays fills the upper two-thirds, and the lettering runs beneath it in a hand-drawn script using a fine black paint pen.
Keep the words short. “You are my sunshine” crowds a small stone fast, so reserve this for a rock at least three inches wide, or split the phrase across two matching stones.
Painted Rock House Village
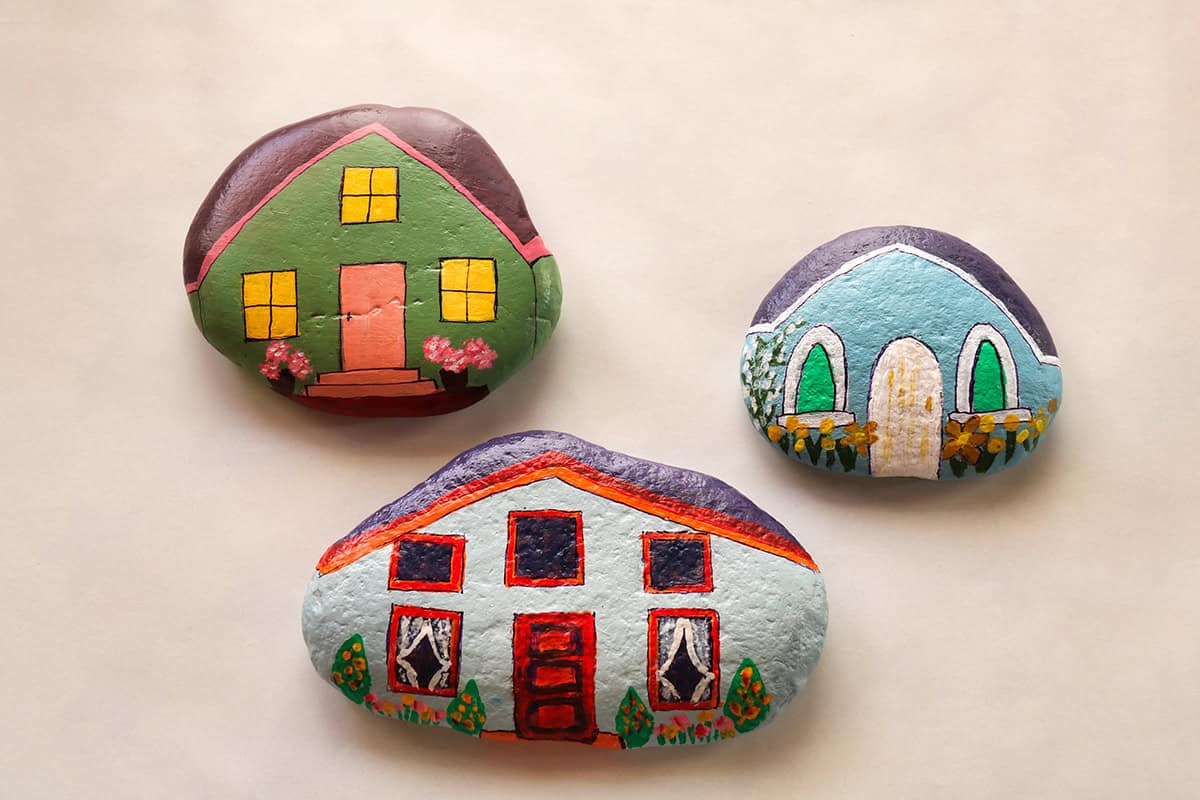
Group five or six stones of varying heights and paint each as a narrow row house. Vary the facade colors, sage, mustard, dusty rose, cream, and outline windows and doors in a dark brown paint pen.
Rooflines look sharpest when painted as a solid triangle or trapezoid across the top curve of the rock. Line the finished houses along a windowsill or bookshelf edge to read as a street.
Pet Memorial Stone
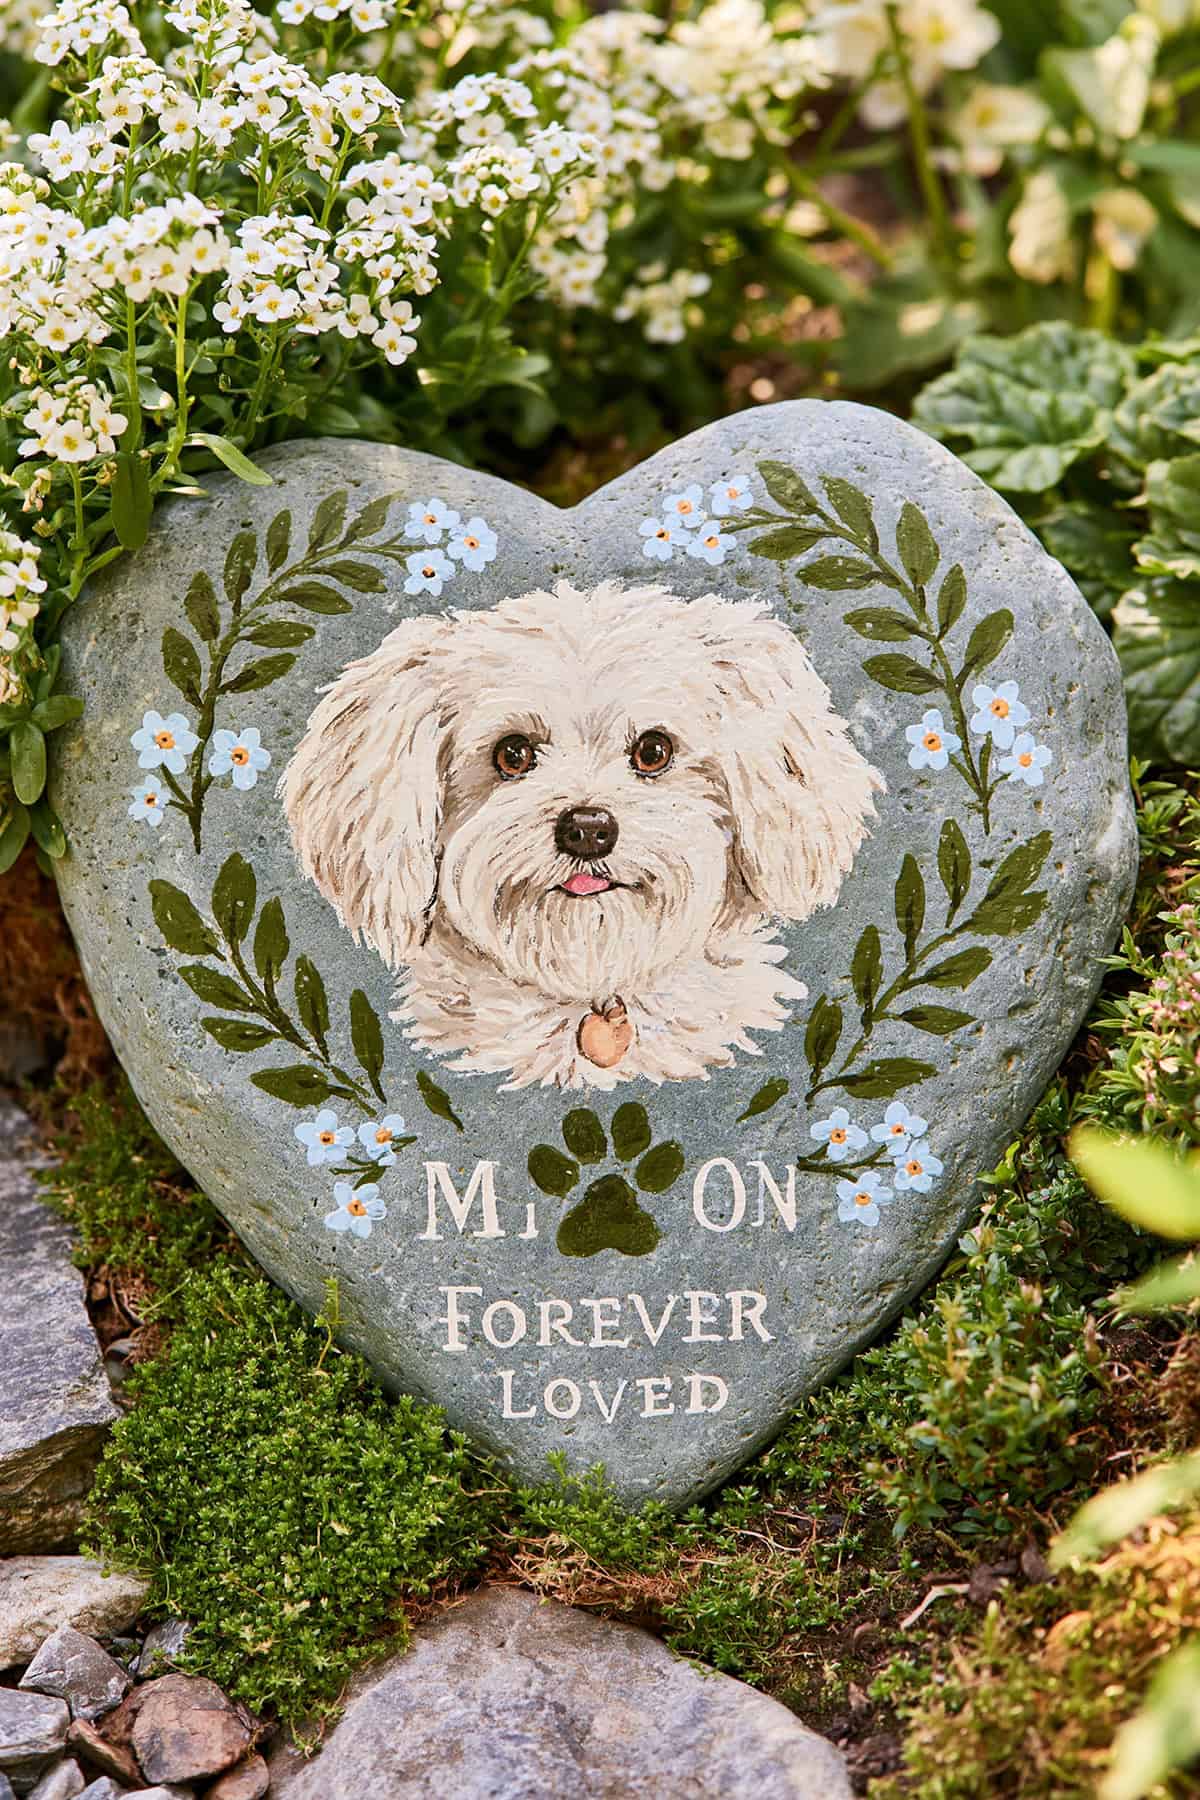
Choose a heavier, flatter stone that stays put outdoors through wind and rain. A simple silhouette of the animal in solid black over a soft background works better than an attempted portrait, and it holds up visually from a distance.
Add the name in clean serif lettering beneath the silhouette, along with a paw print or a single date. Two coats of outdoor sealer, applied a day apart, keep the paint from lifting through a full season.
Glow-in-the-Dark Firefly Rocks
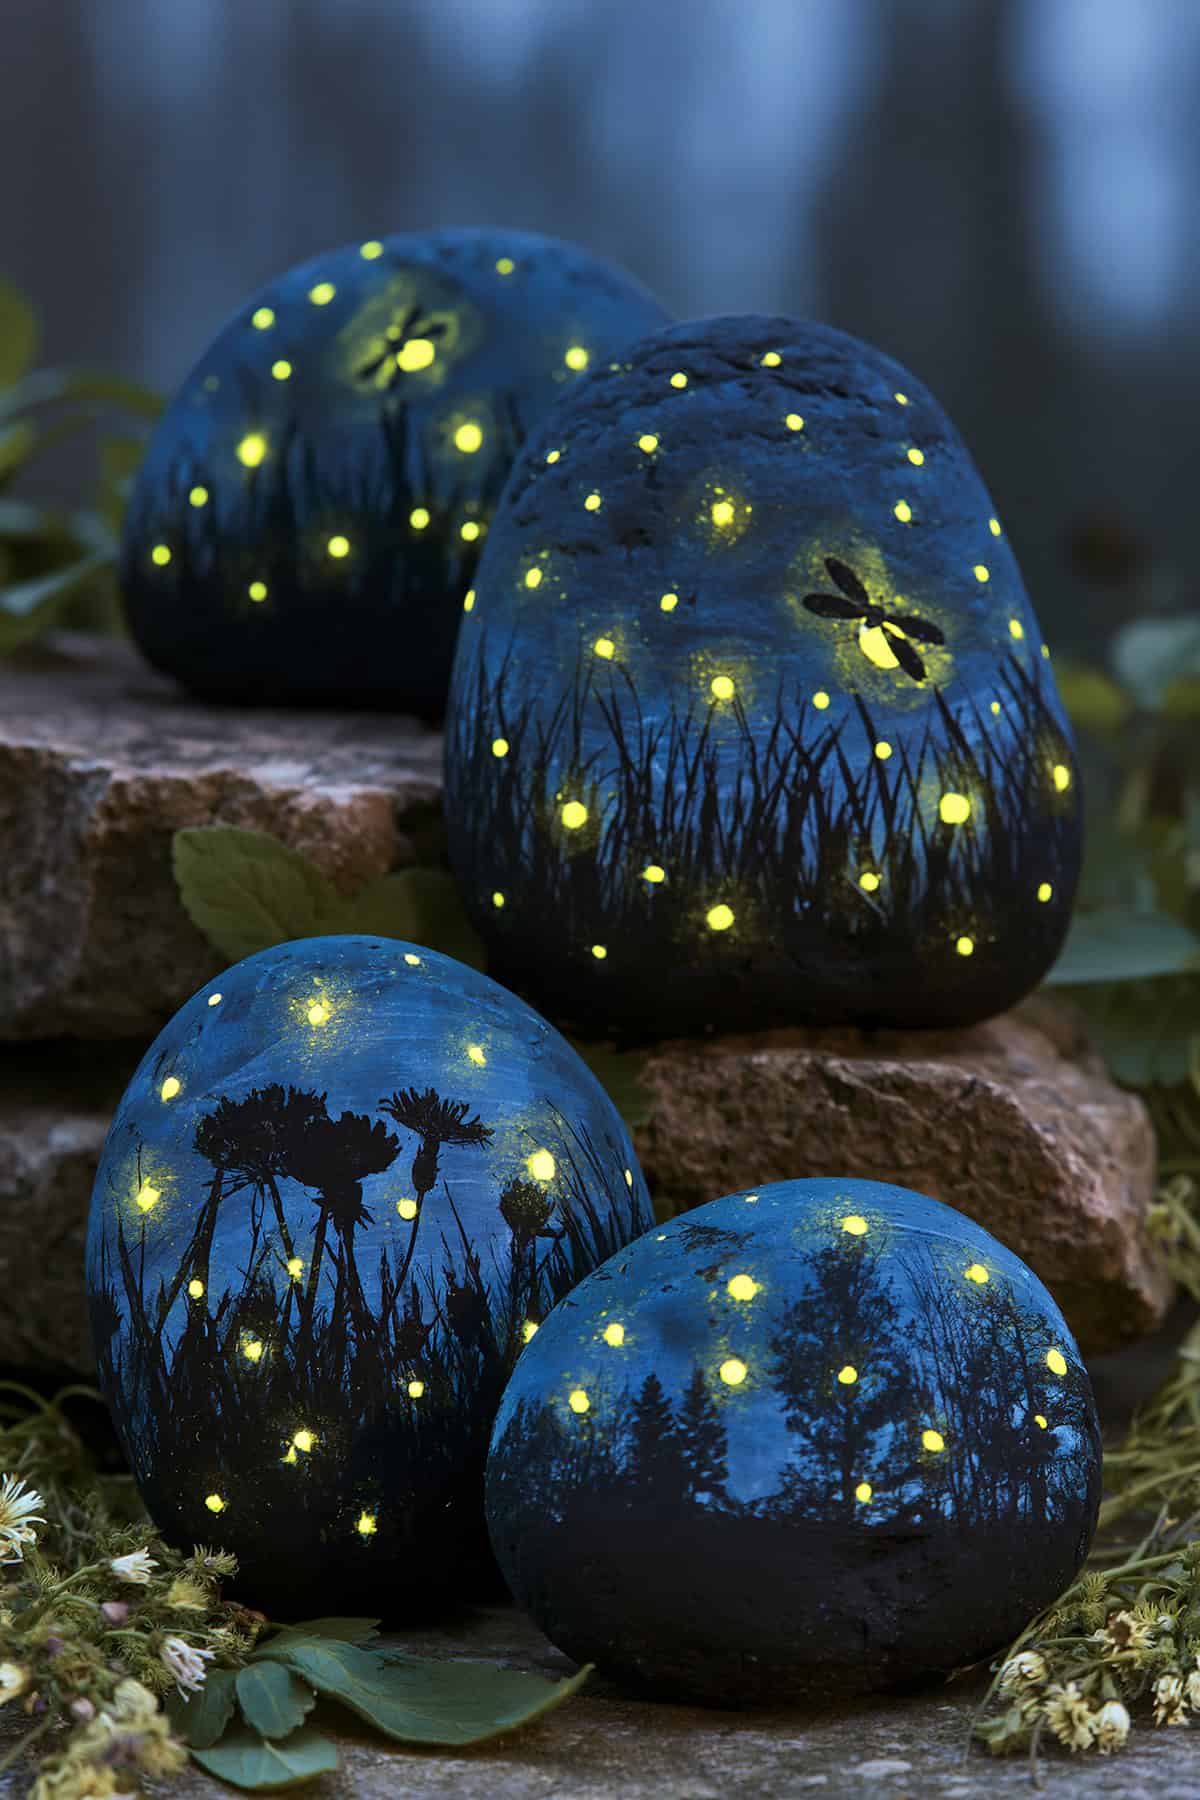
Paint a deep navy or near-black base and add a loose meadow silhouette across the bottom edge in flat black. The fireflies come last: small dots of glow-in-the-dark paint scattered above the grass line at uneven heights.
Glow paint needs thickness to charge properly, so build each dot up over two or three passes. Set the finished rocks along a walkway where they’ll catch daylight and read at dusk.
Boho Rainbow Quote Rock
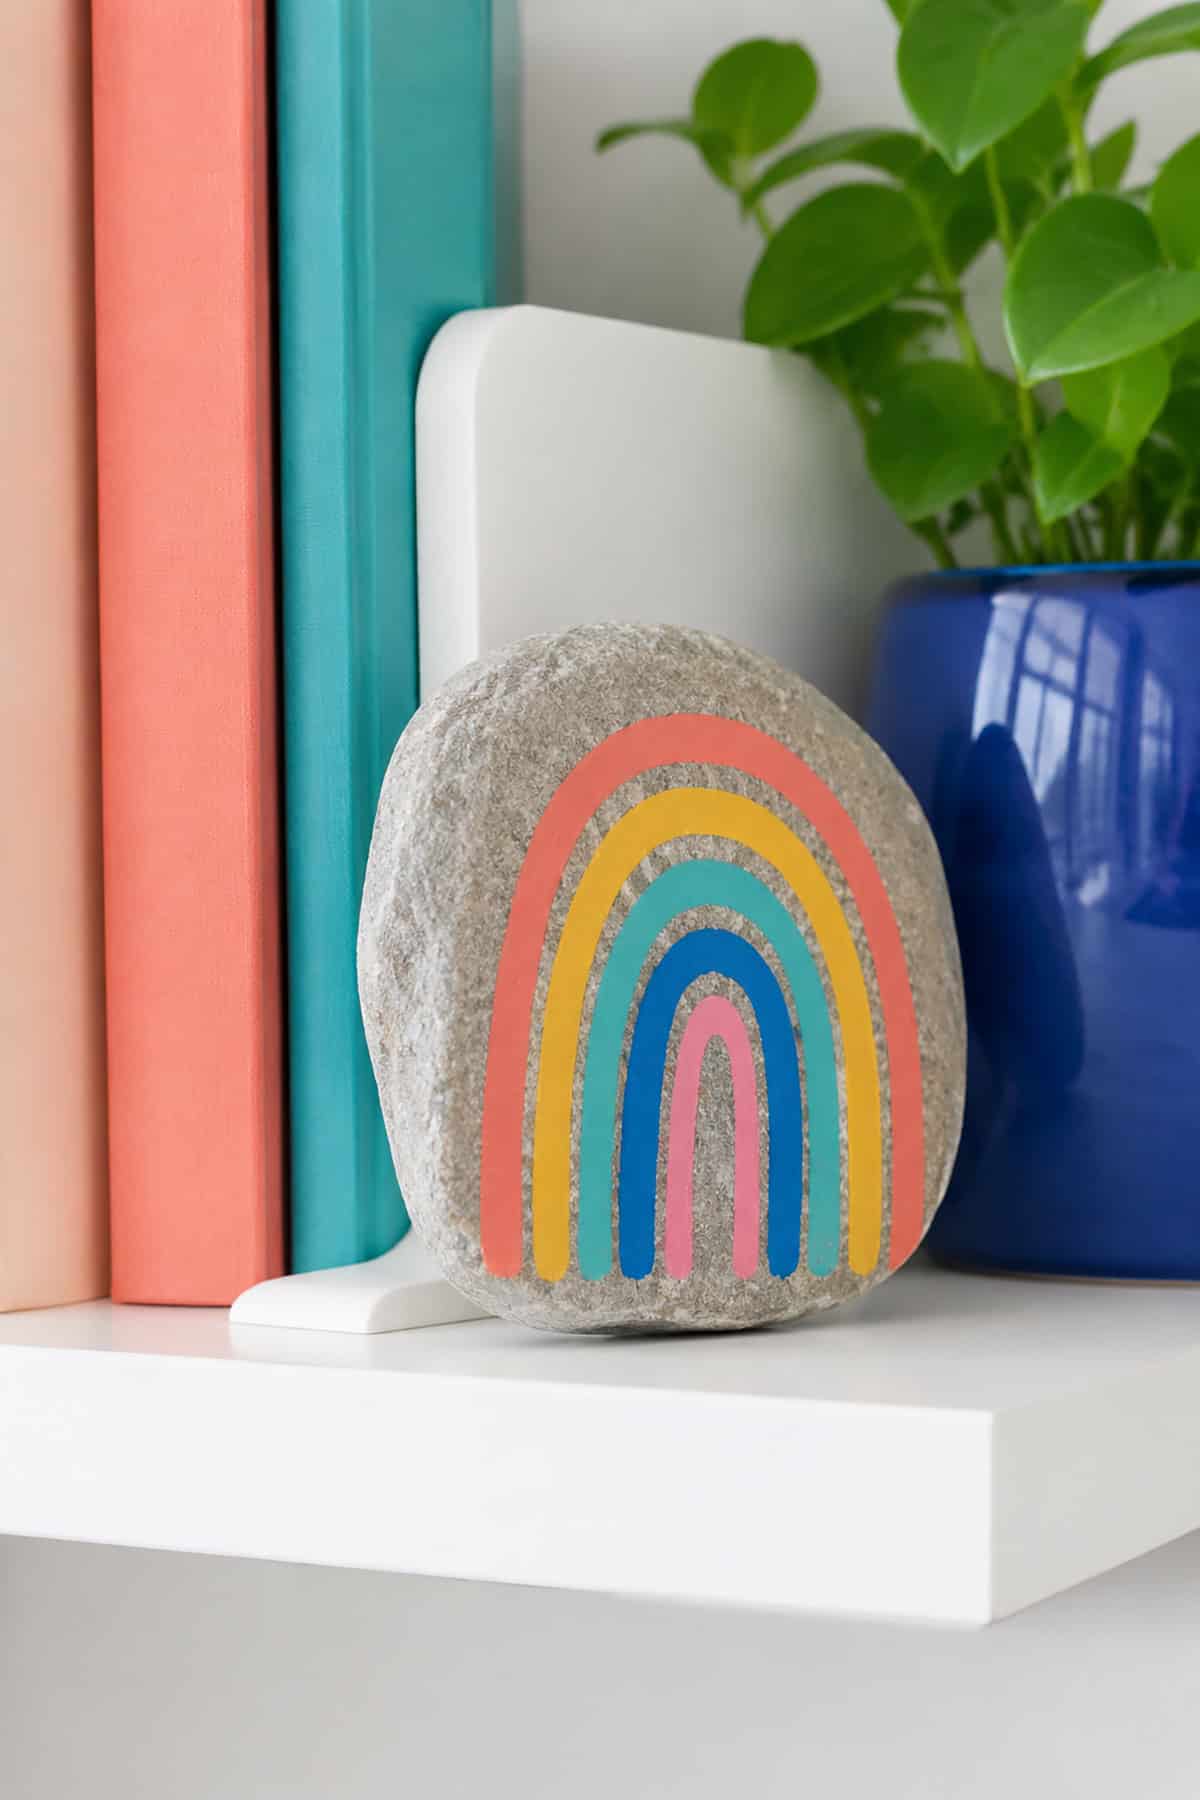
Terracotta, mustard, cream, and muted teal give the arc a grounded look rather than a primary-color one. Paint the rainbow as three or four thick bands across the top half, leaving the arc open at the bottom instead of closing it.
Below the arc, hand-letter a short phrase in charcoal gray. Two or three words hold up best at this scale, and slightly uneven letterforms fit the style better than perfect ones.
Camping Scene Rock
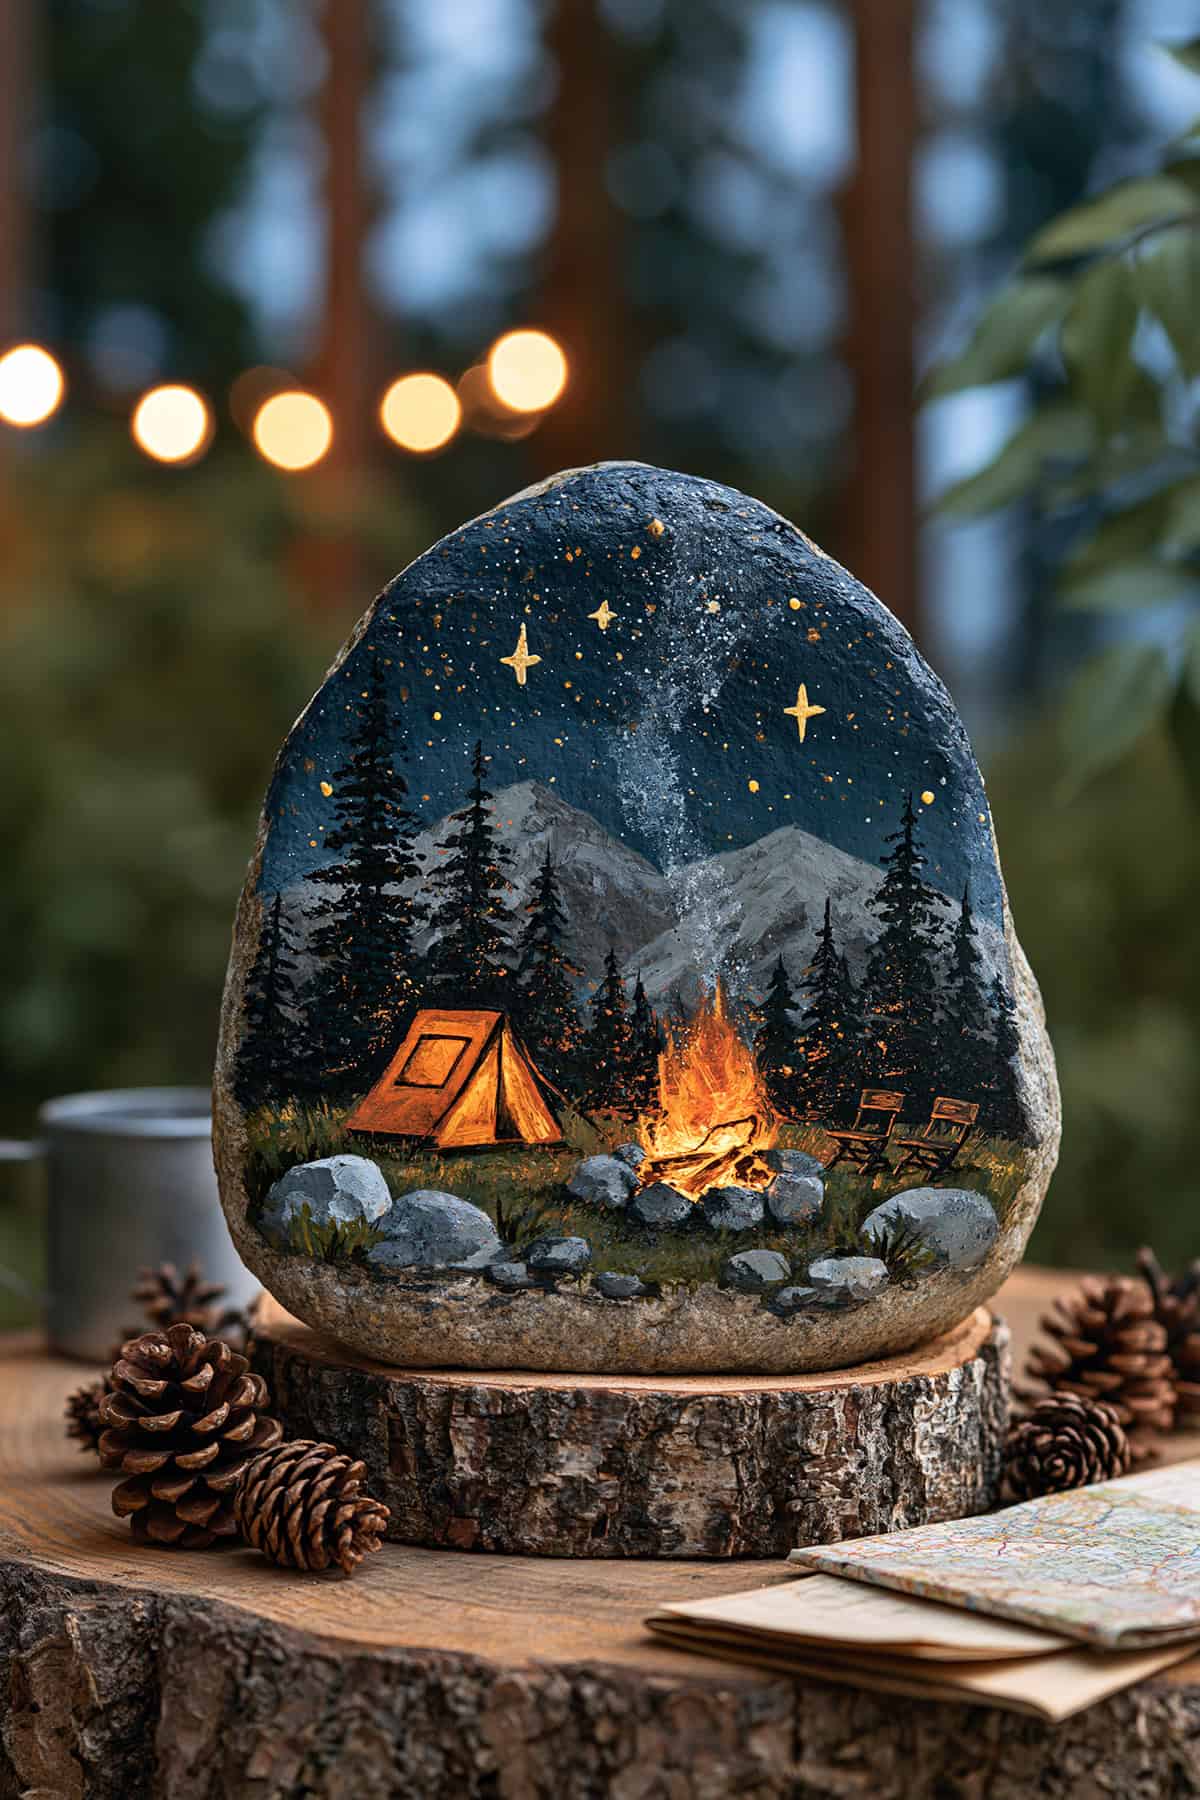
Build this one in layers from the back forward. Start with a gradient sky, deep indigo at the top fading to burnt orange near the horizon, then add a black treeline silhouette, then the tent shape in solid dark green.
A small campfire in orange and yellow anchors the foreground, with a few white specks for stars up top. The whole scene reads clearly because everything except the fire stays in silhouette.
Ocean Wave Rocks
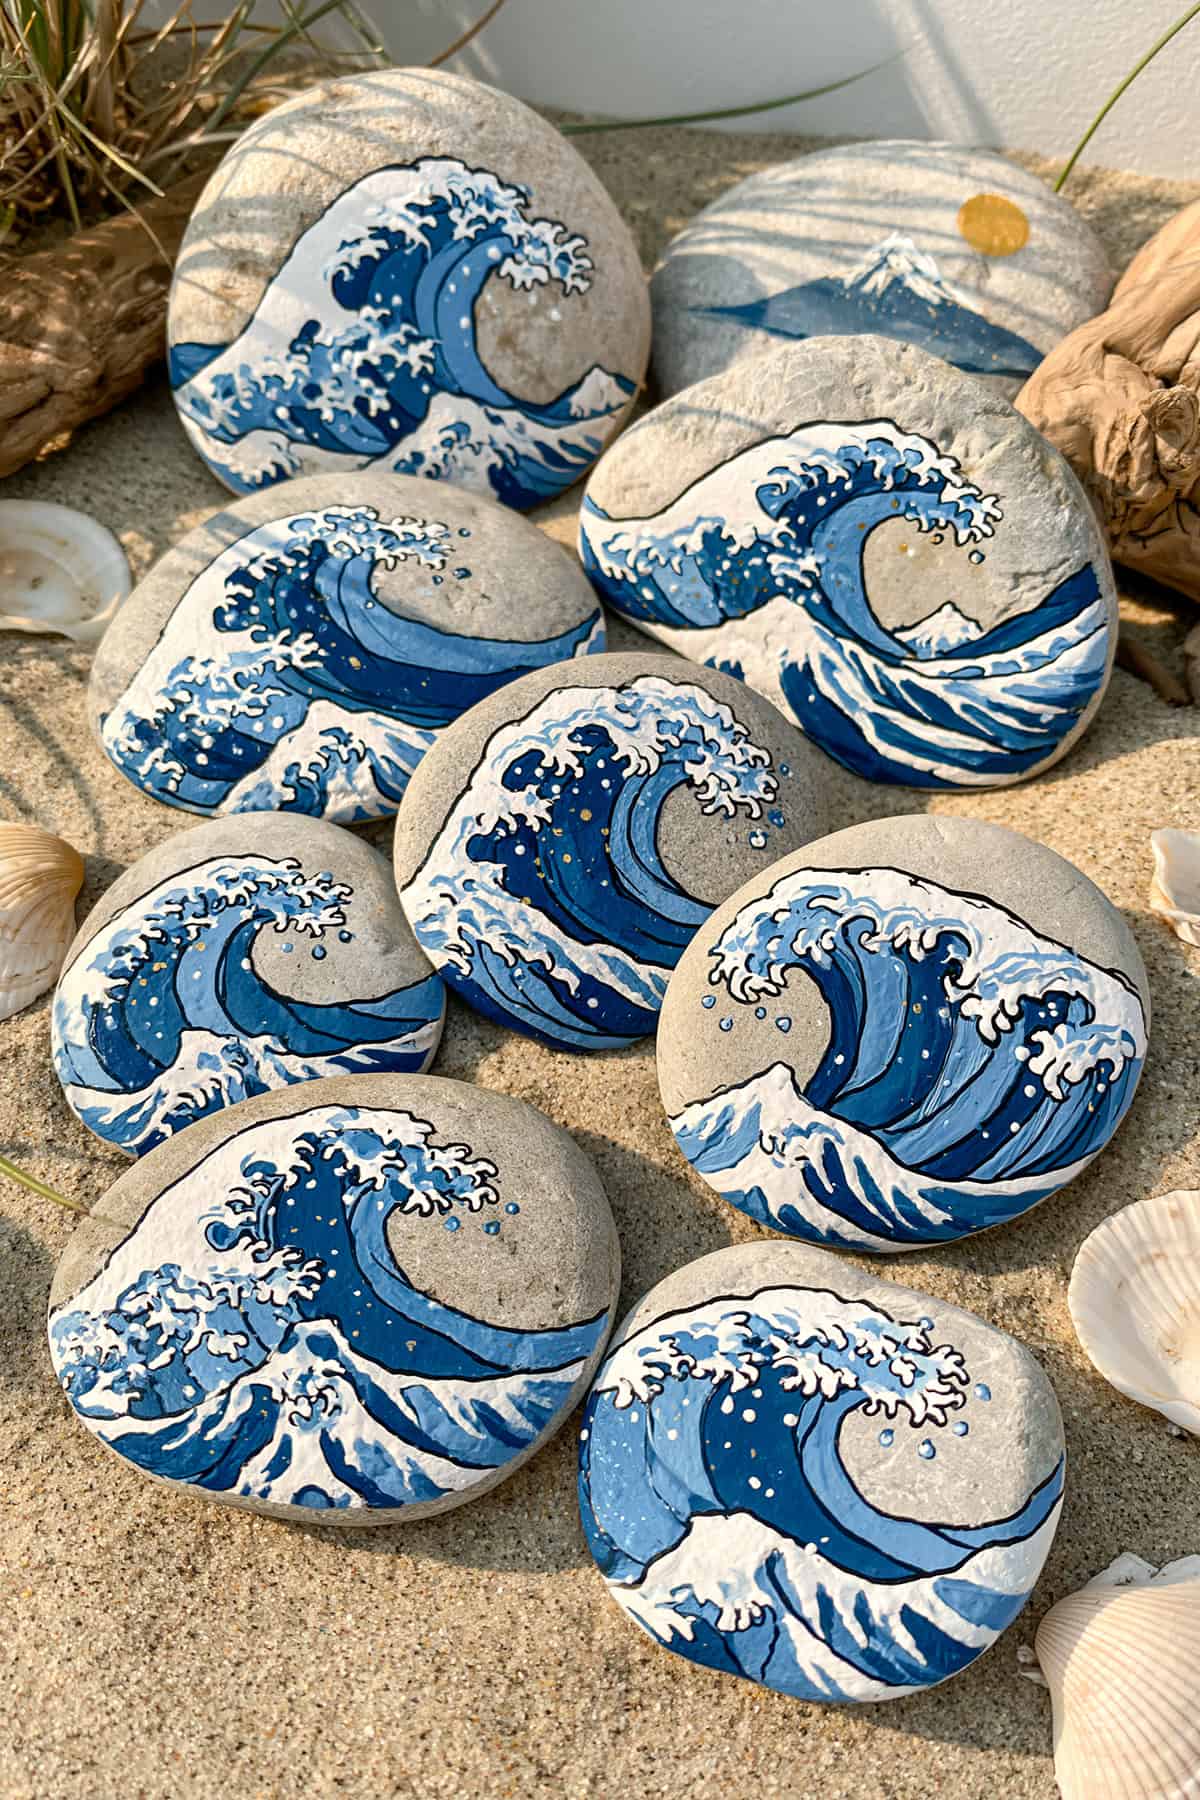
Wet-blend turquoise, teal, and deep blue directly on the stone while the paint is still workable, letting the colors bleed into each other. White foam goes on last as thin curling lines dragged with a liner brush.
A dry brush loaded with white and skimmed across the surface produces spray better than a loaded one. Three or four of these stones grouped together read as a moving swell.
Vegetable Garden Marker Rocks
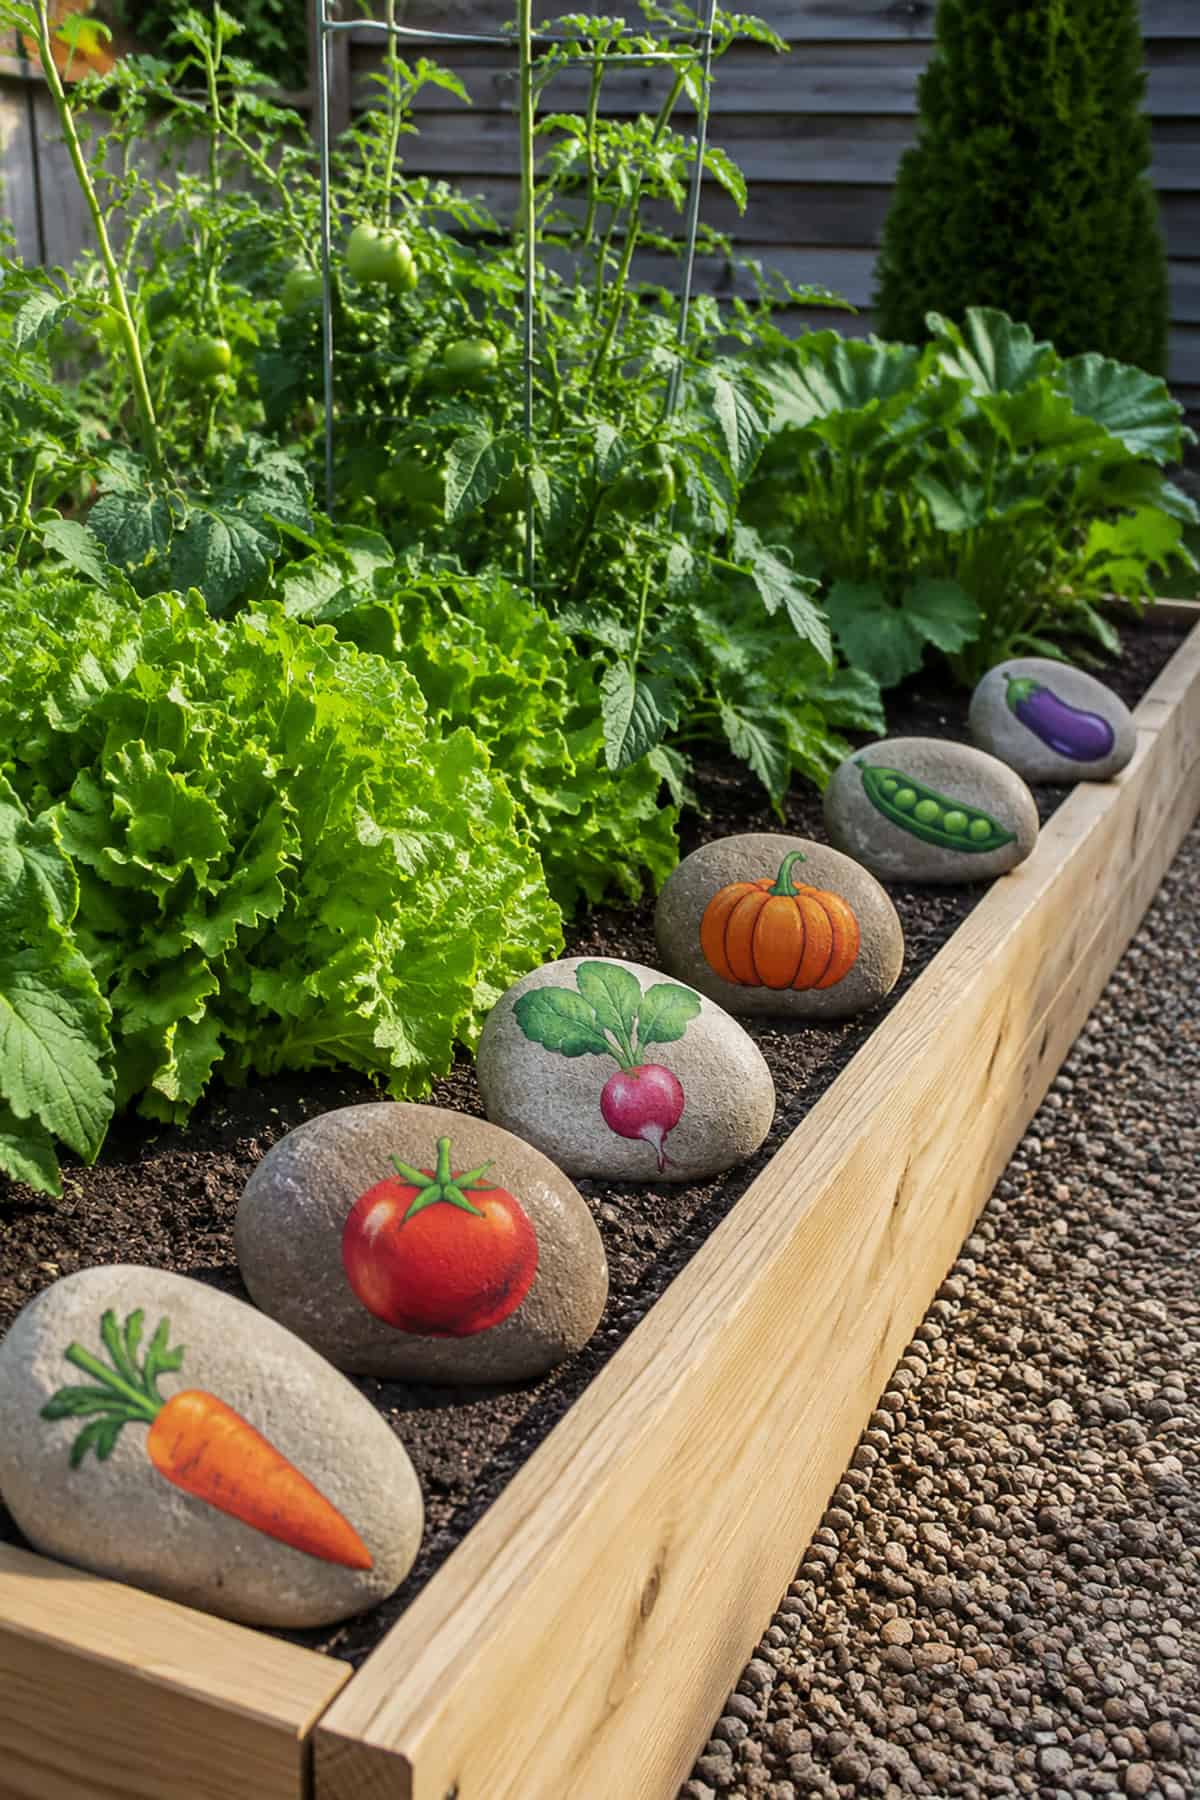
Function comes first here, so paint the vegetable large and the name small. A cream or pale gray base keeps the produce colors legible, and a black paint pen handles the lettering along the bottom curve.
Tomato, carrot, zucchini, and lettuce are the easiest to render recognizably with three colors each. Push half the stone into the soil at the row’s head so the painted face angles up toward you.
Underwater Sea Turtle Rock
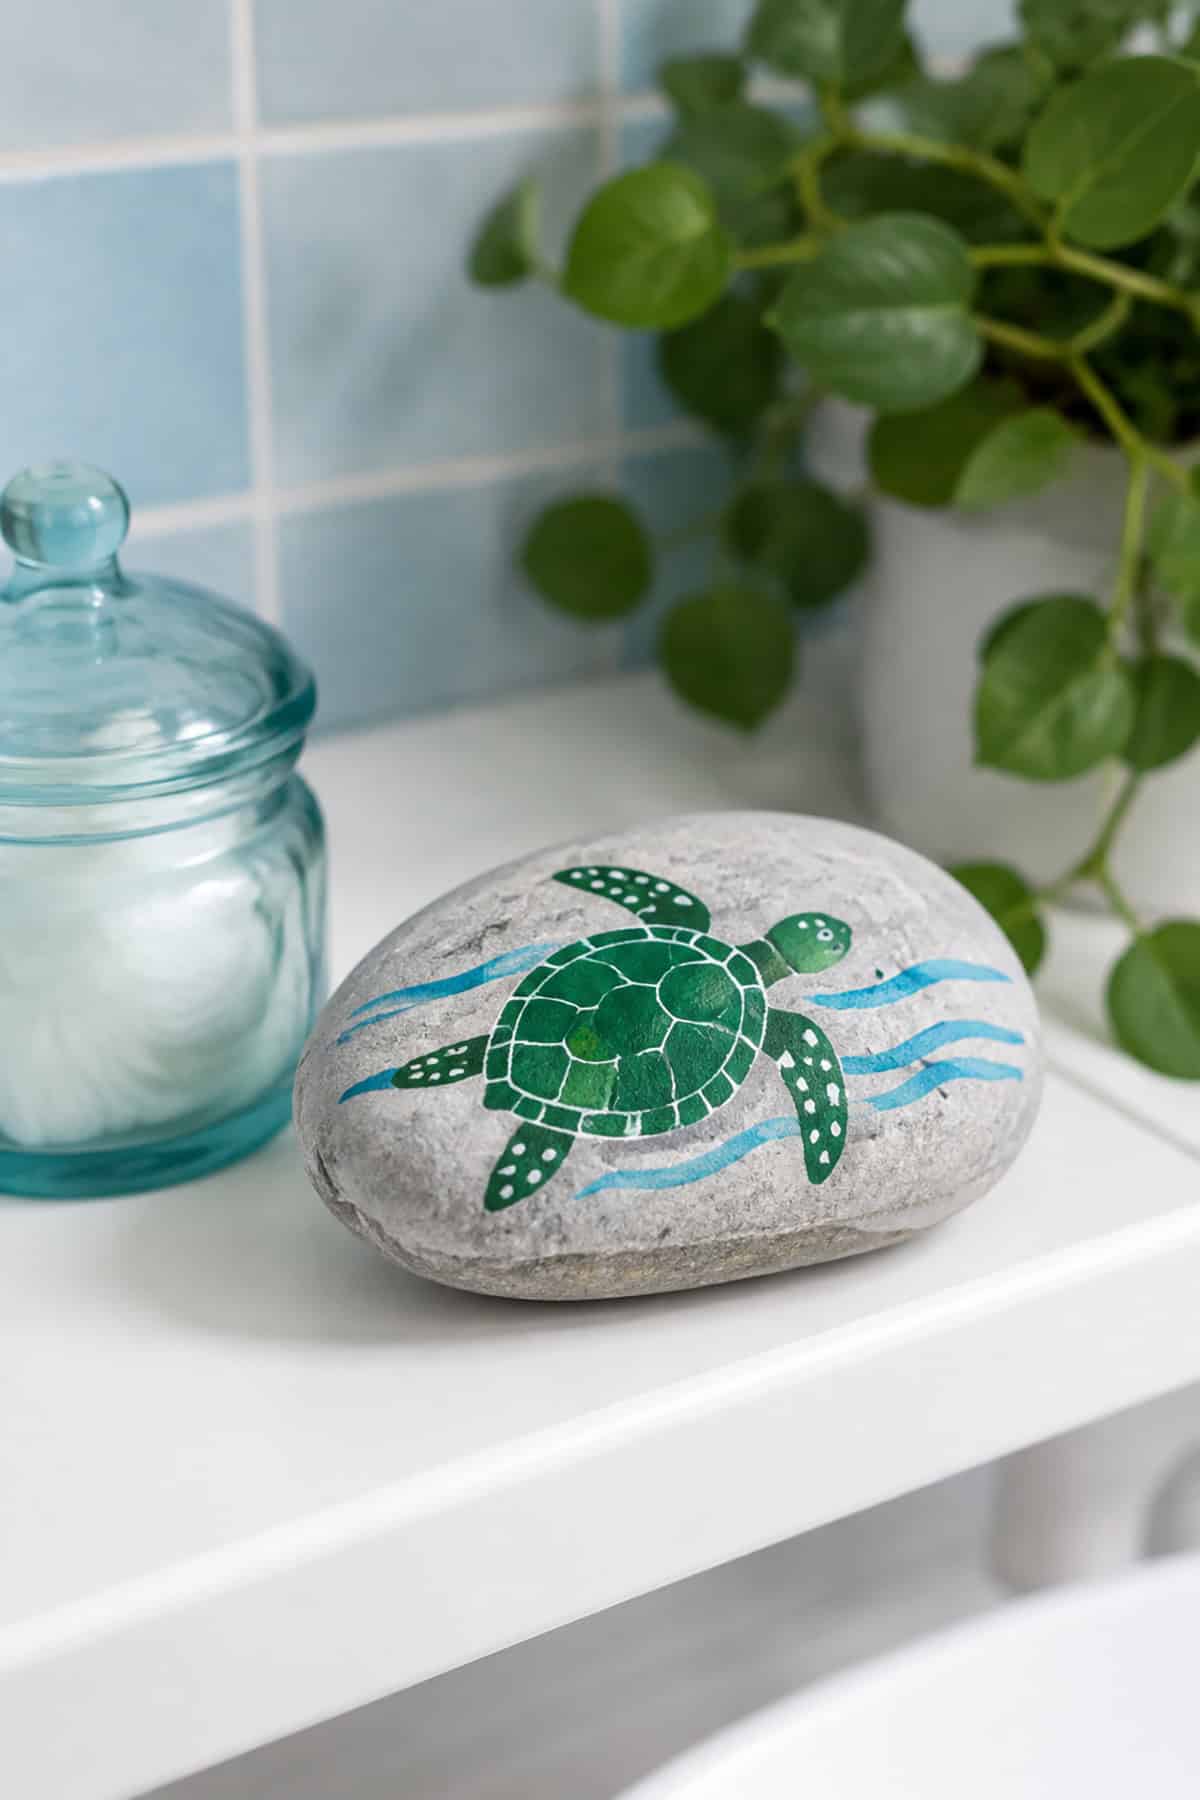
An oval stone becomes the shell almost automatically. Block in the carapace in olive and warm brown, then divide it into a center row of hexagons ringed by smaller scutes, outlining each in a darker brown.
Flippers and head extend past the shell in a lighter sage. Fill the surrounding background with pale aqua and a few white bubble dots to place the turtle in water.
Tiny Cottage Village
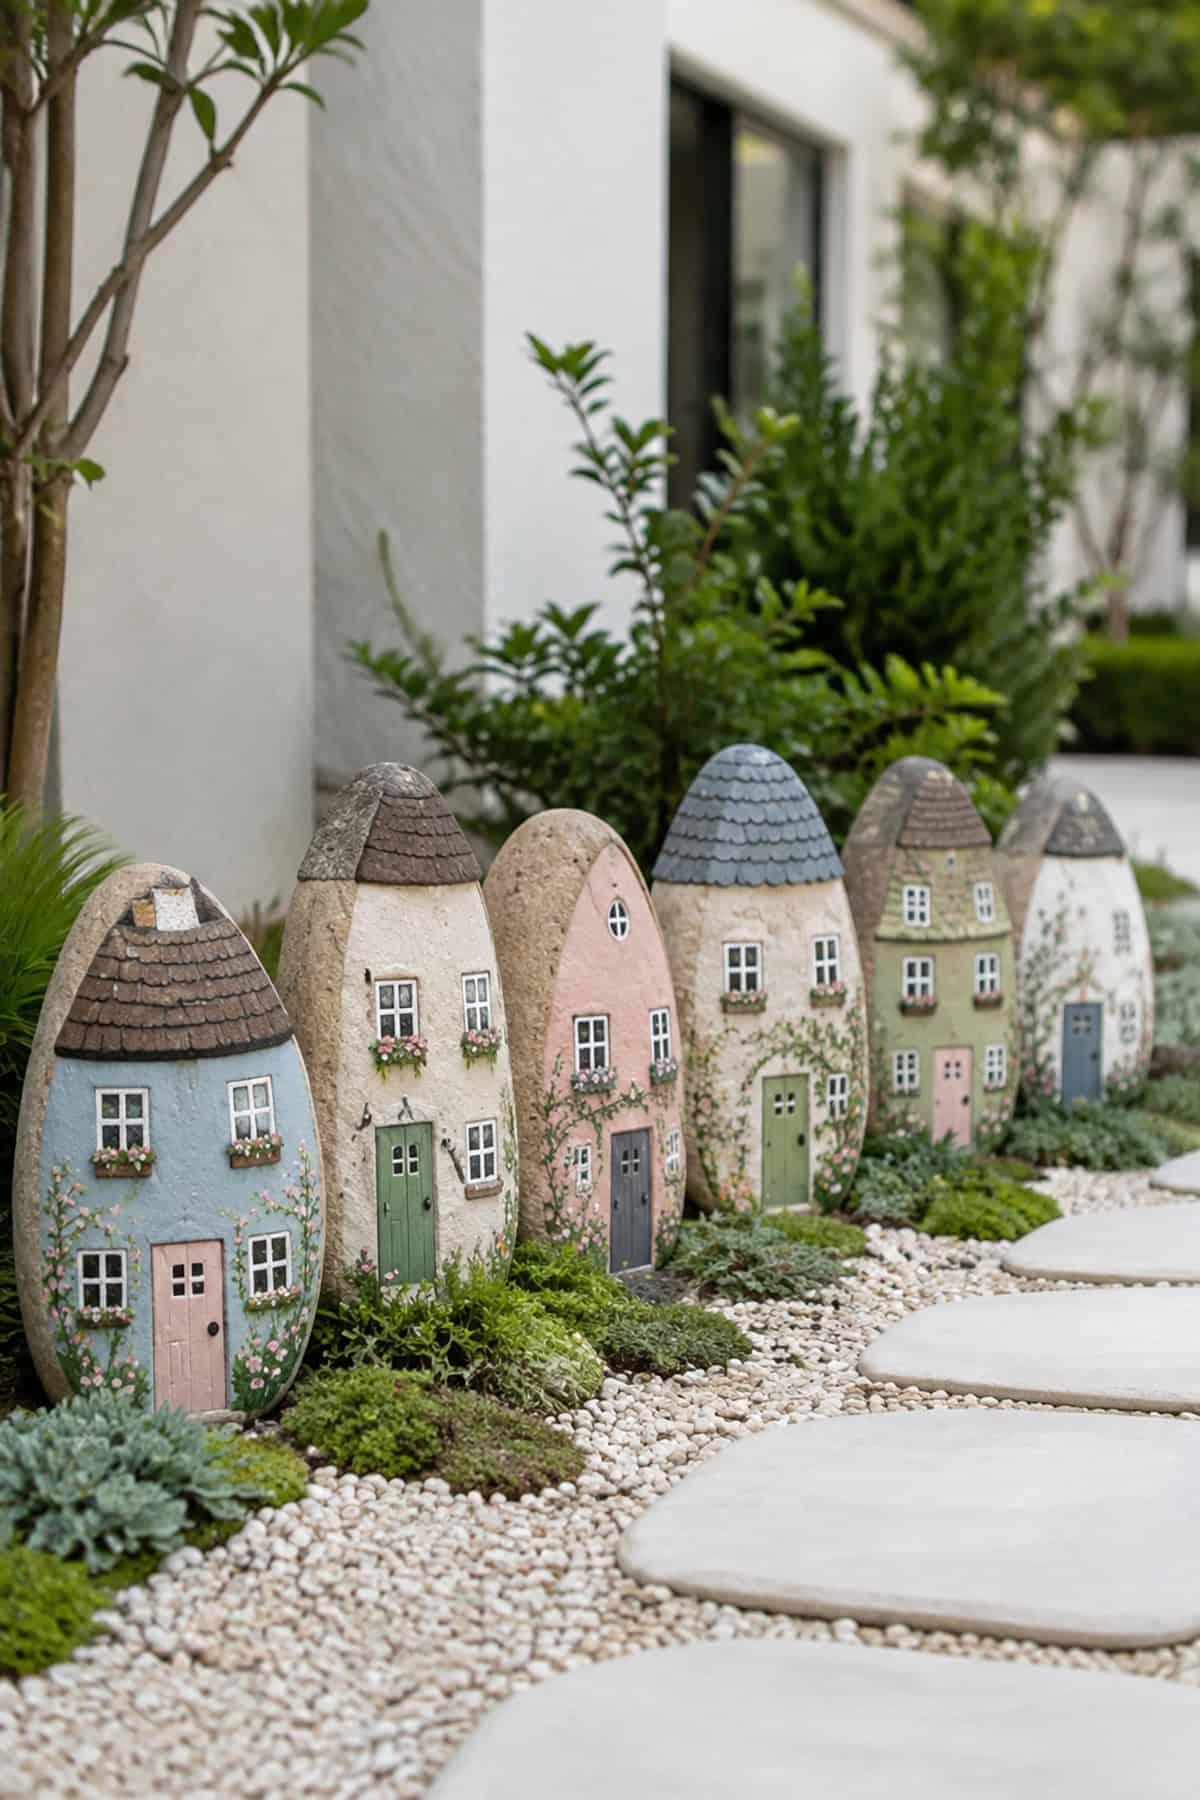
Smaller and rounder than the row-house version, these cottages sit low and wide with steep thatch-colored roofs. Use warm cream, pale blue, and blush for the walls, and a soft brown stippled roof applied with a stiff dry brush.
Add a climbing vine up one wall with a fine green liner brush and dot the flowers in white or pink. A cluster of five looks best arranged in a loose circle rather than a straight line.
Tiny Book Cover Rocks
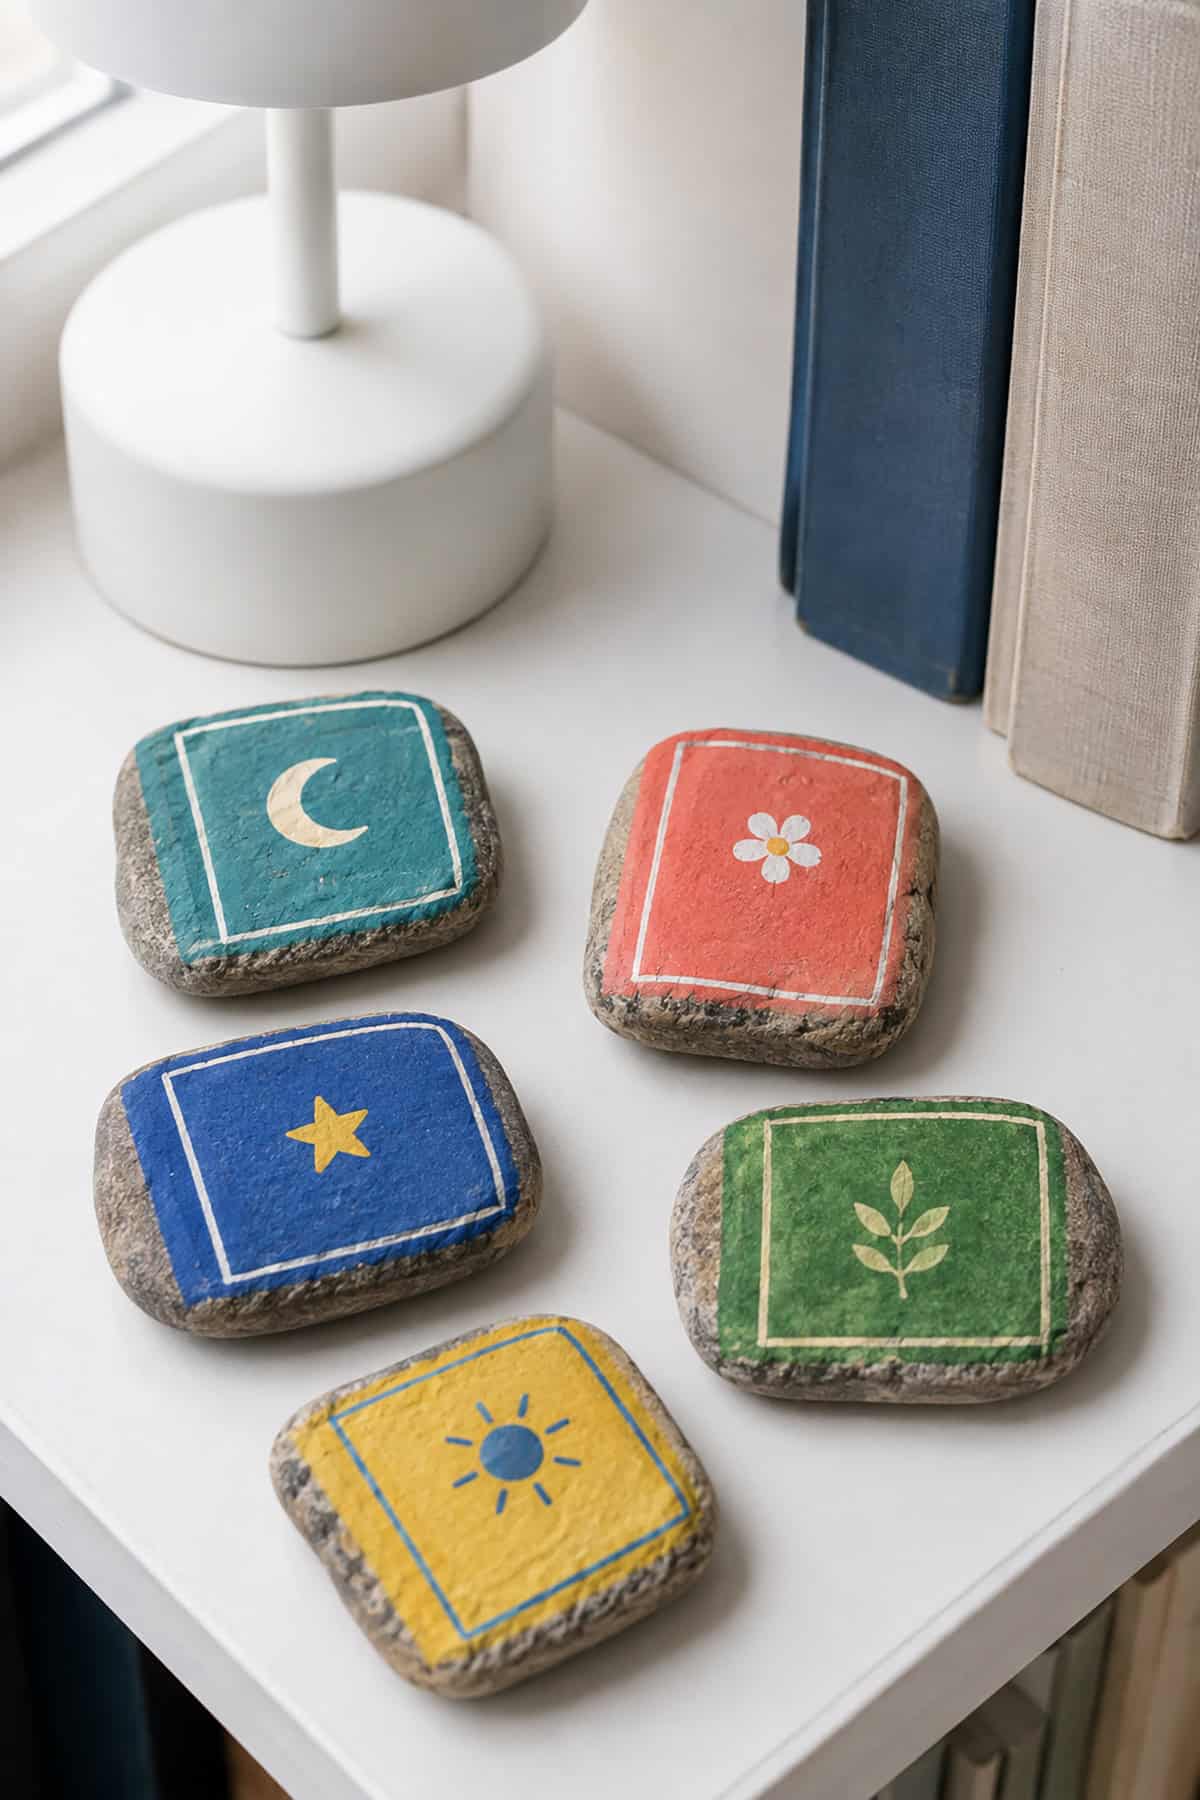
Flat rectangular stones handle this design best. Paint the whole face in a single saturated color, then outline a thin border a quarter inch inside the edge to suggest a hardcover.
Title text goes in gold or white paint pen, centered in the upper third. Paint the narrow side edge in cream with fine horizontal lines to mimic page stacks, which sells the illusion completely.
Sunflower Field Stone
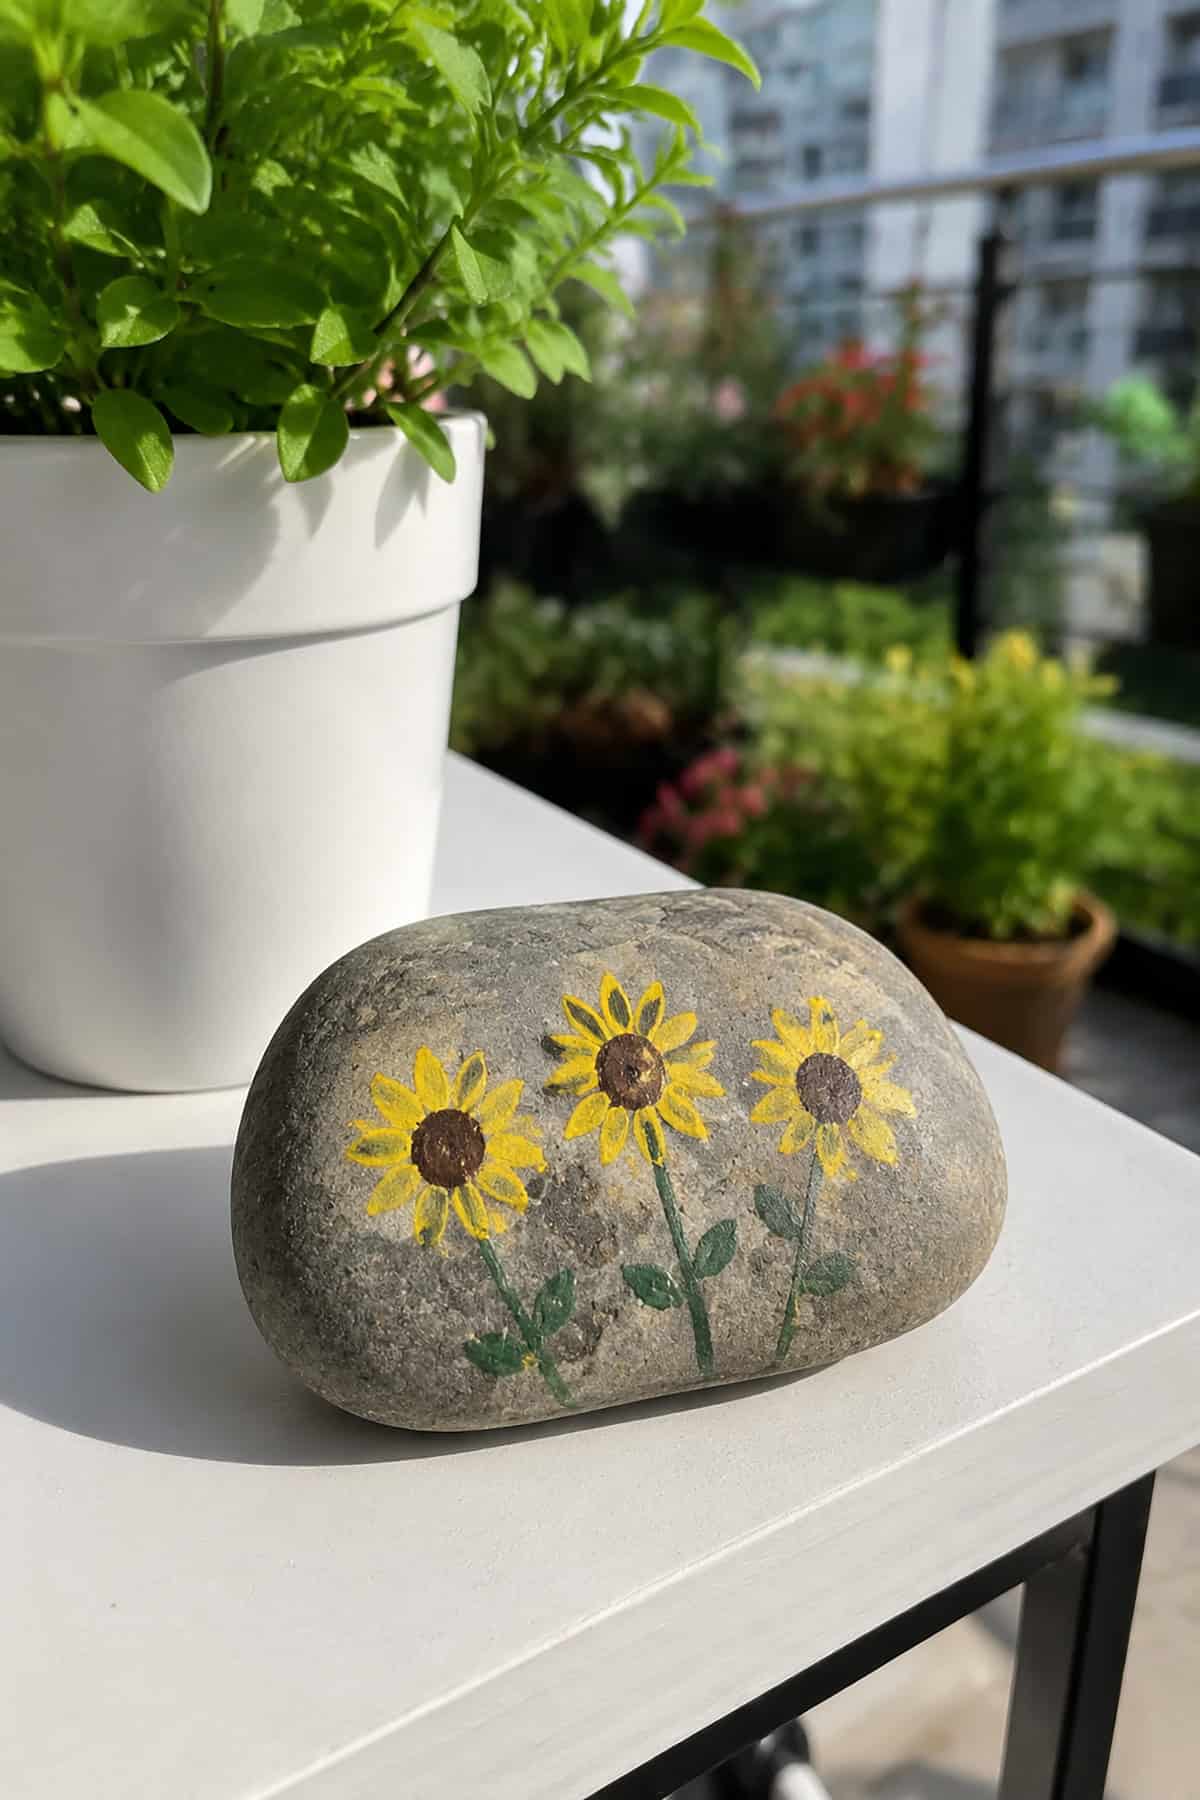
Divide the stone horizontally: warm blue sky above, a band of green stems below. The sunflower heads sit along that dividing line, painted as brown-centered discs with short yellow petals radiating outward.
Vary the head sizes and let one or two overlap the sky. Stipple the brown centers with a dry brush and a touch of burnt umber so they don’t read as flat circles.
Strawberry Garden Rocks
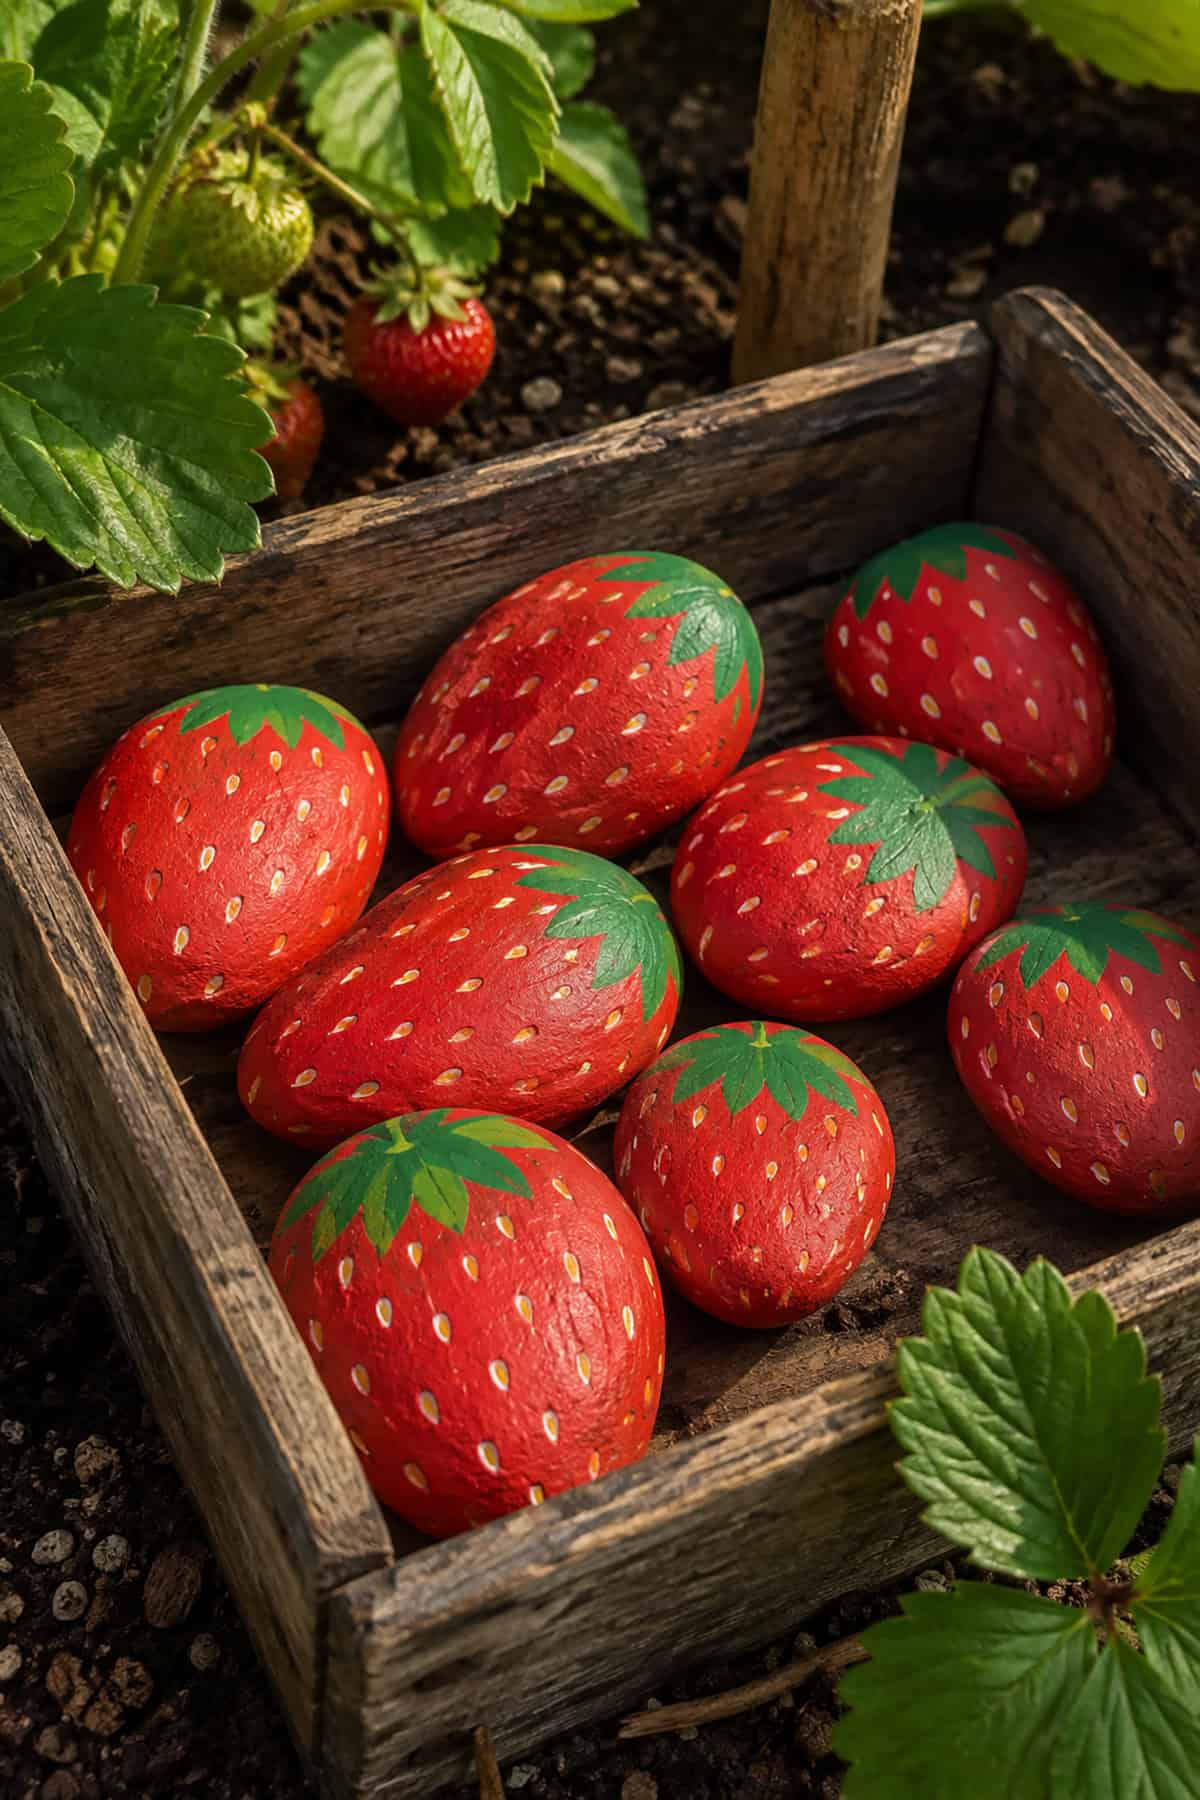
A rounded, slightly tapered stone already has the fruit shape. Cover it in a true red with a hint of crimson at the base, then add seeds as small yellow-and-black comma marks arranged in staggered diagonal rows.
The green calyx caps the top in five or six pointed leaves. Painting the seeds slightly sunken, each with a fine dark crescent below it, gives the surface real dimension.
Storybook Mushroom Houses
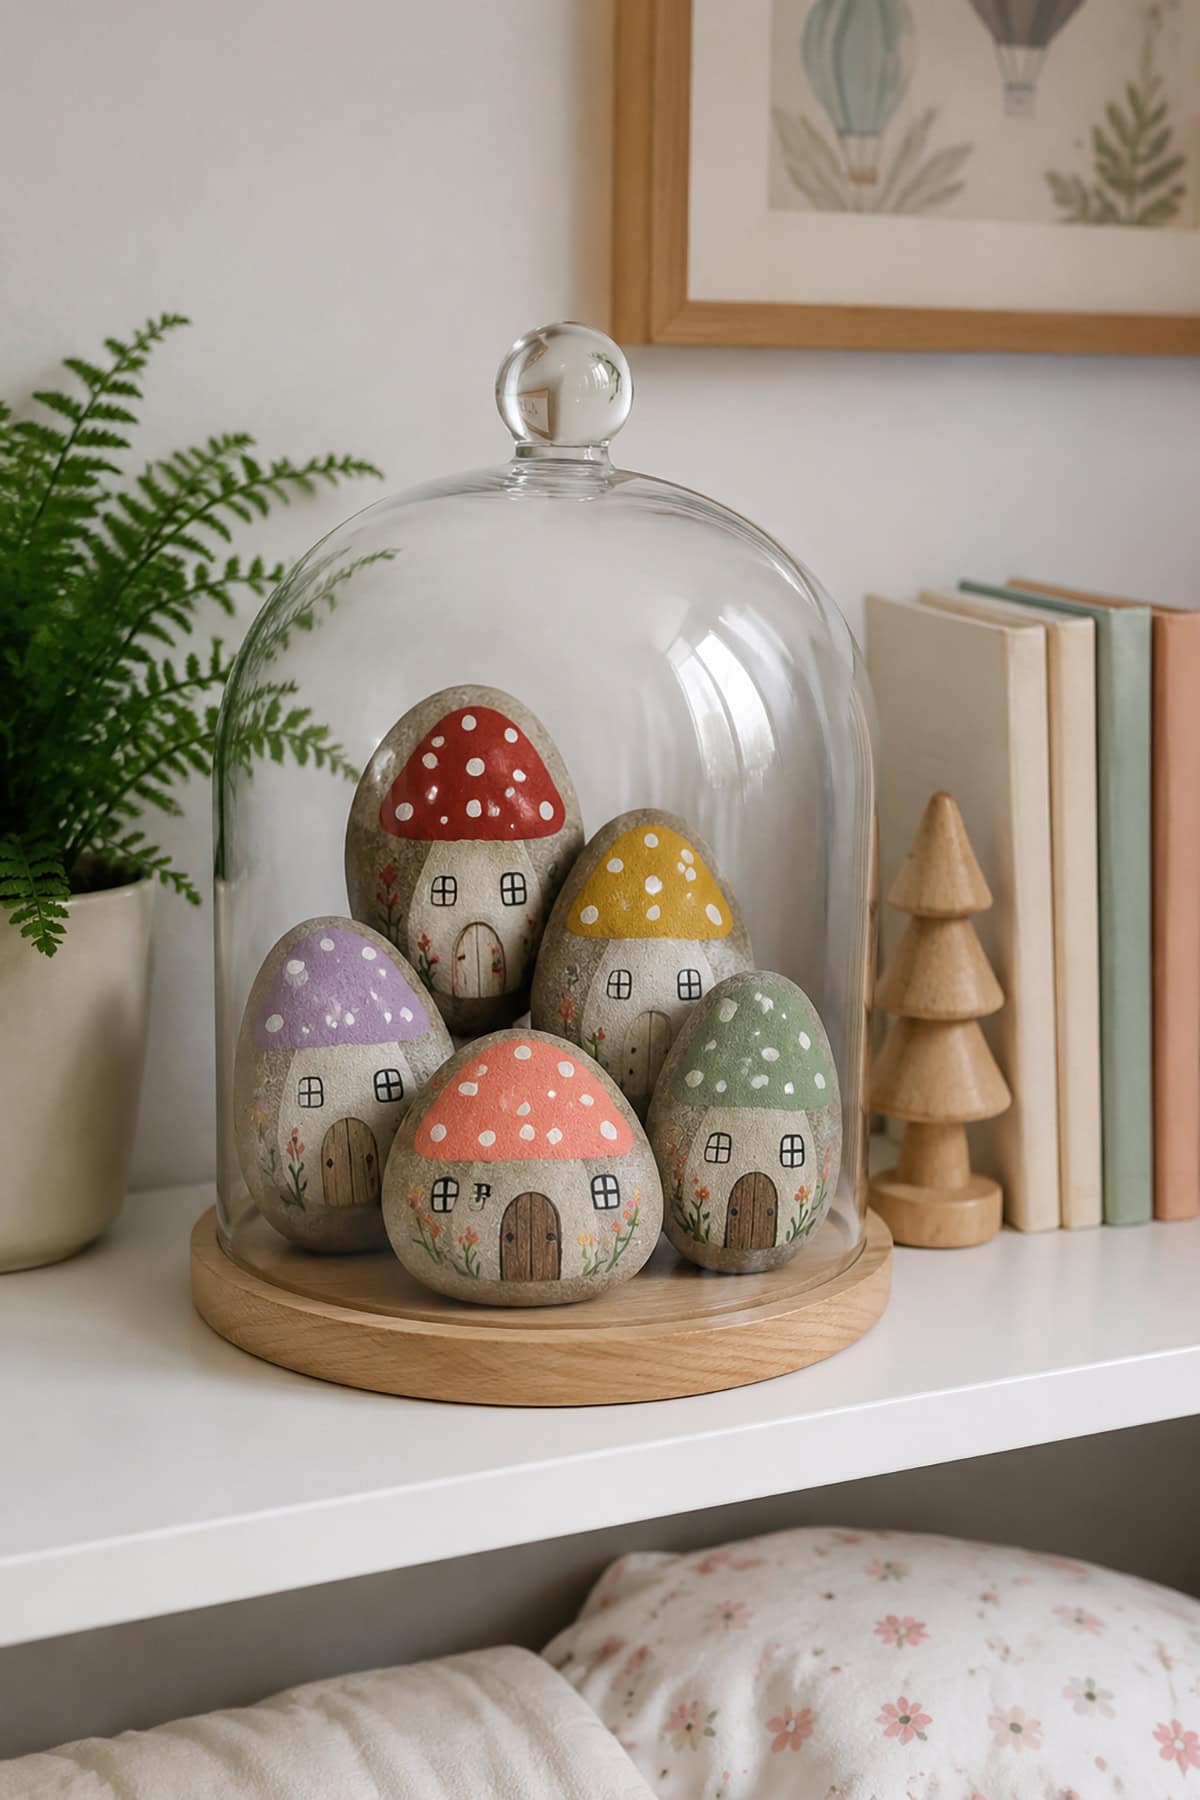
Cap and stem split the stone roughly in half. Red or dusty rose caps with irregular white dots sit above a cream stem, and the door and windows get carved out of that stem in warm brown.
A tiny arched door with a round handle placed slightly off-center looks more storybook than a perfectly centered one. Grass tufts at the base ground the house.
Snowman Family Stones

Three stones in descending sizes, each one snowman, painted on a soft gray-blue base rather than white so the snow figure stands out. Build the body with cream and shadow the lower curves in pale blue-gray.
Coal eyes and buttons go in flat black, the carrot nose in orange, and each scarf in a different plaid or stripe. Uneven scarves and slightly crooked stick arms read as handmade in a good way.
Sleeping Woodland Fox
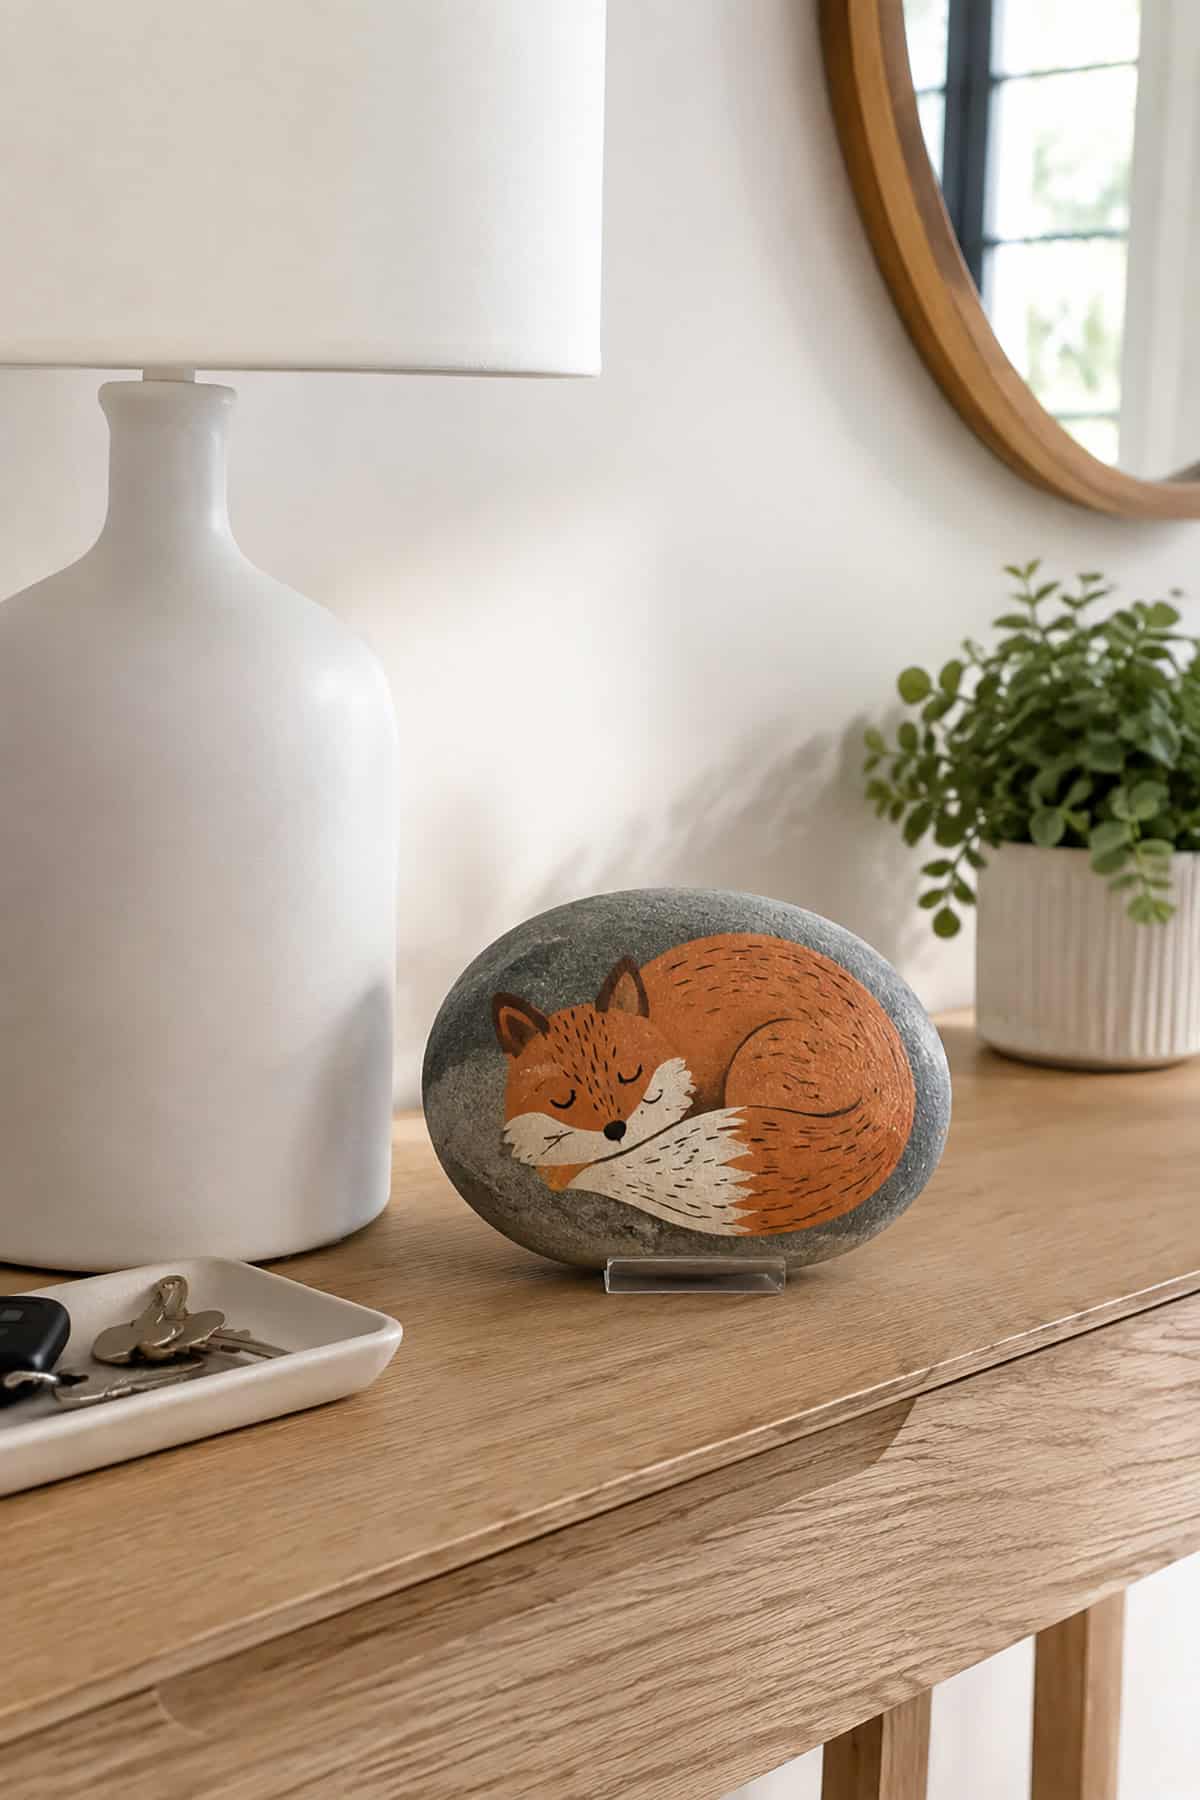
Curl the fox into a tight spiral so the tail wraps the body and the nose tucks under it. Rust orange dominates, with cream on the tail tip, chest, and inner ears, and a dark brown liner for the closed eye and paw separations.
Dry-brush lighter orange over the fur direction once the base dries. Angling those strokes to follow the curl is what makes it read as fur rather than a flat shape.
Realistic Animal Portrait Rocks
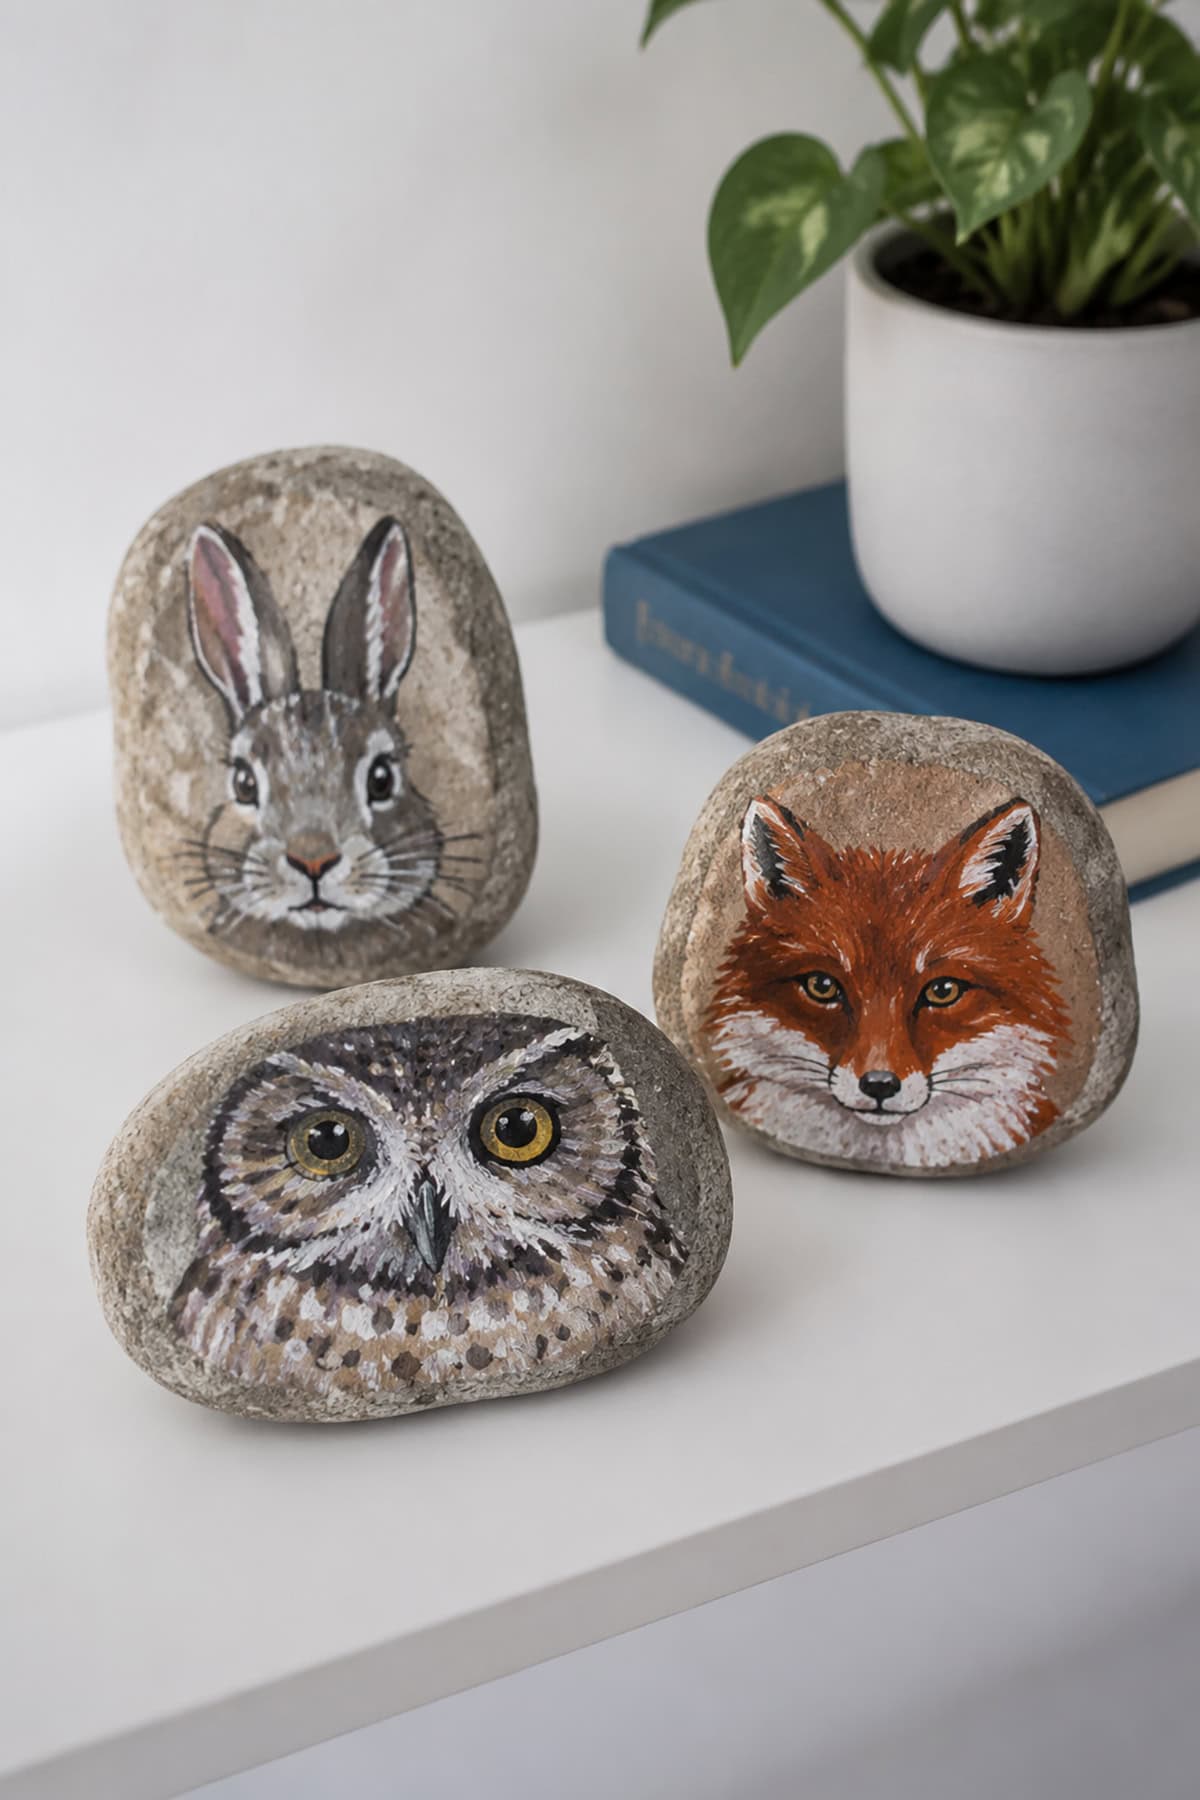
This is the most demanding project here and rewards reference photos. Work from a black or dark gray base, block in the lightest fur masses first, then build detail with a size 0 liner brush and progressively lighter values.
Eyes decide everything. Paint the iris, add a dark pupil, then place a single white highlight dot in the same position on both eyes and stop there.
Rainbow Weather Rocks
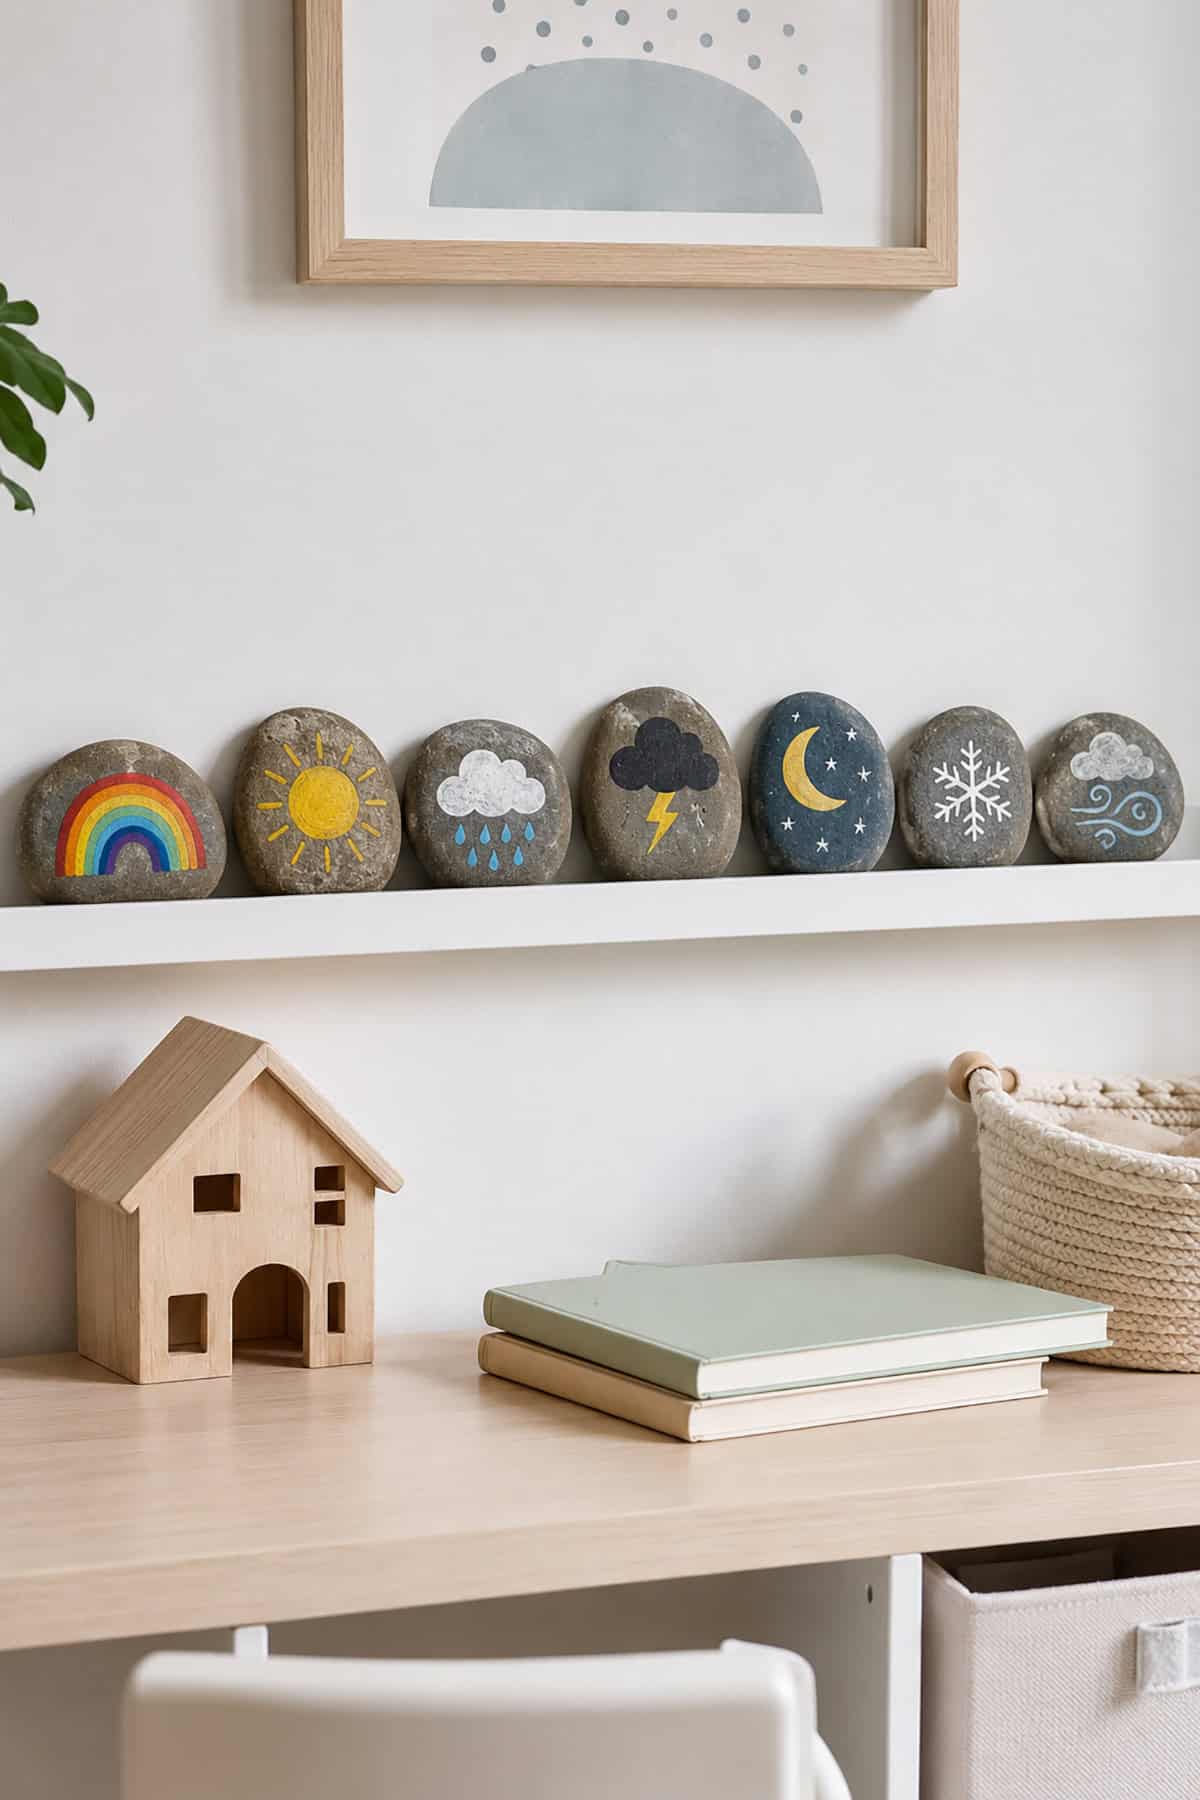
A set of four or five stones, each showing one weather state: sun, cloud, rain, snow, rainbow. Keep the icons flat and graphic against a white or pale sky base with a thin dark outline.
These work as a teaching set for a classroom shelf or a preschool morning routine. Consistency across the set matters more than detail on any single stone.
Painted Stone Tic-Tac-Toe Set
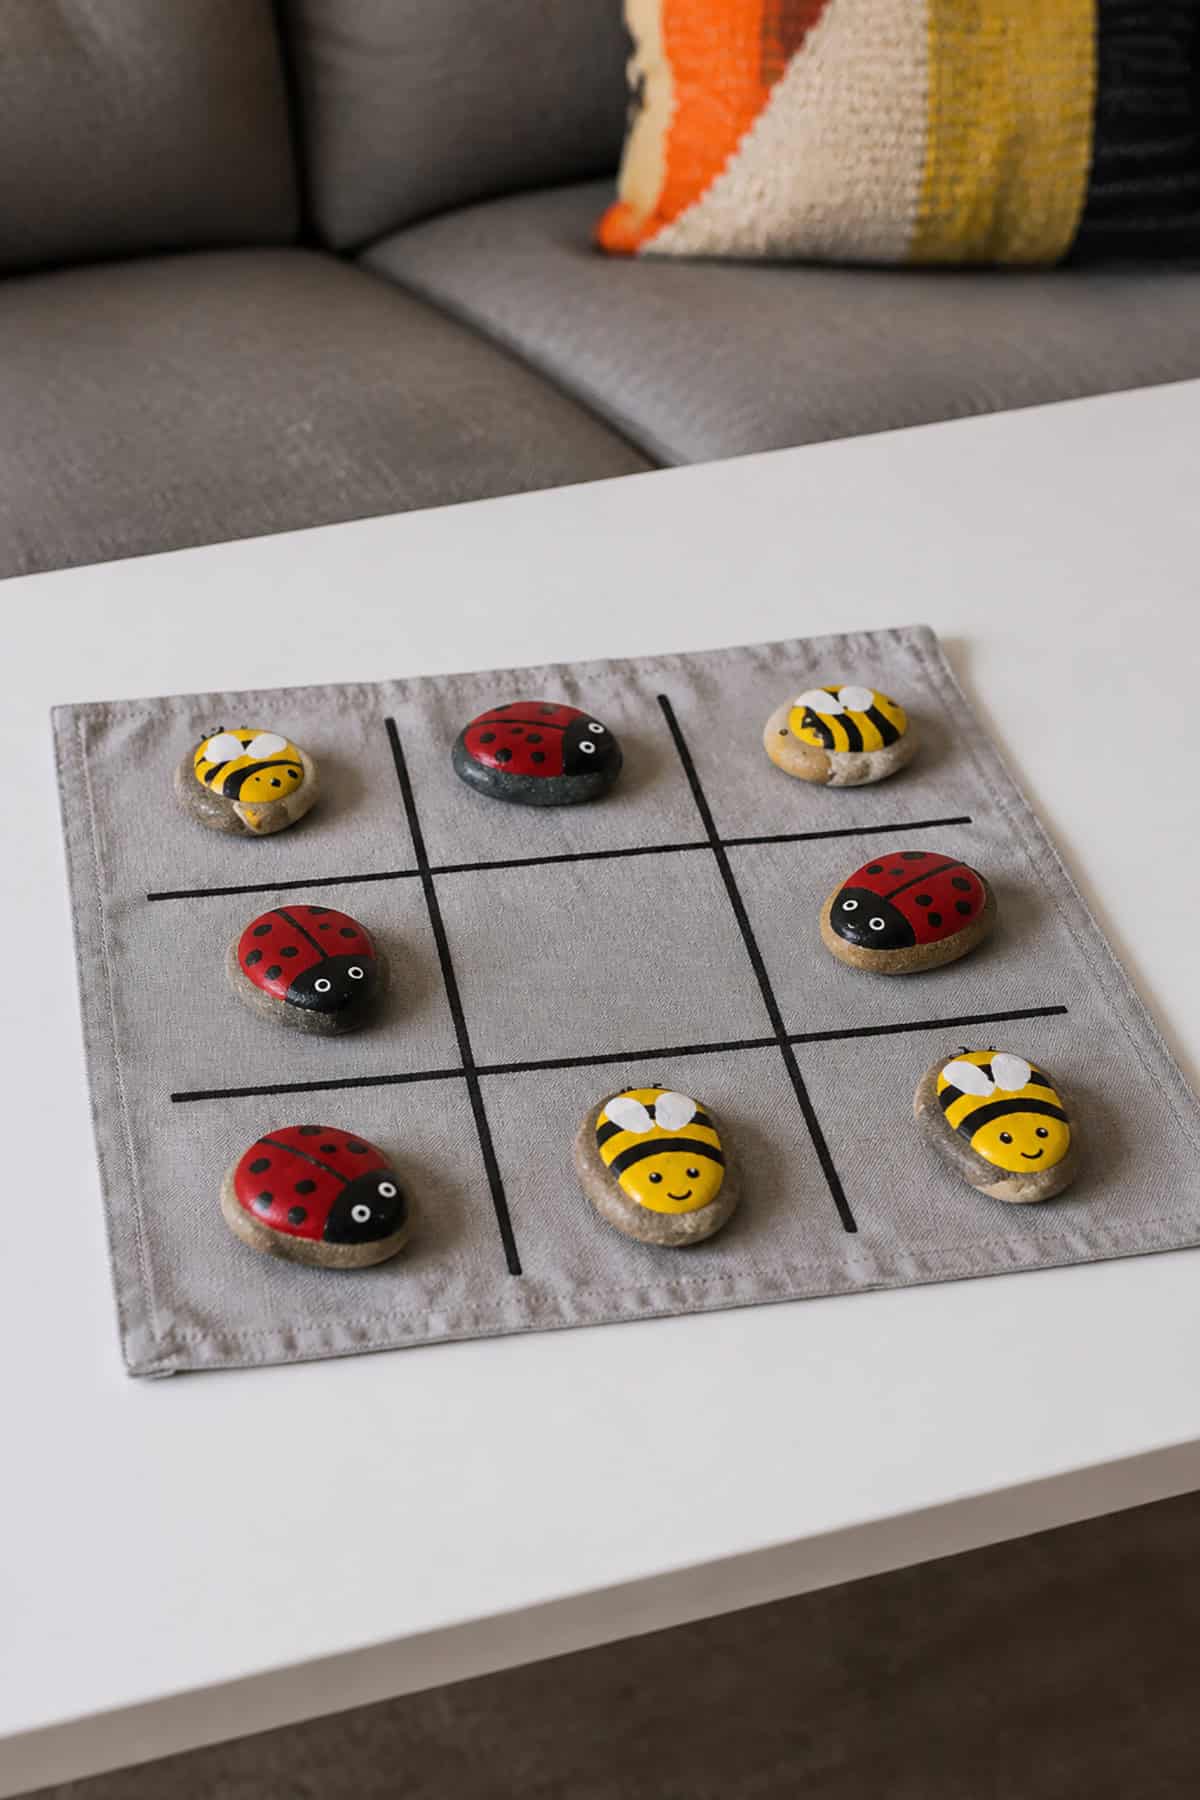
Ten stones of similar size, five in one design and five in another. Skip literal X’s and O’s in favor of paired opposites: bees and ladybugs, suns and moons, foxes and owls.
Keep the two sets clearly distinct in dominant color so players read them instantly. A drawstring bag and a nine-square grid painted on a wood slice complete the set as a gift.
Painted Rock Succulents
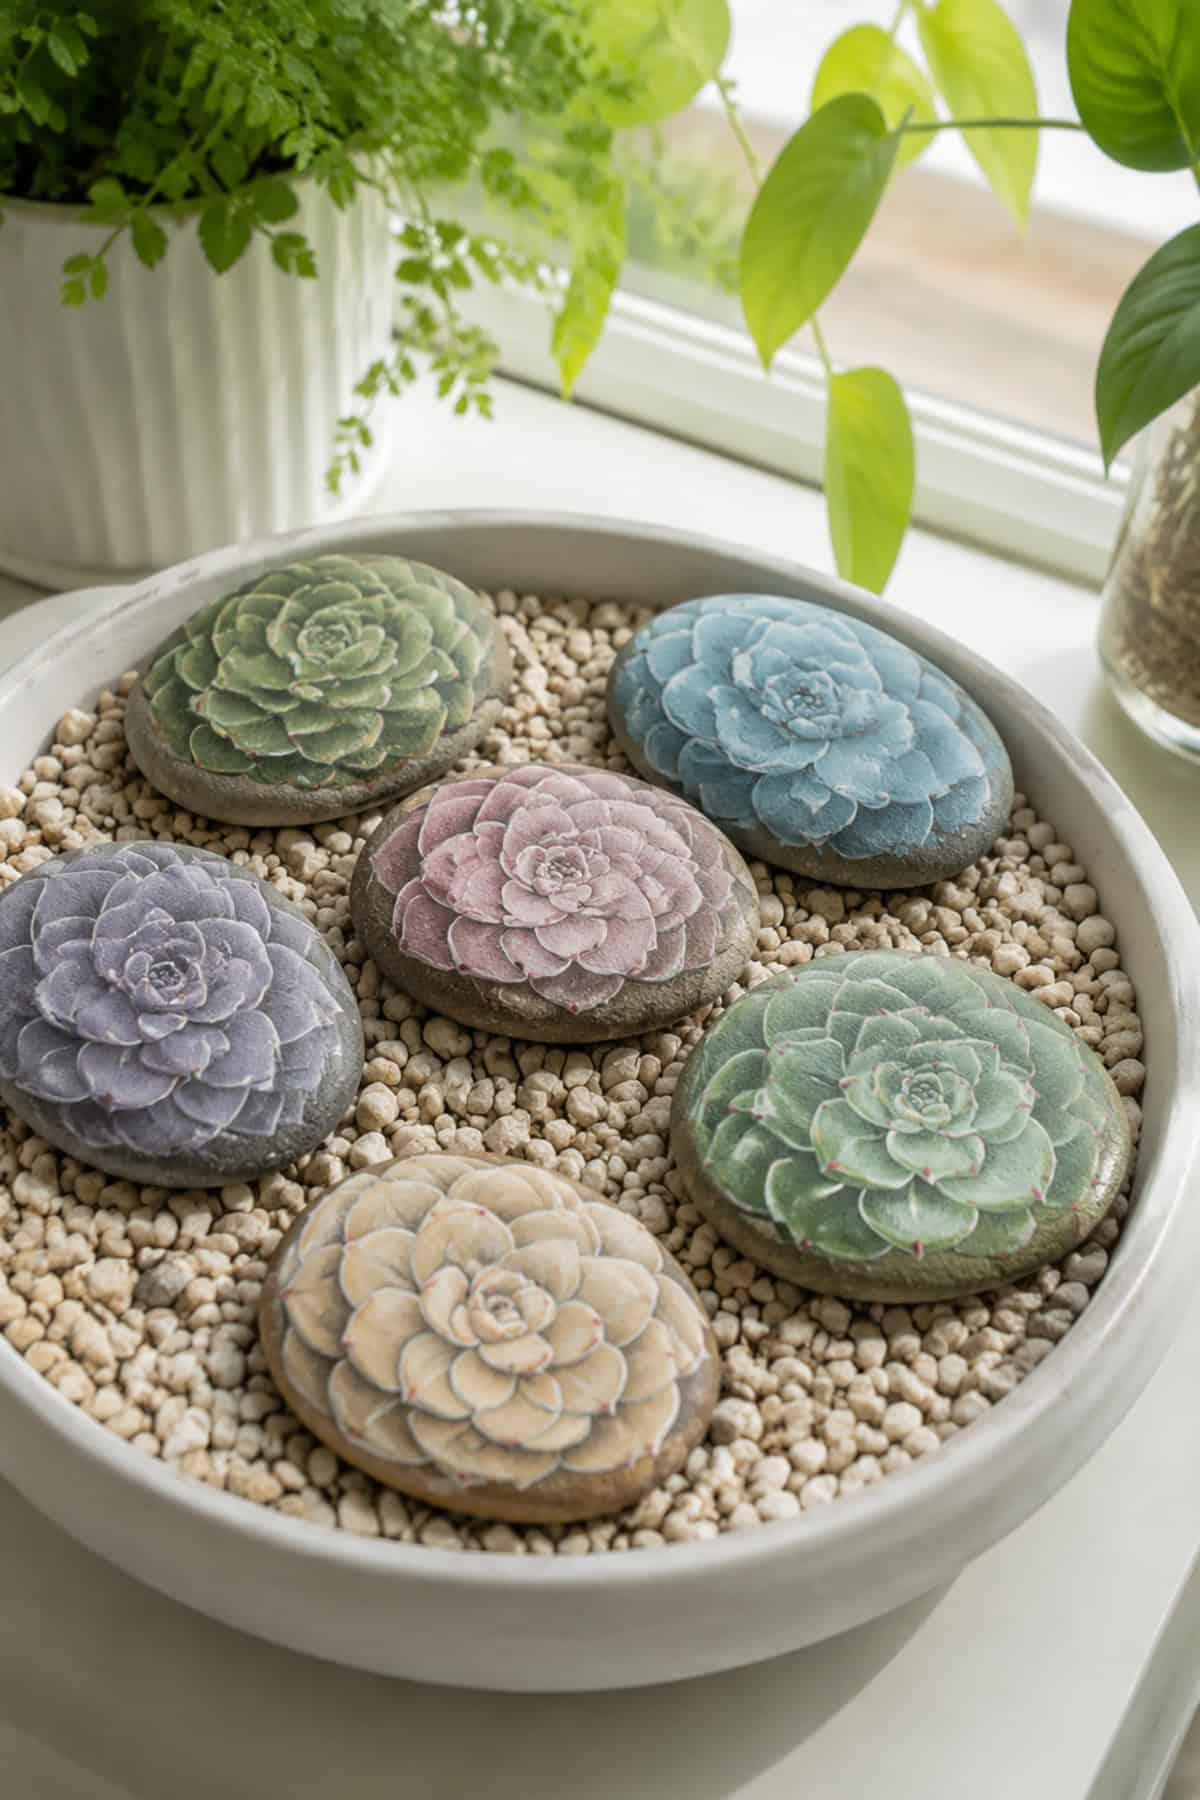
Echeveria rosettes translate to stone beautifully. Start with a center dot and work outward in rings of pointed leaves, each ring slightly larger, using sage green with a blush pink flush at the tips.
A second stone painted as a haworthia, dark green with white horizontal bands, varies the arrangement. Nest several among real potted plants where they hold color year-round.
Miniature Food Rocks
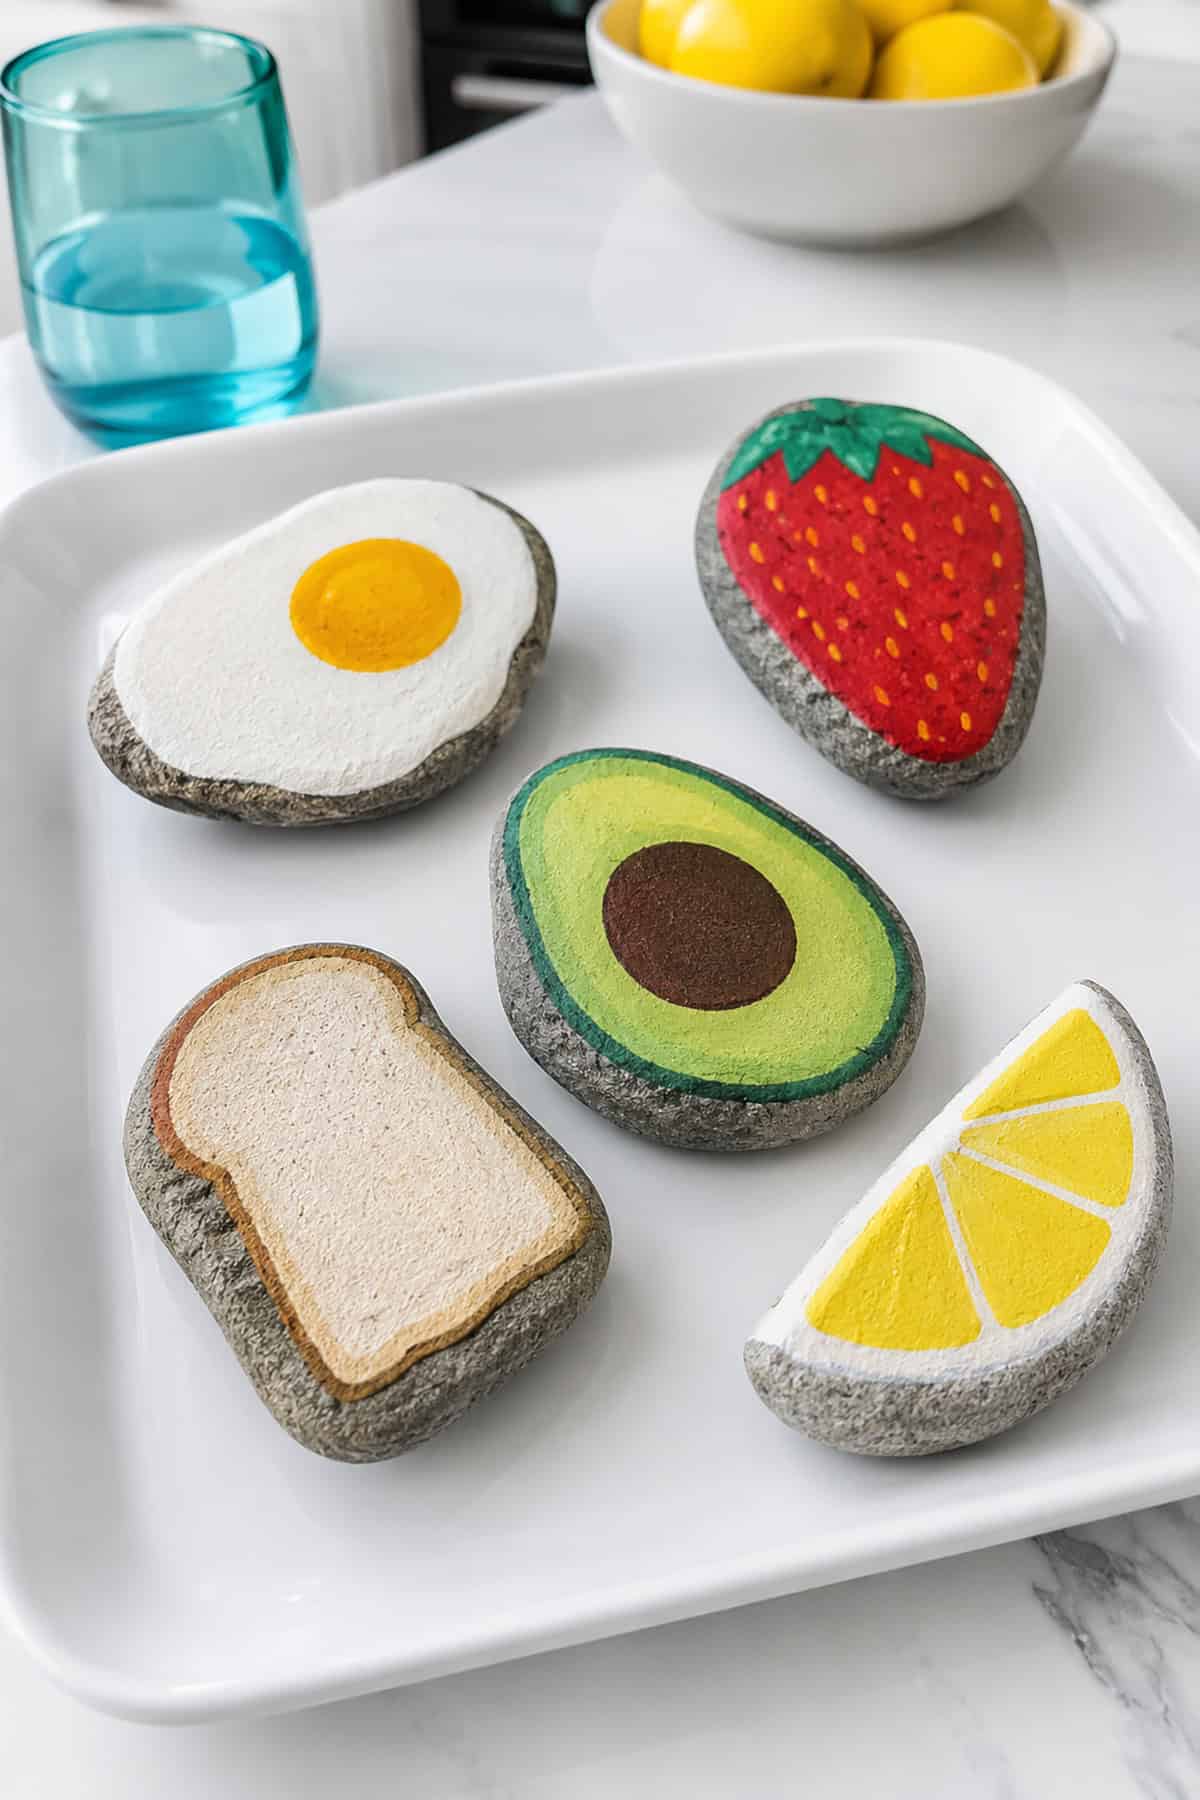
Scale is the trick: paint one food item per stone at near-life size and the illusion lands. A glazed donut with pink icing and sprinkles, a watermelon wedge with a rind edge, a fried egg, a slice of toast.
Match the stone shape to the food before painting. Round for donuts, triangular for pizza slices and watermelon, oval for eggs.
Ladybug Family Rocks
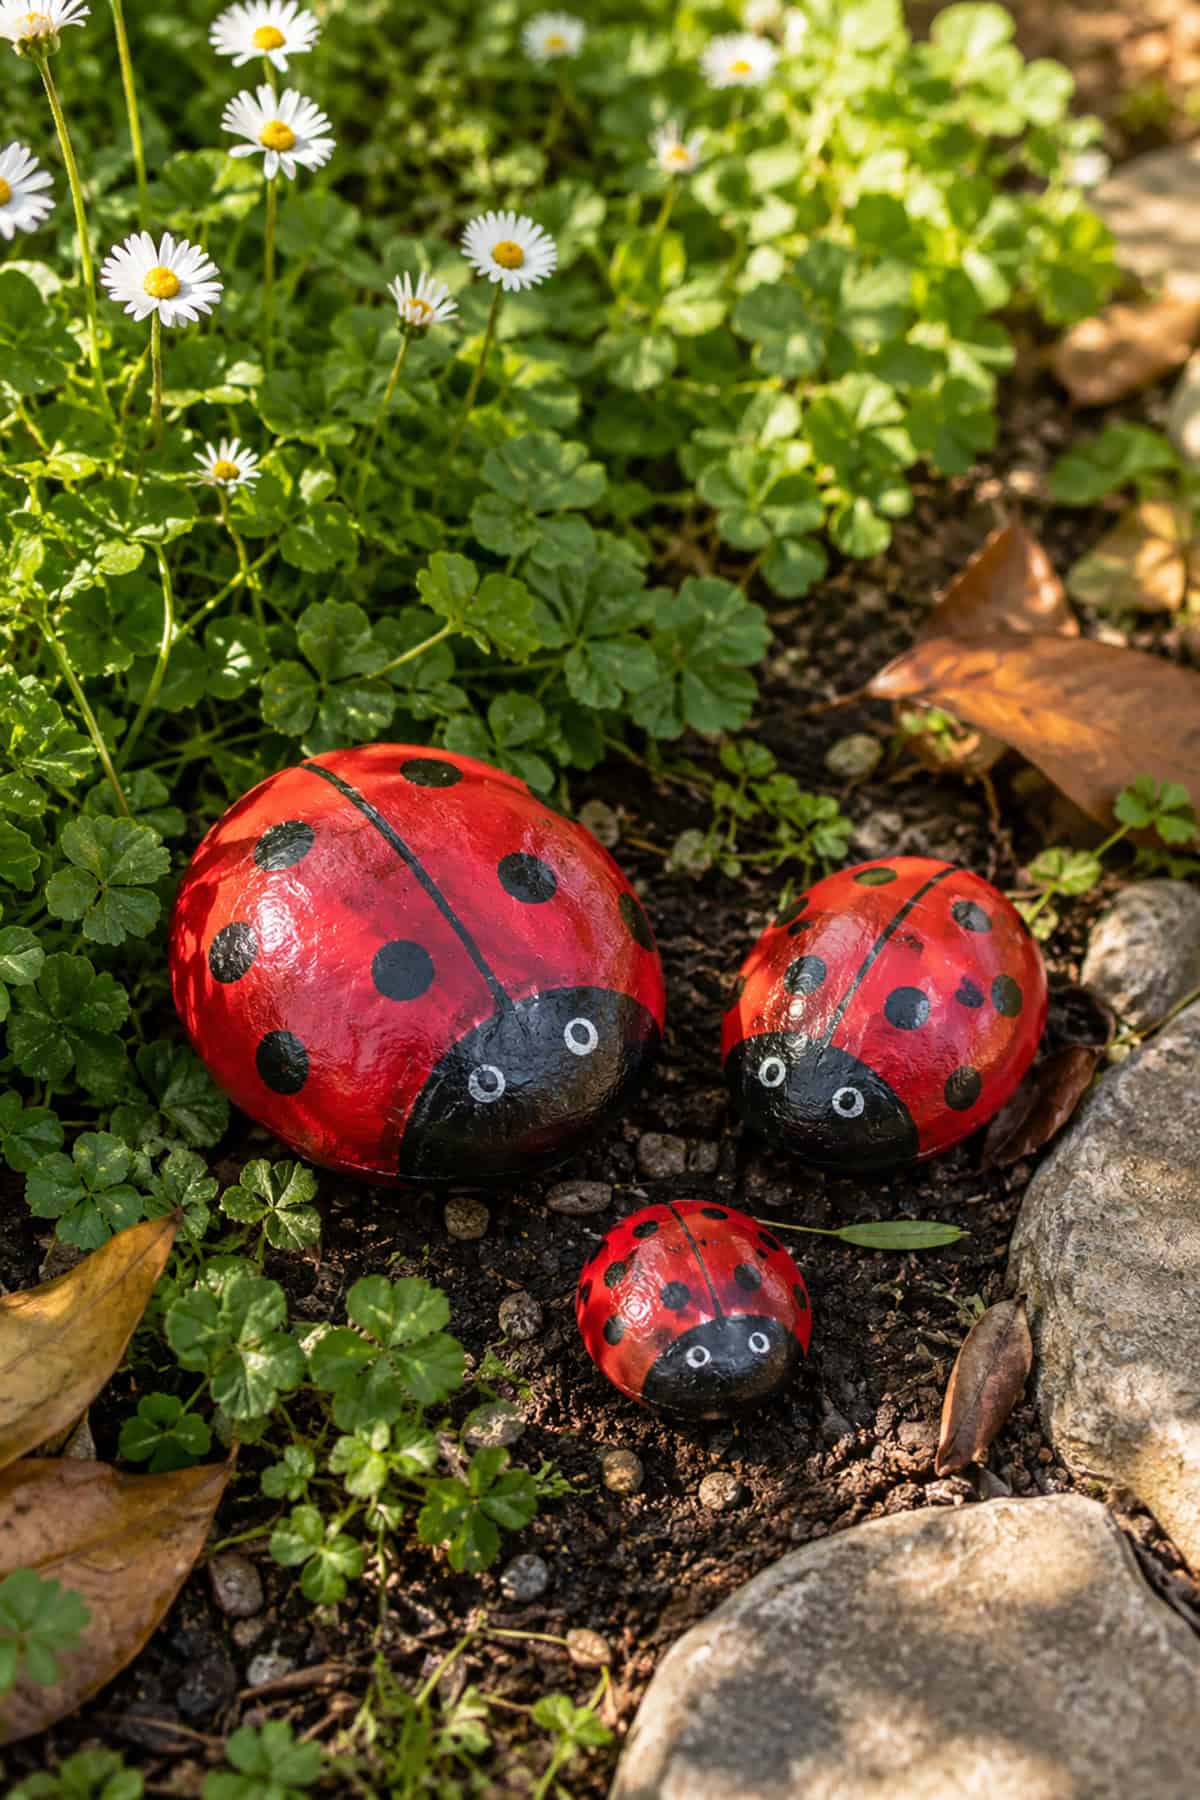
Red bodies, a black head section covering the front third, and a thin black line splitting the wing cases down the middle. Spots go on last in flat black, three or four per side, varied in size.
Paint one stone as a larva or a yellow-shelled variant to break up the set. These hold up outdoors well and look right nestled at the base of garden plants.
Koi Fish Pond Rocks
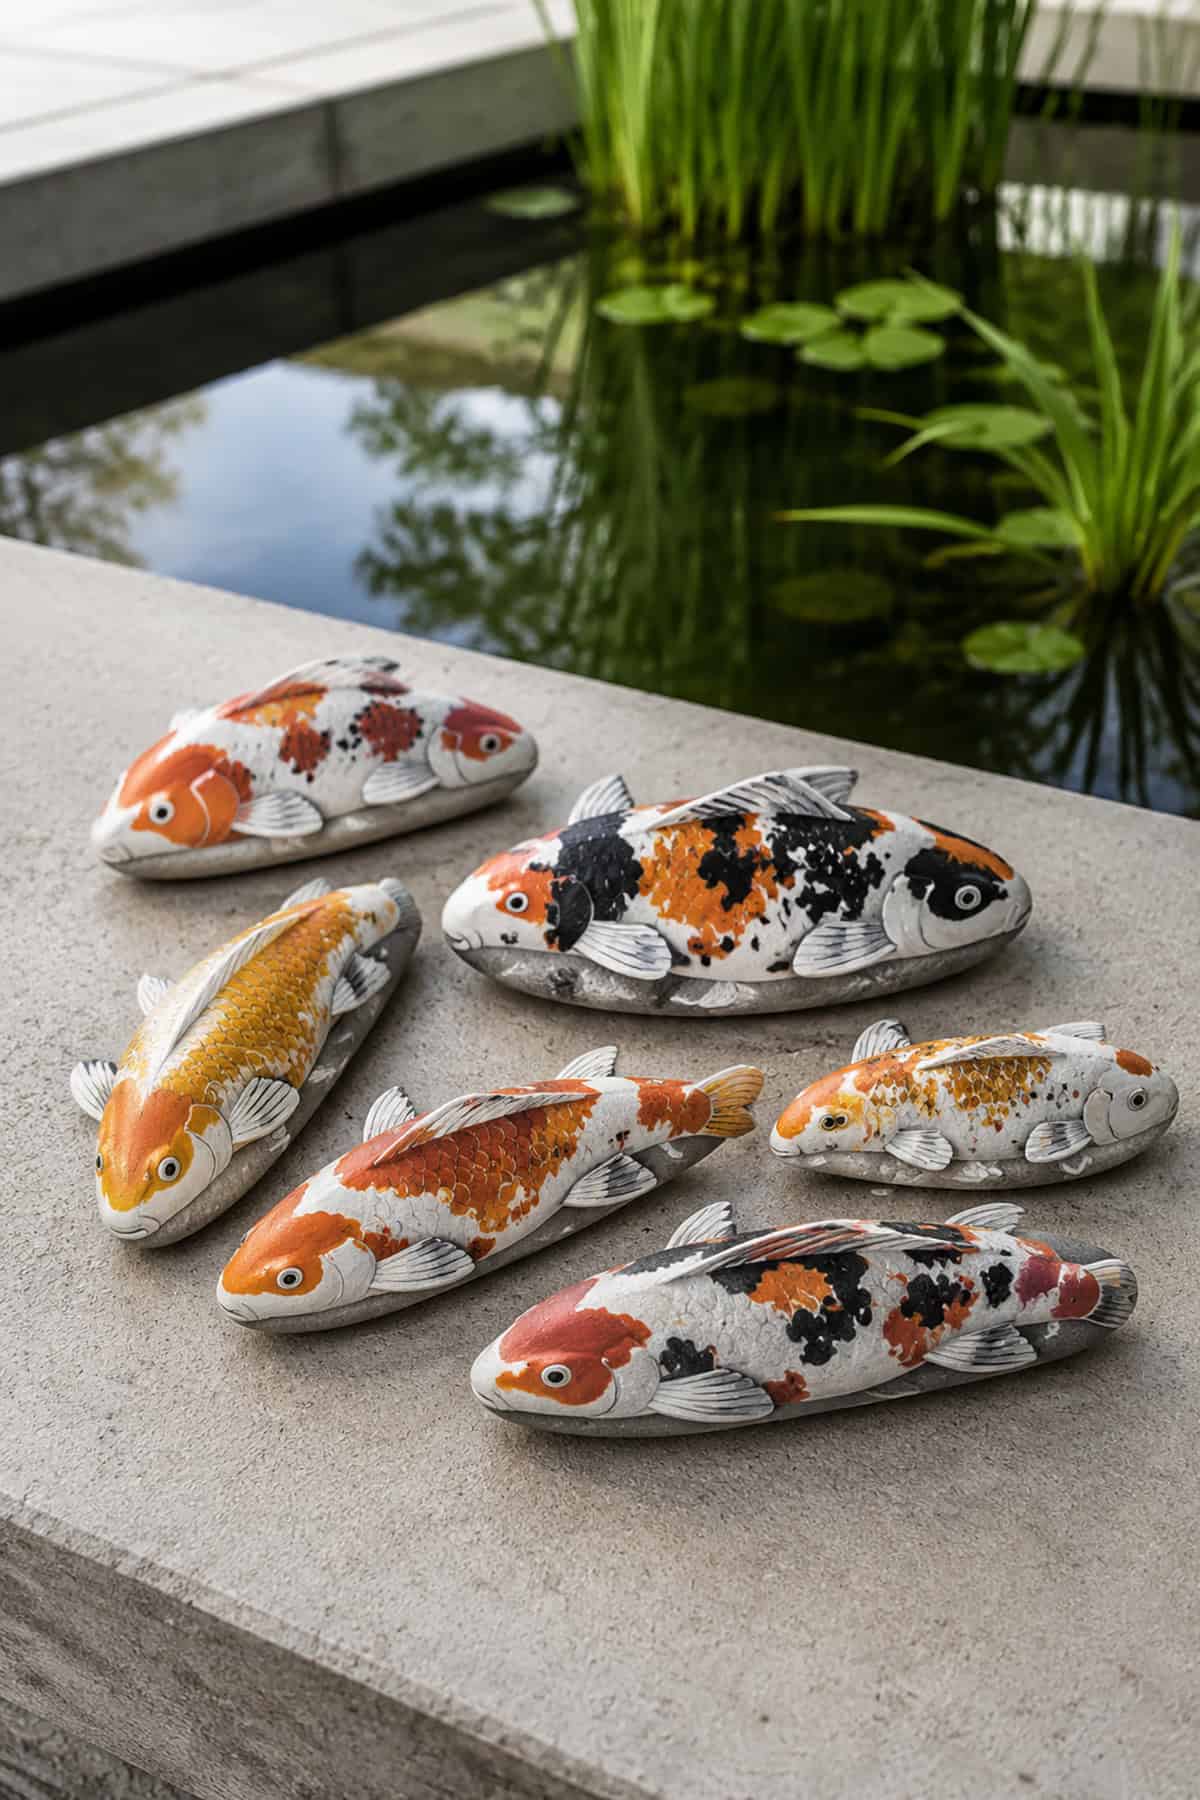
Two or three elongated stones, each one koi in white with orange or red patches and a few black markings. Curve the body slightly so the tail sweeps to one side rather than running straight.
Paint the surrounding stone in deep green-black water with a few pale ripple arcs. Grouped in a shallow dish or a real water feature, they read as a small school.
House Number Welcome Rock
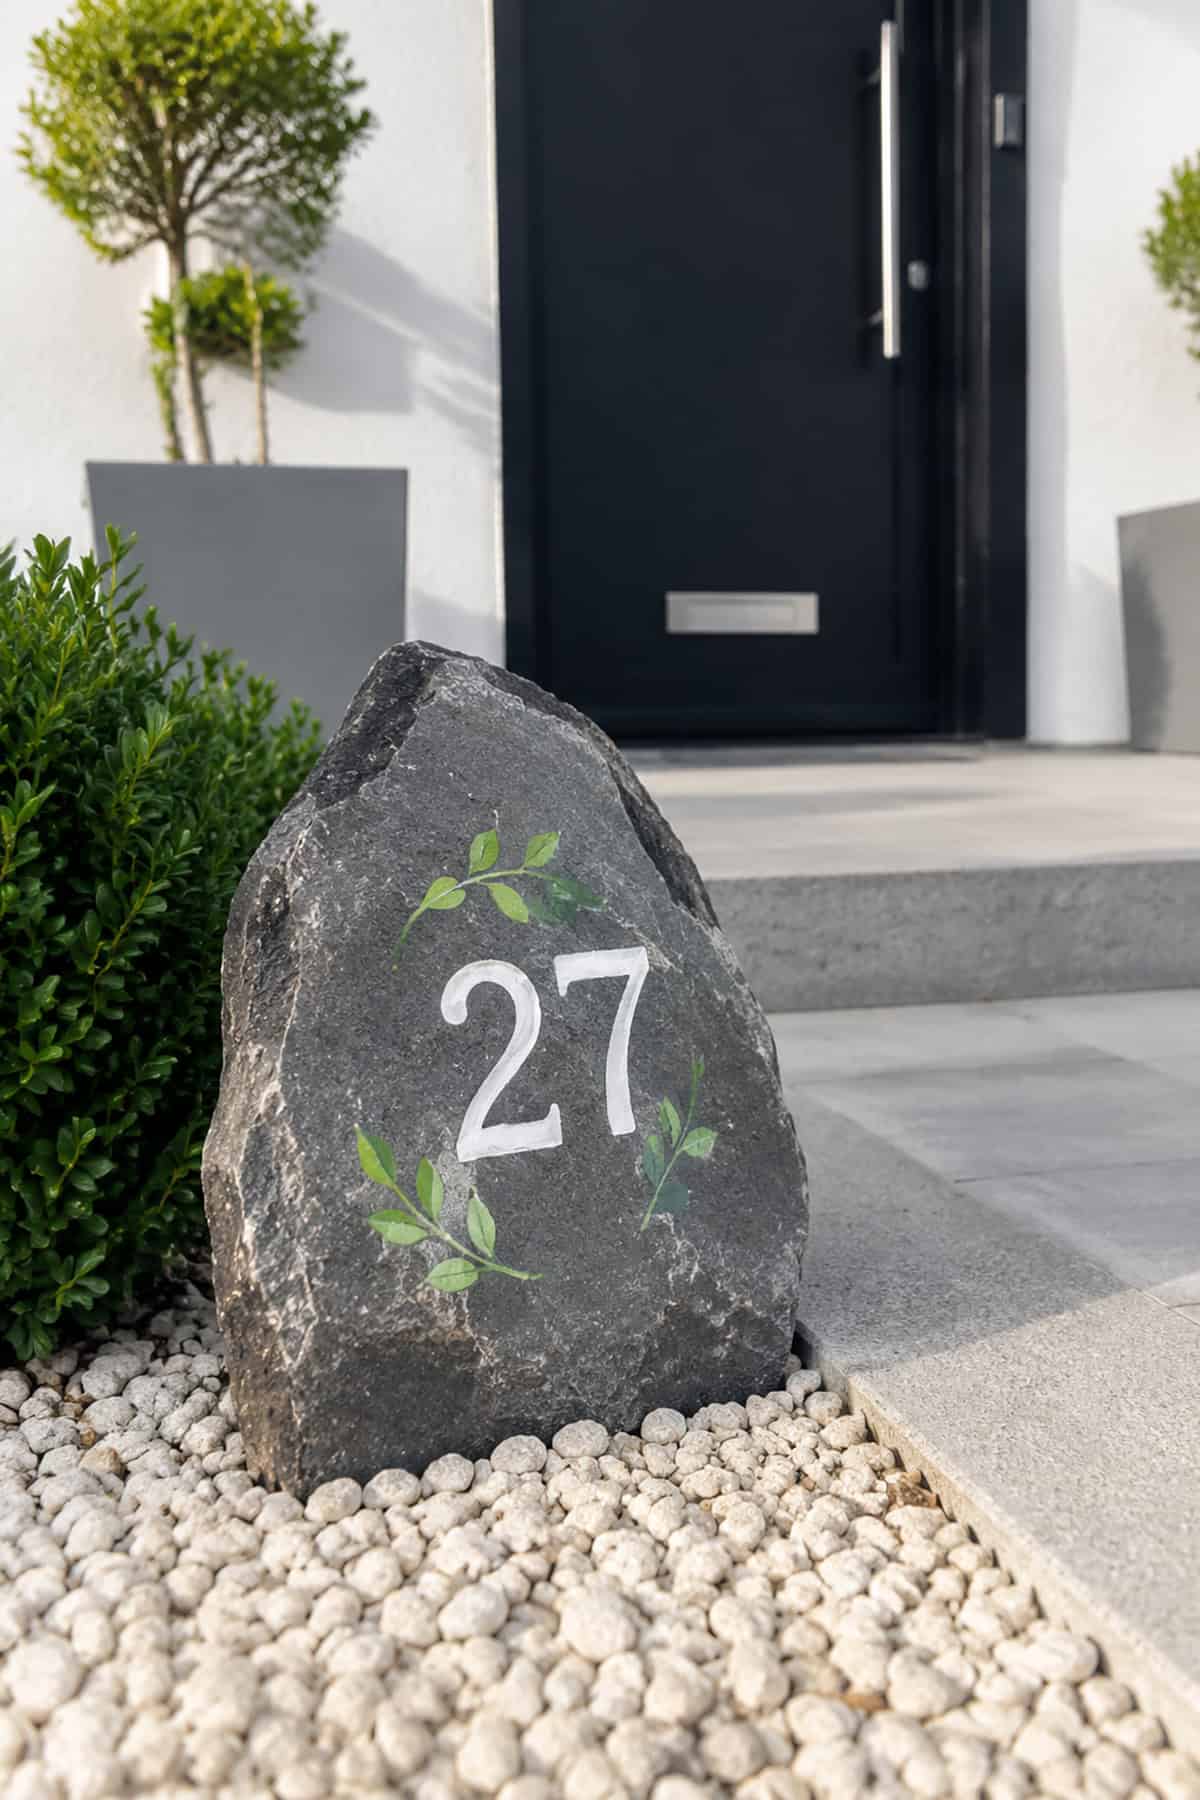
Pick the largest, flattest stone you have. Base it in a muted color that contrasts your door, then paint the numerals large and centered in white or black, using a pencil to lay out spacing first.
A ring of small flowers or a simple laurel border frames the numbers without competing. Three coats of outdoor sealer are the minimum for a stone that sits in direct weather.
Halloween Character Rocks
A set of four: ghost, black cat, pumpkin, and skull. Keep the palette tight to orange, black, white, and one purple, which holds the group together visually.
The ghost works best as a white shape on a black base with two oval eyes and no mouth. Simplicity carries these more than detail, and they finish fast enough to make a dozen in an afternoon.
Galaxy and Constellation Stones
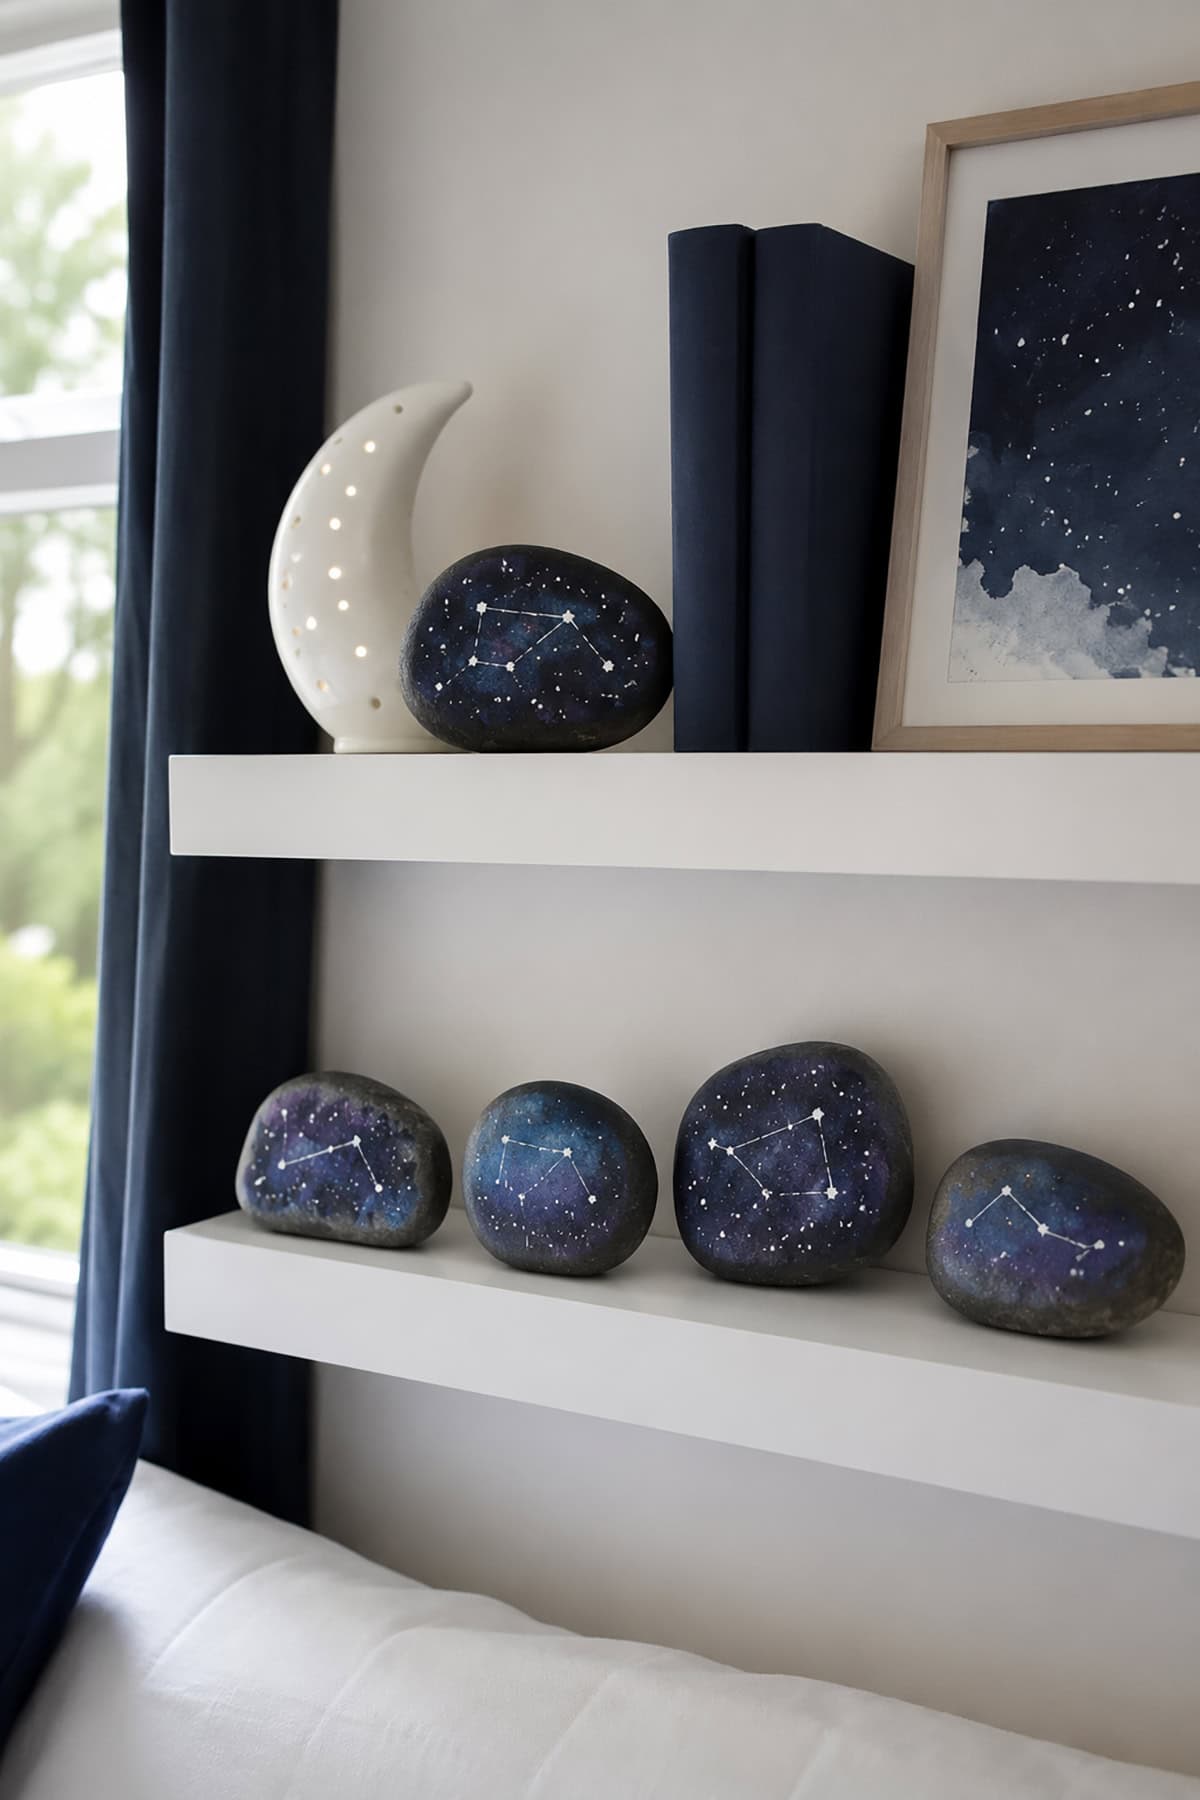
Sponge deep purple, magenta, and navy over a black base in overlapping patches, keeping the edges soft. Once dry, flick white paint from a stiff brush for star scatter, holding the rock at arm’s length.
For constellations, place slightly larger white dots in an accurate pattern and connect them with hairline gray. Orion and Cassiopeia are recognizable enough to be worth the precision.
Friendly Monster Rocks
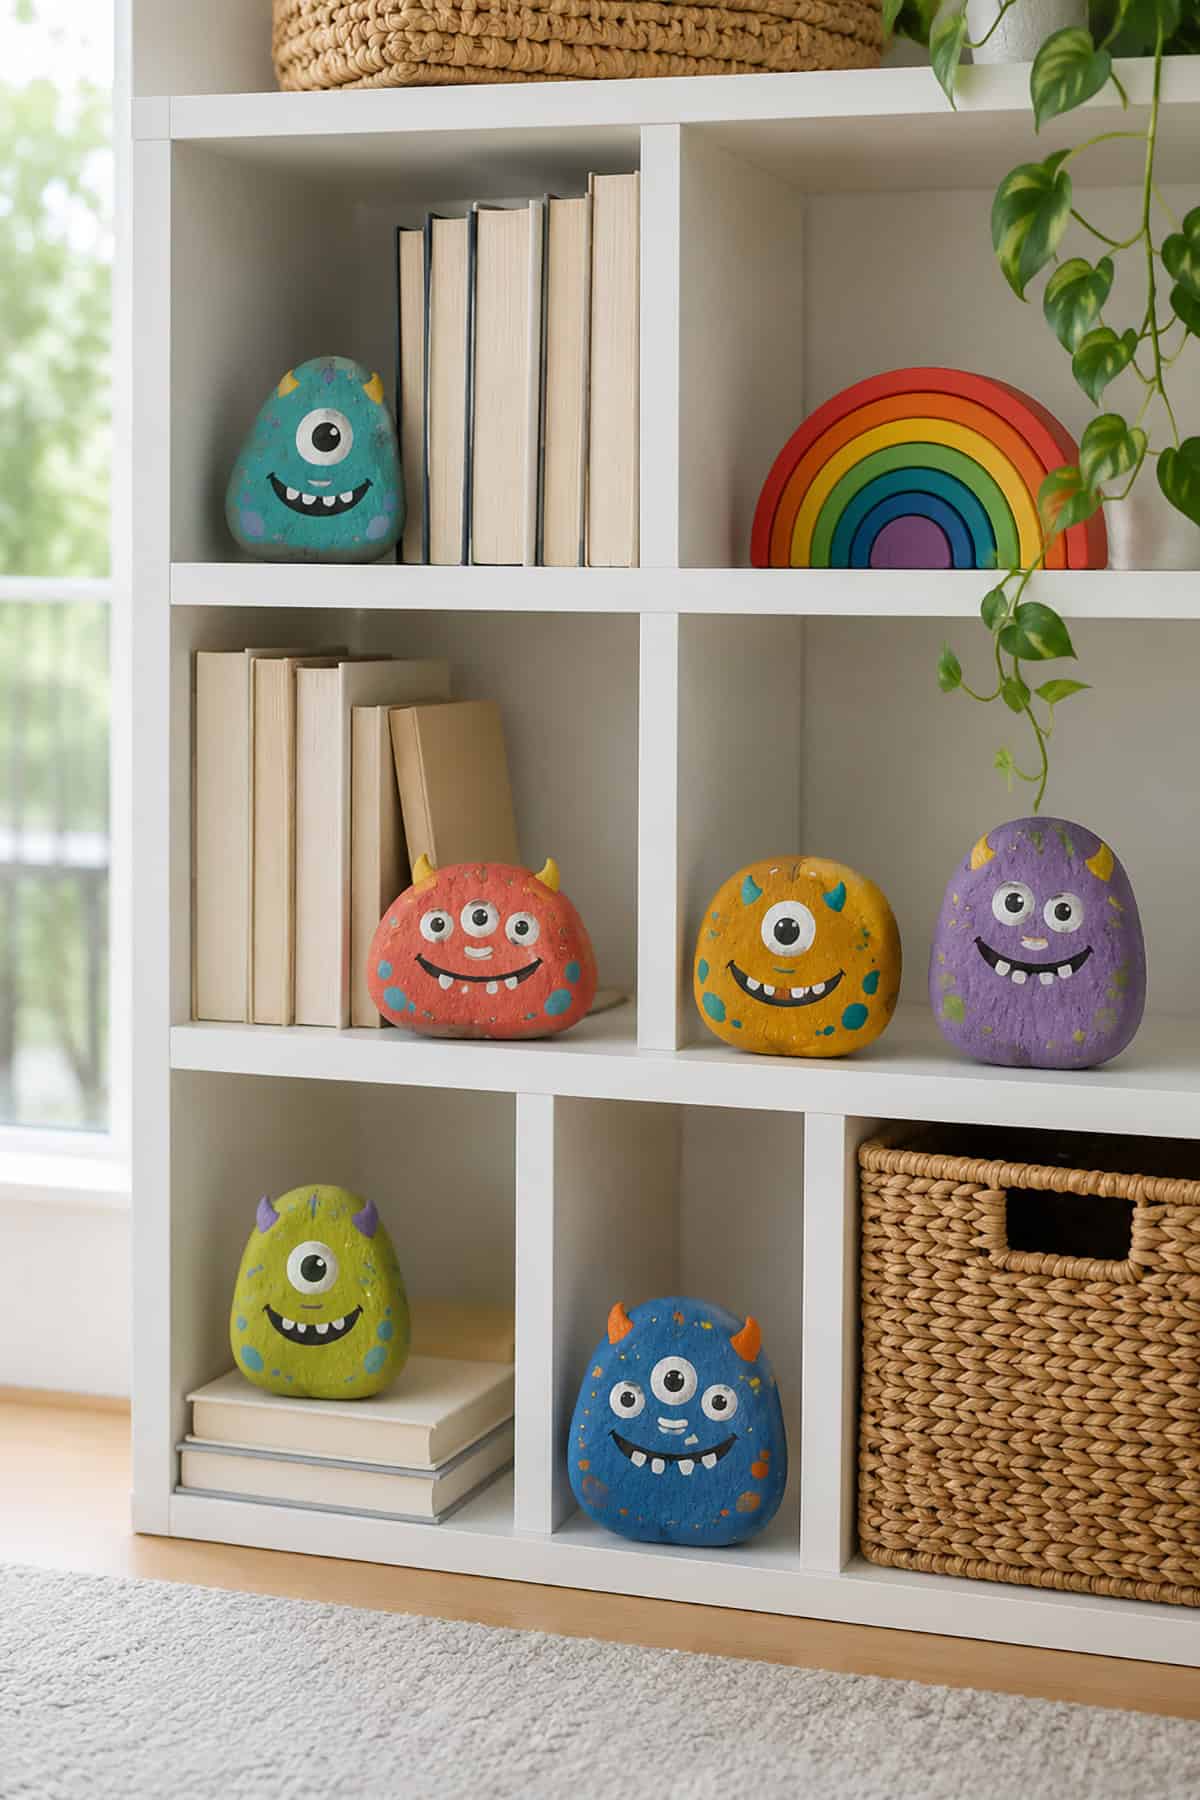
Odd-shaped and irregular stones are the point here, so save your rejects for this project. One bright saturated color per monster, then a single oversized eye or three uneven ones.
Add jagged teeth in white and a couple of horns or antennae in a contrasting shade. Deliberately lopsided features are what make these work, so resist correcting them.
Four Seasons Tree Set
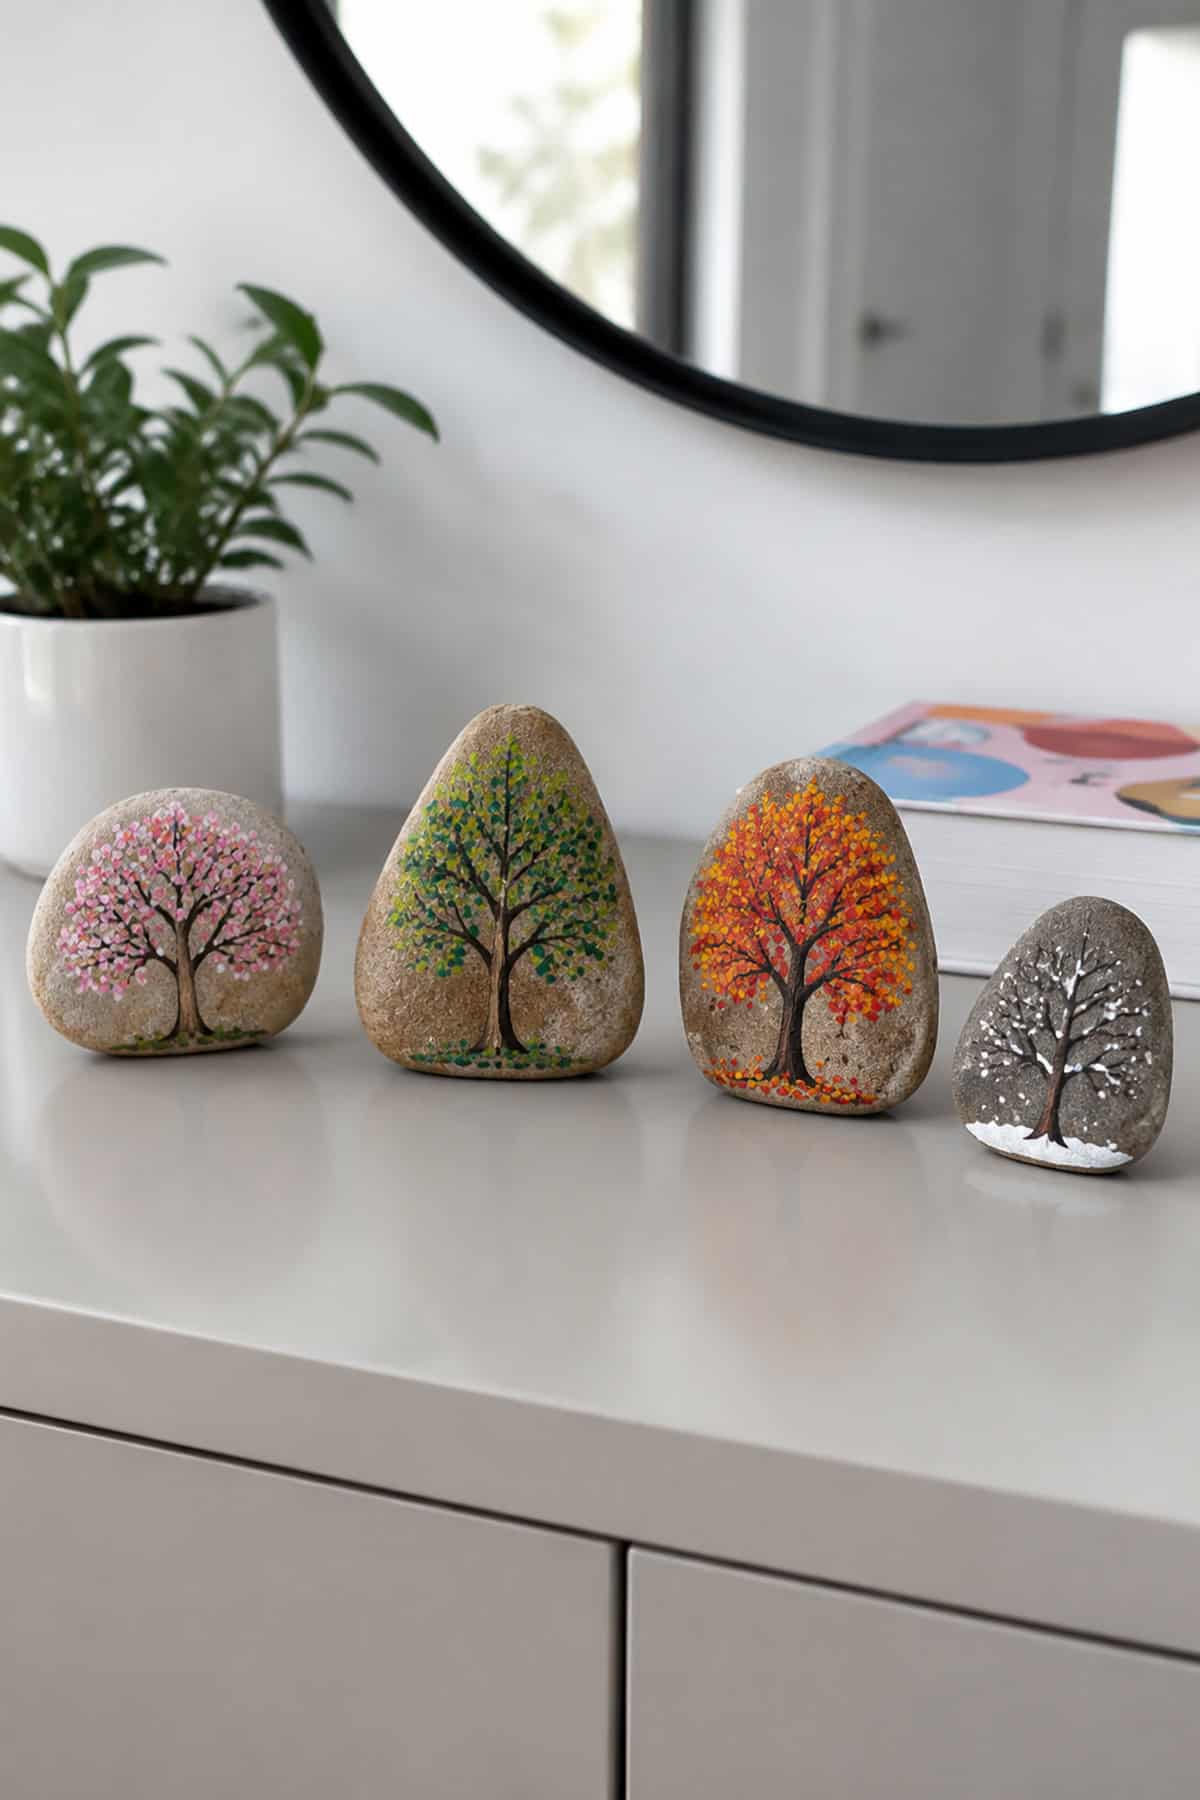
Four stones, the same bare tree silhouette on each, differentiated entirely by background and canopy. Spring gets pale pink blossom dots, summer solid layered green, autumn stippled orange and rust, winter a bare trunk against pale gray with white snow dots.
Trace the same trunk shape on all four so the set holds together. A dotting tool handles the blossom and leaf clusters faster and more evenly than a brush.
Floral Sugar Skull Stones
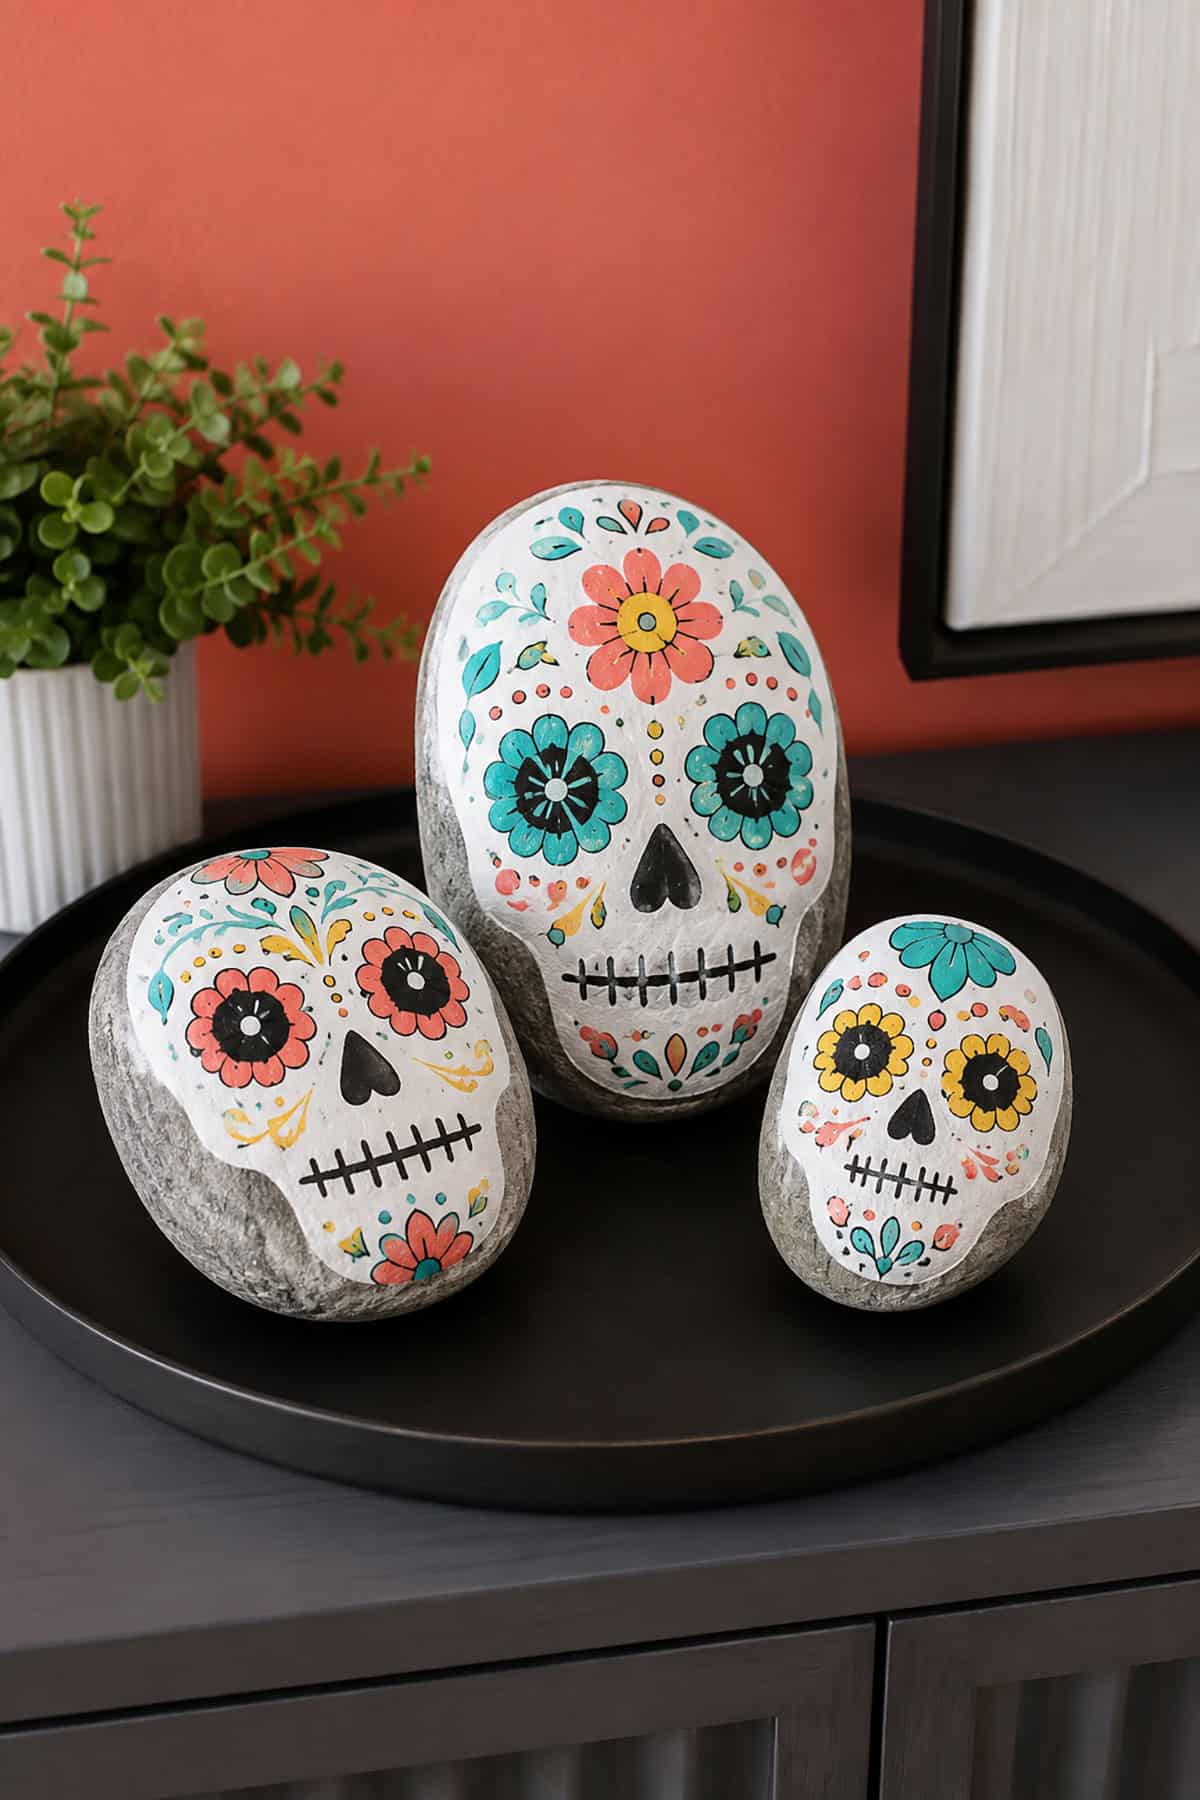
Base the stone in white or bone, then outline the skull’s eye sockets, nose cavity, and jaw line in black. Fill the sockets with concentric petal shapes in magenta and teal rather than leaving them dark.
Marigold patterns run across the forehead and cheekbones, and a row of small dots follows the jaw. Symmetry matters, so mark a center line in pencil before you commit to paint.
Detailed Butterfly Rocks
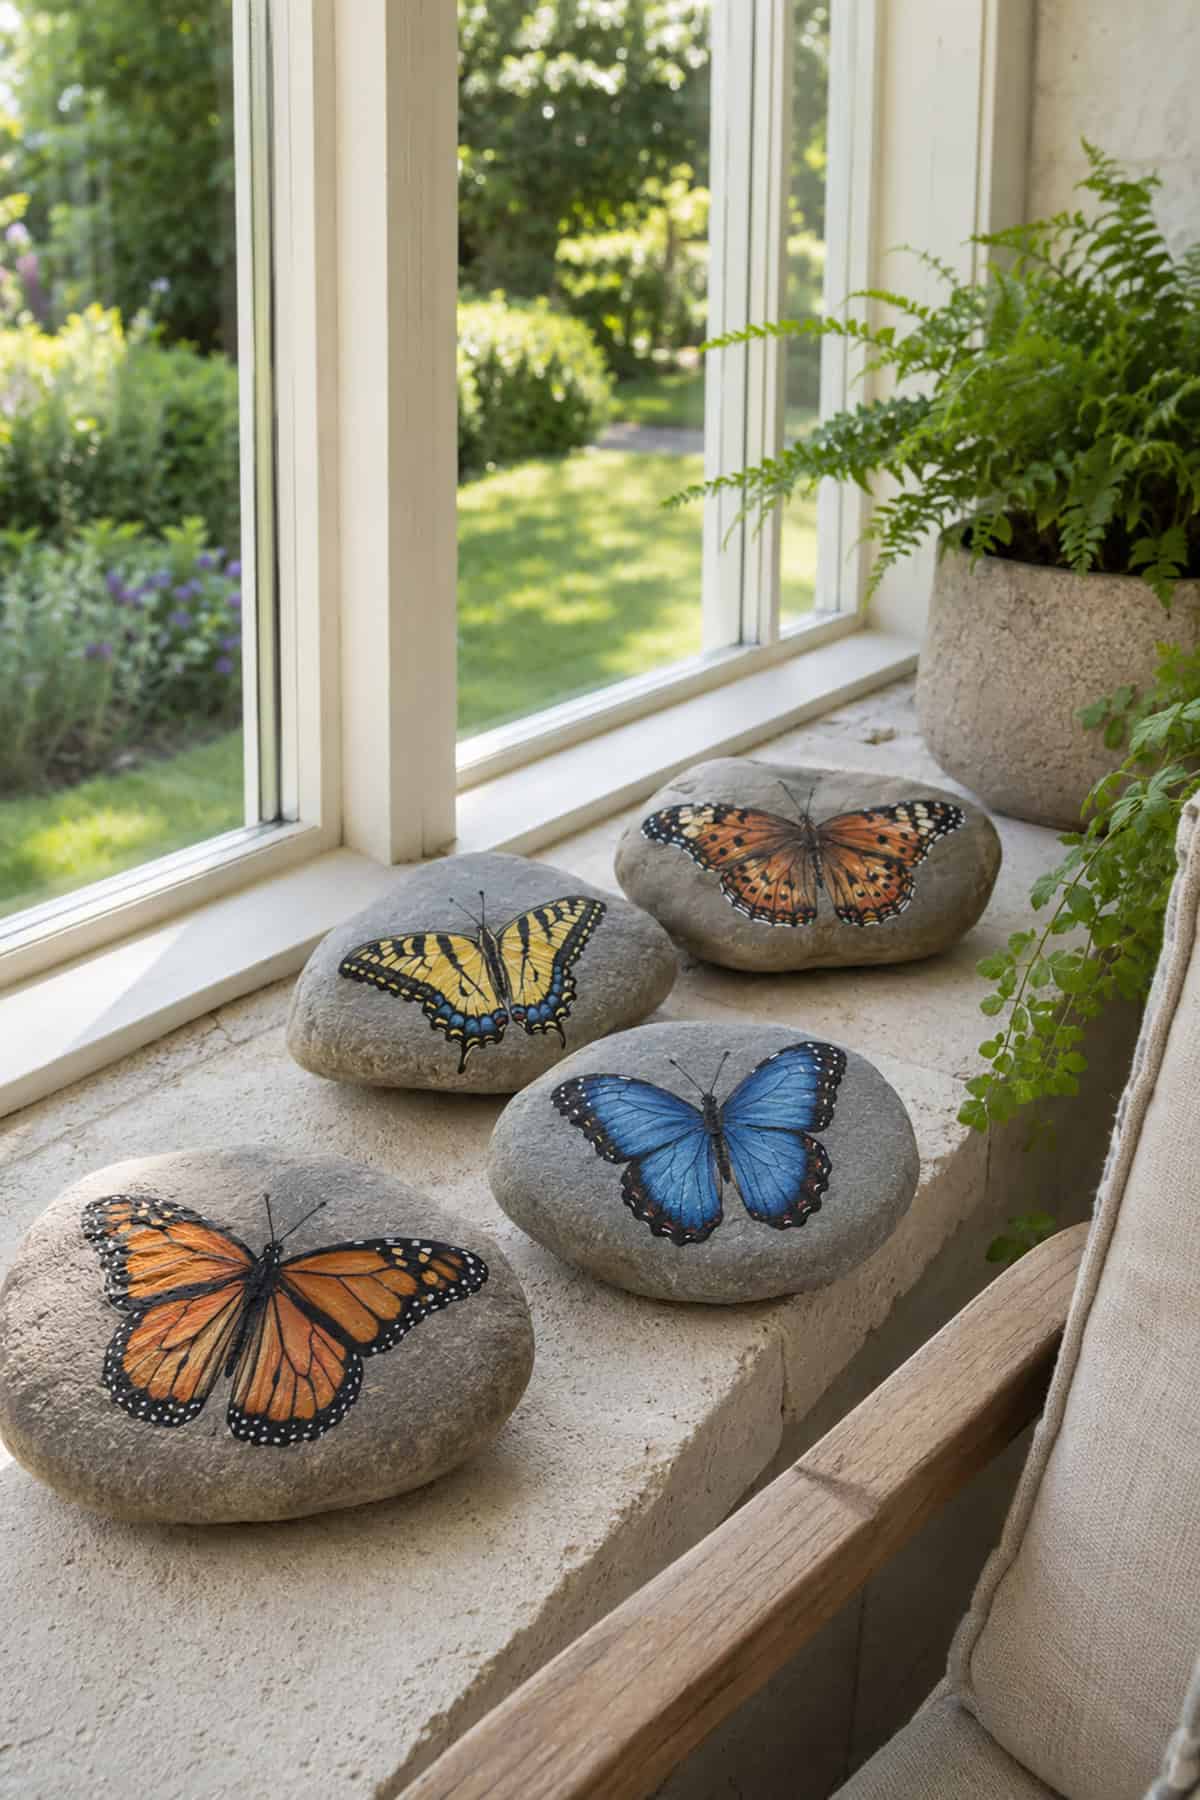
Center the body along the stone’s long axis and let the wings spread to both edges. Monarch coloring, burnt orange panels divided by heavy black veining with white marginal dots, is the most forgiving to paint.
For a blue morpho version, blend two shades of blue outward from the body with a dry brush. A fine black liner brush handles the vein work; anything wider muddies it.
Colorful Mandala Stones
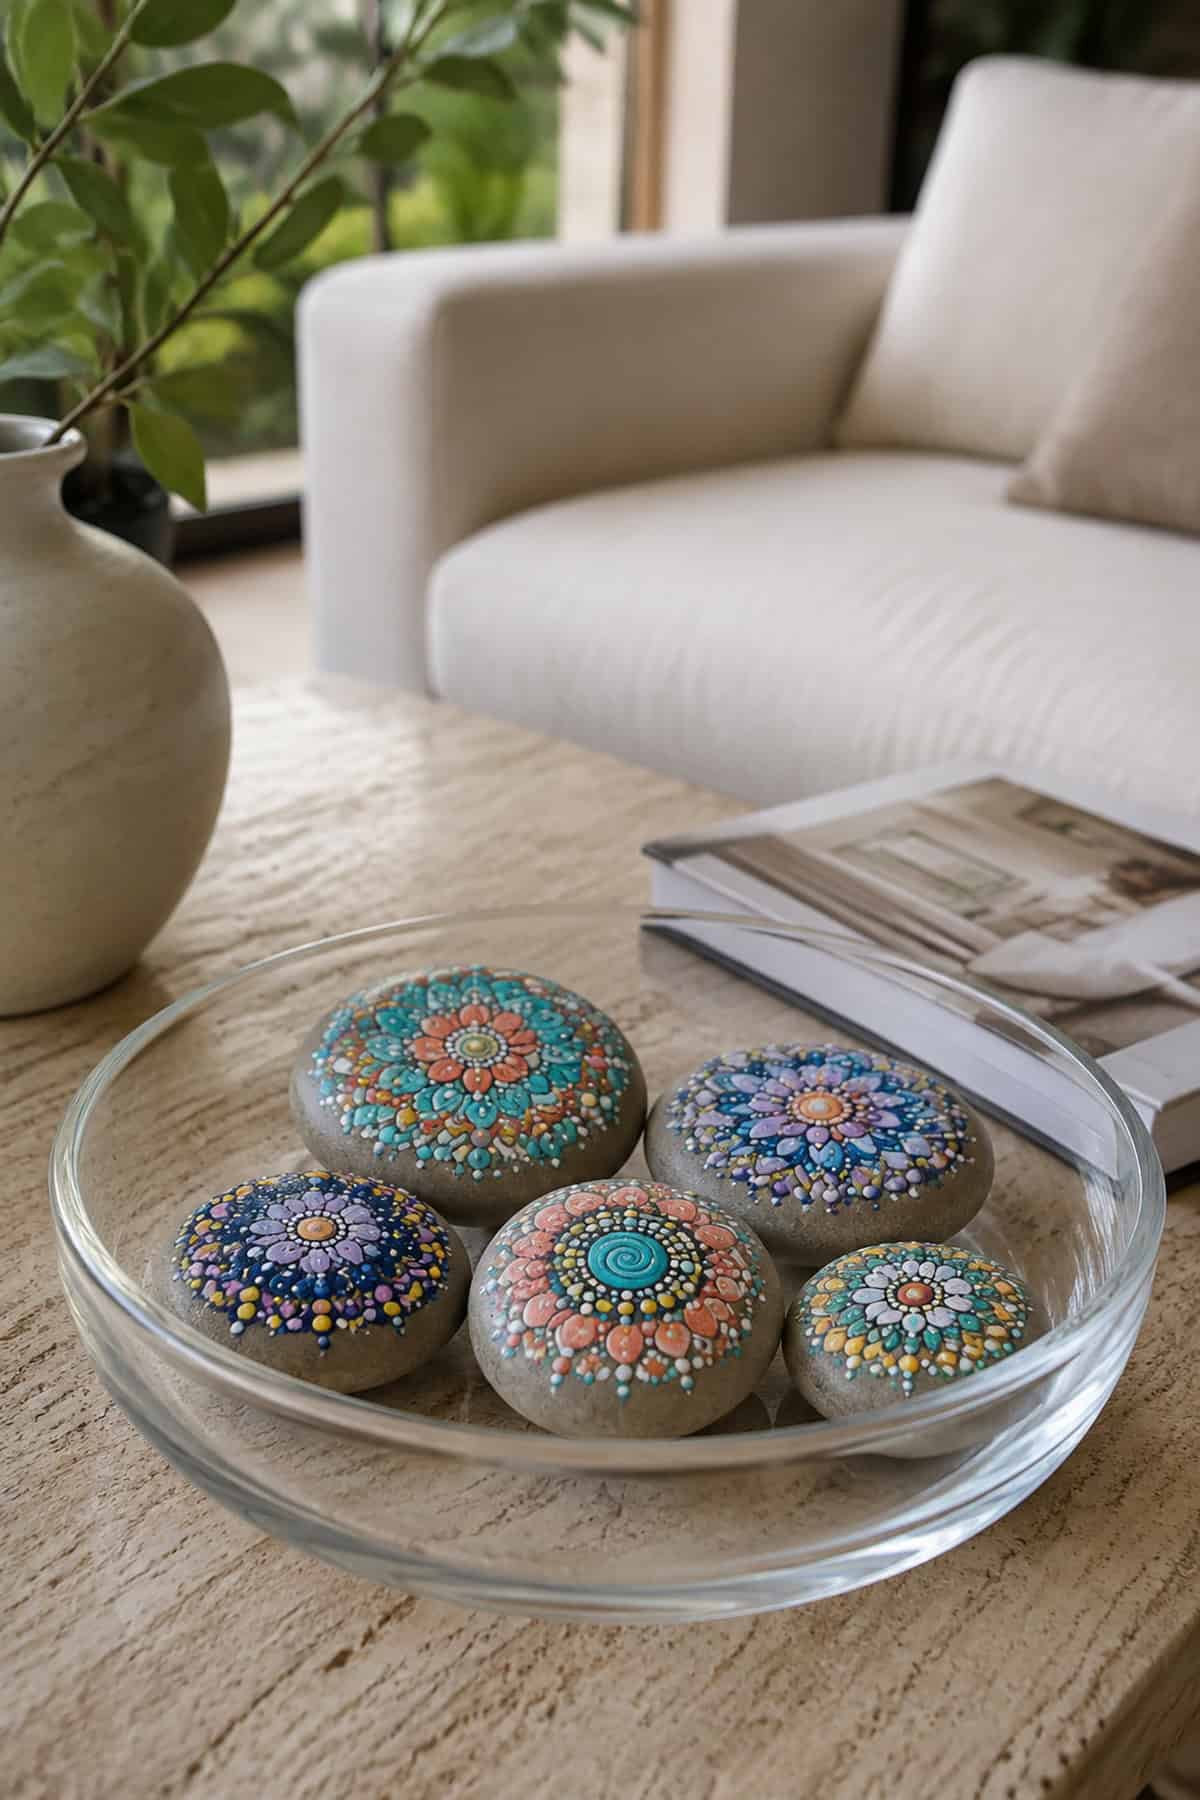
Find the center with a pencil dot and build outward in rings, alternating dot sizes and colors. Use dedicated dotting tools in graduated sizes and reload paint after every two or three dots so ring sizes stay even.
Dark base coats make bright dots pop, teal and coral on black is a reliable combination. Work one full ring before moving to the next, and let each ring dry slightly to avoid smearing.
Christmas Nativity Rocks
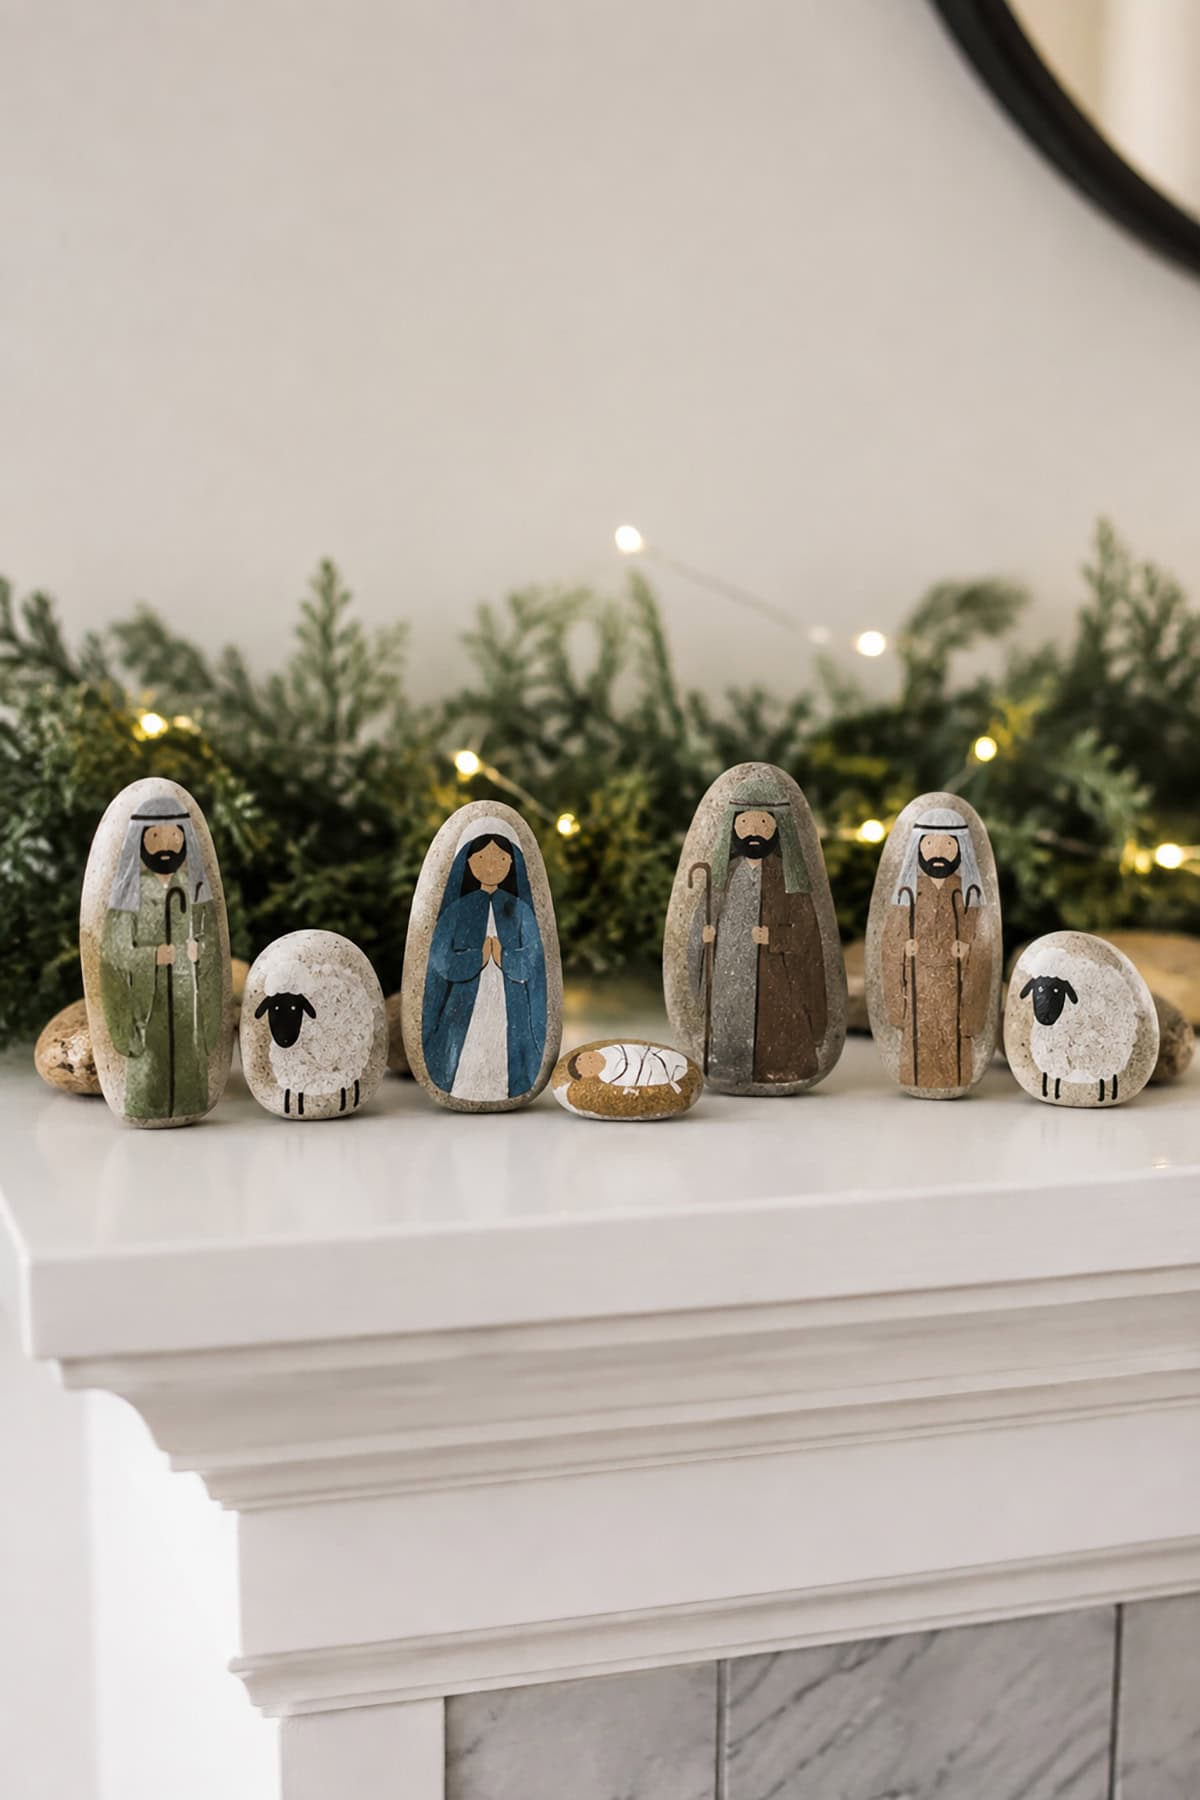
A set of six to eight stones in varying heights, each a robed figure reduced to a simple silhouette: head, shoulders, draped robe. Muted colors, dusty blue, ochre, deep red, brown, keep it from looking like a toy set.
Faces stay minimal or blank entirely, which reads as reverent rather than unfinished. A star stone in gold and a low stone for the manger complete the arrangement.
Cactus Rock Stones
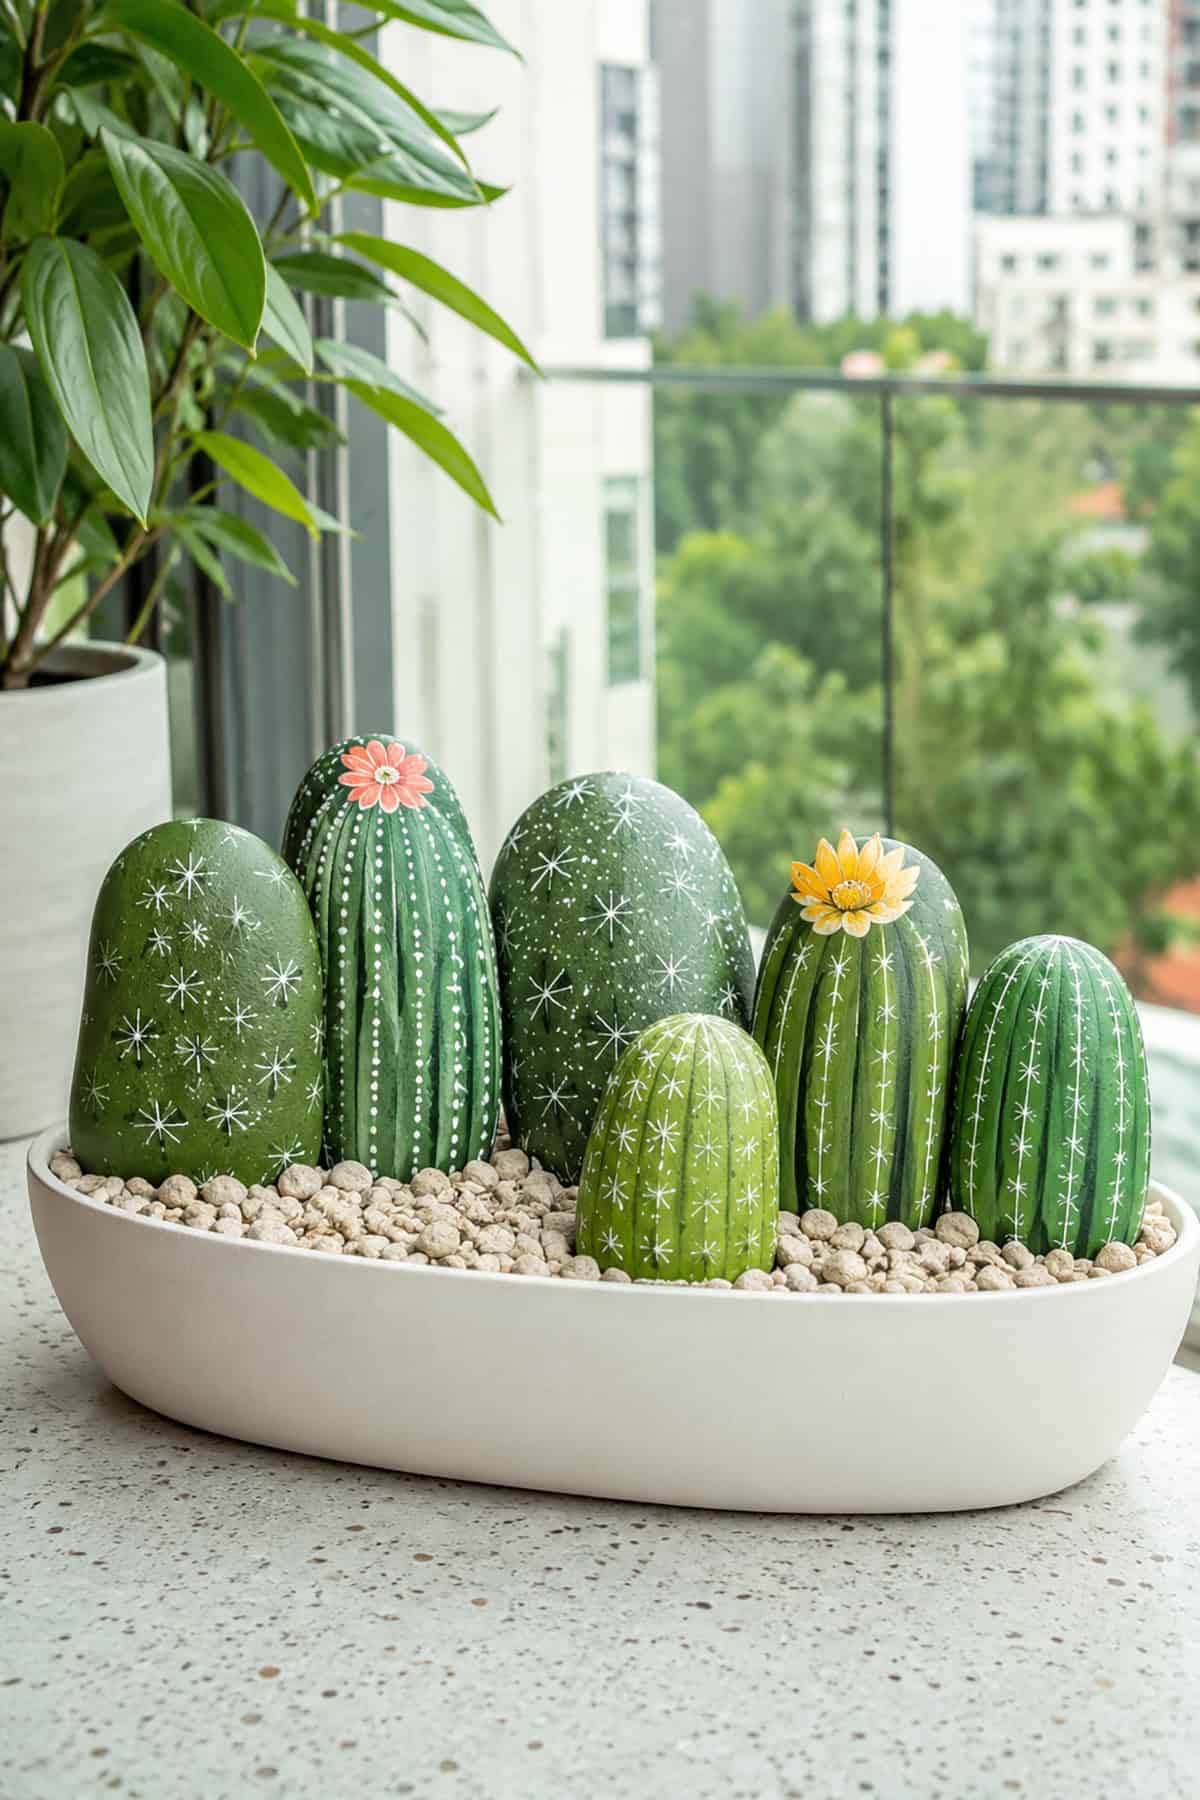
Tall, narrow stones become saguaro or column cacti; rounded ones become barrel cacti. Base in a medium green, then add vertical ribbing with a slightly darker green liner and spines as short white dashes.
A small magenta or coral bloom at the crown finishes it. Set them in a terracotta pot filled with sand, upright, for a plant arrangement that needs no water.
Bumblebee Garden Rocks
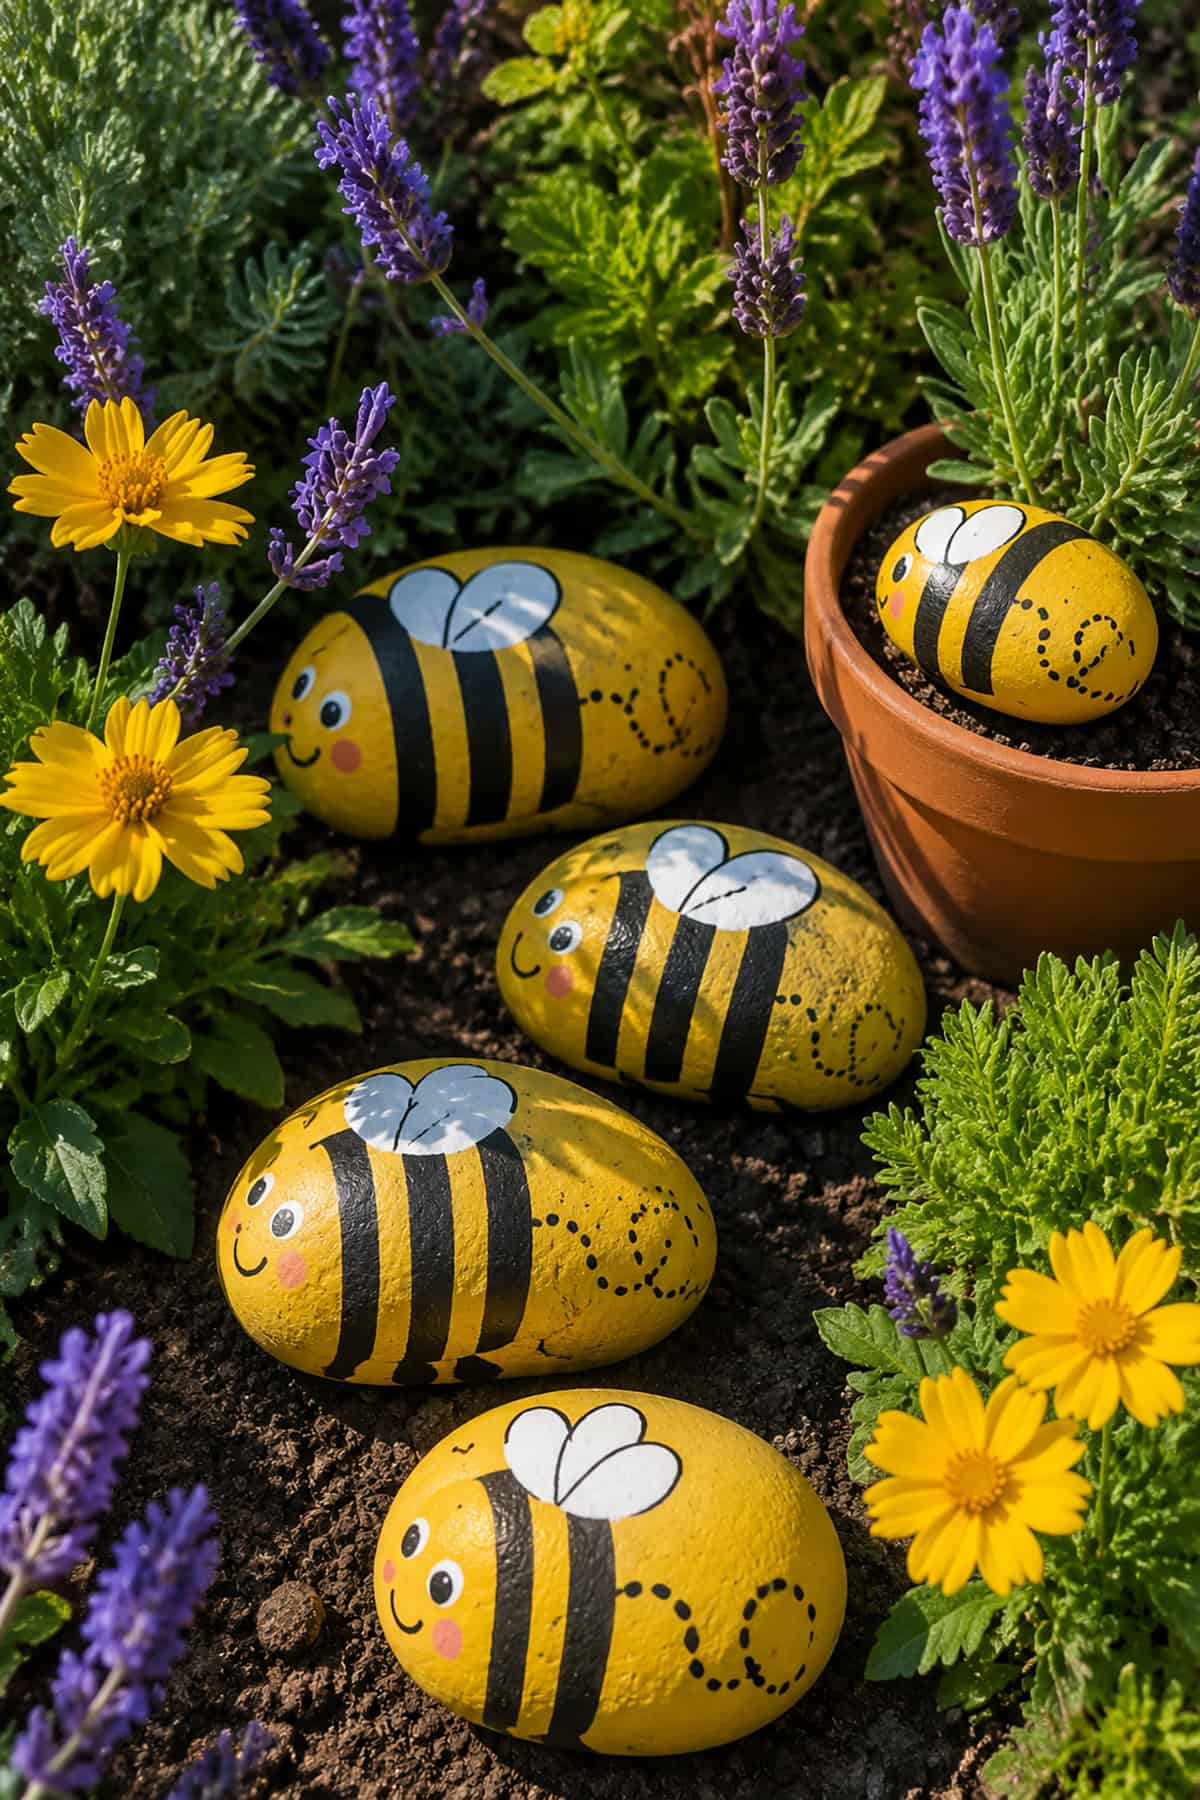
Small oval stones handle this best. Yellow body with three black bands running across the width, a black head at one end, and translucent wings painted in thin white over the yellow.
Keep the bands slightly curved to follow the stone’s contour instead of straight across. Scatter them among real flowers where the yellow catches attention at ground level.
Blue Floral Folk-Art Rocks
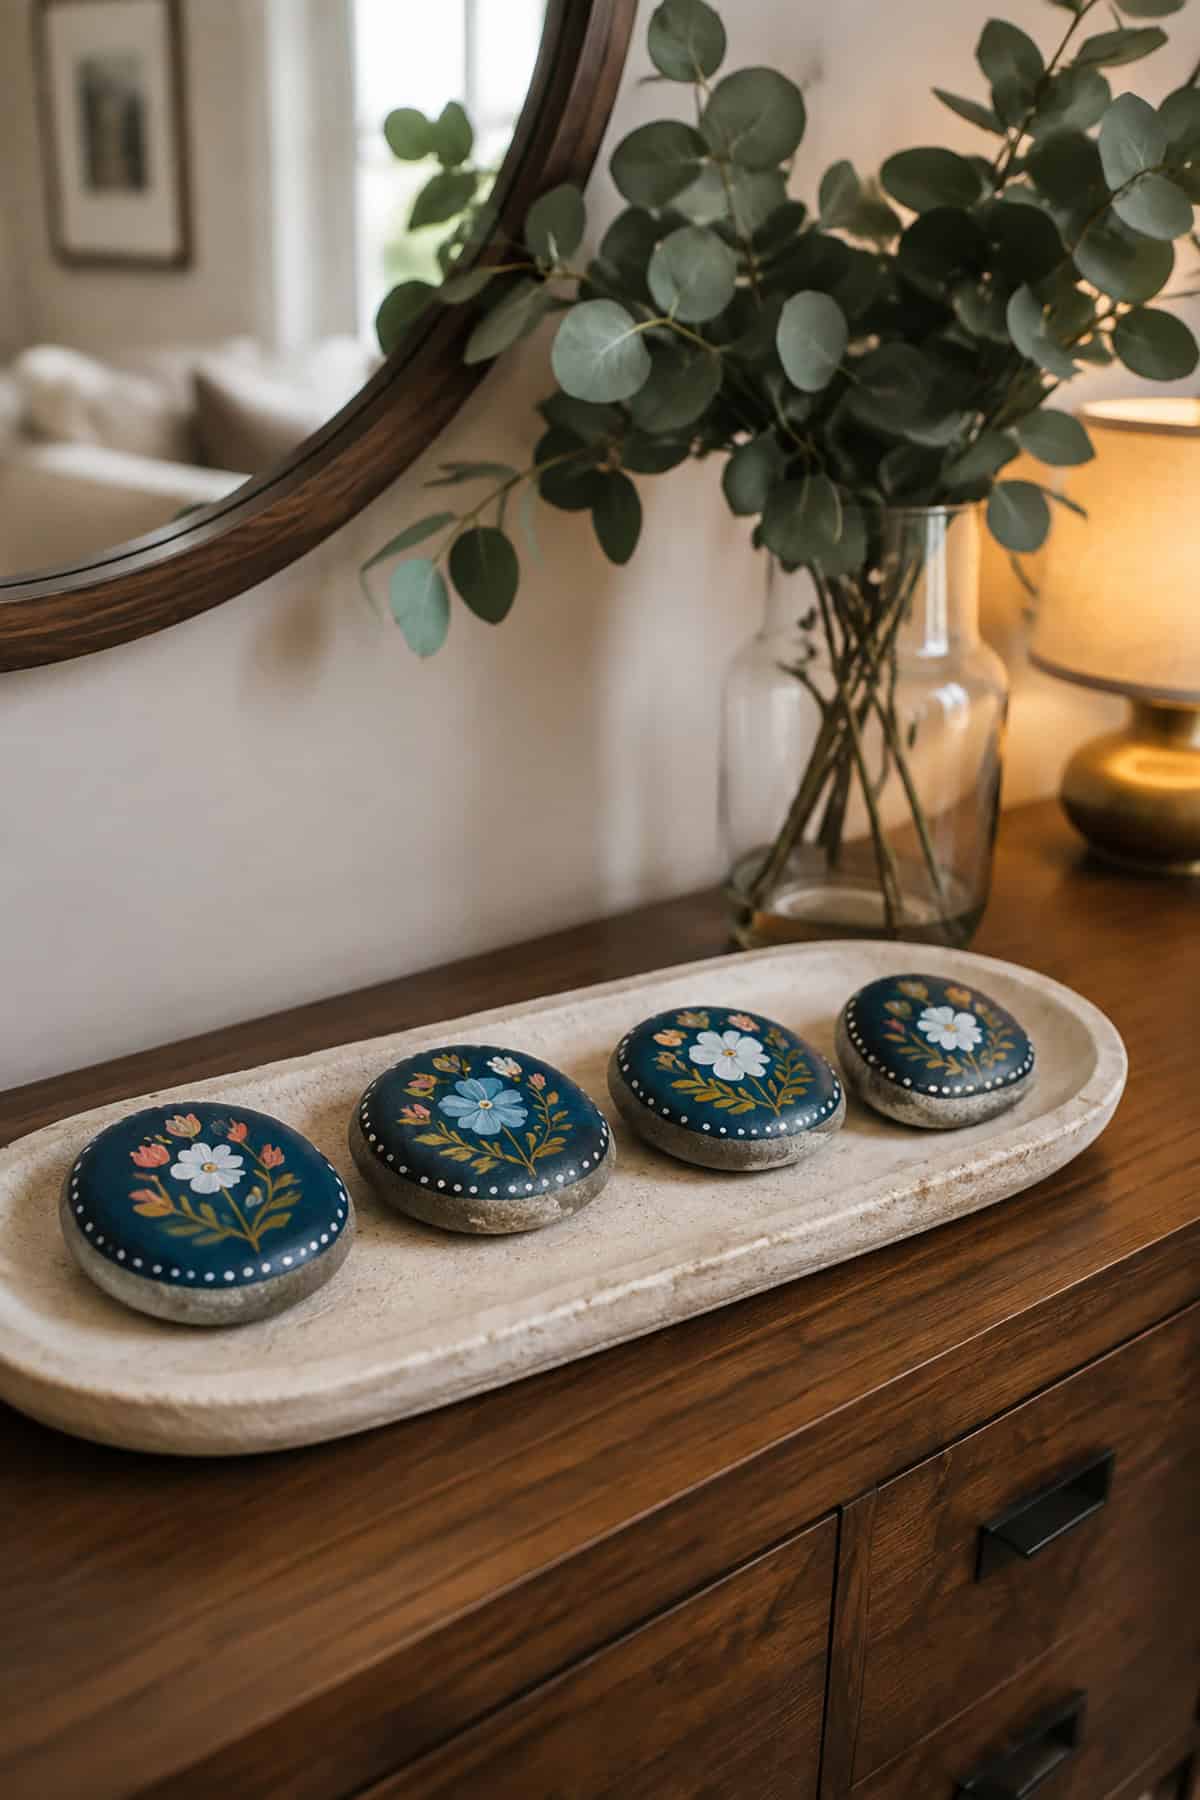
Delft-inspired work: a white base with all detail in a single cobalt blue. Paint a central flower with rounded petals, then radiate smaller buds, curling stems, and leaf forms outward to fill the surface.
Vary line weight between thick petal fills and hairline stem work with a liner brush. A tight border of small dots around the stone’s edge frames the composition.
Black Cat Moon Rocks
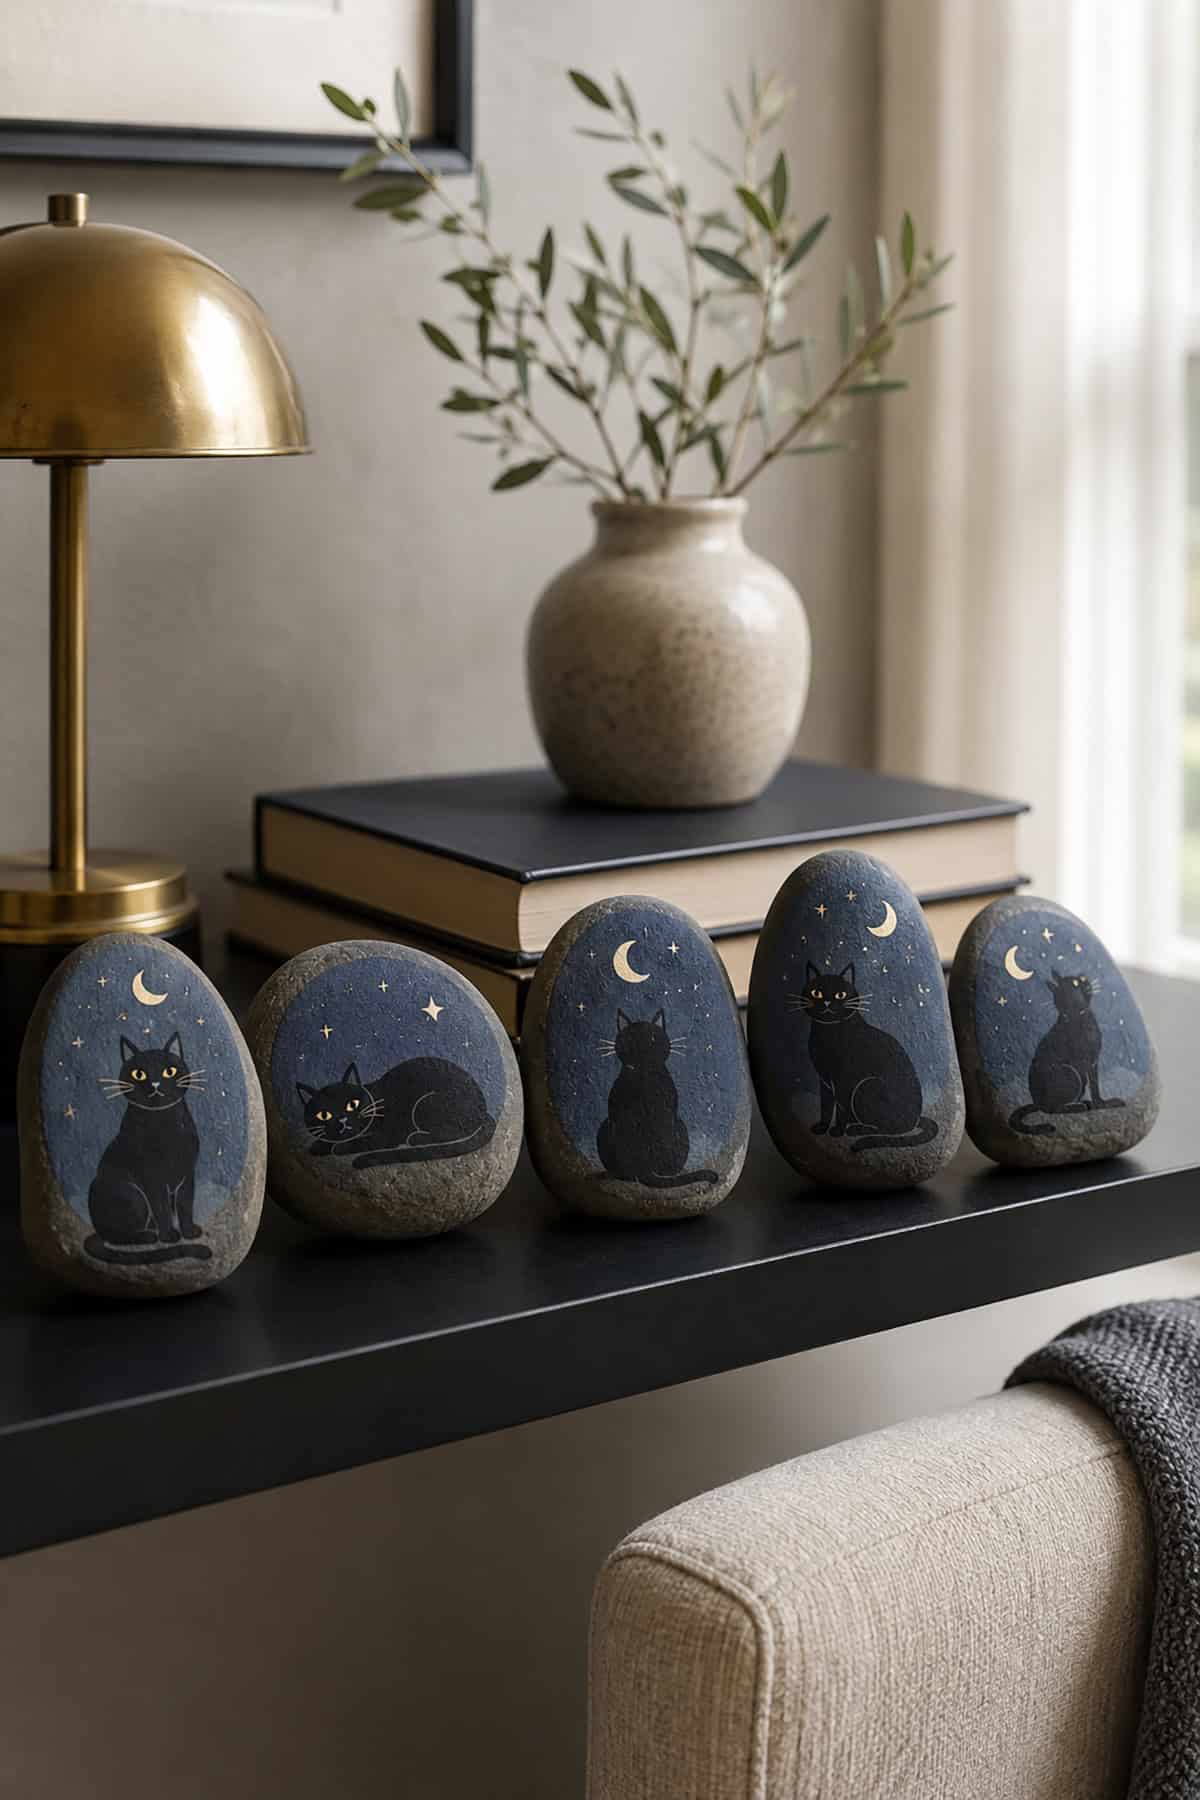
A large cream or pale yellow full moon fills most of a black-based stone. The cat sits in profile at the lower edge, painted in flat black so it silhouettes against the moon.
An upright tail curving beside the body reads as a cat instantly, even at small scale. Add two thin gold slits for eyes and leave every other detail out.
Bee and Wildflower Meadow
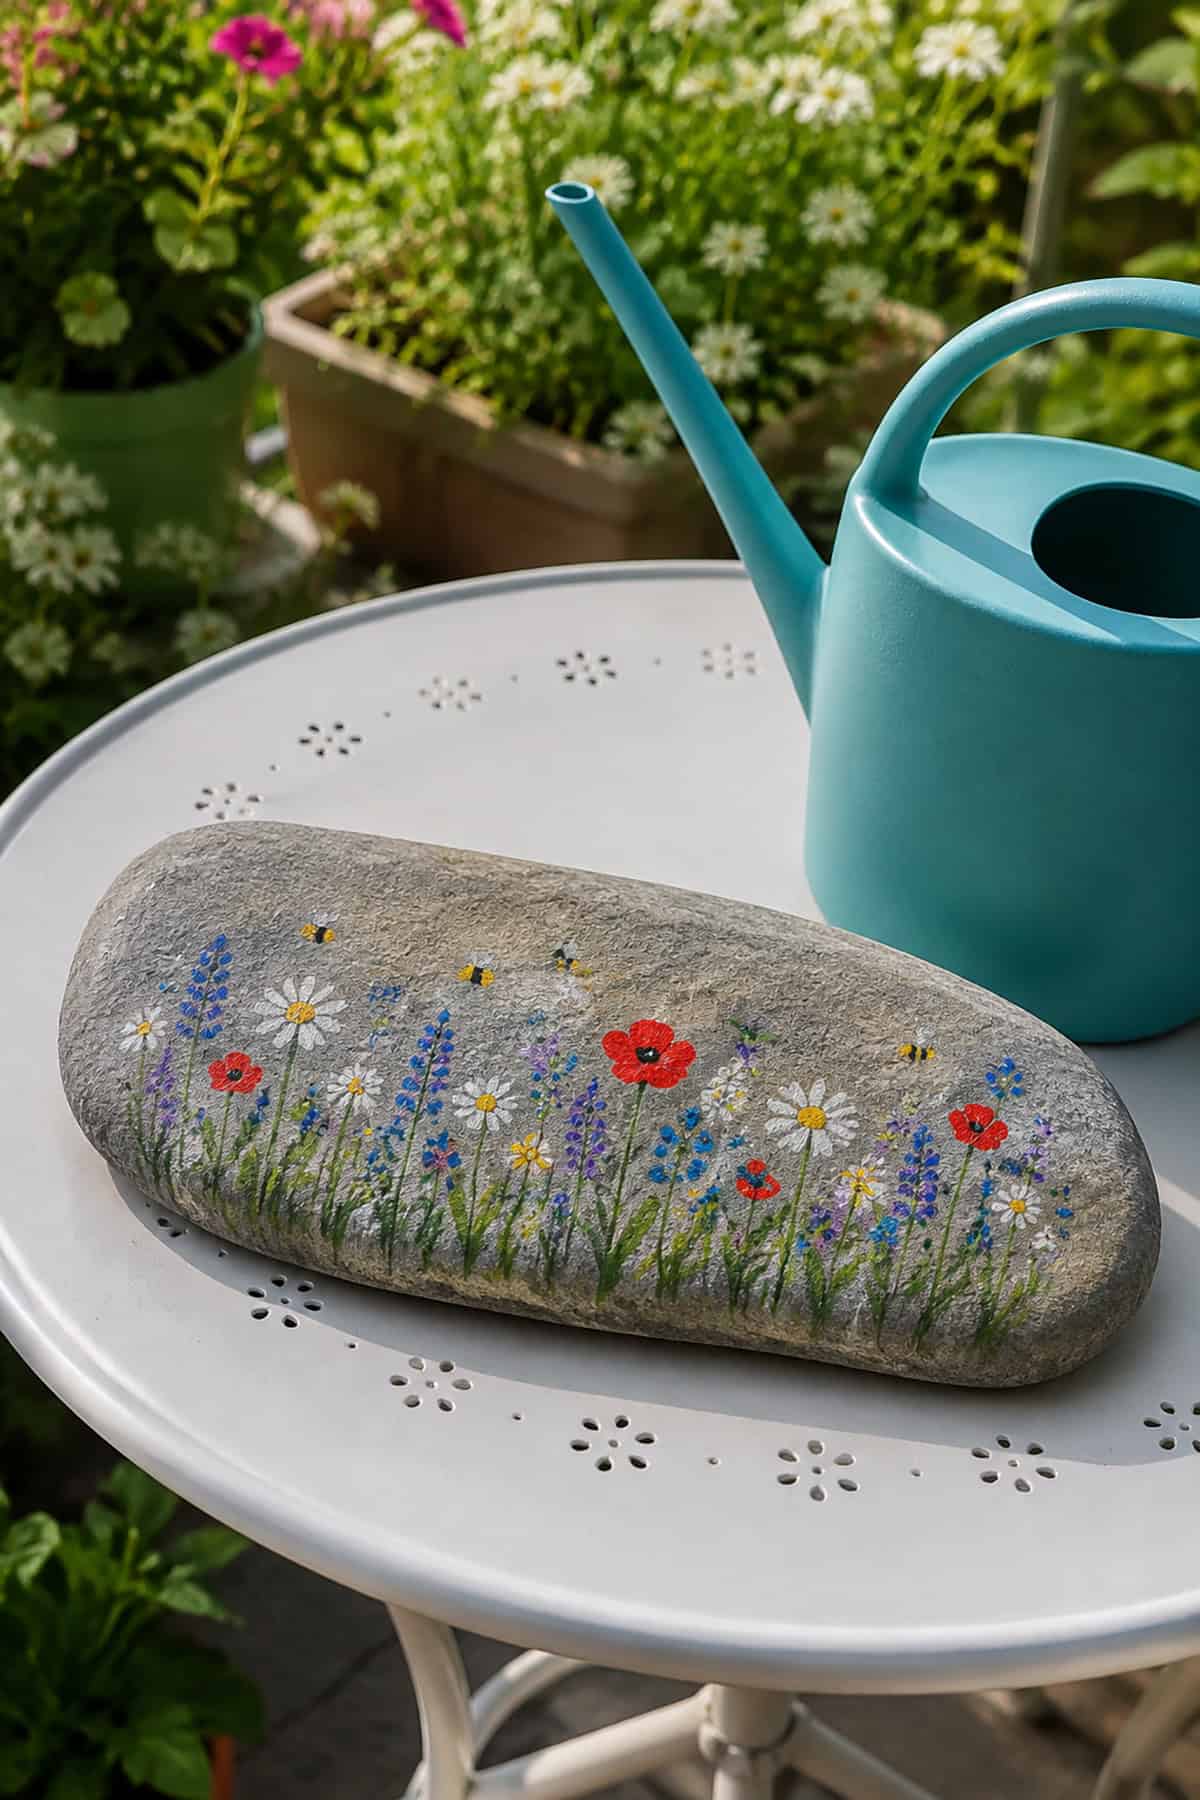
Divide the stone with a low horizon of grass strokes in three greens. Above it, scatter wildflowers, white daisies, purple lupines, yellow buttercups, at staggered heights using a dotting tool and a fine brush.
Two or three bees painted small, with a looping dashed flight path trailing behind each, sit in the open sky area. Keeping the bees tiny relative to the flowers is what makes the scene scale correctly.
Hot-Air Balloon Painted Rock
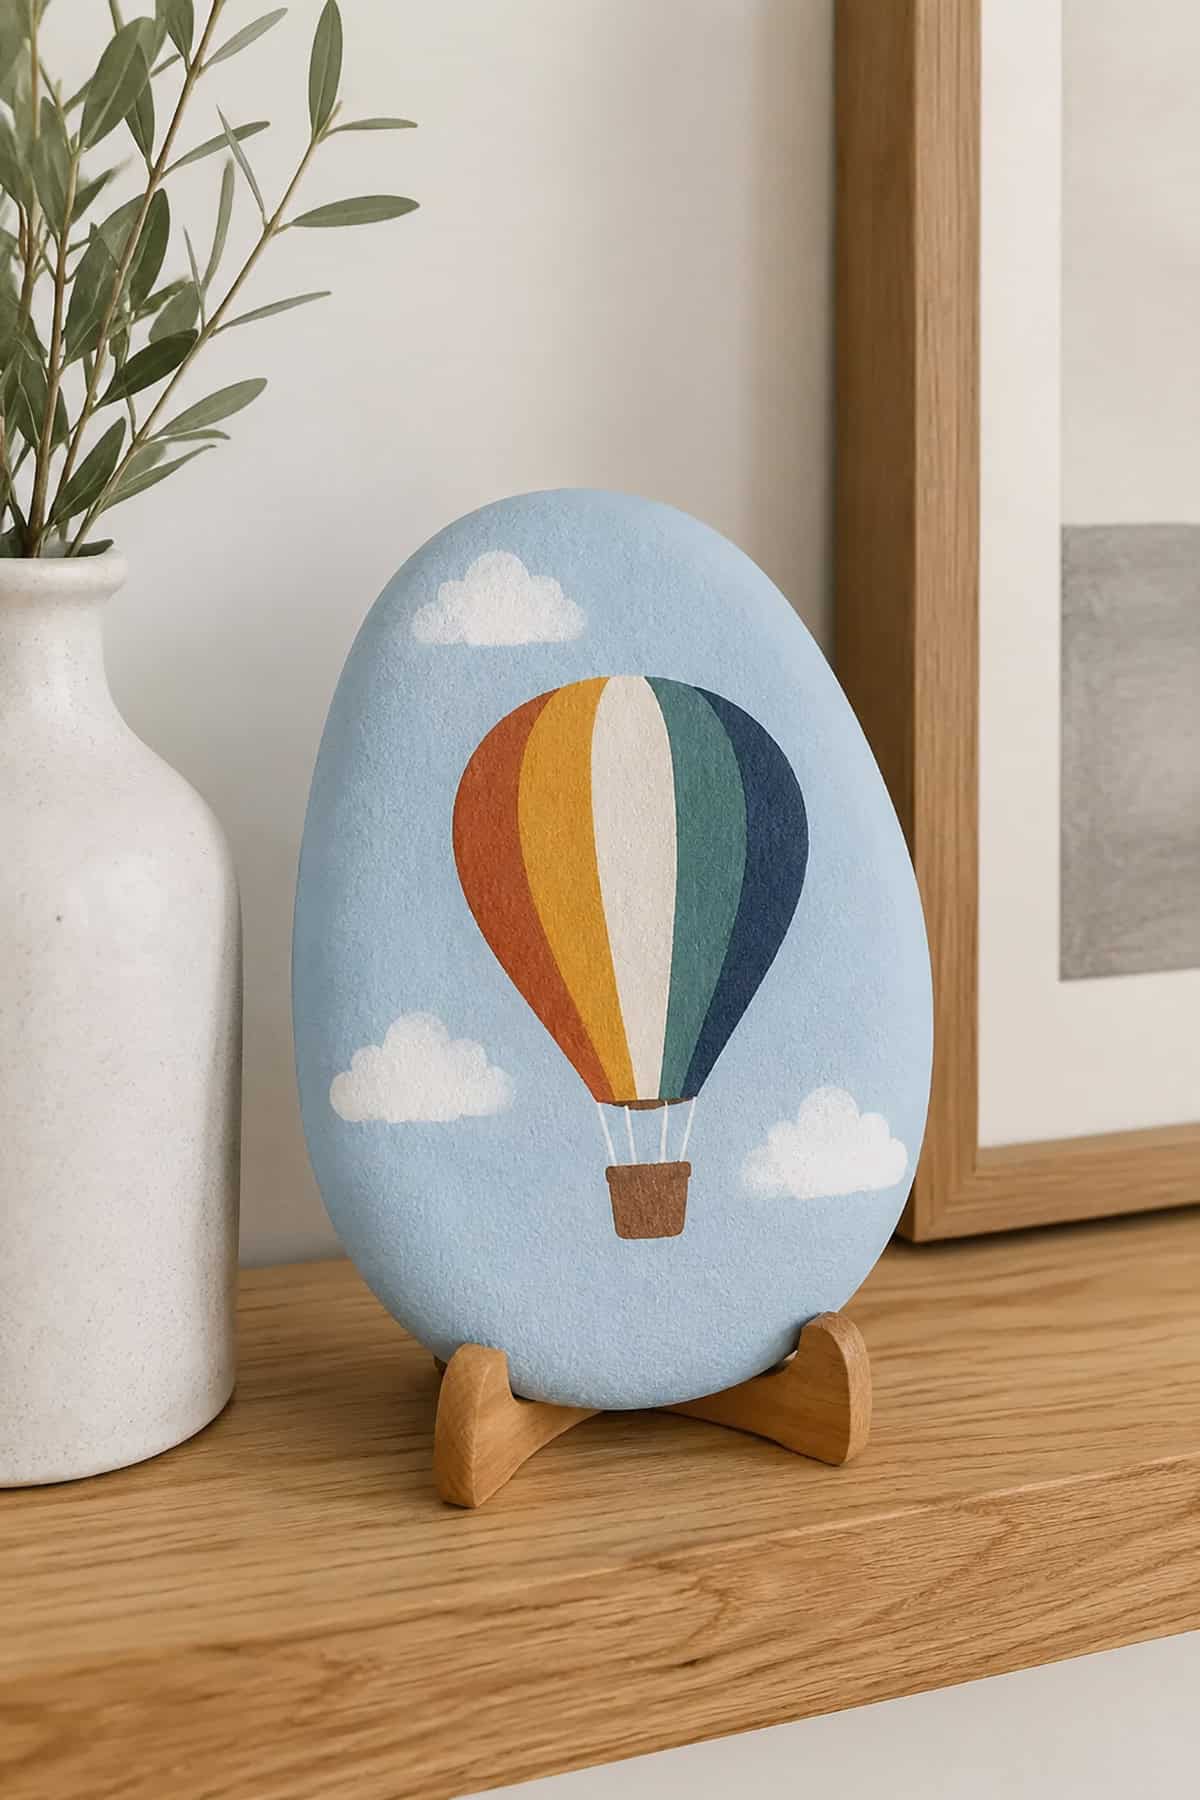
Tall, egg-shaped stones work here because the balloon envelope needs vertical room above the basket. Sketch the balloon outline in pencil first, leaving the bottom third for sky or a horizon line.
Vertical stripes in alternating colors read fastest from a distance. Fill each panel with a flat brush, let it dry, then run a black fine-tip pen down every seam so the curves separate cleanly.
The basket is a small brown rectangle with cross-hatched lines drawn on top. Three thin cords connecting basket to balloon finish the whole piece, and a few white dots in the sky suggest clouds without crowding the design.
Charming Pig Face Rocks
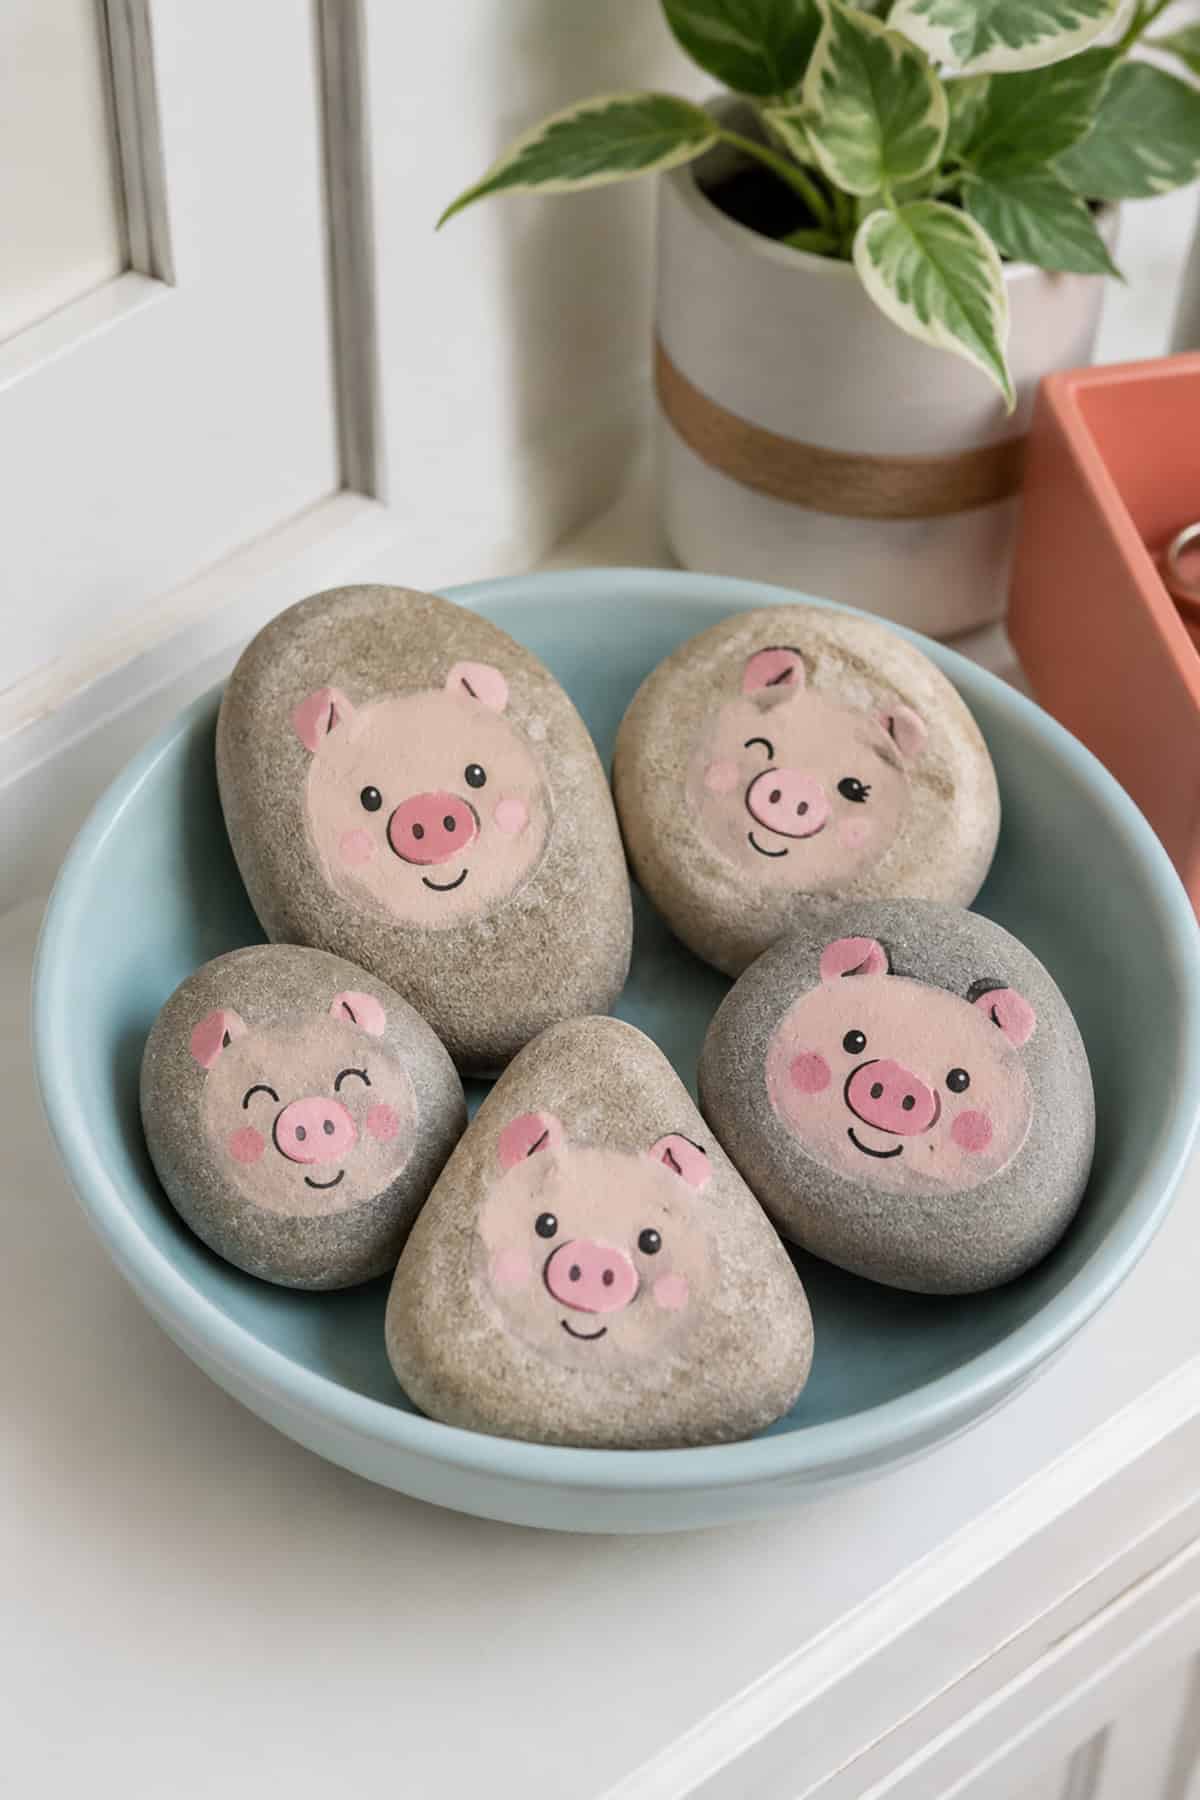
Round, palm-sized stones give you the proportions a pig face needs. Base coat the entire rock in pale pink, two thin layers rather than one thick one, since pink acrylic tends to streak over gray stone.
The snout goes low and center: an oval in a slightly darker pink with two black nostril dots. Ears are simple triangles at the top corners, filled pink with a dusty rose inner shape.
Eyes stay high and wide apart. Two black dots with a single white highlight dot in each corner is all it takes, and a curved smile line under the snout finishes the face.
Colorful Character Face Rocks
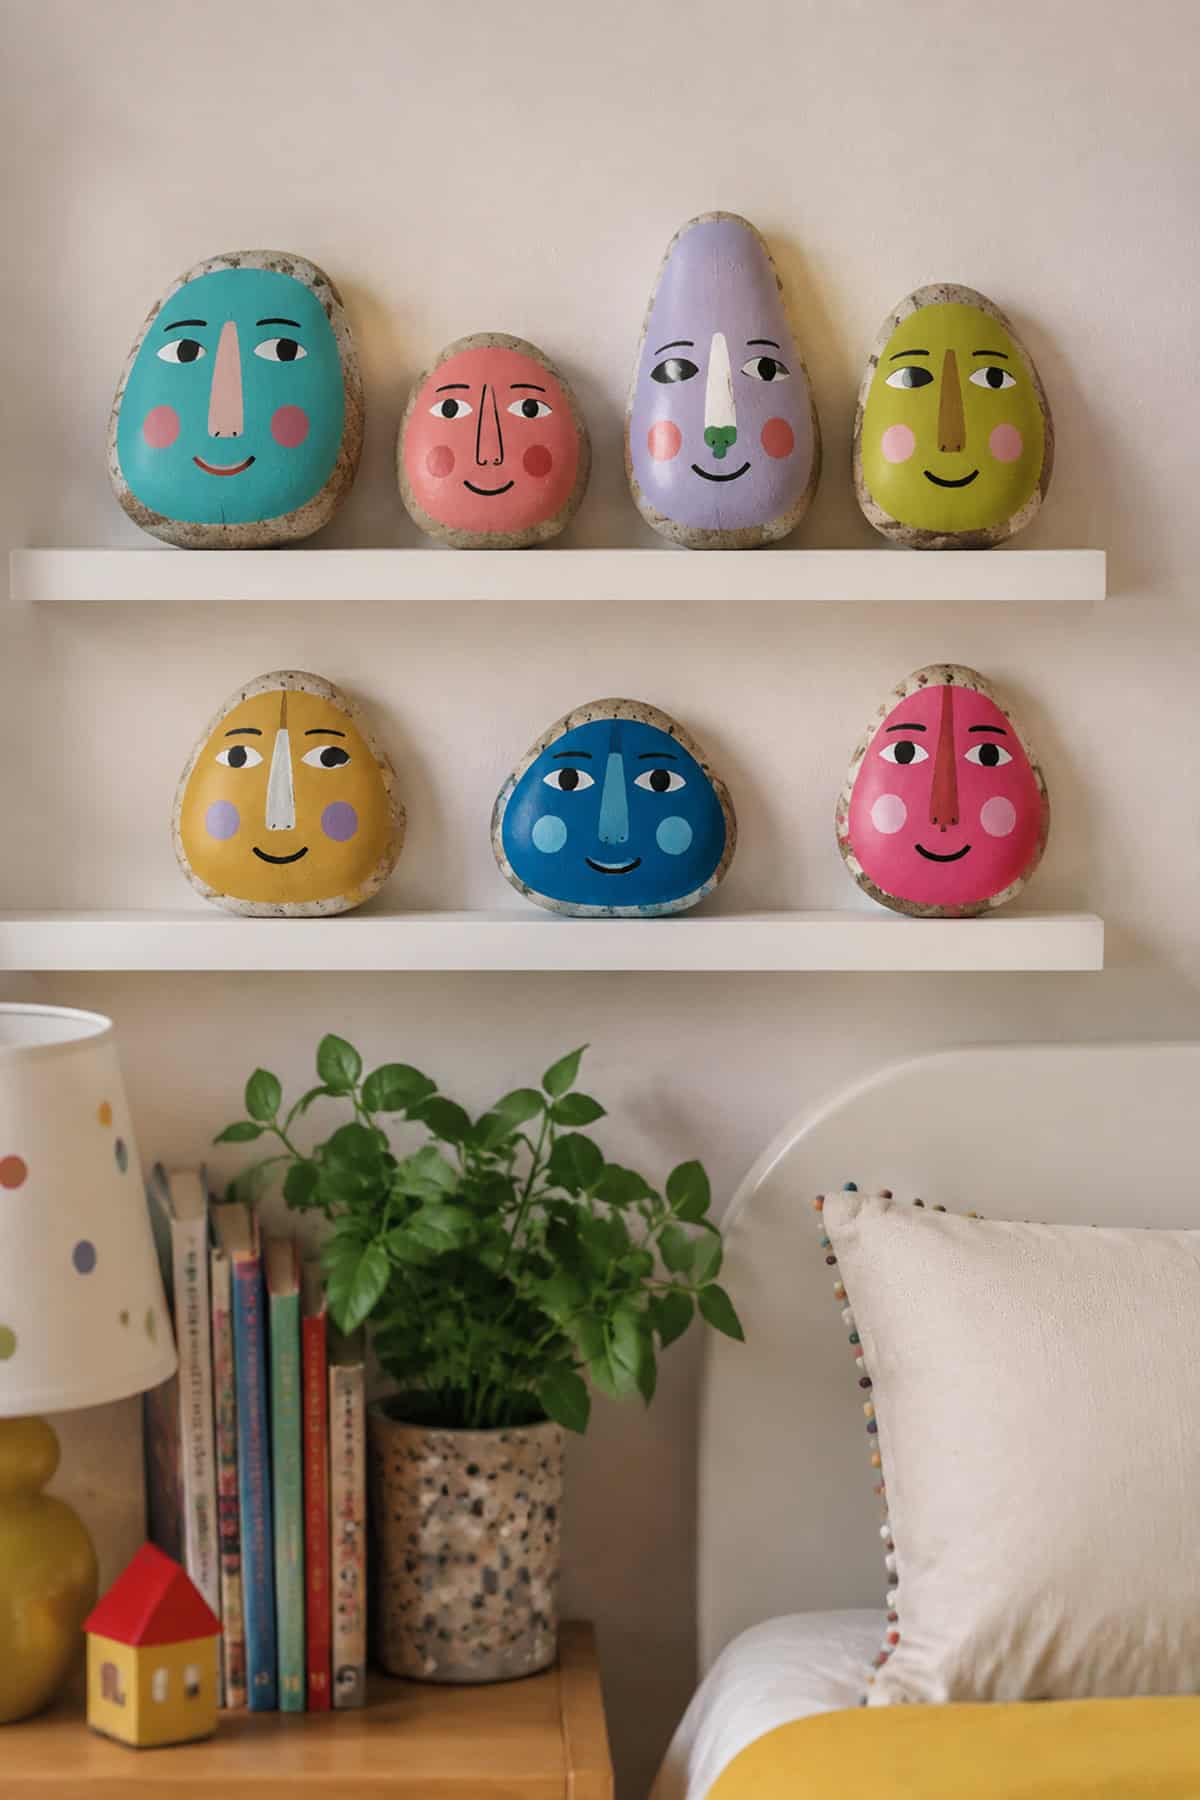
Kids gravitate to this one because the rules are loose. Any stone shape works, and each face turns out different depending on where the eyes land.
Start with a bold background color across the whole rock, something saturated like teal, coral, or mustard. Once dry, add oversized eyes with white paint and black pupils, then position them off-center for a goofier result.
Mouths carry the expression. A wide grin with visible teeth, a small surprised circle, a lopsided smirk drawn in black paint pen. Add freckles, hair tufts, or a tiny hat shape along the top edge, and no two rocks in the batch will match.
Colorful Fruit Painted Rocks
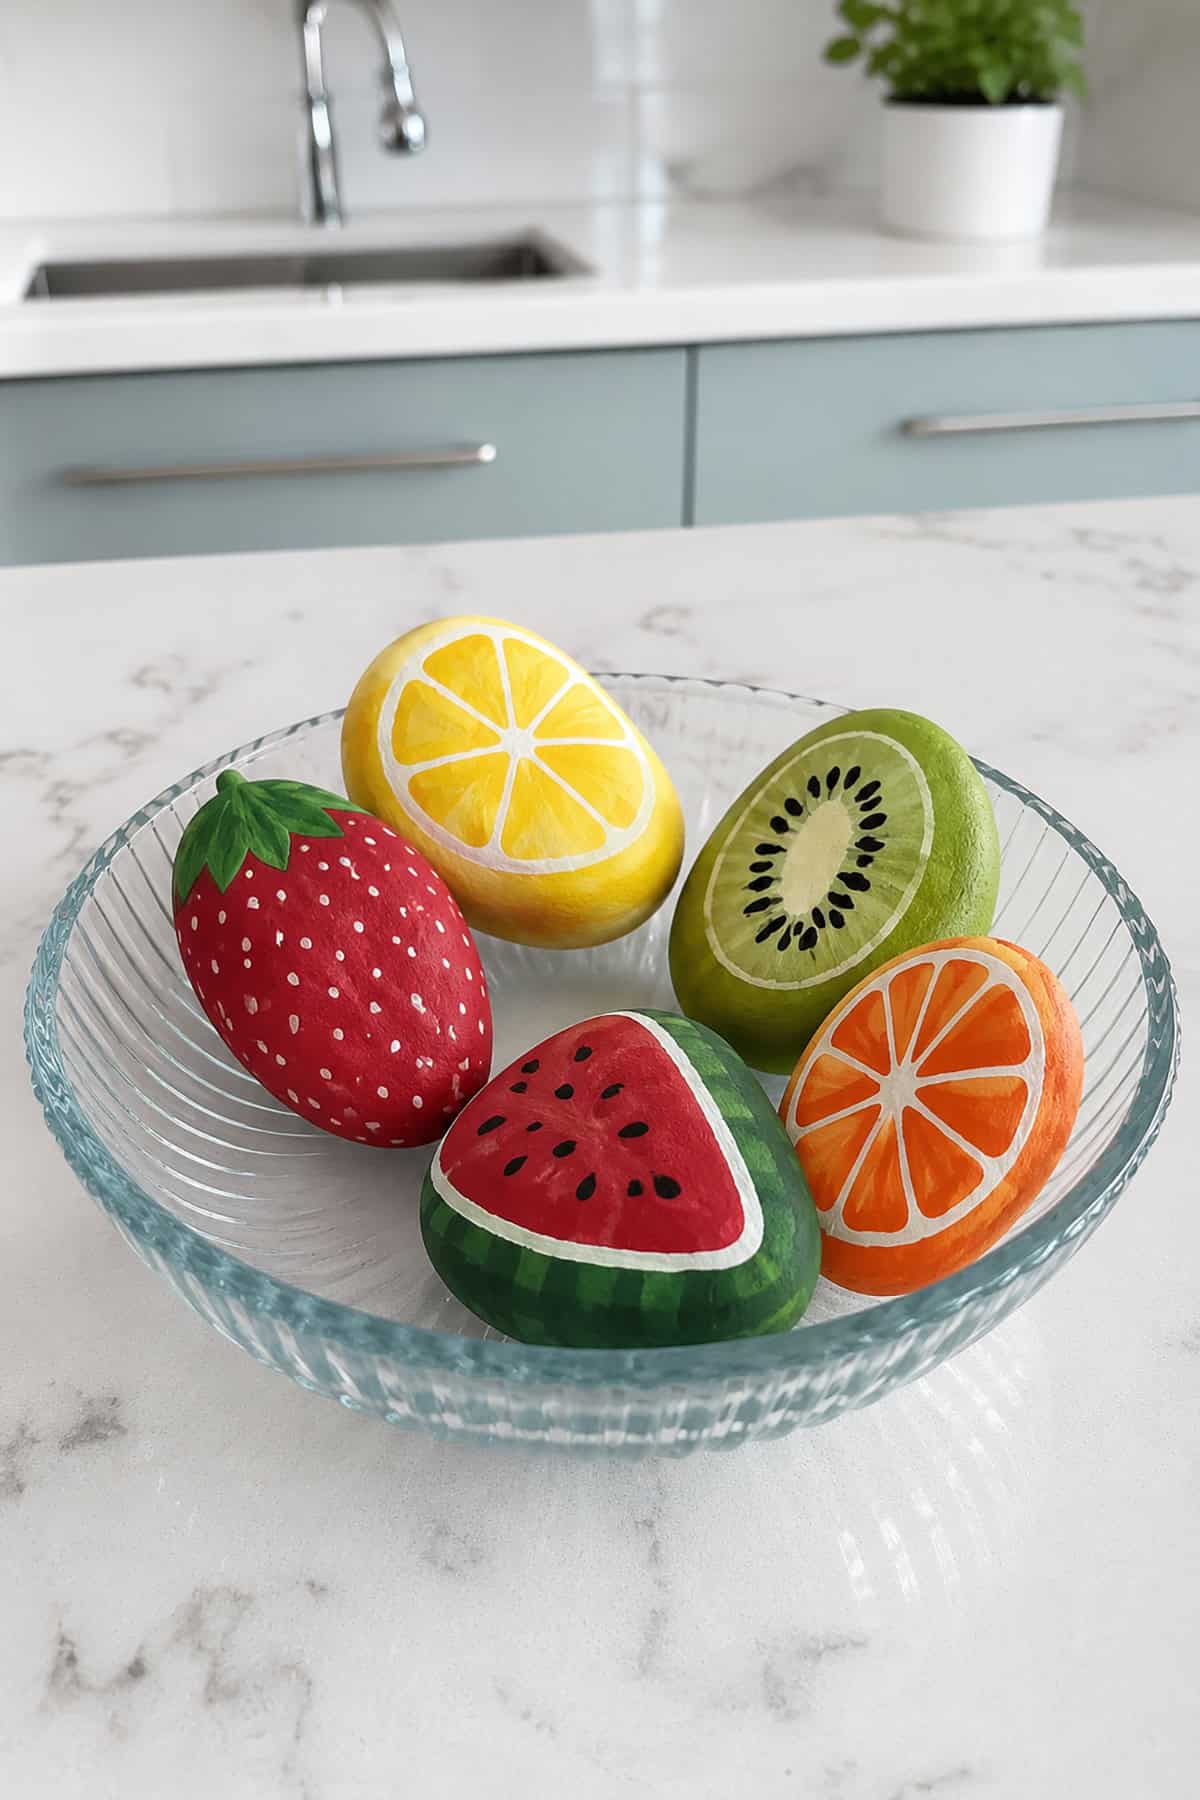
Match the stone to the fruit before painting anything. Long ovals become bananas or watermelon wedges, round rocks turn into oranges and apples, and small flat pebbles work for strawberry painted rocks.
Watermelon rocks need three bands: green rind along one curved edge, a thin white stripe above it, and red filling the rest. Black seeds go on last with a fine brush or the tip of a toothpick.
Strawberries want a red base with a green leafy crown at the top and tiny yellow seed dots scattered across the body. Line up a pineapple, kiwi slice, and lemon half alongside them for a full painted fruit stand.
Creative Studio Helper Rocks
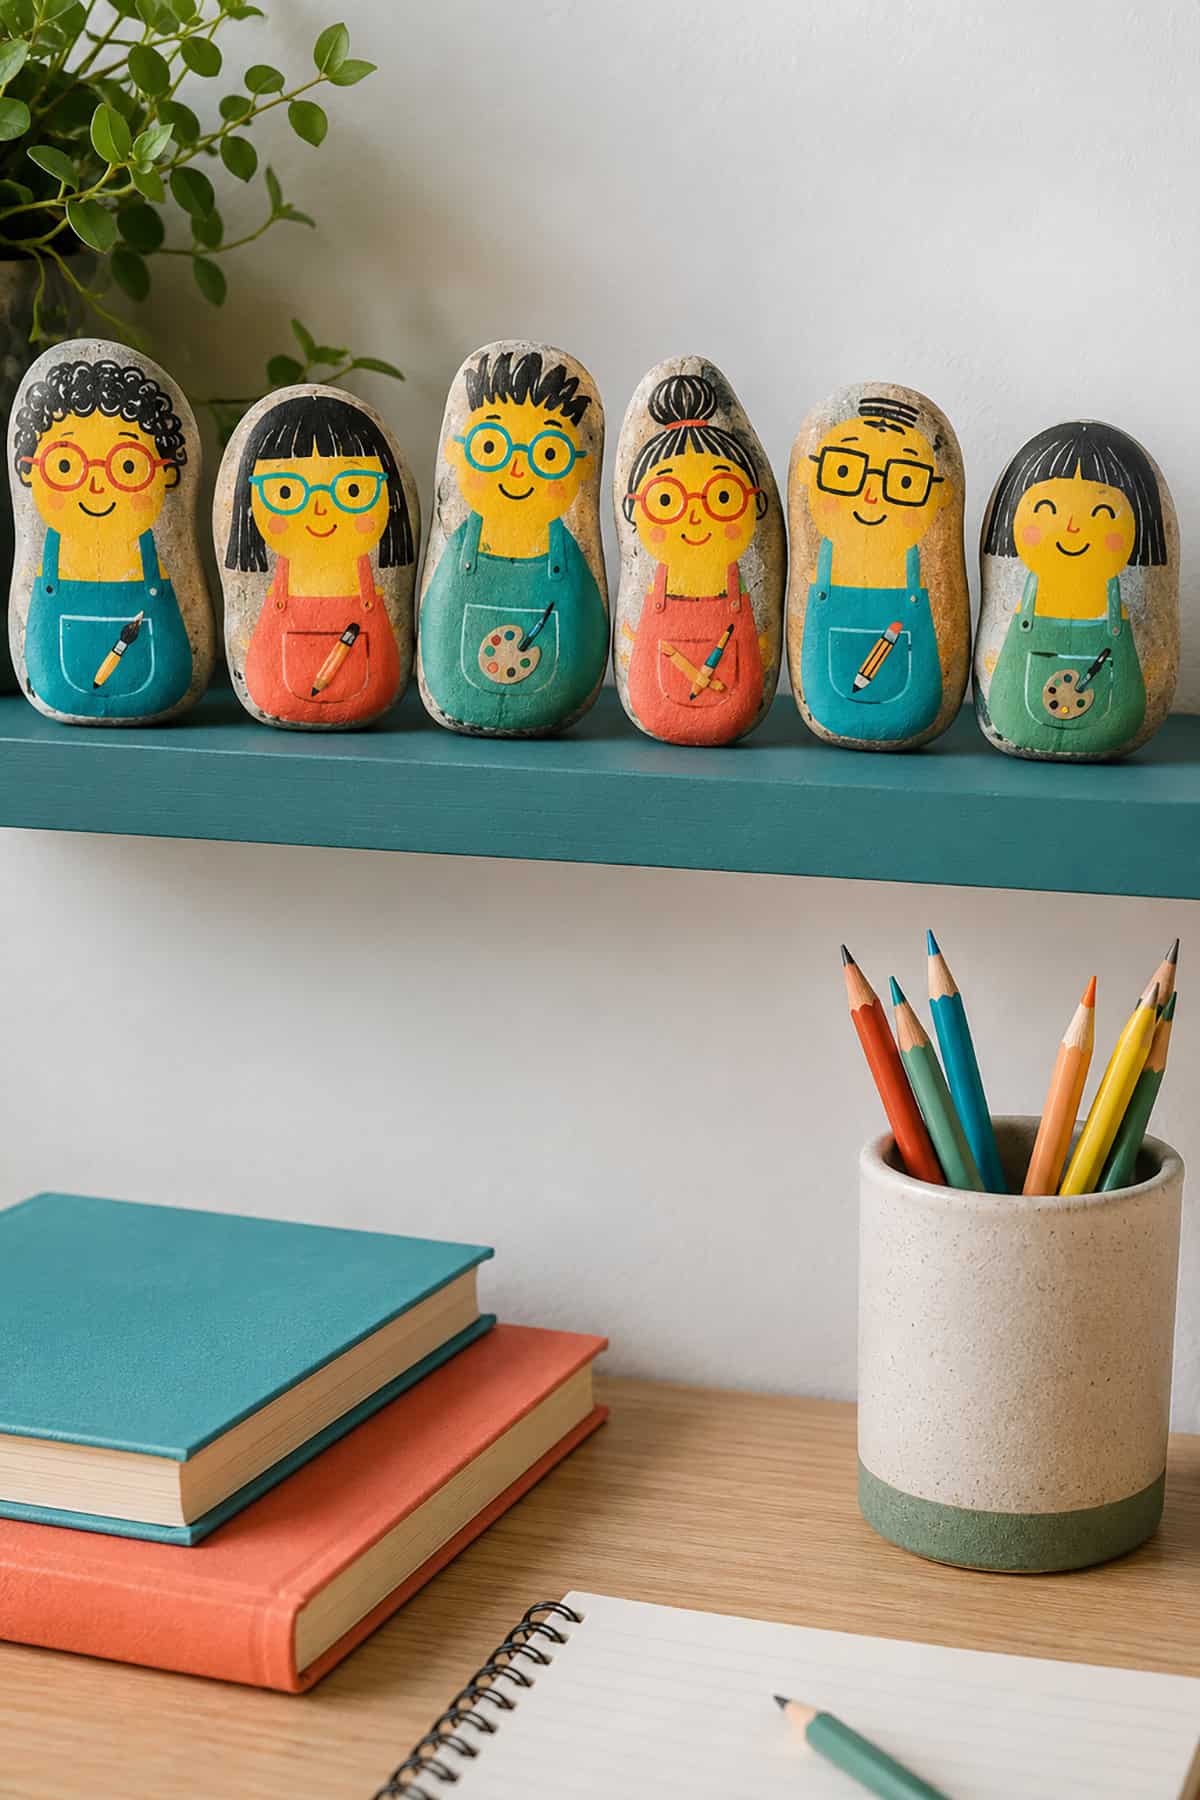
Weight is the point here. Heavier, flatter stones hold down loose sketch paper, keep pattern pieces flat, and prop up a phone at the right angle for filming.
Paint them in colors that read against a cluttered desk: bright chartreuse, deep navy, a hot orange. Solid blocks of color beat fussy detail when the rock has a job to do.
Label a set with what each one holds. A tiny painted paintbrush, a spool of thread, a pair of scissors, each done in white paint pen over the base color. Felt glued to the bottom keeps them from scratching your work surface.
Desert Sunset Painted Rocks
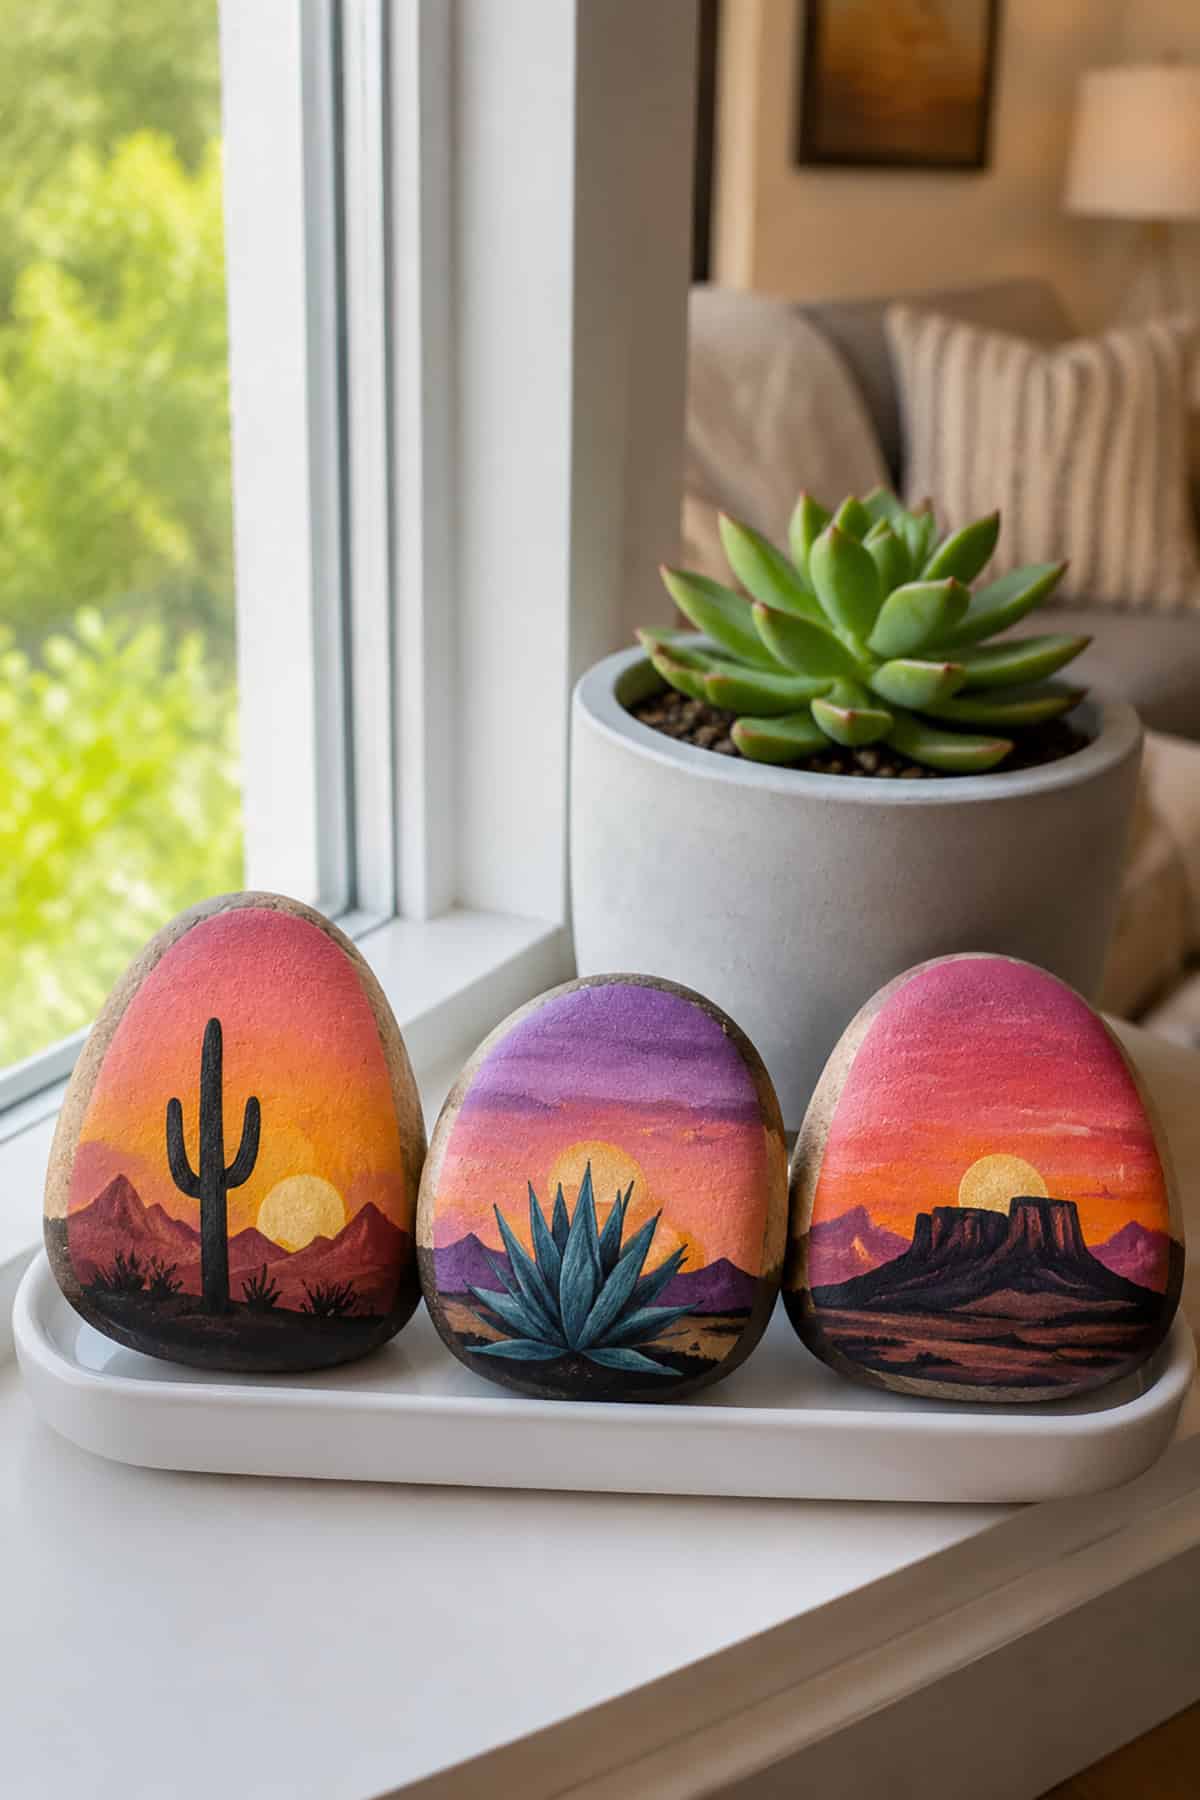
Warmth builds from the bottom up on these. Blend deep magenta at the base into orange, then gold, then a pale peach near the top edge while all the paint is still wet, using a dry brush to soften each seam.
Let the sky cure completely before touching it. A saguaro silhouette in flat black goes on next, painted with a small round brush, arms angled upward and slightly uneven.
Add a low horizon line of black mesa shapes behind the cactus. A small orange sun circle peeking above that line, painted before the silhouettes, gives the scene its focal point.
Gnome Planter Rock Decorations
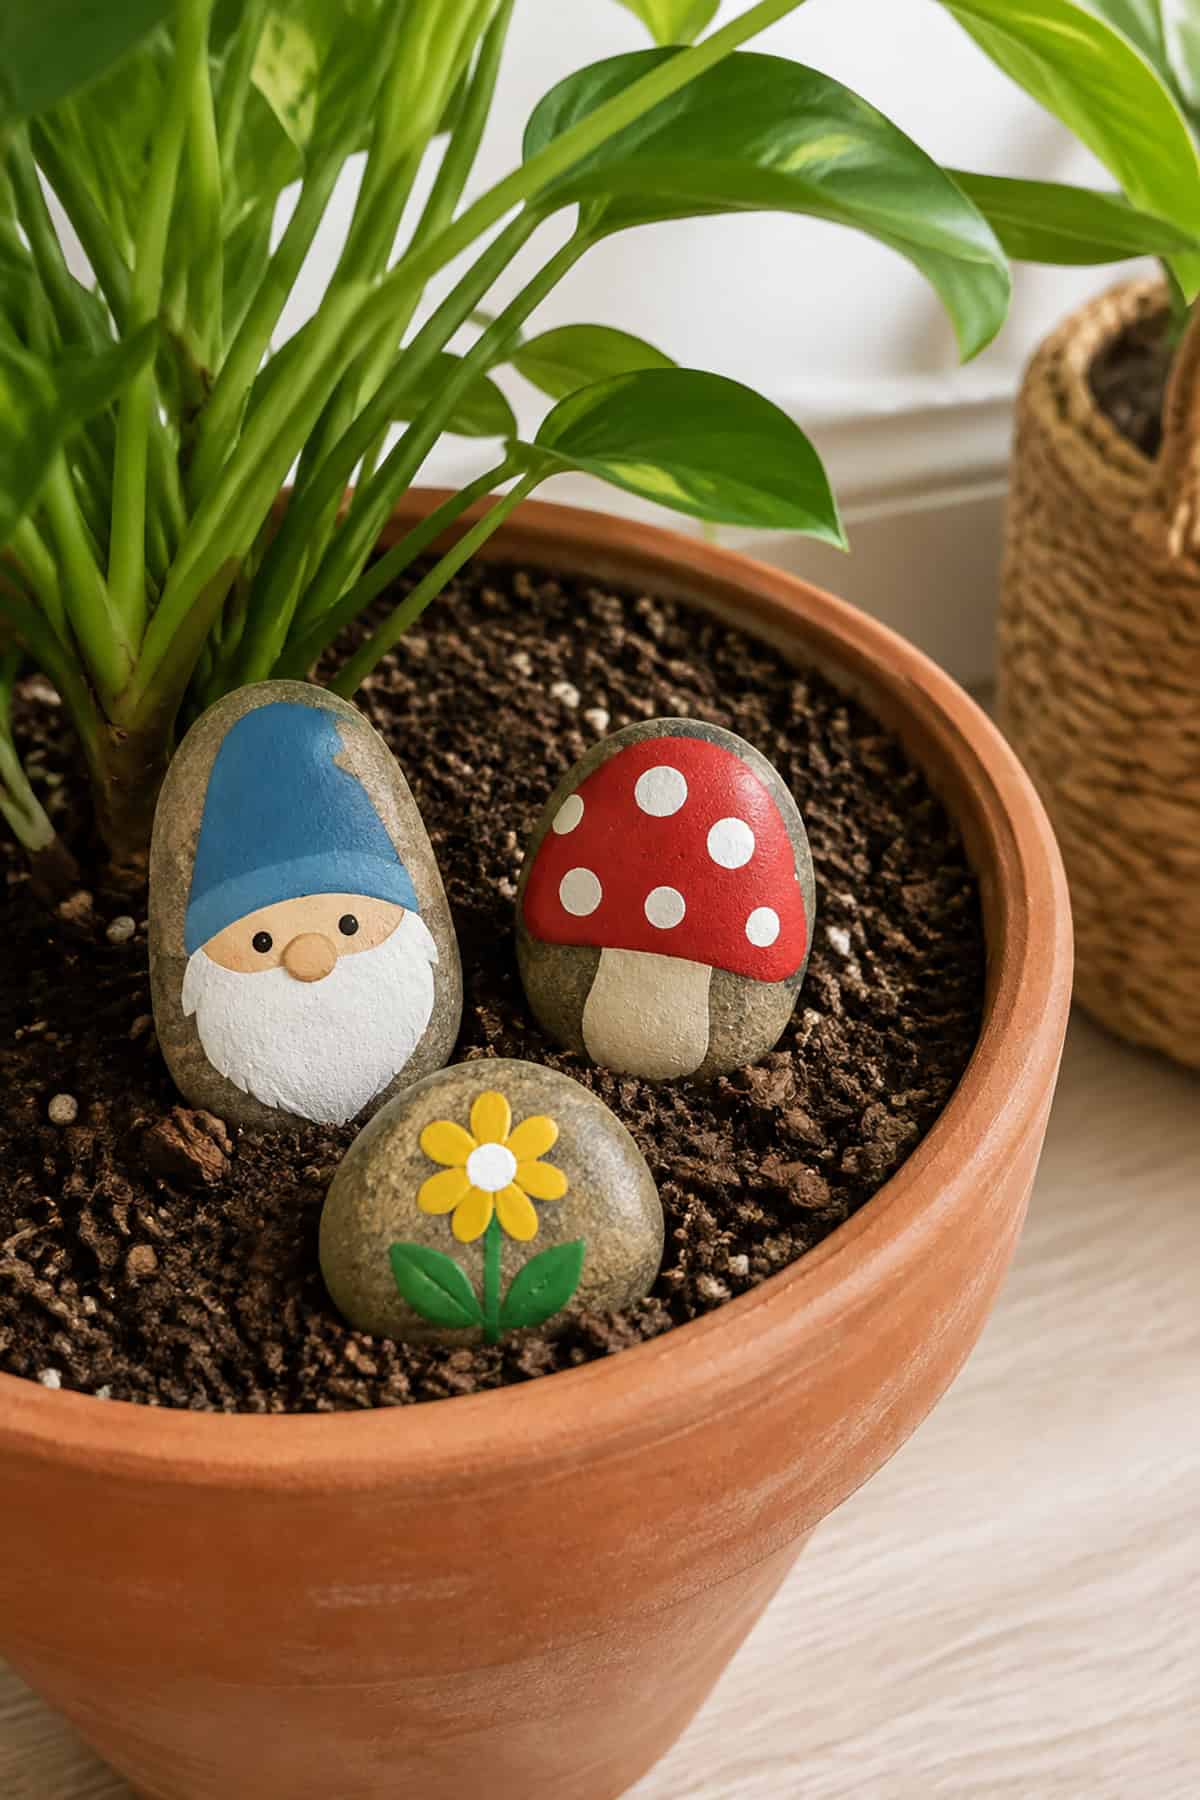
Cone-shaped or teardrop stones already have the gnome hat built into their profile. Paint the top two-thirds in a solid color, red, mustard, or forest green, and stop the hat line low so it nearly covers the face.
Below the hat brim goes a cream or peach triangle for the nose, pointed downward. Everything else is beard: white paint with soft curved strokes fanning out to the bottom of the rock.
Polka dots, stripes, or small stars on the hat give each one its own look. Tuck the finished gnomes into potted plants where the beard catches the light against dark soil.
Hand-Painted Koi Pond Rock
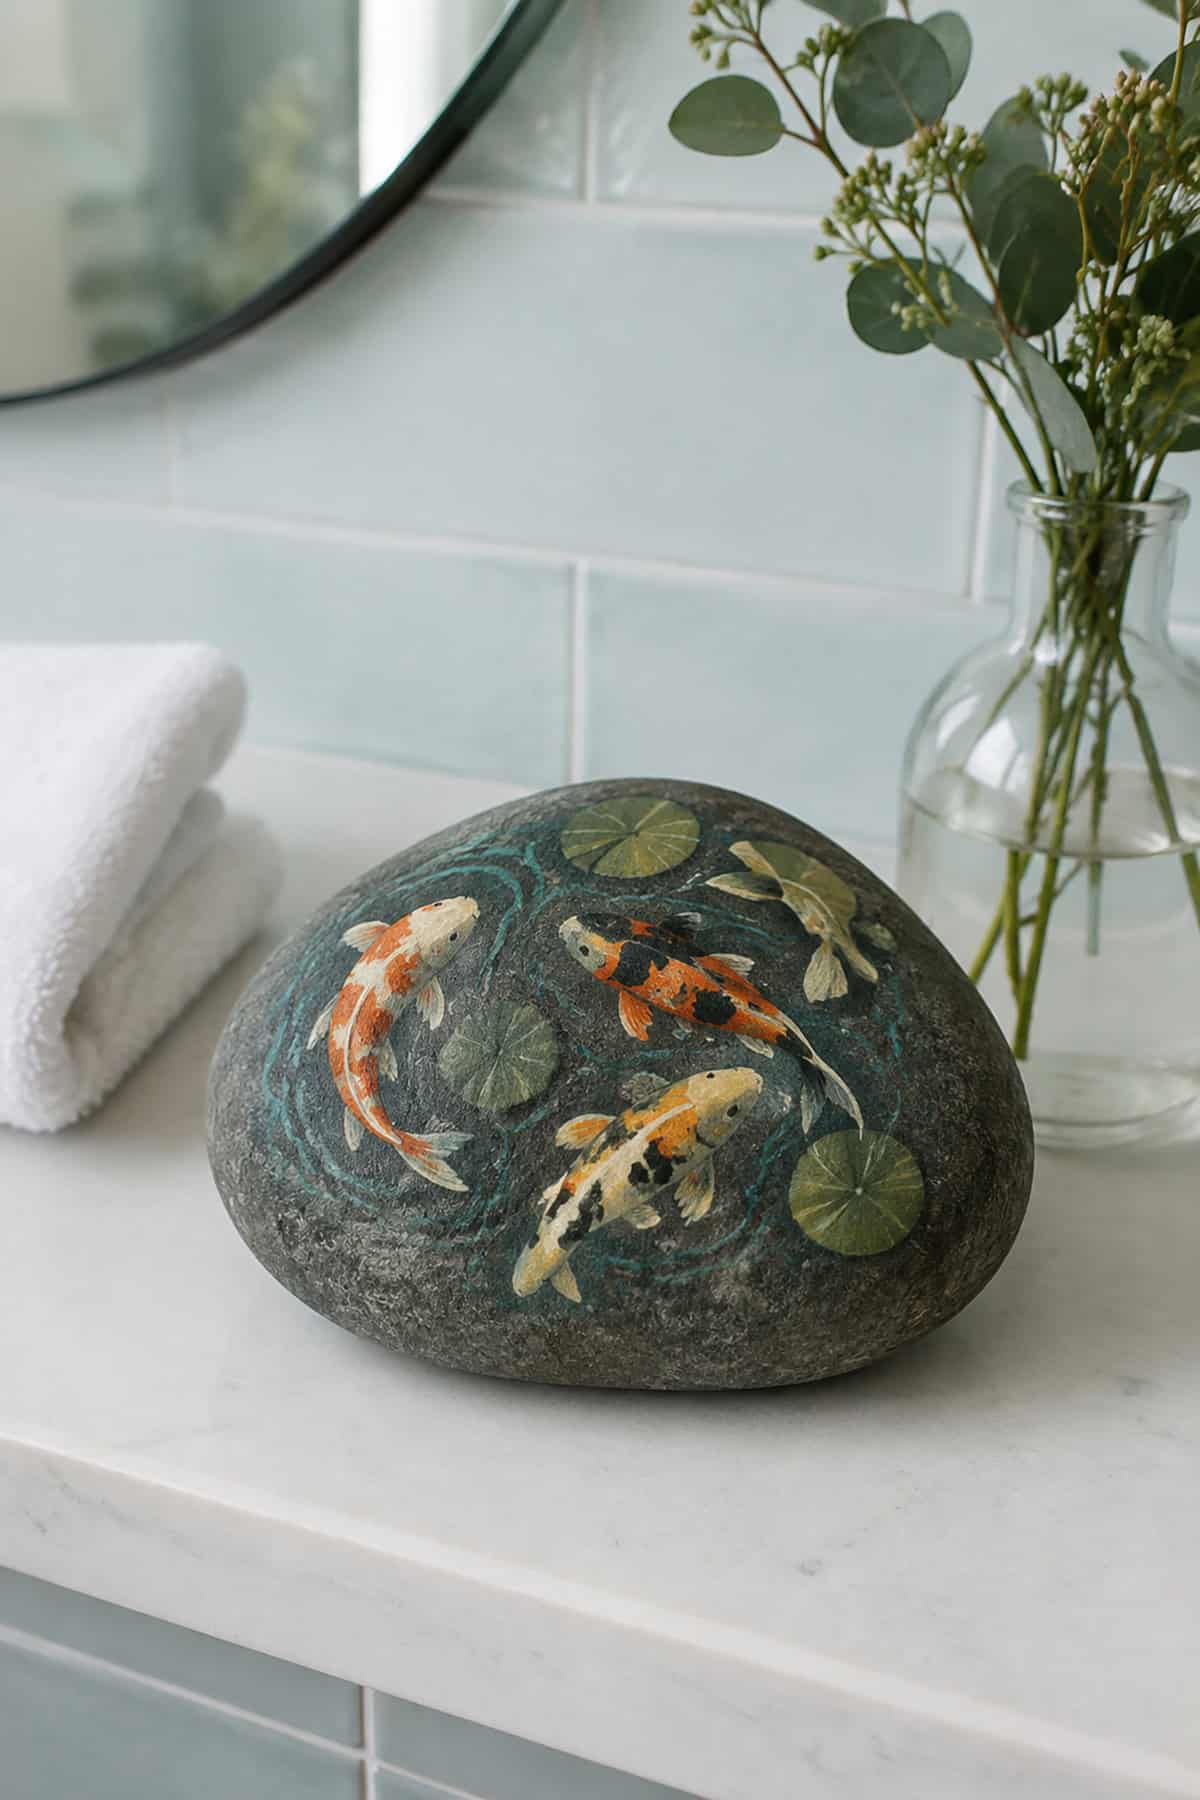
Depth comes from layering thin washes, not thick paint. Cover the rock in deep teal, then float lighter blue-green over the top edges with a nearly dry brush so the water looks lit from above.
Two or three koi swim across the surface at different angles. Paint each body in white first, let it dry, then add orange and black patches over the white so the colors stay bright instead of muddying into the background.
Fins and tails stay translucent. Thin the paint with water and pull short strokes outward from each body. Small white dots scattered across the surface read as light on water.
Jack-O’-Lantern Painted Rocks
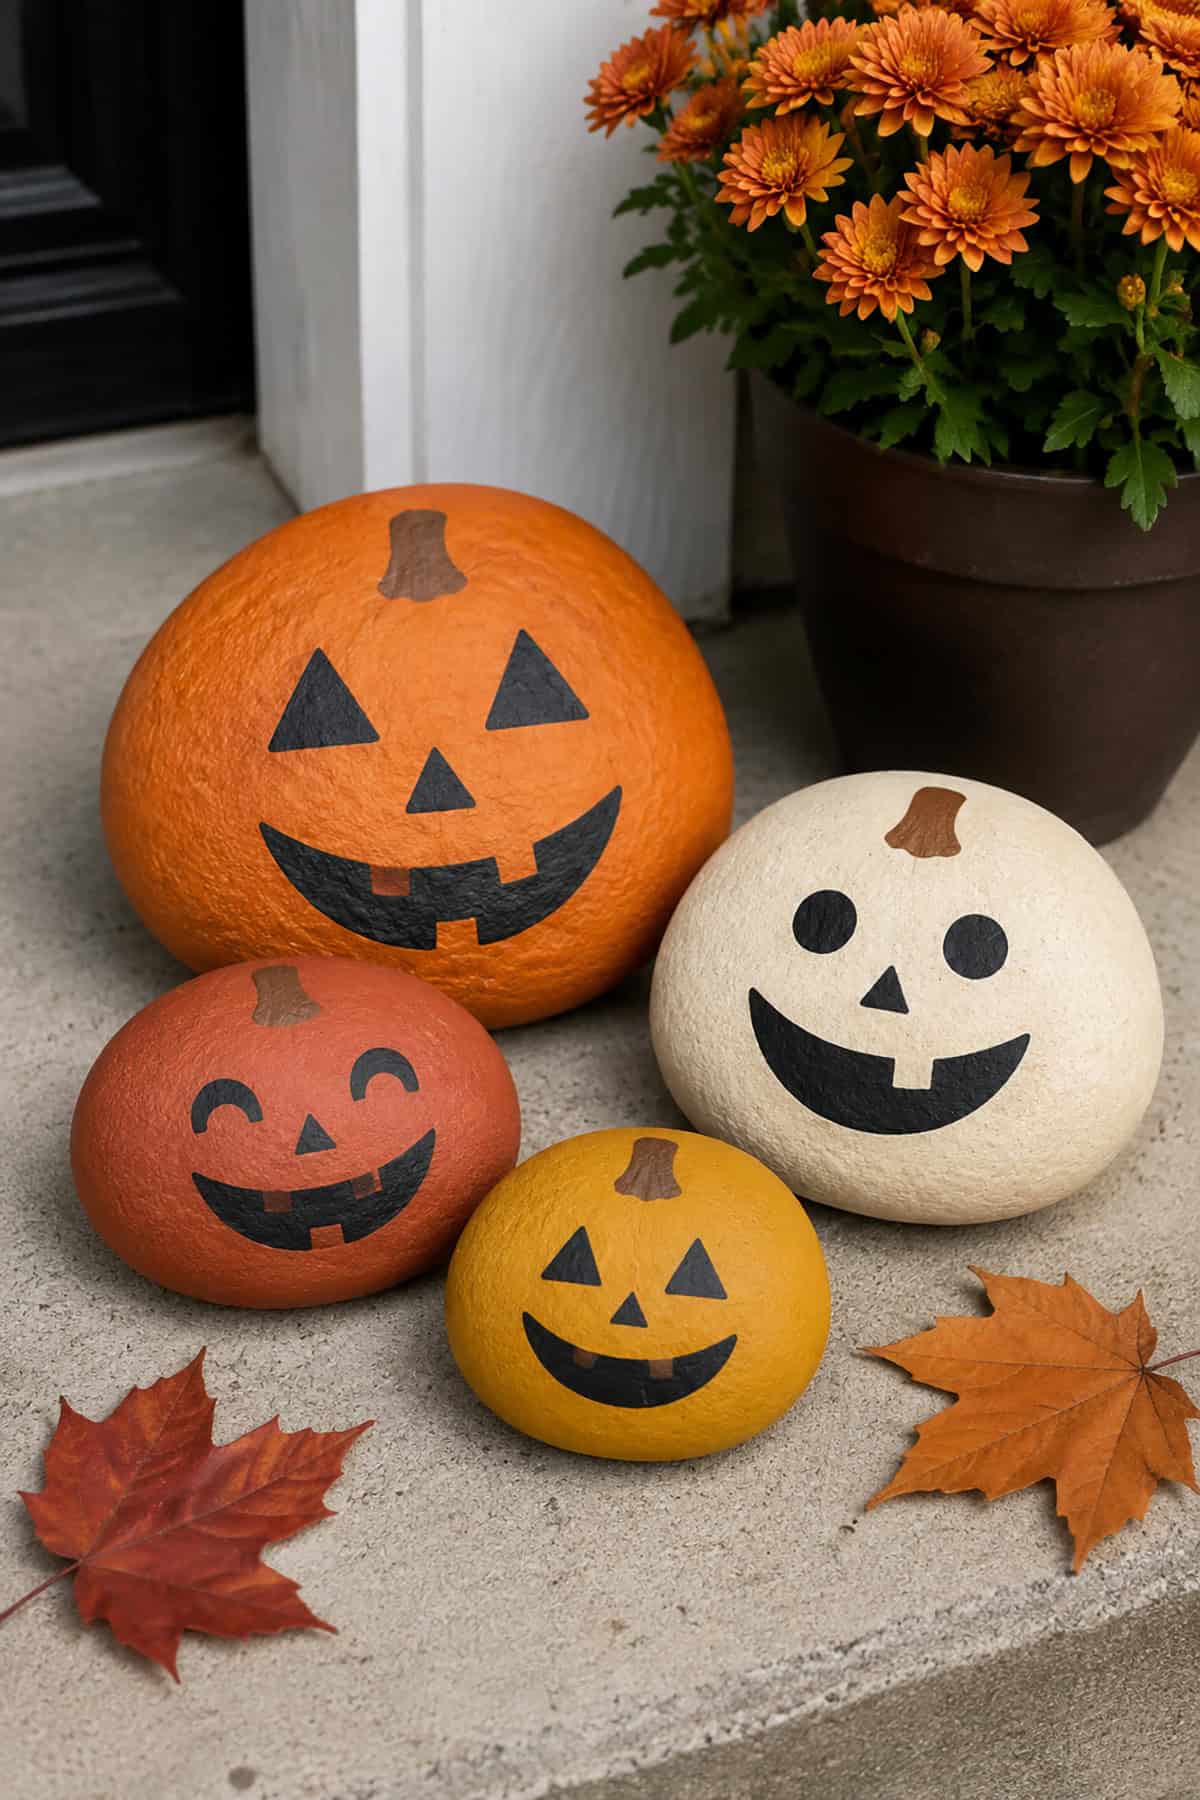
Rounder stones with a slight bulge in the middle sell the pumpkin shape without any drawing. Orange base coat, two coats minimum, then a short green stem at the top.
Curved rib lines in a darker orange give the pumpkin its form. Paint them from stem to base, following the natural curve of the rock, four or five lines total.
Faces go on last in black. Triangle eyes, a triangle nose, and a jagged grin, all painted flat with a small round brush. Line up a candy corn rock and a couple of ghost rocks next to them for a full Halloween set on the porch rail.
Modern Mountain Landscape Rock
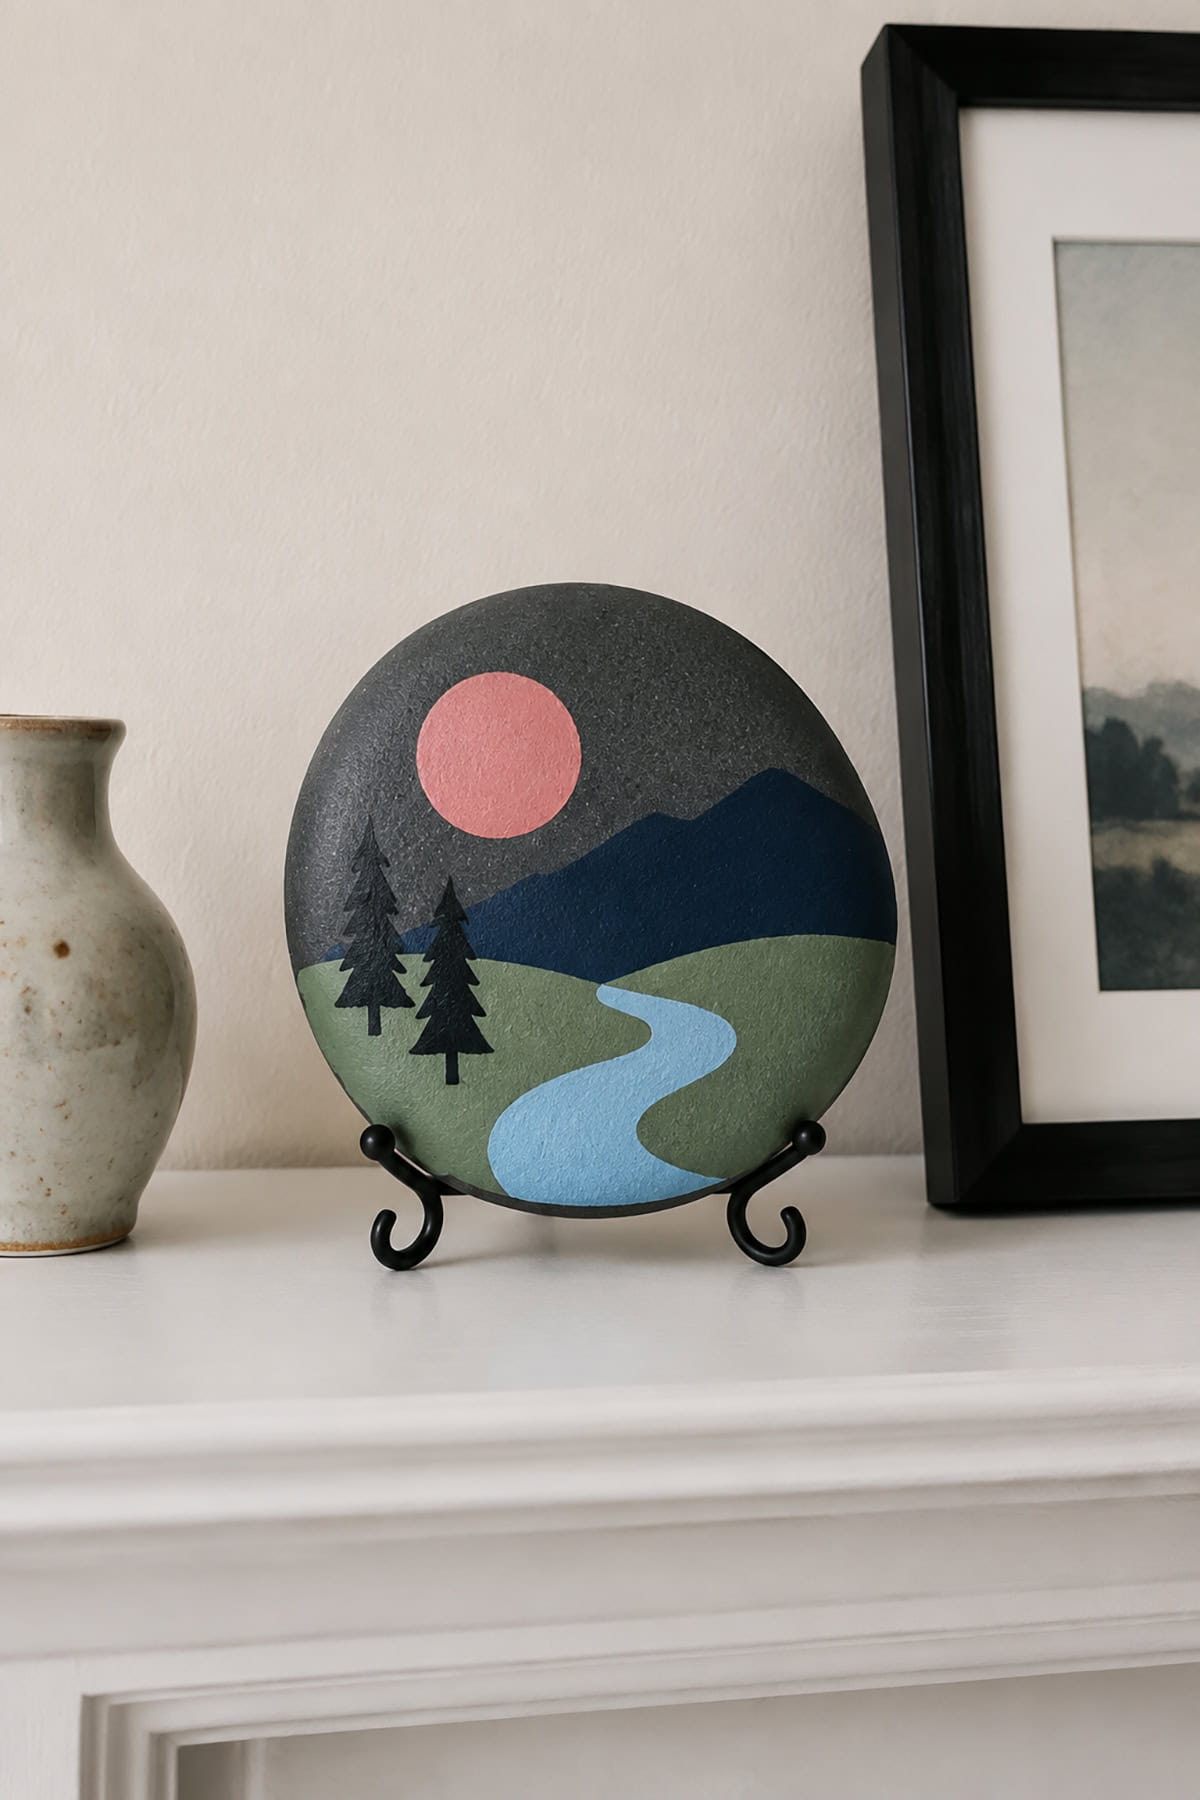
Restraint is what makes this design work. A cream or pale gray background, three overlapping mountain shapes in graduated tones, and a single circle for the sun. That’s it.
Use painter’s tape to mask straight peak edges if you want the crisp geometric look. Peel the tape while the paint is still slightly tacky to avoid lifting the layer beneath.
Terracotta, sage, and charcoal make a strong palette against cream. A thin gold or white line tracing the top ridge of the front mountain pulls the whole composition together and reads well on a bookshelf.
Monkey Family Painted Rocks
Graduated stone sizes do the storytelling. Pick three or four rocks from large to small so the family lines up on a windowsill in order.
Tan base coat on each, then a lighter cream oval covering the lower half of the face. Ears are two cream circles on the sides, painted partially onto the rock’s edge so they catch light.
Eyes sit close together above the muzzle line, with a wide curved smile below. Vary the expressions across the set. One asleep with closed curved lines, one wide-eyed, one mid-laugh with an open mouth.
Positive Message Painted Rocks

Lettering fails when the background is busy, so keep it plain. A single solid color across the rock, or a soft two-tone wash, leaves room for the words to land.
Pencil the text lightly before committing to paint pen. Short phrases work best on a stone this size: “you matter,” “keep going,” “breathe.” Center the first word and build outward.
A thin border of dots or a small heart in the corner finishes it. These are the classic kindness rocks, so seal them well and leave them where someone walking by will actually spot them.
Simple Sailboat Painted Rock
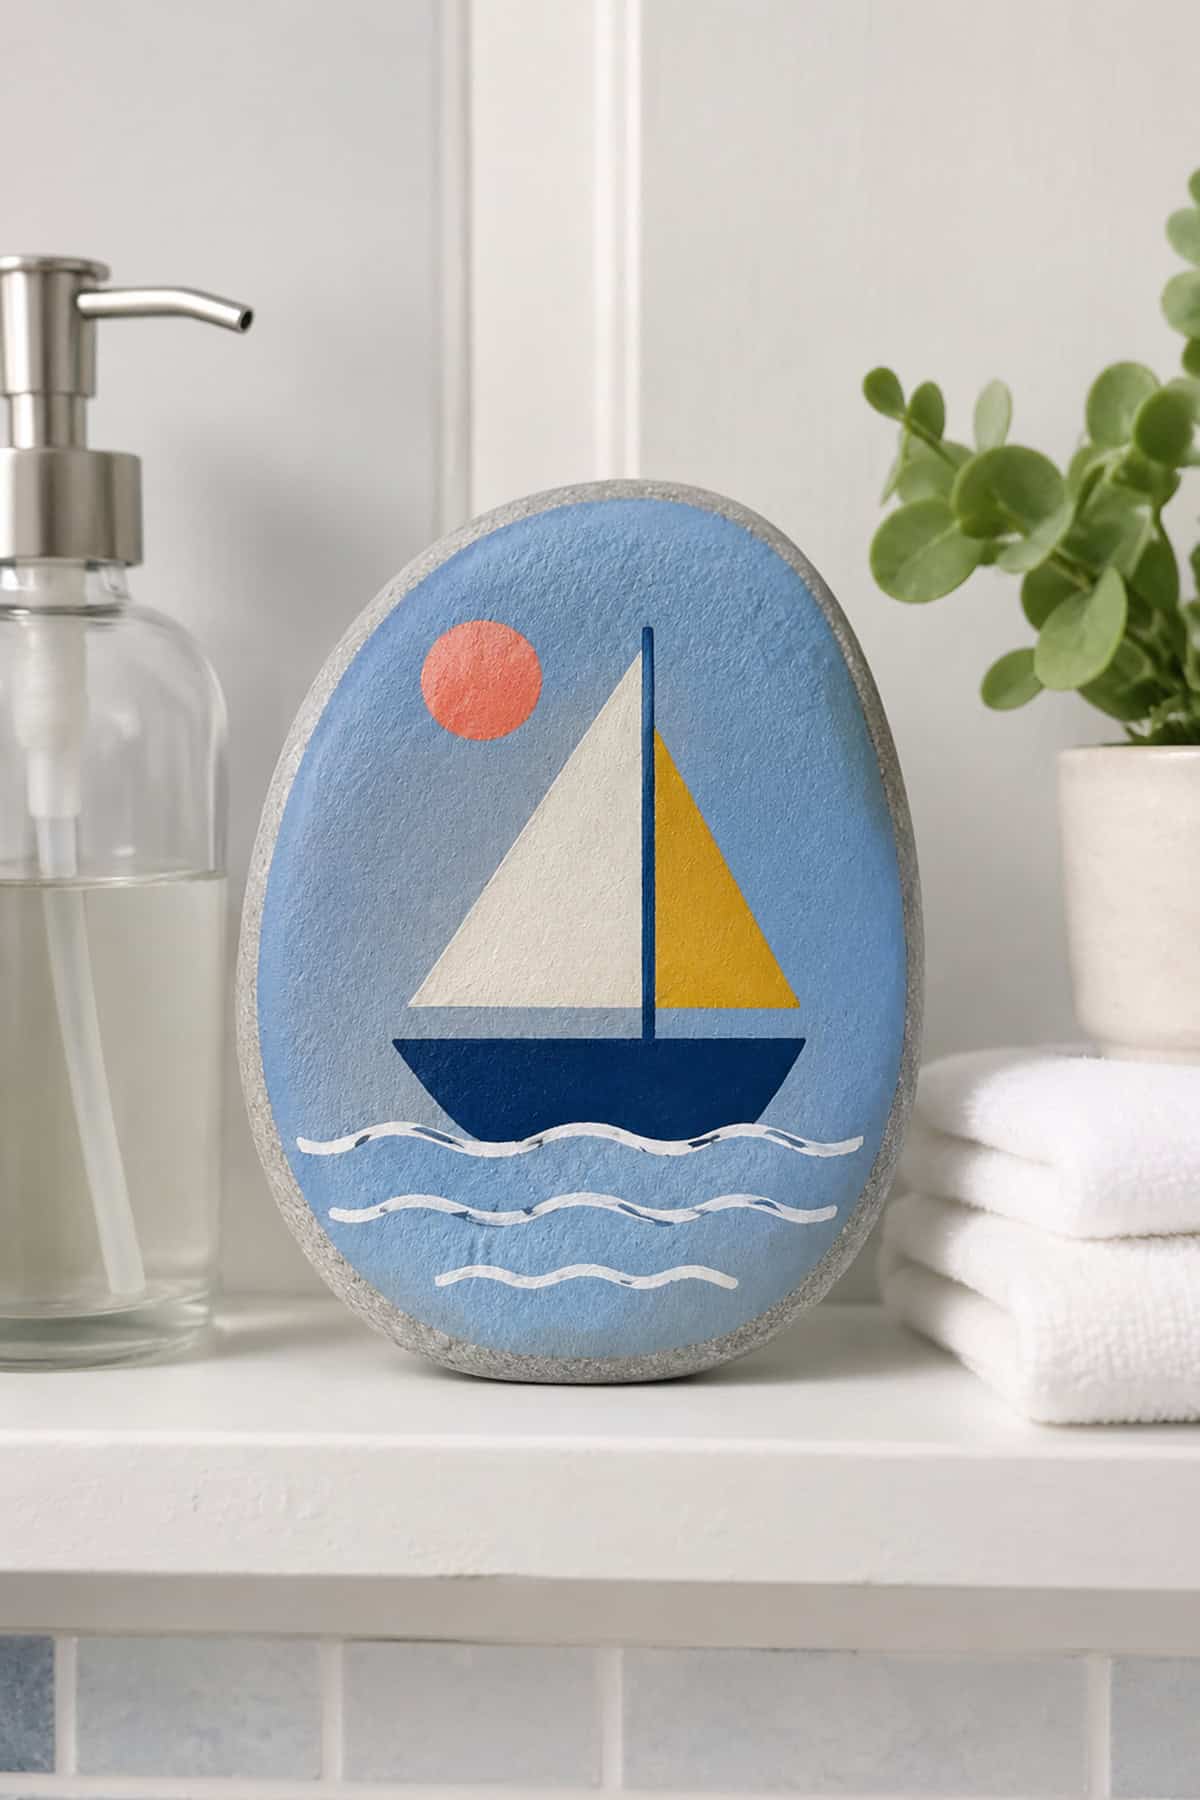
Horizontal stones set the scene fastest, with sky filling the top half and water the bottom. Paint the divide as a straight line, then soften the water with a few horizontal streaks of lighter blue.
The boat is two triangles and a small hull. White sails, one taller than the other, angled slightly right, with a thin brown mast line between them.
A red or navy hull anchors it to the waterline. Two seagull marks in the sky, drawn as small black check shapes, and a pale yellow sun in one corner complete a design that takes fifteen minutes start to finish.
Smiling Ice Cream Cone Rocks
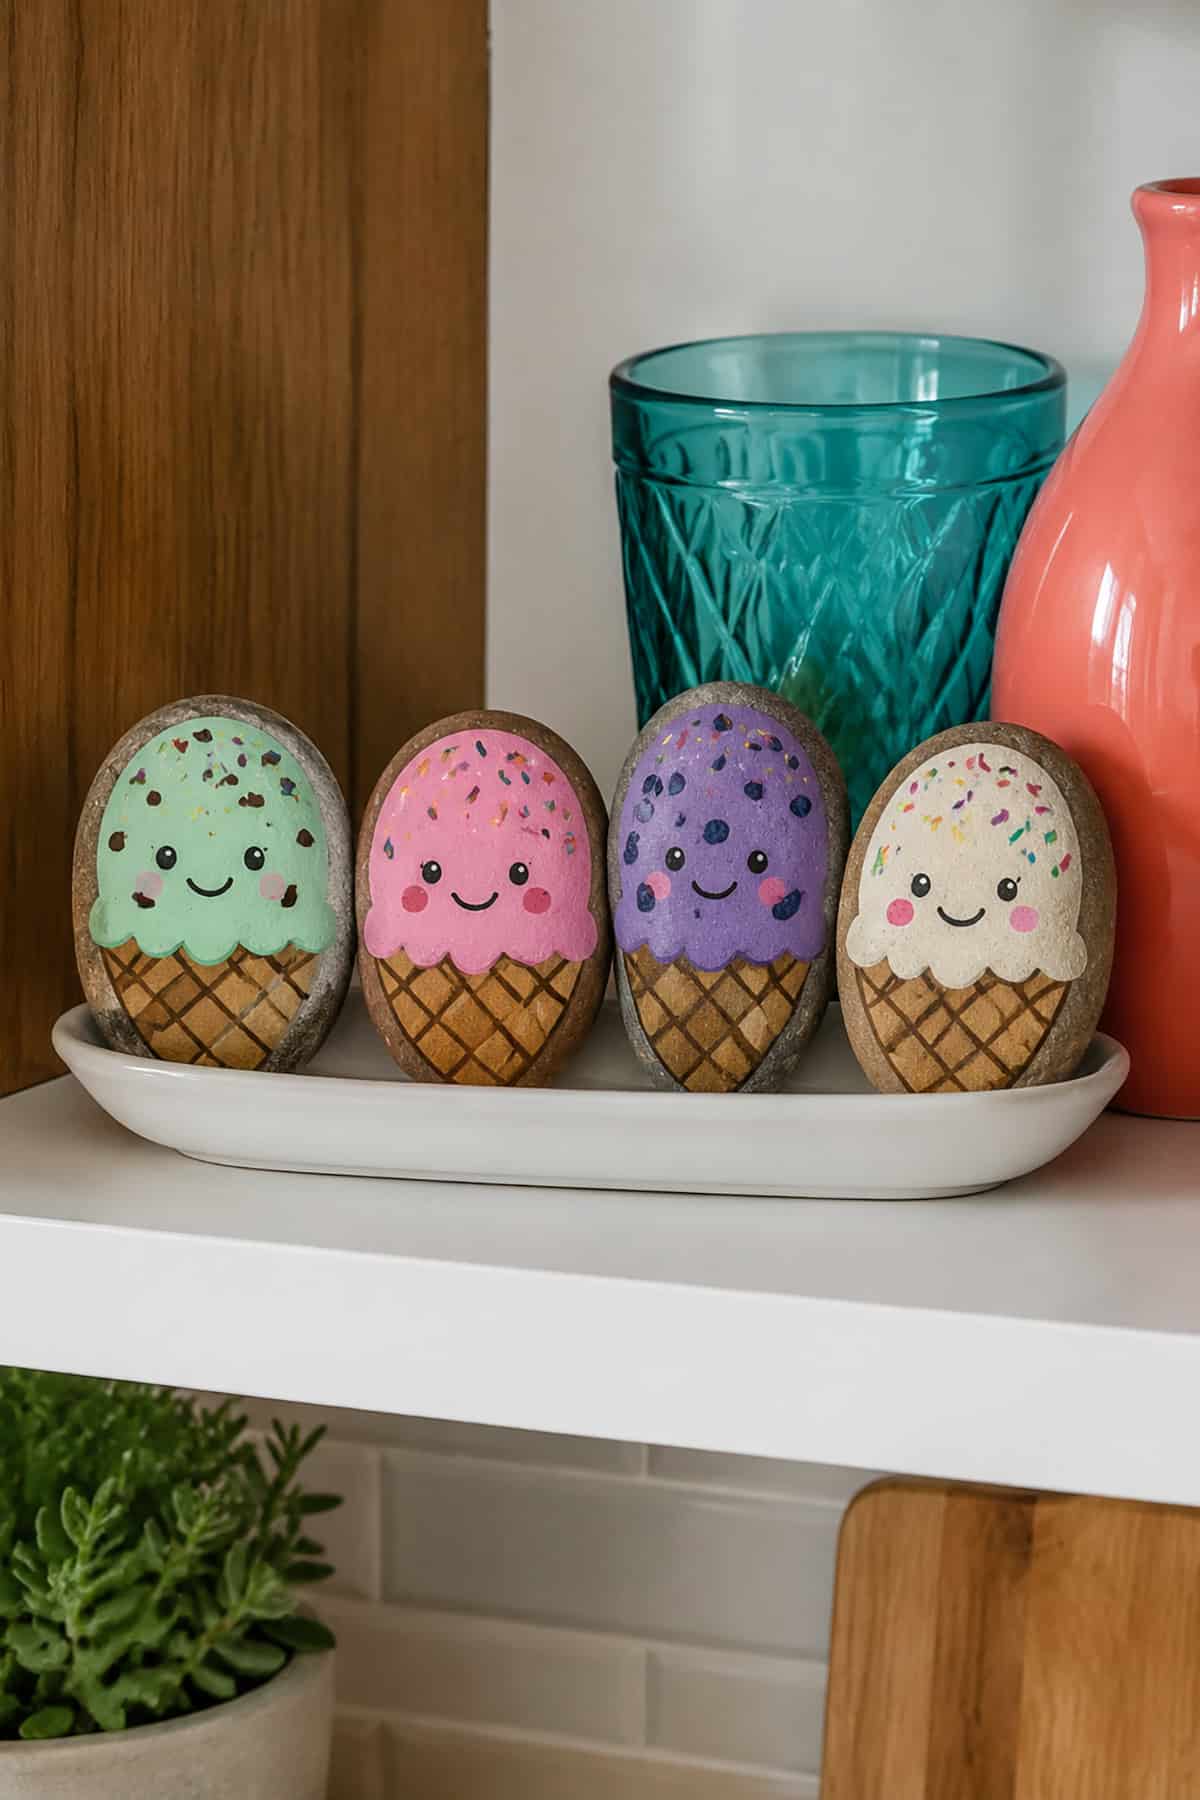
Tall, tapered stones read as cones without much help. Paint the bottom third tan or golden brown, then cross-hatch it with a darker brown paint pen for the waffle pattern.
Scoops stack above it in rounded mounds. Mint green, strawberry pink, pale yellow, each one a slightly different width so the stack looks hand-stacked rather than machine-made.
The face goes on the top scoop: two black dot eyes, rosy cheek circles, and a small curved smile. Add a red cherry with a green stem at the very peak and a few white sprinkle dashes across the scoops.
Sports Ball Painted Rocks

Round stones and flat white base coats get you most of the way there. Basketballs need orange with black curved seam lines, four of them, two vertical and two arcing across the sides.
Baseballs stay white with two red curved stitch lines, each stitch a tiny angled dash. Soccer balls take the longest: white base, then black pentagons spaced evenly, drawn in pencil first.
Tennis balls are the quickest win. Chartreuse yellow with two white curved lines meeting at the sides. A set of four in a bowl works as a desk paperweight collection or a party favor for a team.
Tiger Family Painted Rocks
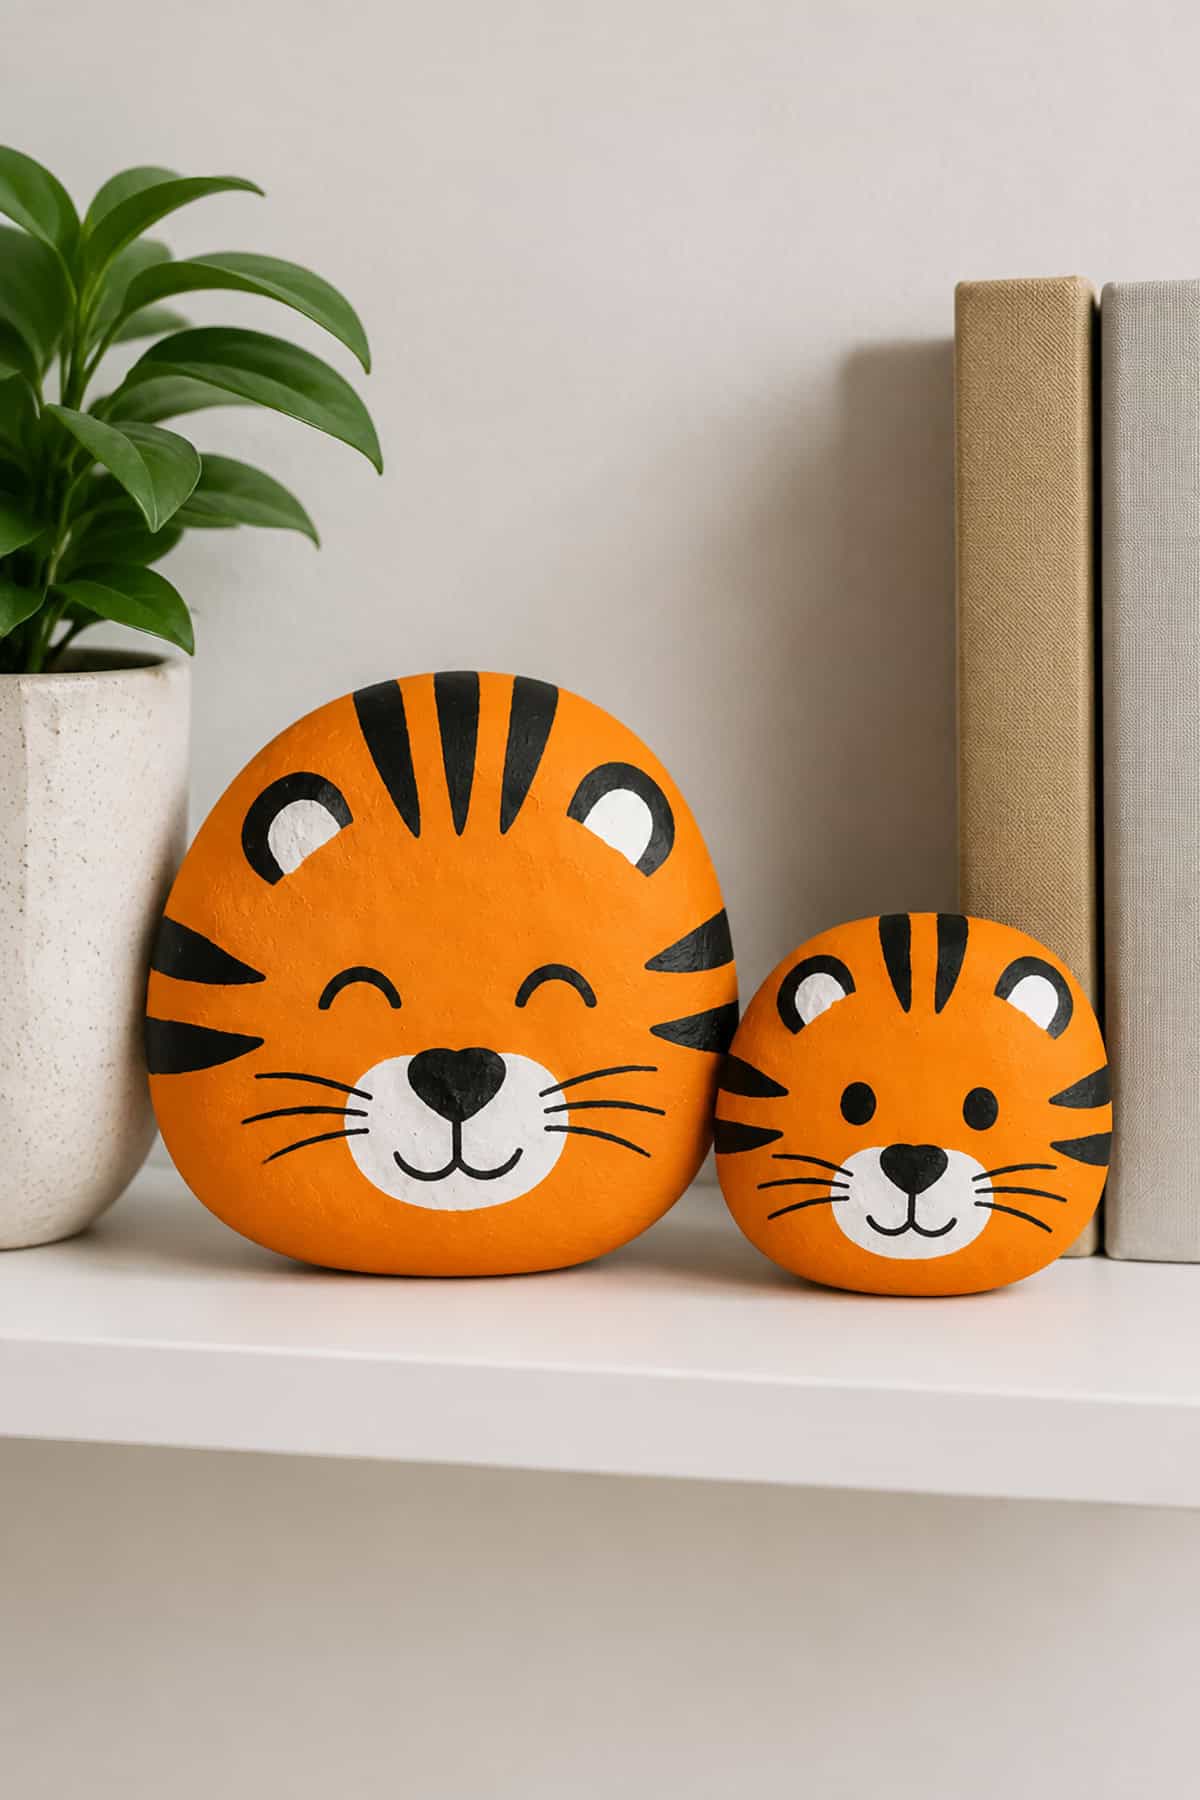
Stripes hold this whole design together, so plan them before the brush touches the rock. Orange base across each stone, cream on the lower muzzle and around the eyes, then black stripes over the top once everything is dry.
Keep the stripes irregular. Short, tapered strokes of varying thickness across the forehead and cheeks look far more convincing than evenly spaced bars.
A pink triangle nose with a small black outline sits center. Eyes go amber or green with black pupils and a white highlight dot. Paint three or four in descending sizes and they line up as a family group.
Two-Stone Yin-Yang Design
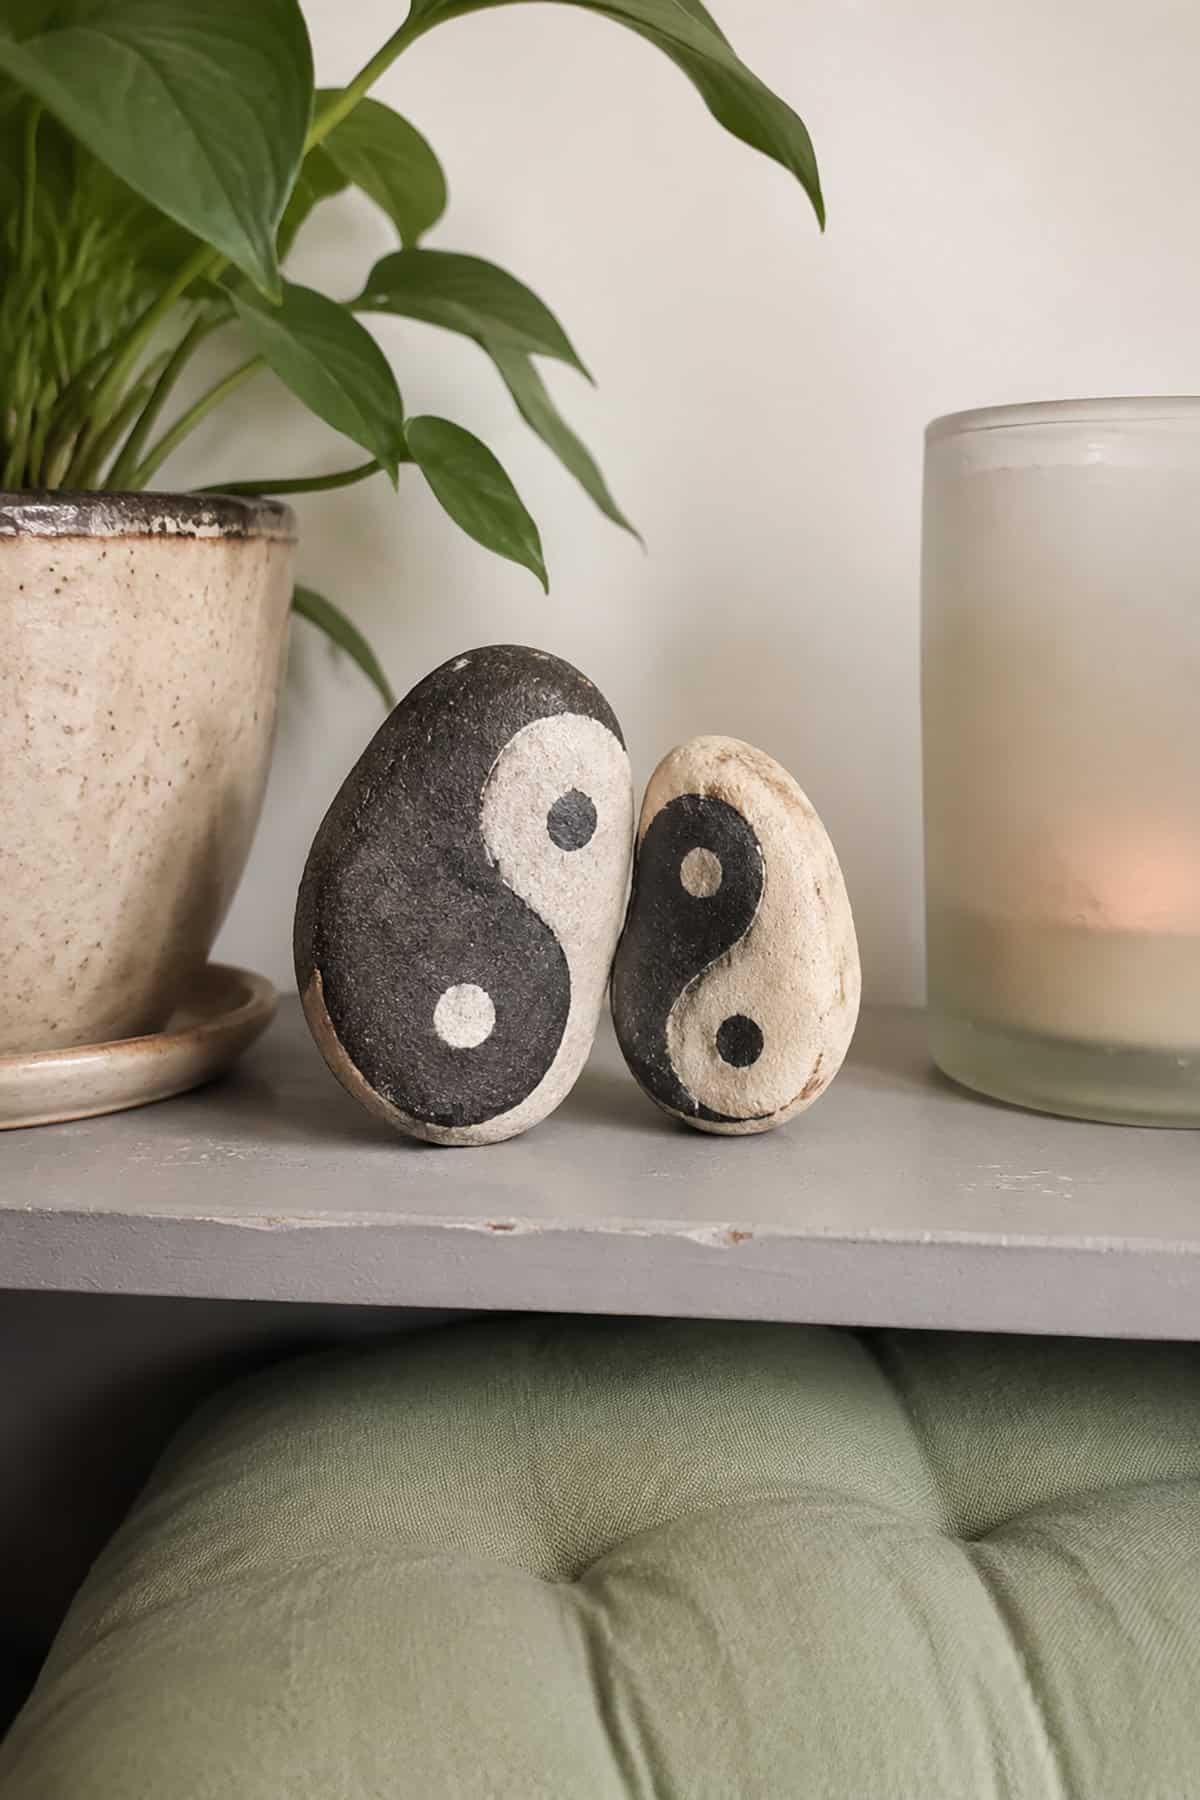
Two matched stones of similar size and shape are the requirement, and finding them takes longer than the painting does. One goes solid black, one solid white, both with two coats for full opacity.
On the black rock, paint a single white circle roughly a third of the way down from the top. Reverse it on the white rock with a black circle in the same position.
Set the pair together so the curves face each other and the composition closes. Sealed with a matte finish, they sit well on a bedside table, a bathroom shelf, or beside a small plant.