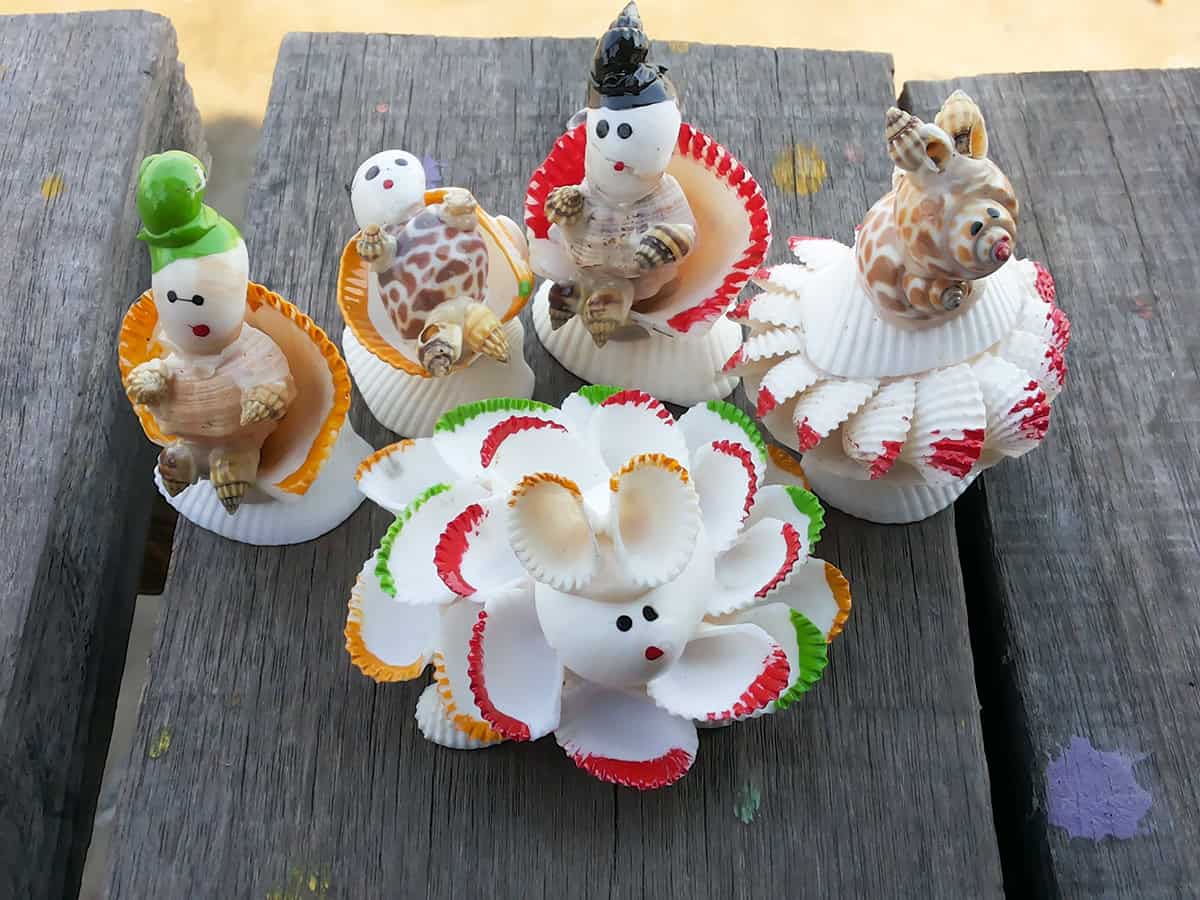
If you have a jar of seashells collecting dust on a shelf, it is time to put them to work. Seashell crafts turn those beach finds into decor, gifts, and keepsakes that actually get used and displayed. Whether you hauled home a bag of shells from a Florida trip or grabbed a mixed pack from the craft store, the projects below cover a wide range of skill levels and styles.
The best glue for most seashell crafts is E-6000 for glass surfaces and a strong craft glue like Aleene’s for wood. A hot glue gun works in a pinch for lightweight projects, but it does not hold up well in heat or humidity. Keep that in mind before you start.
These seashell craft ideas span coastal decor, summer crafts for kids, DIY gifts, and functional home pieces. Some take thirty minutes. Others are weekend builds. All of them give your shell collection a purpose beyond sitting in a mason jar.
Table of Contents
- Seashell Craft Ideas
- Conch Shell Sailing Ship
- Shell-Covered Wooden Boat
- Wooden Cross With Seashells
- Hanging Seashell Mobile
- Seashell and Branch Wall Hanging
- Seashell Resin Keepsakes
- Nautical Boat With Seashells
- Shell-Covered Garden Planter
- Glowing Seashell Candle Centerpiece
- Oyster Shell Champagne Coupe
- Hanging Seashell Window Curtain
- Colorful Seashell Wind Chime
- Personalized Seashell Resin Keychains
- Seashell Seahorse Mosaic
- Seashell-Covered Table Lamp
- Seashell-Adorned Treasure Chest
- Seashell Hot-Air Balloon Sculpture
- Seashell Hair Comb and Hairpins
- Seashell Flower Bouquet
- Seashell Fairy Garden
- Seashell Drawer Pulls
- Seashell Clock
- Seashell Christmas Tree
- Seashell Chess Set
- Seashell Bookmark Collection
- Seashell Bookends
- Scallop Shell Soap Dish
- Scallop Shell Napkin Rings
- Miniature Seashell Village
- Broken-Shell Mosaic Stepping Stone
- Arched Seashell Mosaic Mirror
- Beachcomber’s Seashell Wreath
- Egg Carton Ocean Diorama
Seashell Craft Ideas
From wreaths and mosaics to resin keychains and fairy gardens, these projects cover wall art, table decor, wearable accessories, and outdoor pieces. Most require basic supplies you already own, plus shells in a range of sizes.
Conch Shell Sailing Ship
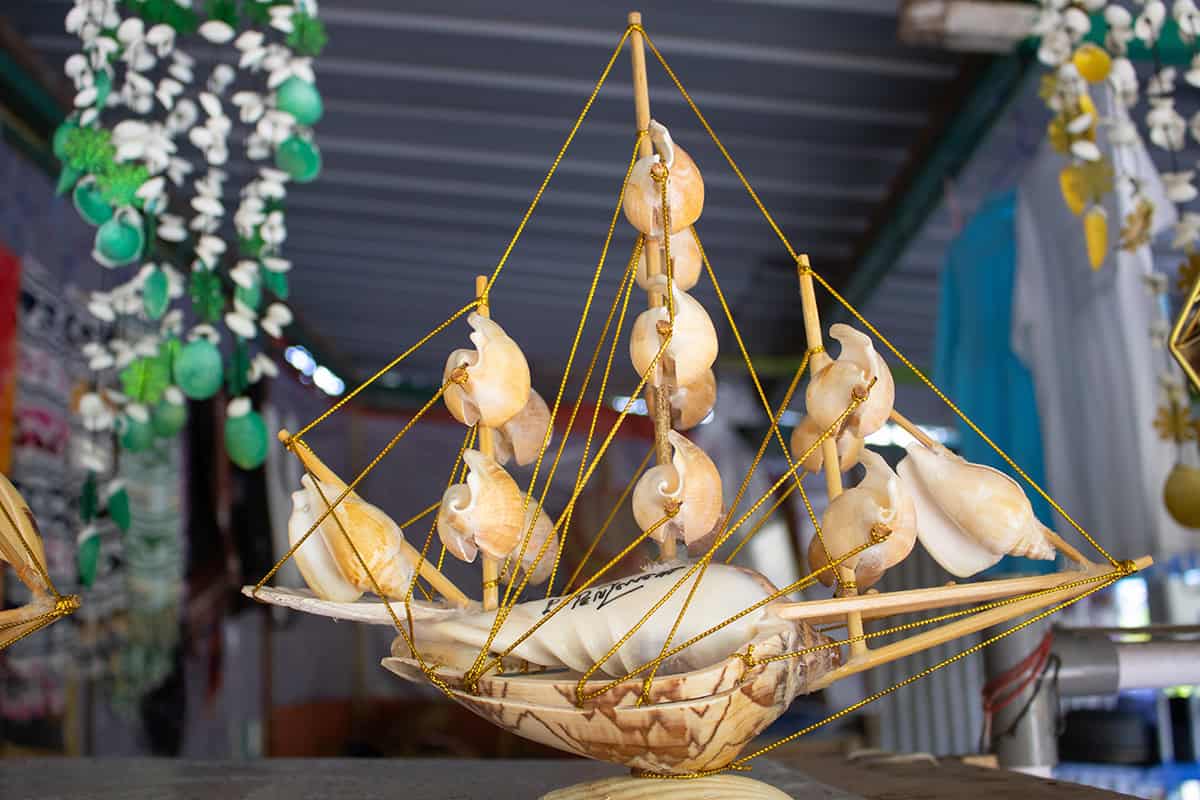
A large conch shell serves as the hull of a miniature sailboat. Prop it upright with a ring of clay or a small wooden base, insert a thin dowel through a dab of adhesive putty, and attach a triangular scrap of linen or canvas as the sail.
Rig a few lines with twine tied between the dowel and the shell’s natural curves. The finished ship sits well on a bookshelf or windowsill. Look for conch shells with a wide, stable base so the piece does not tip over.
Shell-Covered Wooden Boat
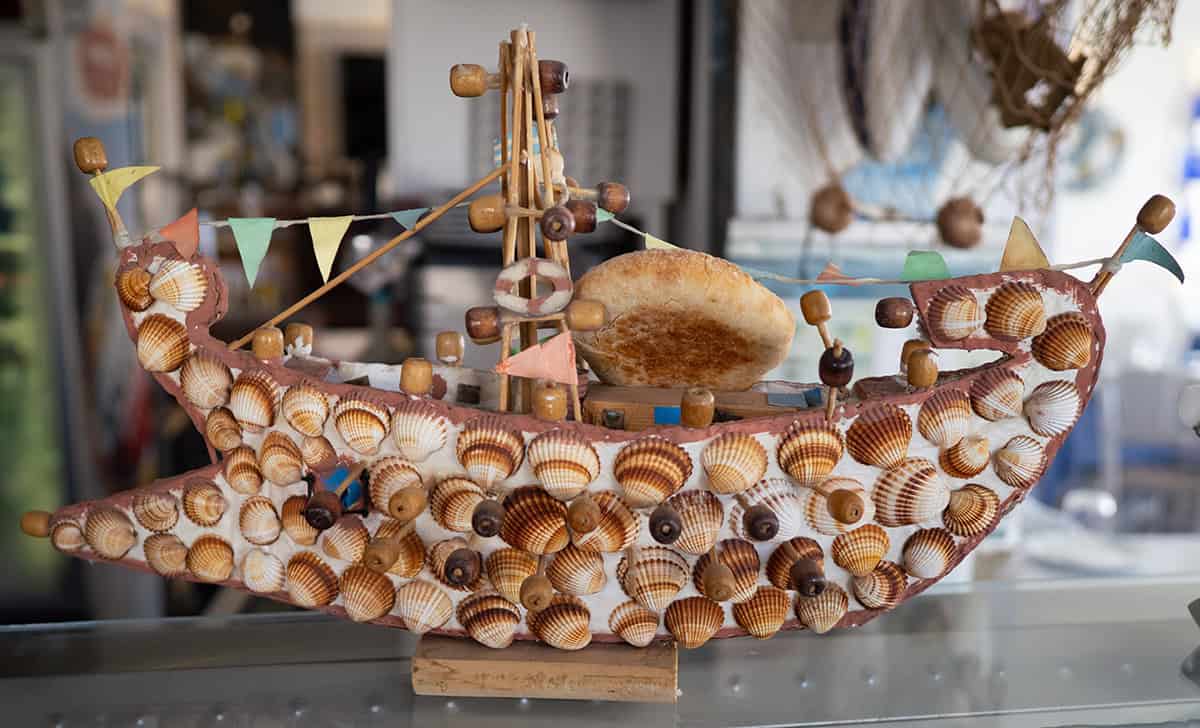
Pick up a small unfinished wooden boat from a craft store, the kind sold for model building or birdhouse projects. Sand it lightly, then cover the hull with overlapping flat shells using E-6000 adhesive. Clam and cockle shells work well because they lay flush against curved surfaces.
Stagger them like roof shingles for a scaled, almost fish-like effect. Leave the deck bare or fill it with a handful of loose sand and a miniature starfish. This project takes patience but the layered result looks professional.
Wooden Cross With Seashells
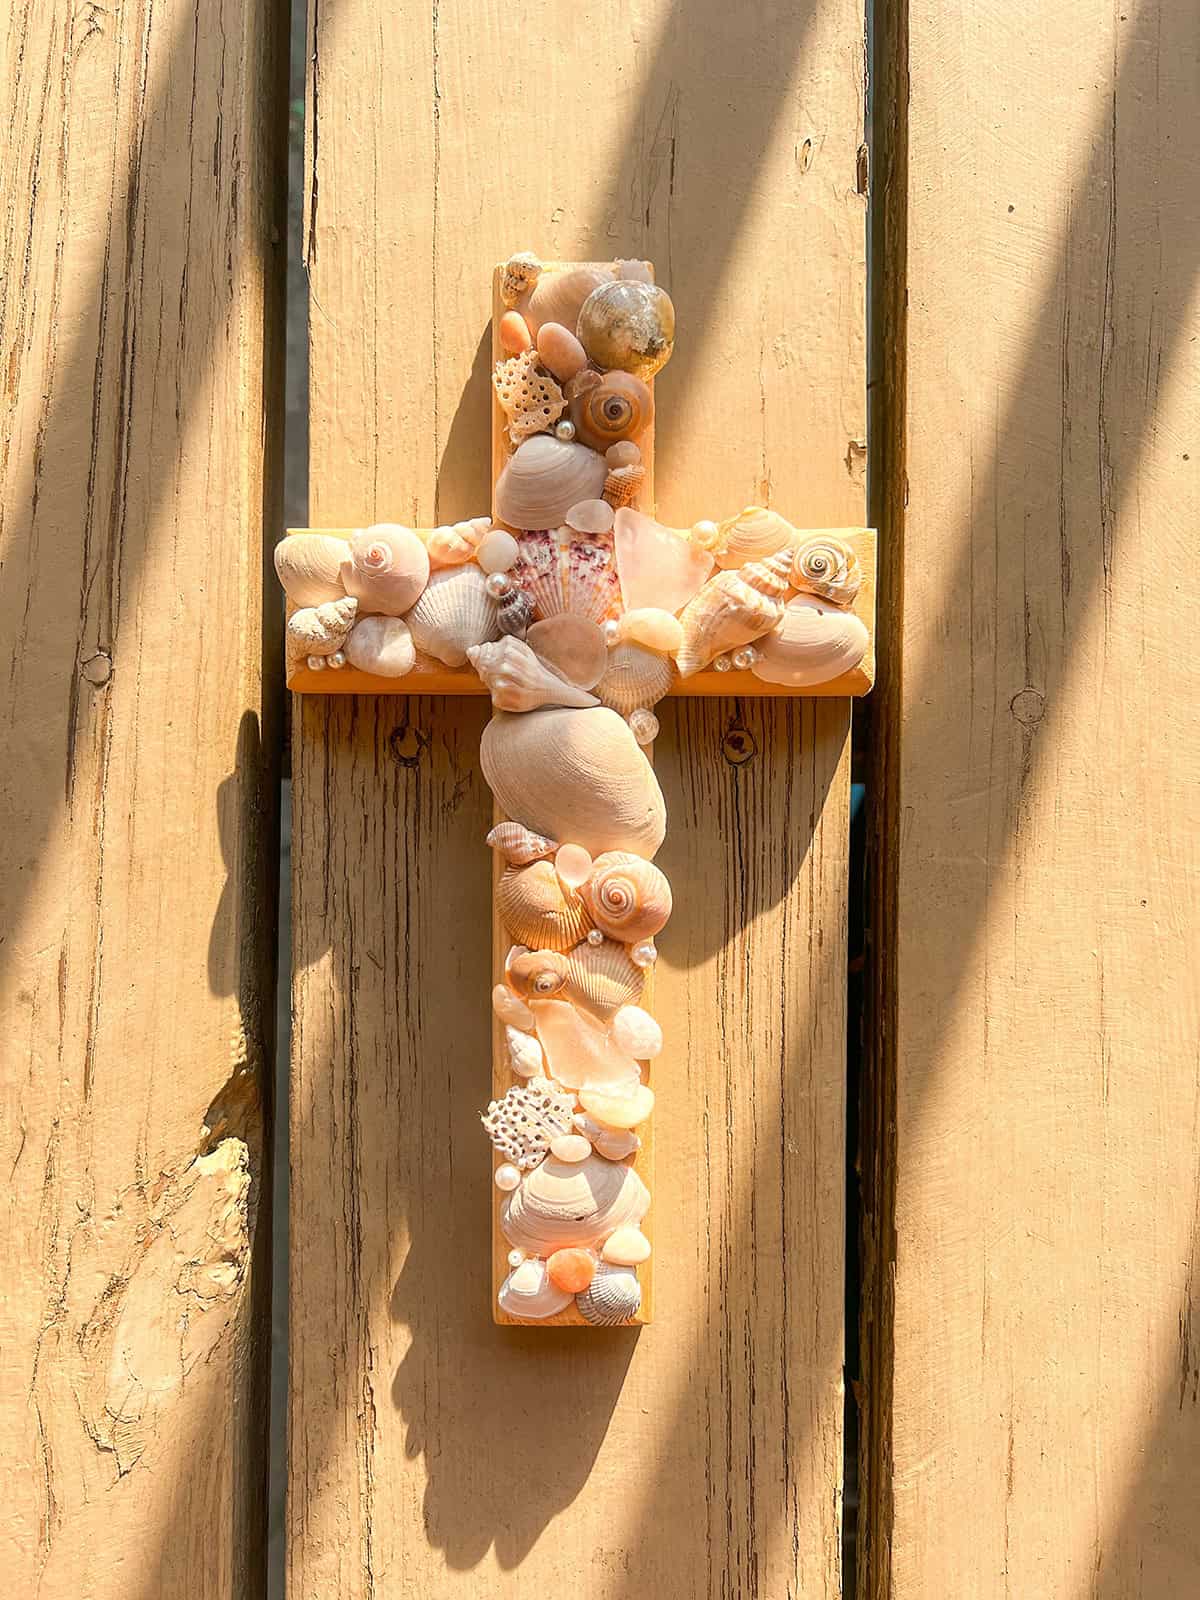
Start with a flat wooden cross blank, available at most craft stores for a few dollars. Coat the surface with craft glue and press shells into it while the glue is wet, working from the center outward. Small shells fill the arms; a single statement piece anchors the middle.
Paint the exposed wood white or leave it raw. This makes a meaningful gift for baptisms, confirmations, or housewarmings. A sawtooth hanger on the back lets you mount it immediately.
Hanging Seashell Mobile
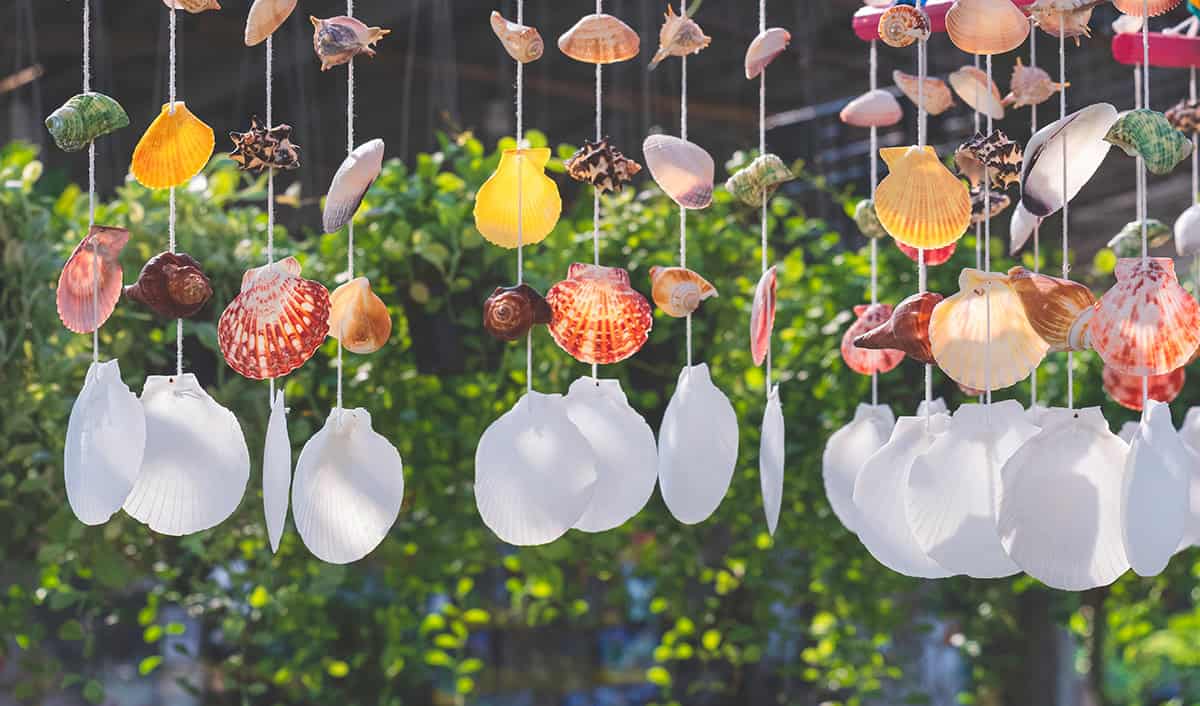
Drill small holes near the edge of each shell with a 1/16-inch bit on a rotary tool. Thread fishing line through the holes and tie each shell at a different height. Attach the lines to a piece of driftwood, a wooden dowel, or a metal ring.
Balance matters here. Hang the mobile from a hook temporarily and adjust line lengths until the bar sits level. Once you are satisfied, secure each knot with a drop of super glue. Hang it near a window where light passes through the translucent shells.
Seashell and Branch Wall Hanging
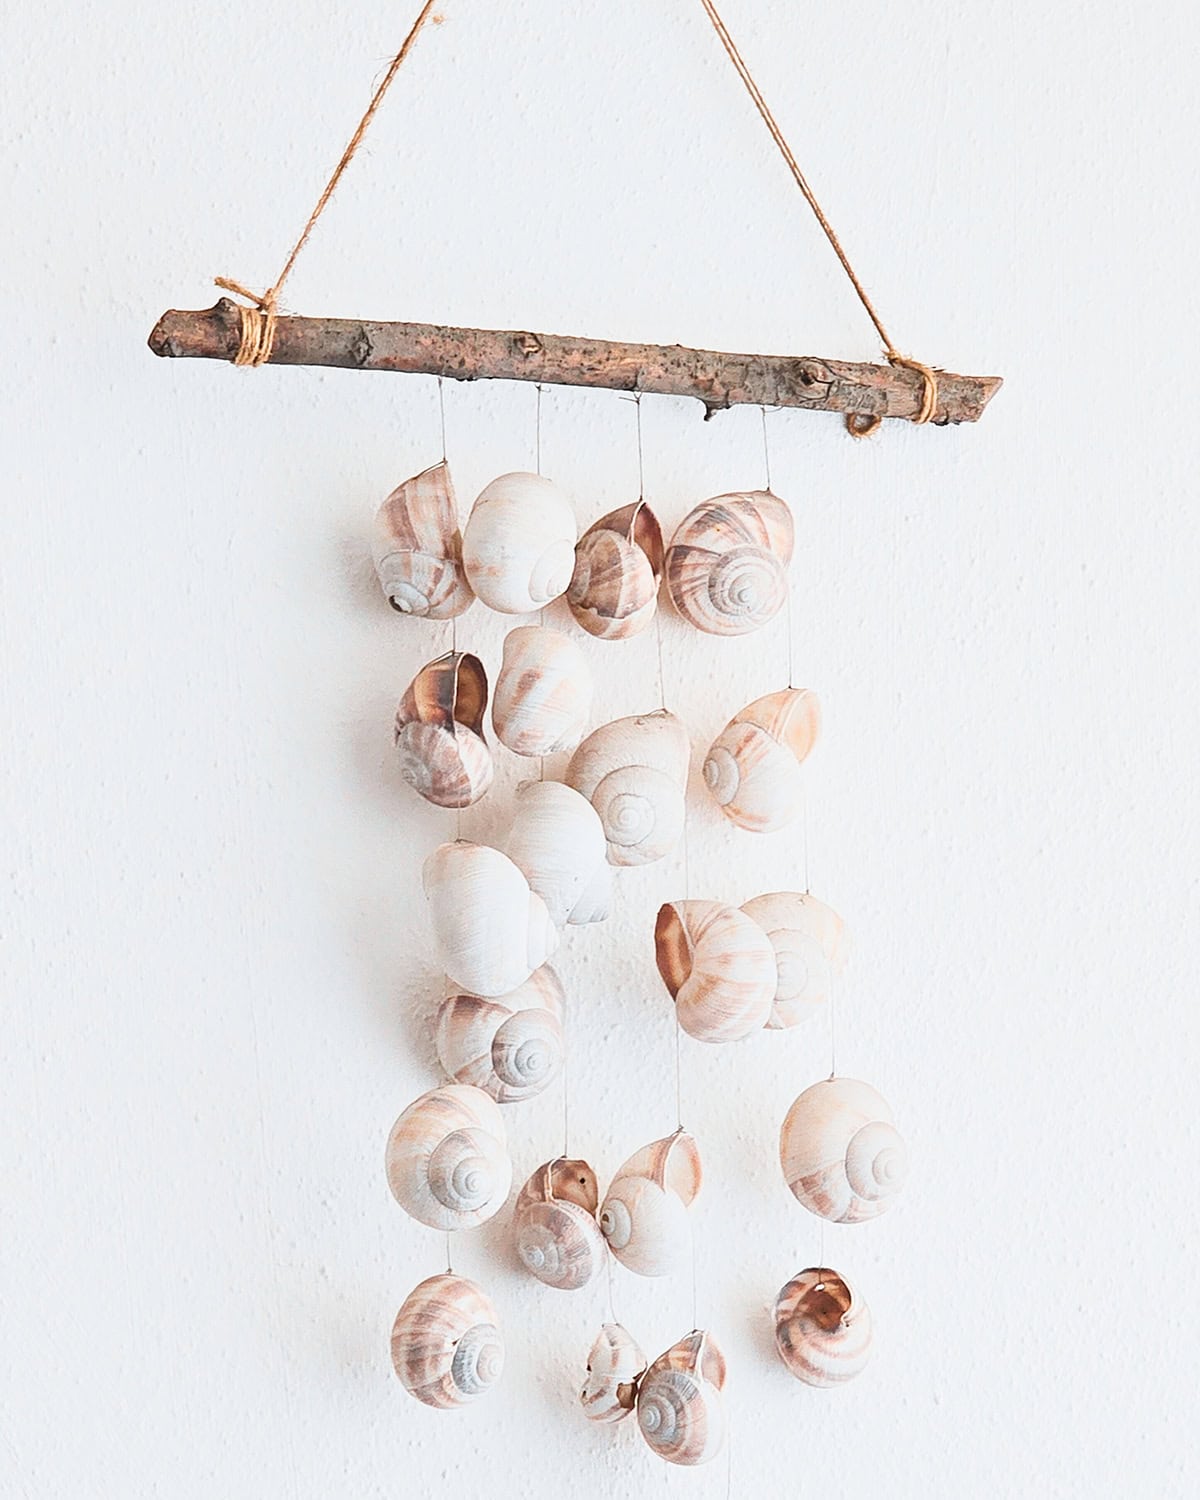
Find a sturdy branch about two feet long, strip the bark if you prefer a clean look, and tie lengths of jute twine at even intervals along its length. String shells onto each strand, knotting above and below each one to hold it in place.
The finished piece hangs horizontally from two nails or a single cord tied at both ends of the branch. It fills a blank wall the way a tapestry would, but with a coastal edge. Mix in a few beads or pieces of sea glass for color variation.
Seashell Resin Keepsakes
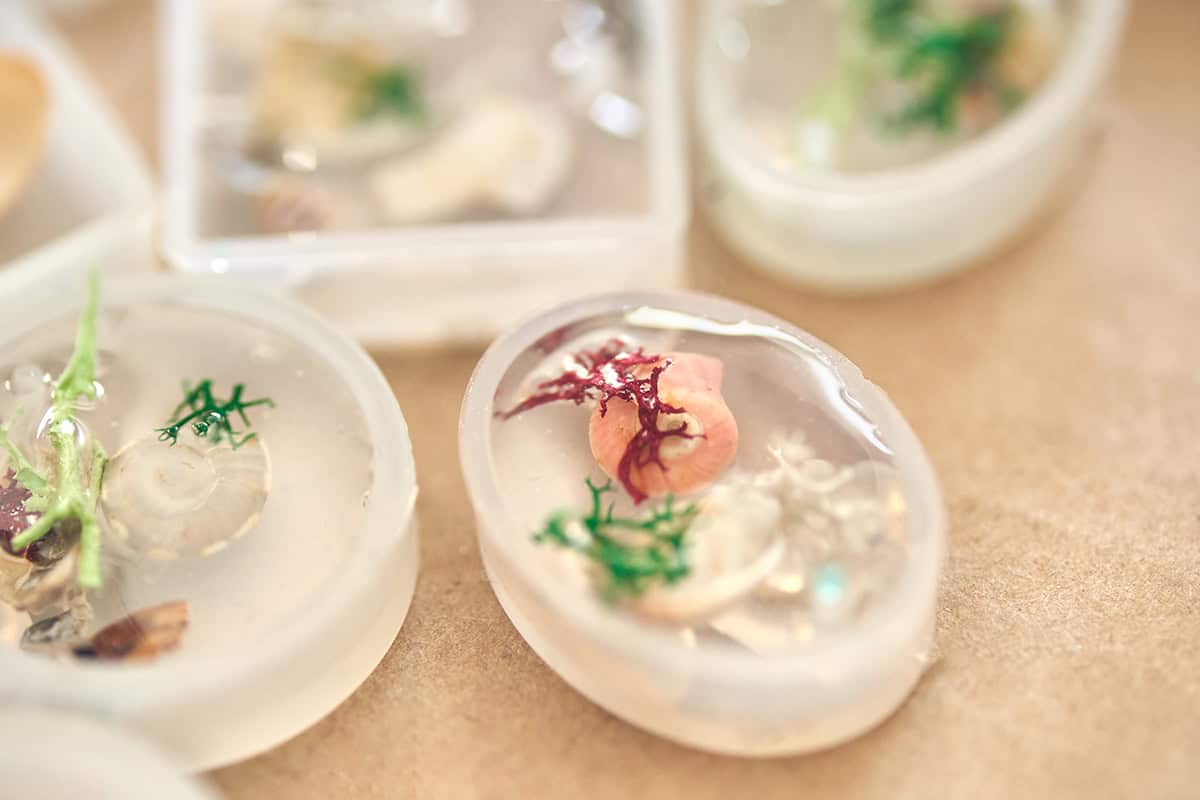
Pour clear epoxy resin into silicone molds, drop in small shells, and let them cure for 24 hours. Coaster molds, paperweight molds, and sphere molds all work. The resin preserves the shells in a glossy, permanent block.
A few tips from experience: spray the shells with a clear sealant before embedding them so trapped air does not cloud the resin. Pour in thin layers, letting each one partially set before adding the next. This keeps shells suspended at different depths instead of sinking to the bottom.
Nautical Boat With Seashells
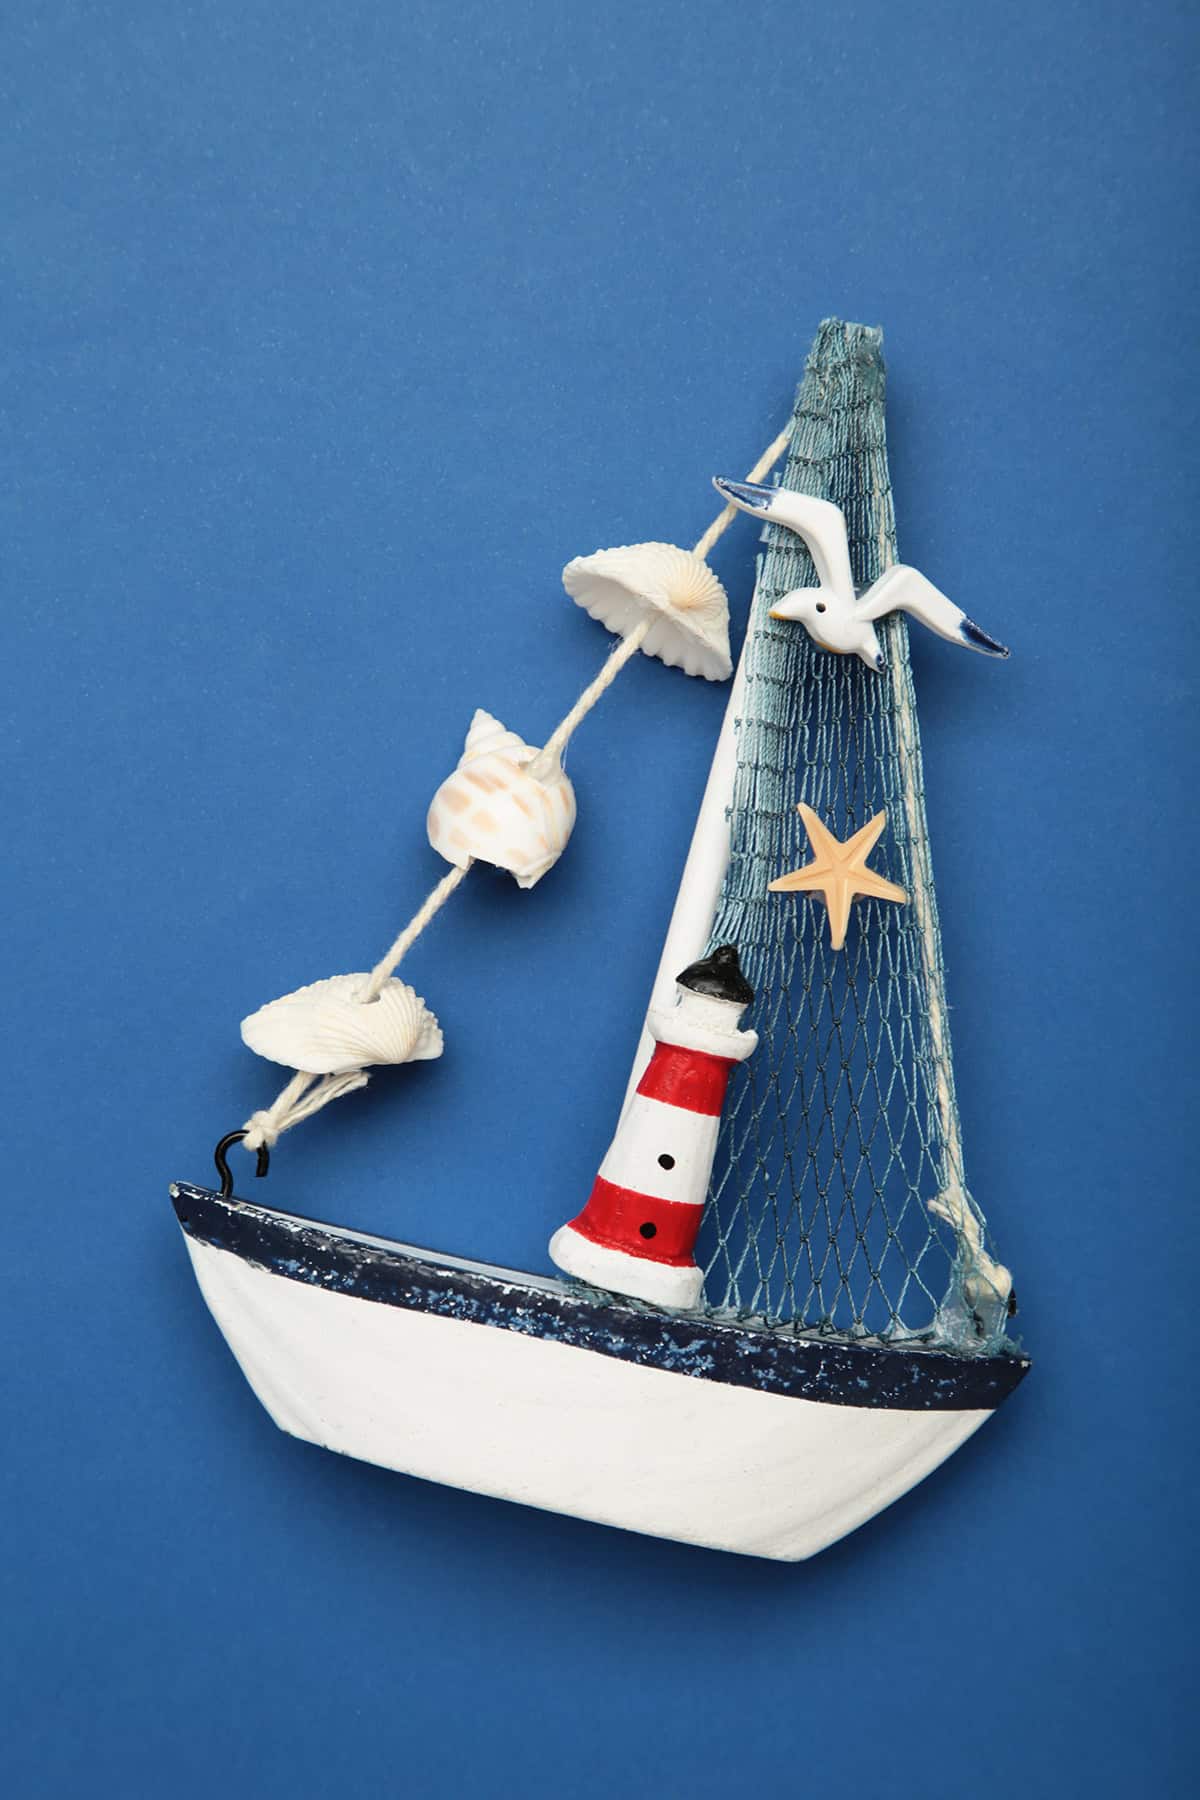
Unlike the shell-covered wooden boat, this version builds the entire structure from shells. Use a large half-shell as the hull. Glue smaller flat shells as bench seats inside. A twig mast and a fabric scrap sail complete the build.
The key is selecting a hull shell with enough depth to hold the interior pieces. Abalone halves and large scallops both work. Display it on a piece of driftwood or inside a shadow box.
Shell-Covered Garden Planter
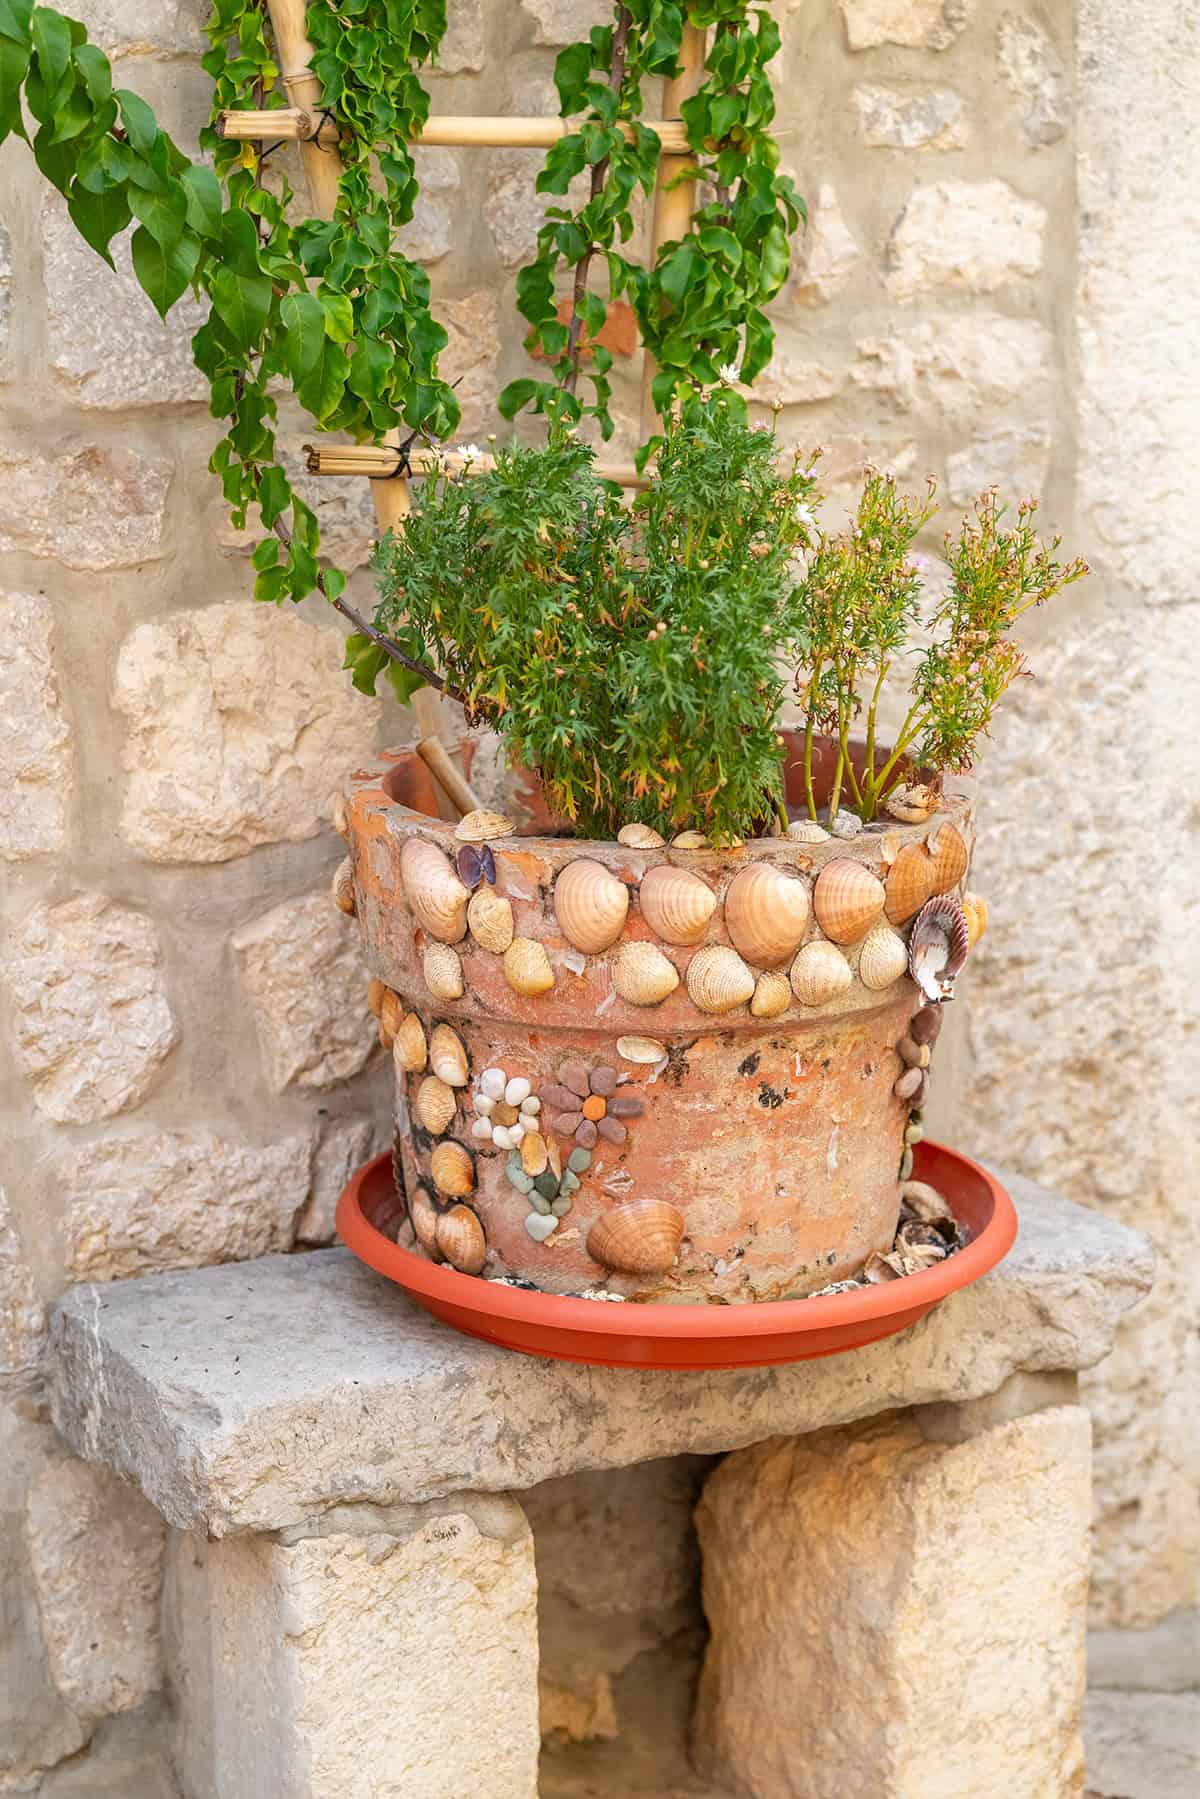
A standard terracotta pot transforms when you coat it with adhesive and press shells into the surface. Work from the rim down, overlapping larger shells first, then filling gaps with smaller ones. Let it cure for a full day before planting anything inside.
Seal the exterior with outdoor-rated polyurethane if the planter will sit on a patio or porch. Without sealer, rain loosens the adhesive over time. This project pairs well with succulents, which mirror the beachy look without needing much water.
Glowing Seashell Candle Centerpiece
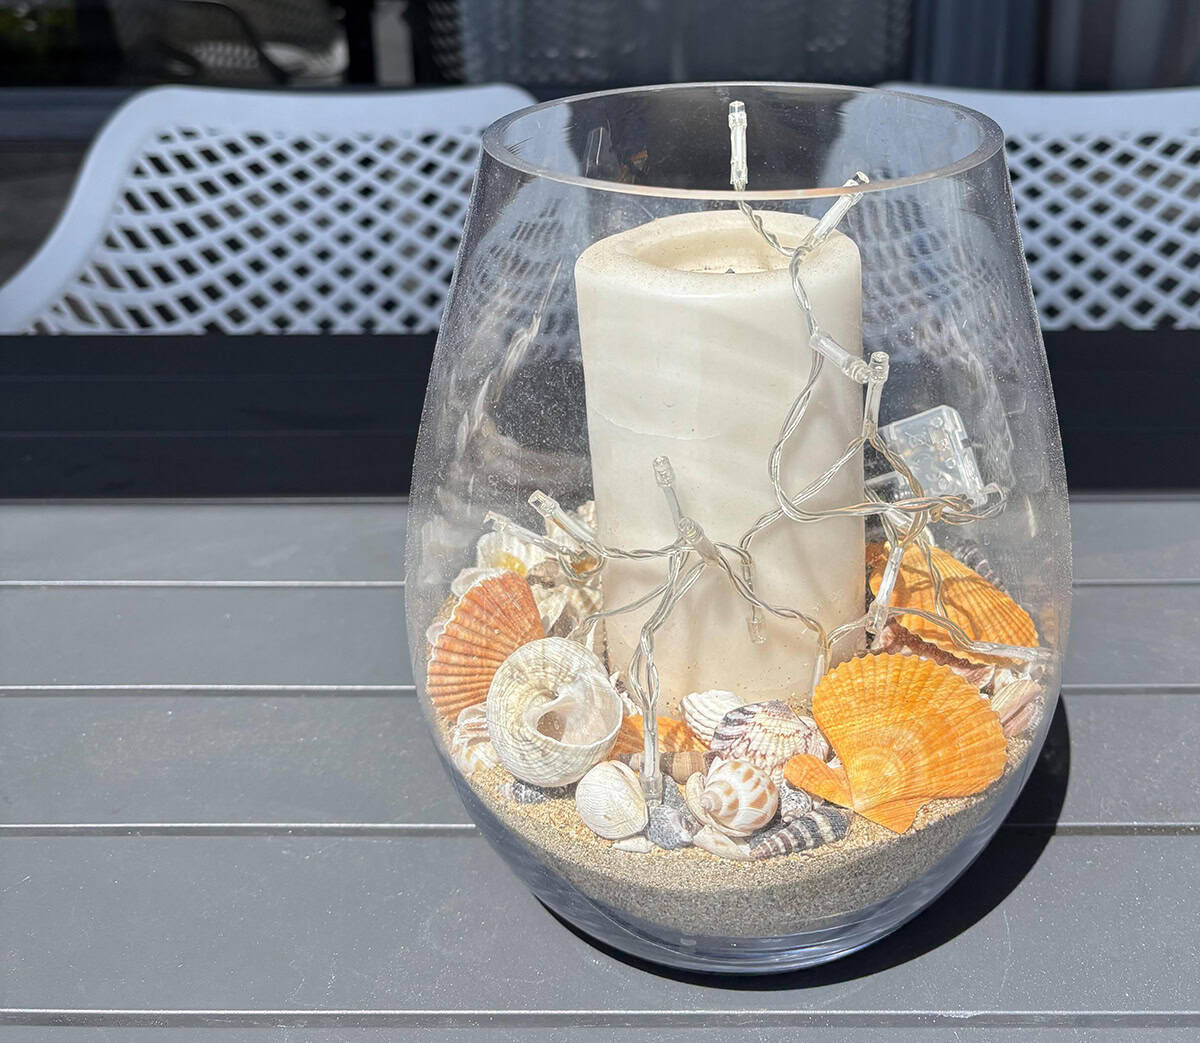
Melt soy wax flakes in a double boiler, add a few drops of ocean-scented fragrance oil, and pour the wax into large, deep shells. Press a pre-tabbed wick into the center of each shell before the wax sets. Let them cool completely, at least four hours.
Group three to five shell candles on a wooden tray or a bed of sand for a centerpiece that anchors a dinner table or patio setup. The wax pool glows through the thin walls of certain shells, especially translucent scallops.
Oyster Shell Champagne Coupe
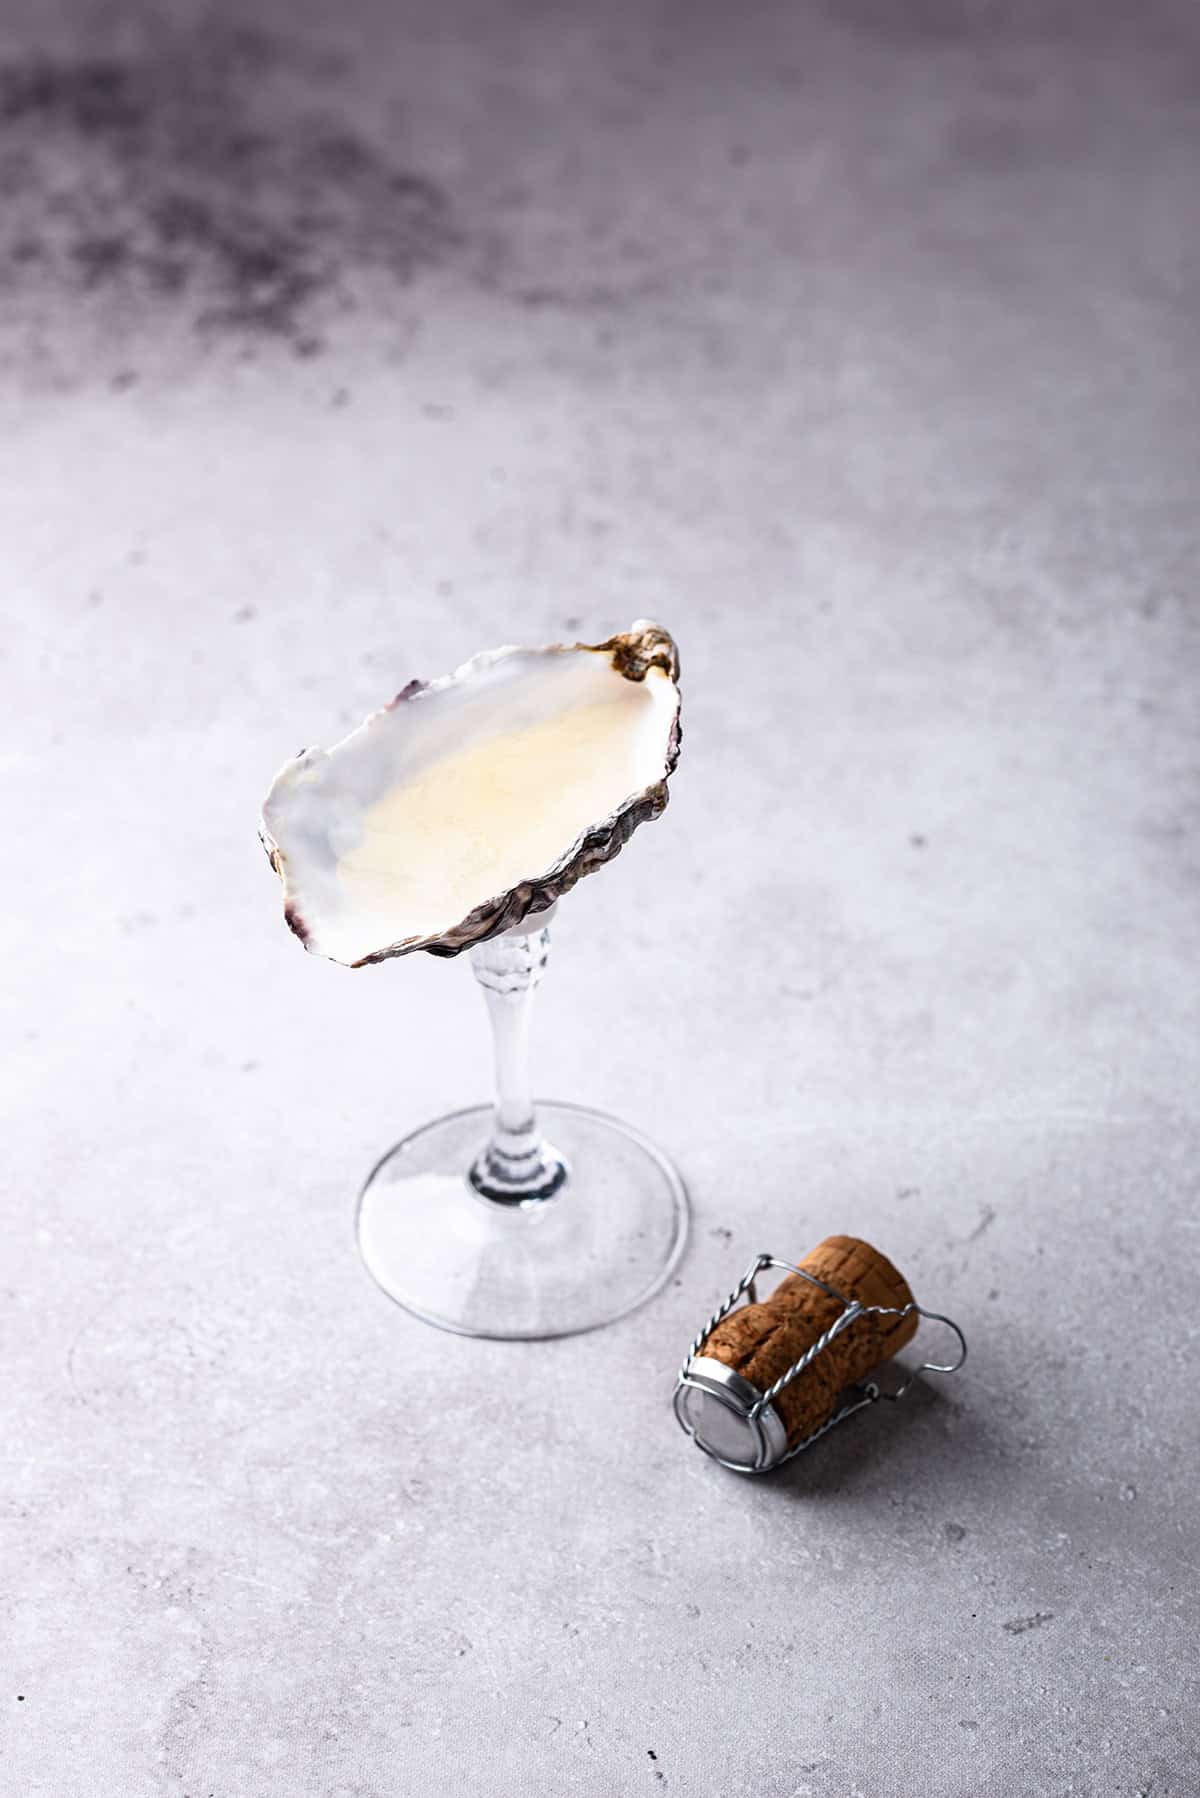
Clean a large oyster shell thoroughly, sand the edges smooth, and attach it to a short candlestick or a decorative finial with E-6000 glue. The shell becomes a shallow dish elevated on a pedestal.
This is not a functional drinking vessel. It is a ring dish, a salt cellar, or a decorative catch-all for an entryway table. The proportions mimic the silhouette of a champagne coupe, which gives it a playful elegance that reads well in both coastal and traditional interiors.
Hanging Seashell Window Curtain
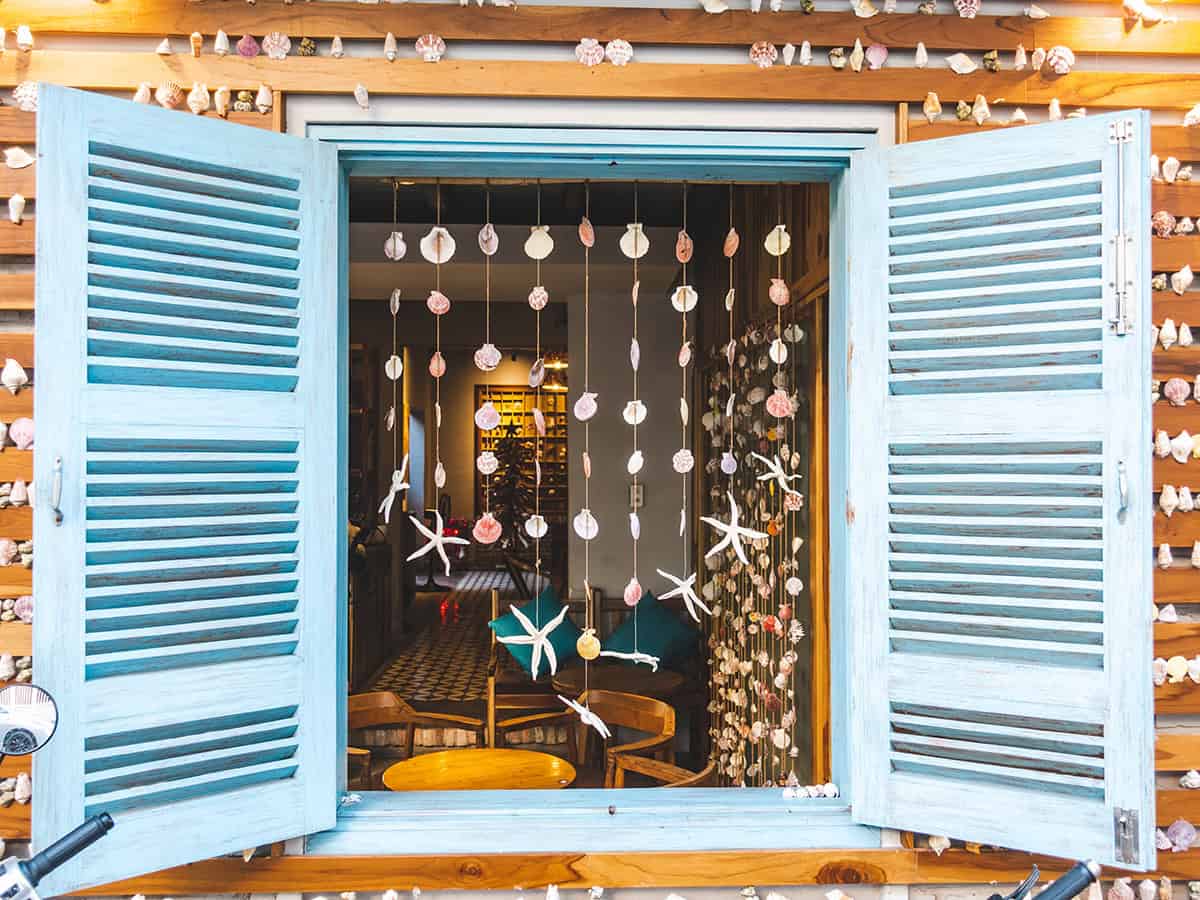
Drill holes in dozens of flat shells, string them onto monofilament or fishing line at staggered intervals, and hang the strands from a tension rod inside a window frame. The shells click softly against each other when a breeze passes through.
Spacing matters. Leave about three inches between each shell so the strands move freely. For a standard 36-inch window, eight to ten strands spaced evenly across the rod give you solid coverage without looking overcrowded.
Colorful Seashell Wind Chime
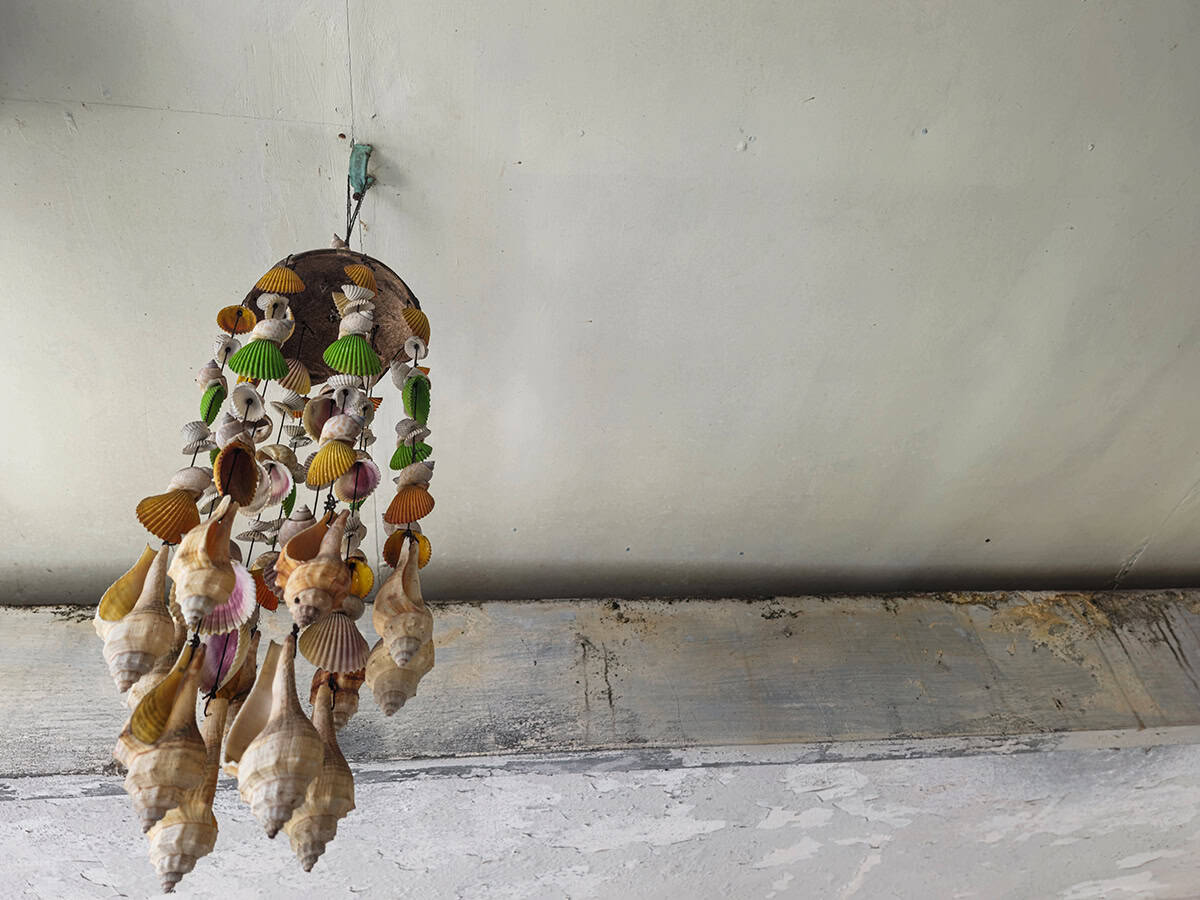
Paint your shells in bold, saturated colors using acrylic craft paint. Let them dry completely, then seal with a spray-on clear coat. Drill a small hole in each shell and string them onto nylon cord, tying them to a driftwood crossbar at varying heights.
Hang it where wind will catch the shells and send them tapping against each other. The sound is softer and more subtle than metal or bamboo chimes. The bright colors stand out against a neutral exterior wall or a green garden backdrop.
Personalized Seashell Resin Keychains
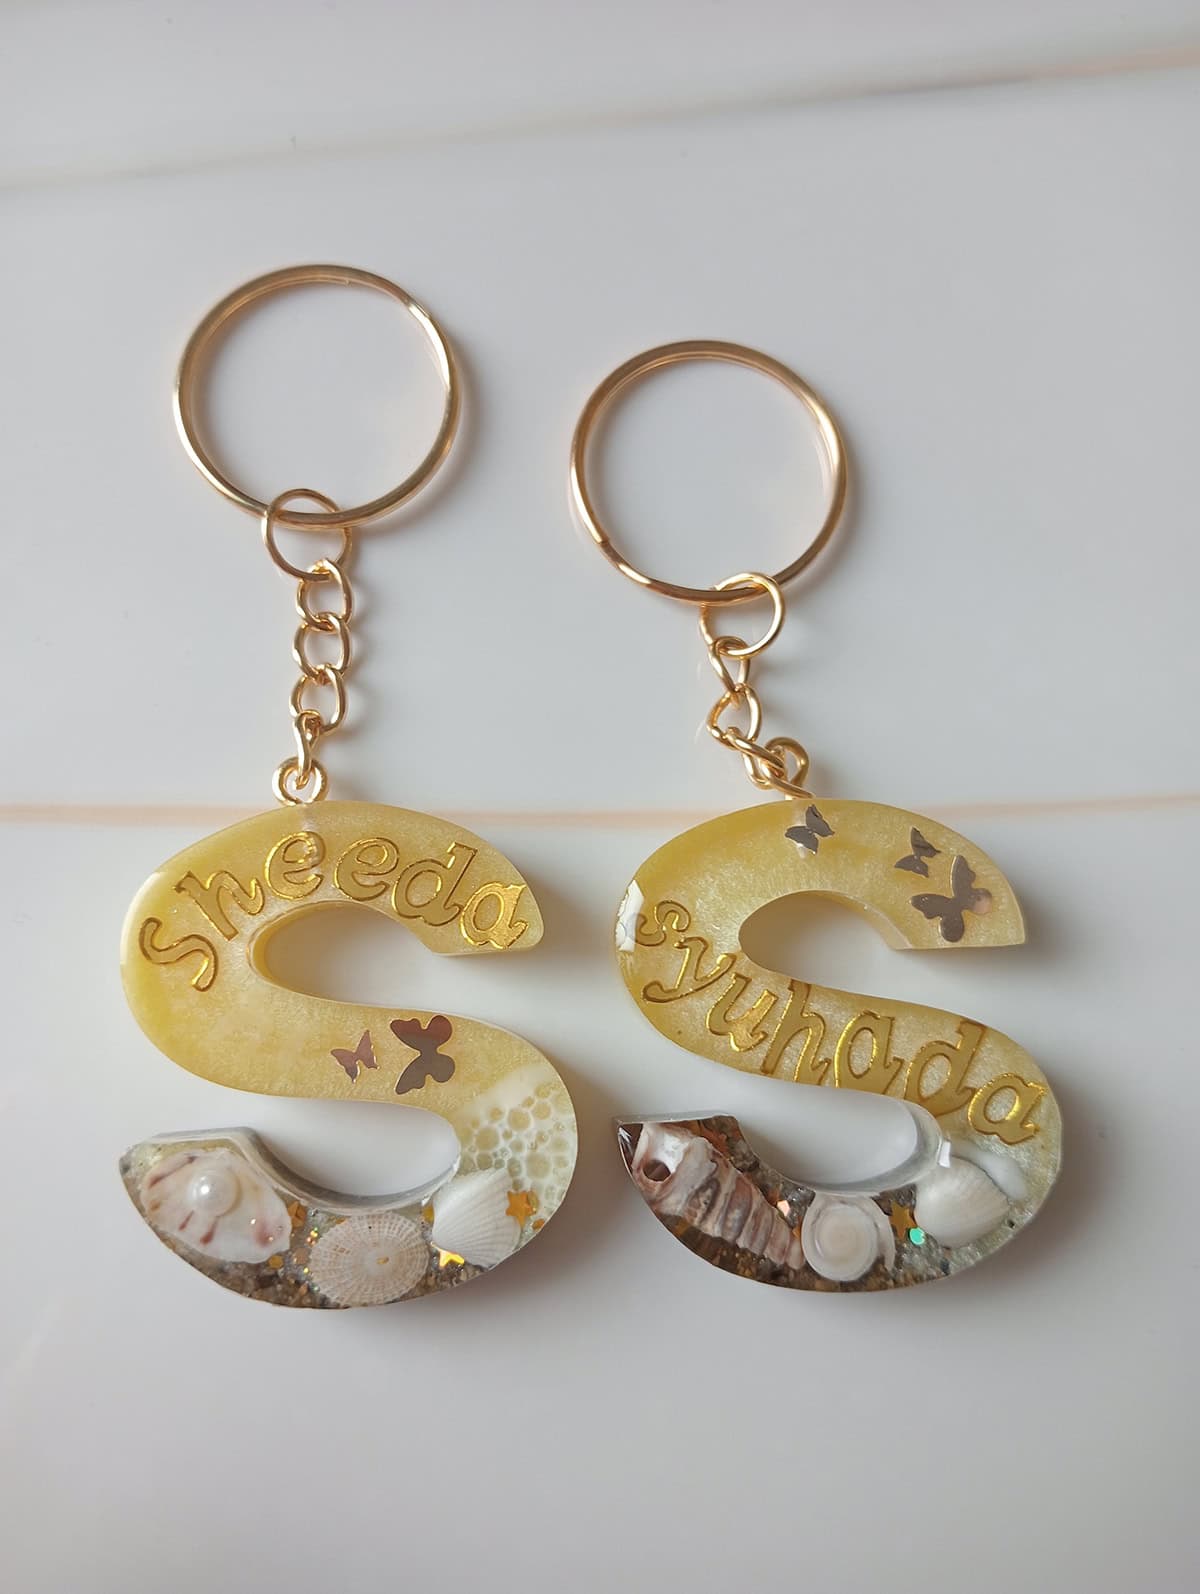
Pour resin into small rectangular or circular molds, place a tiny shell and a printed name or initial (cut from waterproof vinyl) inside, and let it cure overnight. Attach a keychain ring and clasp to the finished piece through a pre-drilled hole or an embedded eye pin.
These make excellent party favors, back-to-school gifts, or vacation souvenirs. Batch production is efficient because you mix one cup of resin and fill multiple molds at once.
Seashell Seahorse Mosaic
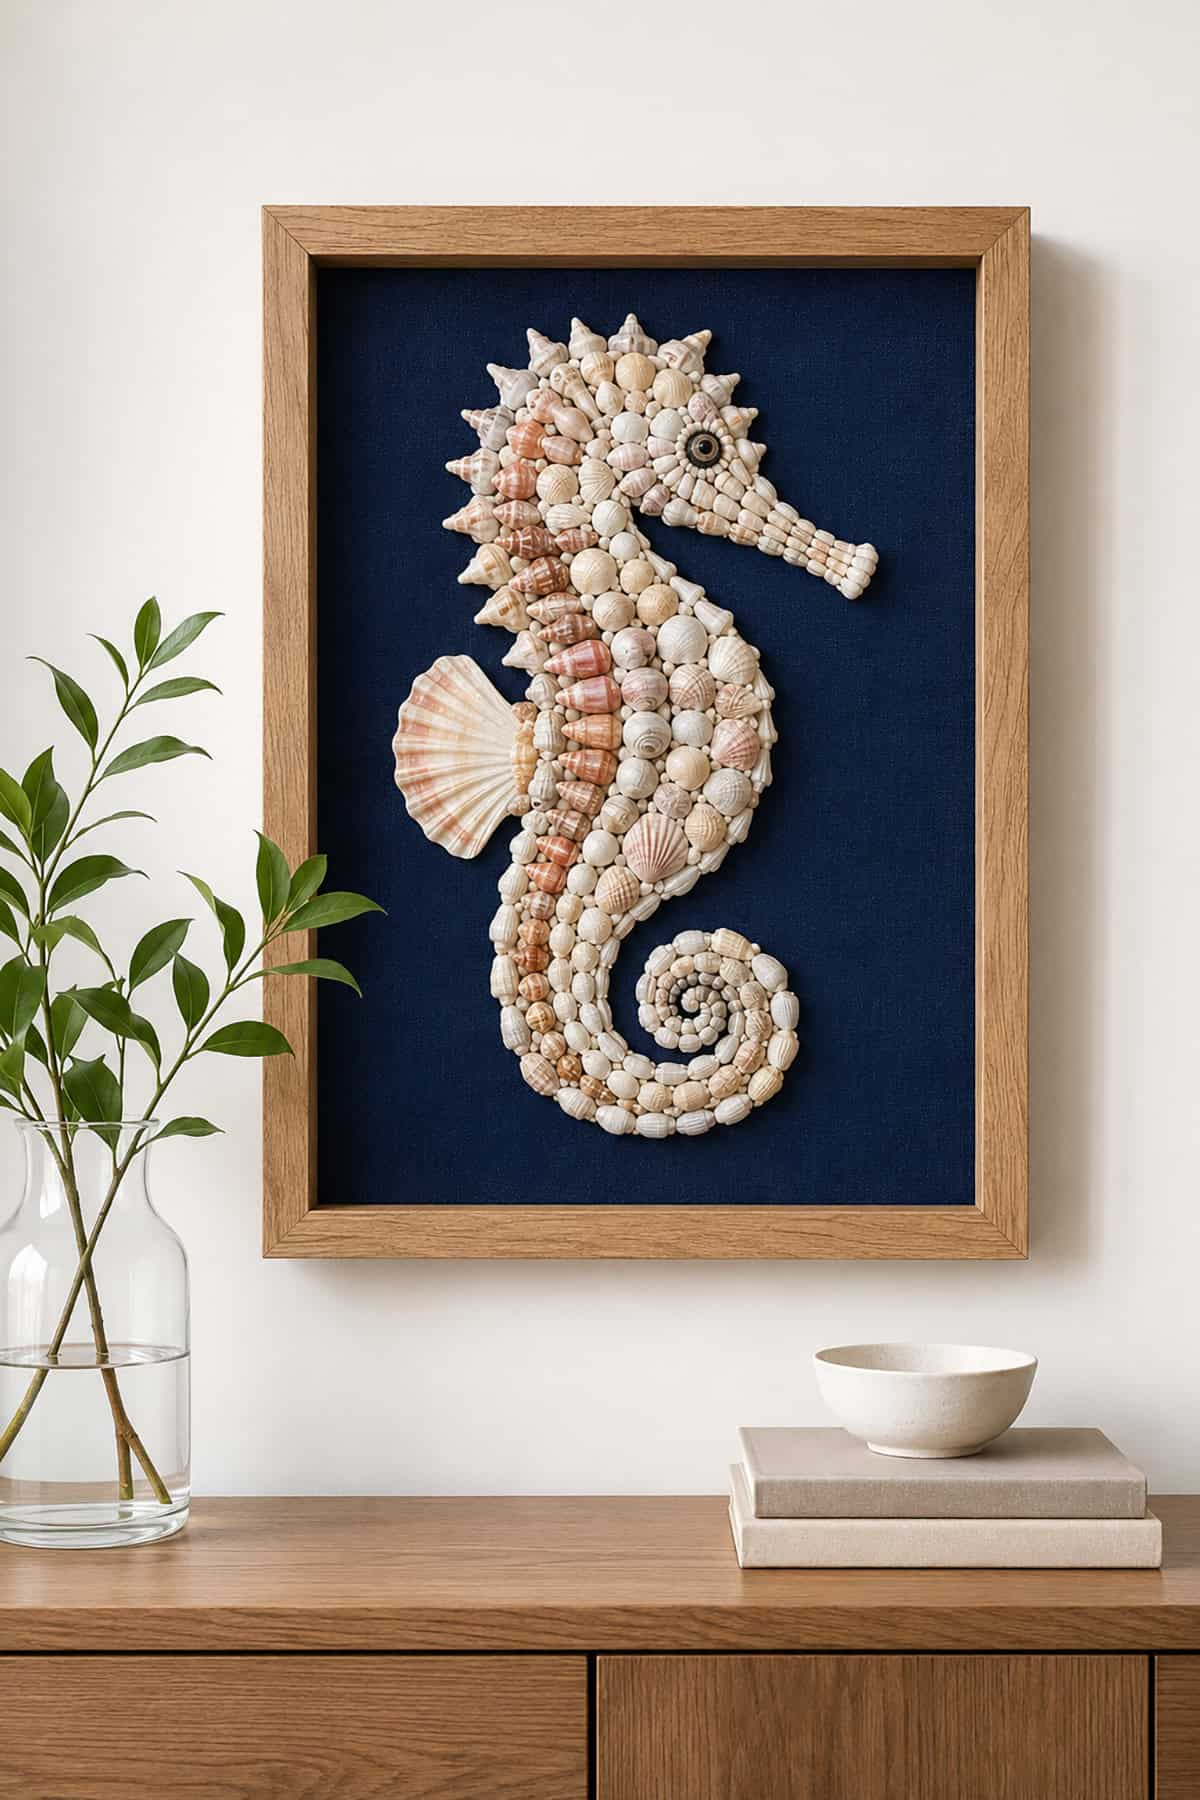
Draw or print a seahorse outline on a piece of plywood. Break shells into small, irregular fragments using a cloth-wrapped hammer. Spread a layer of tile adhesive inside the outline, then press the shell fragments into the adhesive, fitting them together like puzzle pieces.
Grout the gaps once the adhesive sets, wipe away the excess with a damp sponge, and let everything dry. The finished mosaic looks best mounted on a contrasting painted background. Dark navy or charcoal behind a white shell seahorse creates strong visual impact.
Seashell-Covered Table Lamp
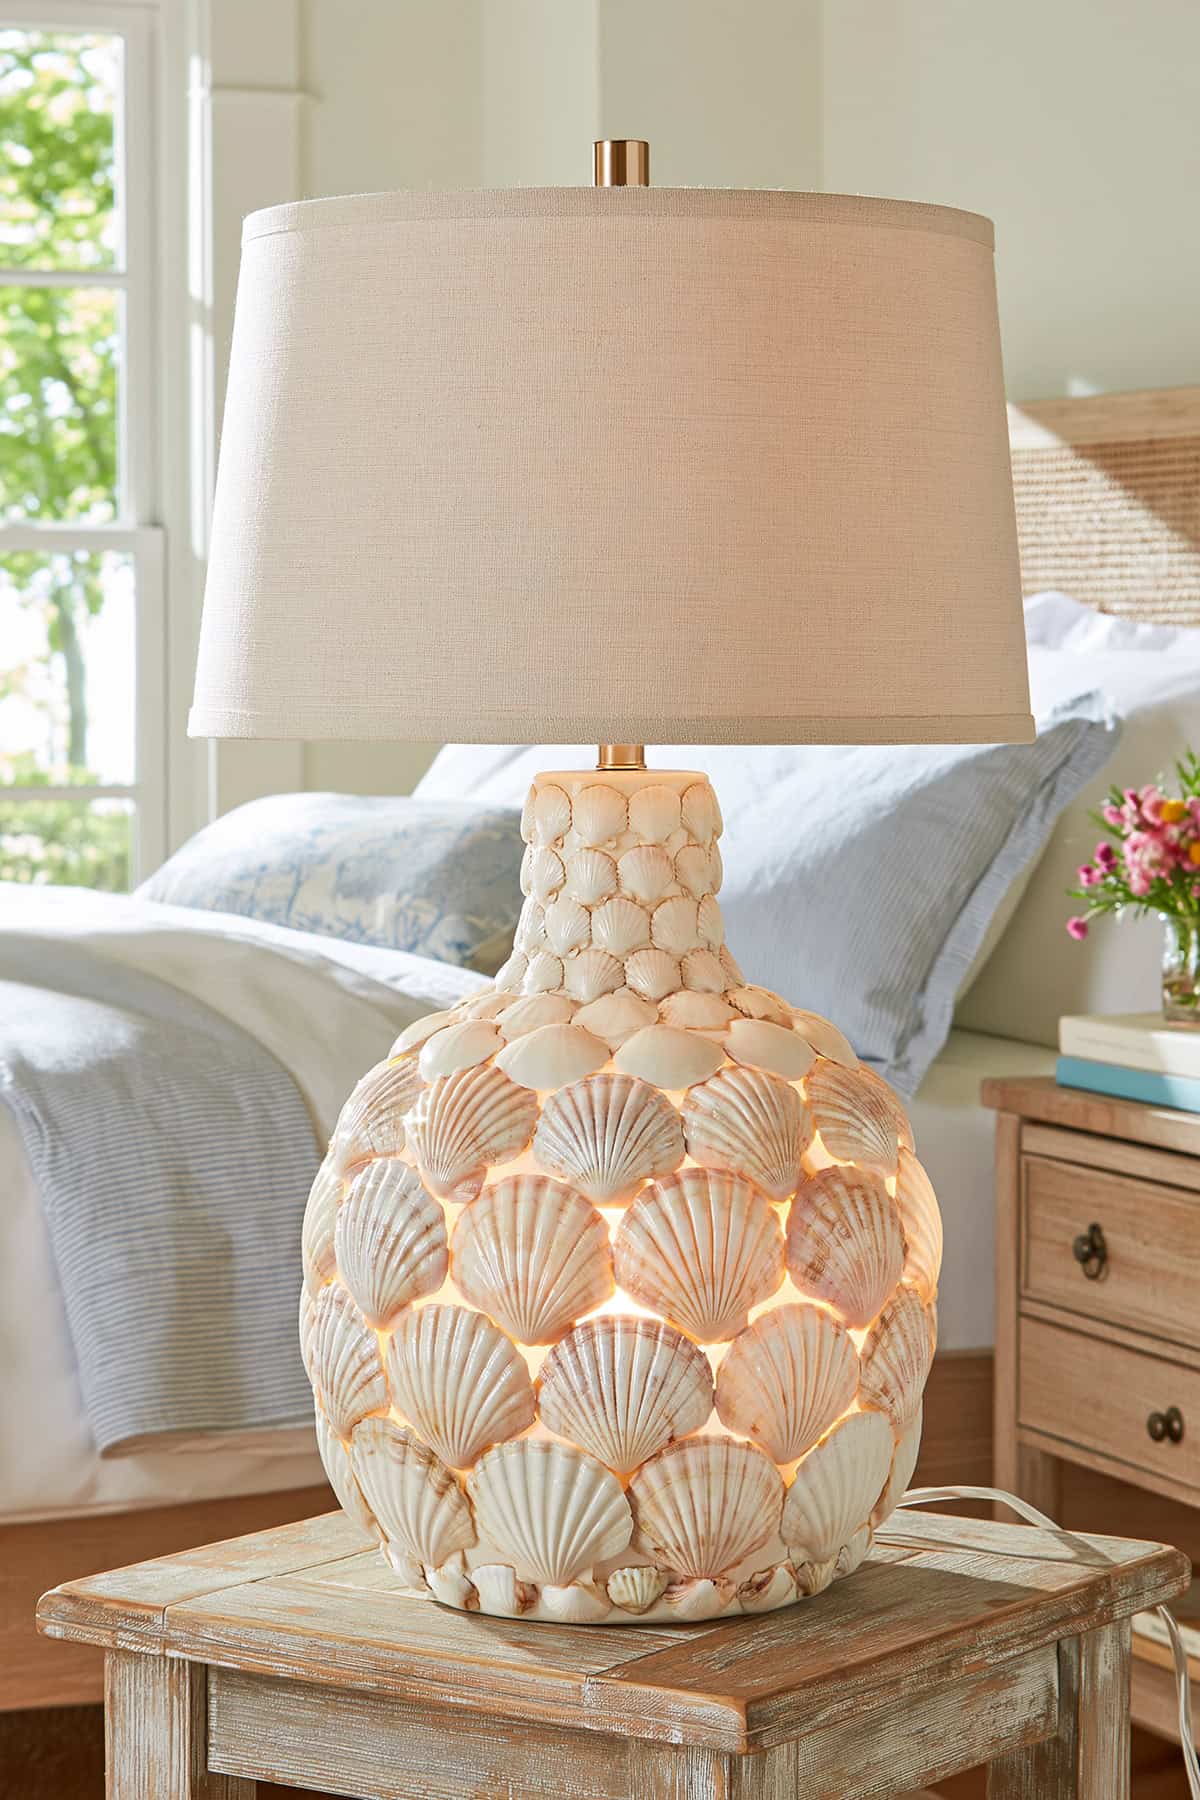
Find a simple cylindrical lamp base at a thrift store. Clean it, rough up the surface with sandpaper, and glue shells directly onto the exterior. Overlap them in rows, working from the base upward, so each row hides the glue line of the row below.
Pair the finished lamp with a plain linen shade to keep the focus on the shell base. This project elevates a two-dollar thrift store find into a statement piece that looks custom-made.
Seashell-Adorned Treasure Chest
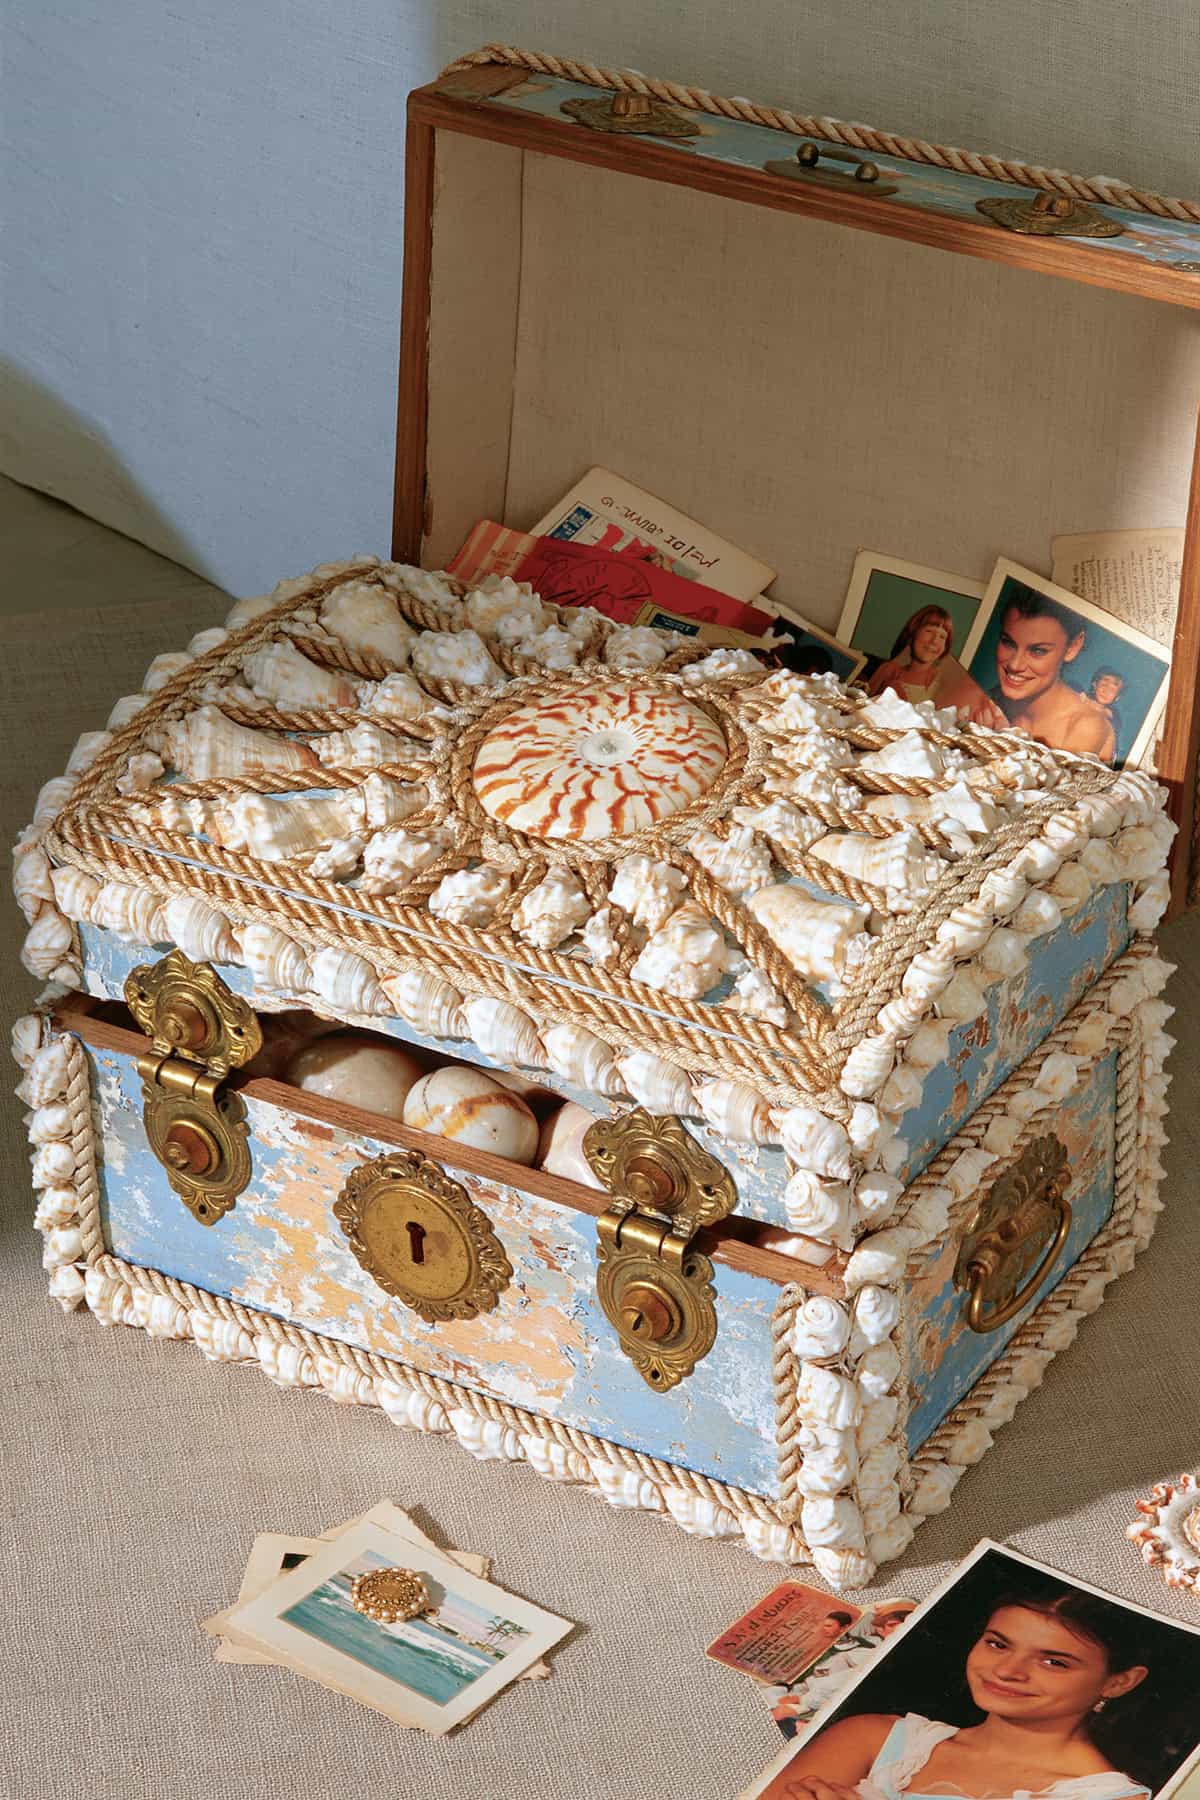
Buy a small wooden hinged box from a craft store. Paint or stain the interior, then cover the exterior with shells. Flat clam shells work as panels on the sides; smaller spiral shells and pieces of coral fill the lid.
Line the inside with velvet or felt for a finished look. This chest stores jewelry, keepsakes, or vacation mementos. It also works as a gift box, where the packaging is part of the present.
Seashell Hot-Air Balloon Sculpture
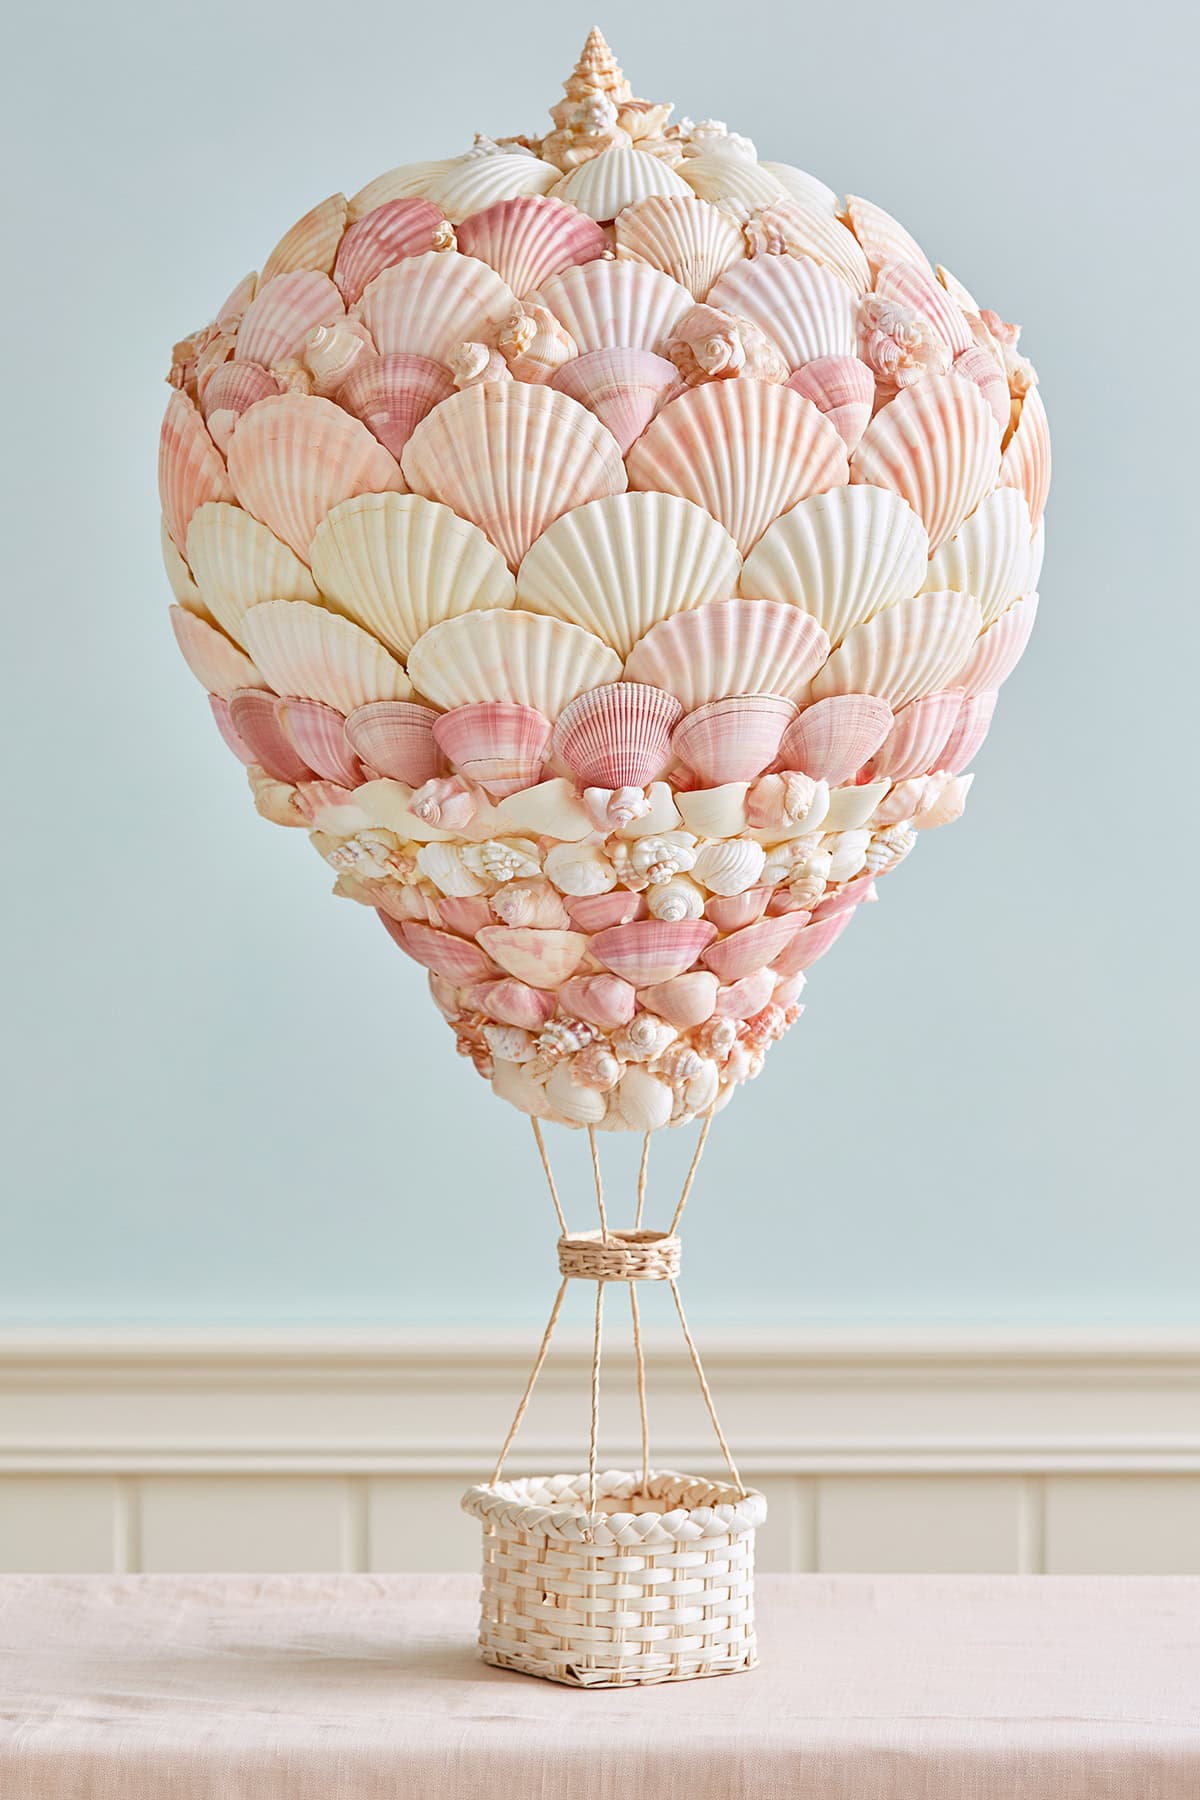
Use a small foam ball as the balloon. Glue tiny shells all over its surface, then attach four equal-length pieces of thin wire or string from the bottom of the ball to a small woven basket or half-walnut shell below. The basket hangs about three inches beneath the balloon.
Suspend the finished sculpture from a ceiling hook with monofilament so it appears to float. Grouping two or three at different heights in a corner or above a crib creates a whimsical display.
Seashell Hair Comb and Hairpins
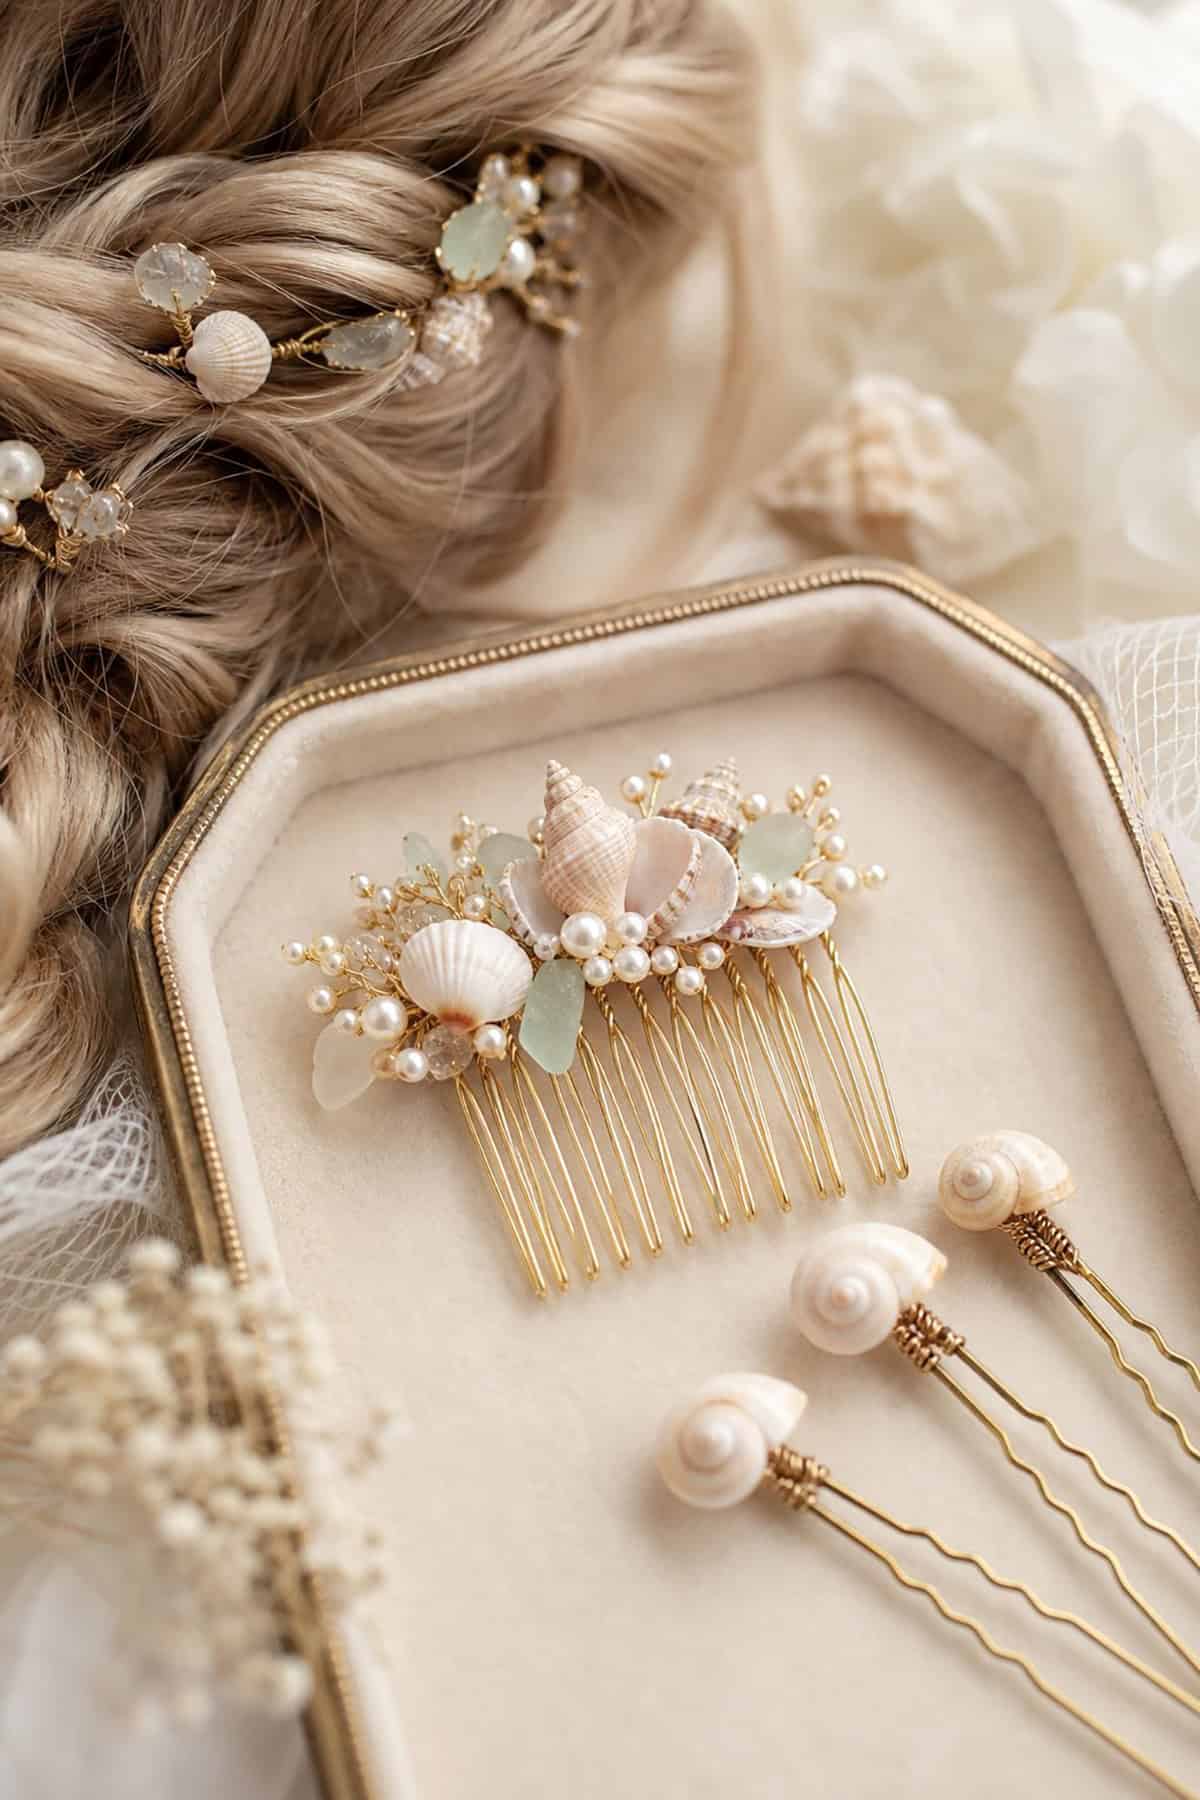
Attach small shells to a plain metal hair comb using E-6000 adhesive. Arrange them in a cluster at one end or scatter them across the top edge. For hairpins, glue a single shell to the flat pad of a bobby pin or a plain hair clip.
Let everything cure for 24 hours before wearing. These accessories suit beach weddings, summer parties, and festival outfits. Choosing shells with natural iridescence, like small abalone fragments, eliminates the need for extra embellishment.
Seashell Flower Bouquet
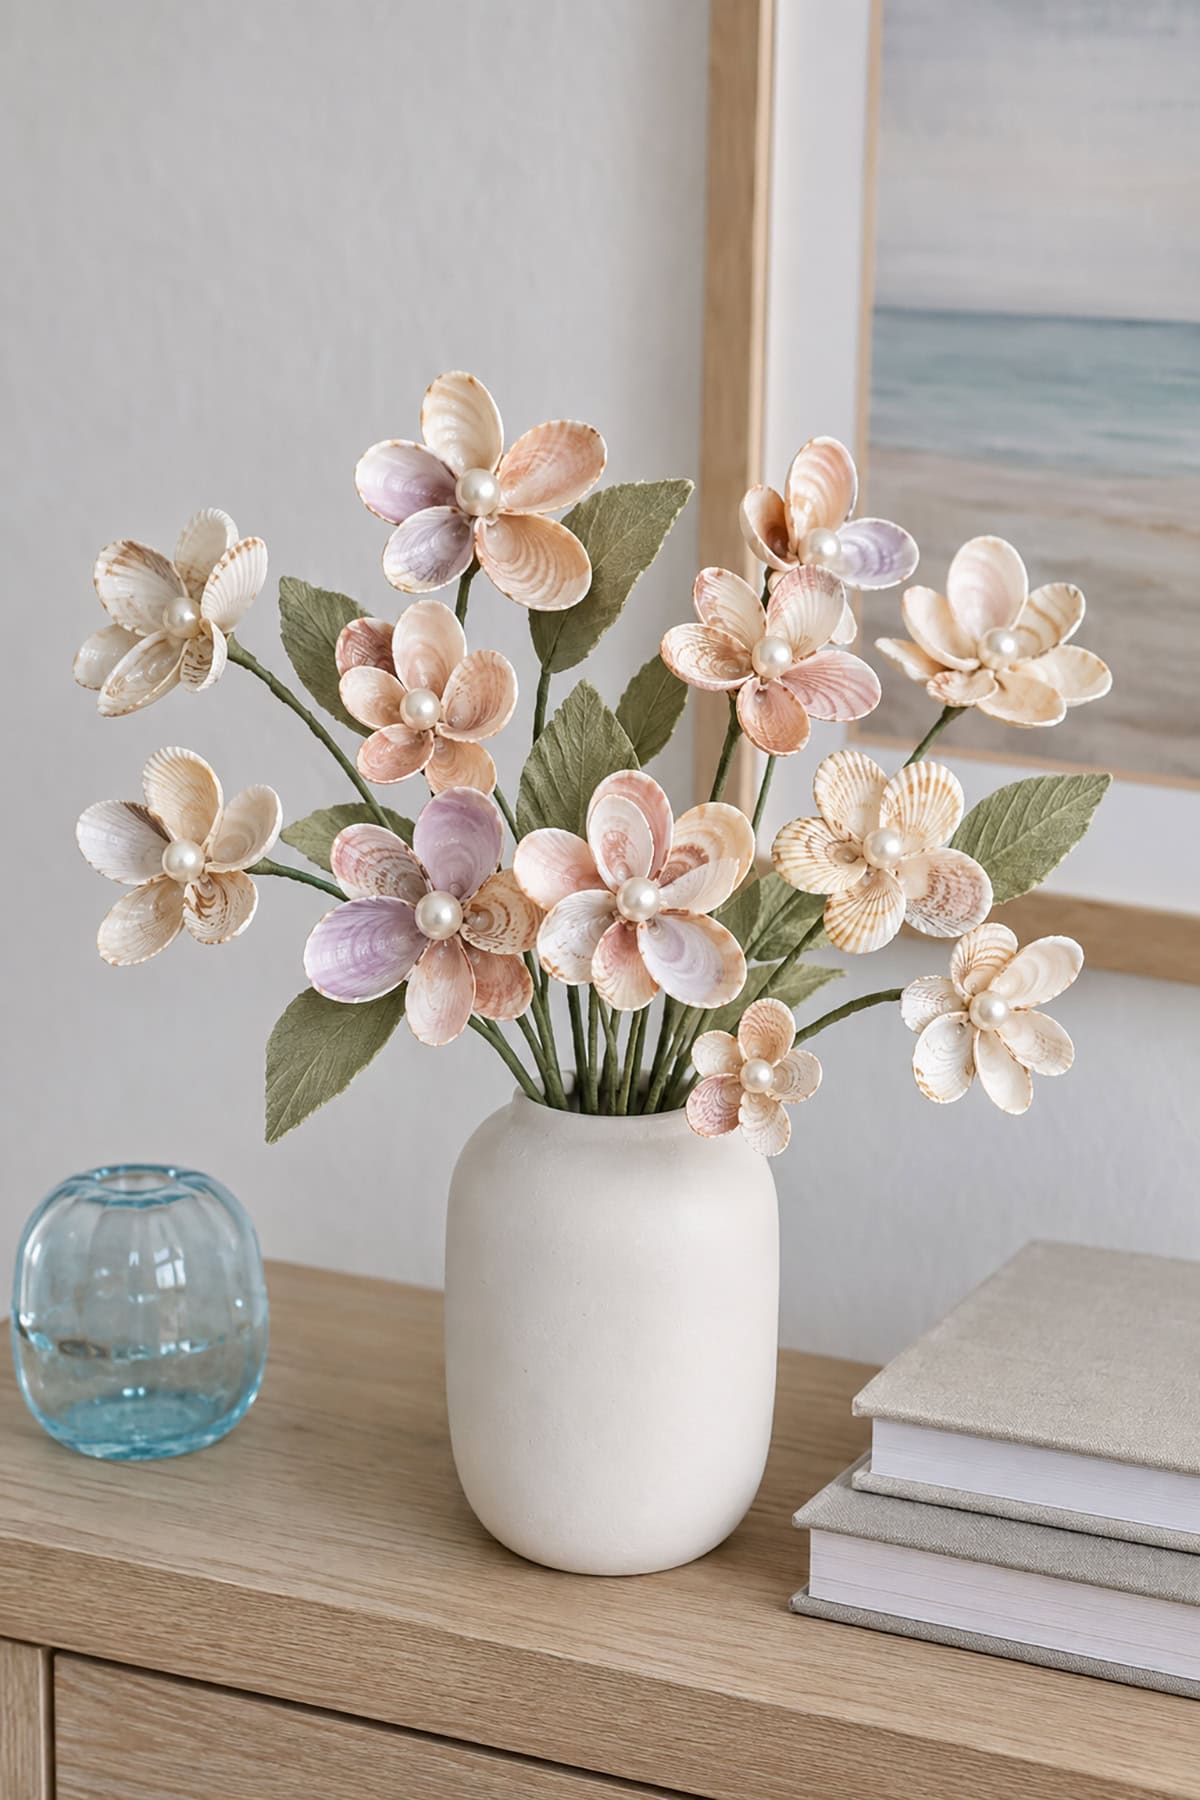
Glue individual shells to the ends of floral wire stems, layering two or three shells per “flower” to mimic petals. Wrap the wire with green floral tape, arrange the stems in a bouquet, and place them in a vase.
The bouquet never wilts, never needs water, and works year-round. It doubles as a permanent centerpiece or a standalone gift. Mixing shell sizes and types within a single bloom gives each flower a distinct shape.
Seashell Fairy Garden
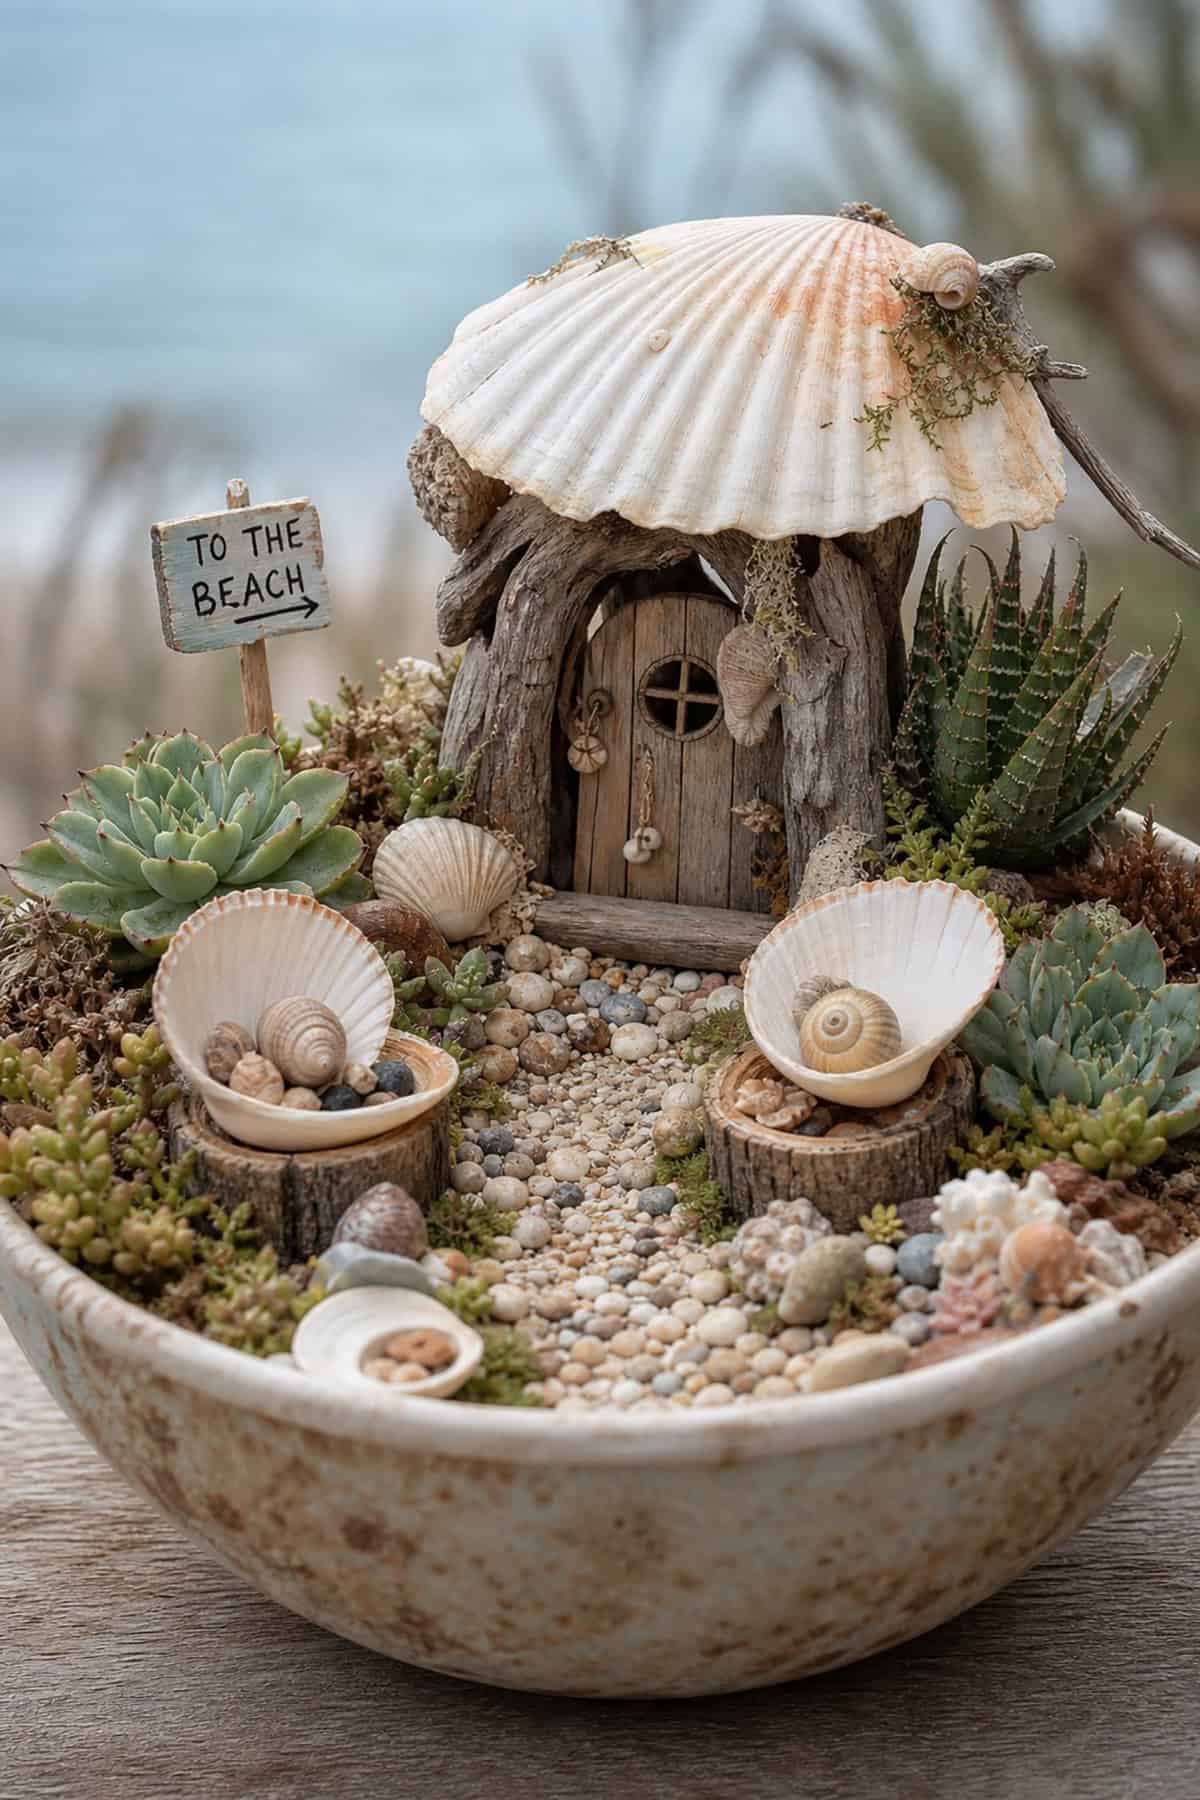
Set up a shallow planter or wooden tray as the base. Fill it with sand, add small potted succulents, and build miniature structures from shells: a scallop shell as a door, a spiral shell as a tower, clam shells propped open as tiny benches.
Pebbles mark pathways. A small mirror sunk into the sand becomes a fairy pond. This project invites constant tinkering, which makes it a good ongoing activity for kids or a desktop display you update whenever you find new shells.
Seashell Drawer Pulls
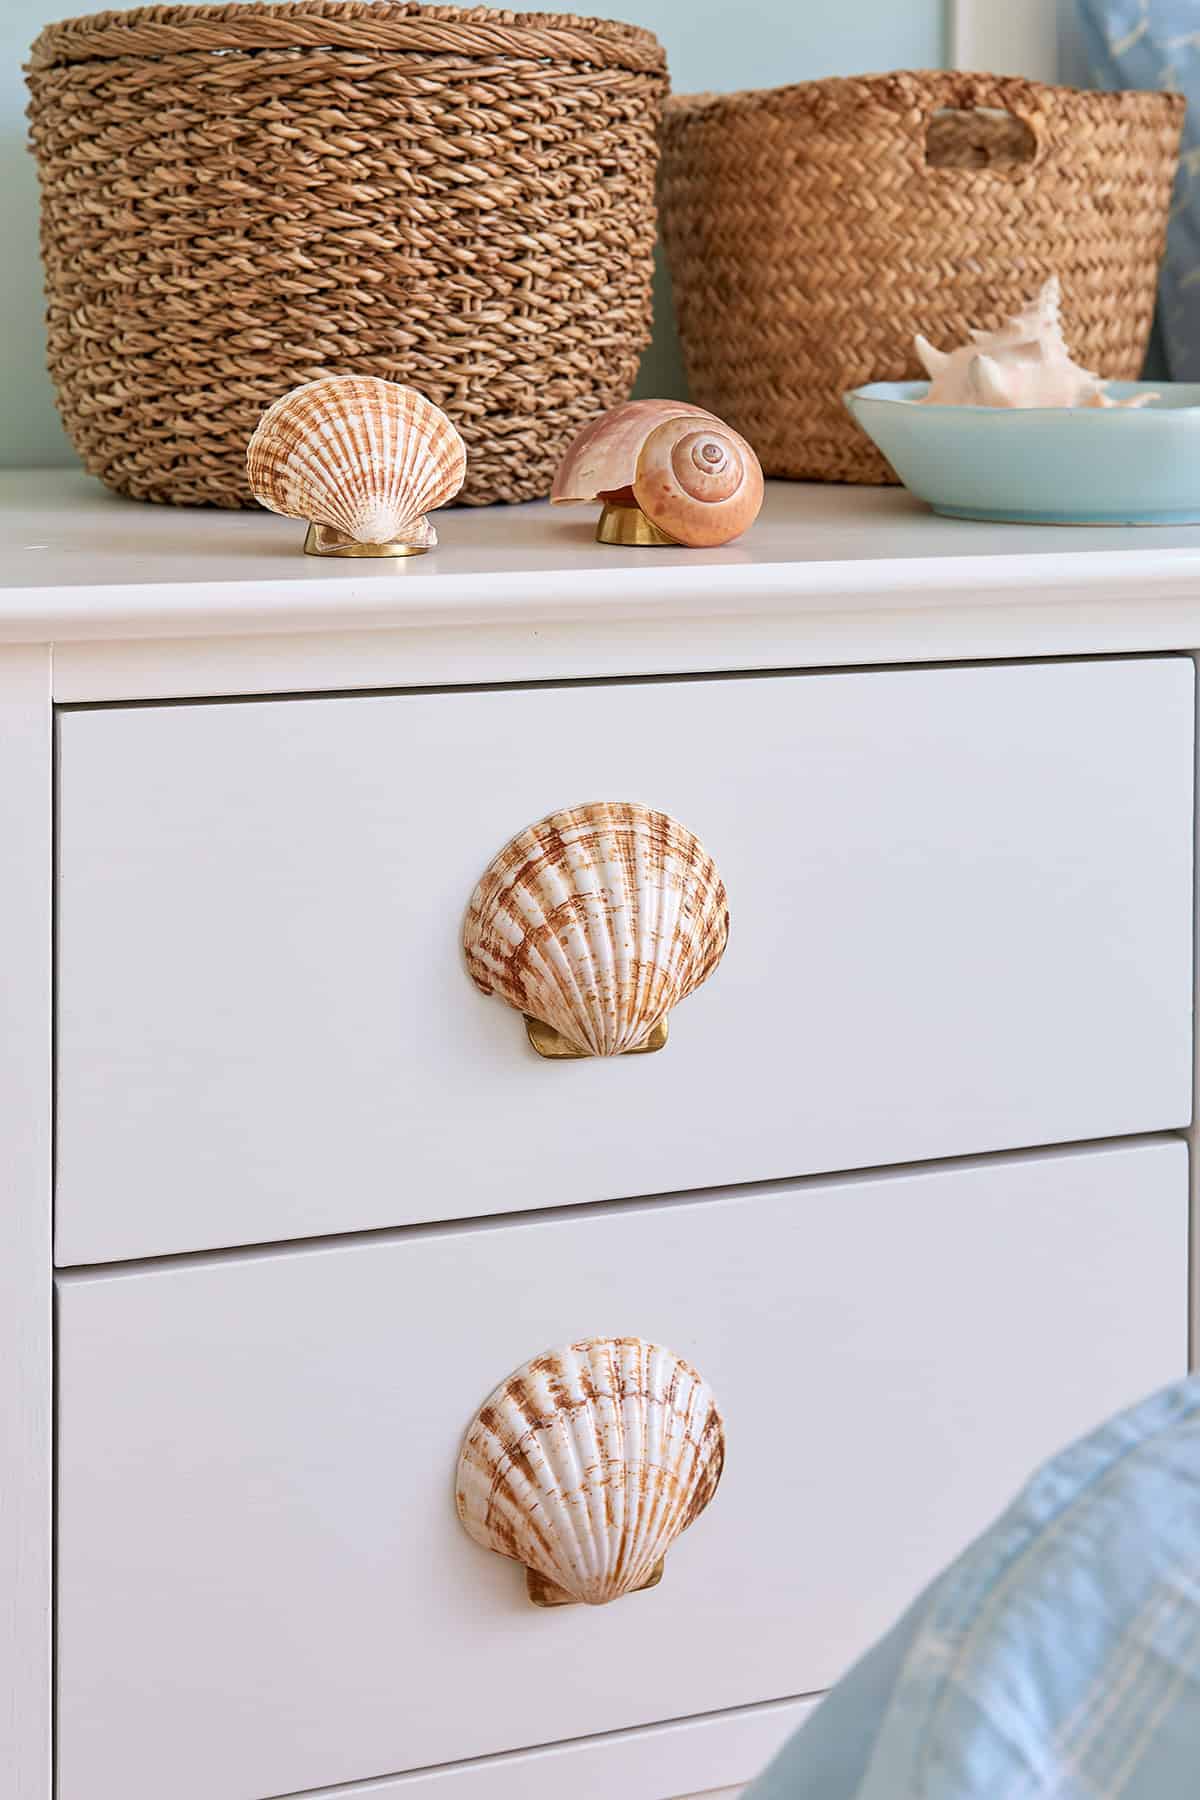
Remove existing knobs from a dresser or cabinet. Glue a flat shell to the top of each knob using E-6000, or drill through a shell and bolt it directly to the drawer with a short machine screw and a washer behind the drawer face.
The bolt method holds more weight and lasts longer. Sand the inside of the shell where the bolt head sits so it lies flat. This swap takes under an hour for an entire dresser and changes the look of a room immediately.
Seashell Clock
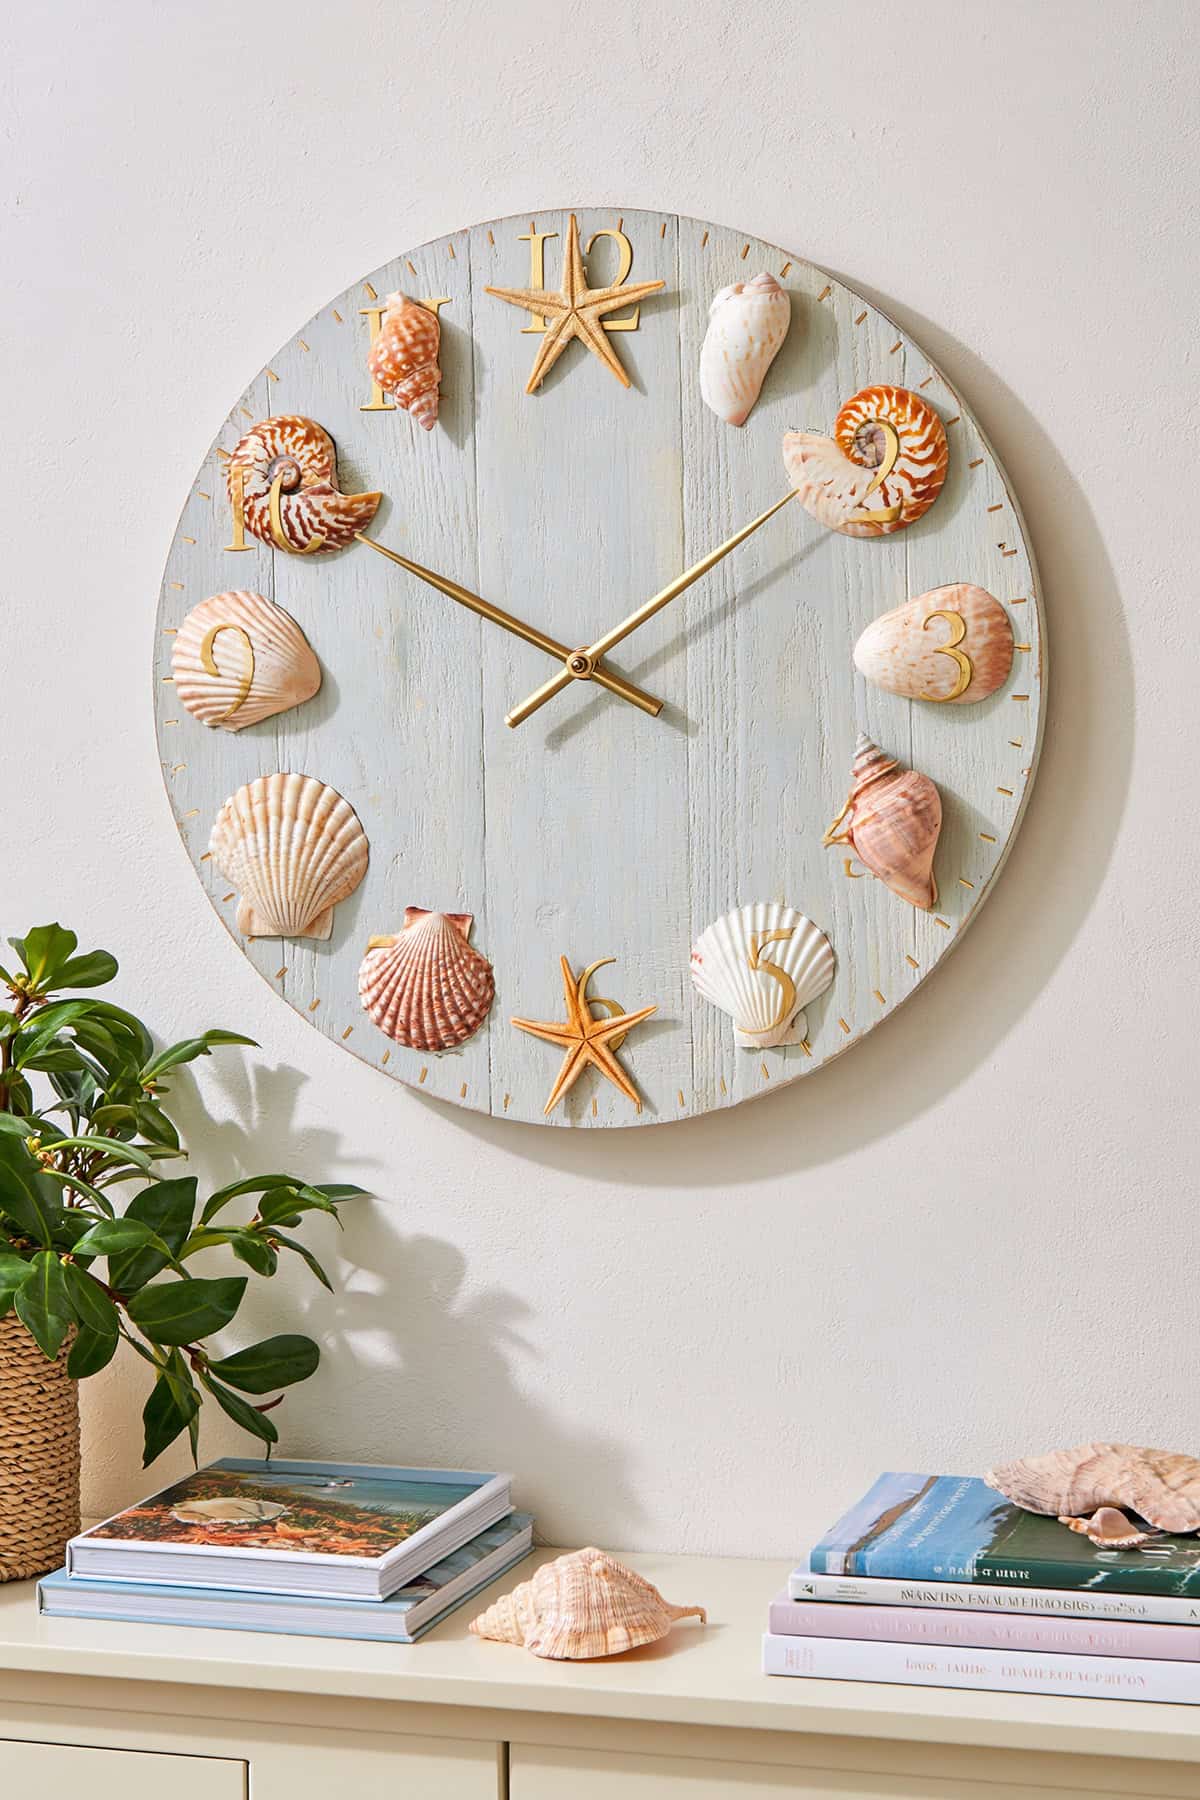
Buy a clock movement kit from a craft store. Mount it through the center of a large flat shell, a piece of driftwood, or a round wooden disc covered in shells. Attach the hands, insert a battery, and hang it.
For the disc version, arrange shells in a ring around the edge to mark the hours. Number them with small painted dots or leave them unmarked for a minimal look. The movement kits cost a few dollars and include everything except the face material.
Seashell Christmas Tree
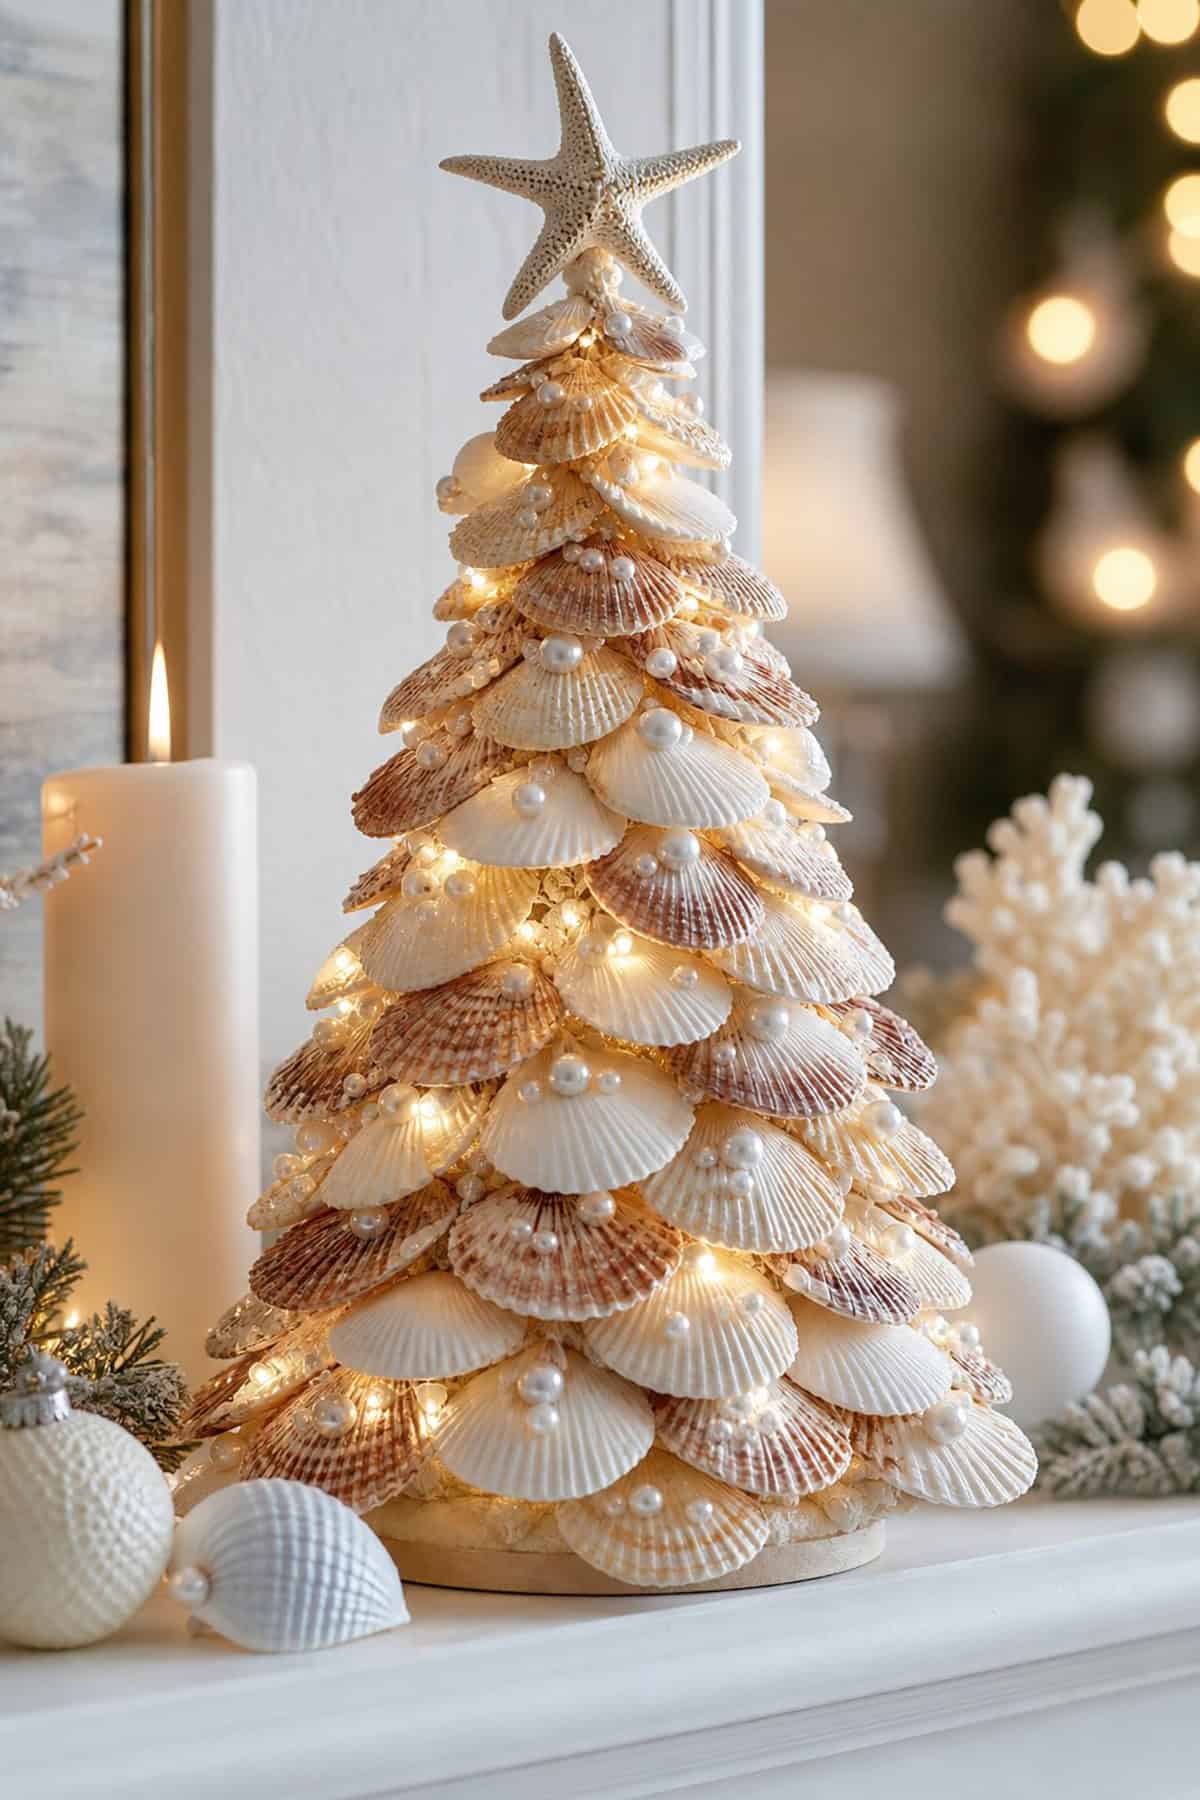
Stack shells in descending size order on a foam cone, starting with the largest at the base and spiraling upward with progressively smaller shells. Hot glue each one in place. Top the tree with a tiny starfish or a single spiral shell.
Spray the finished tree with metallic gold or silver paint for a holiday finish, or leave the shells natural for a coastal Christmas look. A set of three in graduated heights makes a strong mantel display.
Seashell Chess Set
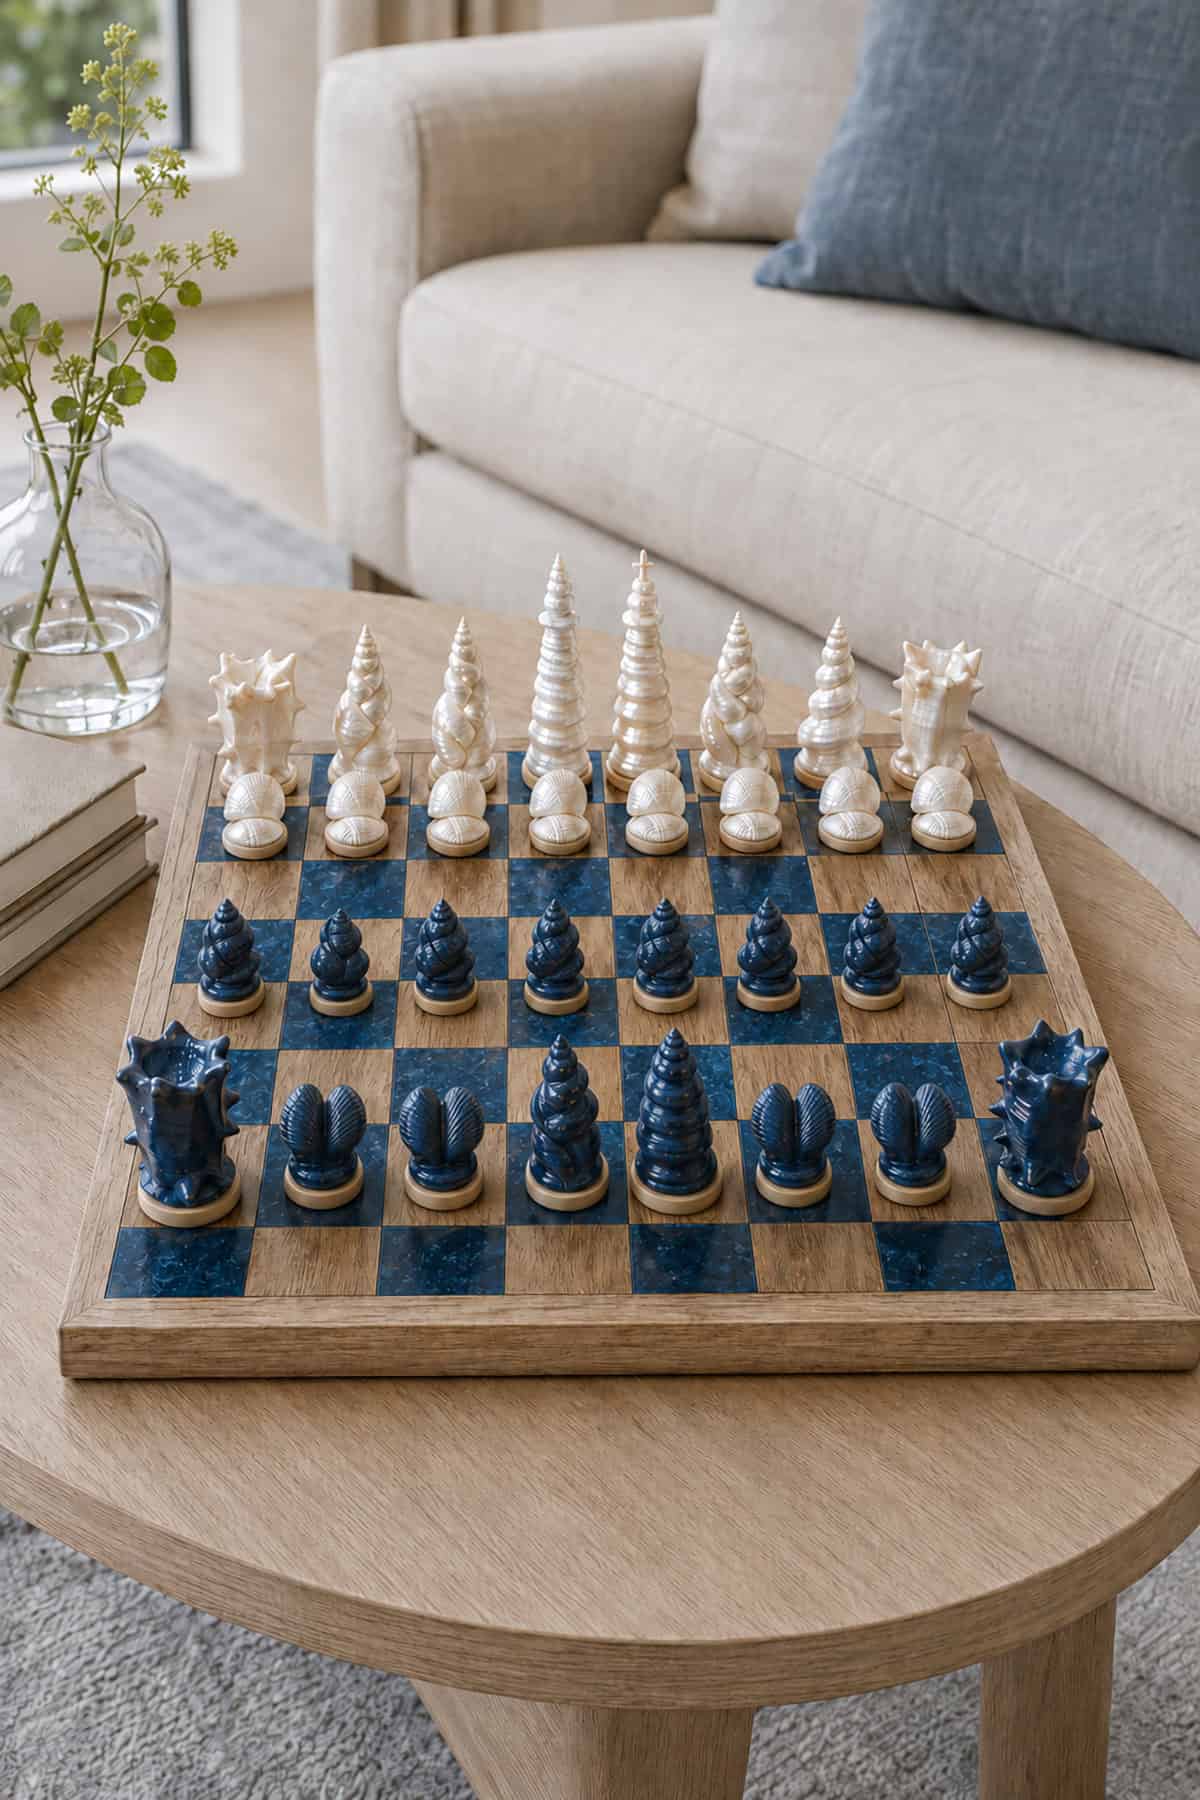
This project demands patience. You need 32 shells, 16 in one color family and 16 in another. Paint or leave them natural. Assign a shell type to each chess piece: spirals for bishops, clams for pawns, large conch fragments for rooks.
Build the board from a flat piece of wood with alternating painted squares or use a store-bought board. Glue a small felt circle to the bottom of each shell so it slides without scratching. The finished set is more art object than game, but it plays just fine.
Seashell Bookmark Collection

Glue a small, flat shell to the end of a wide paperclip or a strip of card stock. For the card stock version, fold a rectangle of heavy paper in half, glue a shell to the front panel, and slip it over a page corner.
A set of five or six, packaged in a small muslin bag, makes a thoughtful gift for readers. Coordinate the shells by color or type for a cohesive look. Flat shells work best because they do not add bulk between pages.
Seashell Bookends
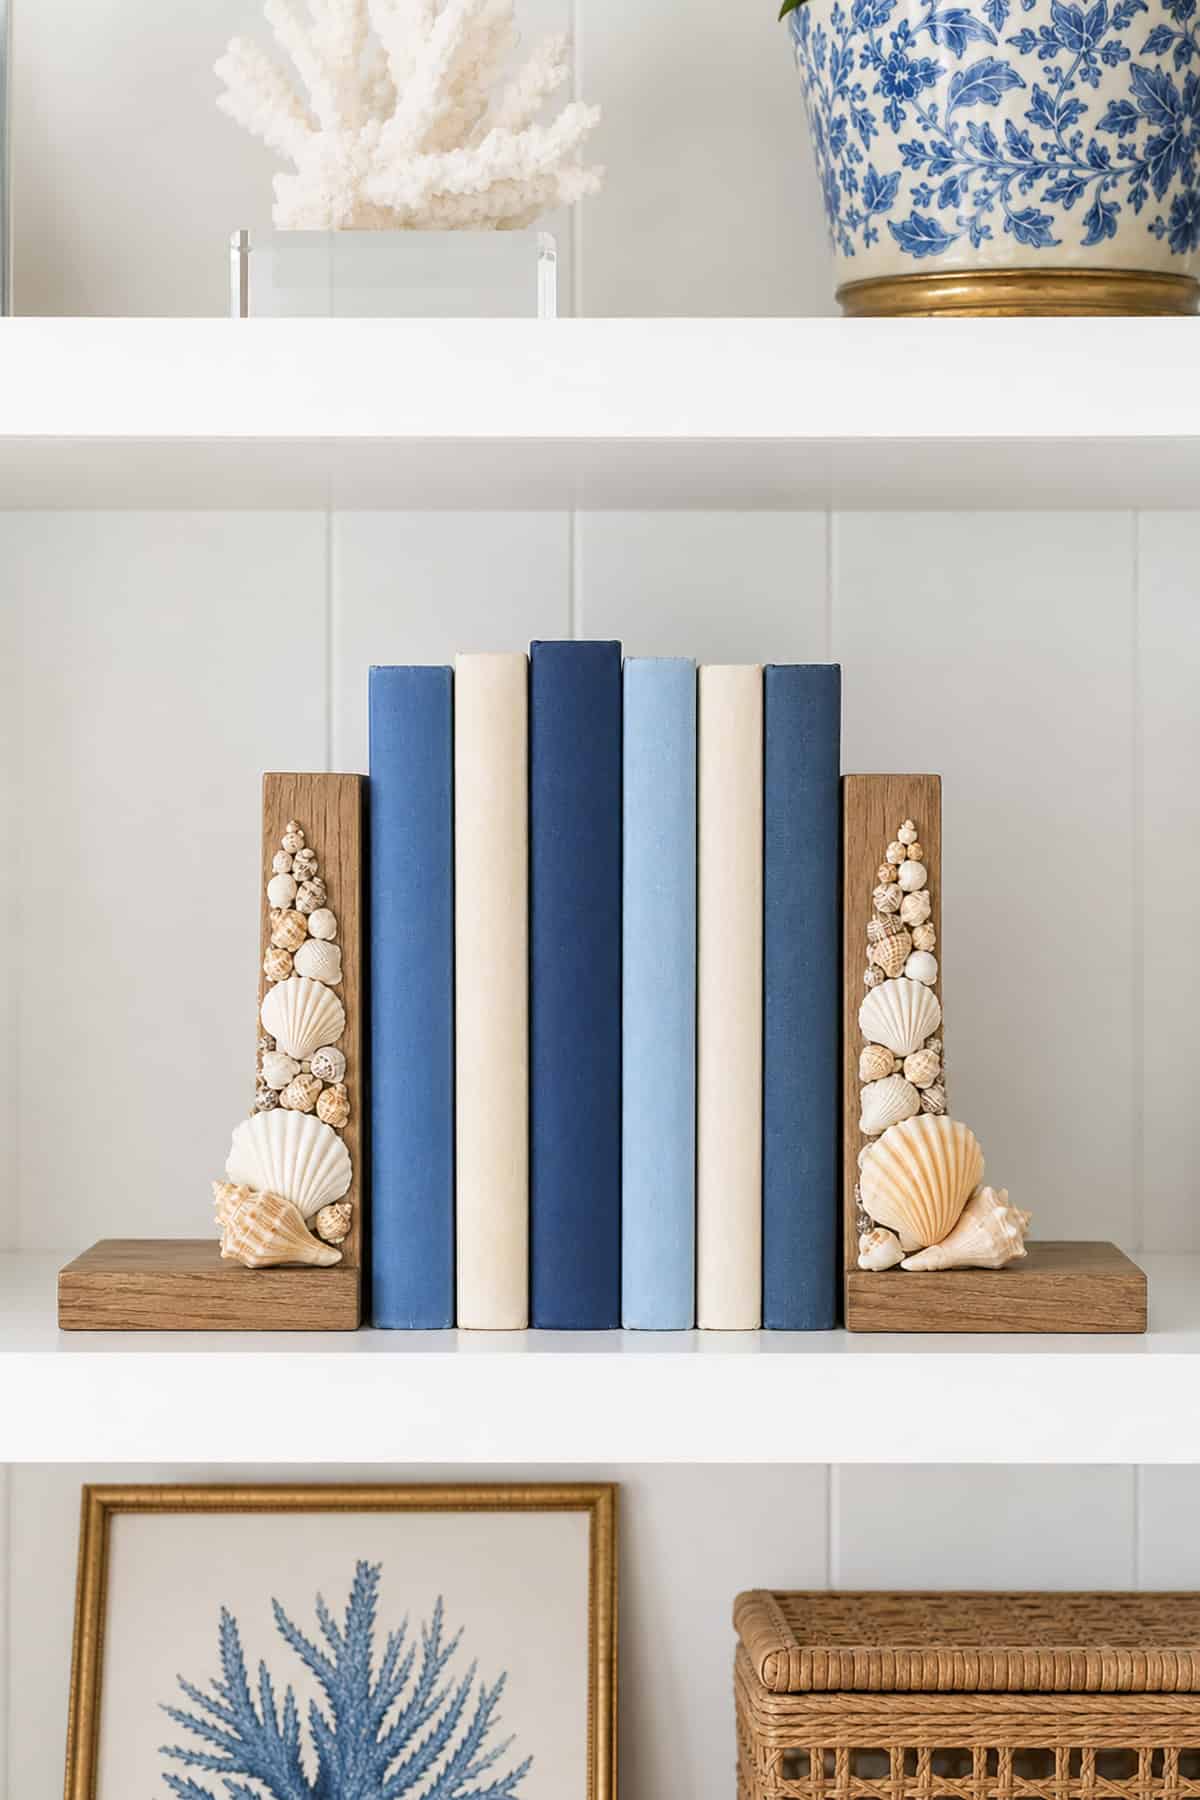
Fill two small, sturdy boxes or L-shaped wooden brackets with pebbles for weight. Glue shells to the exterior surfaces, covering all visible sides. The internal weight keeps the bookends stable enough to hold a row of paperbacks.
Alternatively, use two large, heavy conch shells as standalone bookends without any construction at all. Their natural weight and flat base do the job. A coat of clear lacquer gives them a polished, finished appearance on a shelf.
Scallop Shell Soap Dish
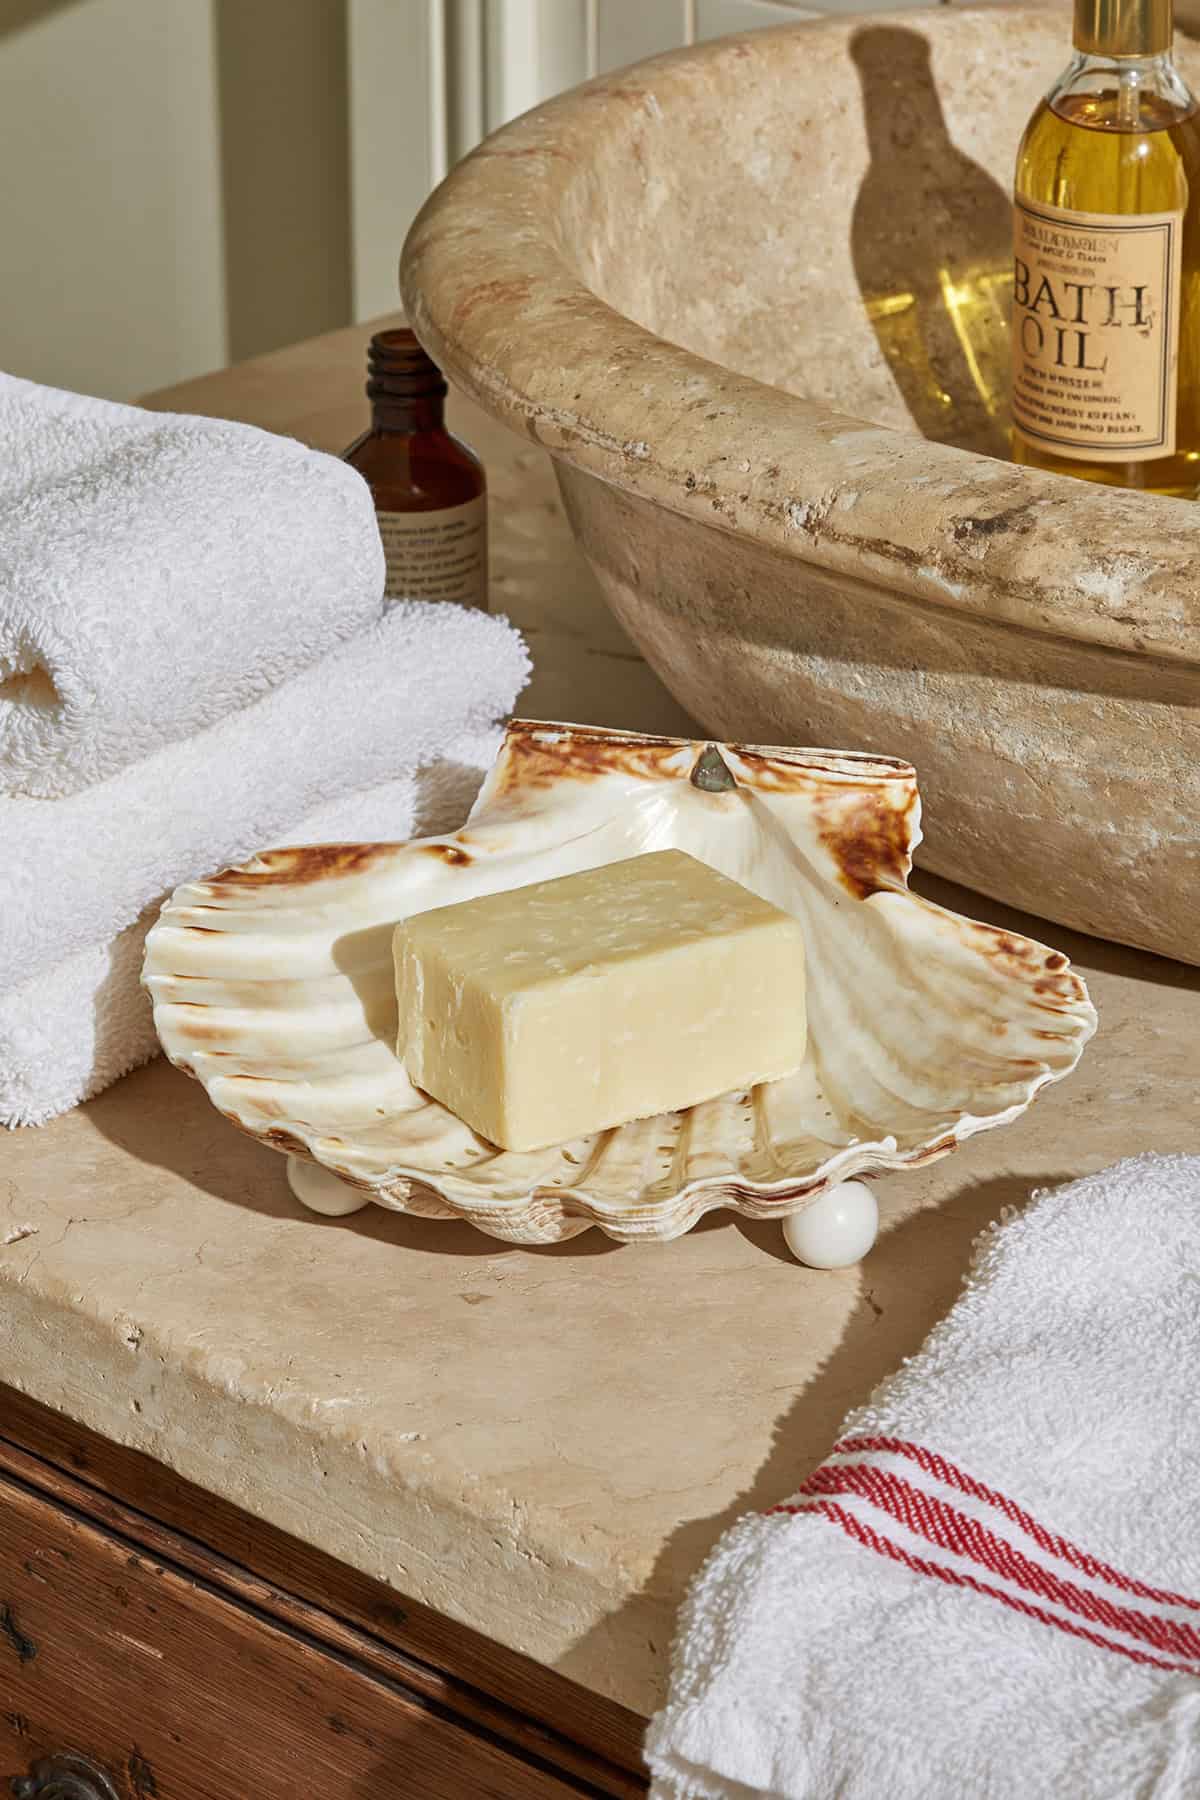
A large scallop shell already has the right shape for a soap dish. Clean it, sand the bottom flat if needed, and attach four small rubber bumper pads so it sits level on a countertop without sliding.
Seal the interior with a coat of marine-grade polyurethane so water does not degrade the shell over time. One shell per bathroom. The ridges in the scallop allow water to drain away from the soap, which keeps the bar from turning to mush.
Scallop Shell Napkin Rings
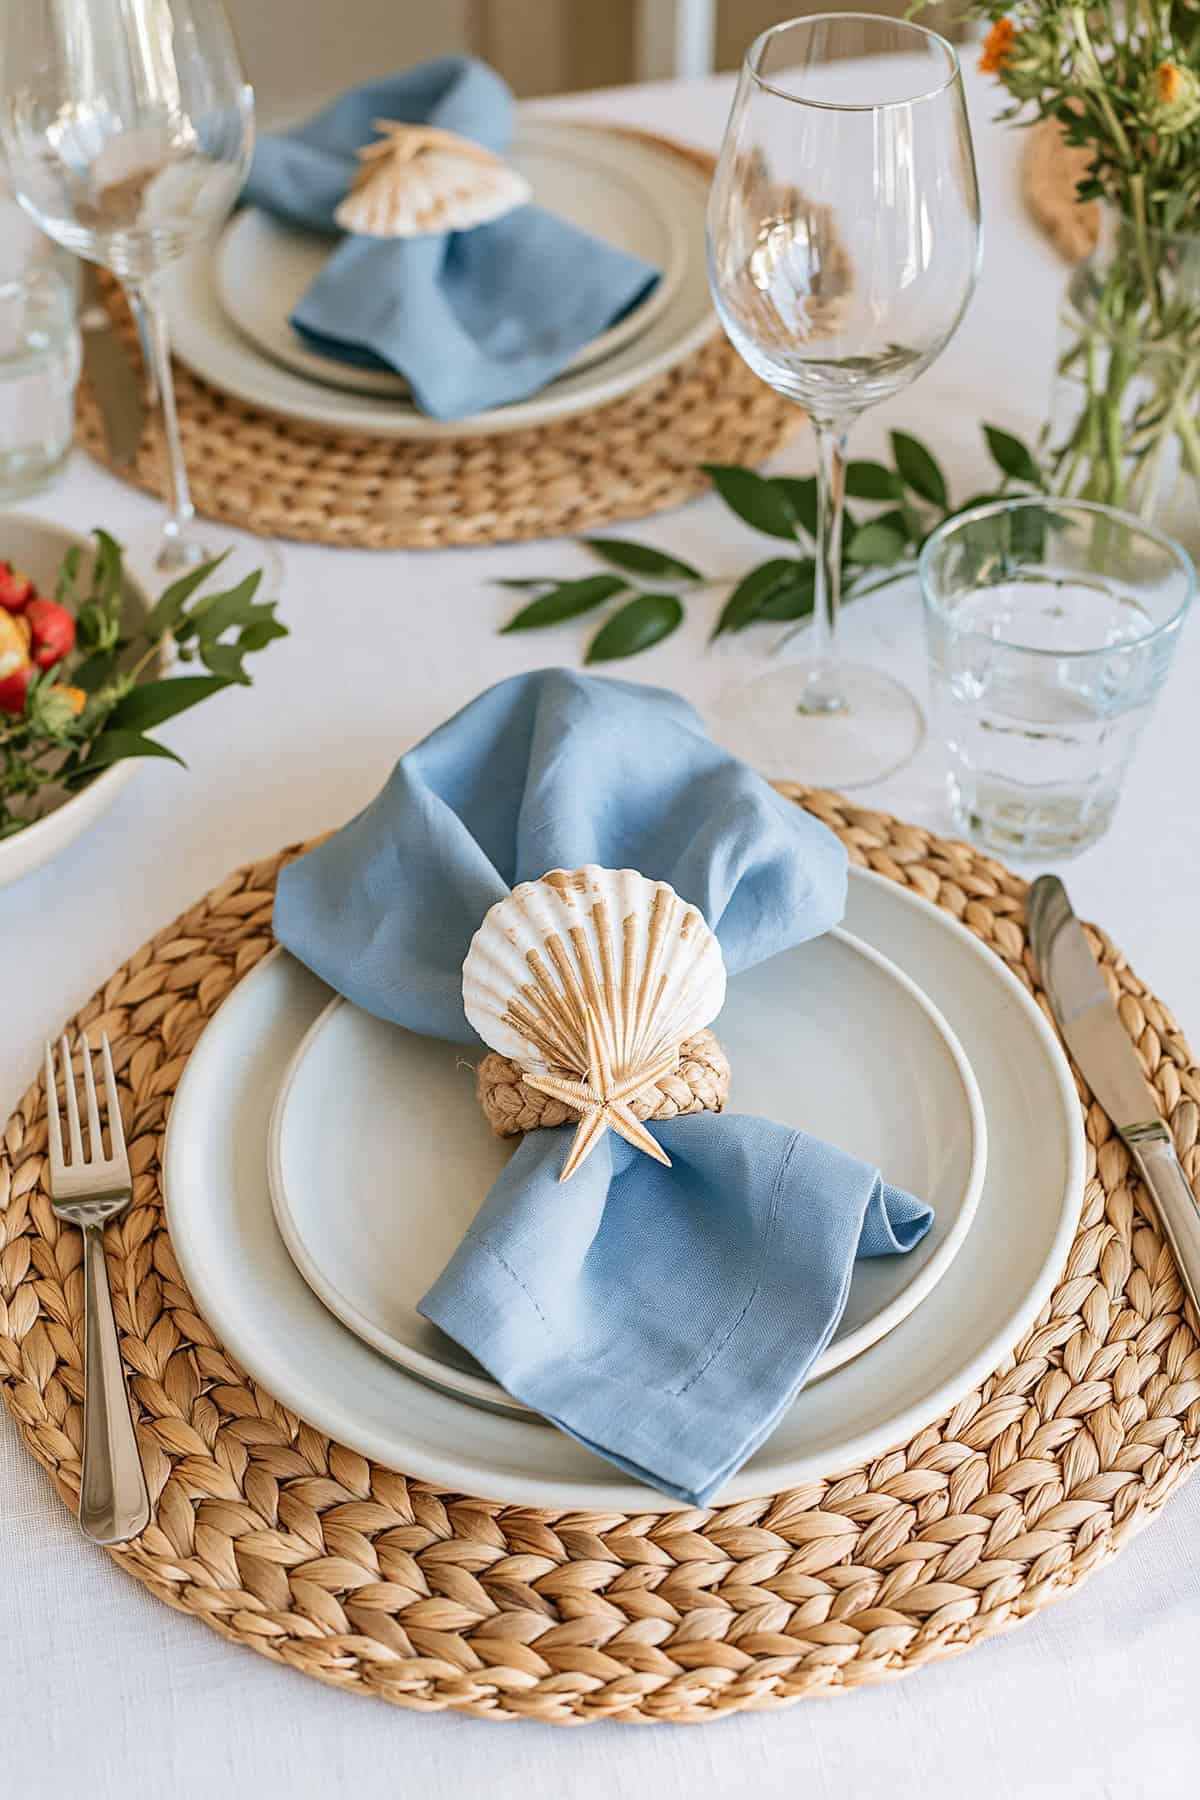
Glue a single small scallop shell to a plain wooden or acrylic napkin ring using E-6000 adhesive. Clamp it until the bond cures completely, at least eight hours.
A set of eight rings takes about thirty minutes of active work, plus cure time. Match the ring color to the shells or paint the rings white for a clean coastal table setting. These hold up through multiple uses and hand washings.
Miniature Seashell Village
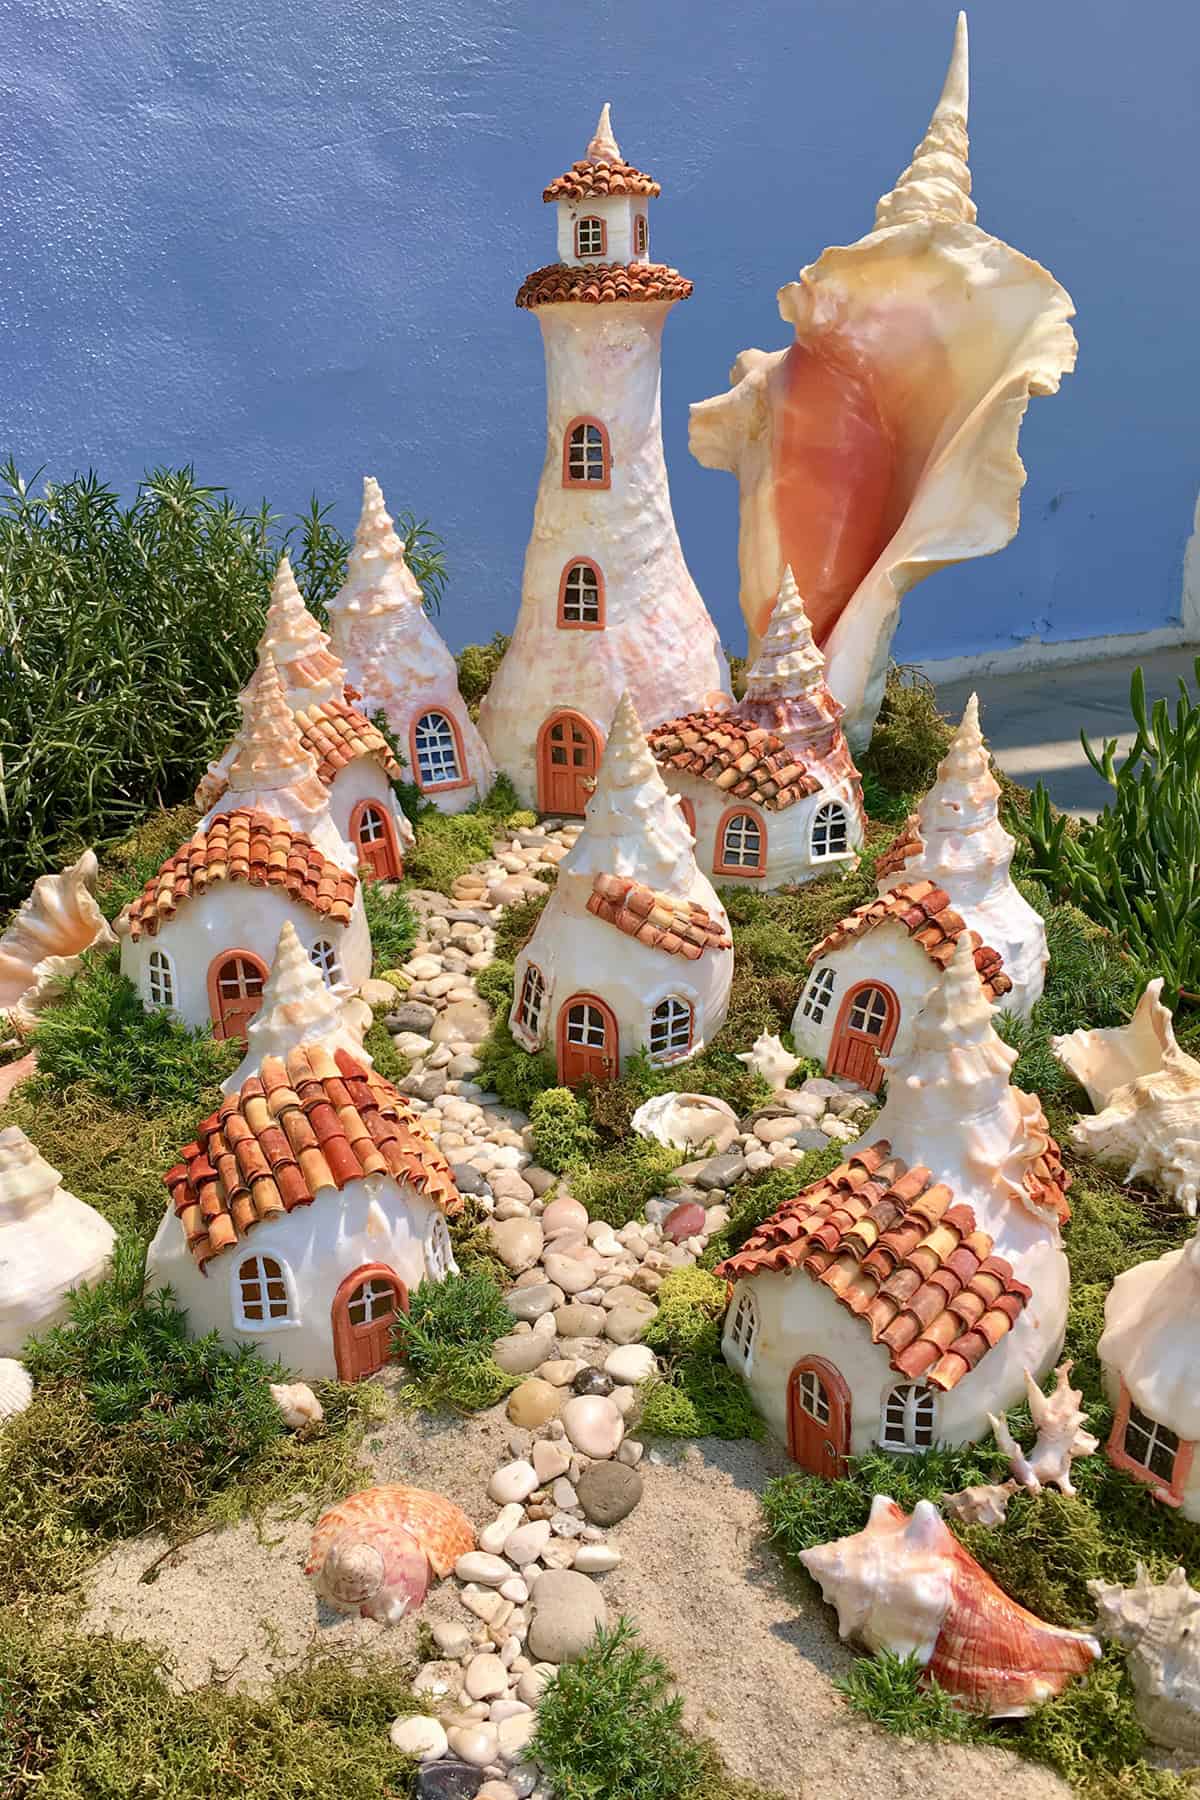
Build tiny houses, shops, and a church from clay or small wooden blocks, then roof each structure with overlapping flat shells. Arrange the buildings on a sand-filled tray or a piece of driftwood to create a seaside village scene.
Add shell fences, pebble pathways, and dried moss landscaping. The project grows over time as you add buildings and details. It works as a shelf display, a seasonal centerpiece, or a collaborative family project that evolves over multiple weekends.
Broken-Shell Mosaic Stepping Stone
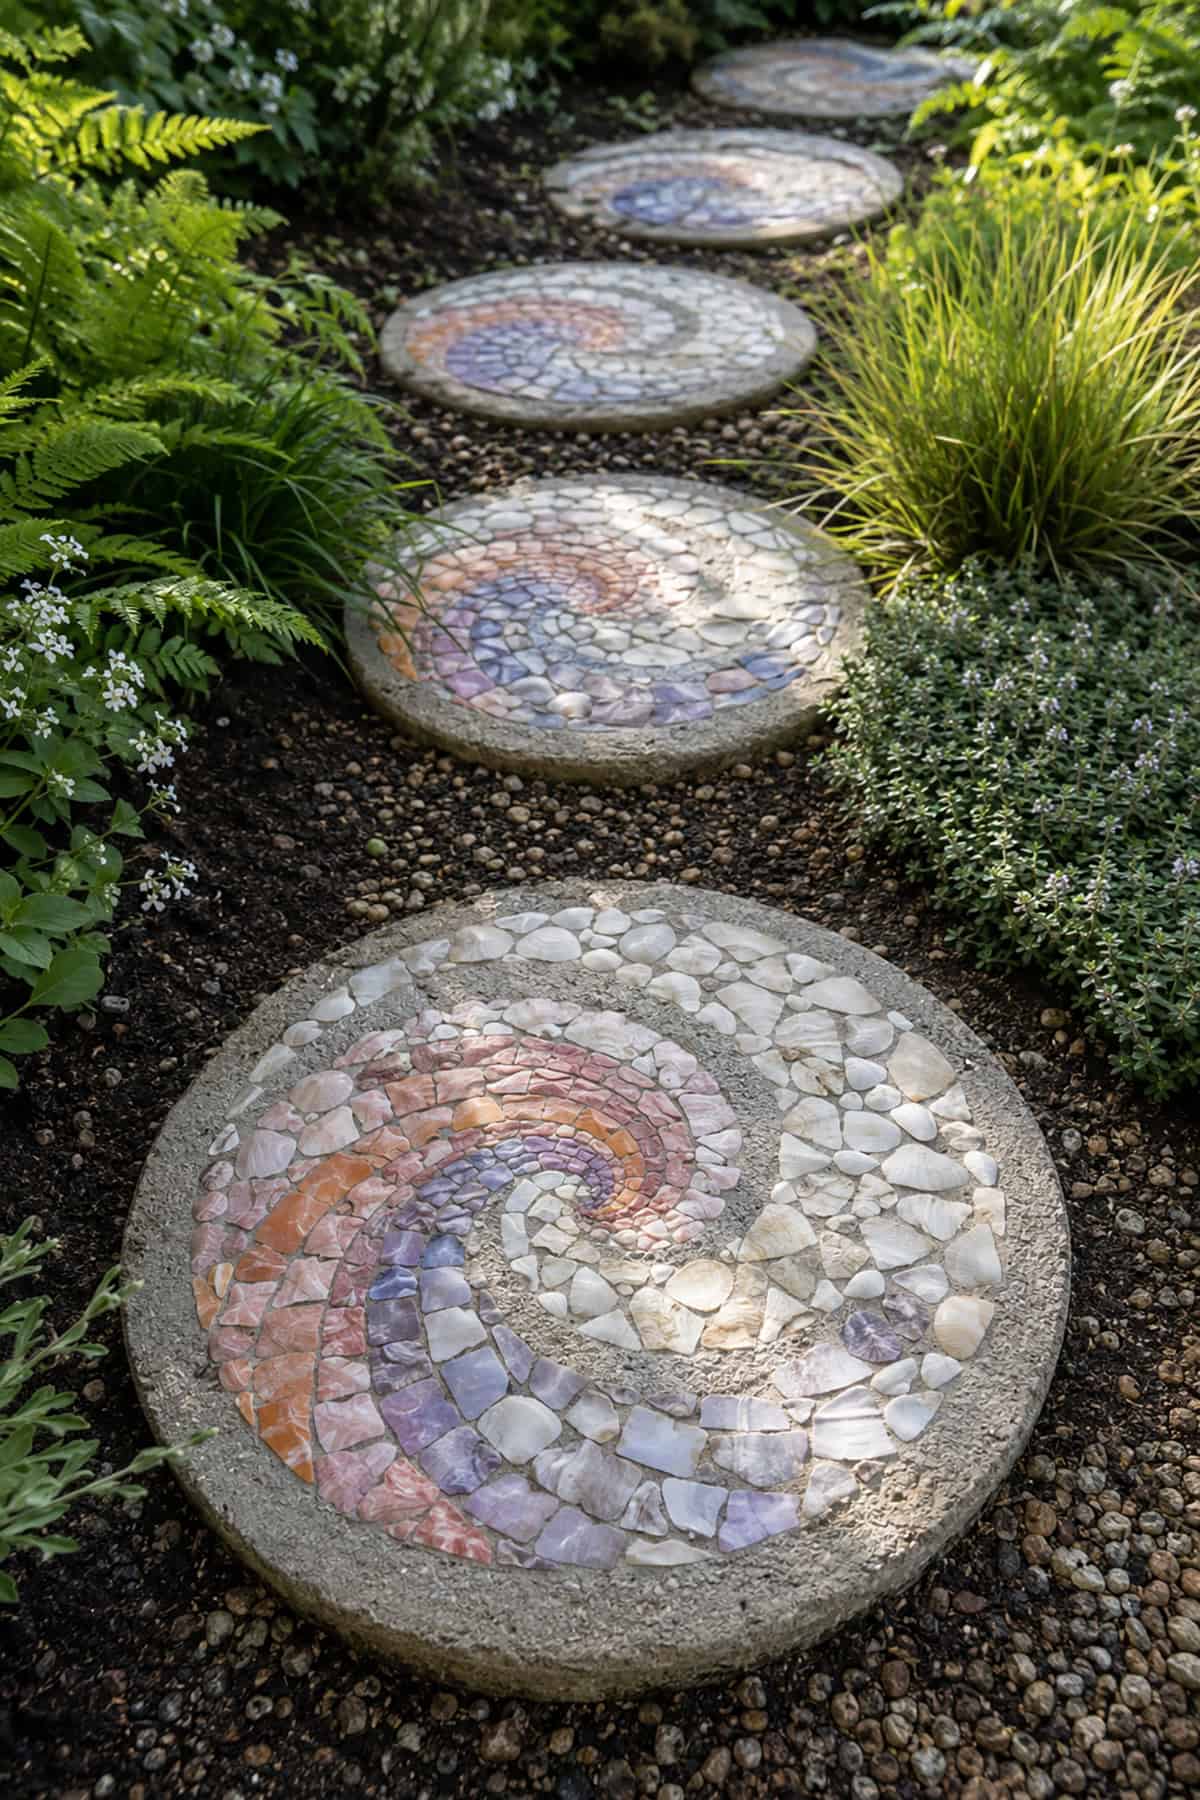
Pour quick-set concrete into a round or square stepping stone mold. Before it sets, press broken shell fragments into the surface in a mosaic pattern. Swirls, starbursts, and concentric rings all work well.
Let the concrete cure for 48 hours before unmolding. Seal the surface with an outdoor stone sealer to protect the shells and prevent the concrete from absorbing water. Place the finished stone in a garden path where it catches sunlight and shows off the shell colors.
Arched Seashell Mosaic Mirror
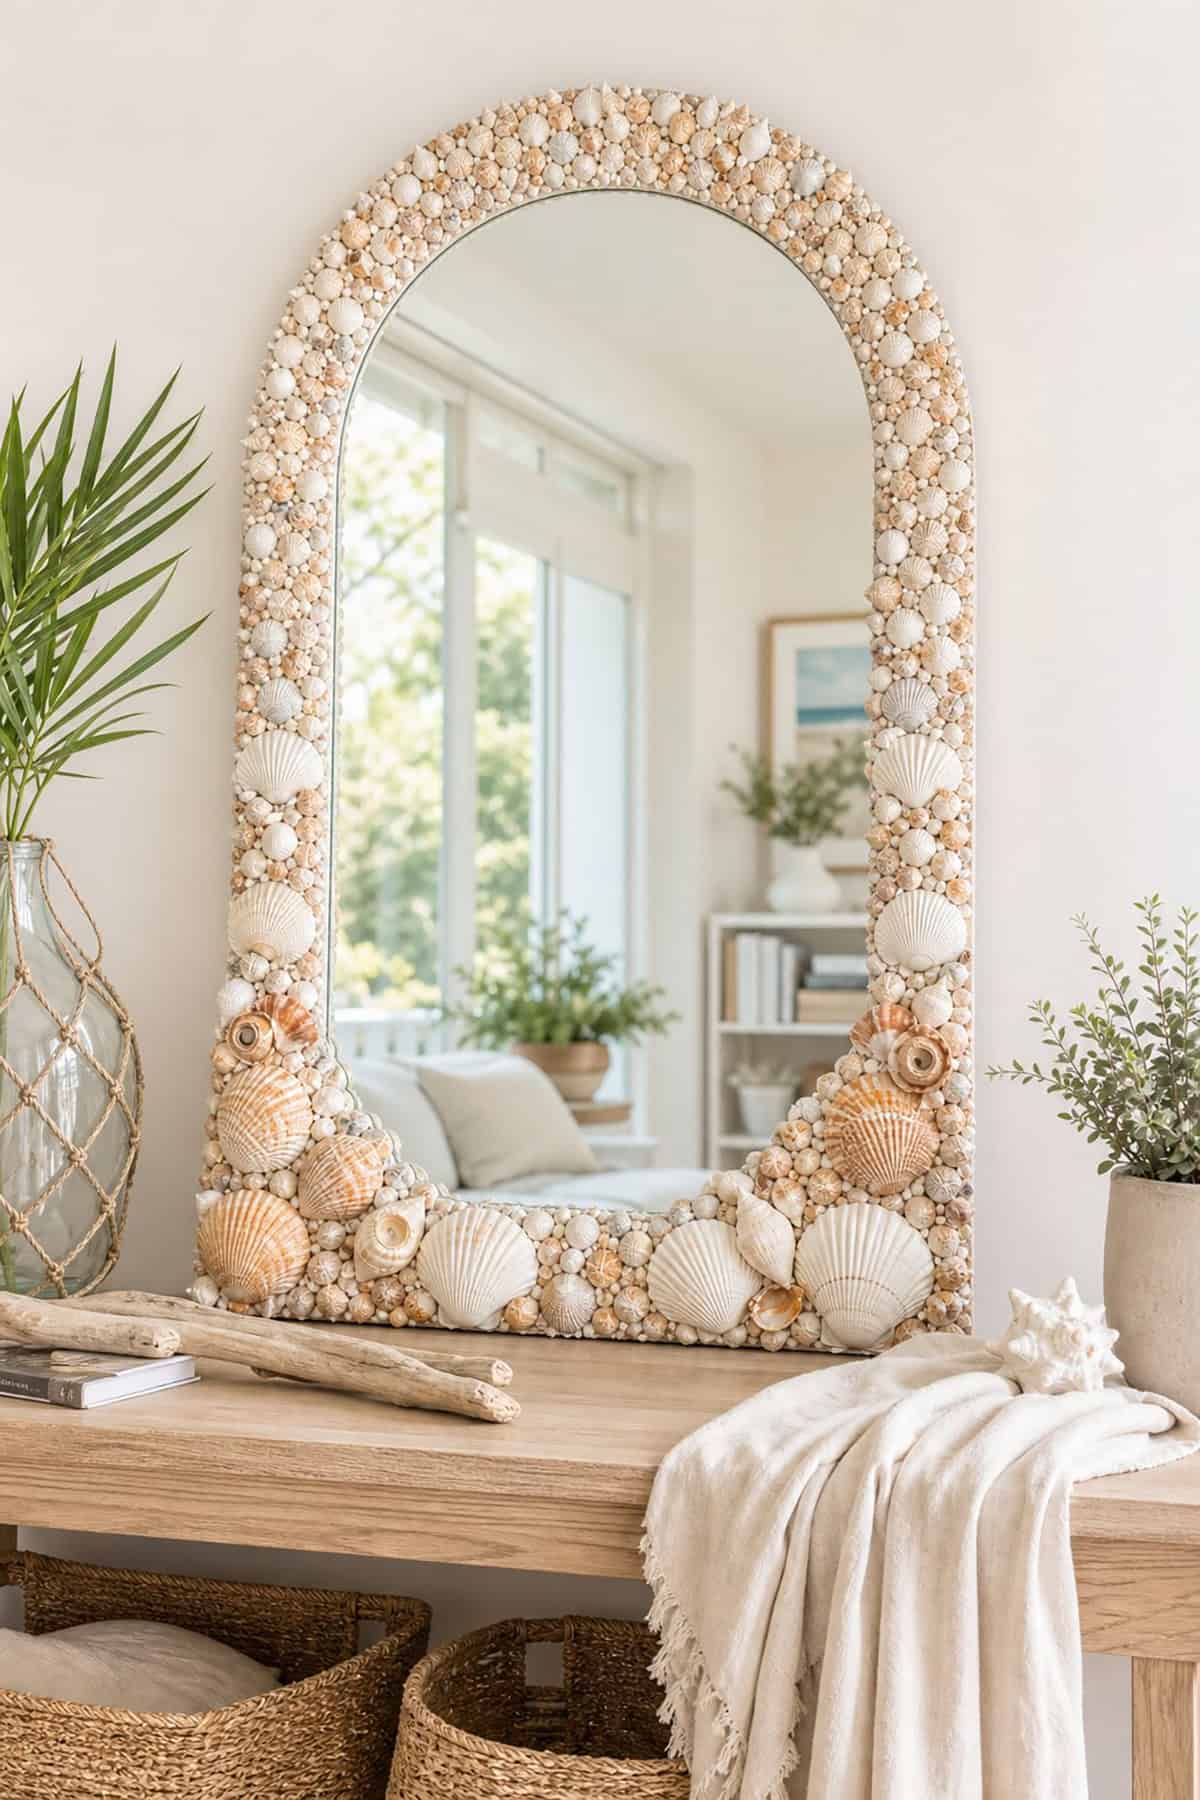
Start with an arched mirror, either store-bought or cut from a larger piece. Build up the frame with wood strips or foam board to create a wide border. Cover the border in broken shell fragments arranged in a mosaic pattern, grouting between pieces for a finished tile look.
Oyster shell fragments give this project a pearlescent quality that catches light at different angles. Wipe the grout haze from each shell piece with a damp cloth before it dries completely. Hang the finished mirror in a bathroom or entryway where its arched shape draws the eye upward.
Beachcomber’s Seashell Wreath
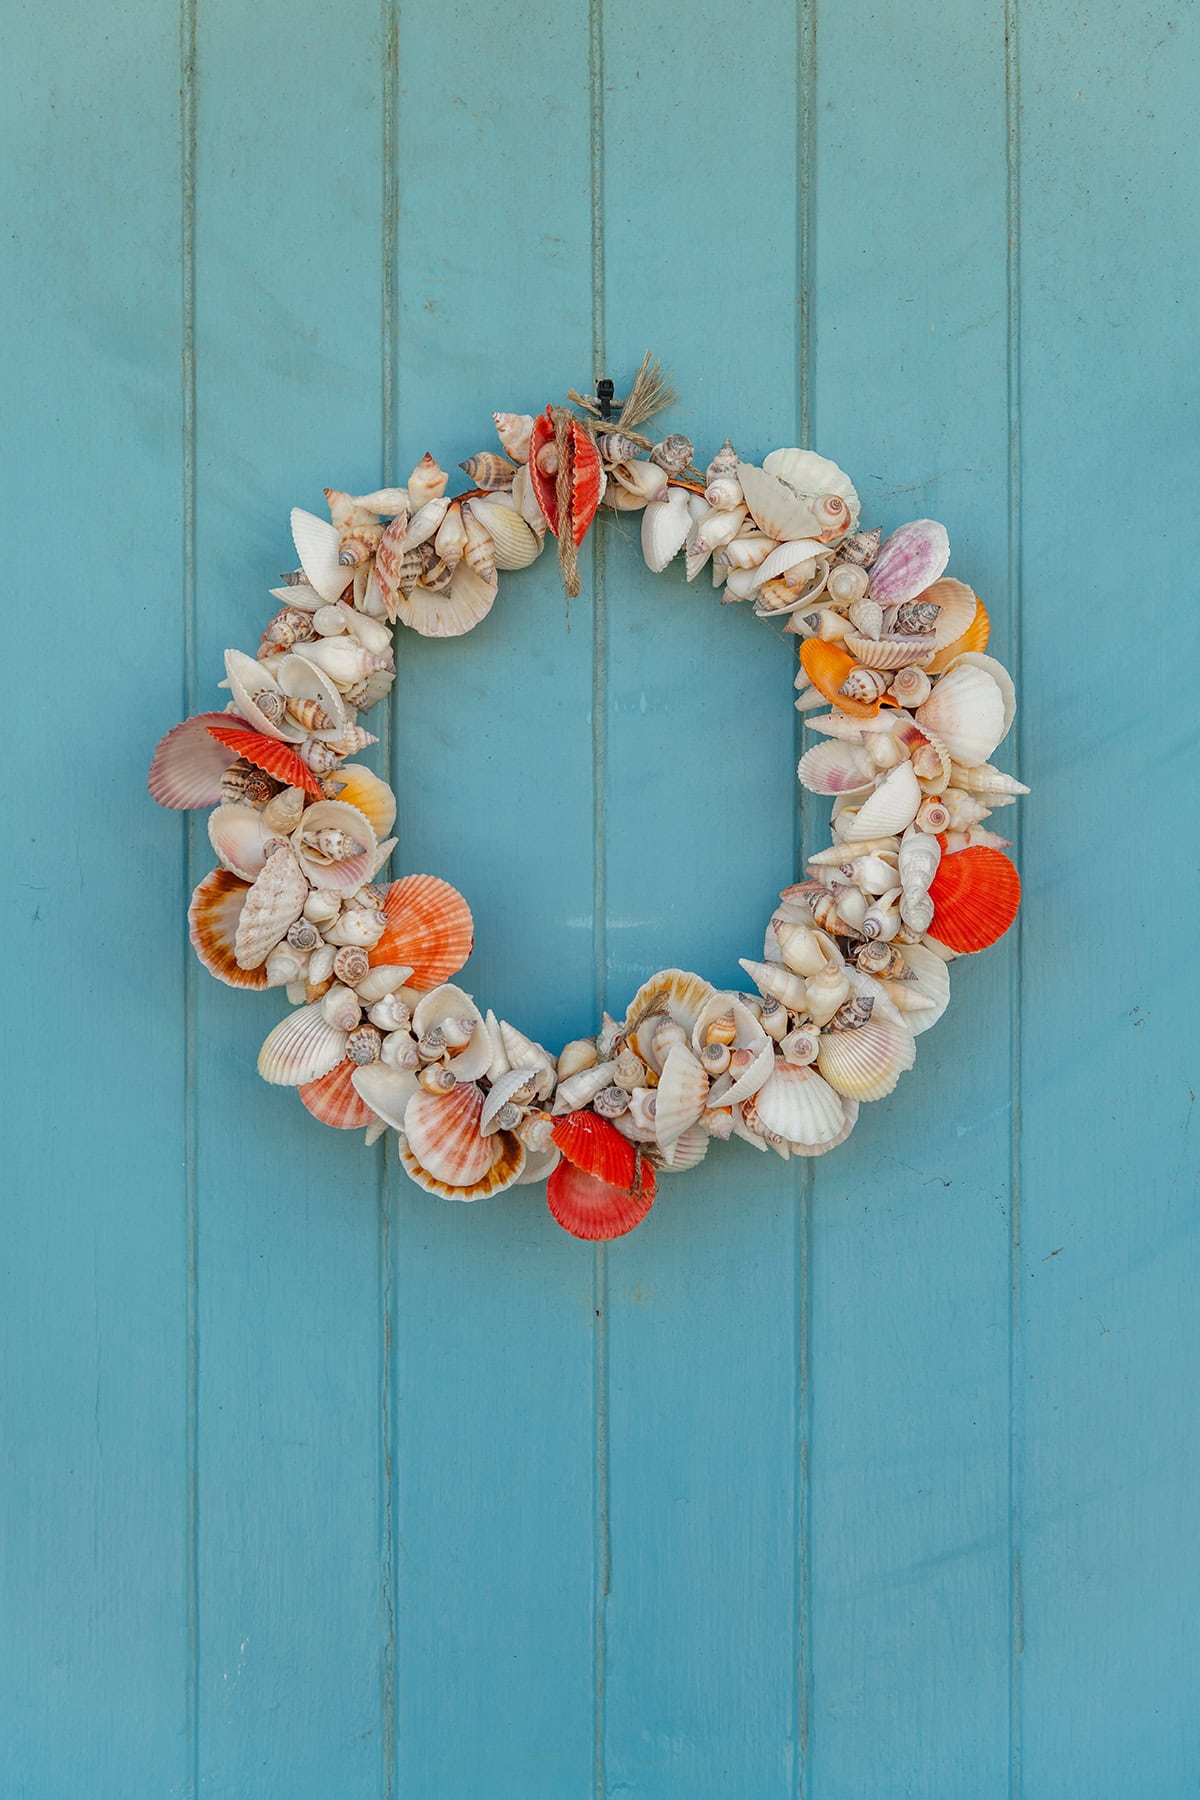
A foam or grapevine wreath form disappears completely under layers of shells when you pack them tightly and vary the sizes. Start by hot-gluing the largest shells around the form first, then fill gaps with smaller pieces, sand dollars, and bits of sea glass. Work in sections so the glue stays tacky.
Hang the finished wreath on your front door or above a mantel. For outdoor use, seal the shells with a clear spray polyurethane to protect against moisture. Two coats dry in under an hour. The wreath holds up well through summer and into fall if you keep it out of direct rain.
Egg Carton Ocean Diorama
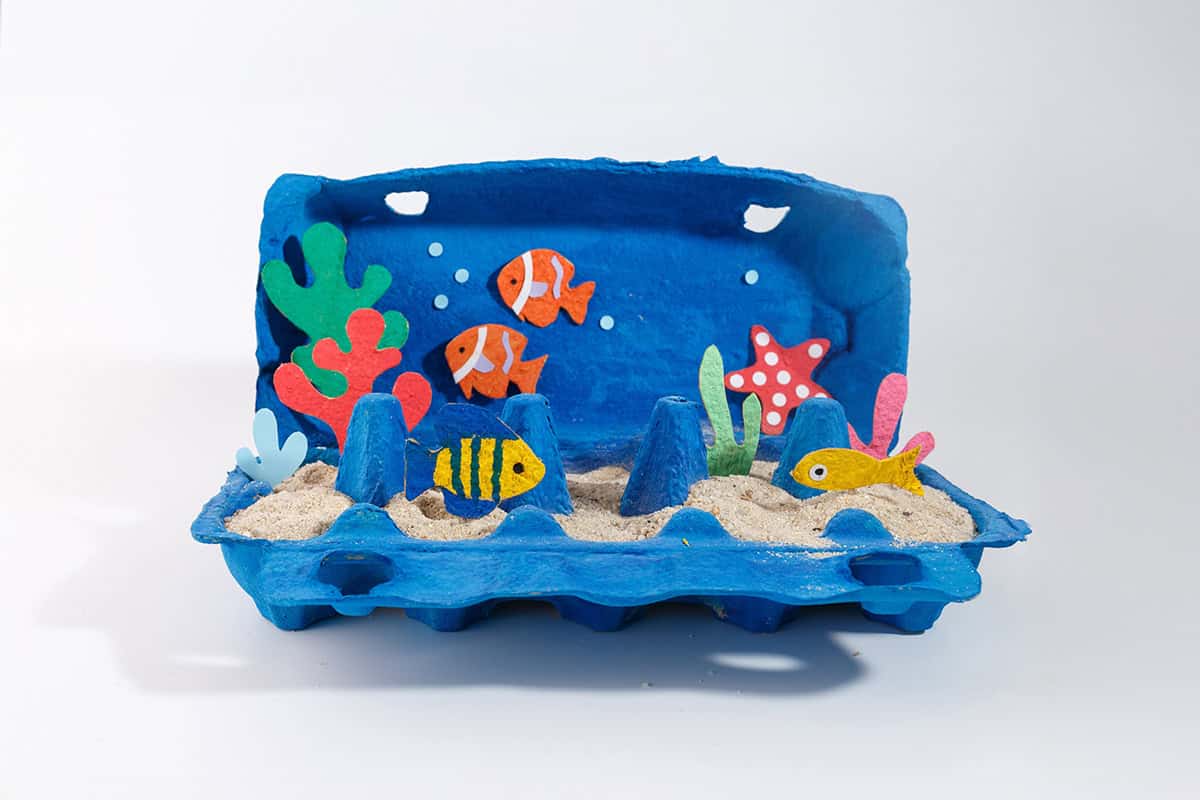
Cut the lid off a cardboard egg carton, paint the inside blue, and you have a ready-made underwater scene with built-in compartments. Each cup becomes a pocket for a different element: a tiny shell, a painted pebble, a scrap of green felt for seaweed, or a small plastic fish.
Kids love this project because it is low-pressure and endlessly customizable. Let them arrange and rearrange pieces before gluing anything down. The egg carton stands upright on a shelf or lies flat on a desk. It costs almost nothing to make and keeps young hands busy for an entire afternoon.