Installing new brick molding around your front door, or replacing an old brick mold trim is a good idea if you want to enhance your home’s curb appeal. Brick mold comes in PVC or wood material, depending on your preference and climate.
A new brick mold trim around your patio, front door or windows can add appeal to your home’s exterior. And the good news is, it’s not difficult to install. In this article, we will take you through how to install brick molding around your doors, windows and garage door as well as how to remove rotten old brick mold. So let’s get started now…
Table of Contents
How to Remove Rotten Old Brick Molding
- Use a chisel or utility knife to strip back any old paint or caulking around the window or door edge. A chisel is less likely to damage or scratch the original molding than a knife.
- If the old caulking doesn’t come off easily, use a paint scraper or putty knife.
- Now grab a hammer and gently remove the nails from the old molding using the hammer’s claw.
- Finally, clean the old caulking and sand the surface.
How to Install Brick Molding Around Windows
- Start by taking measurements from the upper left-hand corner of the window frame to the lower corner. Write down the measurement and repeat the same on the right-hand side of the window frame.
- Now measure the brick molding’s width. It usually ranges from 1.5 inches to 5 inches. Write the measurement down.
- Next, find the linear length of the molding you need for your window. This means up to 200 inches of brick molding to trim your window.
Now comes the installation part:
- Cut the brick molding’s length down to the required size but take care with the corners as they must be cut at a 45 degree angle.
- Now attach the molding around the window using a hammer and nails. Leave 2 foot intervals between the nails.
- Apply a little caulk to cover the nails and smooth it.
- Allow the caulk to dry and paint the newly installed trim around 2 hours later.
Here is a demo on how to install brick molding around window:
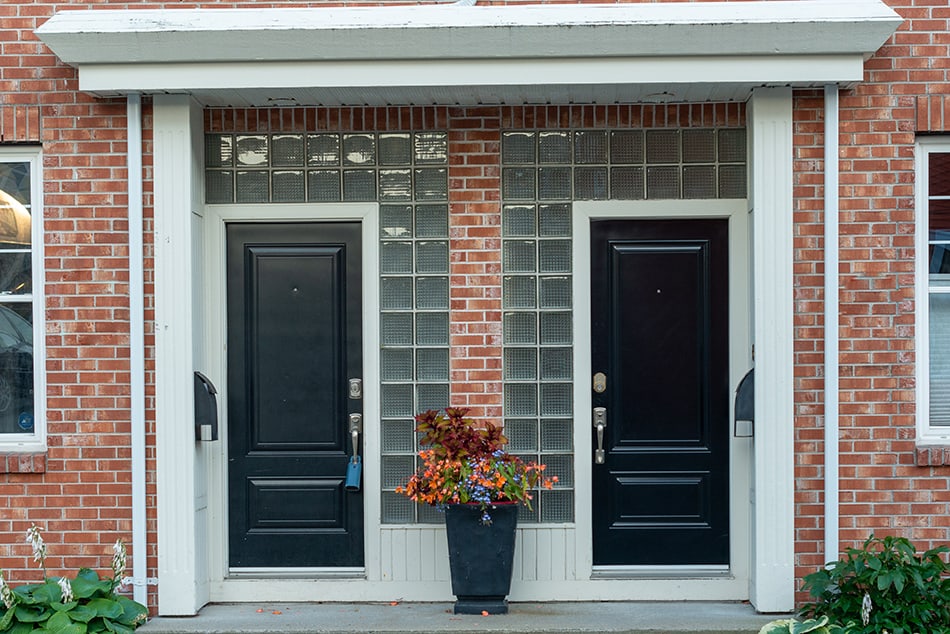
How to Install Brick Molding Around Patio or Front Door
- The first measurement starts from the head casing of the door frame. Measure from the inner top right-hand corner all the way to the inner top left-hand door jamb. Write down this measurement.
- Now we move on to the right side casing of the door. Take your measurement from the top right-hand side of the casing to the bottom of the door frame. Subtract half an inch from your measurement. Write down the measurement.
- Repeat the previous step for the left side casing of the door, measuring from the top left-hand corner to the floor. Record your measurement.
- Finally, we need to measure the brick molding’s width, which should again be the same measurement as your windows.
Now, the installation part:
- Cut the brick molding’s length just like you did before at 45 degree angle.
- Attach the molding around the door using a hammer and nail. Begin with the center of head casing and nail the molding into place firmly with your hammer.
- For the inside edge, use 3 inch and 4 inch nails along this trim and attach the head casing to the jamb.
- For the outer edge of the trim, use 3 or 4 inch nails and attach them to the head casing and the jamb.
- Now apply some glue to the corner end of the side casing. Join this corner to the head casing by pressing them together to secure firmly in place.
- At every 15 to 16 inch intervals, nail the casing to the door jamb.
- Use 6 inch nails to attach the casing to the wall.
- Use 3 inch nails for the head casing and side casing as these will securely lock the corner ends into place.
- Apply some caulk over the nails and distribute it smoothly before allowing it to dry.
- Paint the trim after a couple of hours as required.
Watch this detailed demo on the installation of brick mold around door:
How to Install Brick Molding Around Garage Door
- To start with your garage door brick molding installation, determine the exact linear measurement for both the sides and the top part of the garage door opening. When measuring, begin from the side at eye level and add an extra 8 inches for miter cuts. Measure from one side of the door opening from the upper part to the bottom and add an extra 5 inches for a miter cut. To determine the lineal footage, double your measurement and add it to the upper piece.
- Now, to determine the size of the brick molding, measure the molding’s thickness that will be installed on the garage door. Most brick mold trims are 3.5 inches thick from the outer section to the inner section. Brick mold trims come in ready-made pieces that range from half an inch thickness to 1 inch. You must add an extra half an inch thickness to account for the mortar, wire and substrate paper in order to determine the size of the brick molding trim.
- For the outside of the garage door opening, set up your miter saw or hand saw on a sturdy work table. Cut the mold at a 45 degree angle, but alternatively, you may use the 45 degree slots on the miter saw as a guide.
- Place the molding piece that you want to install across the top of the garage door against the miter saw, with the narrow edge facing upwards. Begin cutting the 45 degree angle at the one end of the molding piece.
- Go back to the measurement you took for the inside trims. Measure from the shorter end of the 45 degree angle cut and mark the opposite end of the molding trim. Use this mark as your guide to cut the opposite end.
- To install the top cut, get a ladder or go on a scaffold. Position the top piece across the garage door opening with the opposite miter cuts facing outward. Align the bottom edge of the top trim and the shorter ends must correspond with each side of the opening. Now attach the molding piece to the upper trim with the appropriate nails at 12 inch intervals from end to end. You can use a hammer to secure the nails in place. If you’ve used wood molding instead of brick, add some wood filler to hide the nails. The end result will look neat and clean.
- For the left side of the opening, measure the distance from the underside of the top trim to the surface of the driveway. Again, set the miter saw to cut at a 45 degree angle.
- Again, work from your ladder or scaffold and repeat the previous steps to install the side of the garage door trim. Mark the molding piece for the left side to length. The marked area represents the shorter point of the saw cut. Remember to place the piece with the narrow edge facing up.
- Attach the molding piece vertically on the left side of the trim opening and align the inner edge with the trim’s inner edge. The miter cuts must meet at the top left corner. Just like before, attach the piece to the trim and set the nails in the molding at 12 inch intervals.
- The last step is the same as before for the right side of the opening. Make sure the angle of the miter saw cut matches the right end of the top piece. Follow the previous steps to install the right side of the garage door opening.
To make it simpler, here is a video that will show you how to install brick molding around your garage entry:
What Is Brick Molding Used For?
Brick molding is an exterior trim that’s typically installed around windows or doors to seal the openings and provide an appealing transition between the siding and the door or window. This type of exterior molding was invented during the time brick was the most common material for a home’s siding.
The purpose of brick siding was to cover the gap between the brick exterior and the door frame. It also served the same purpose for window frames. Brick mold is normally pre-installed on residential homes, but it can also be purchased as single panels of mold so you can install it yourself.