A subway tile has a traditional and standard size of 3 x 6 inches. Other common sizes include 2 x 4 inches, 4 x 8 inches, 6 x 12 inches. Some popular subway tile patterns include 50% offset, ⅓ offset, ¼ offset, Grid, Herringbone.
Table of Contents
What is a Subway Tile?
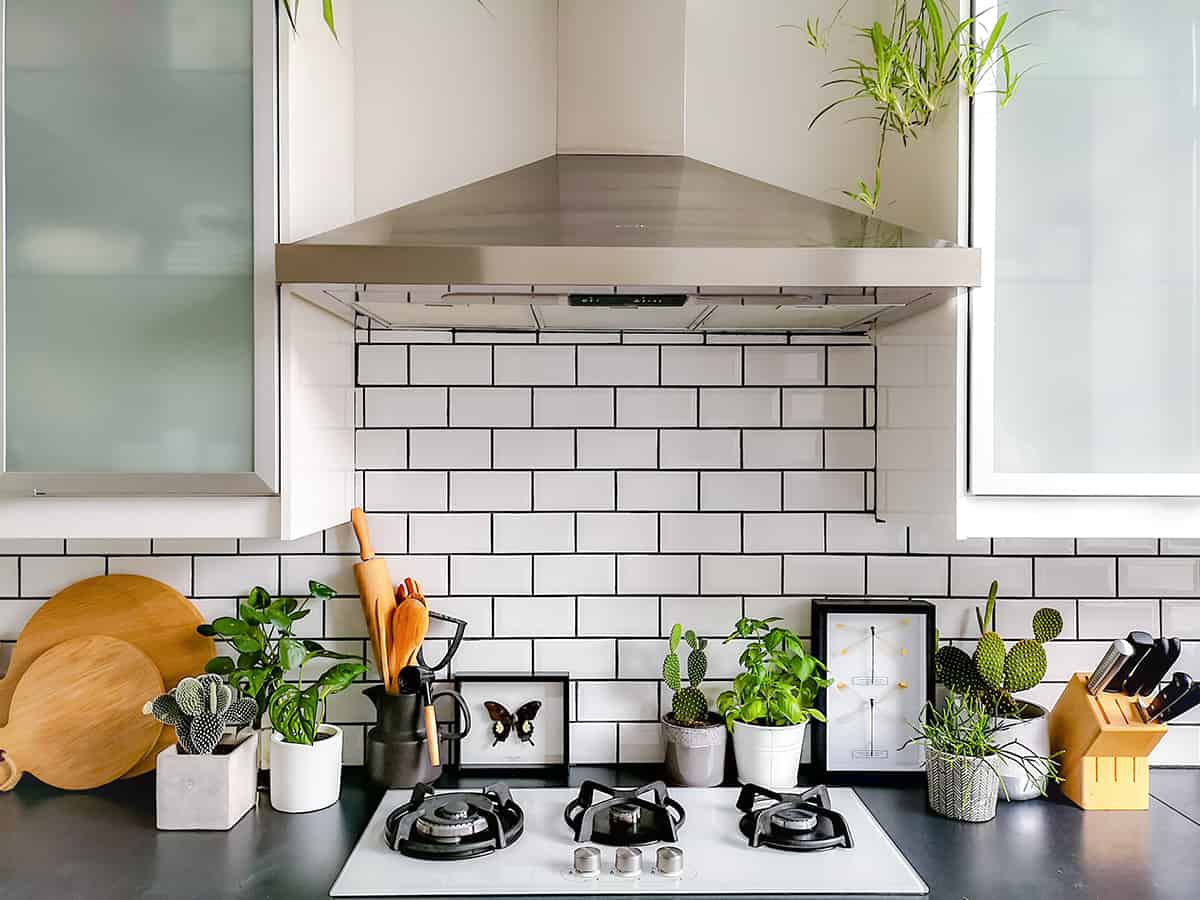
Most people can easily recognize a subway tile since this is a type of tile that is enormously popular in both commercial and residential settings. The subway tile was originally invented to be used to cover the wall surfaces of New York’s brand new subways in 1904.
The designers, Christopher Grant La Farge and George C. Heins, created the tile as an easy clean surface that would not harbor bacteria in a bright white color that would reflect light and make the subway feel less claustrophobic. The ceramic material had a glossy finish which also helped to reflect light and make the areas feel brighter, as well as being suitable for simple wipe cleaning with a cloth.
The original subway tiles were 3 inches in height and 6 inches in length, and they were installed at a 50% offset, which means that the edge of one tile will be aligned with the middle of the tile positioned beneath it.
Subway tiles proved hugely popular and went on to be used in other transport hubs like train stations and bus stations, hailed for their cleanliness and fresh look.
The sanitary quality of subway tiles meant that it wasn’t long before they started to be used for other spaces that needed to be kept clean, such as home kitchens and bathrooms. Subway tiles, remarkably, continue to be popular over a century after their invention and are still considered a stylish choice for kitchen and bathroom backsplashes in interior decor today.
Subway Tile Sizes
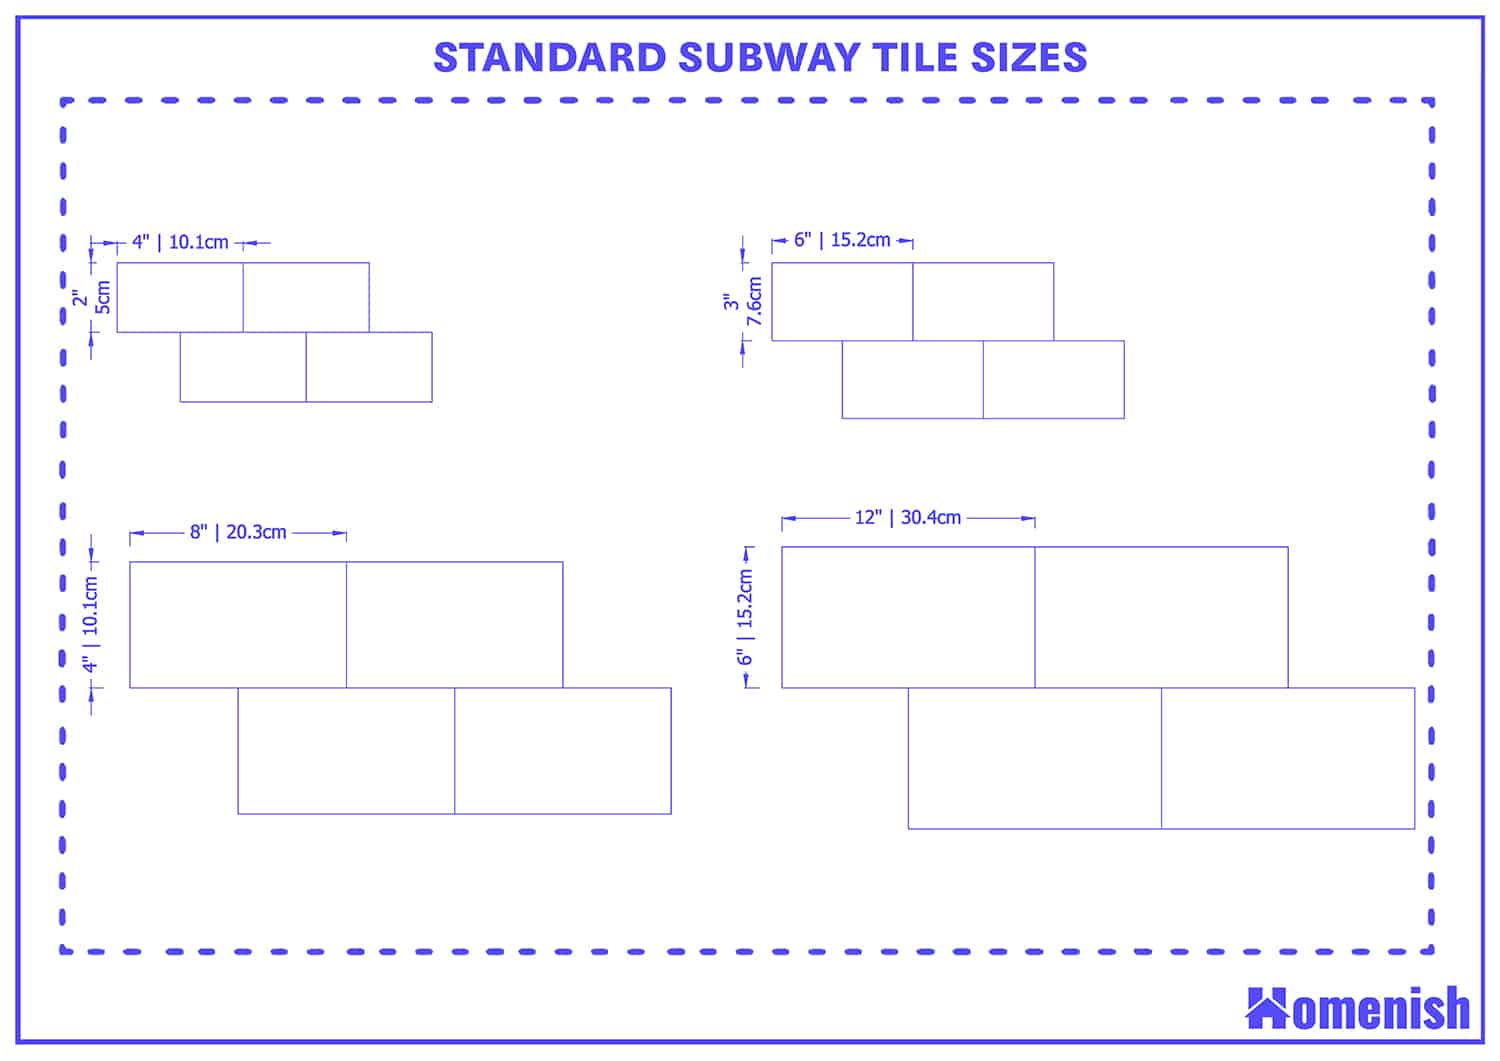
3 x 6 inches
The original size of subway tiles, which is also referred to as the ‘standard’ size of subway tiles, is 3 inches in height by 6 inches in length. Since this is the original size of the subway tile, it is the best size to use if you want an authentic or traditional subway look.
This is the most popular size of subway tile that you will find used in home decor today. It is widely used as a backsplash in kitchens and bathrooms, and you can also use it to create a feature around a fireplace or behind a countertop in a laundry room. Although this is the original size of subway tile, it is not the only size available.
You can create a subway tile look with any tile which has dimensions in a 1:2 ratio. This means that the length of the tile should be exactly two times bigger than the height measurement.
2 x 4 inches
This is a more petite version of a standard subway tile, which can give a more delicate or dainty look on a backsplash. The benefit of this size of tile is that it will create a more refined look, but it will take longer to install, and as such, you may end up with a bigger bill from your tiler.
4 x 8 inches
This is a larger size of subway tile compared to the standard size. It can create a sleeker look because there will be fewer grout lines visible compared to those visible when using original size subway tiles. This can help to achieve a more modern look in a contemporary style kitchen, and it can also create a sense of individuality because it looks different from the typical subway look you will see in a lot of places.
6 x 12 inches
This tile is double the size of the original subway tile, so a single tile of these measurements will take up the space of two standard subway tiles. Using tiles measuring 6 inches by 12 inches will give a very oversized look which can create a modern appeal. Since these tiles are bigger, they will cover more surface area in a smaller amount of time when they are installed.
Subway Tile Patterns
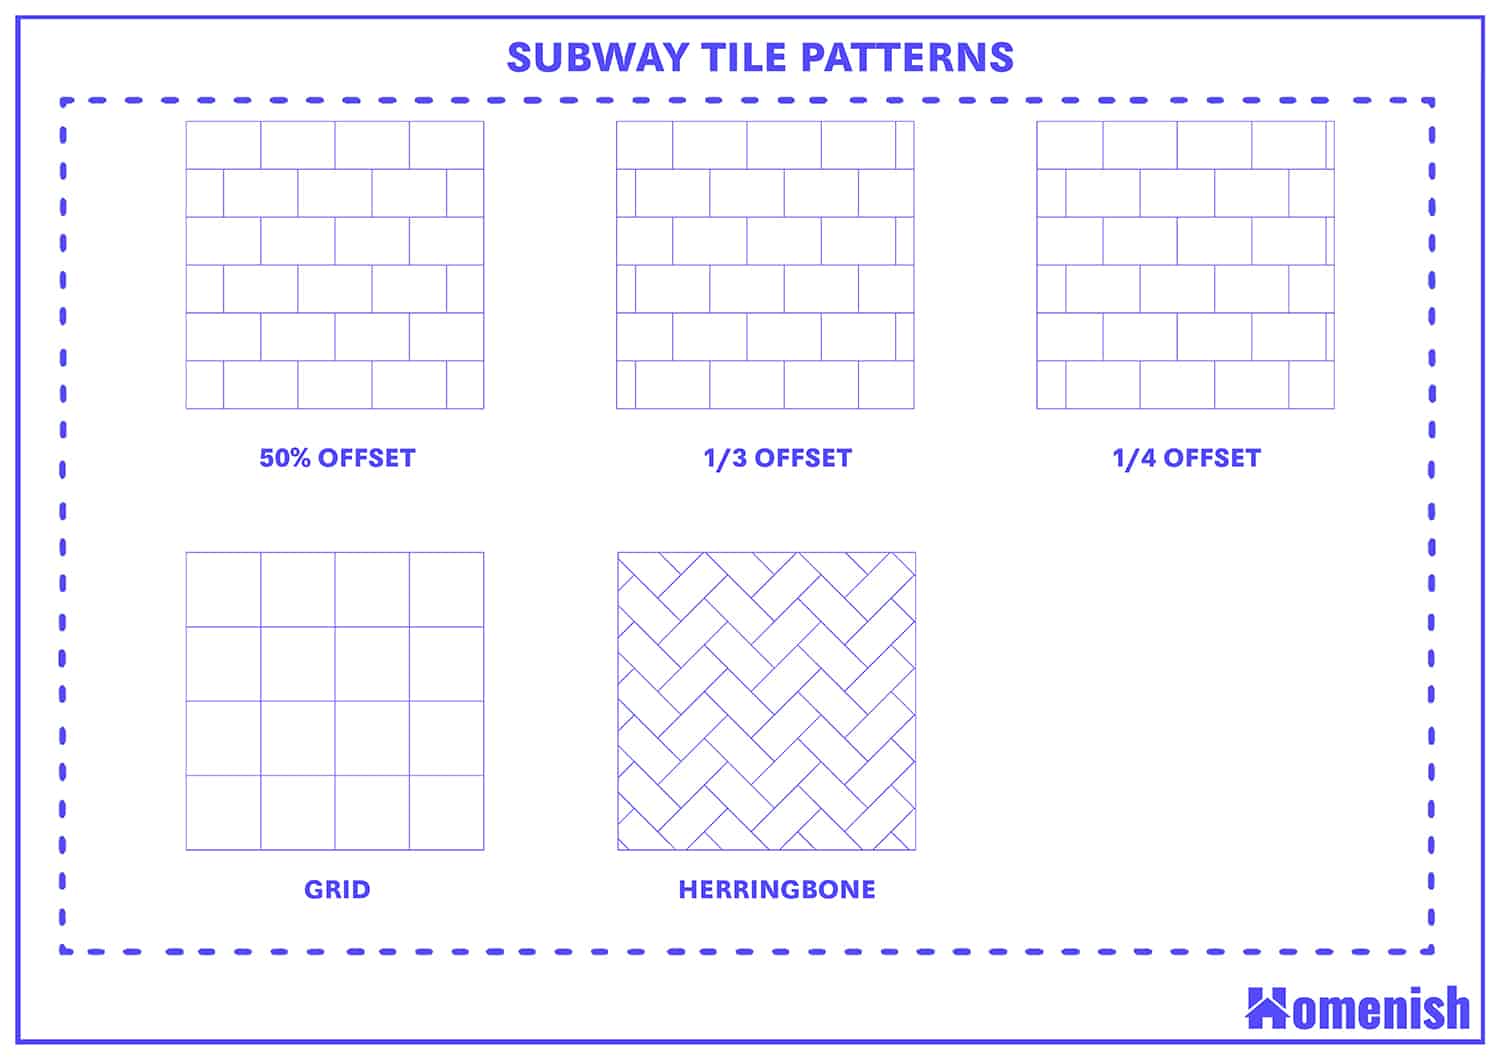
50% offset
Traditionally subway tiles are installed in a 50% offset pattern. This will give a similar look that you might find on a brick wall. It involves positioning the side edge of a tile exactly in the middle of the tile beneath it. This is an easy pattern to follow and will give a clean, modern look.
⅓ offset
This pattern involves segmenting a tile into thirds to show you where you need to lay the next tile. The side edge of a tile will be in line with the first third of the tile beneath it, and the tile which goes above that will be moved along a further third.
¼ offset
This pattern for laying subway tiles will give the effect of a staircase pattern. To achieve this, measure a subway tile into quarters and use this as a guideline for installing the tile on the row above. For example, after fixing one row of tiles in place, the tiles on the row above should be positioned a quarter of a tile measurement to one side.
The next row of tiles will be moved another quarter distance in the same direction. The result is a more complex look that is elegant.
Grid
A recent trend that has been growing over the past few years is to install subway tiles in a grid pattern. This involves lining them up directly above each other so that the grout around them forms a grid shape with clean, straight horizontal and vertical lines.
This is a look that is popular in loft-style spaces, as well as Scandinavian and industrial styles. This pattern can be applied with tiles laid horizontally or vertically, depending on the type of look you want to achieve.
Herringbone
The herringbone pattern is classy and sophisticated, and it can be created using standard subway tiles. It is essential to achieve a herringbone pattern that the tiles are an exact 1:2 ratio; otherwise, the pattern will not work. This is a more complex pattern to complete with tiles, but most people find that the additional cost of labor or hassle is worth it.