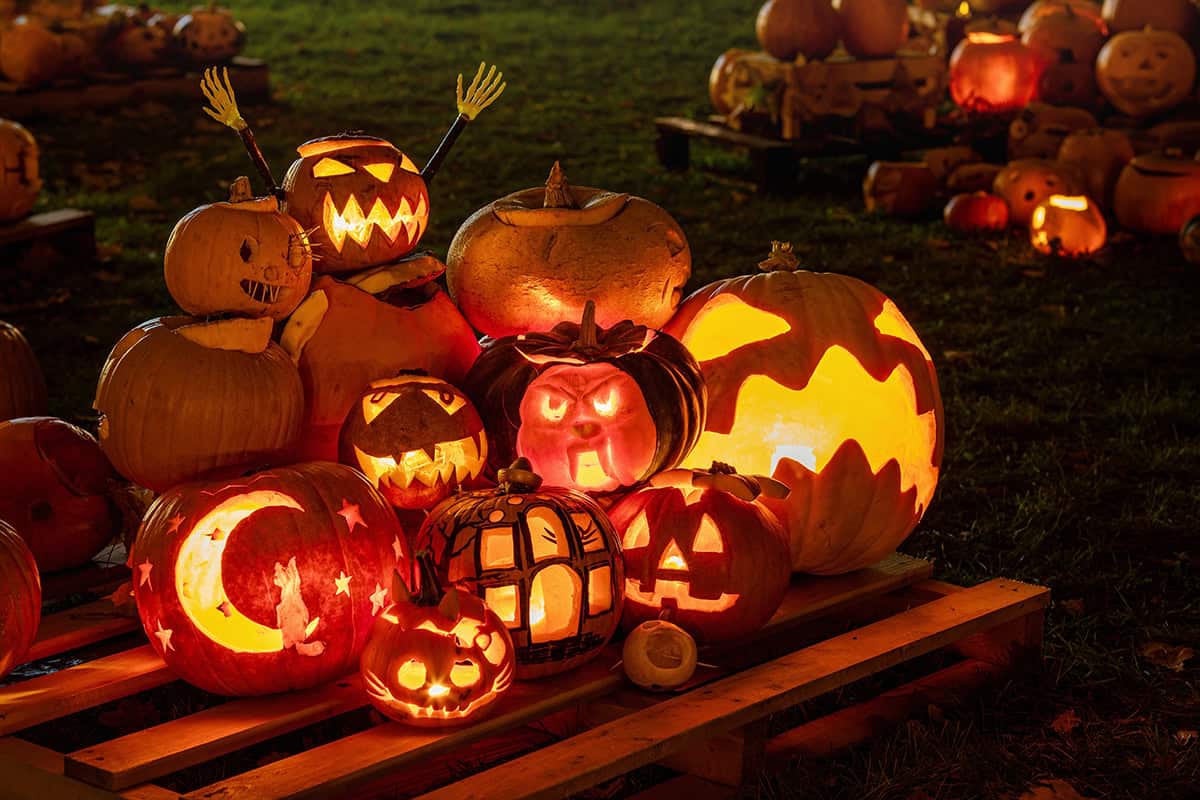
A carved pumpkin says plenty before anyone reaches the front door. It might grin, glare, sparkle, or look completely ridiculous. This collection includes 44 pumpkin carving ideas for every skill level and Halloween style. Browse the full article and choose the face that belongs on your pumpkin this year.
Table of Contents
- Giant Fanged Monster
- Crowd of Carved Faces
- Droopy Pumpkin Faces
- Moon and Monster Pair
- Nervous Sweating Pumpkin
- Pumpkin Spider
- Monster Candy Bowl
- Giant Goofy Faces
- Whiskered Cat Pumpkin
- Pumpkin-Eating White Monster
- Three Skull Faces
- Giant Eyeball Pumpkin
- Carved Direction Sign
- Funny Face Collection
- Pumpkin Eating a Smaller Pumpkin
- Wide Eyes and Chunky Teeth
- One-Eyed Monster
- Sunglasses Pumpkin Planter
- Zipper-Mouth Pumpkin
- Spiderweb Mask
- Twig-Stitched Face
- Monster With a Lure
- Skeleton Hand Stack
- Skull With an Exposed Brain
- Silly Tongue-Out Face
- Pumpkin-Head Scarecrow
- Small Gourd in Monster Jaws
- Mini Gourd Attack
- Pulp-Spewing Pumpkin
- Many-Eyed Monster
- Hinged Surprise Face
- Heart-Eyed Pumpkin
- Googly-Eyed Monster
- Long-Tongued Pumpkin
- Glowing Cat Face
- Bat Silhouette Pumpkins
- Glowing “BOO” Pumpkins
- Giant Painted Eyeballs
- Onion-Eyed Goofy Face
- Bunny Pumpkin
- Starry-Eyed Face
- Candy-Haired Pumpkin
- Bats and Crescent Moon
- Cozy Scarf Pumpkin
Giant Fanged Monster
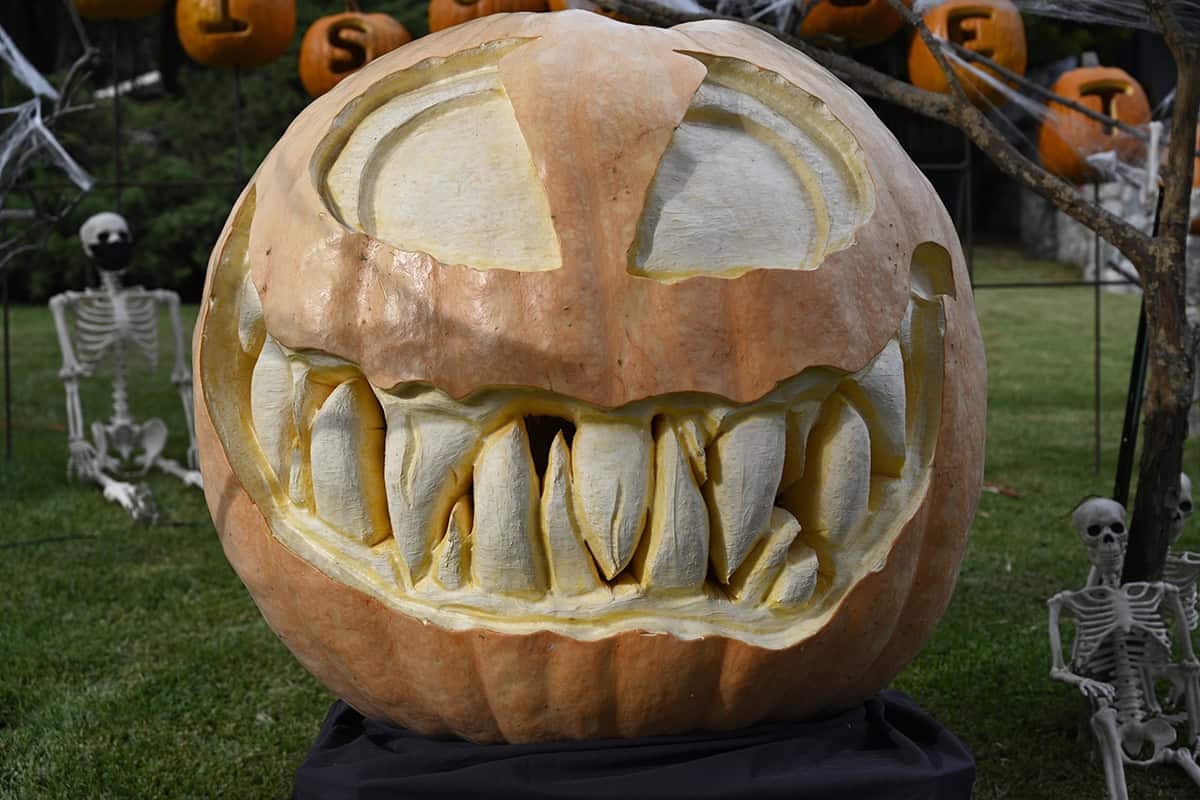
Go oversized with a carved monster that dominates the front yard. A pale pumpkin makes deep eye sockets and thick fangs easier to see, especially after dark.
Uneven teeth add more menace than a neat row, so bold cuts matter more than precision. Raise the pumpkin near the porch steps and scatter skeletons farther back. One enormous face is enough to anchor the entire outdoor display.
Crowd of Carved Faces
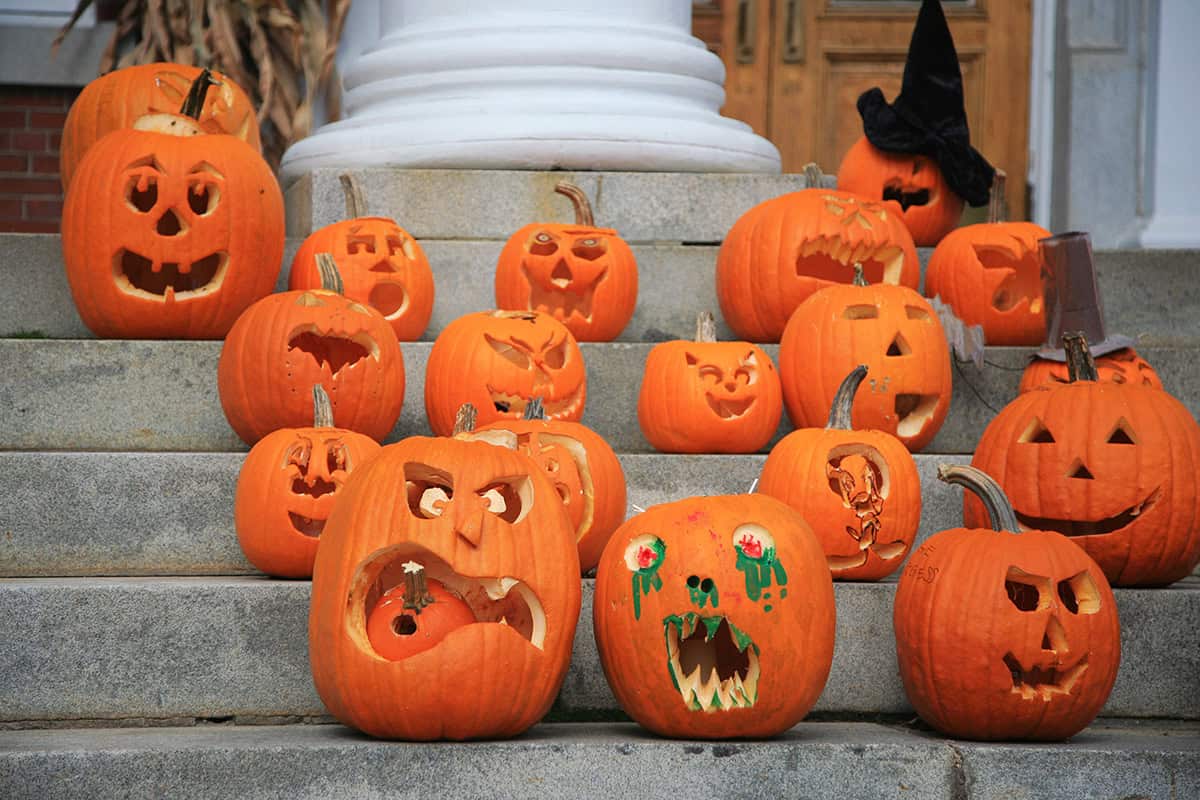
A large collection looks more interesting when every jack-o’-lantern shows a separate mood. Mix silly smiles, angry brows, shocked mouths, and painted details across pumpkins of several sizes.
Spread them over the front steps rather than placing them in one straight row. Hats and other simple accessories add height near the door. The final display looks playful, busy, and easy for the whole family to contribute to.
Droopy Pumpkin Faces
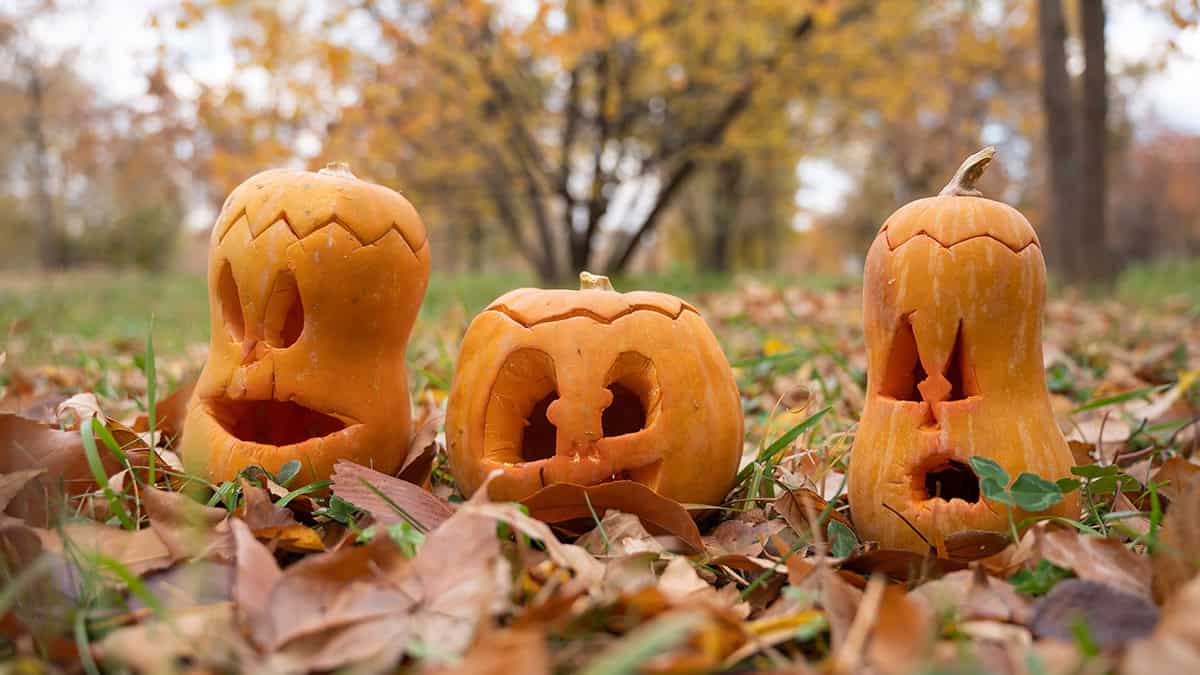
Crooked squash and pumpkins have plenty of character before the first cut. Their bent shapes naturally support tired eyes, sagged mouths, and cracked tops.
Use three different forms for a small group near a tree, fence, or garden path. Fallen leaves make the faces look even older and more worn. This idea adds humor to the yard while making good use of pumpkins that seem too strange for classic designs.
Moon and Monster Pair
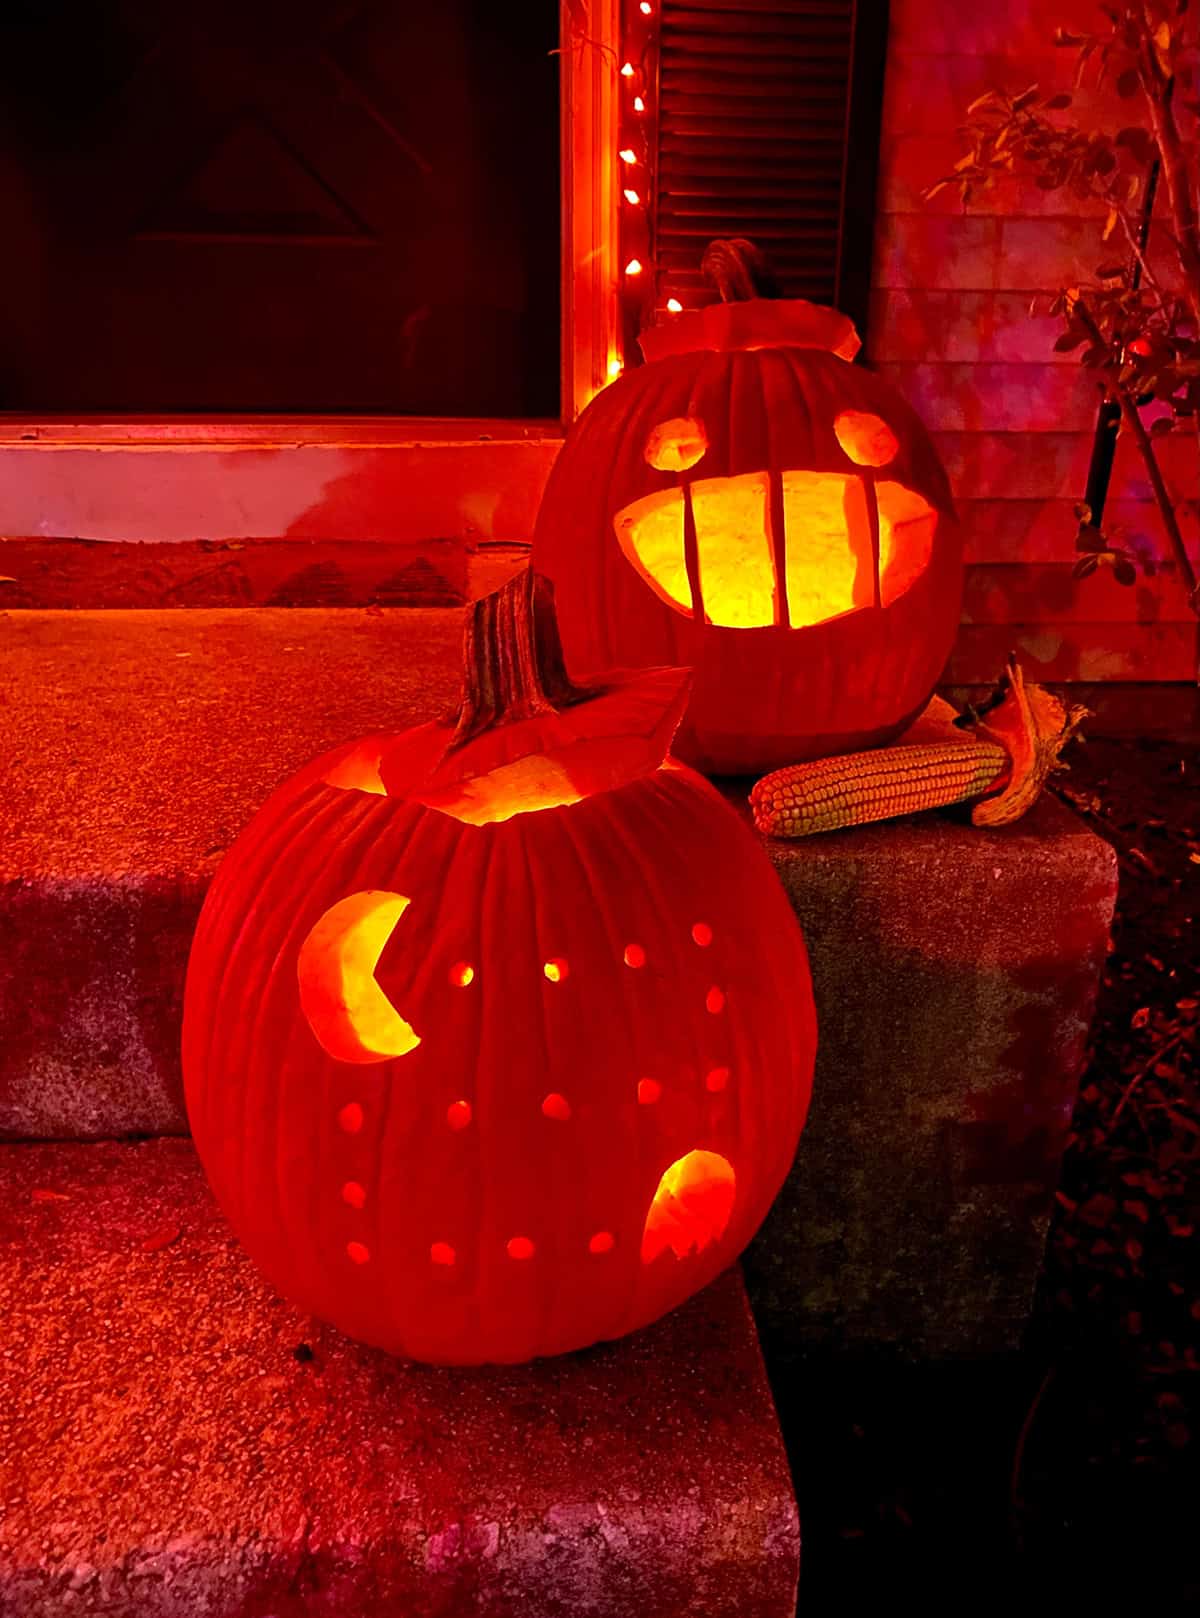
Pair one celestial pumpkin with a goofy monster for a porch display that has two separate moods. A crescent moon and small star holes look calm beside a wide face with a barred grin.
Place the designs on different steps and add warm bulbs inside both. Red porch lights shift the colors toward a scarier look. The contrast between the moon and monster keeps the pair visually balanced.
Nervous Sweating Pumpkin
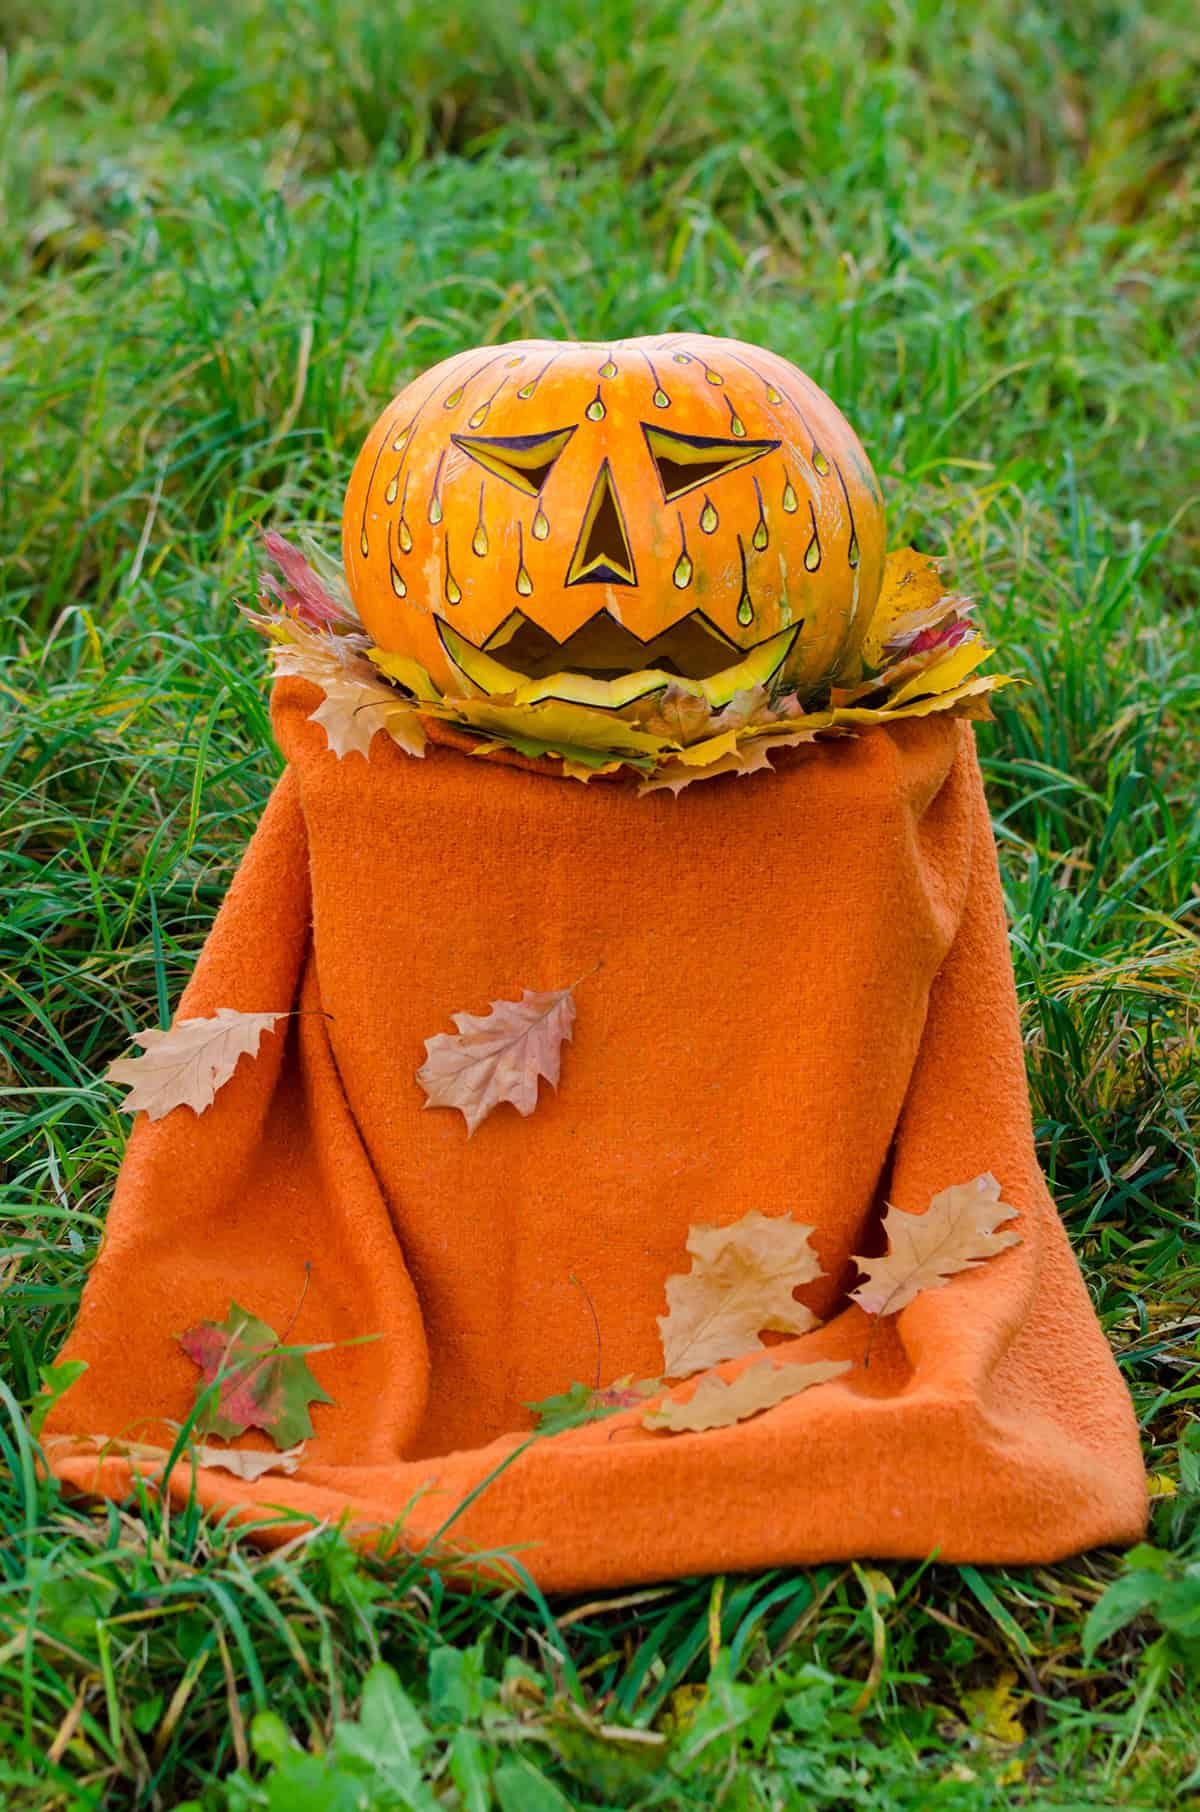
An anxious jack-o’-lantern makes a funny break from the usual evil grins. Sweat drops, narrow eyes, and a shaky mouth sell the nervous expression.
Treat the pumpkin as a complete porch character rather than a simple carved face. Orange fabric forms the body, while real maple leaves make a wide collar below the head. Set it near a garden path where guests meet the worried character on their way inside.
Pumpkin Spider
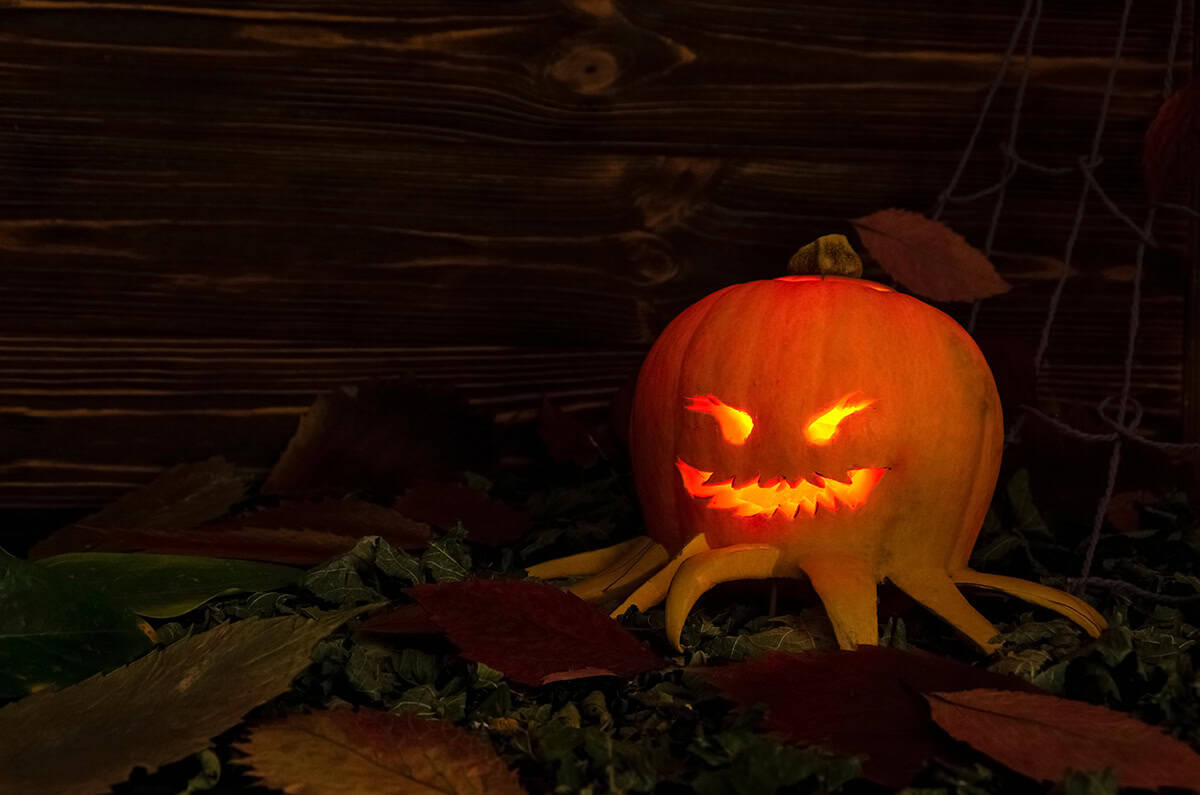
Take Halloween decor closer to the ground with a pumpkin spider beside the front door. A compact round pumpkin makes a solid body, while long rind legs spread the design across the porch.
Sharp eyes and a jagged mouth prevent the creature from looking too cute. Tuck it beneath a bench or near the doormat. Its low position adds variety beside taller lanterns and upright jack-o’-lanterns.
Monster Candy Bowl
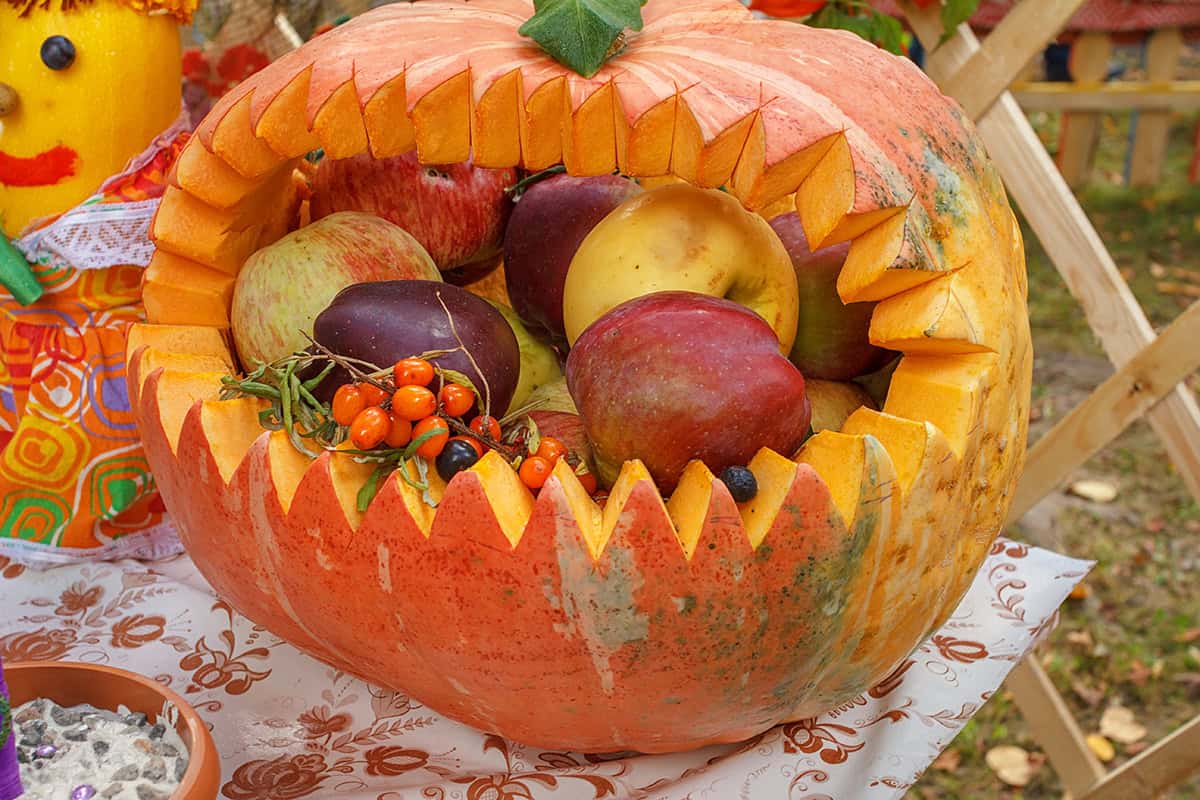
A monster mouth also makes a playful container for fruit or wrapped candy. Choose a broad pumpkin and use pointed edges around the opening as oversized teeth.
Apples, pears, and plums add deep fall colors inside the mouth. Place the piece on a kitchen island, buffet, or covered porch table. As guests take the contents, the hollow center and rows of teeth become more visible.
Giant Goofy Faces
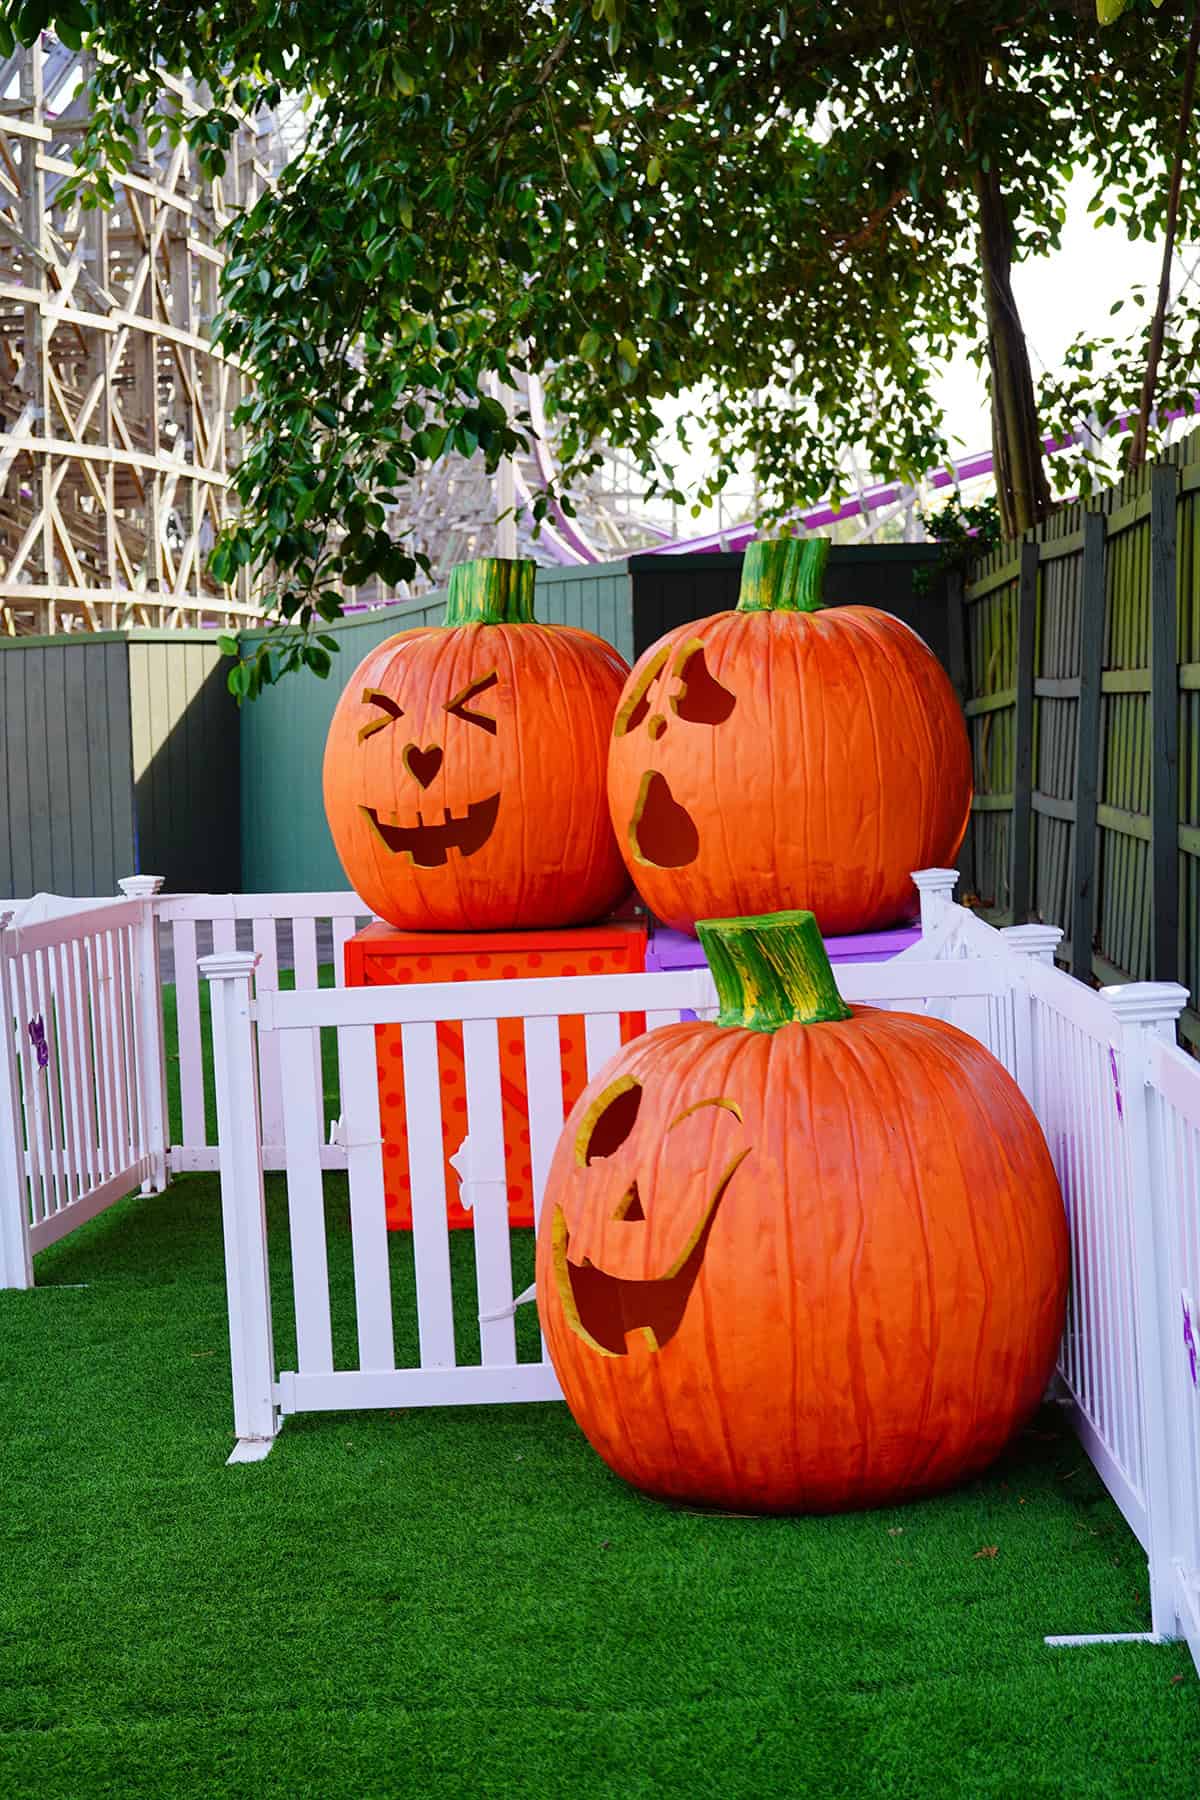
Oversized pumpkins look less serious with exaggerated cartoon faces. Use a separate expression for each one, such as a crooked grin, raised brow, or shocked mouth.
Different heights help the trio fill a lawn or wide entrance. Place two on hidden platforms and one closer to the walkway. Angle the faces toward each other so the pumpkins appear caught in a silent, ridiculous conversation.
Whiskered Cat Pumpkin
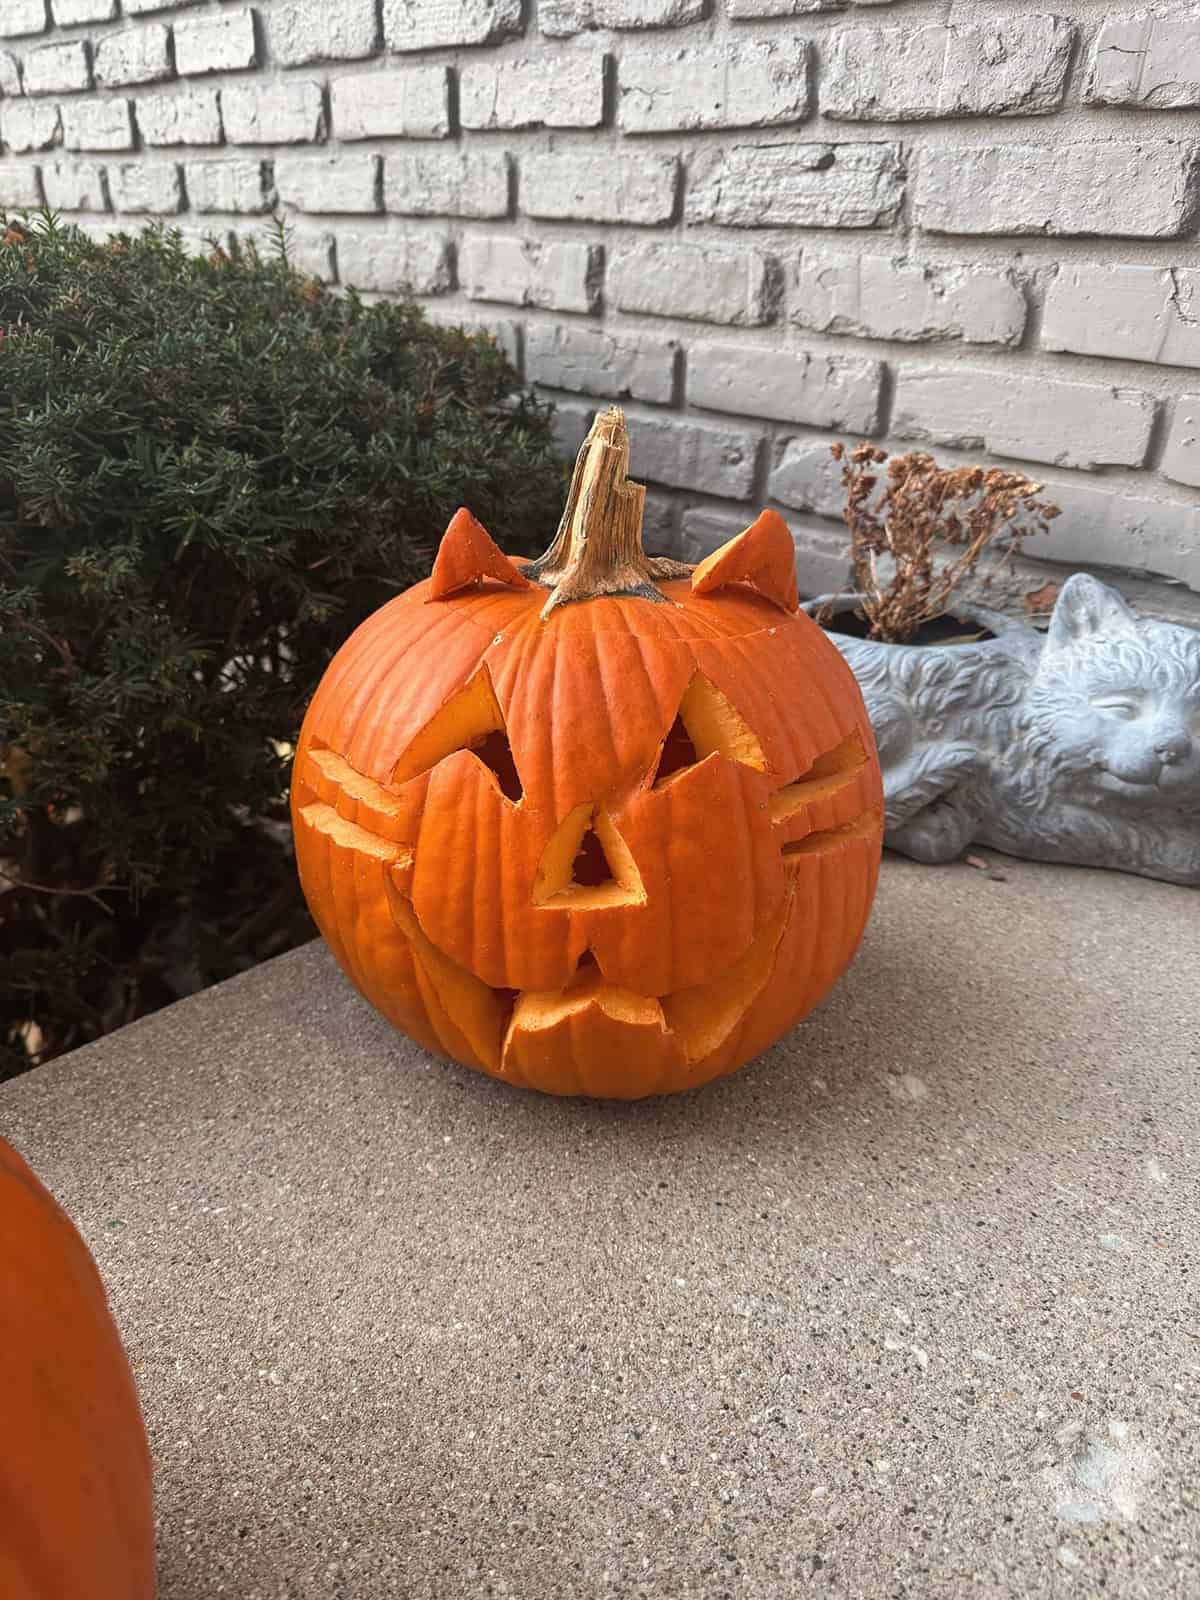
A cat-inspired jack-o’-lantern adds a familiar animal shape to the porch. Raised ears, layered cheeks, and carved whiskers make the design more detailed than a flat silhouette.
Narrow eyes create a grumpy expression, while the small nose and mouth soften the face. Display the pumpkin beside the front door or near a feline garden statue. A plain lantern lets the added rind pieces remain visible at night.
Pumpkin-Eating White Monster
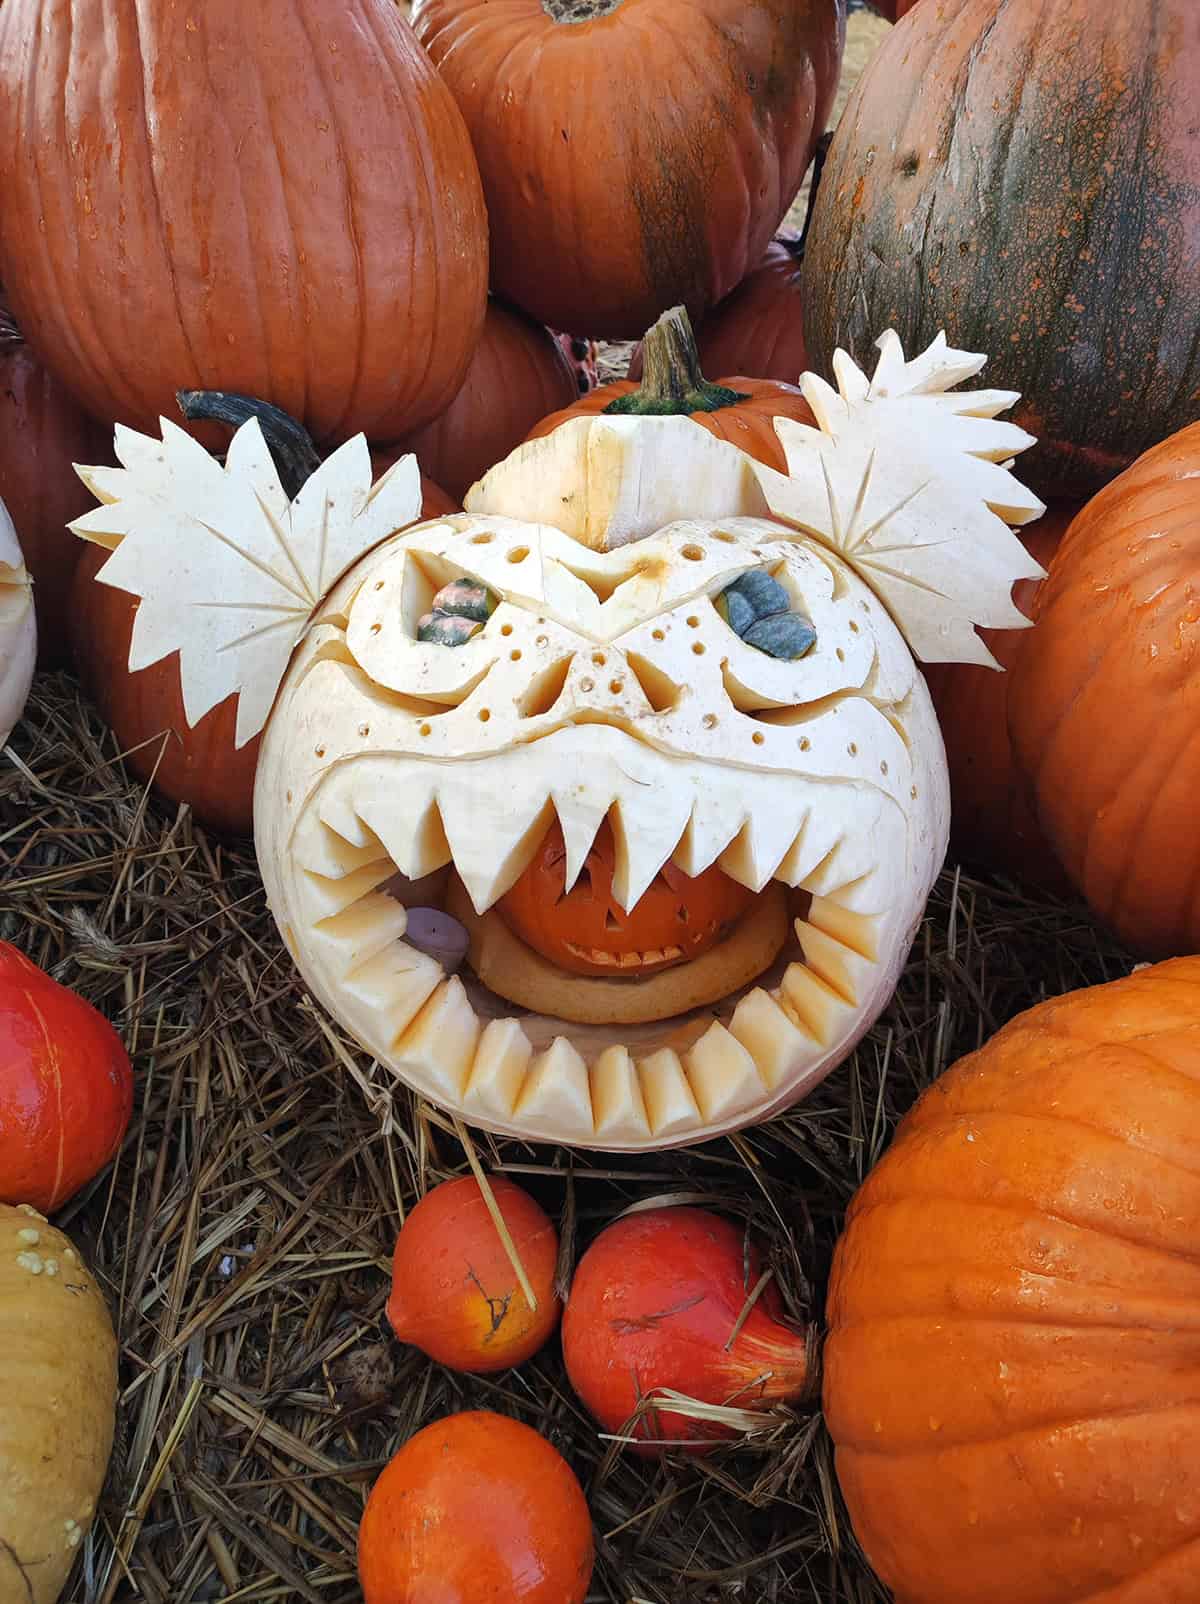
Use two pumpkins to build a scene rather than another single carved face. The large white pumpkin becomes a fierce outer monster, while a smaller orange jack-o’-lantern sits between its teeth.
Leaf-shaped ears and pebble eyes push the design toward a strange woodland creature. Nestle the pair among straw and plain gourds near the porch. The pale shell helps the monster stand apart from the surrounding orange pumpkins.
Three Skull Faces
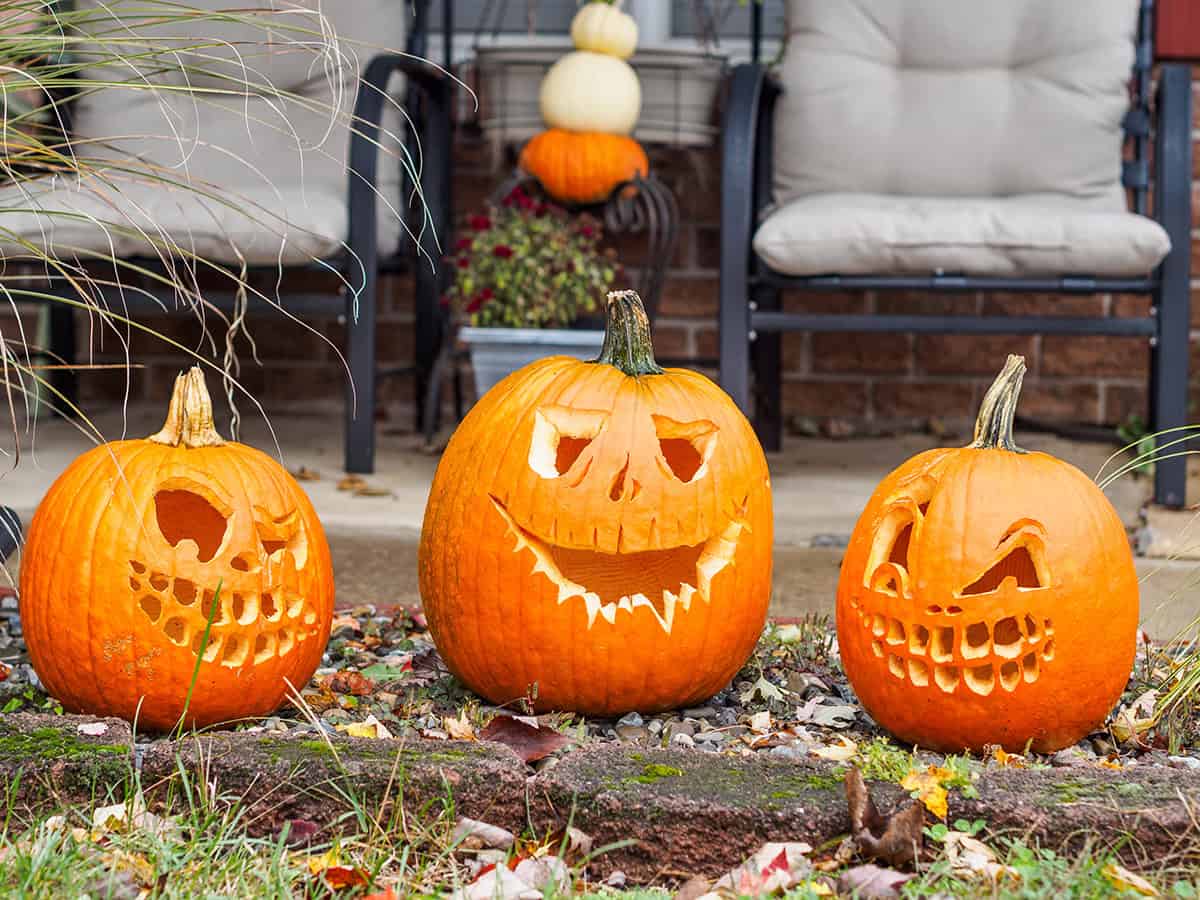
A skull design becomes more interesting when each pumpkin has different bone details. Try deep eye sockets on one, a broken jaw on another, and narrow teeth across the third.
Remove the rind around selected areas to expose pale flesh and add depth around the cheeks. Full cutouts suit the darkest sections, while shallow cuts define cracks, nasal holes, and smaller teeth. Different skull shapes prevent the set from looking copied.
Giant Eyeball Pumpkin
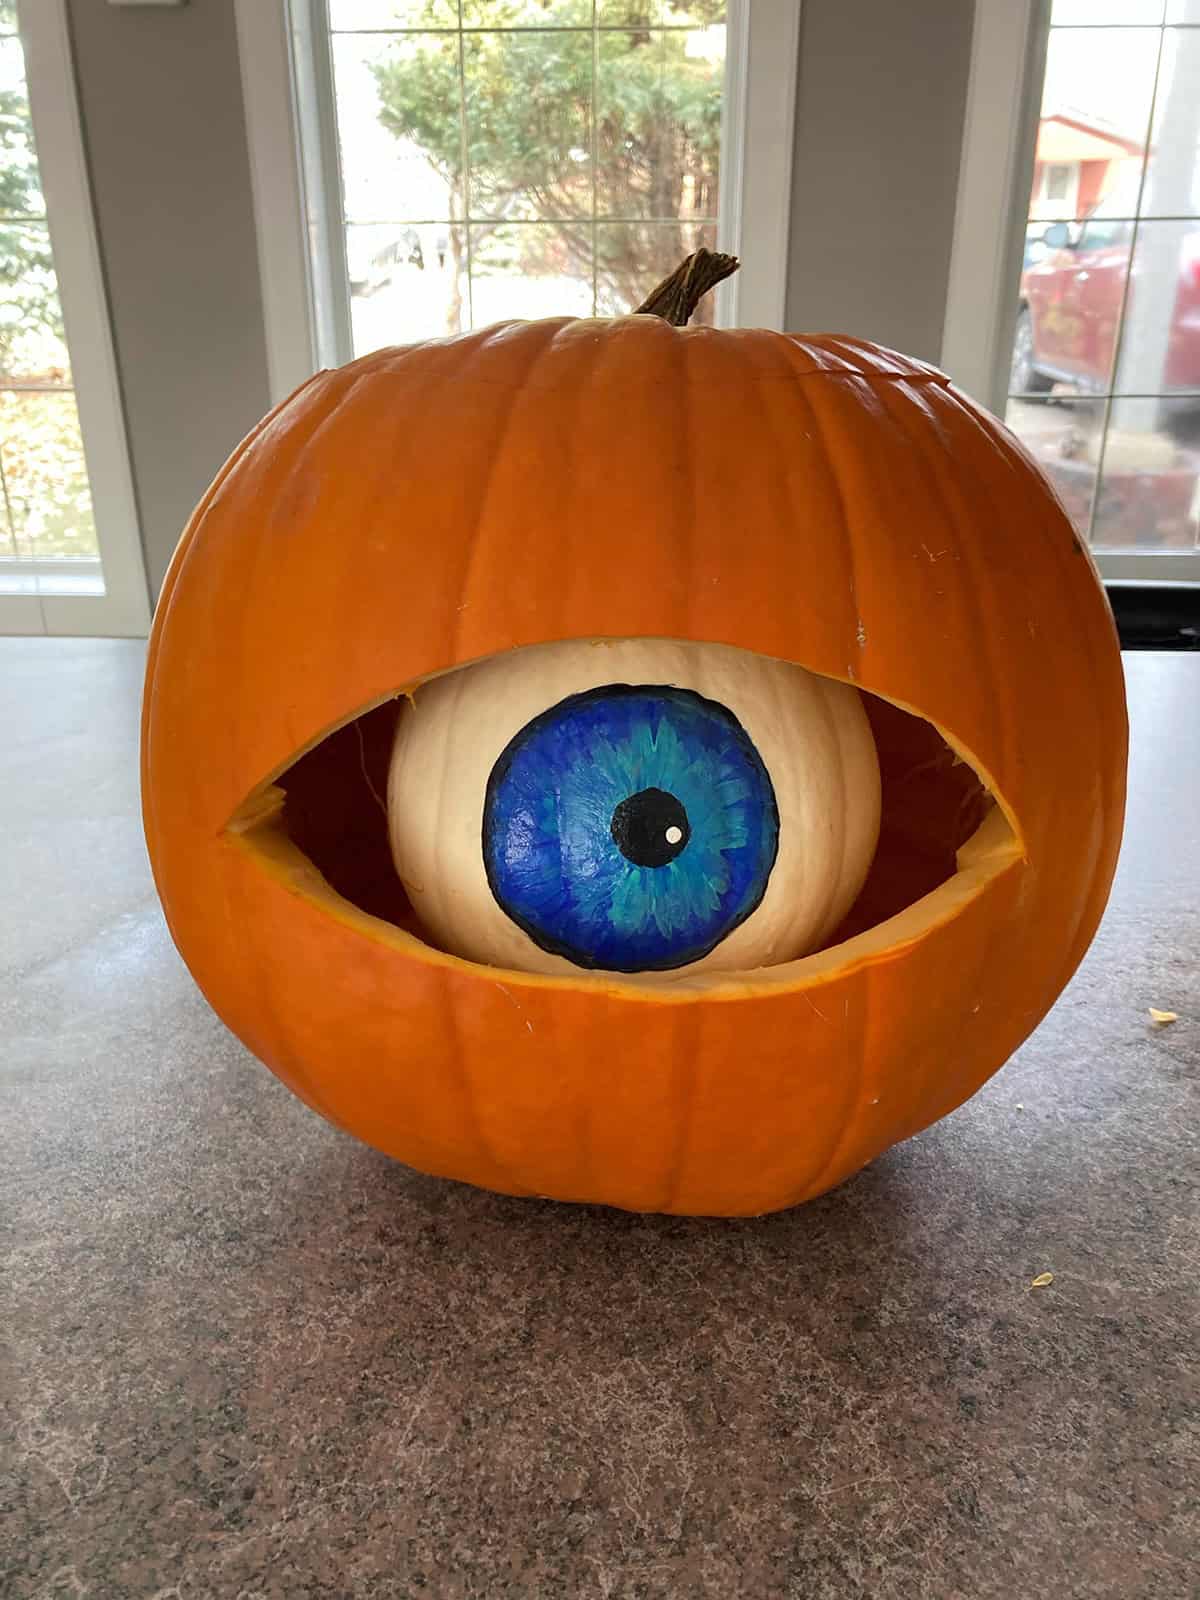
This giant eye design uses two pumpkins for a layered carving. Cut a wide almond shape into the larger pumpkin, then fit a small white pumpkin inside the opening.
Paint a detailed iris and pupil on the white surface before assembly. Blue, green, amber, and red each create a different eye style. The outer opening should narrow at both ends so it resembles eyelids rather than a round hole.
Carved Direction Sign
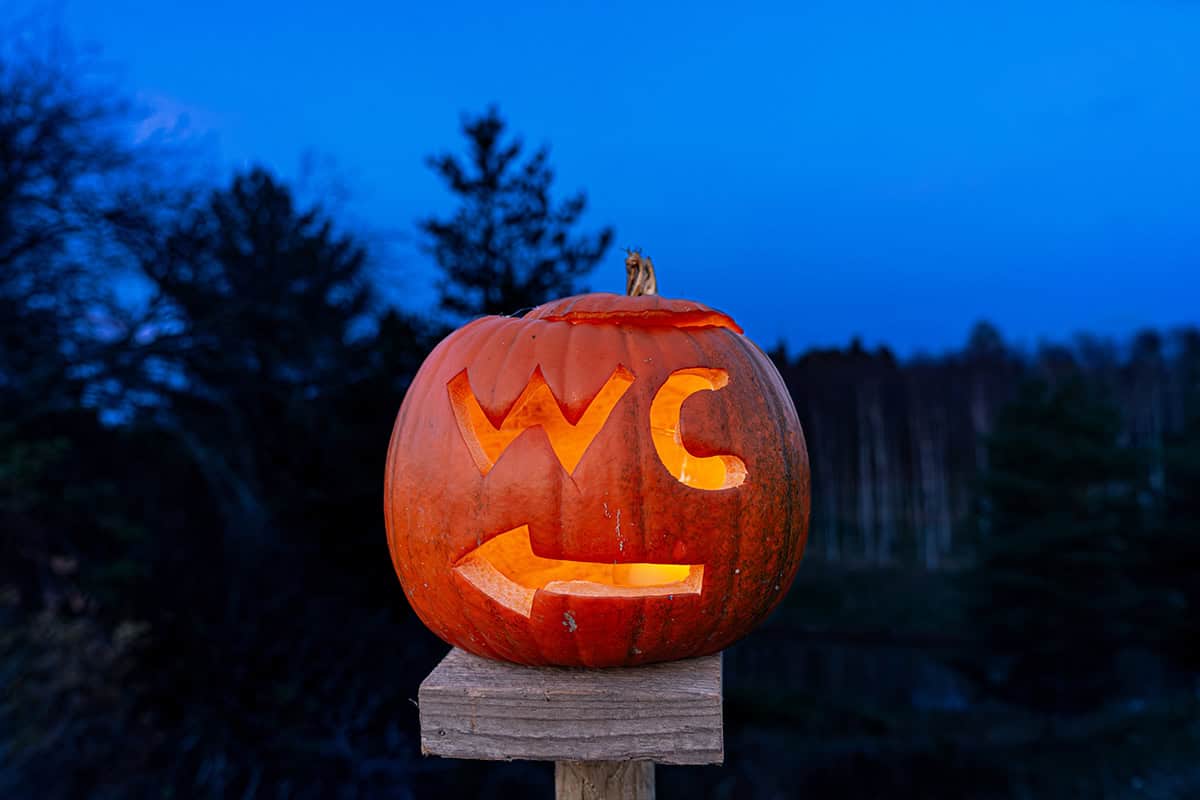
Letter carving provides a useful alternative to another jack-o’-lantern face. Large initials, short words, and arrows fit best because thick shapes remain easier to cut and read.
Draw the letters with a stencil before carving, then leave enough rind between each opening to prevent cracks. The same method applies to house numbers, family names, short Halloween phrases, or directional signs. Block lettering produces the clearest result.
Funny Face Collection
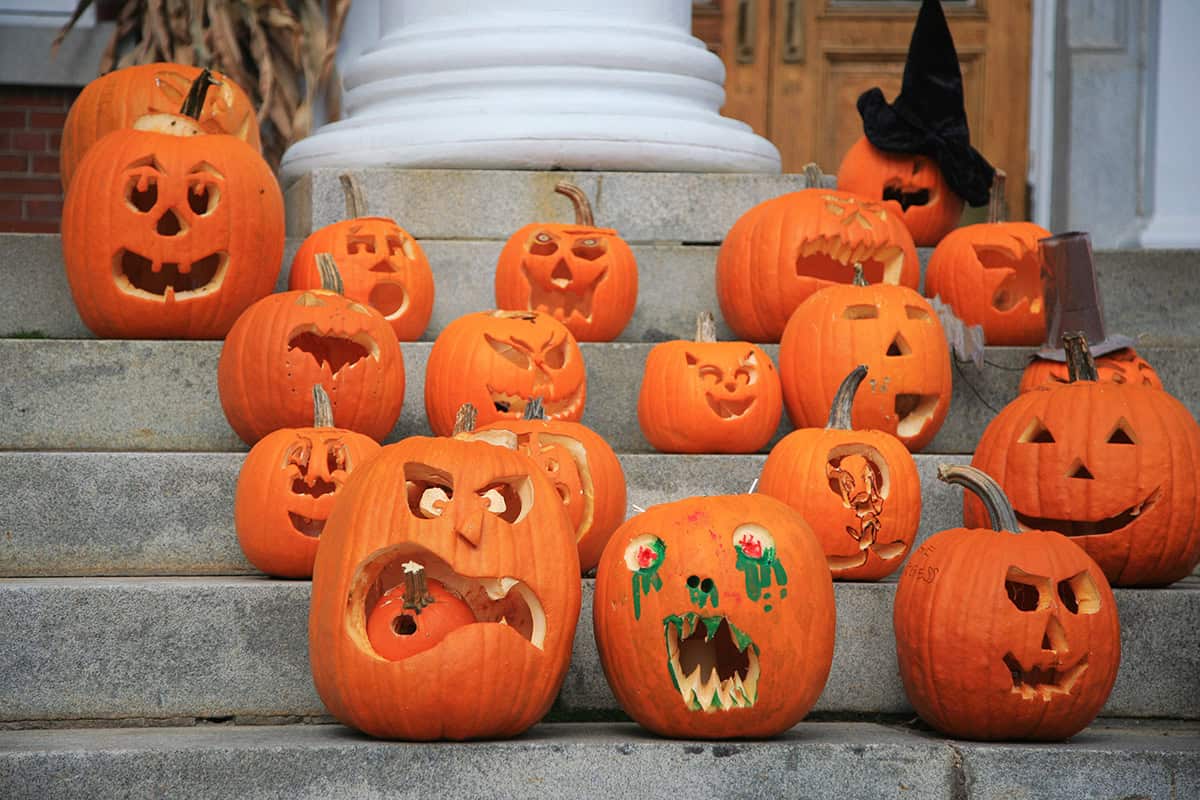
A collection of funny faces lets each pumpkin use a different carving style. Try tiny eyes with a huge mouth, uneven brows, missing teeth, long noses, or mouths that lean to one side.
Simple features suit smaller pumpkins, while larger ones have room for layered cuts and extra details. Change the spacing and proportions rather than repeating the same face. Exaggerated features make even rough cuts look deliberate and expressive.
Pumpkin Eating a Smaller Pumpkin
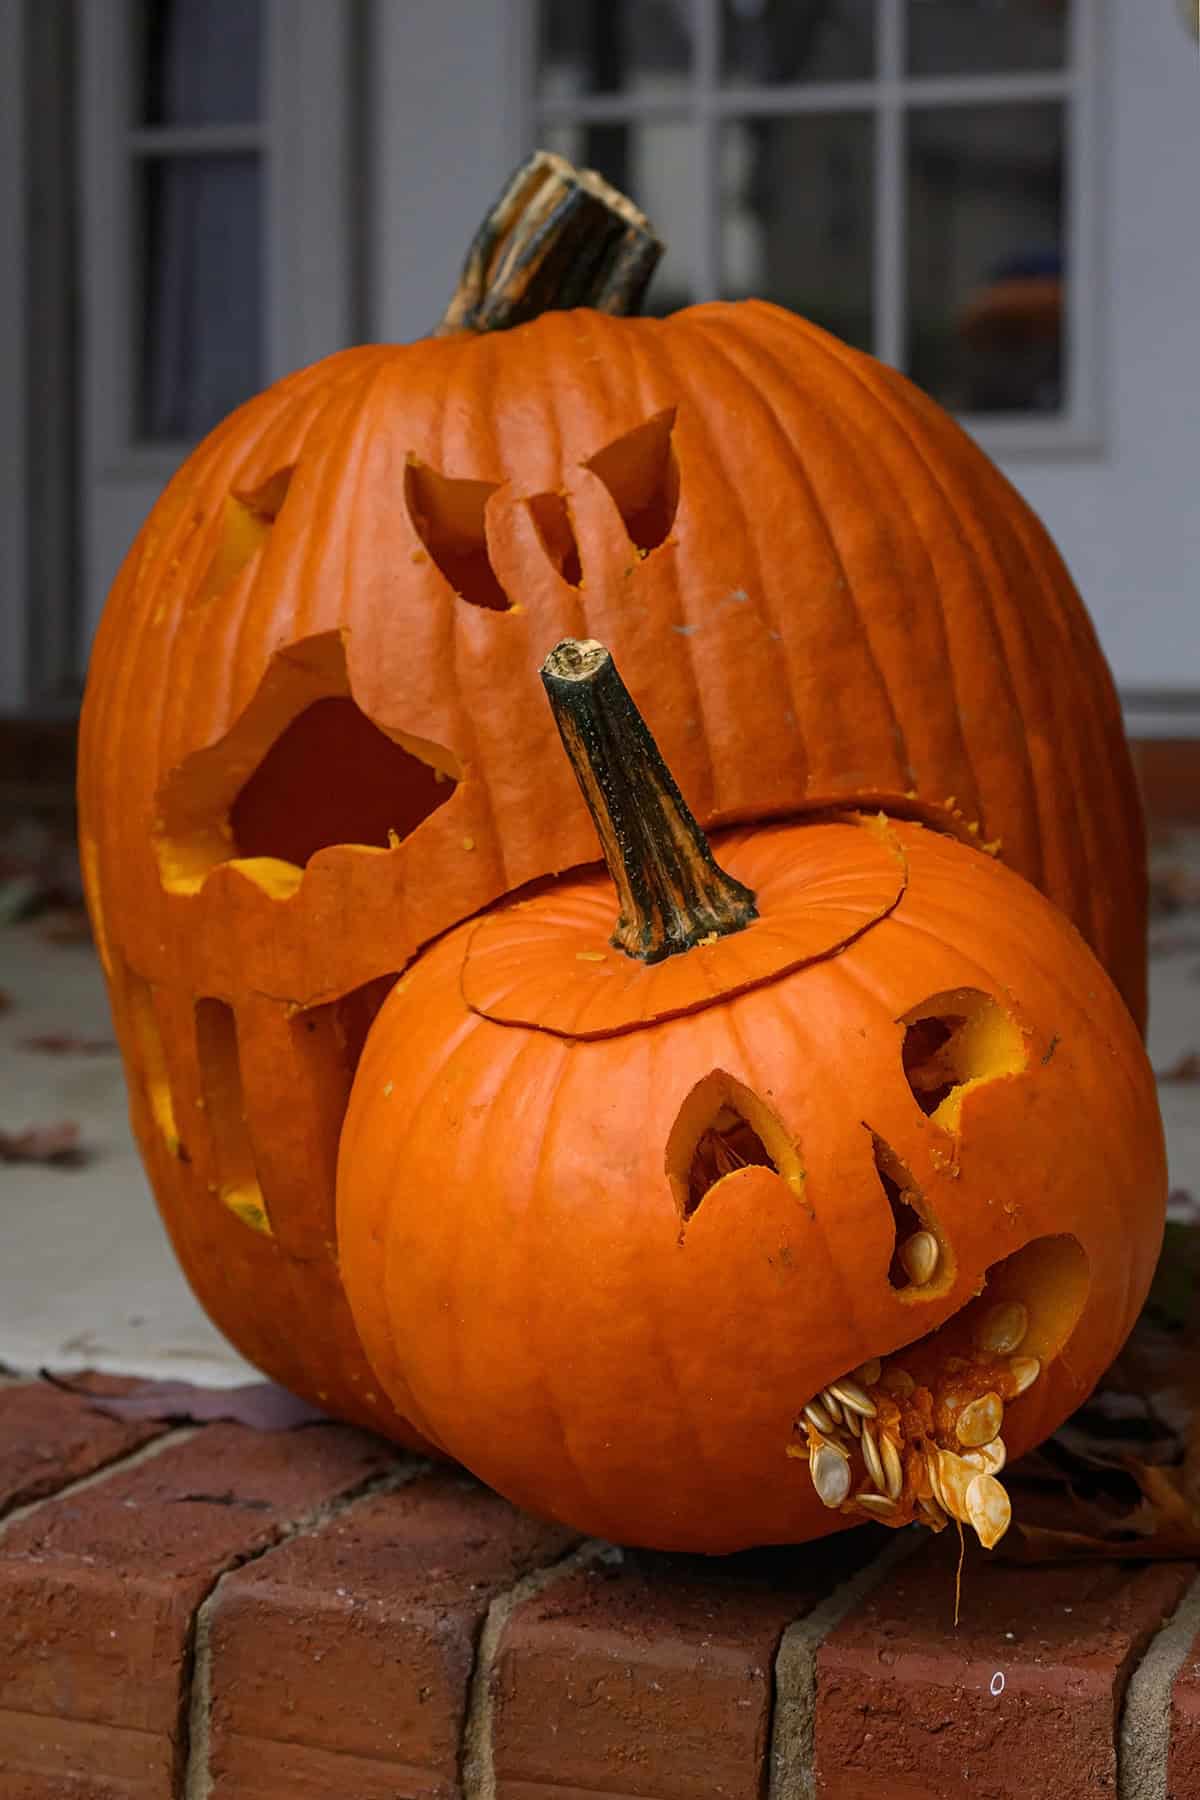
This two-pumpkin idea turns a large carved mouth into part of a complete scene. Cut the opening wide enough to hold a smaller pumpkin securely between the upper and lower jaws.
Carve sharp eyes into the large pumpkin and a frightened face into the smaller one. Seeds and pulp left near the victim’s mouth add a gross detail. The concept also adapts into biting, trapping, or chasing scenes.
Wide Eyes and Chunky Teeth
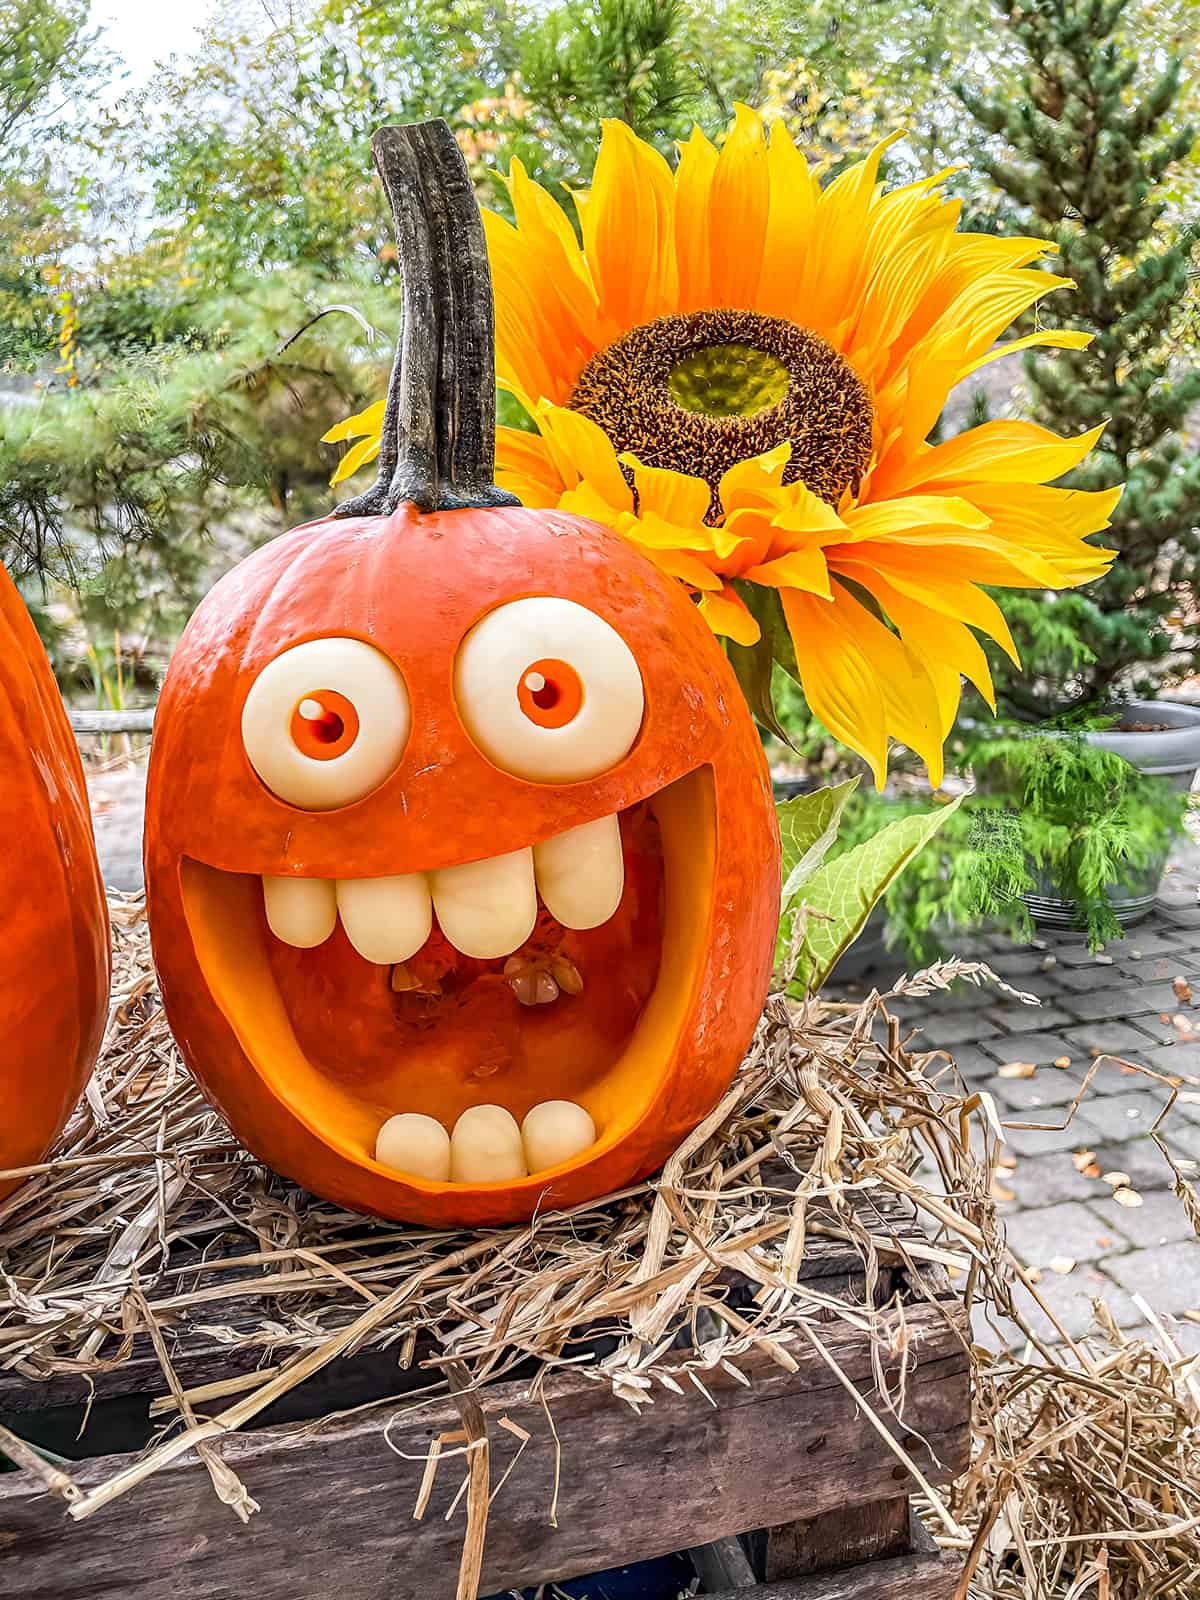
Large round eyes and thick teeth create a funny face that reads clearly from a distance. Cut two circular eye openings, then insert pale squash pieces or onion sections as raised eyeballs.
Separate chunks of pale pumpkin flesh form the teeth across the upper and lower mouth. Use different tooth sizes and leave wide gaps between them. A very large mouth provides enough room for the inserted pieces and keeps the face easy to recognize.
One-Eyed Monster
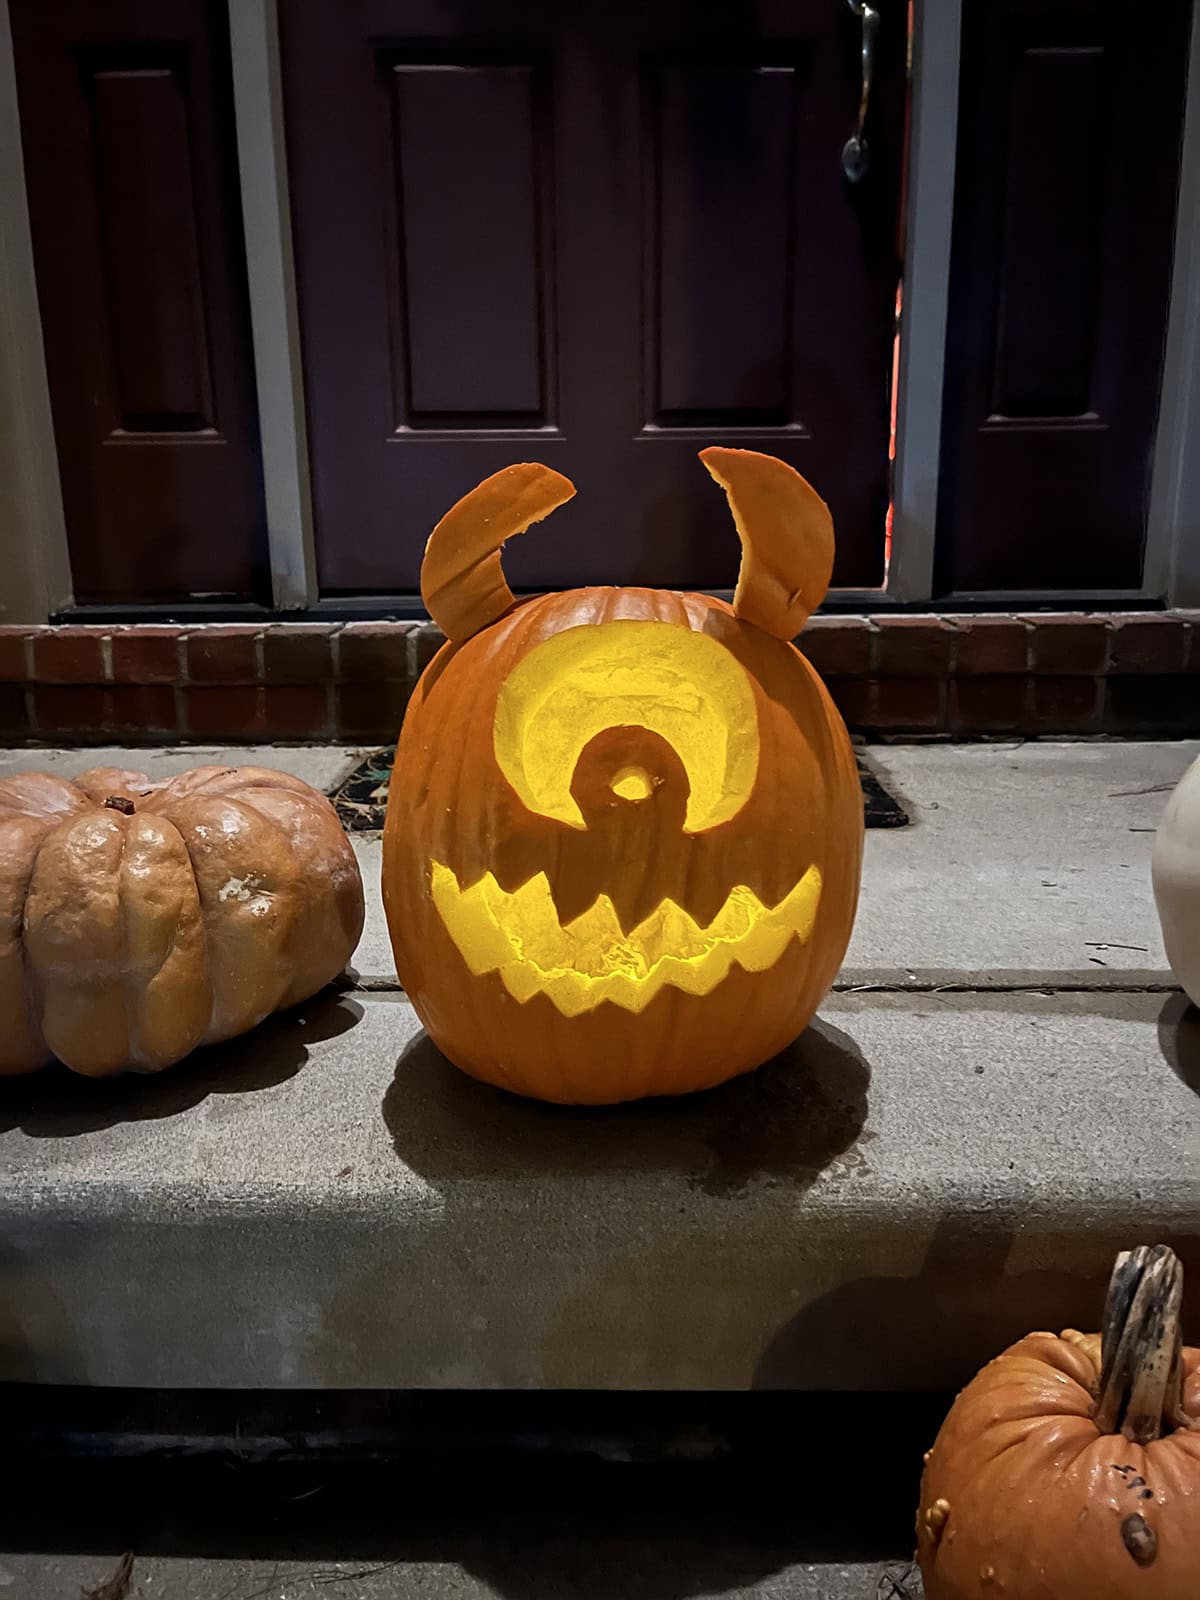
A cyclops face needs only one eye, which leaves more space for an oversized mouth. Shave a broad circle until the flesh becomes thin, then cut a smaller pupil through the center.
Jagged upper and lower teeth balance the large eye above them. Curved pieces cut from the lid serve as horns near the top. Different pupil shapes, tooth patterns, and horn sizes produce several variations of the same monster idea.
Sunglasses Pumpkin Planter
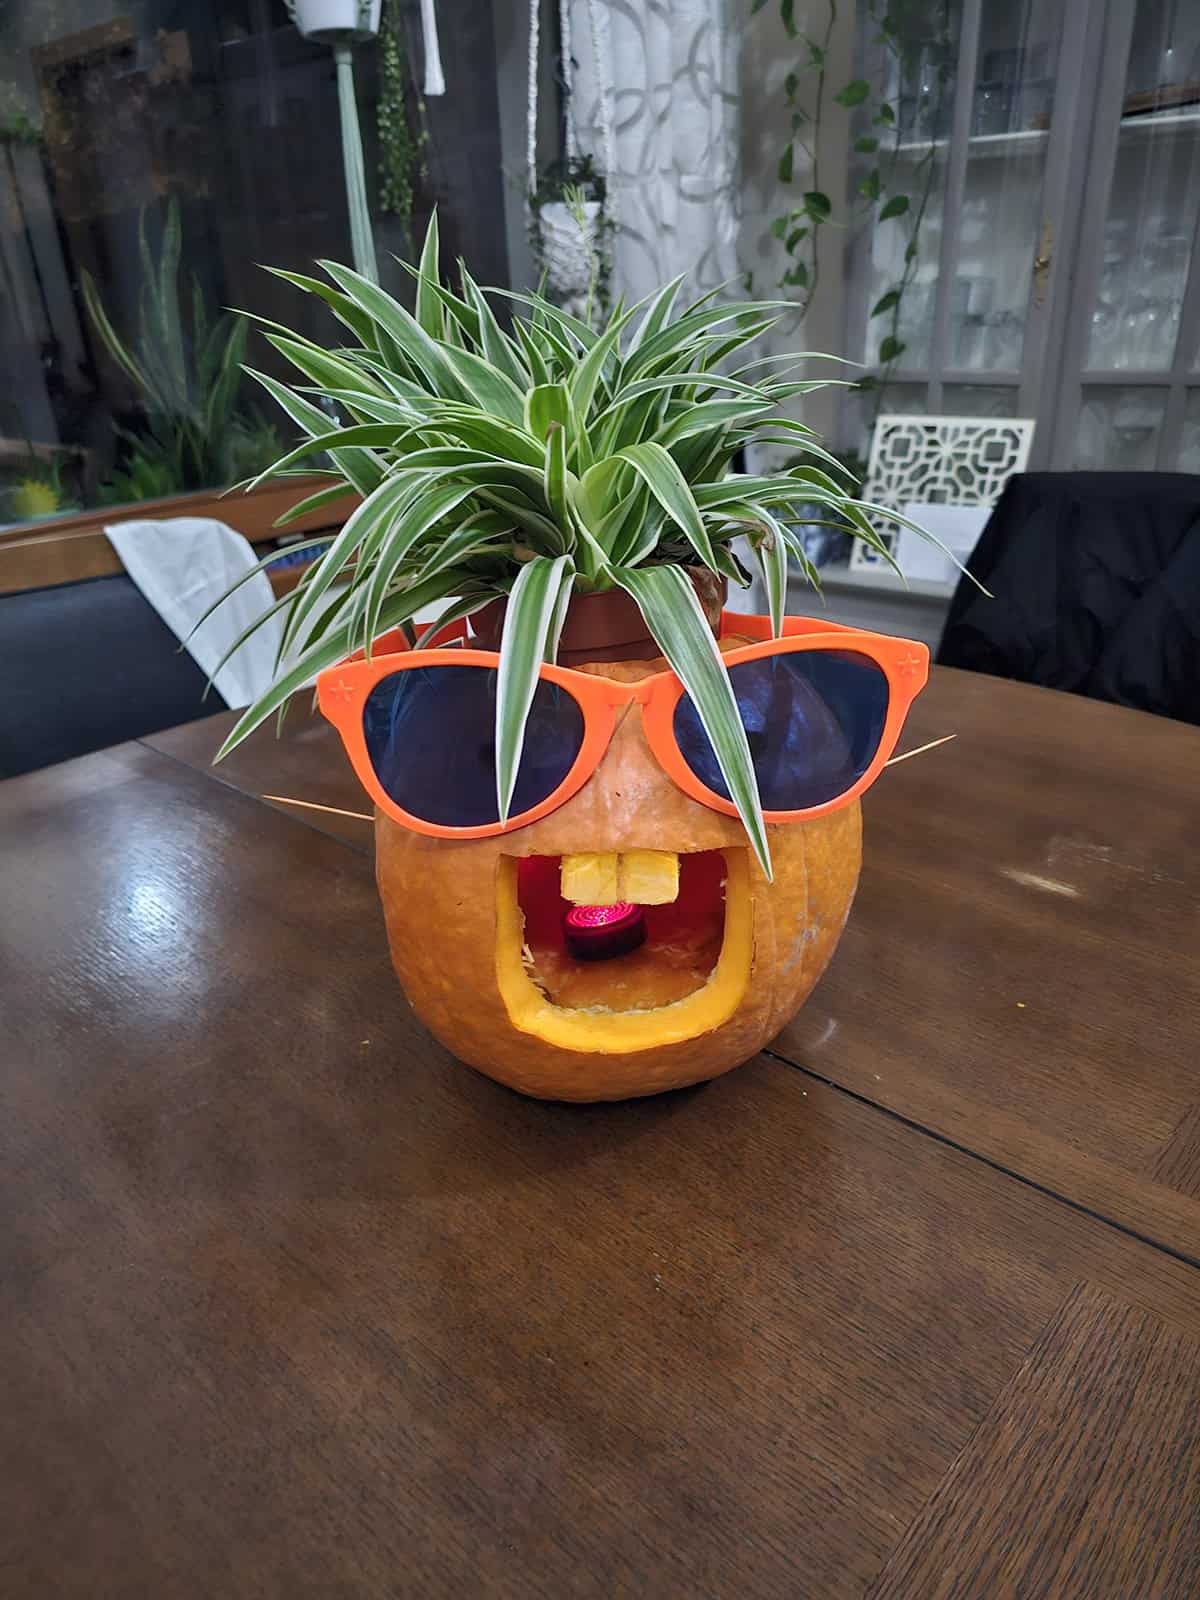
A planter pumpkin starts with a wide opening around the stem, similar to a standard lid cut. Make the opening large enough for a small nursery pot, then carve a broad mouth and two chunky front teeth below it.
Sunglasses cover the eye area, so detailed eye cuts are unnecessary. The face could also use carved eyelids or simple round holes. Long plant leaves act as hair and extend the carved character above the pumpkin.
Zipper-Mouth Pumpkin
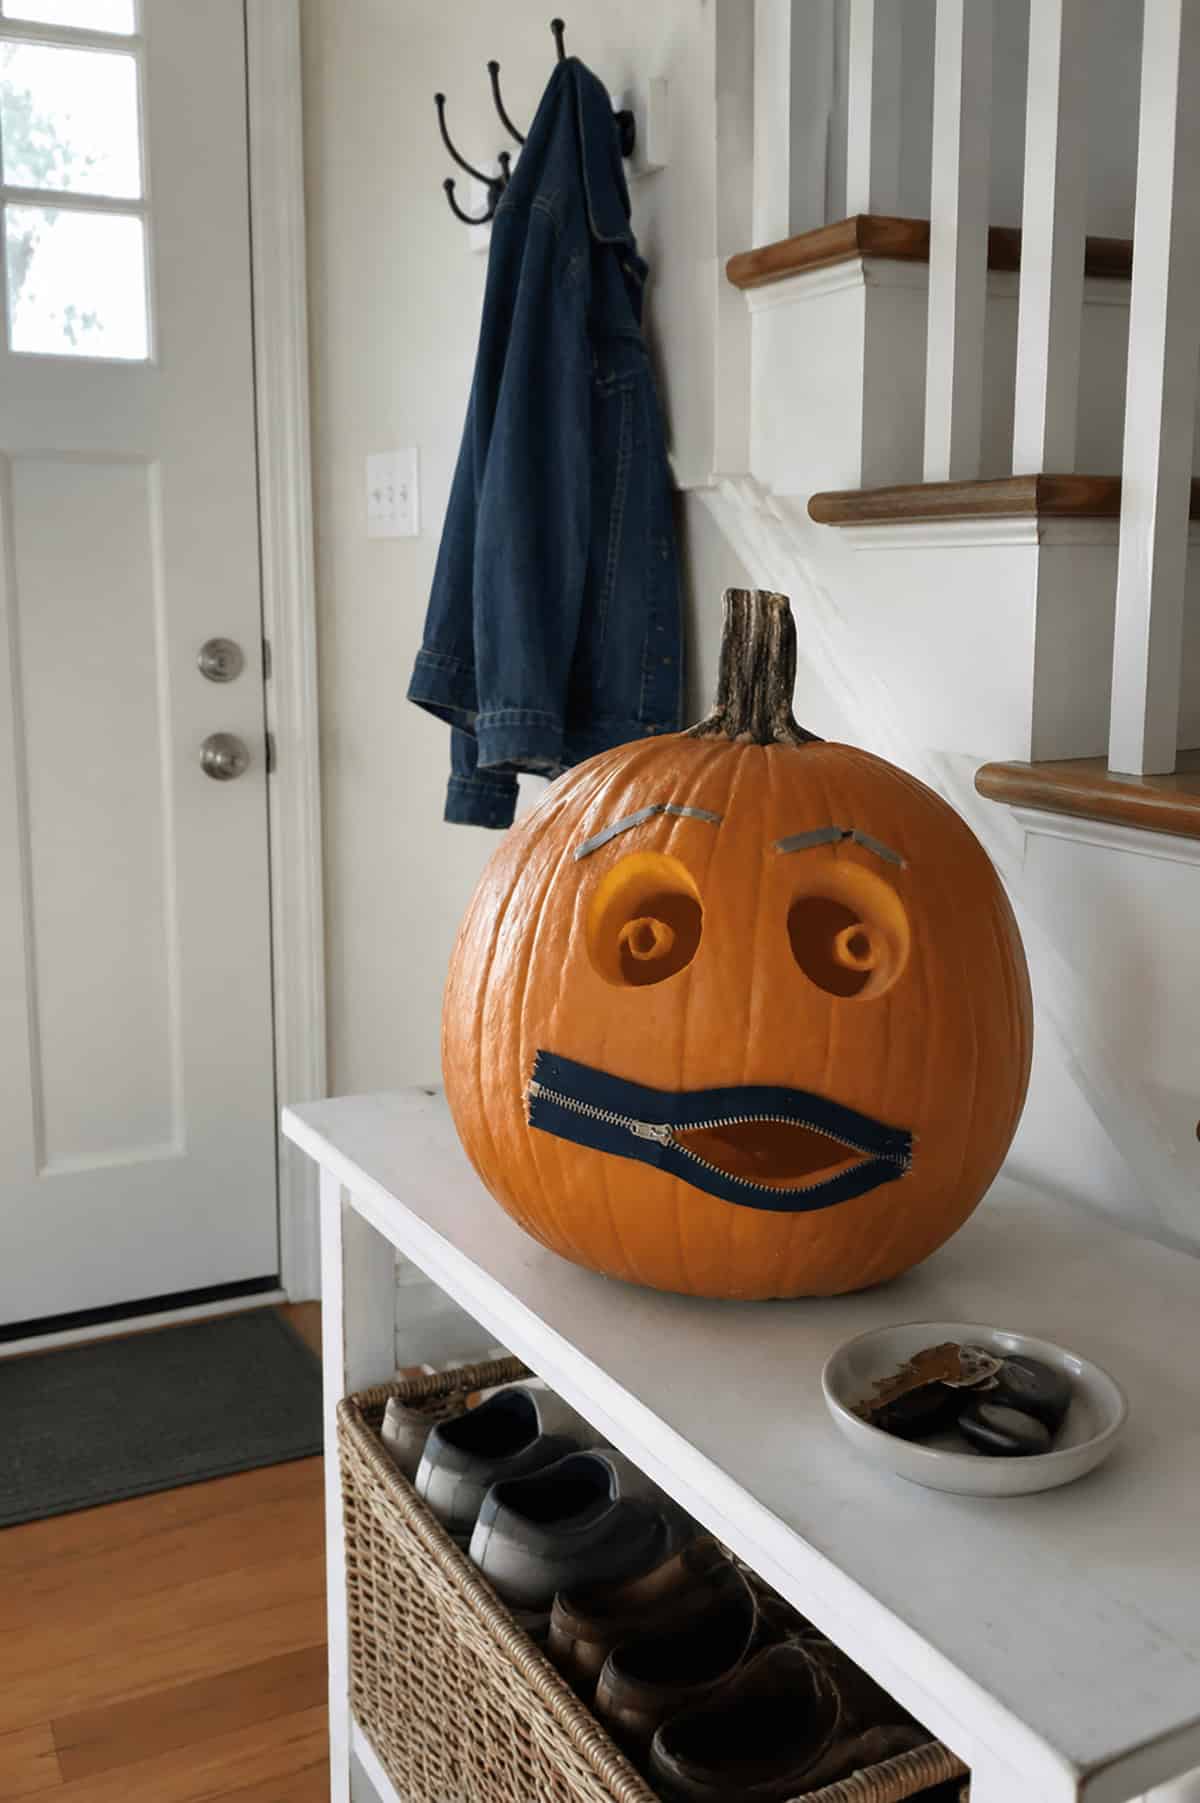
A real zipper makes the mouth look sealed shut until one side opens into a nervous gap. Cut a narrow slit first, then attach the zipper around the edge with short pins.
Round eye sockets and tiny pupils match the worried mouth better than sharp Halloween eyes. Set the eyebrows high to exaggerate the panic. A black zipper looks severe, while bright colors push the face toward comedy.
Spiderweb Mask
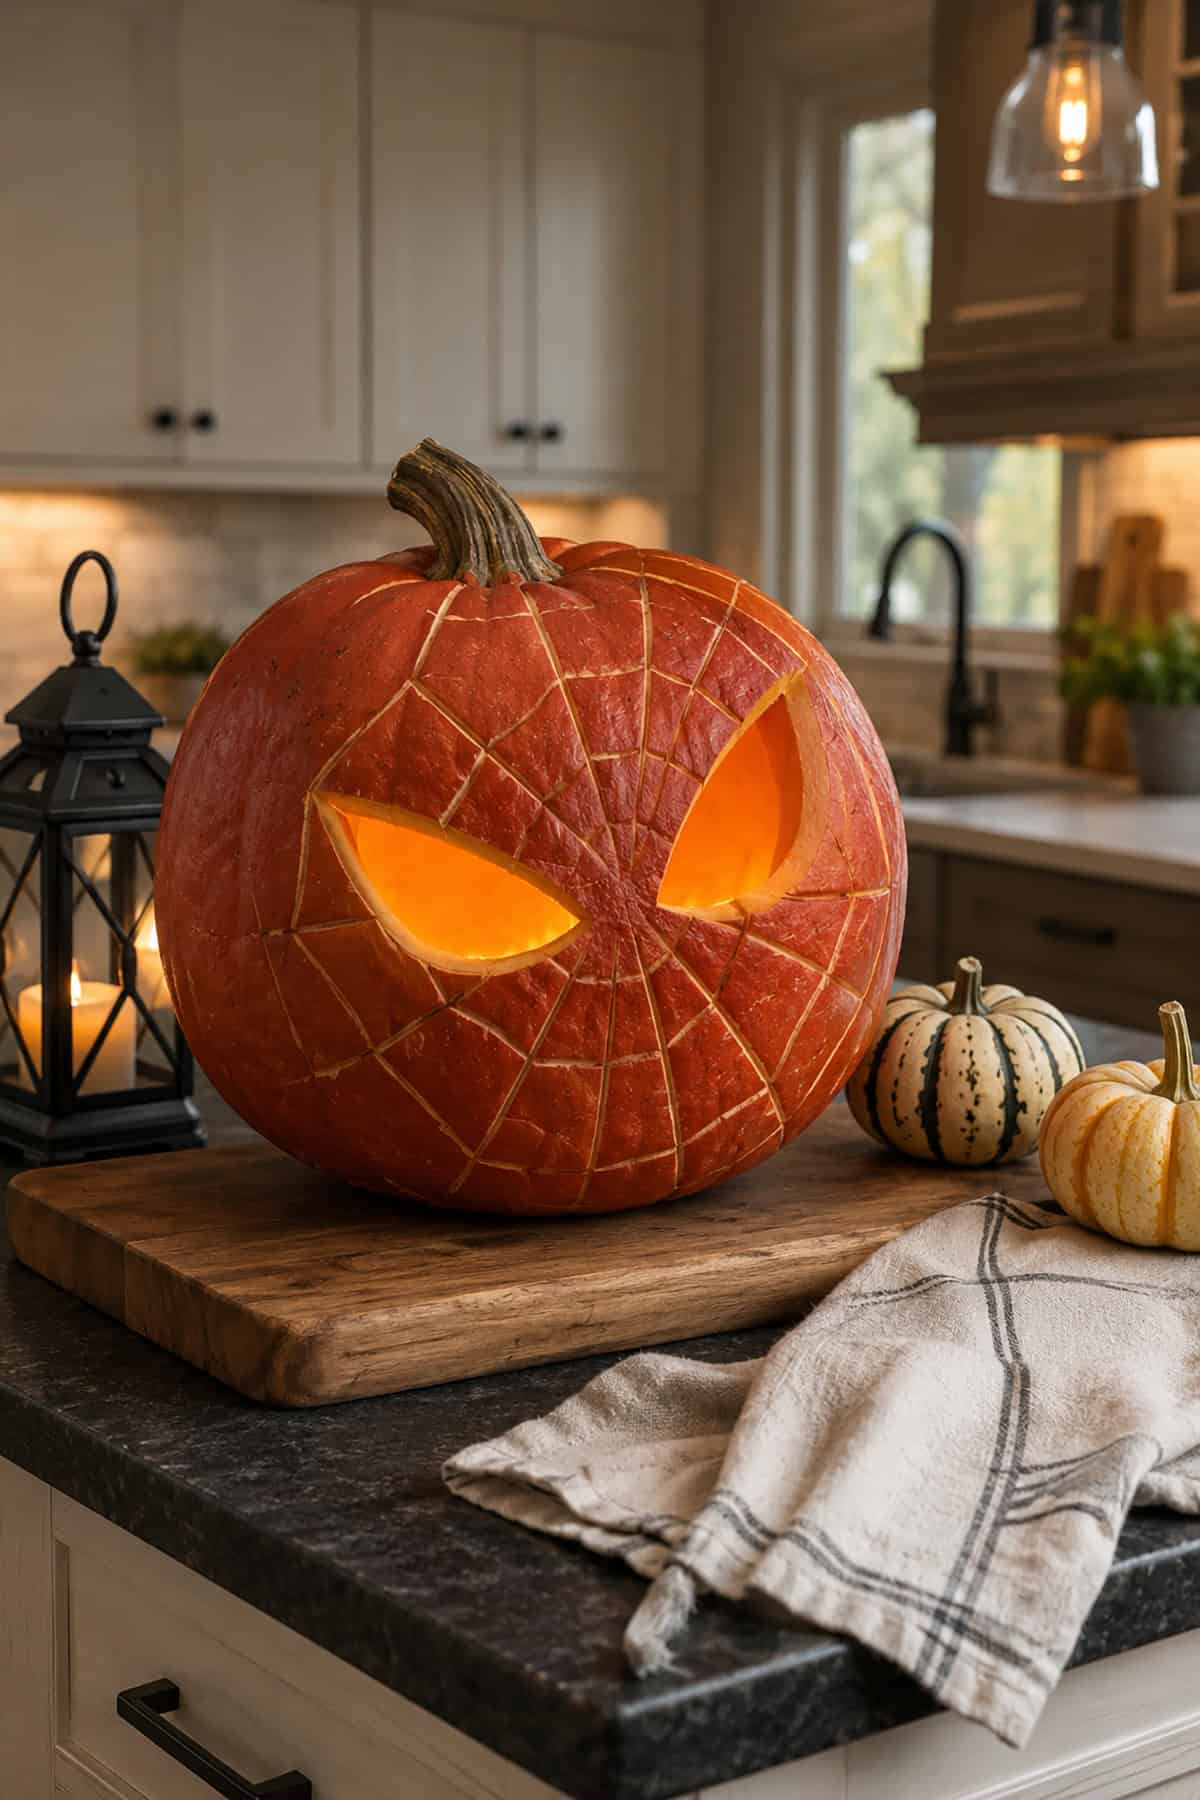
The web does most of the detail here, so the eyes should remain bold and simple. Cut two long eye openings with sharp outer points, then scrape shallow lines across the rind.
Start every line from one spot between the eyes and add curved links between them. Uneven spacing makes the web look hand-drawn rather than printed. Thin cuts catch light across the surface, while the open eyes glow much brighter.
Twig-Stitched Face
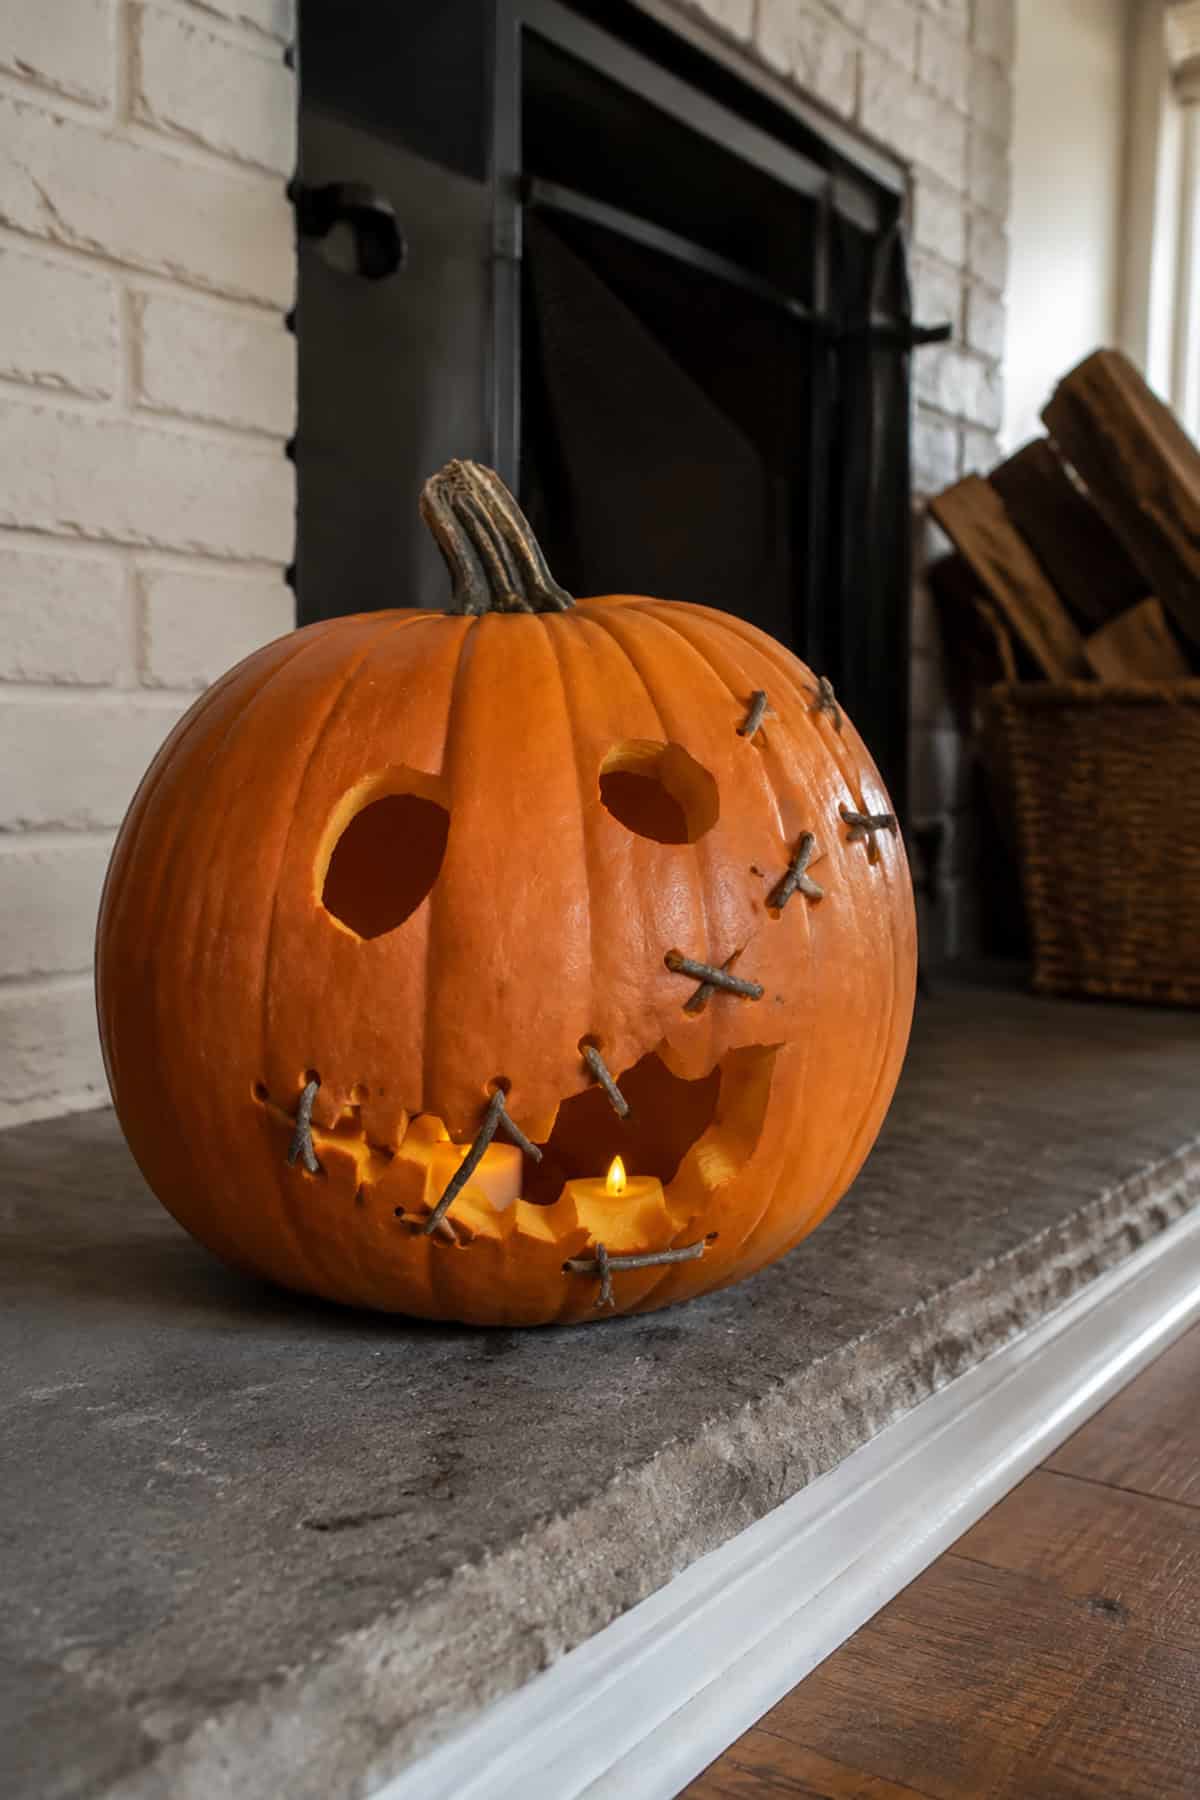
Twigs make excellent stitches across a rough, broken face. Carve uneven eyes and a torn mouth, then pierce small holes on both sides of each split.
Short sticks pass through the holes in straight lines or crossed X shapes. Mix thick and thin twigs so the repairs look rushed and crude. A few extra stitches across the cheek suggest that the pumpkin has already survived several accidents.
Monster With a Lure
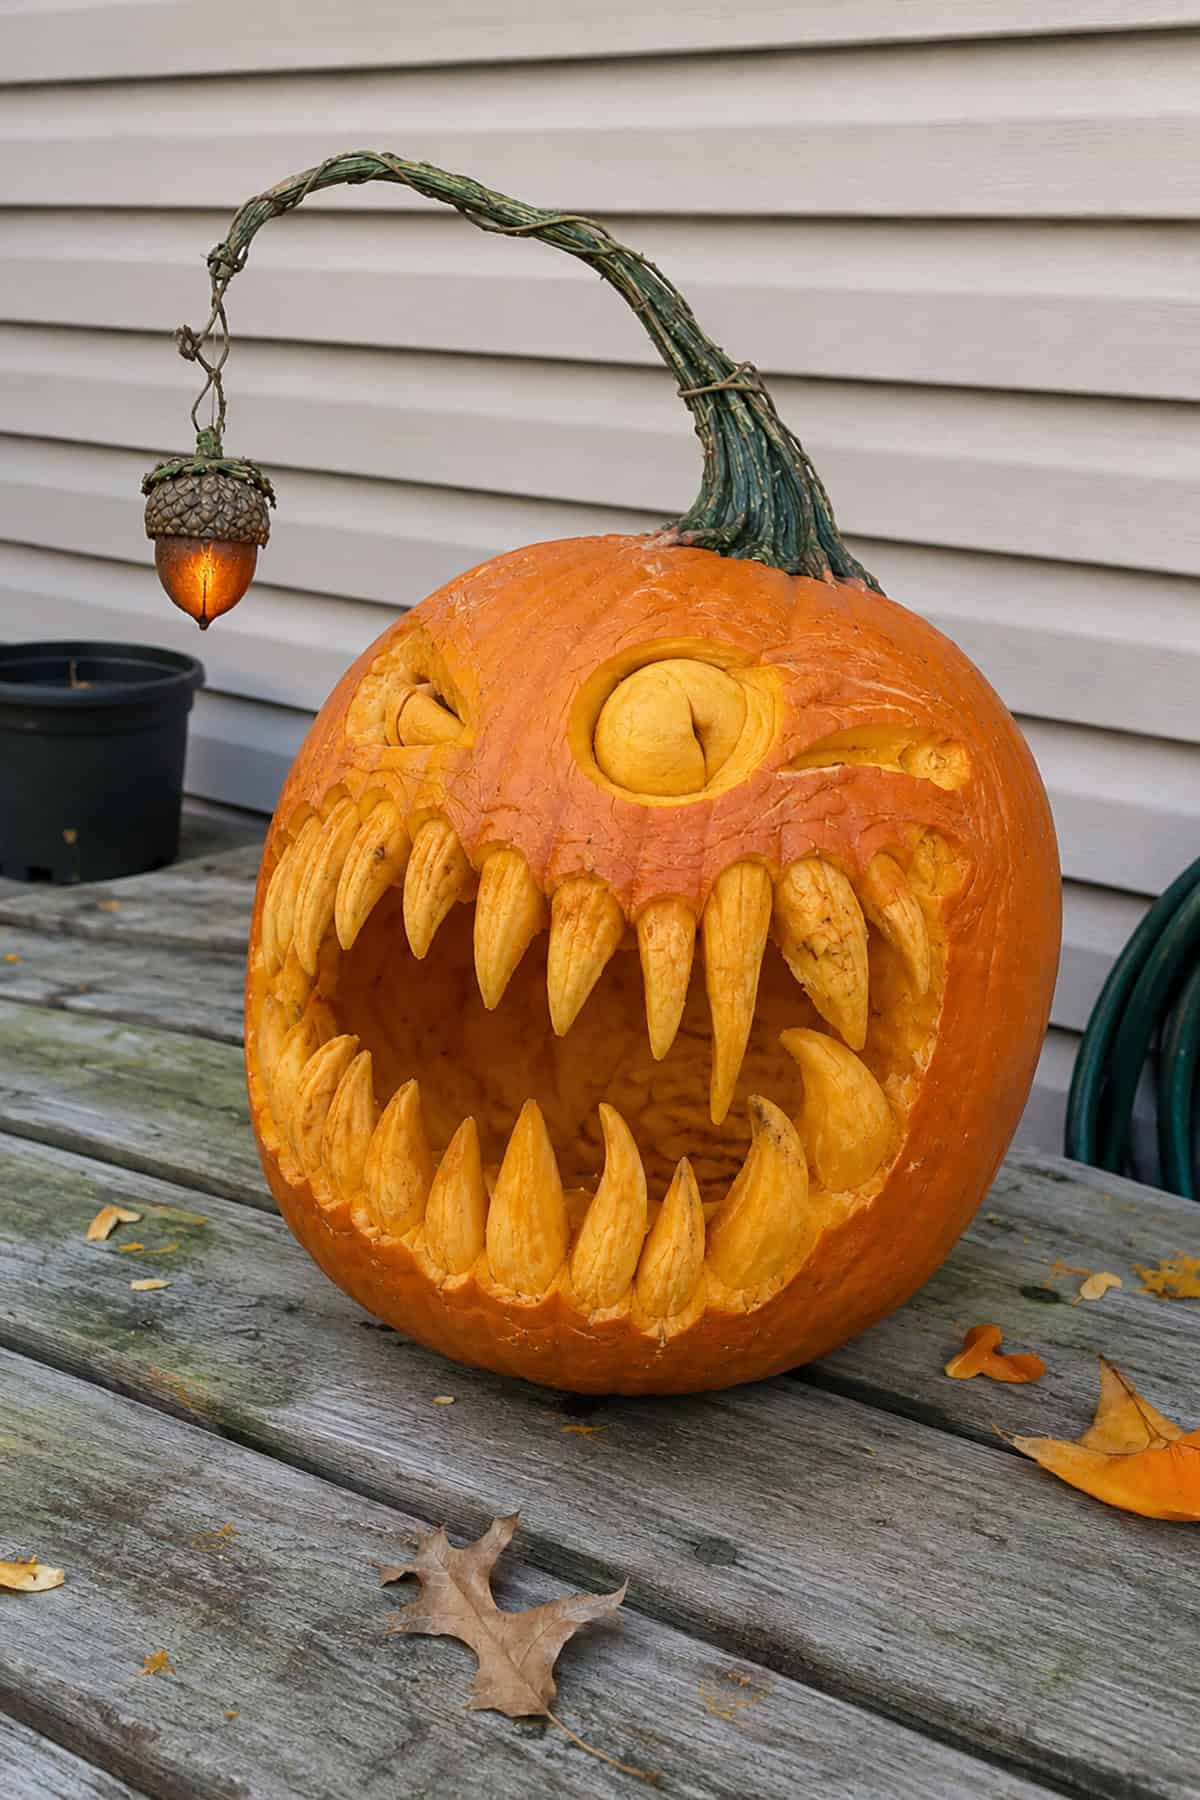
Rows of carved fangs make this monster look hungry before the lure enters the design. Shape each tooth directly from thick pumpkin flesh and vary the length across both jaws.
The curved stem acts as an arm above the face. Hang a carved acorn, tiny gourd, or small lantern from its tip as bait. One narrowed eye and one round eye add a strange expression that matches the enormous mouth.
Skeleton Hand Stack
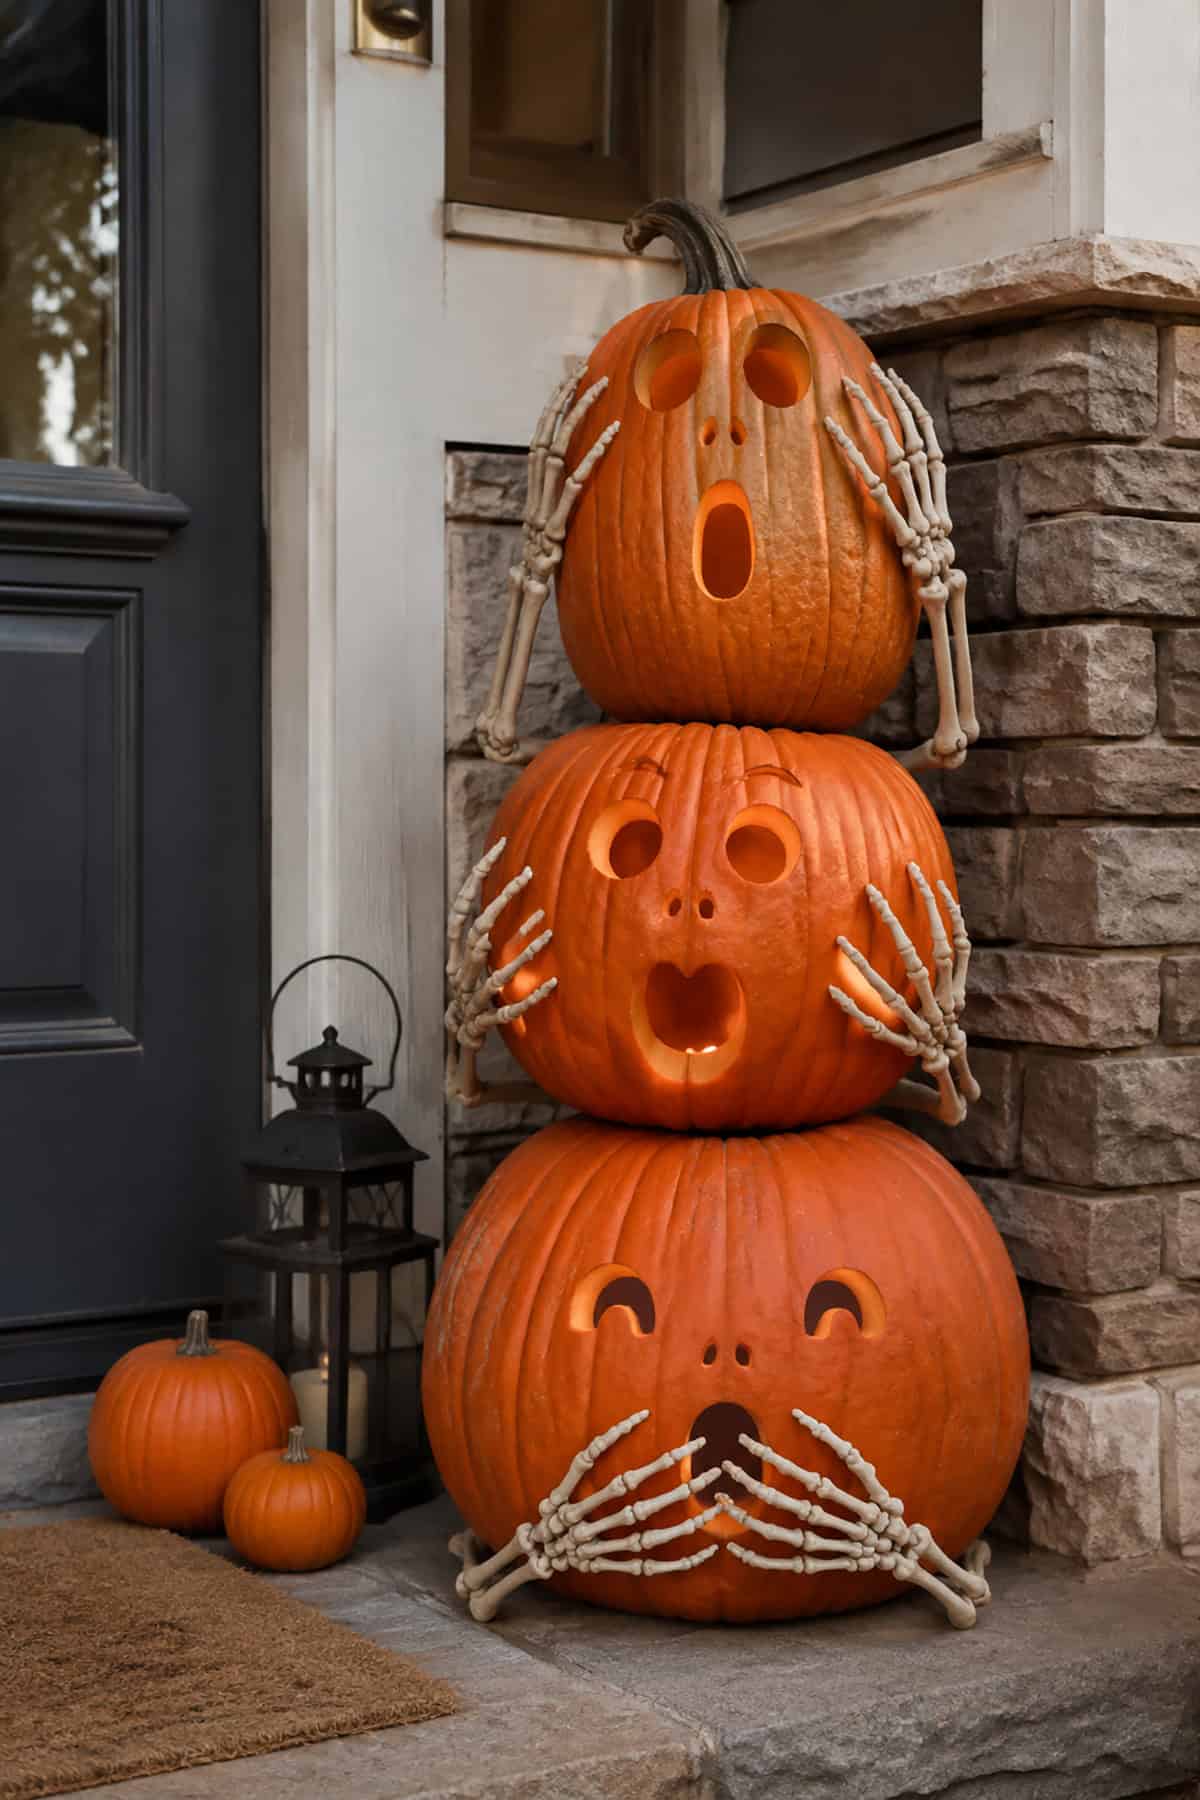
Three pumpkins allow three separate reactions in one vertical carving idea. Use wide eyes and round mouths, then change the brows and eye shapes from one face to the next.
Skeleton hands add the final gestures: one pair covers the cheeks, another reaches toward the eyes, and the lowest pair closes over the mouth. Choose pumpkins with flat bases and secure the stack through the center before attaching the hands.
Skull With an Exposed Brain
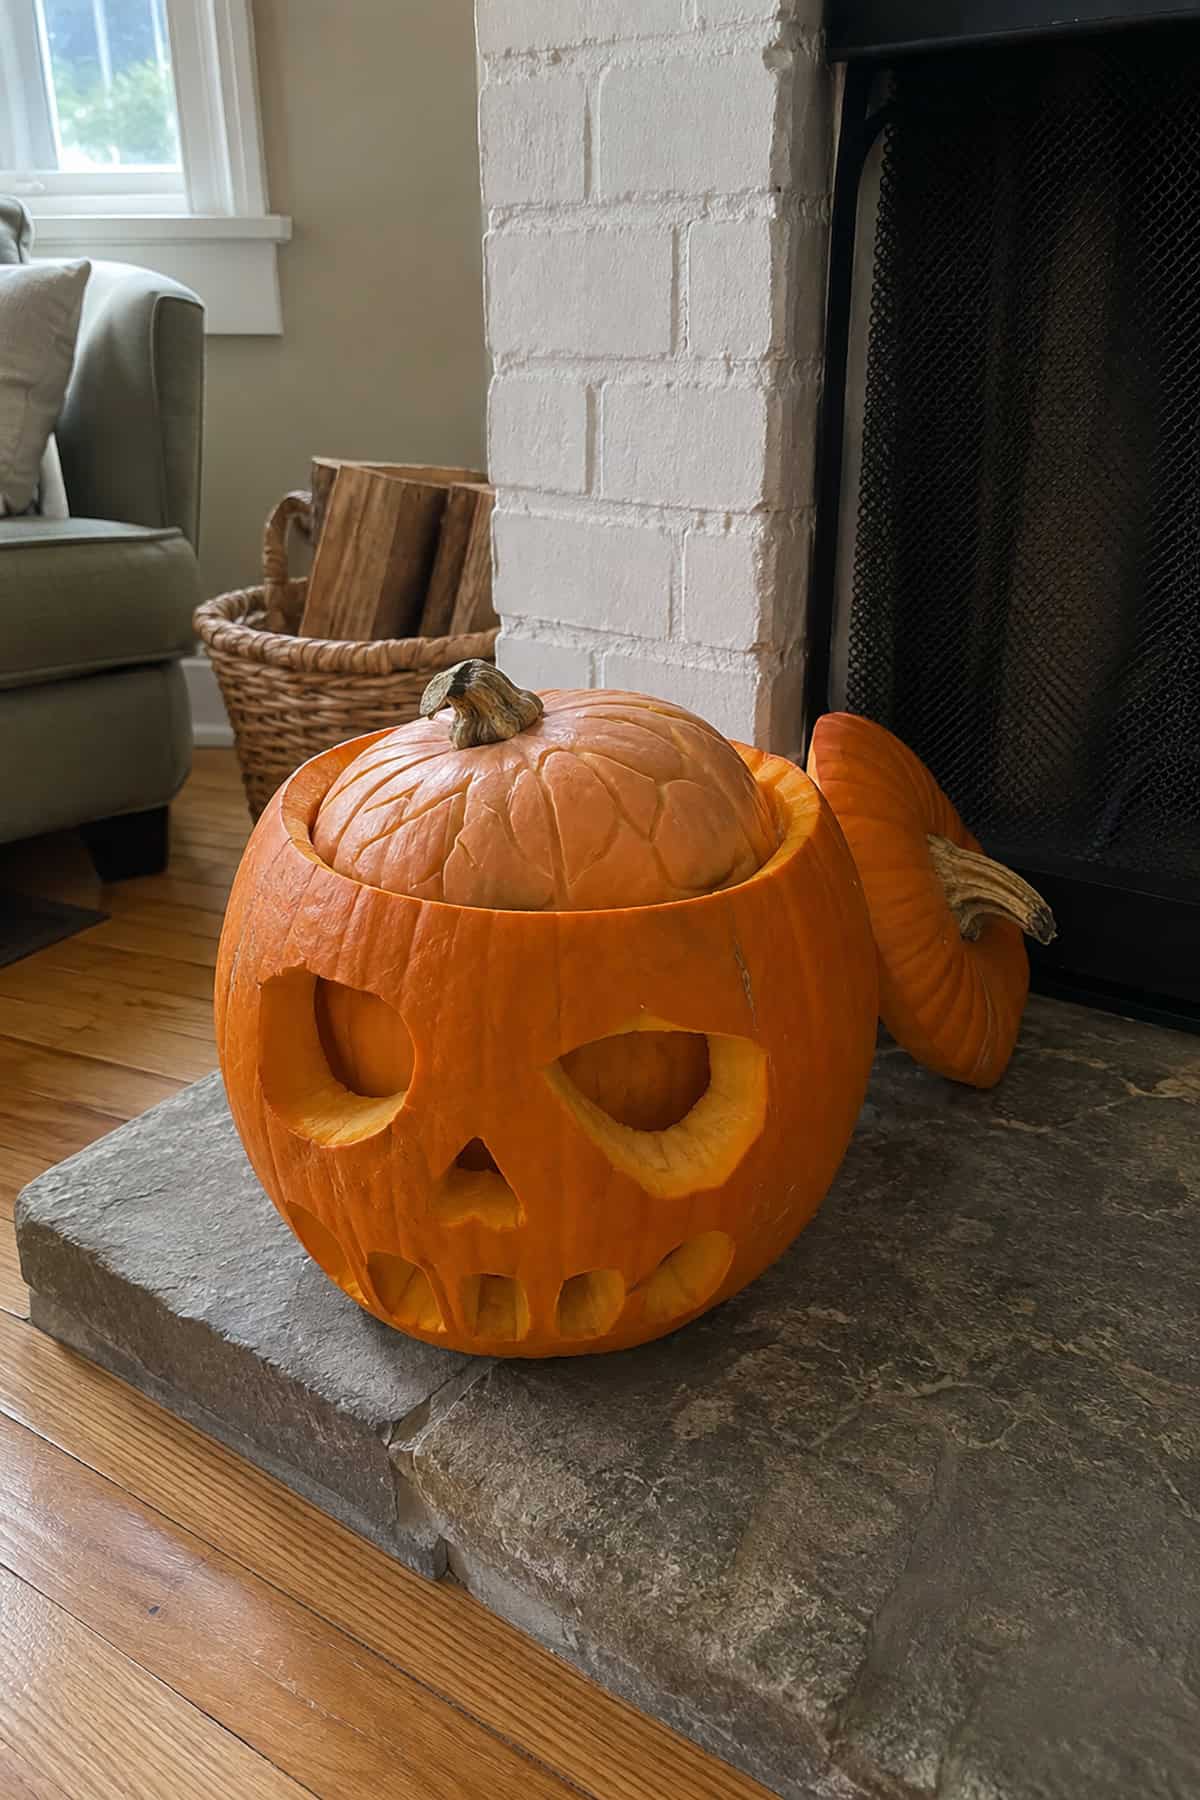
Cut the top much lower than a standard pumpkin lid so the head appears split open. A second small pumpkin fits inside as the exposed brain.
Shave winding grooves across the inner pumpkin to copy the folds of a brain. The outer shell needs deep eye sockets, a narrow nose, and square teeth for a skull-like face. Tilt the lid beside the opening so the hidden insert remains easy to see.
Silly Tongue-Out Face
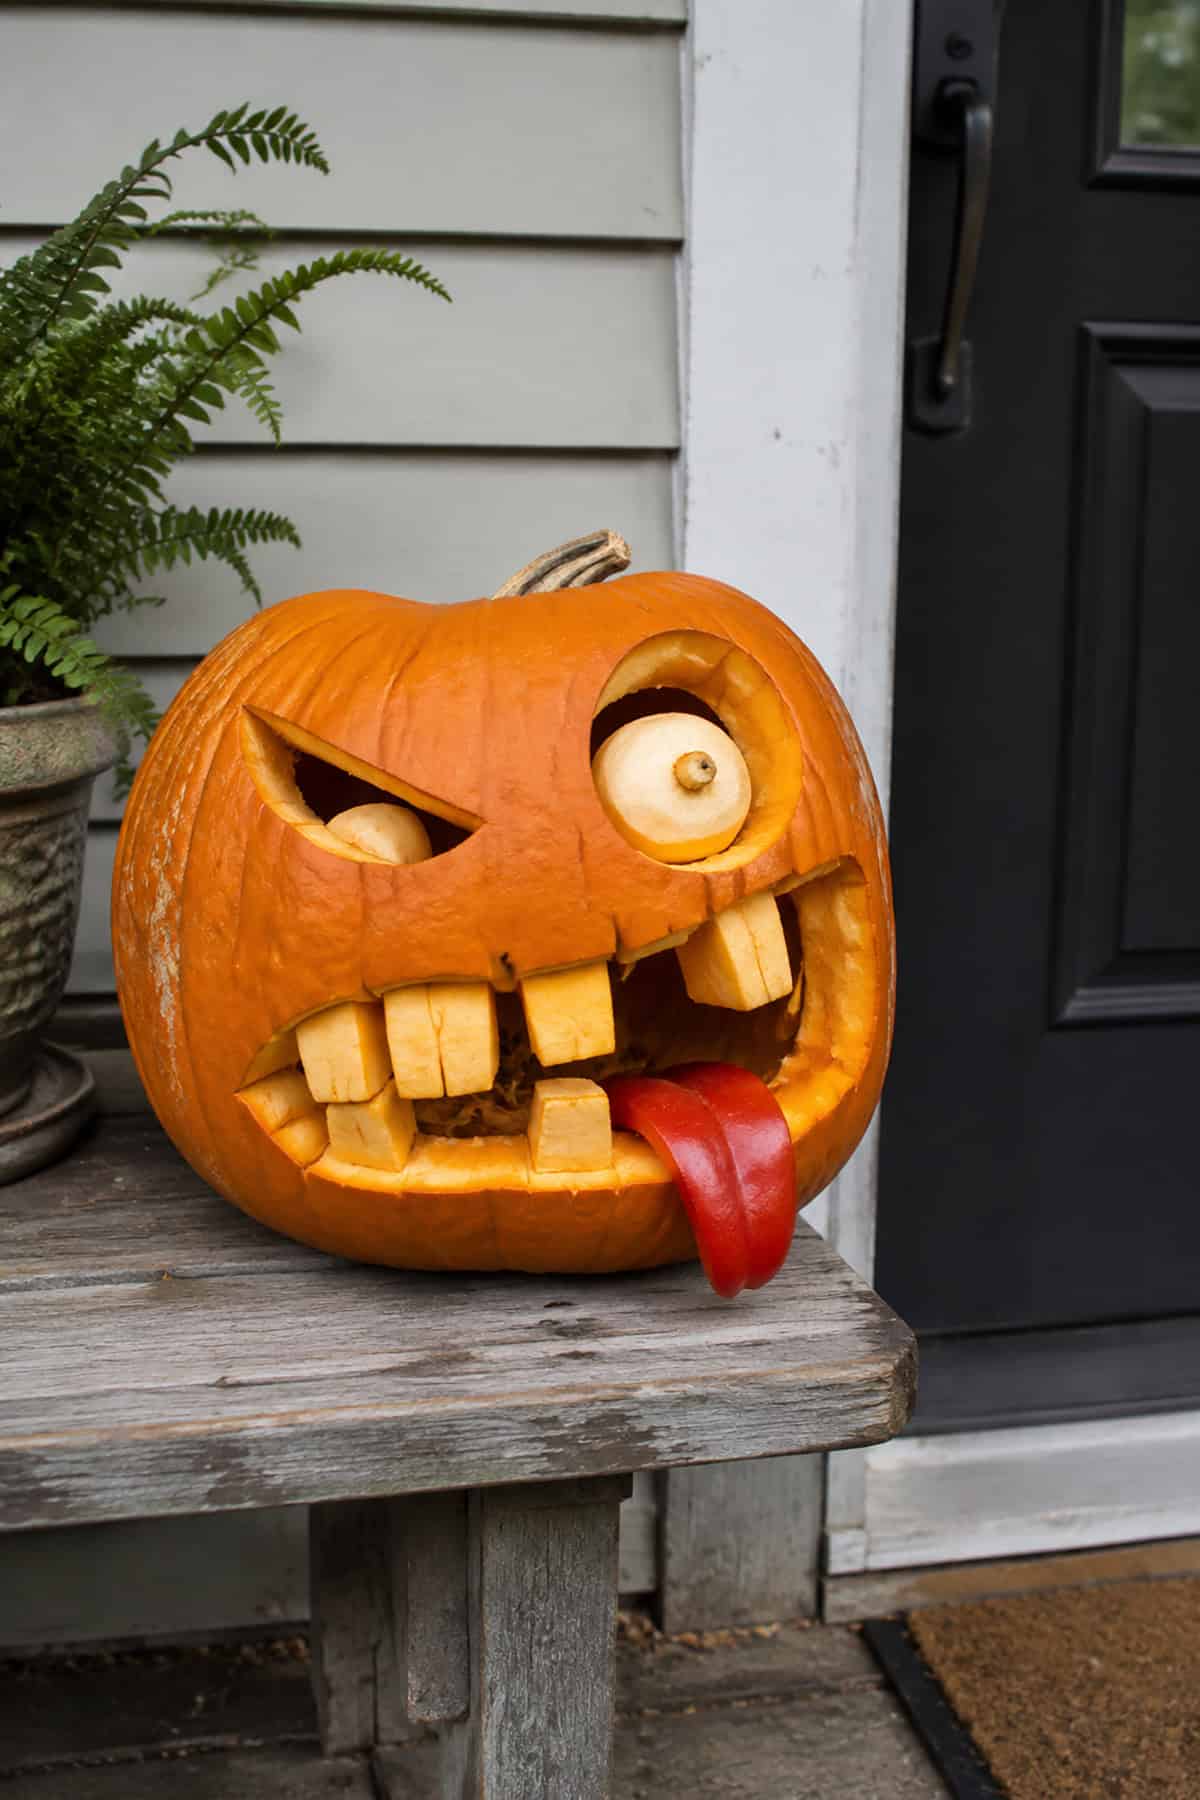
A crooked smile looks even sillier with one eye half closed and the other pushed wide open. Small pale gourds fit inside the eye sockets as raised eyeballs.
Square teeth cut from pumpkin flesh make the mouth look clumsy rather than scary. For the tongue, use a long rind strip and paint the outer surface red. Let it hang over one corner of the lower lip instead of straight down.
Pumpkin-Head Scarecrow
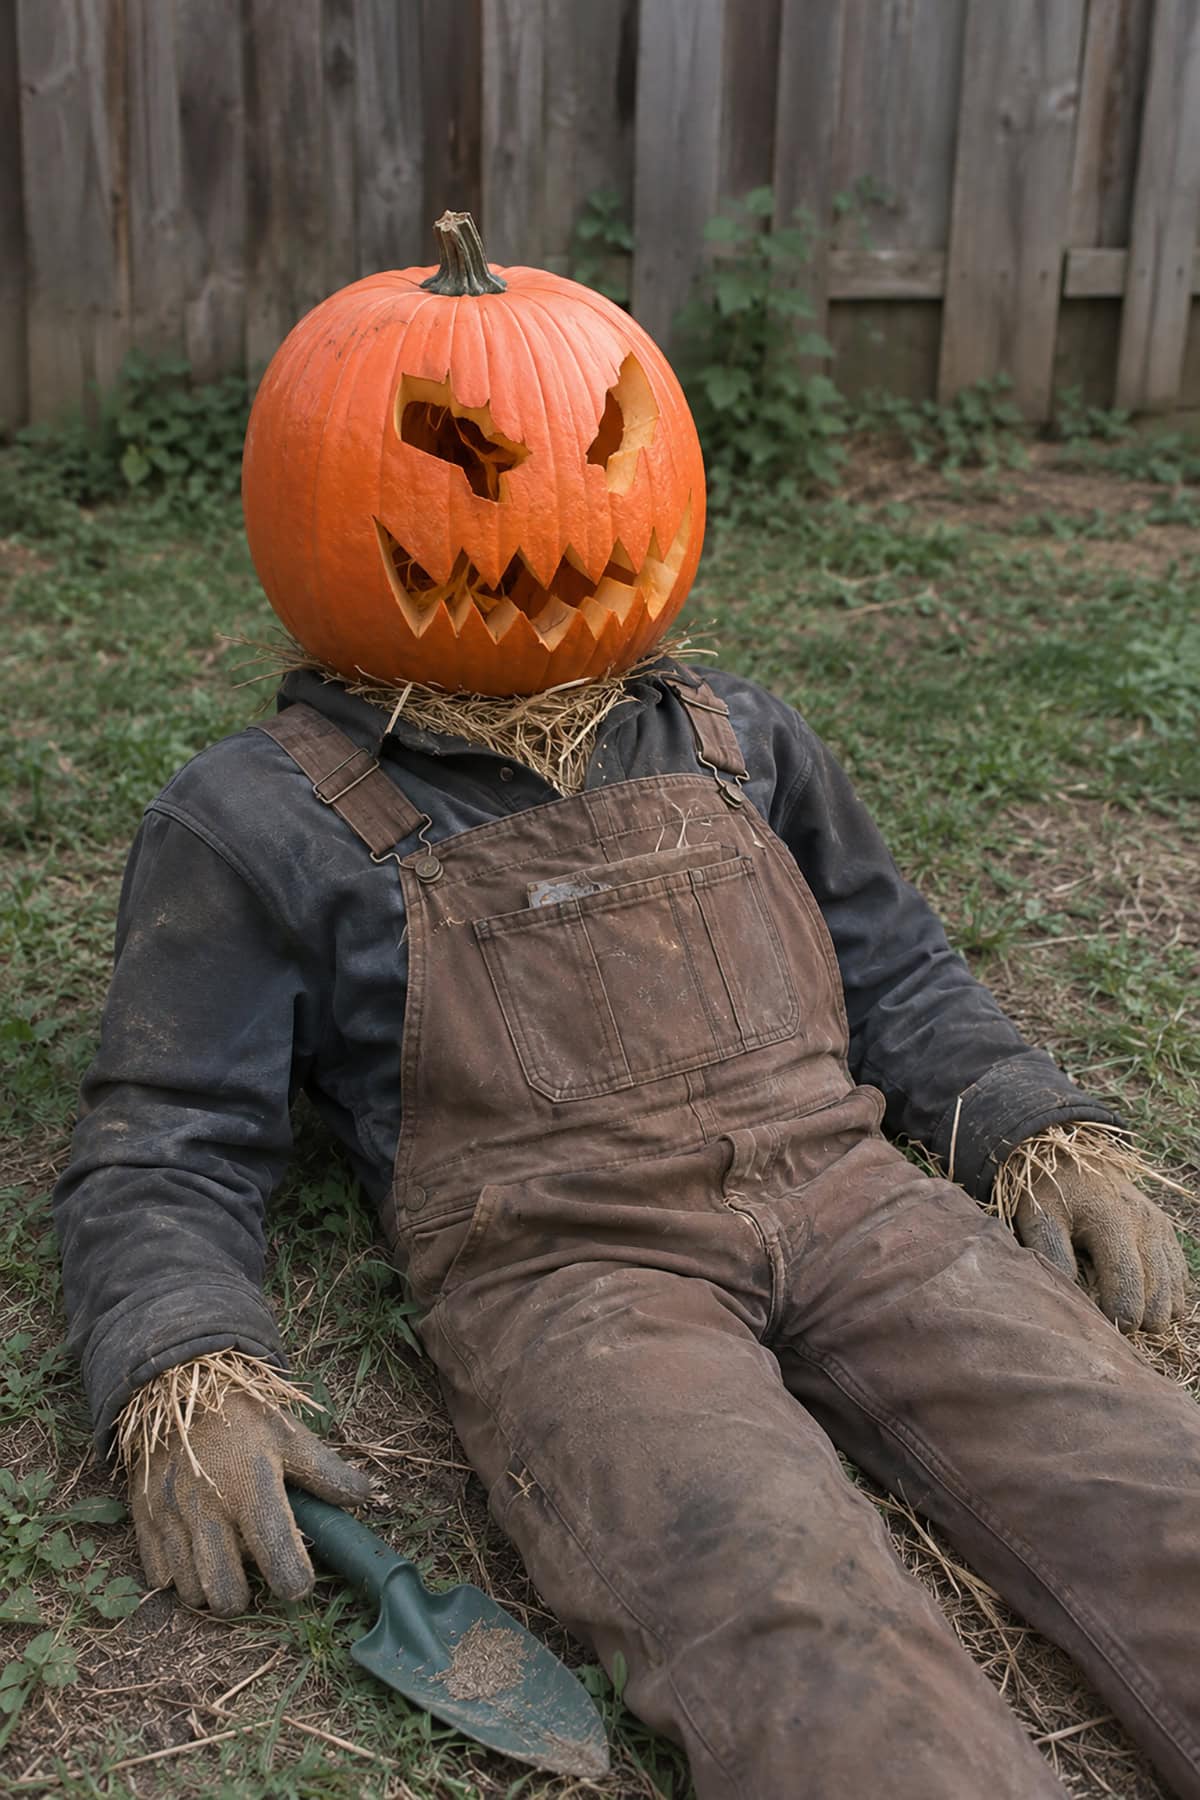
The scarecrow body makes a carved pumpkin face look life-sized. Sharp eyes and two rows of uneven teeth fit the rough clothes and straw collar.
Choose a medium pumpkin so the head stays balanced above the shoulders. Cut the mouth wide enough for light to pass through the straw behind it. A damaged brow, chipped tooth, or split eye adds a harsher character than a clean, symmetrical face.
Small Gourd in Monster Jaws
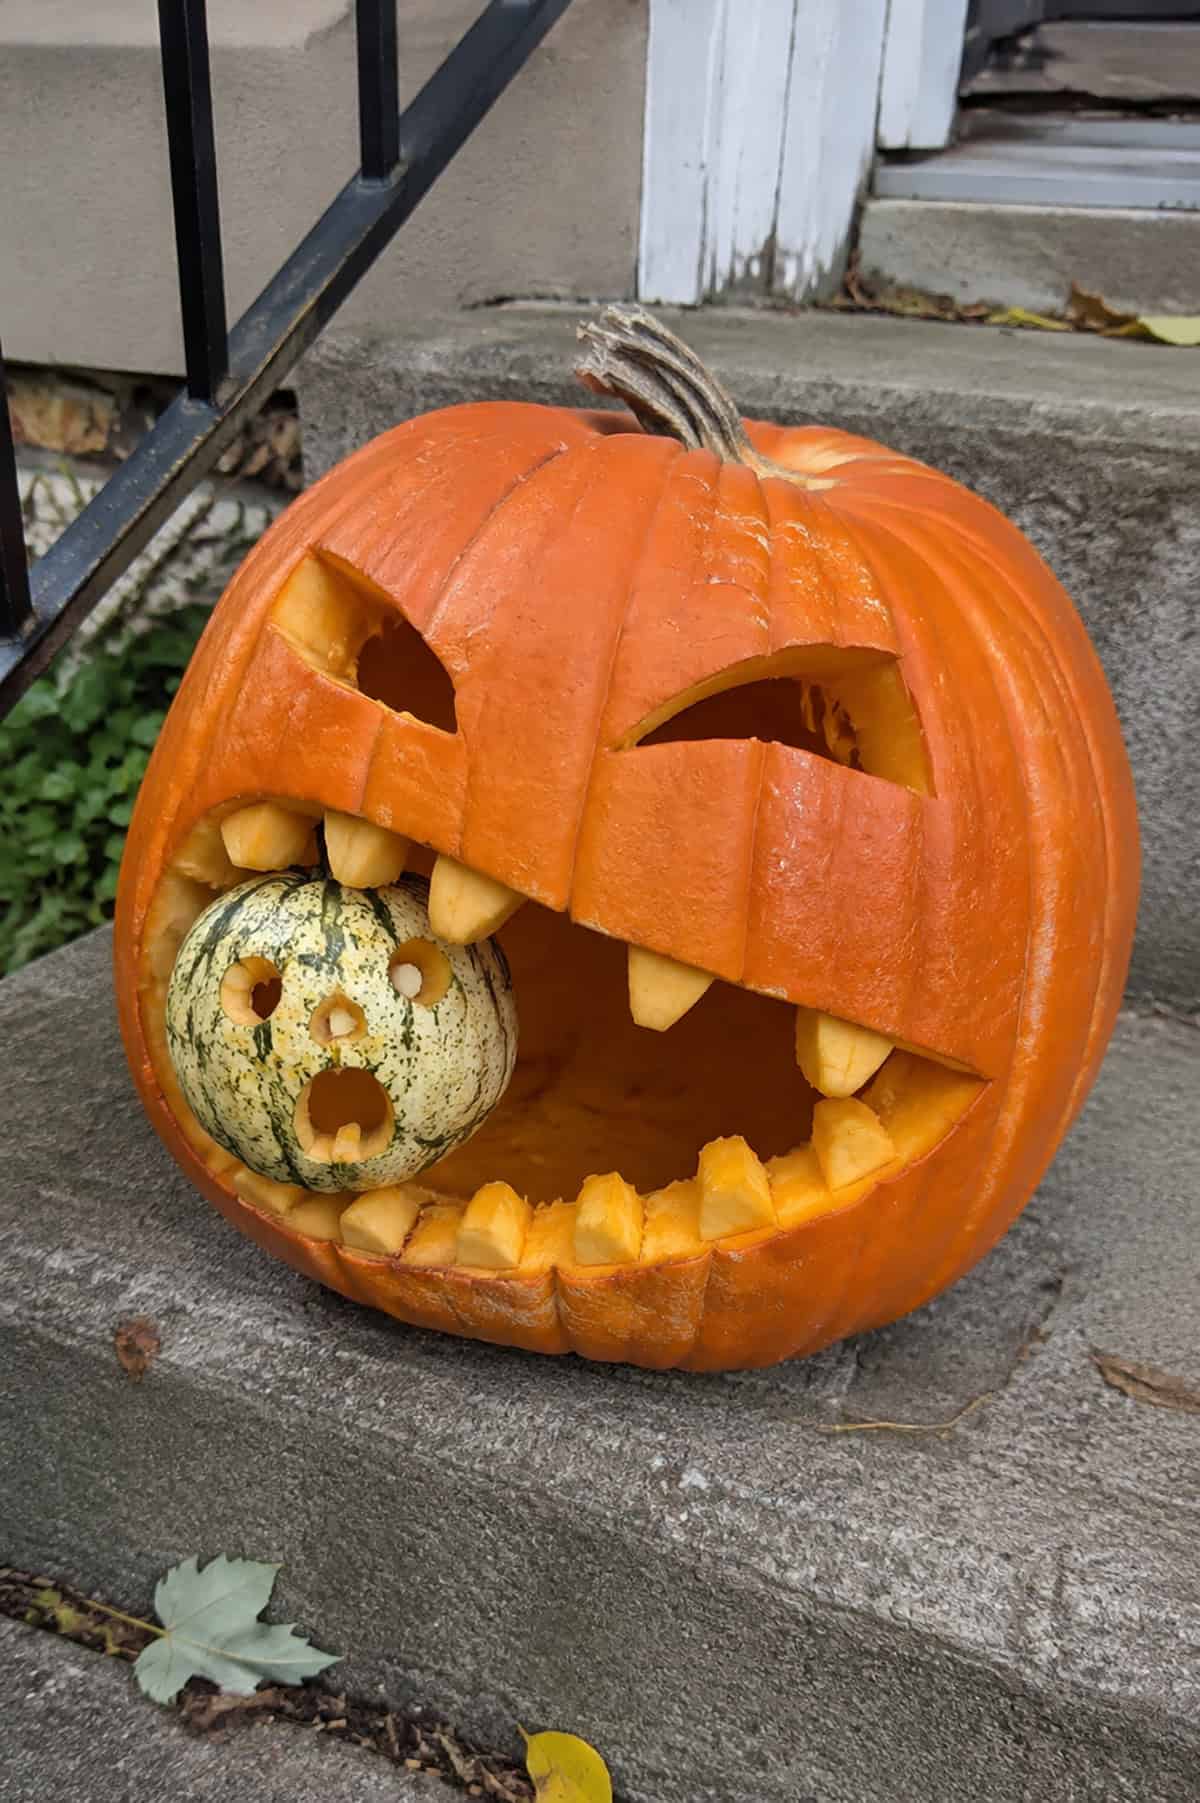
A tiny gourd trapped between large teeth turns a monster face into a complete joke. Cut the mouth across most of the pumpkin and leave thick blocks of flesh for the upper and lower teeth.
Carve a shocked face into the smaller gourd before placing it between the jaws. A speckled or pale victim stands out against the orange shell. Tilt it slightly so the frightened face remains visible from the front.
Mini Gourd Attack
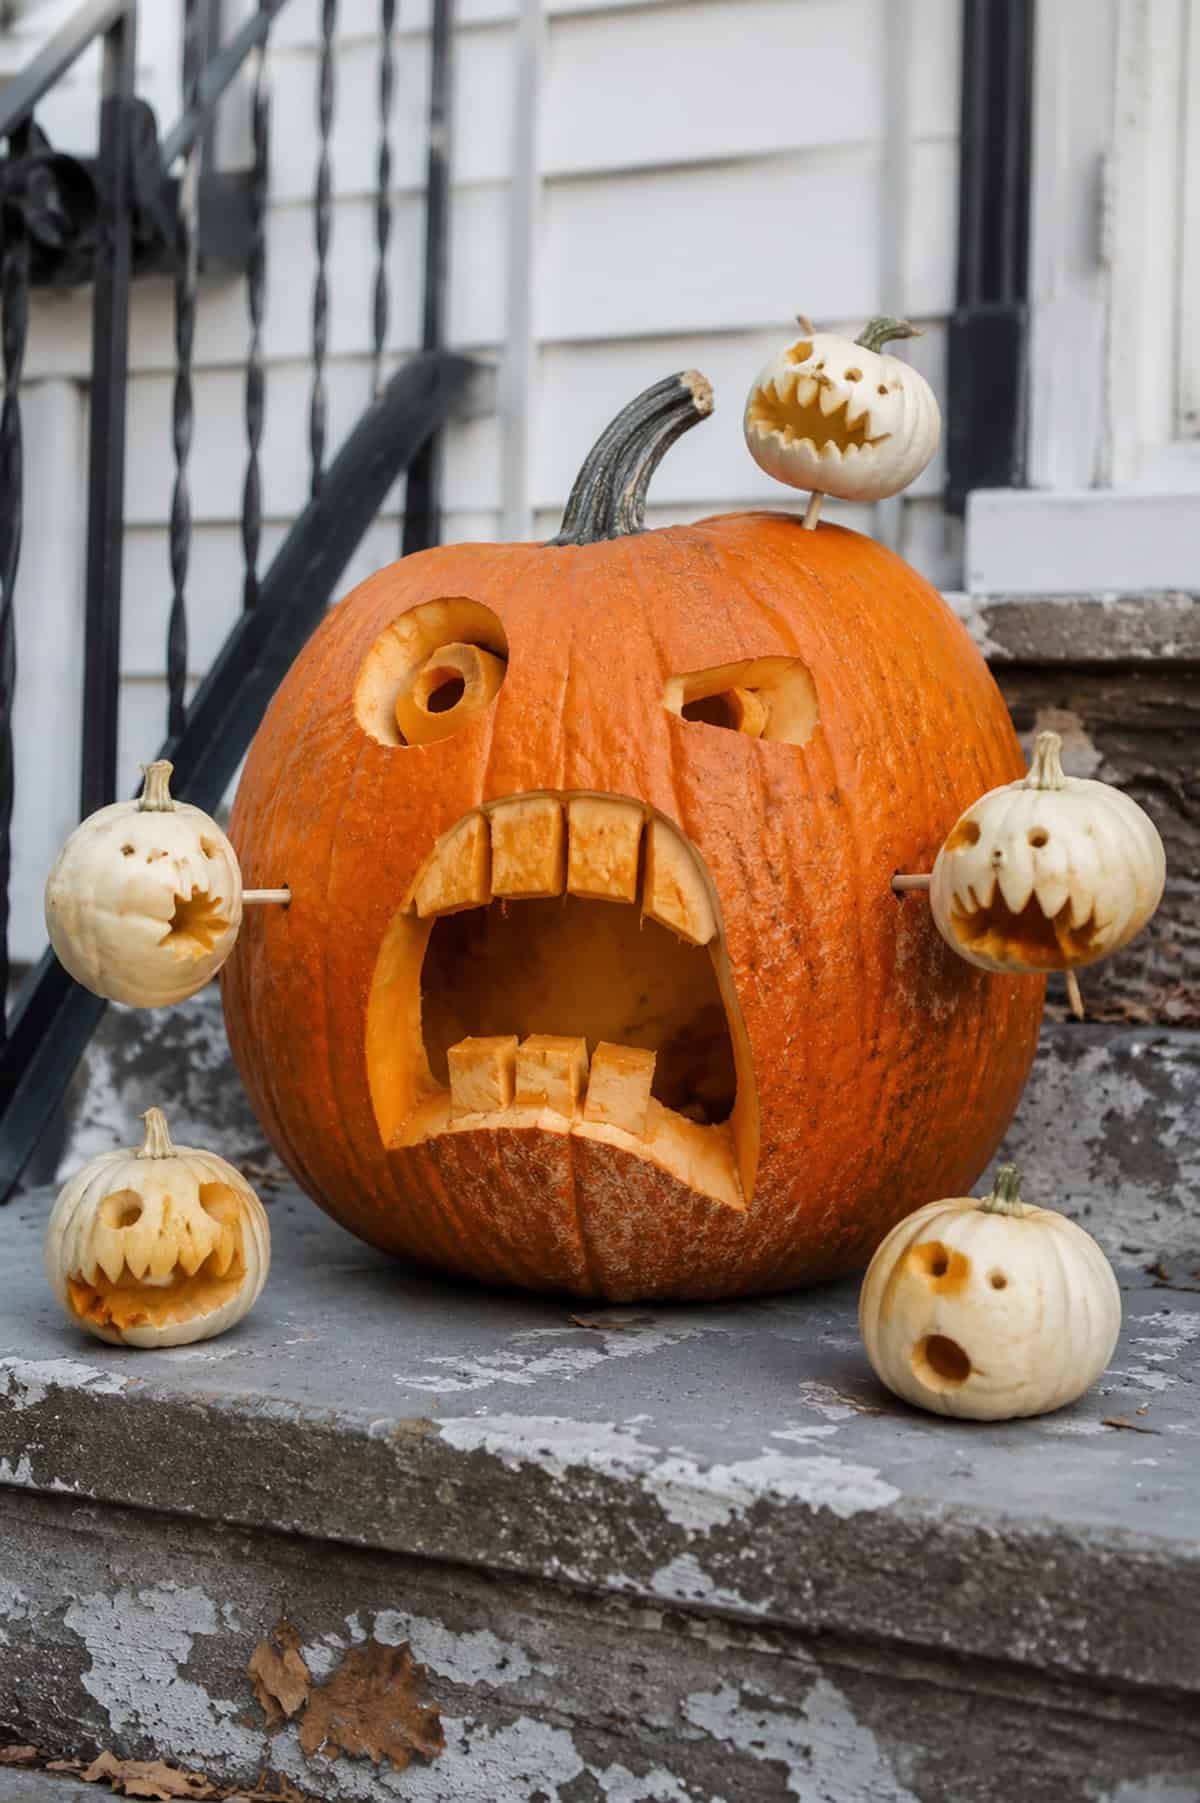
Reverse the usual monster scene and let several tiny gourds attack one giant pumpkin. Carve sharp teeth into each mini gourd, then attach a few to wooden skewers around the larger face.
The main pumpkin needs a panicked expression with uneven eyes and a huge open mouth. Square teeth add extra comedy. Use white gourds for the attackers so they stand apart from the orange victim.
Pulp-Spewing Pumpkin
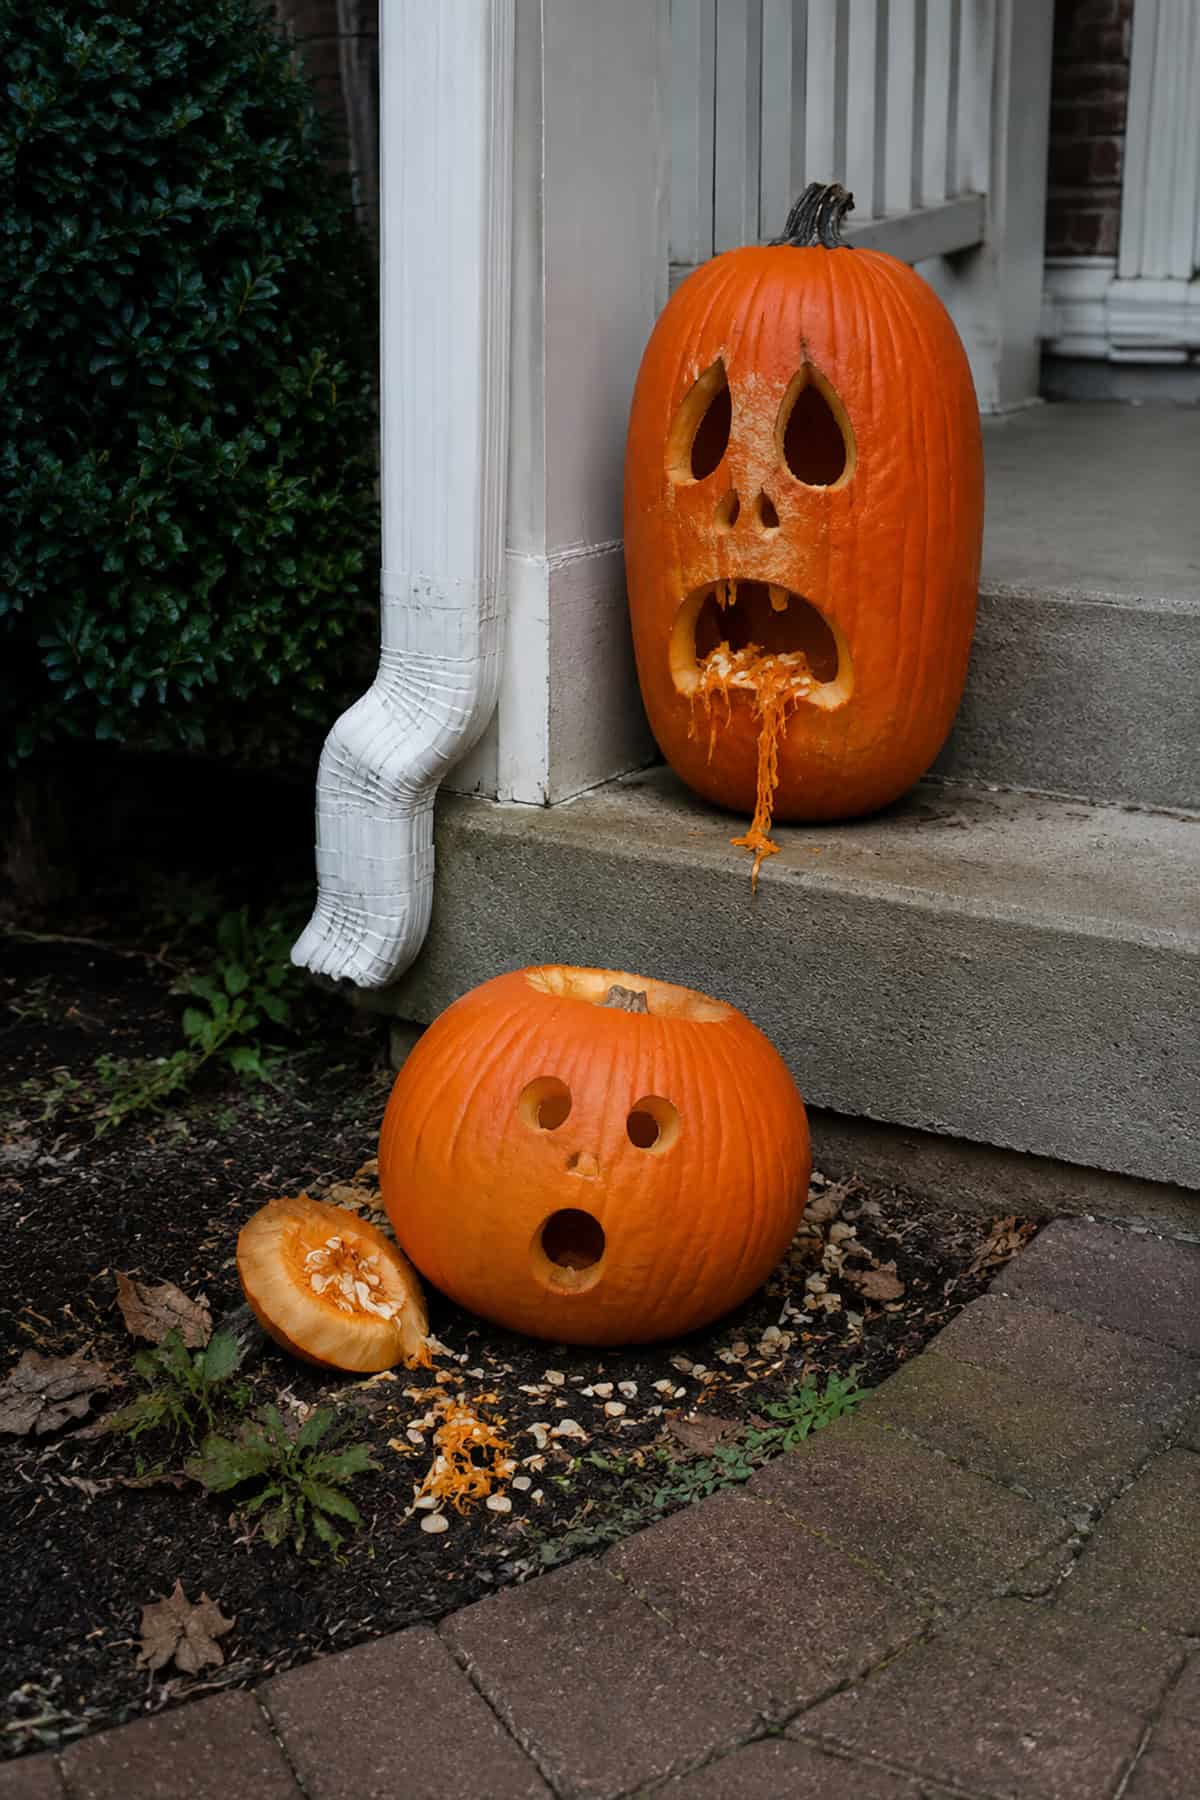
Pumpkin pulp already looks disgusting, so make it part of the face. Carve a long skull with hollow eyes and a wide mouth, then pull strands of pulp through the lower opening.
A second pumpkin below could react with a shocked face or catch the mess. Leave several seeds mixed into the strands for a grosser result. This idea uses the scraps that would otherwise go straight into the bowl.
Many-Eyed Monster
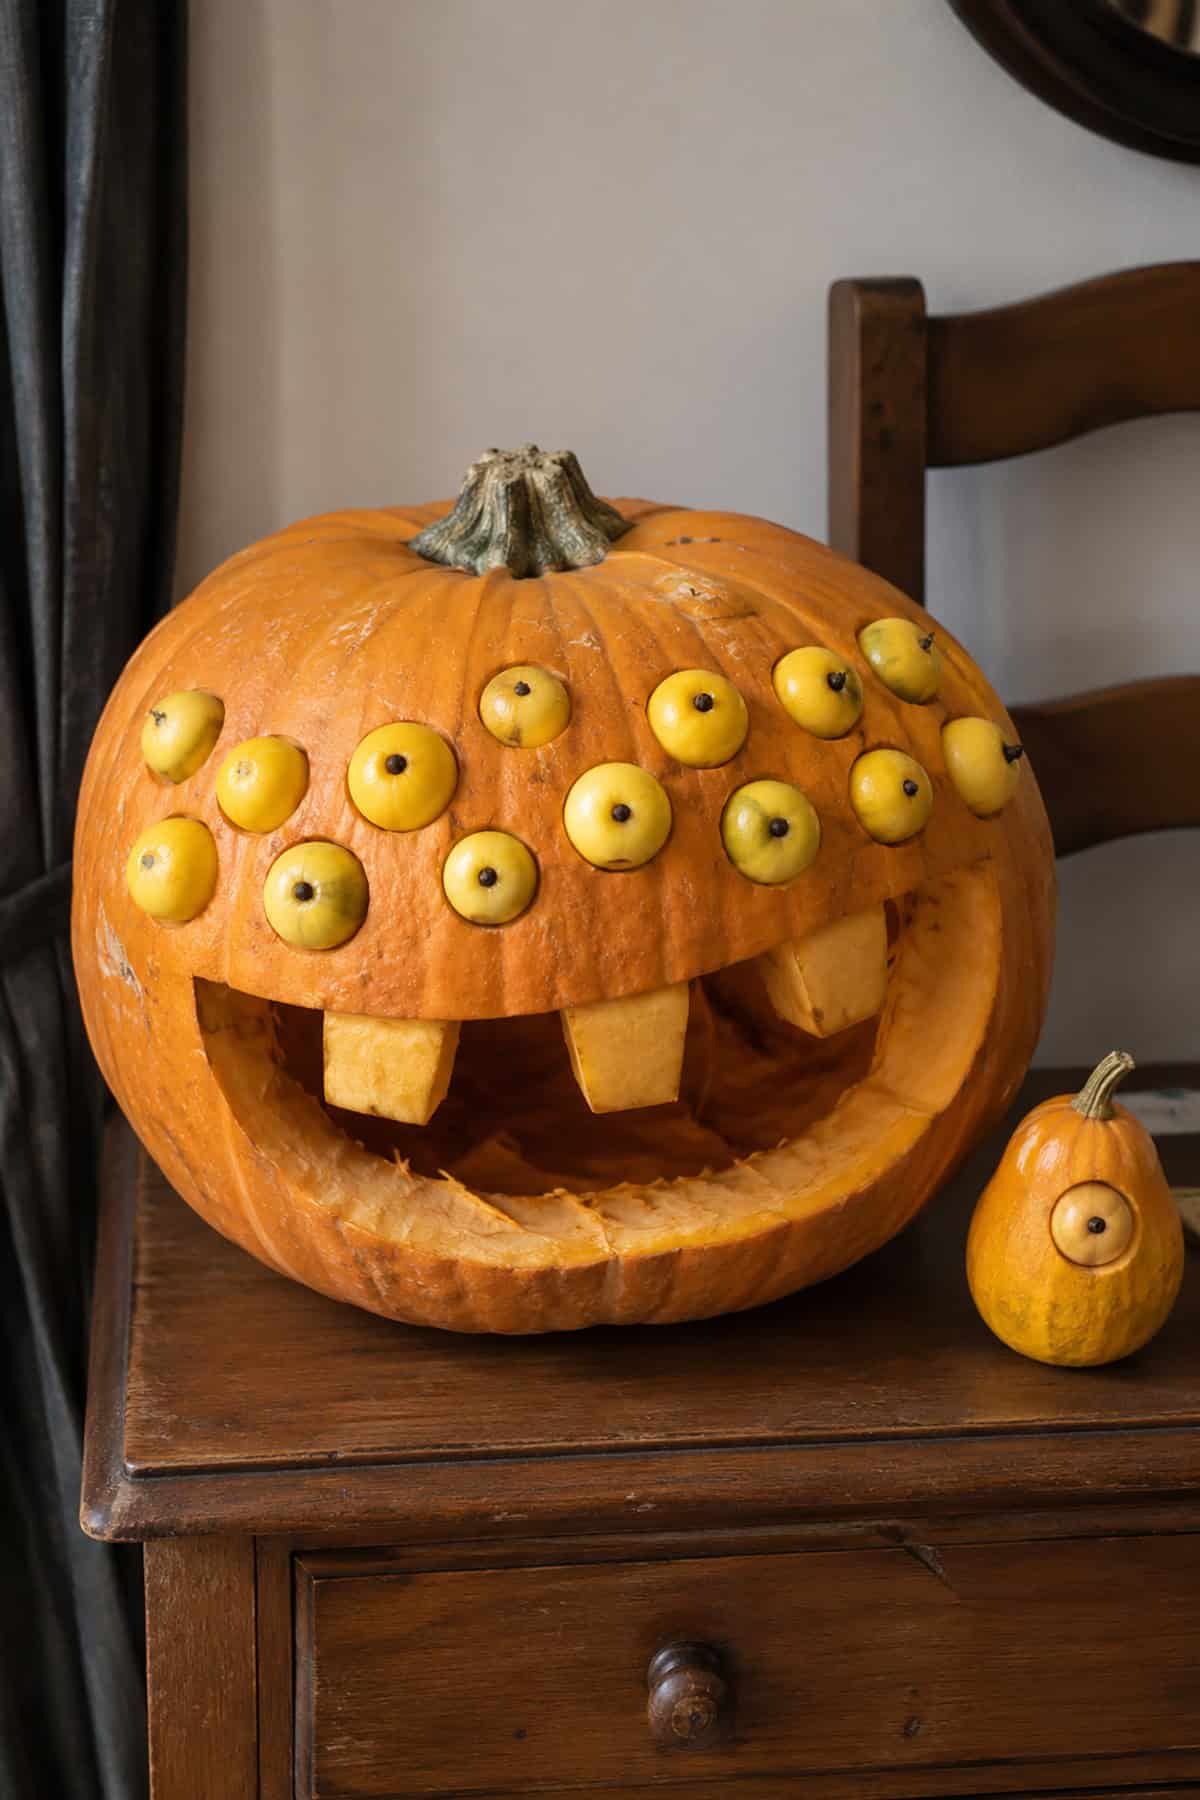
Cover the upper half of a pumpkin with mismatched eyes rather than carving a regular pair. Small yellow crabapples, round gourds, or onion pieces fit into shallow sockets across the rind.
Dark cloves or peppercorns make quick pupils. Scatter the eyes at different heights and angles so they appear to look everywhere at once. A huge mouth with only a few square teeth leaves the crowded eye area as the main feature.
Hinged Surprise Face
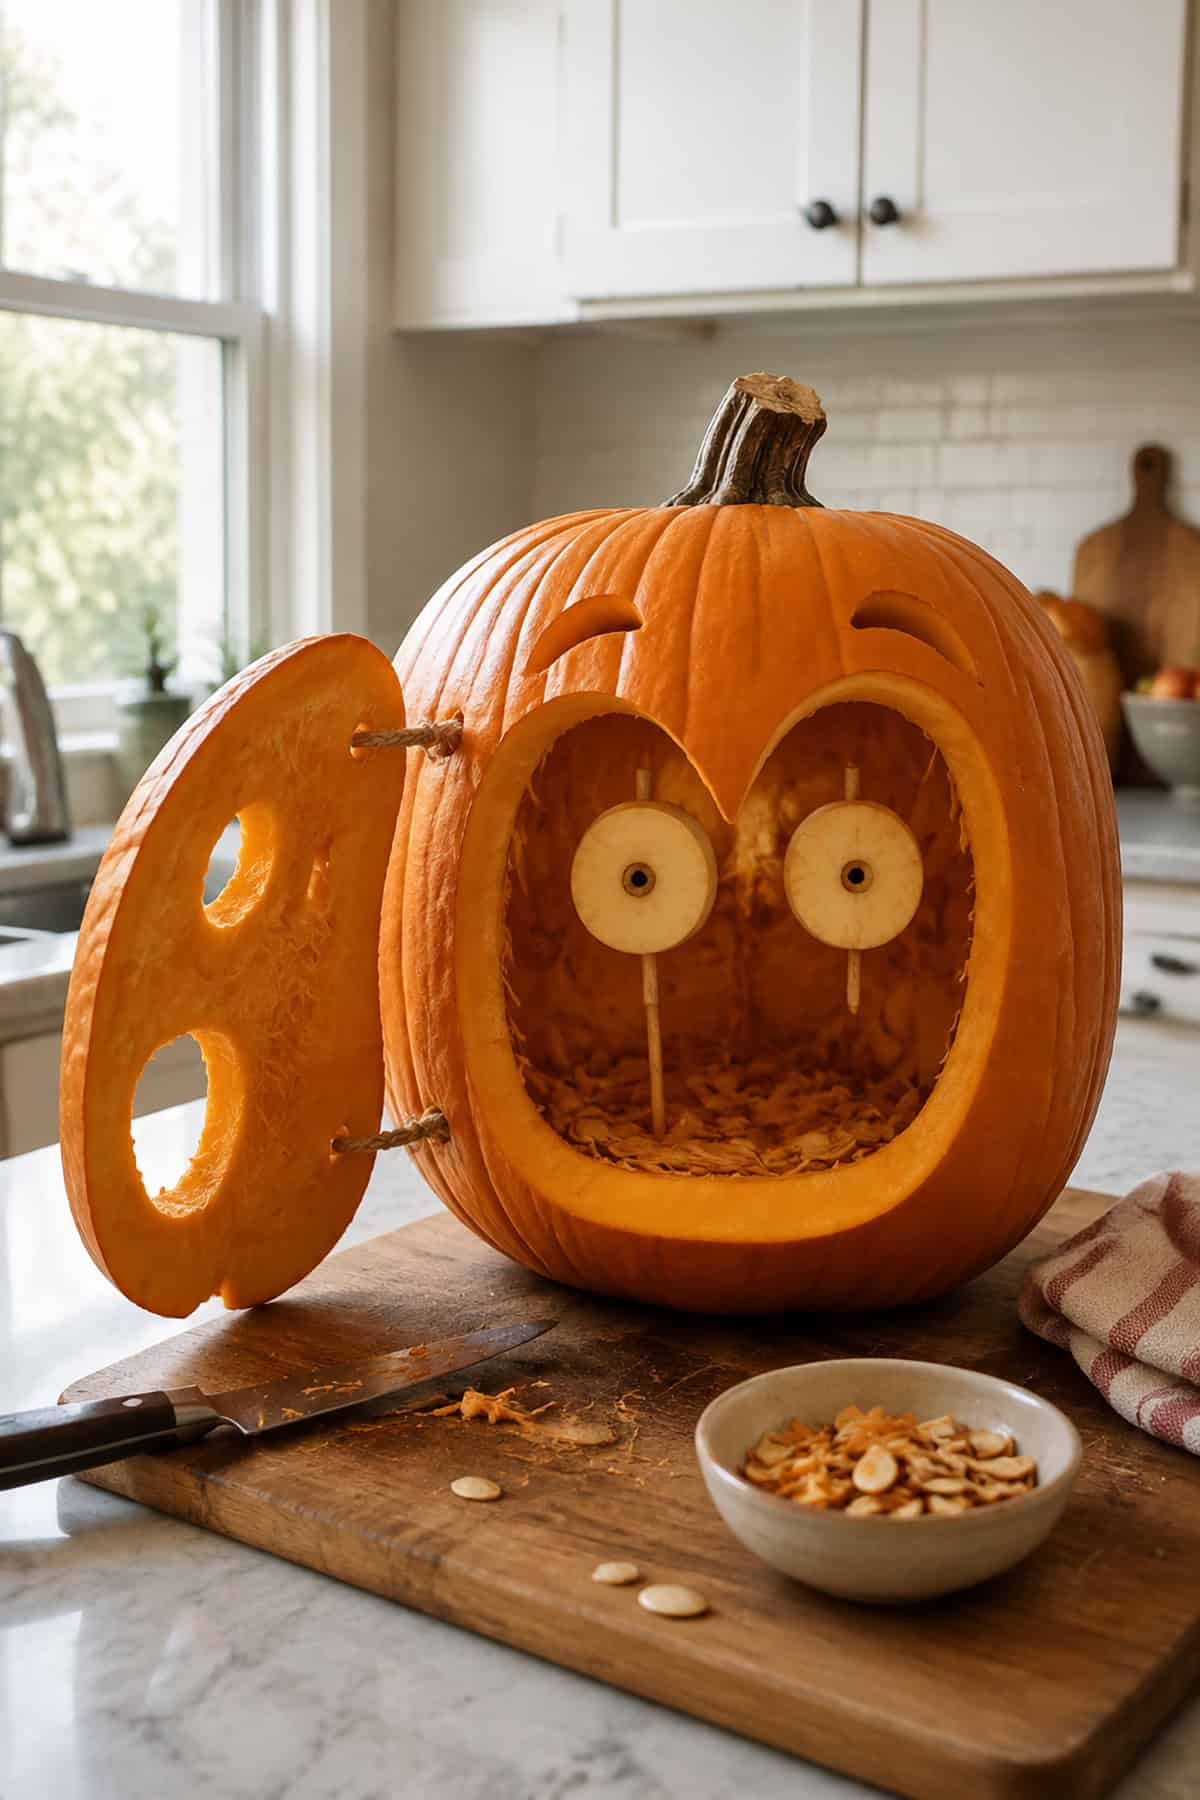
A hinged face adds a hidden second expression inside the pumpkin. Cut a large oval panel from the front and leave one side attached with sturdy wooden skewers or small craft hinges.
Carve simple eye holes into the panel, then place two pale eyeballs deeper inside the hollow pumpkin. Thin sticks hold the eyes upright. Closed, the panel resembles a face; open, it reveals the wide-eyed surprise behind it.
Heart-Eyed Pumpkin
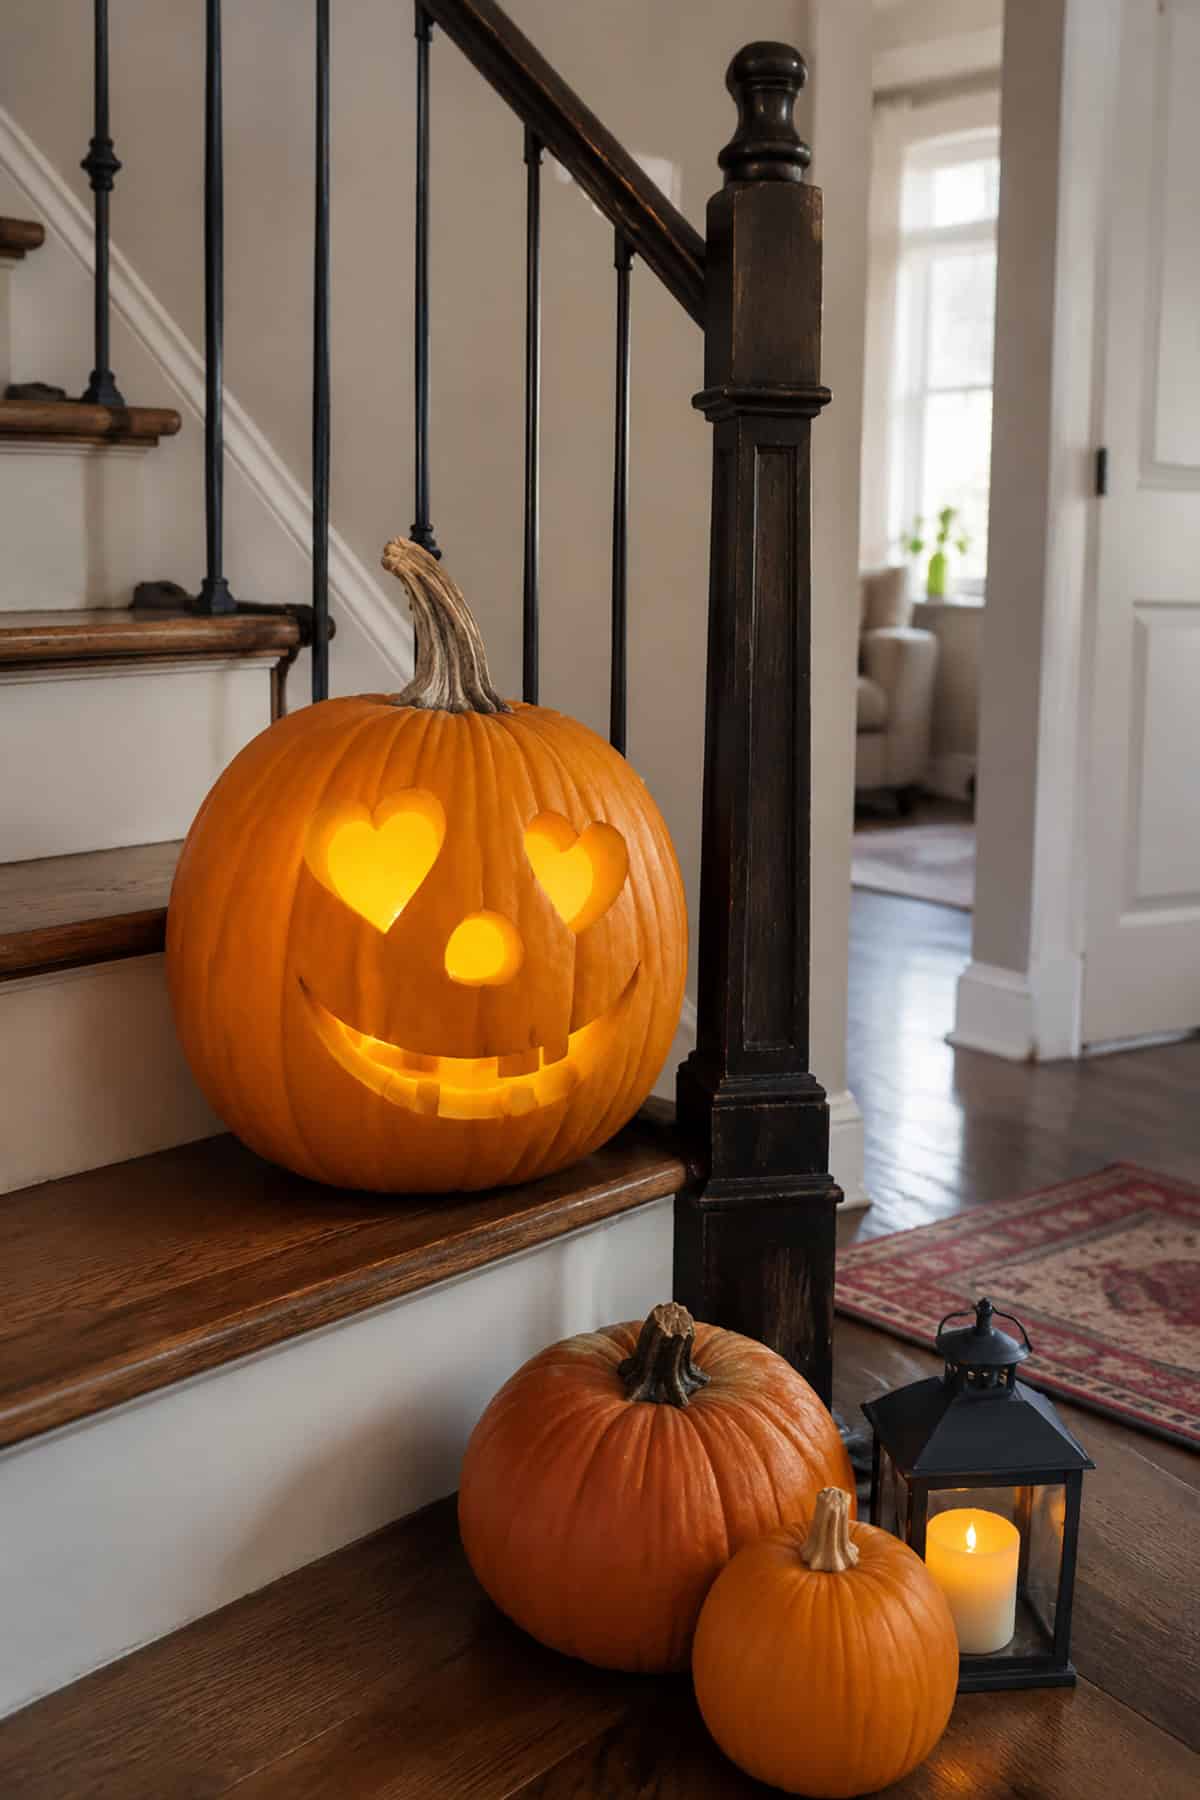
Heart eyes put a cheerful spin on the classic jack-o’-lantern. Use two different heart sizes for a less rigid face, then pair them with a small round nose and an easy curved smile.
A few square teeth along the mouth add humor and stop the design from looking too sweet. Thin cuts around each heart produce clean points. This simple pattern also fits smaller pumpkins and beginner carving sessions.
Googly-Eyed Monster
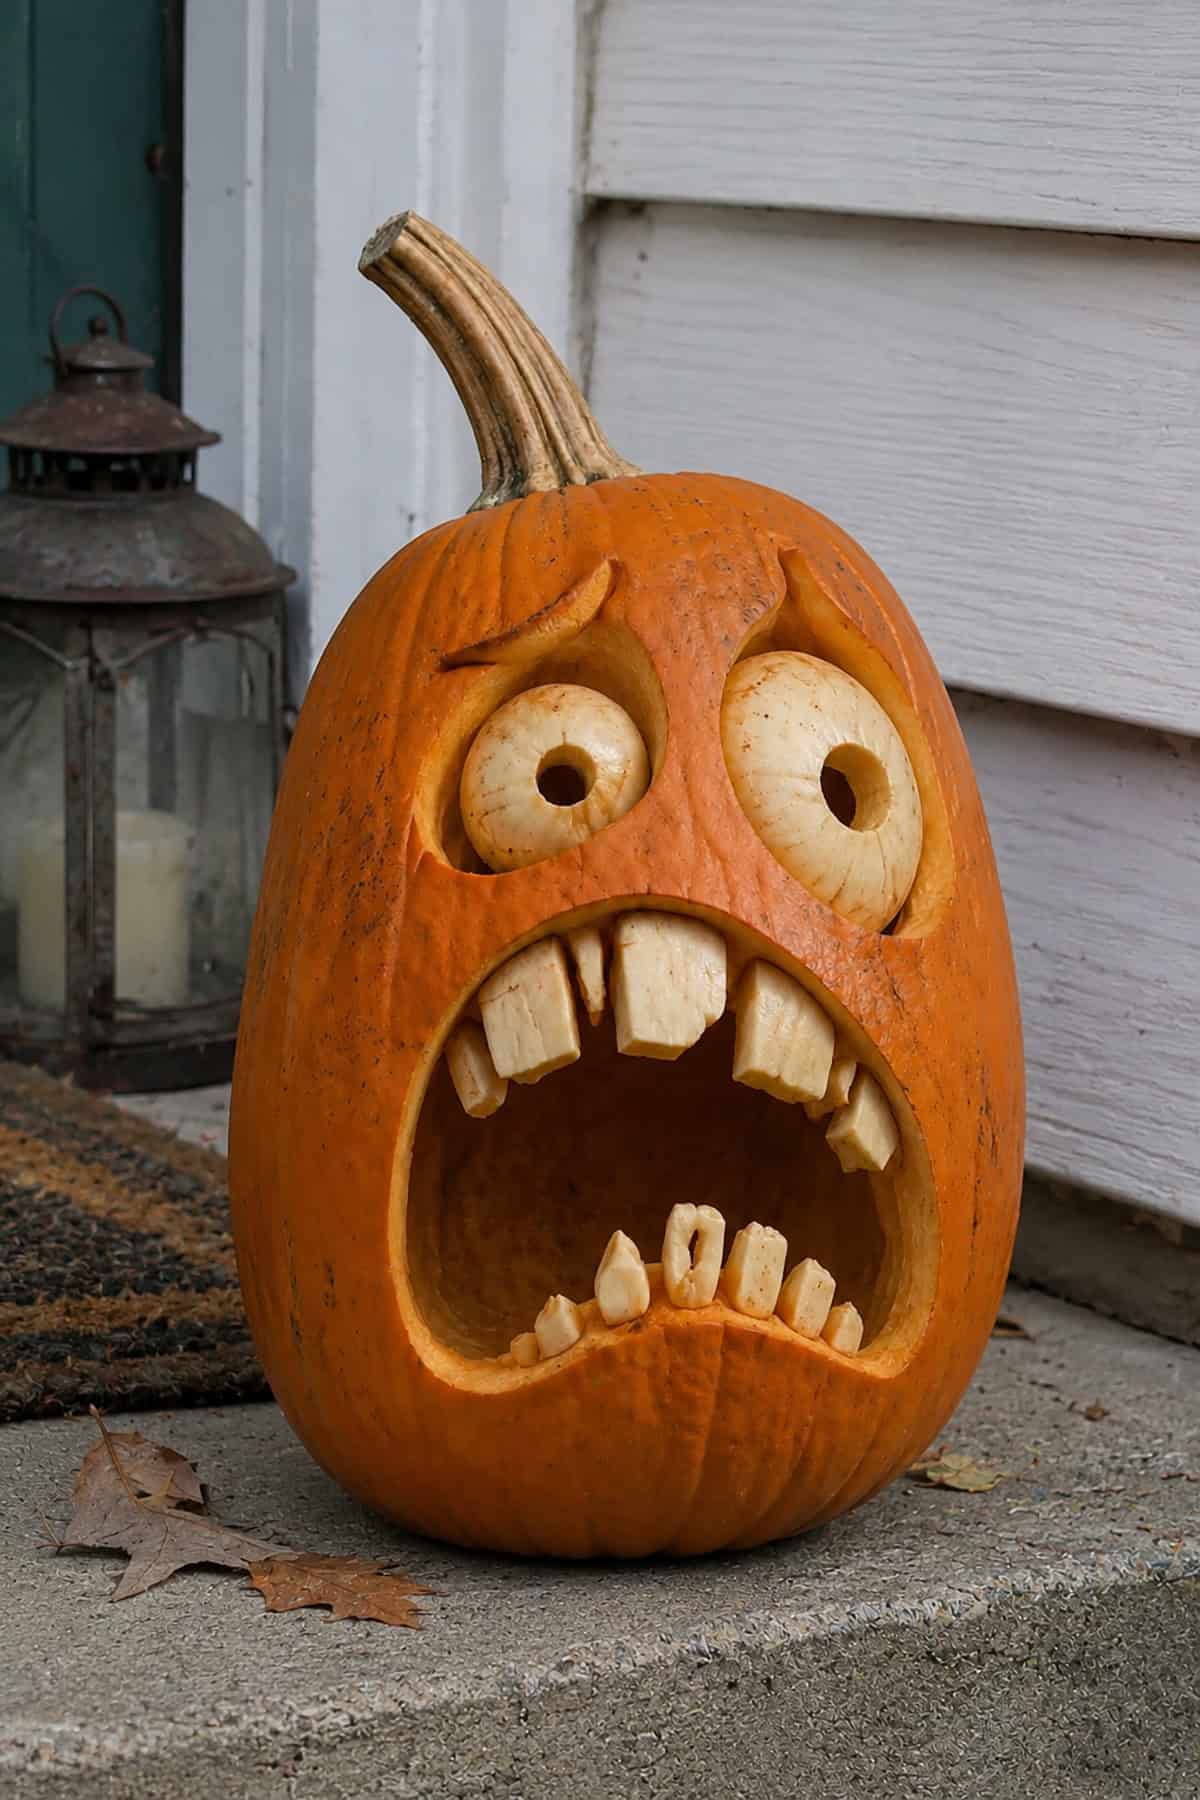
Big pale eyeballs and bad teeth make a monster look ridiculous rather than frightening. Cut deep sockets at different heights, then fit small white gourds or onion halves inside them.
Use narrow holes as pupils and point each eye in a separate direction. The mouth should occupy most of the lower half. Fill it with chunky teeth in random shapes, with gaps between them and a few tiny fangs near the corners.
Long-Tongued Pumpkin
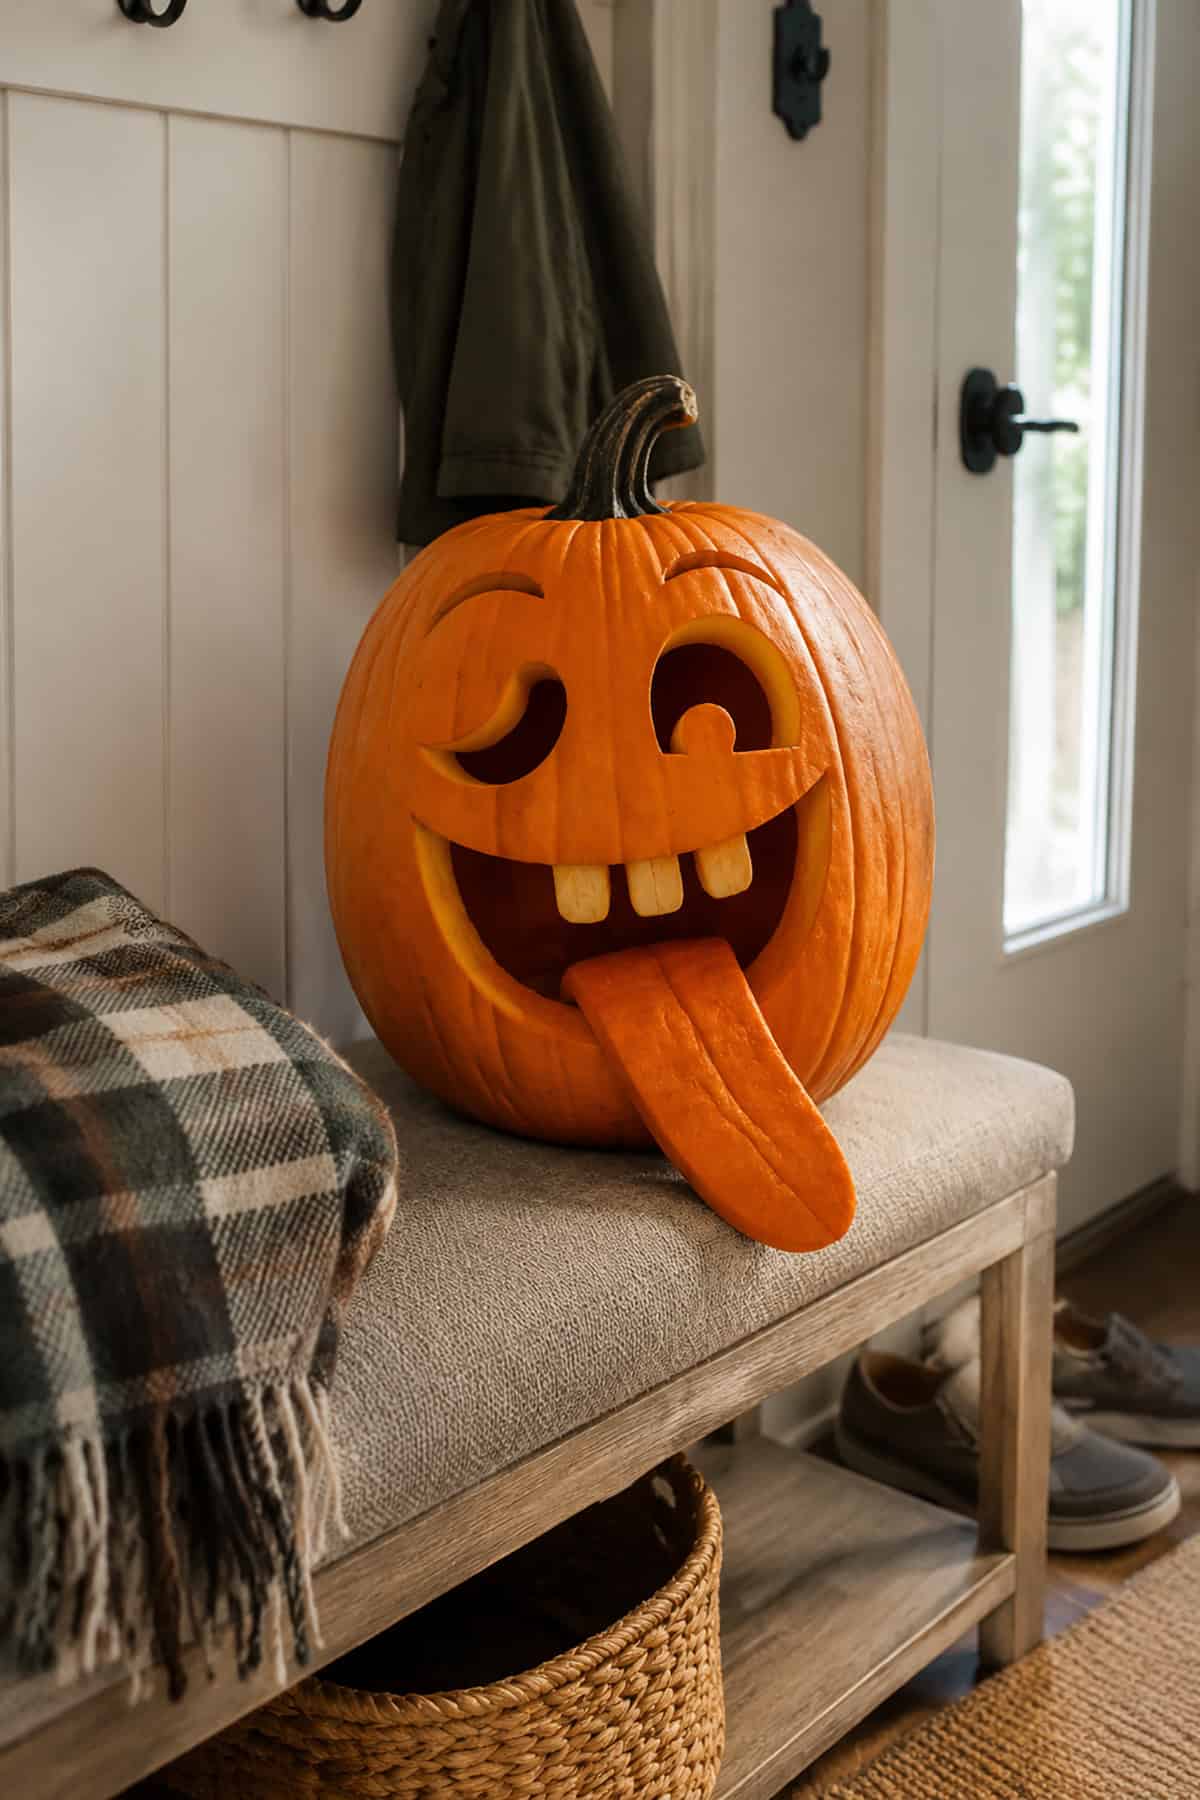
A long tongue pushes a basic goofy face much further. Carve one eye nearly closed, leave the other wide, and add raised brows that lean in opposite directions.
Cut a broad smile with three or four square teeth along the top. A long strip from another pumpkin forms the tongue and rests against the lower lip. Score a shallow line down its center so it resembles two rounded halves.
Glowing Cat Face
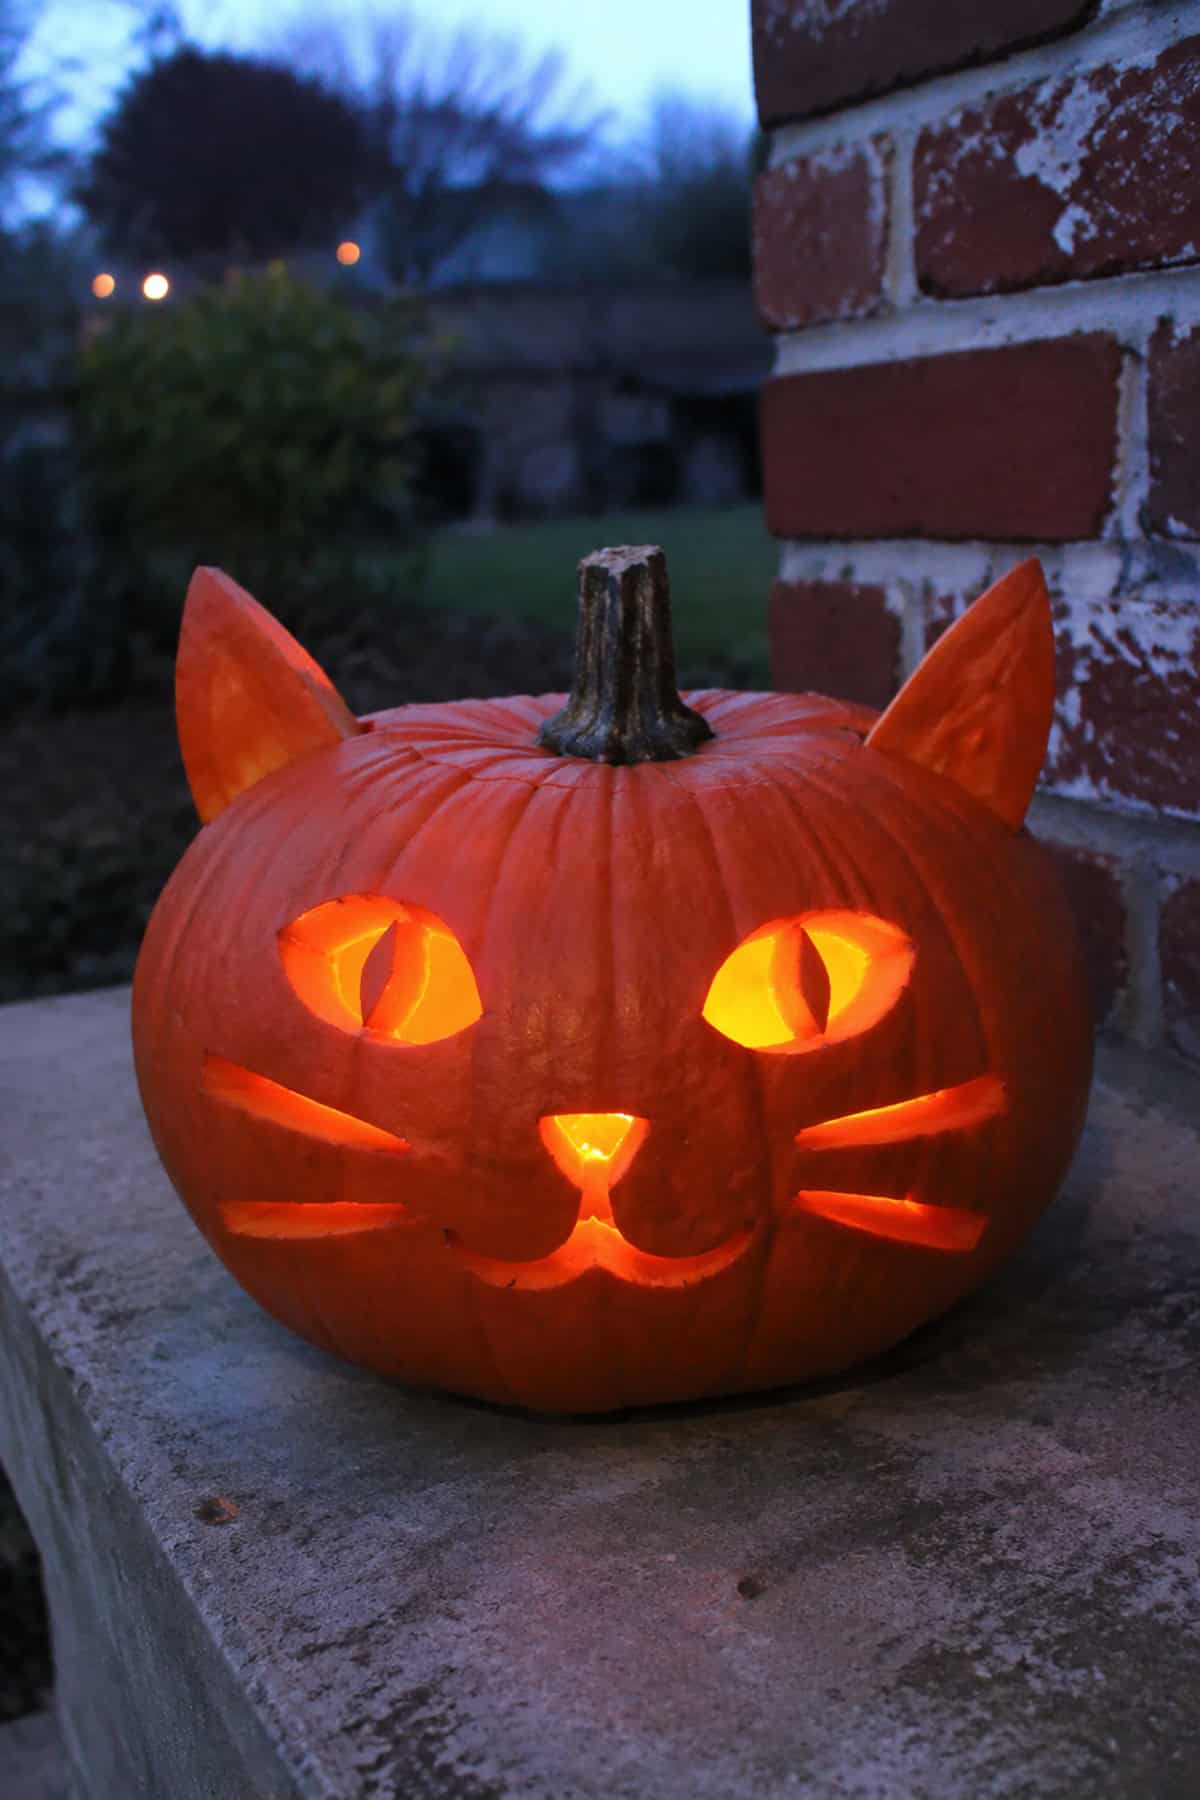
Cat eyes need narrow pupils and pointed corners to look sharp after dark. Cut the outer eye shapes first, then leave slim vertical sections of rind inside each opening as pupils.
Two triangular pieces from the lid form raised ears near the stem. Add a small nose, curved mouth, and three whisker cuts on each cheek. Wider whisker openings allow more light through and frame the face clearly.
Bat Silhouette Pumpkins
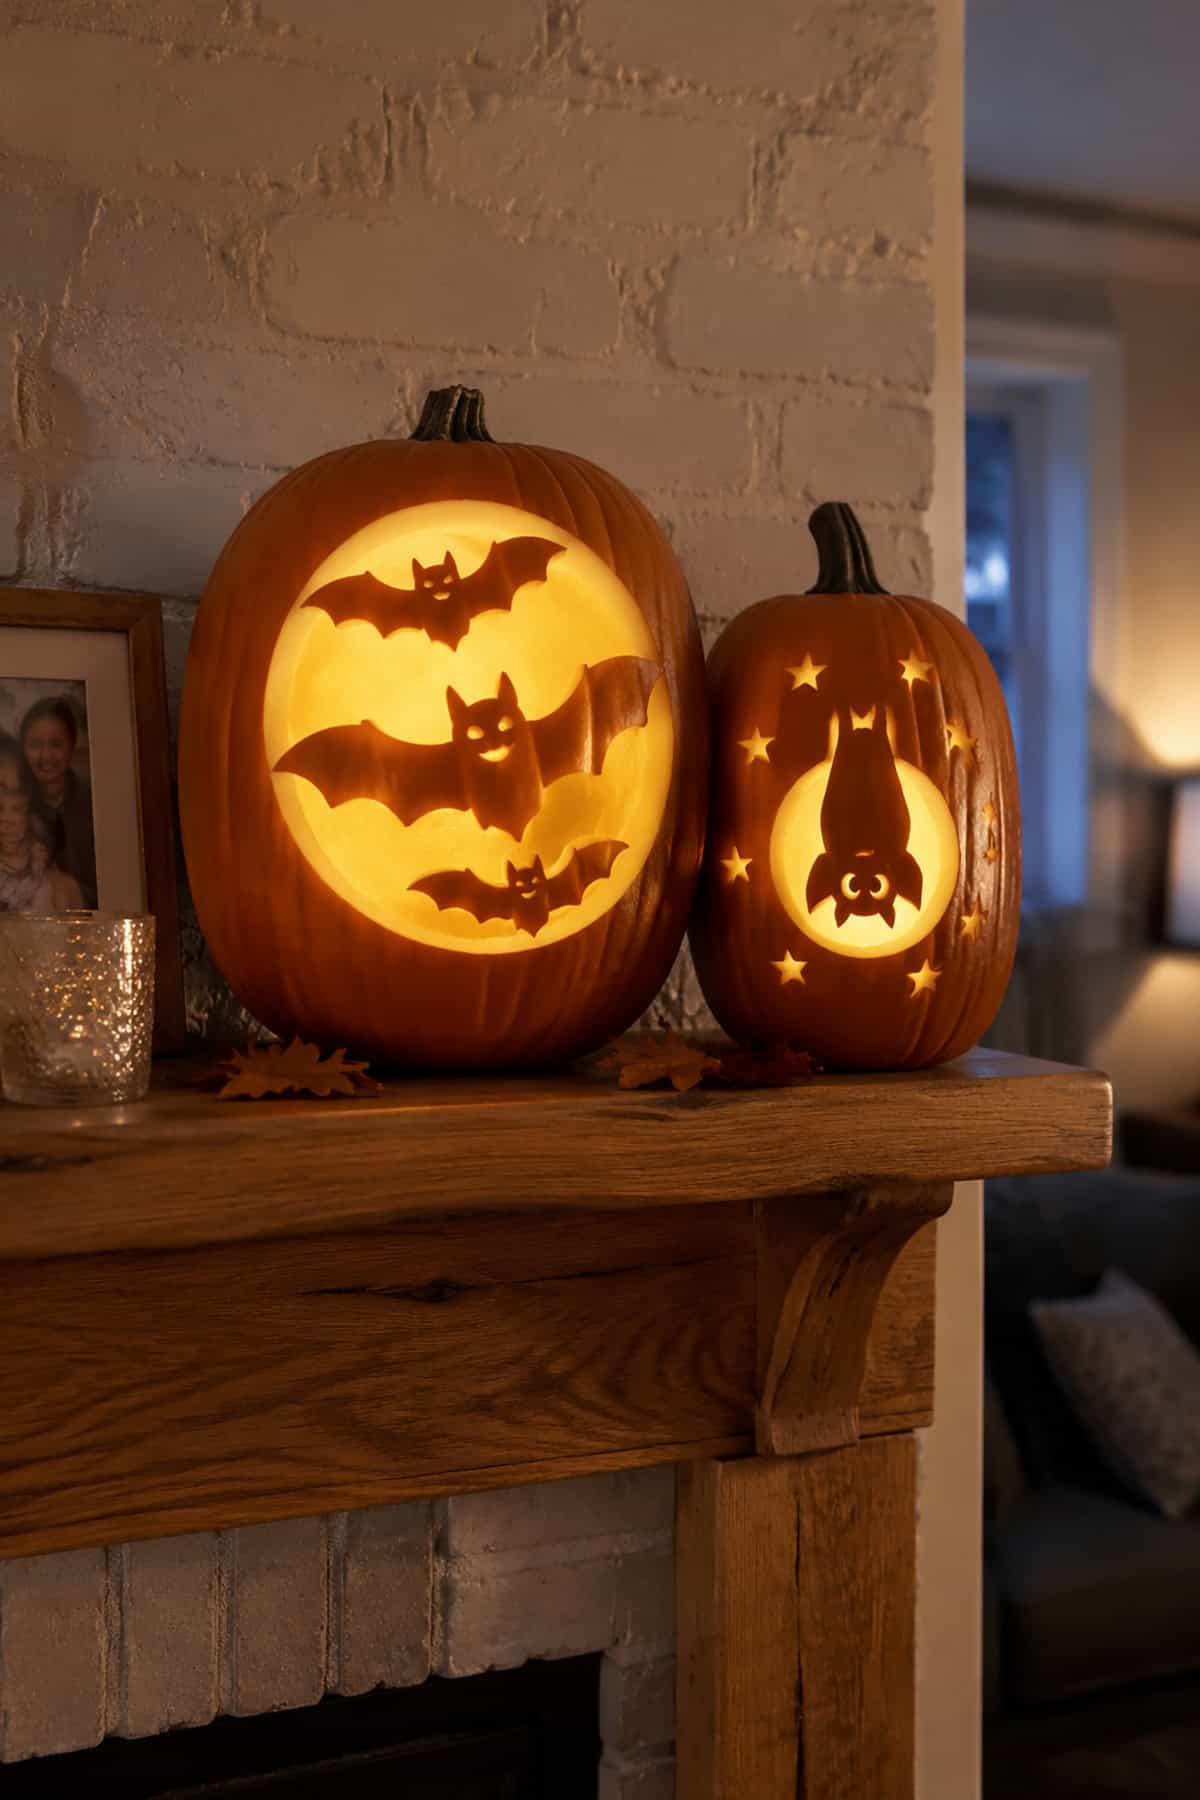
Use two pumpkins to show bats in opposite ways. On the first, carve a large moon and leave solid bat silhouettes across the open circle.
The second design places one upside-down bat inside a smaller moon, with star cutouts around it. Choose simple wing shapes with thick sections between each point, since narrow tips break easily. Different pumpkin heights help separate the two patterns as a matching set.
Glowing “BOO” Pumpkins
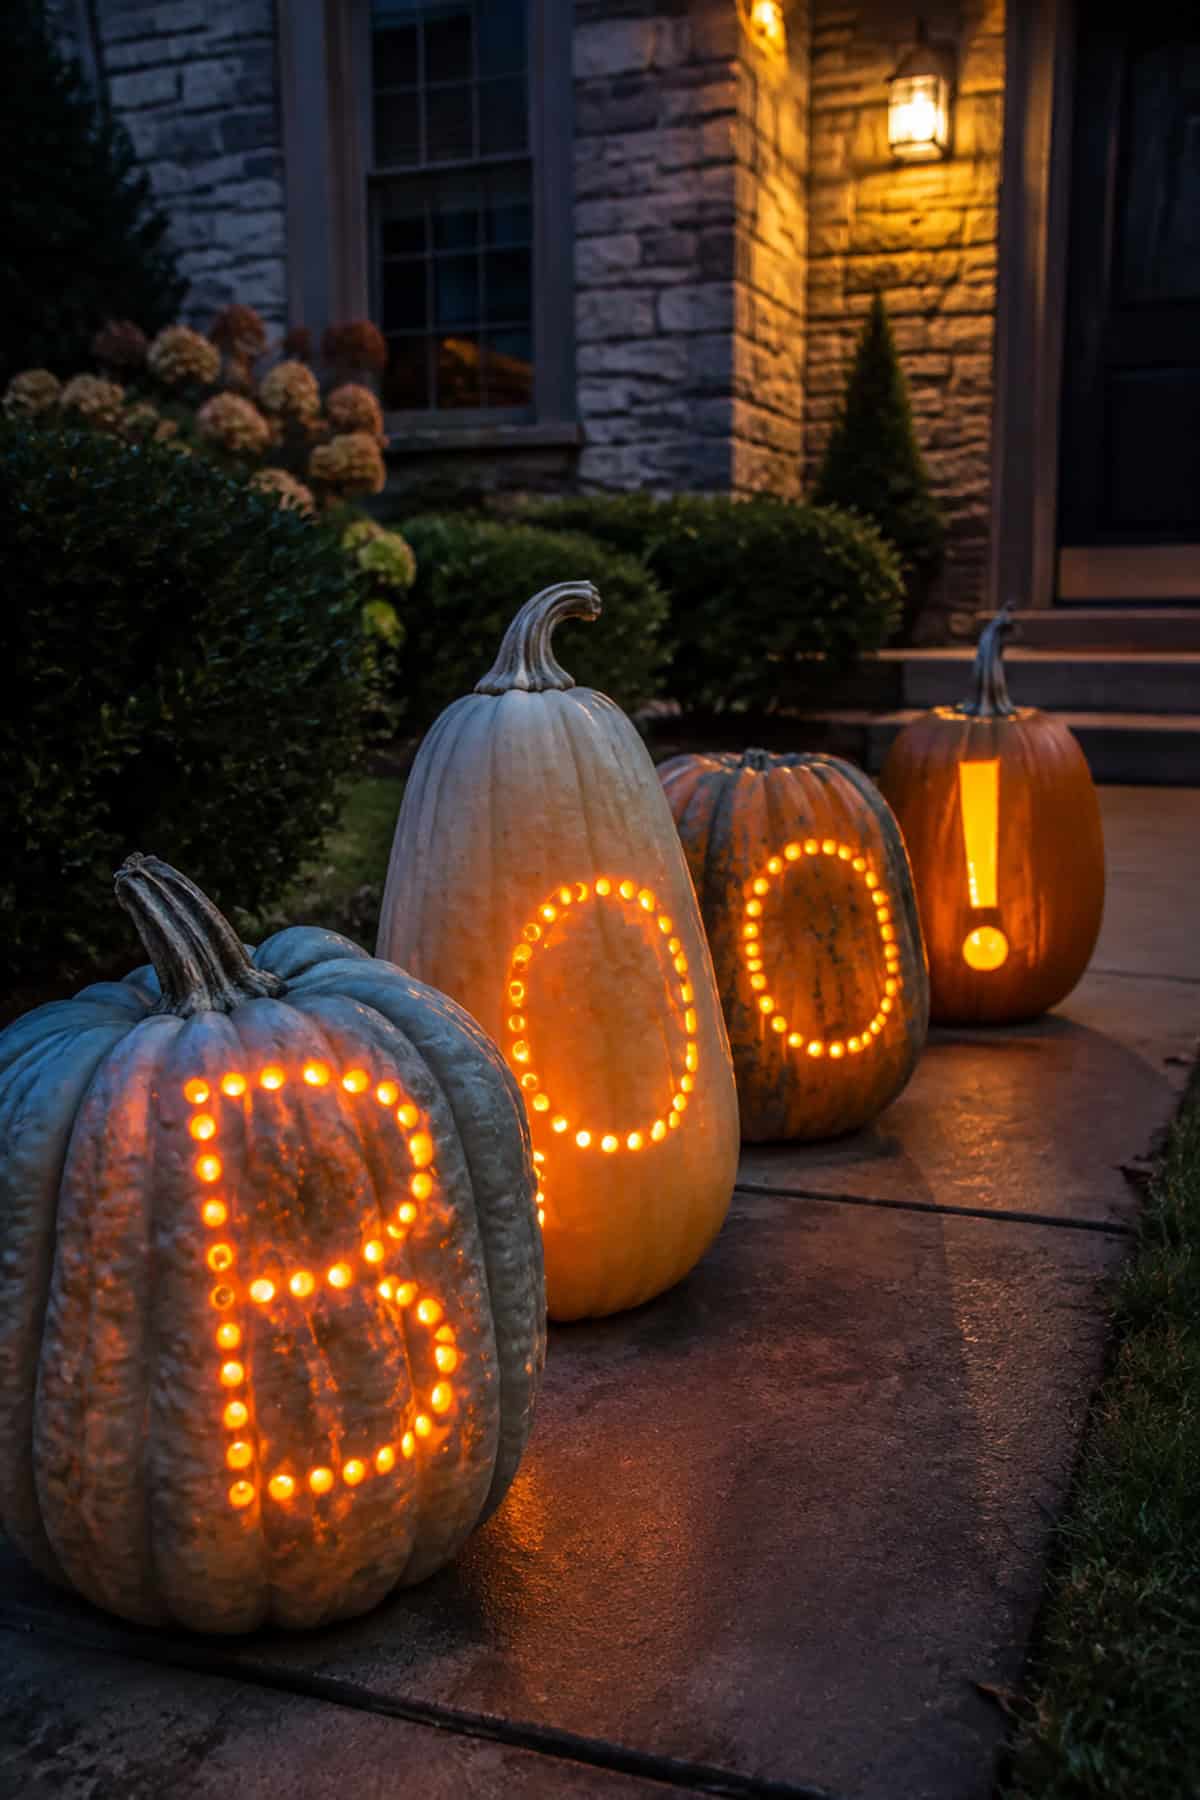
Spell out a short Halloween word across separate pumpkins for a bold group project. Draw one large letter on each rind, then mark the outline with evenly spaced holes.
A drill bit or metal tube produces clean circles much faster than a knife. Use pumpkins with different colors and shapes while keeping the hole size consistent. Add an exclamation mark on the final pumpkin for a fourth piece and a stronger ending.
Giant Painted Eyeballs
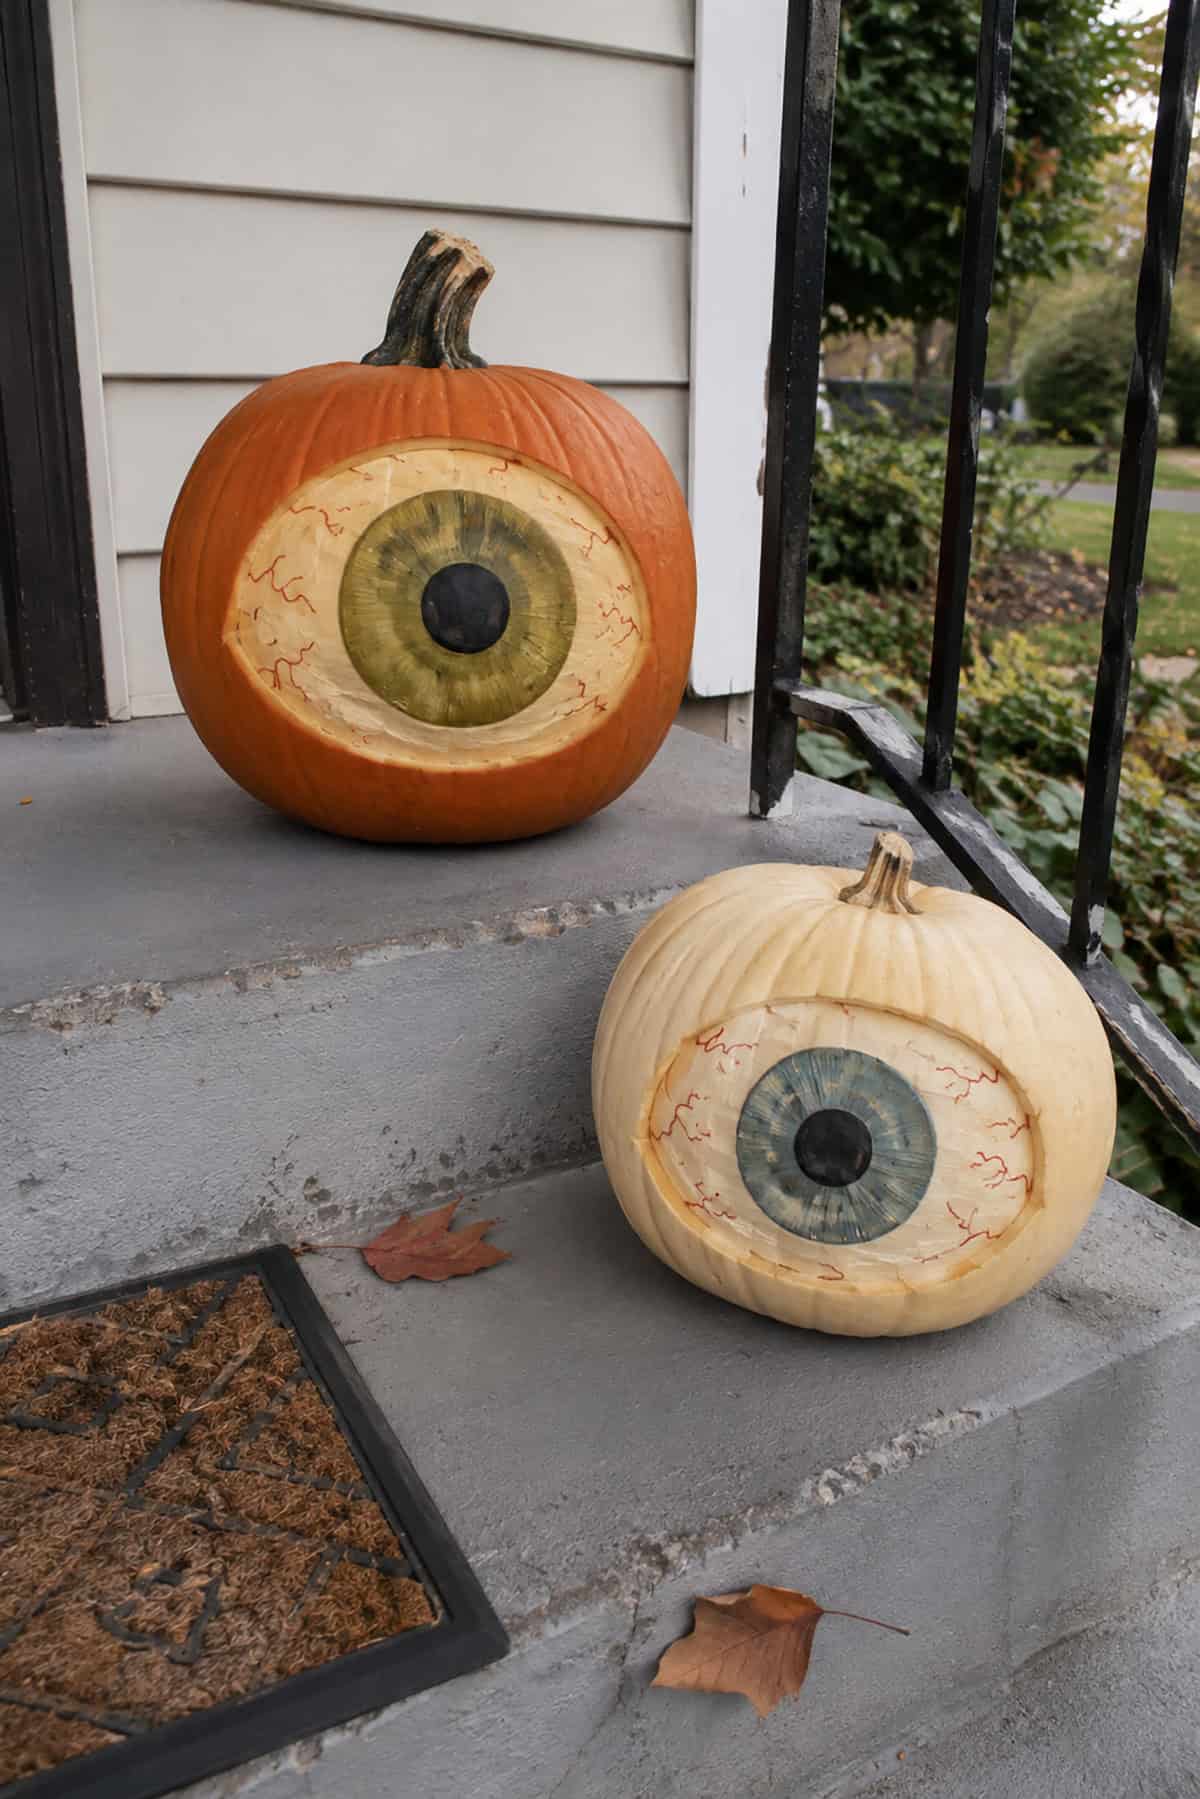
For a creepy design that skips the standard face, carve the entire front of each pumpkin as one giant eye. Remove the rind inside a wide circle, but leave enough flesh to form the pale outer area.
Paint the iris directly onto the shaved surface and place a dark pupil in the center. Thin red veins add a bloodshot detail. Different iris colors help each eyeball look distinct.
Onion-Eyed Goofy Face
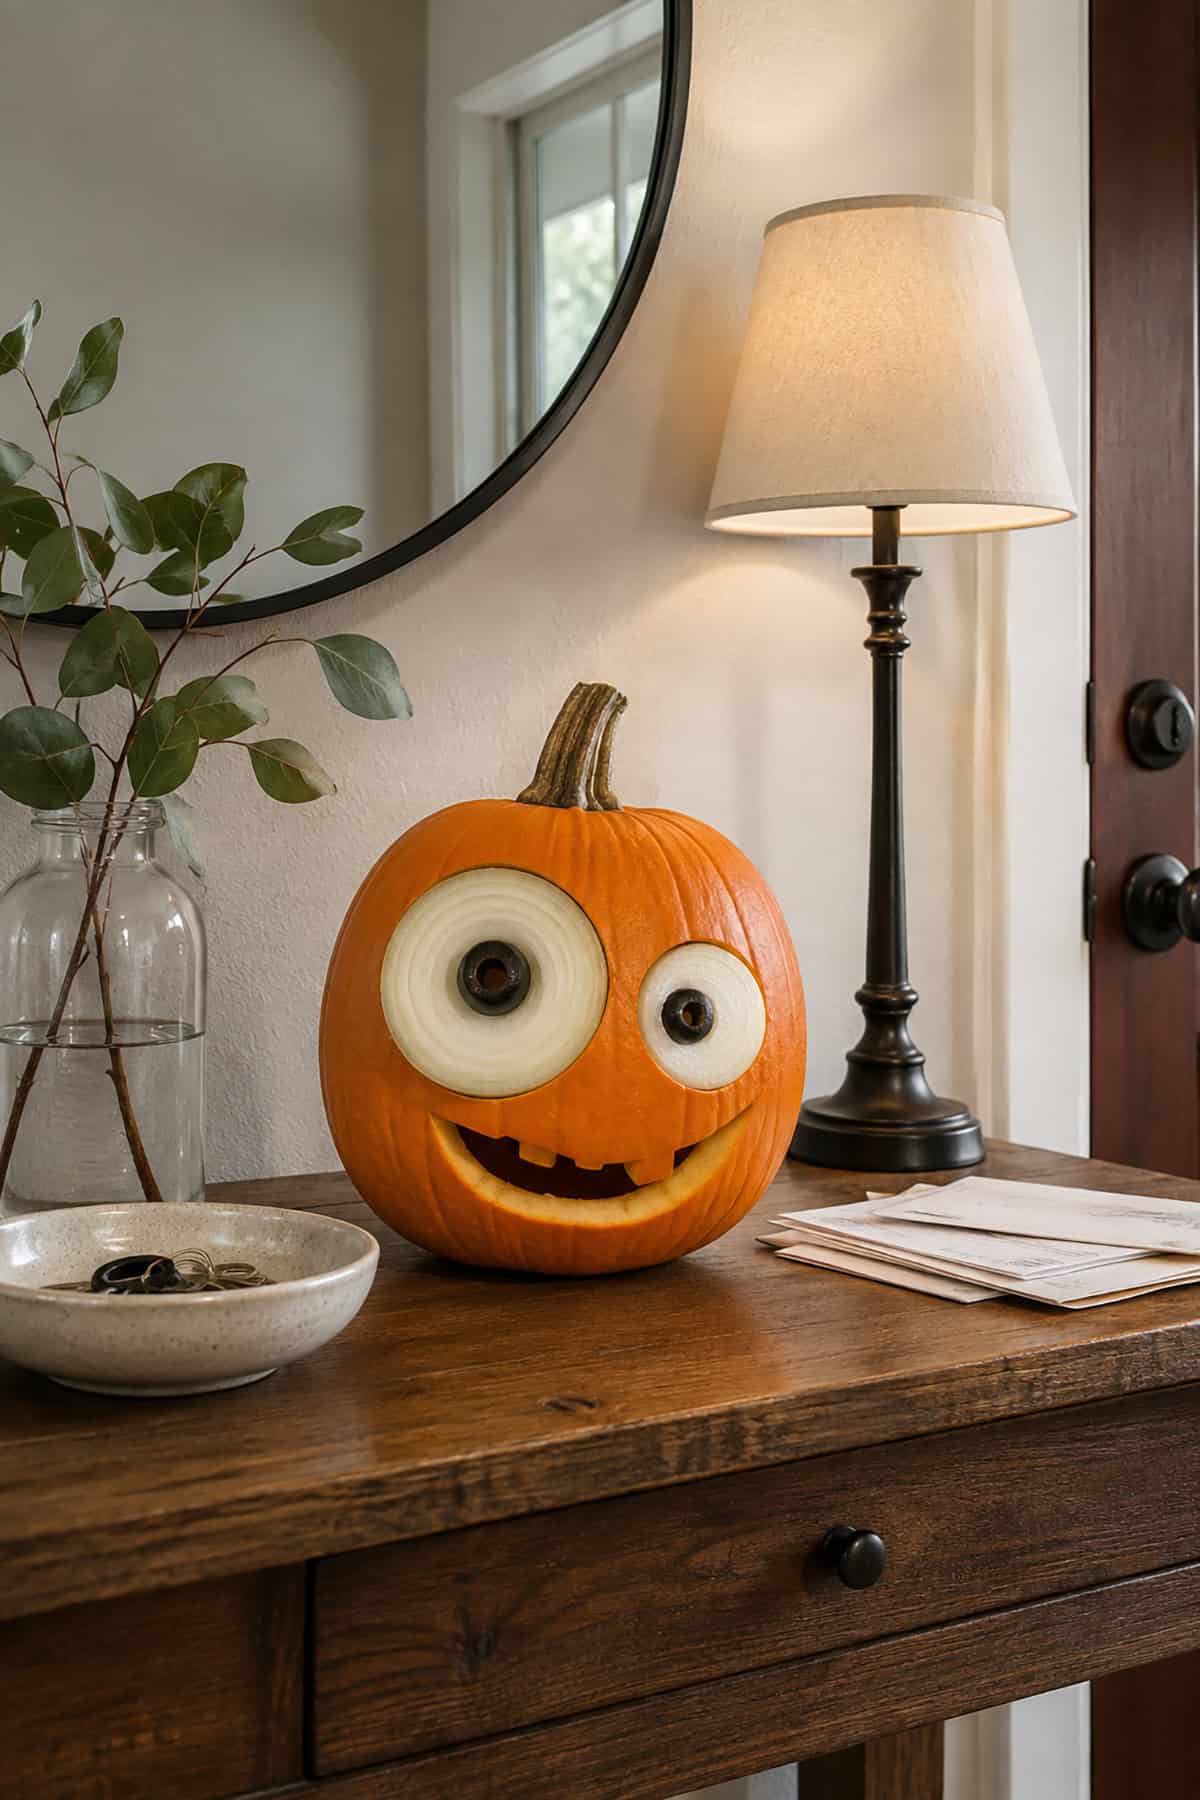
A funny pumpkin face gets much of its expression from mismatched onion eyes. Cut one large socket and one smaller socket, then press thick onion slices into the openings.
Dark olives or round pieces of black rind form the pupils. Set them slightly off-center so the eyes point in different directions. Finish the carving with a low curved smile and a few small teeth spaced across the upper edge.
Bunny Pumpkin
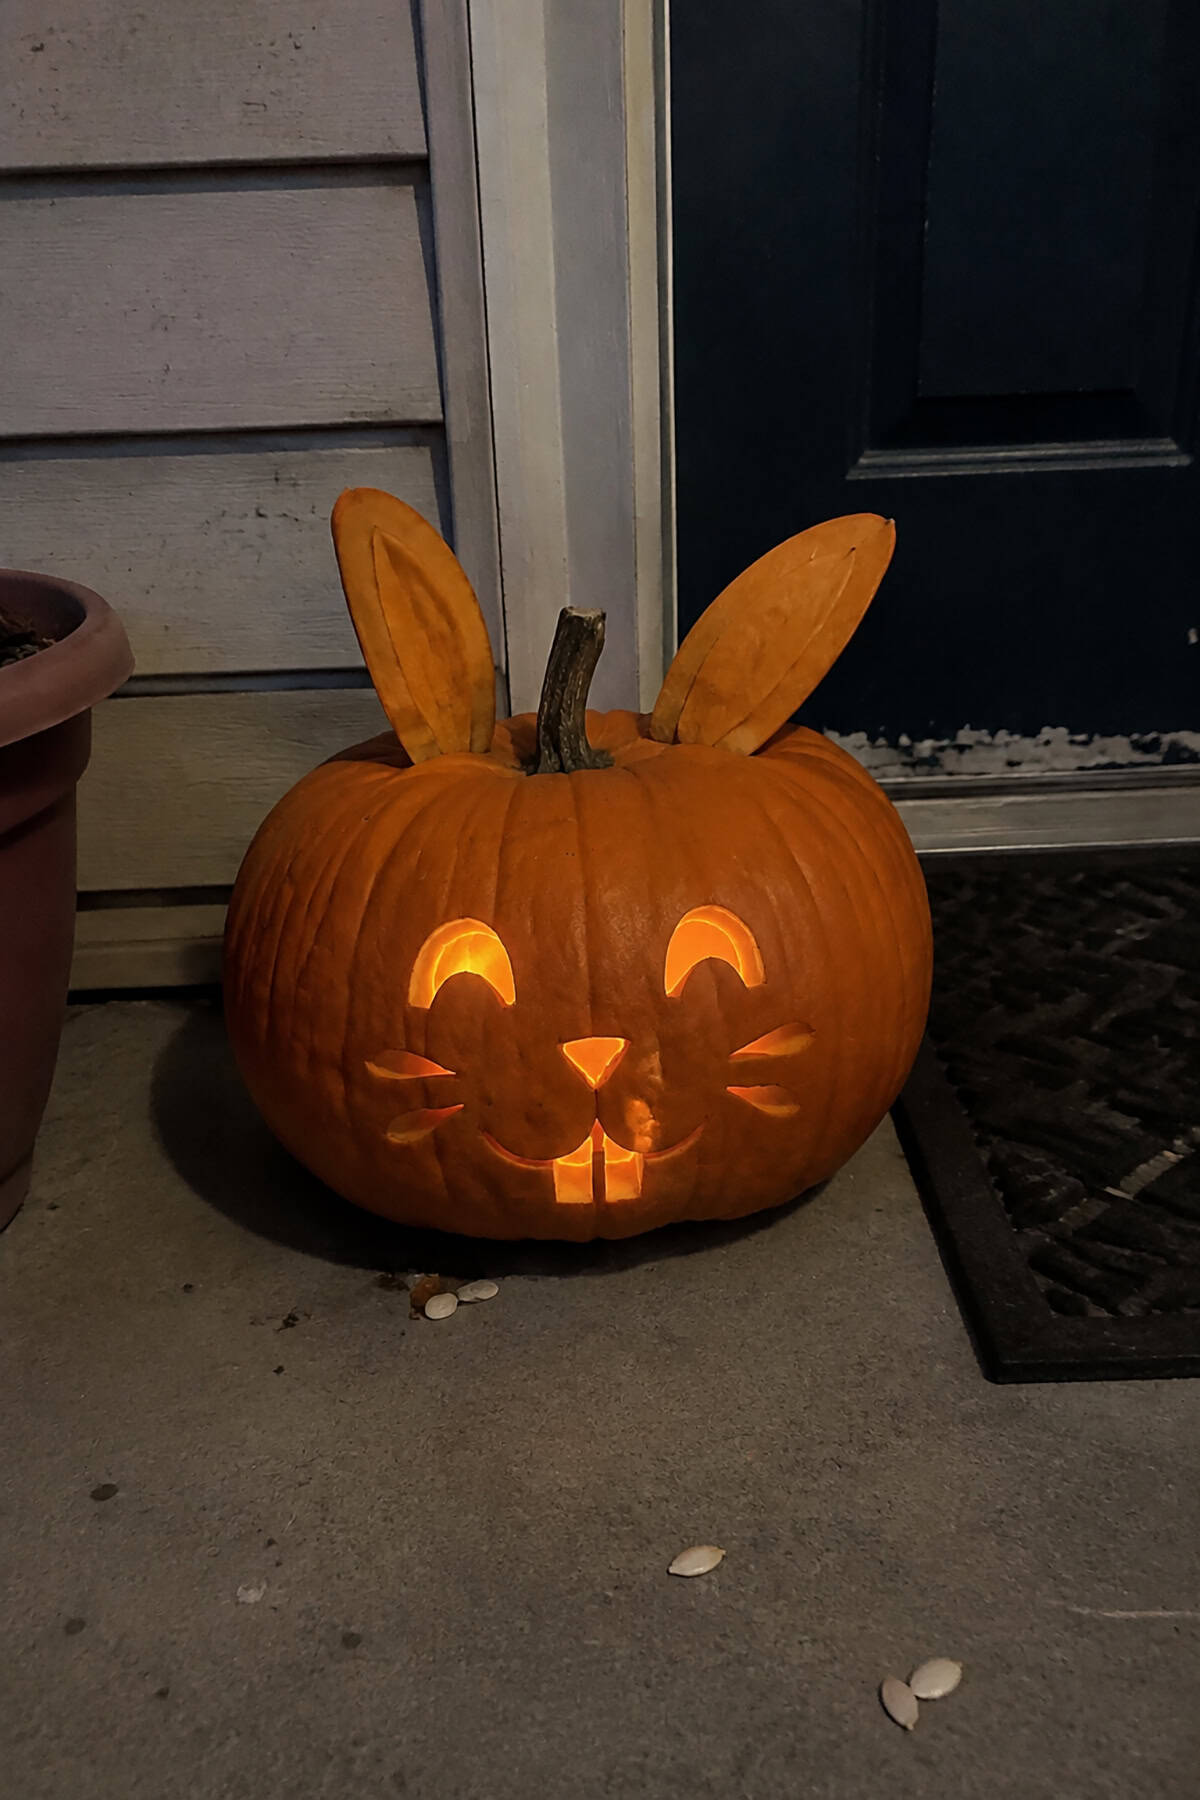
For younger children, a bunny face provides a friendly alternative to monsters and skulls. Carve two curved eyes, a small triangle nose, three whiskers on each cheek, and two large front teeth.
Long ears cut from spare pumpkin rind complete the animal shape. Attach them near the stem with wooden skewers. Shallow inner lines separate the ear centers from their thicker outer borders.
Starry-Eyed Face
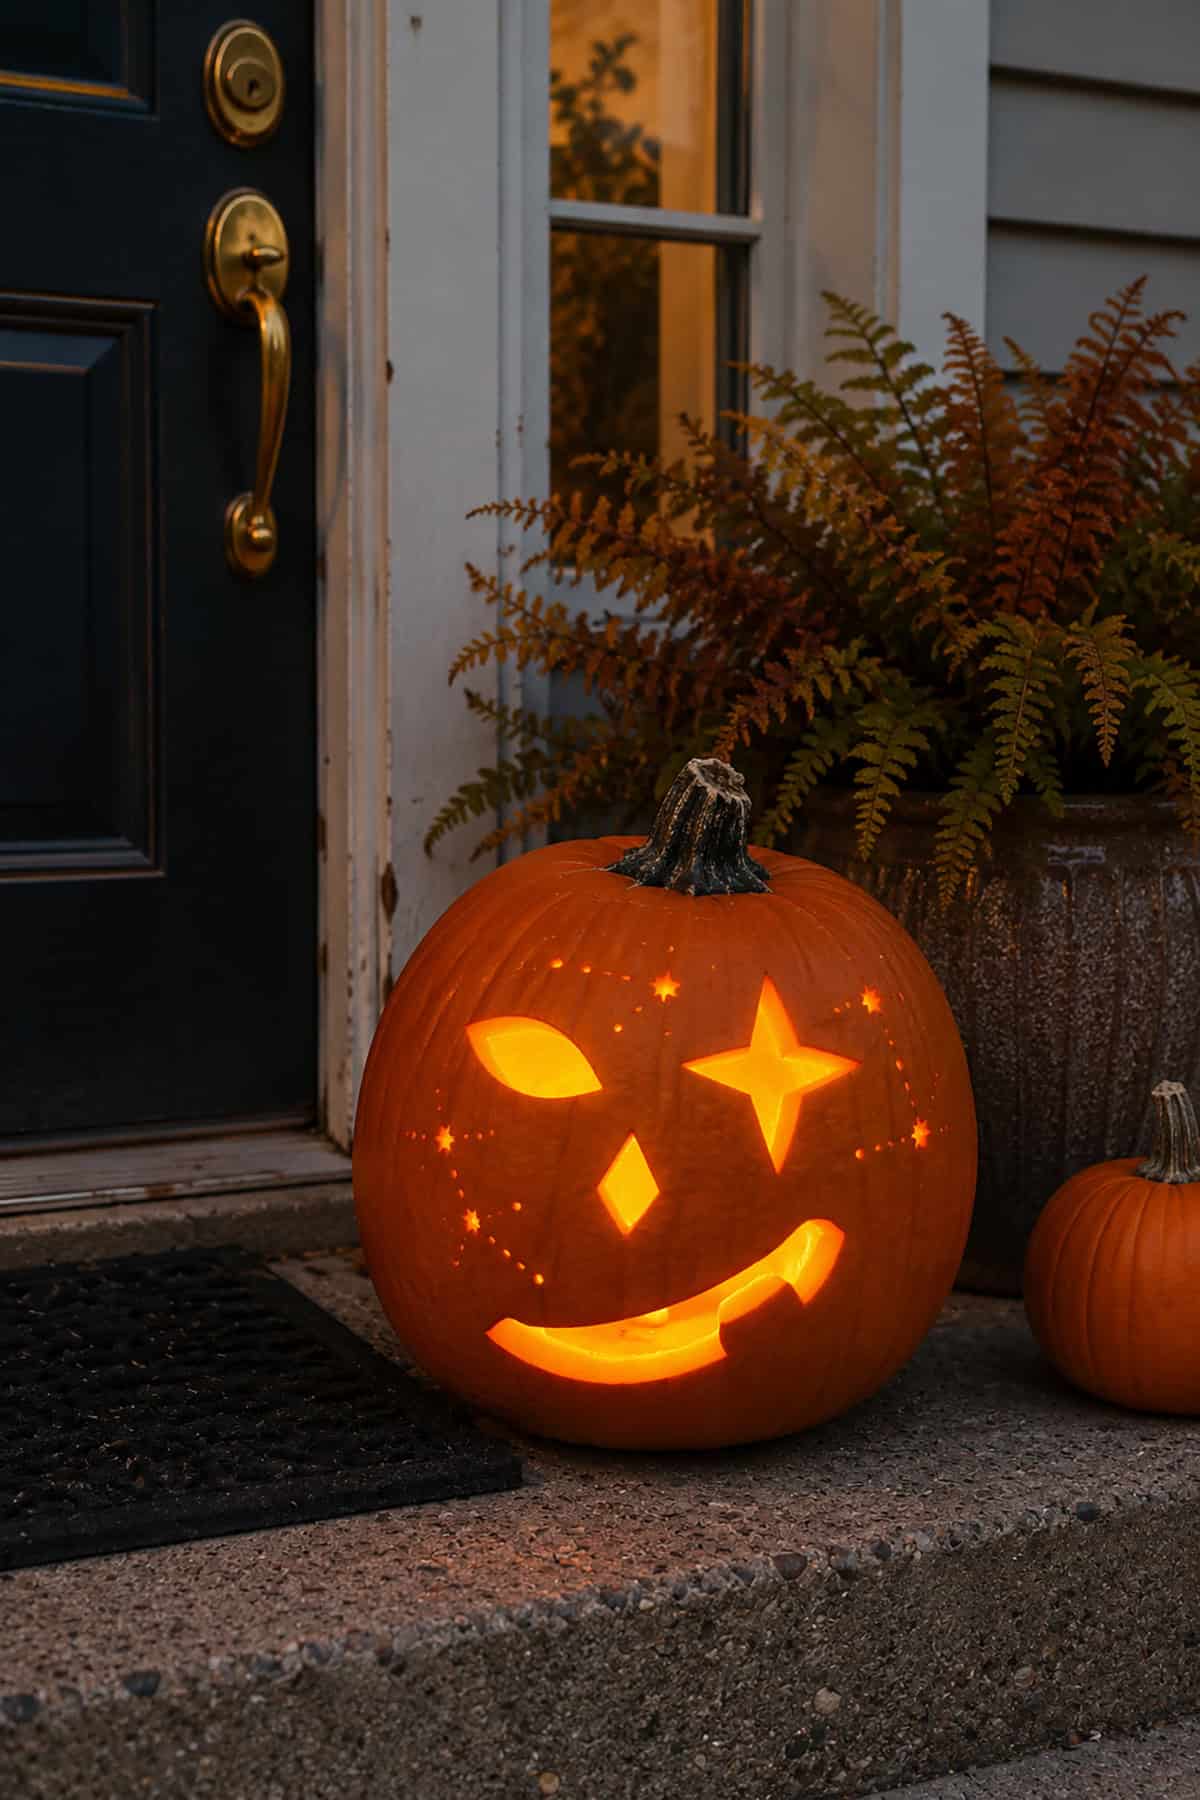
A celestial face lets several simple cutout shapes share one pumpkin. Use a large star for one eye, a curved leaf shape for the other, and a small diamond for the nose.
Surround the face with tiny stars and drilled dots arranged in loose circles. The wide smile should remain plain so the upper details receive more attention. Leave thick borders around the star points to reduce breakage.
Candy-Haired Pumpkin
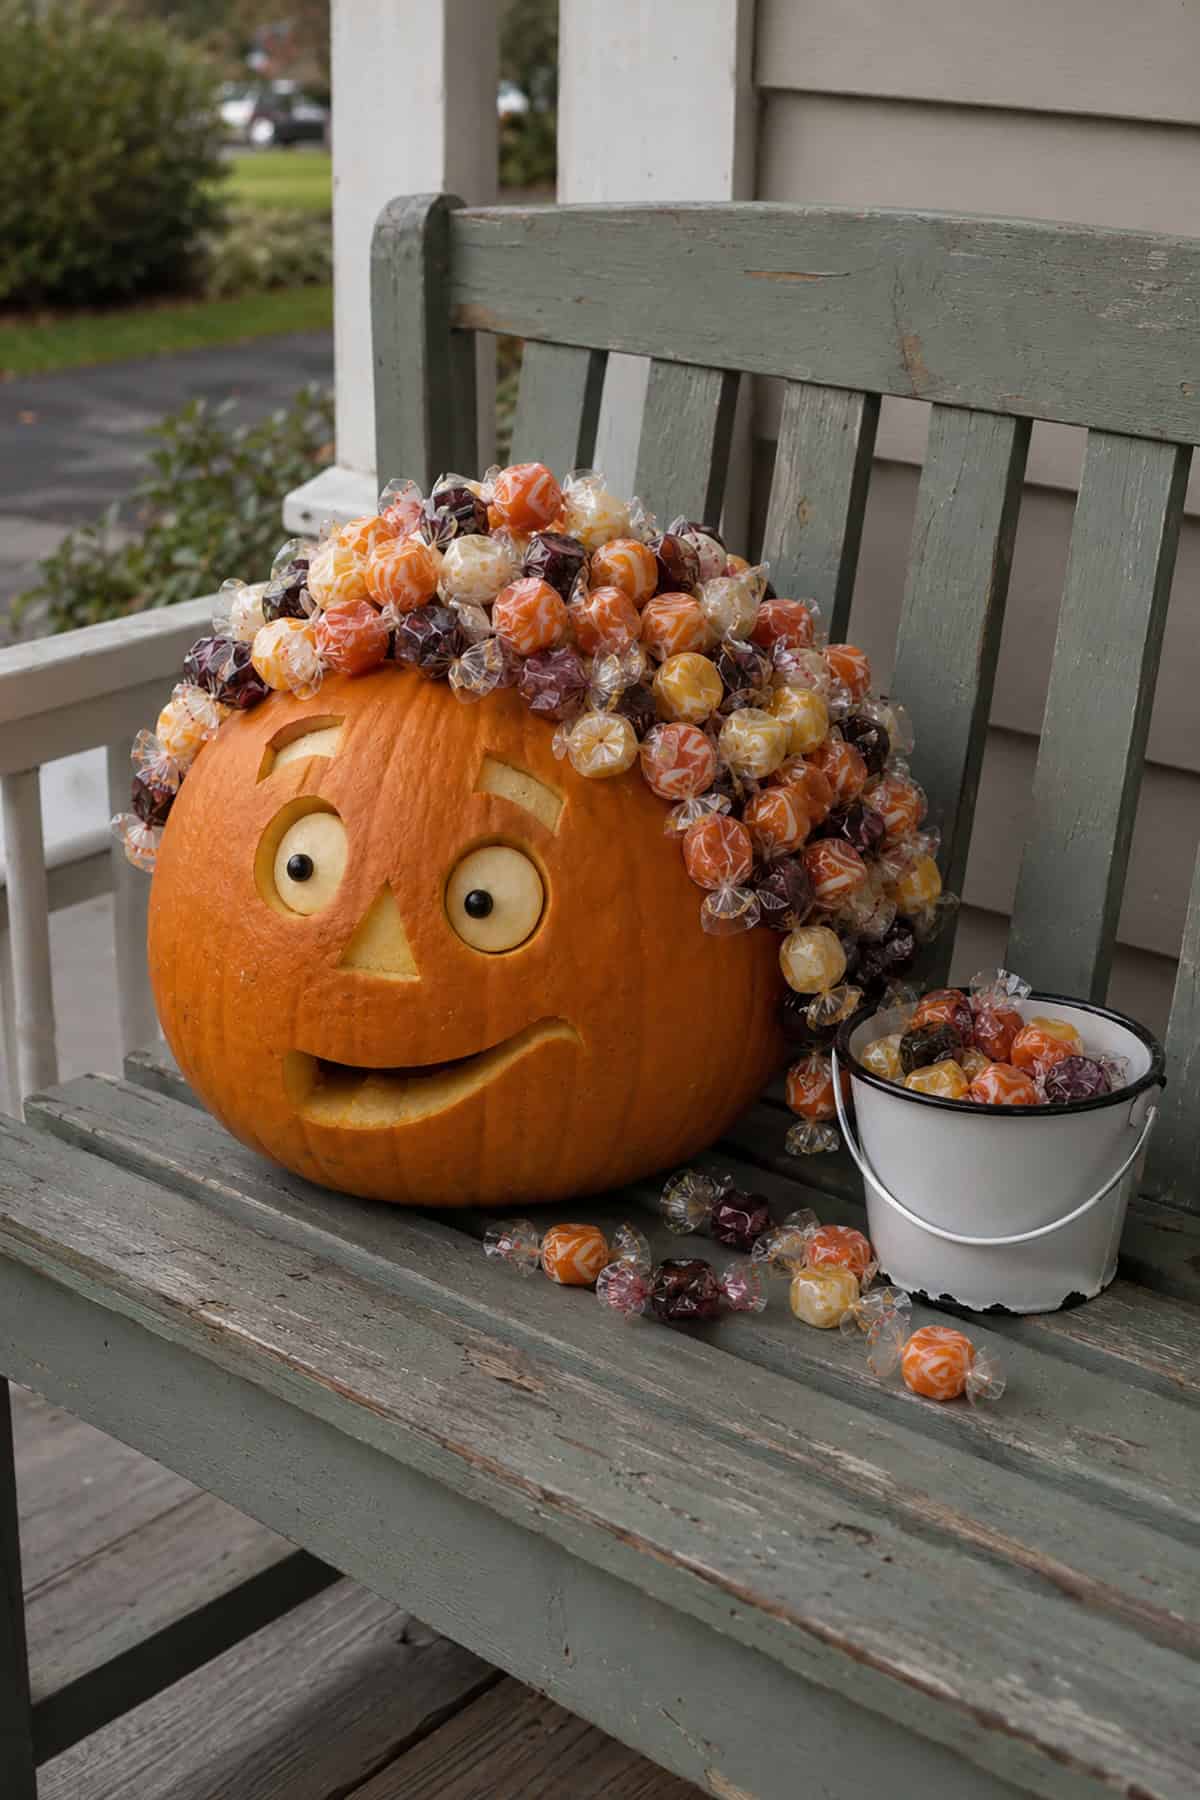
For a pumpkin that doubles as a candy holder, build the face around a full head of wrapped sweets. Carve round eye sockets, slightly raised eyebrows, a triangle nose, and an uneven open smile.
Onion slices and dark olives make the eyes stand out from the orange rind. Attach each sweet near the lid with a short toothpick. Dense rows produce large curls, while loose rows resemble shorter hair.
Bats and Crescent Moon
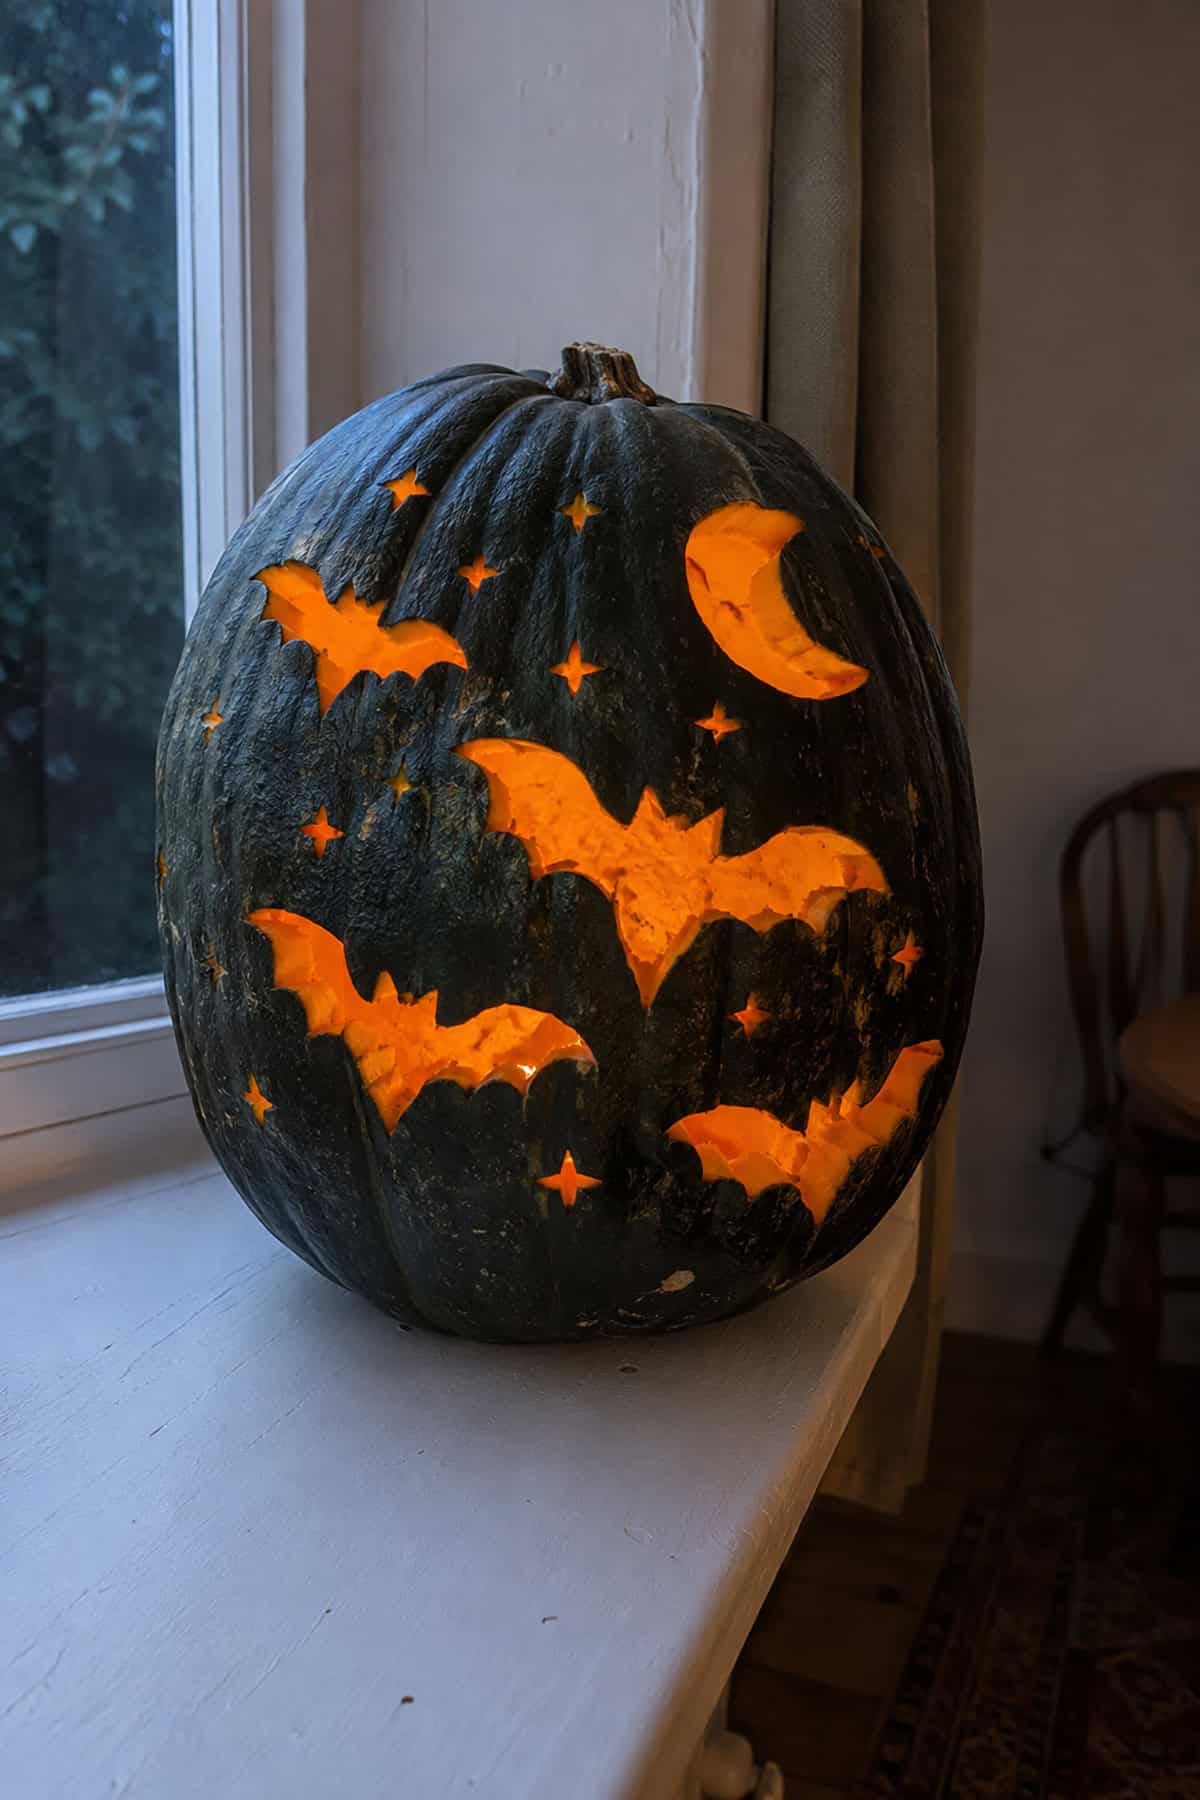
A nighttime pattern provides another route beyond carved faces. Draw several bats across the rind, then vary their wing widths, body sizes, and flight directions.
Add a crescent moon near the top and scatter small stars between the larger shapes. Thick wing joints protect the delicate points during carving. Dark green pumpkins sharpen the contrast between the outer rind and the orange light inside.
Cozy Scarf Pumpkin
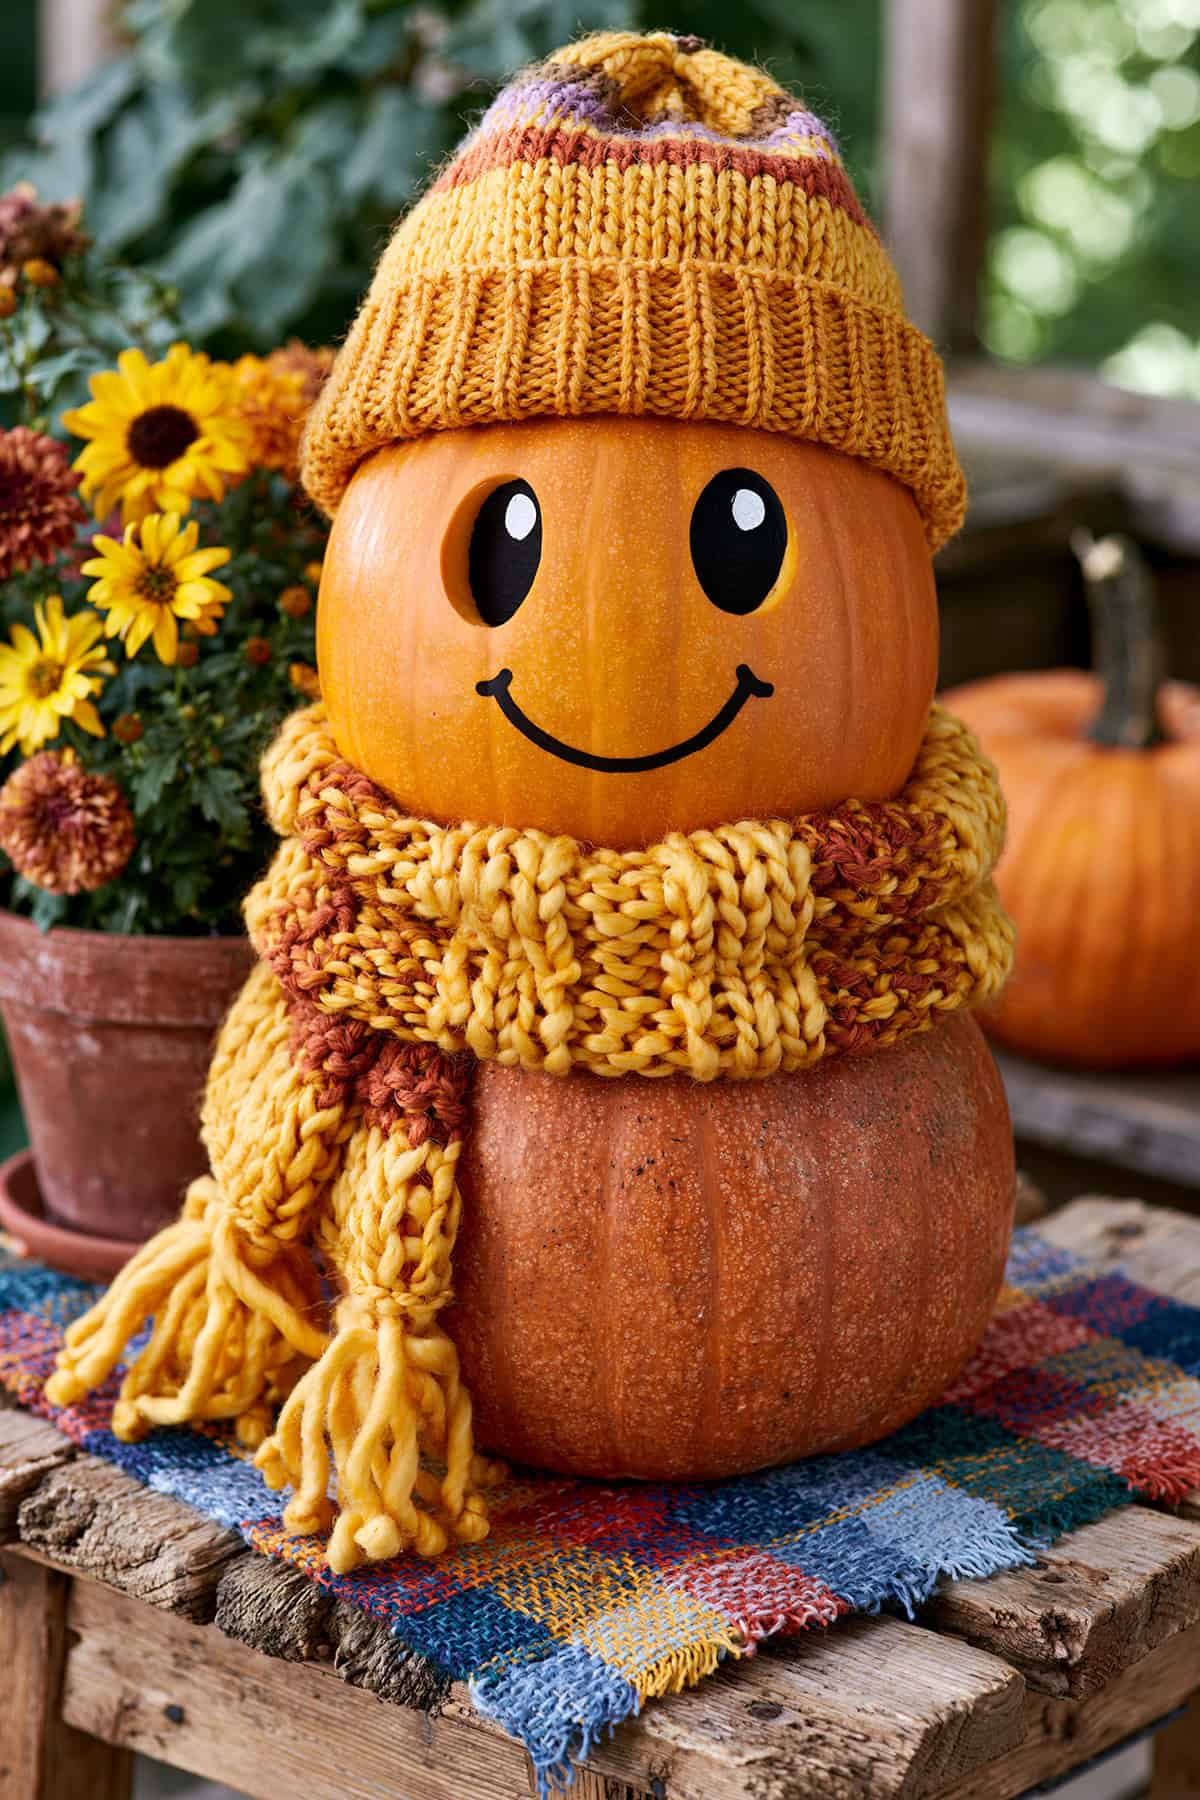
Stack two pumpkins to build a playful character for your porch or entryway. Carve oval eyes and a curved smile into the top pumpkin, then add painted pupils for extra expression.
Use the second pumpkin as the body and wrap a chunky knit scarf around the middle. Finish with a matching cap in mustard, rust, or plaid.