Crack open a bag of air-dry clay, and you’re off—molding trinket dishes, quirky keychains, whatever pops into your head. No kiln, no drama; just let them sit overnight, and they’re good to go. It’s a ridiculously simple way to turn a creative spark into something people actually want to buy.
Let’s get into some project ideas that aren’t just fun to make but also catch buyers’ attention. Handmade clay goods have a charm that keeps people coming back. Once you start, it’s almost impossible to run out of new things to try.
Table of Contents
- Air Dry Clay Ideas To Make And Sell
- Rainbow Clay Rose Set
- Personalized Ornaments
- Cactus Earring Stand
- Birthday Shadow Box Clay Doll
- Checkerboard Trinket Dish
- Shell Ring Dish + Bubble Tray
- Custom Family Clay Portrait Plaque
- Minimalist Trinket Dishes
- Personalized Name Keychains
- Monogram Jewelry Holders
- Flower-Shaped Ring Dishes
- Mini Plant Pots
- Textured Clay Coasters
- Handmade Candle Holders
- Clay Incense Holders
- Clay Earrings
- Clay Pendant Necklaces
- Decorative Fridge Magnets
- Clay Wall Hangings
- Handmade Clay Beads
- Clay Phone Grip Toppers
- Clay Bookmarks
- Clay Business Card Holders
- Clay Stamps And Texture Tools
- Miniature Clay Food Art
- Clay Holiday Ornaments
- Clay Picture Frames
- Essential Oil Diffuser Charms
- Clay Desk Organizers
- Faux Ceramic Clay Vases
- Clay Wind Chimes
- Zodiac-Themed Clay Dishes
- Clay Pet Name Tags
- Clay Hair Clips
- Decorative Clay Tiles
- Clay Candle Tray Plates
- Clay Spoons And Scoops
- Clay Letter Blocks
- Clay Drawer Knobs
- Layered Clay Art Panels
- Clay Bookends
- Minimalist Clay Sculptures
Air Dry Clay Ideas To Make And Sell
Without a kiln, you can still pull off both useful and decorative pieces. Think gifts, home accents, or accessories—stuff that people love because it’s got that handmade touch.
Rainbow Clay Rose Set
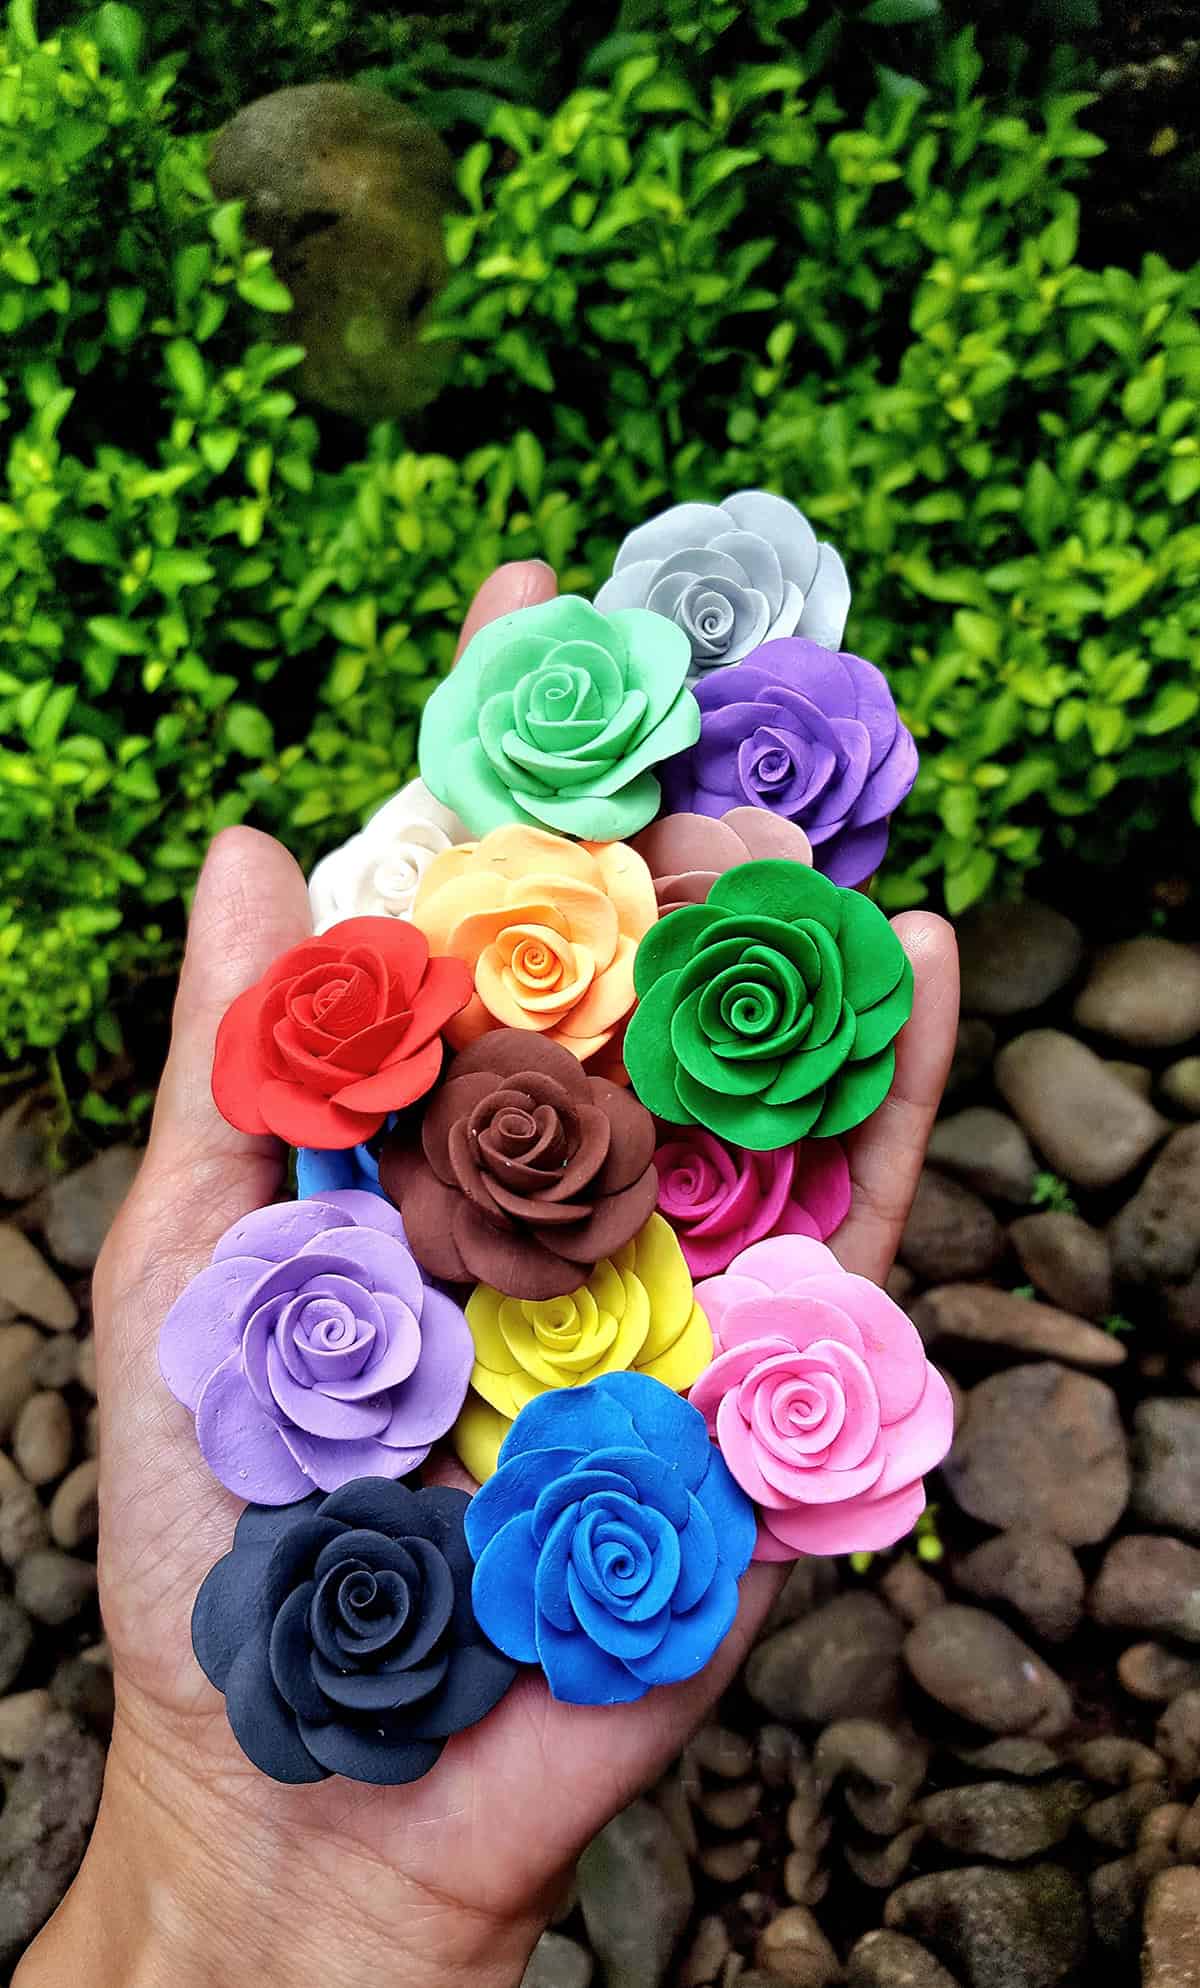
Color sells—no way around it. For these, you’ll make layered petals in different solid shades, then piece them together after the clay firms up a bit. Air-dry clay is great here since thin petals keep their shape without needing to be fired.
Some people buy a single rose, but honestly, boxed sets look great and photograph even better. Good photos matter, especially since buyers care about color accuracy. A matte seal keeps dust off. Try to keep the sizes close—makes pricing and shipping way easier.
People use these for everything from desk decor to shelf fillers. Simple, neutral packaging lets the colors pop. If you want to save on materials, offer just a few color combos at a time.
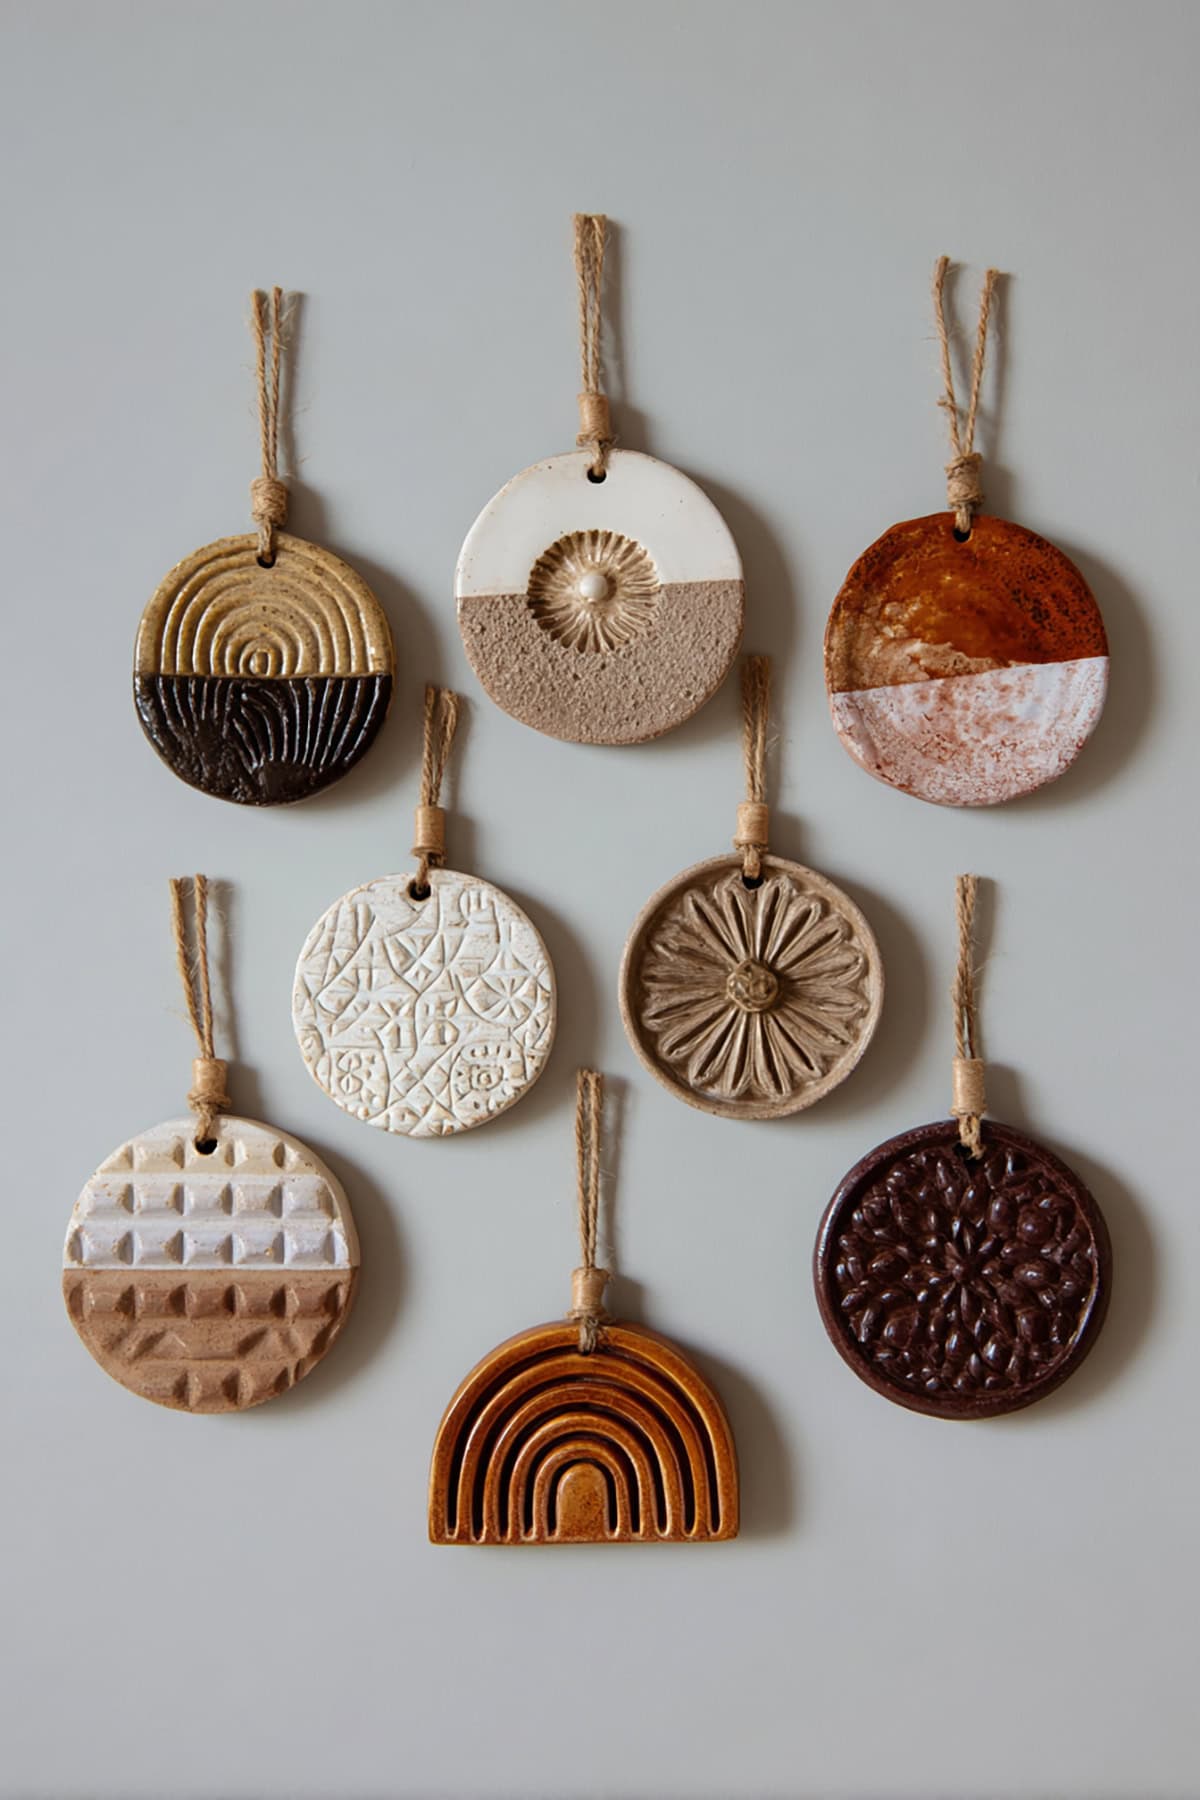
Personalized Ornaments
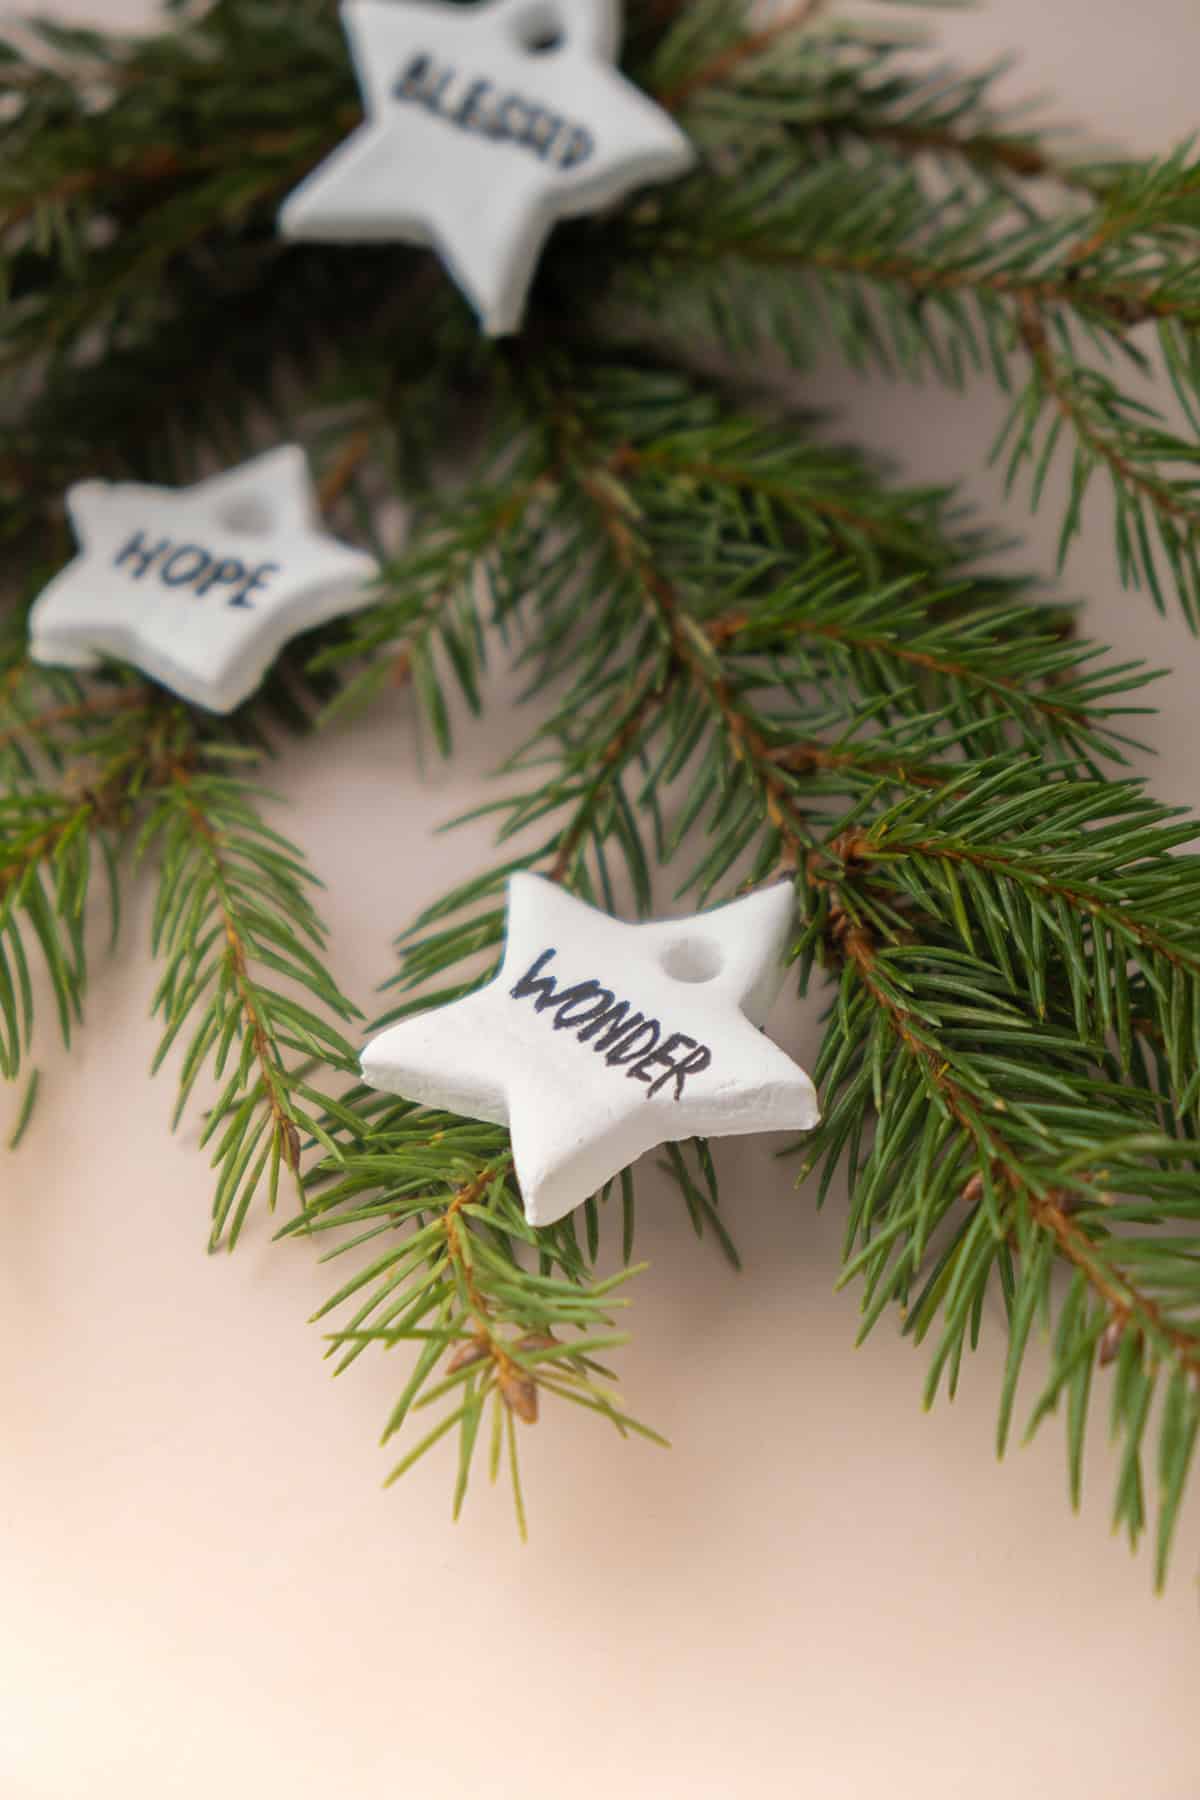
Ornaments pretty much always have a market. Pressing in names, dates, or short messages is easy—stamps or hand-carving both get the job done on air-dry clay.
If you go too thin, they’ll crack, so keep an eye on thickness. Once they’re completely dry, you can add paint or just leave them plain.
Buyers expect crisp, clean text. Stick to short names so you don’t run out of space. If someone wants a date or a custom shape, charge a bit more for the extra work.
Cactus Earring Stand

People love clever little organizers. For this one, you’ll make a sturdy base and upright cactus “arms” for hanging earrings. Air-dry clay works, but you’ll want to reinforce those joints so nothing snaps.
Balance is more important than fancy details. Definitely test it with real earrings before listing. A sealed finish helps keep chips at bay.
Most buyers go for neutral colors, but pastels can work if you’re aiming for gift shoppers. These make cute vanity pieces and are cheap to ship since they’re pretty compact.
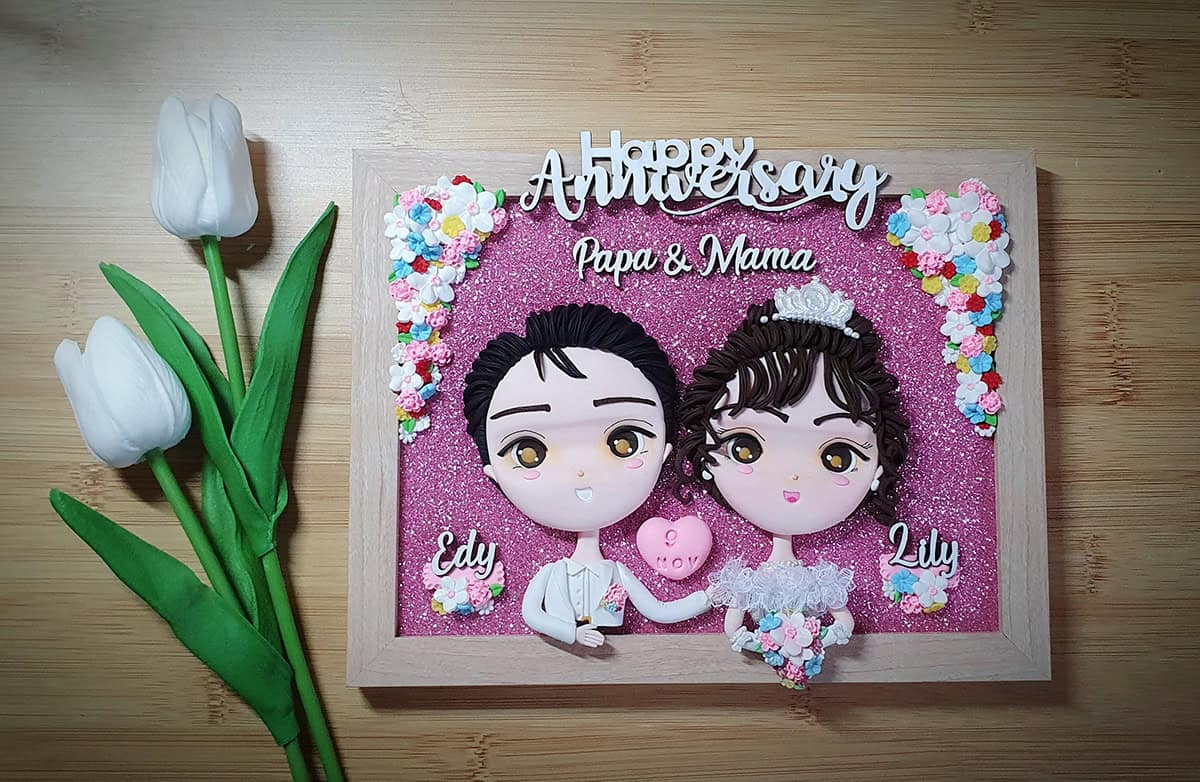
Birthday Shadow Box Clay Doll
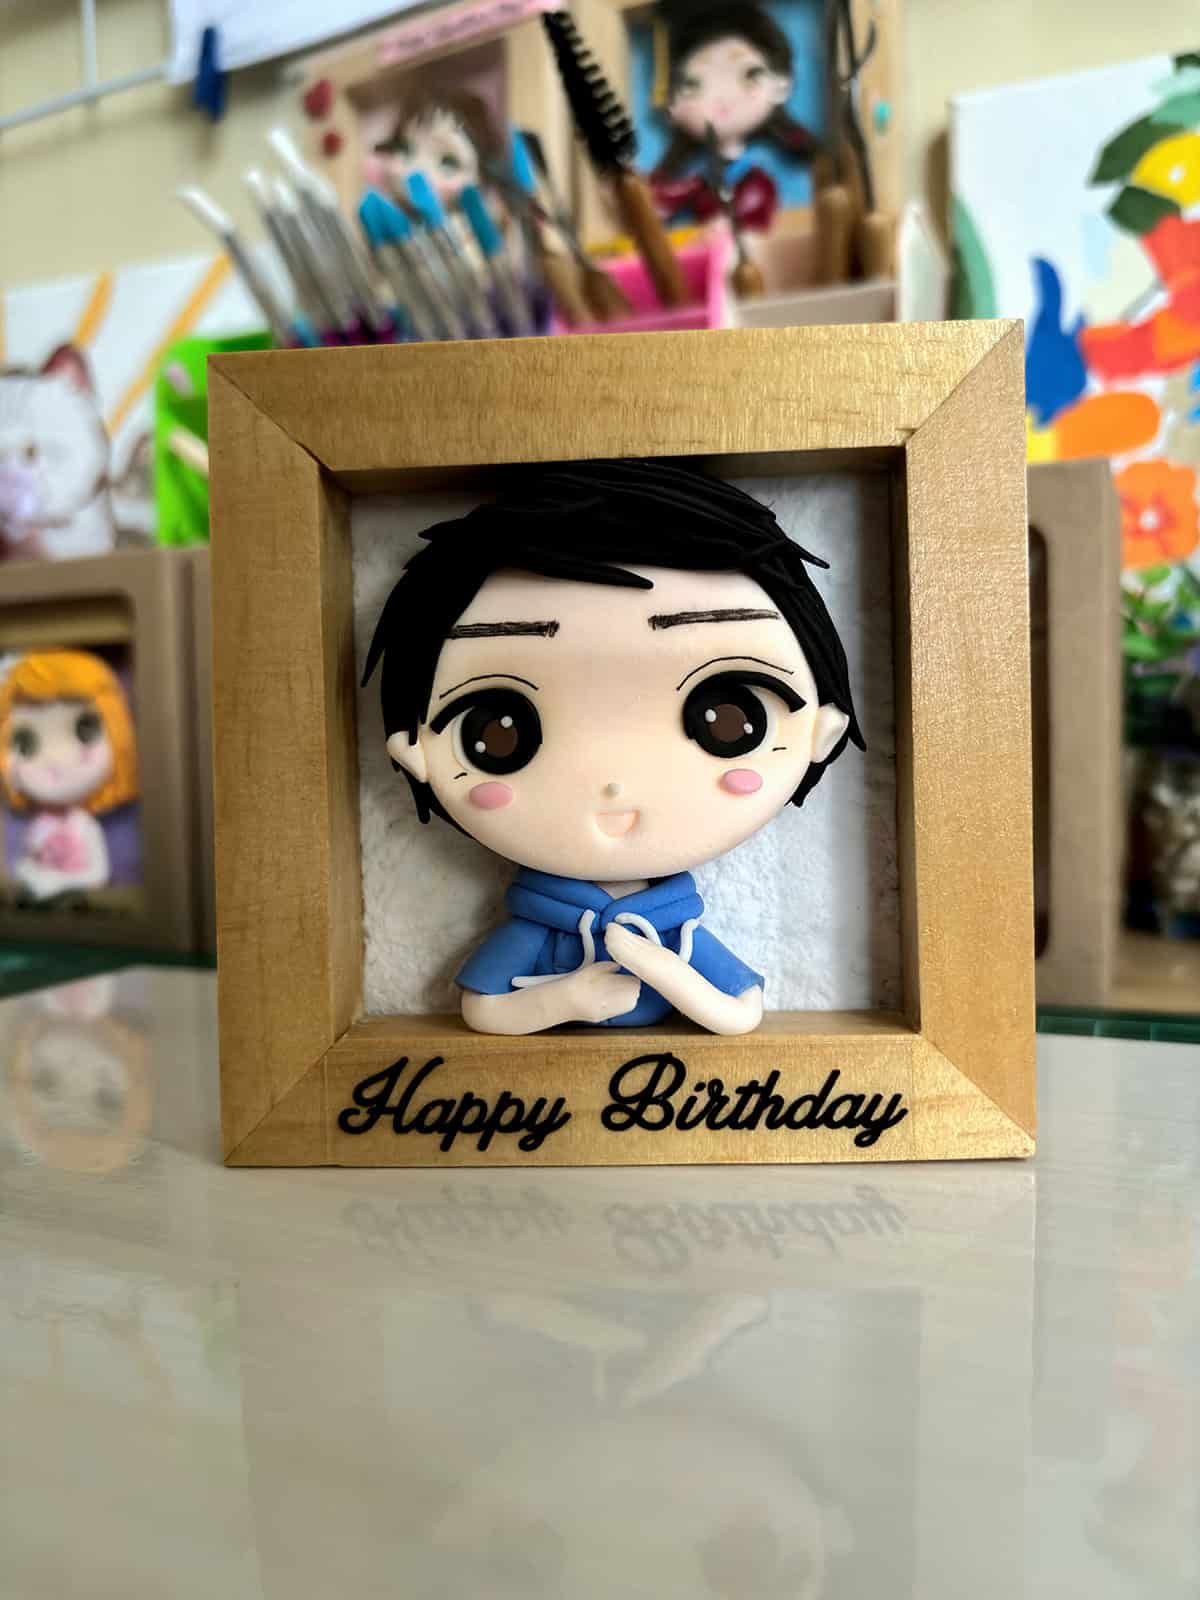
This one’s more for the keepsake crowd. Sculpt a small figure with the right age, hairstyle, and outfit, then pop it in a shallow shadow box.
Don’t stress over the face—keep it simple. Let the clothes and pose do most of the talking. Air-dry clay is fine since the doll’s small and has the box for support.
Get clear details from the buyer before you start. Be honest about how long it’ll take. These cost more, but people expect that for custom stuff.
Checkerboard Trinket Dish
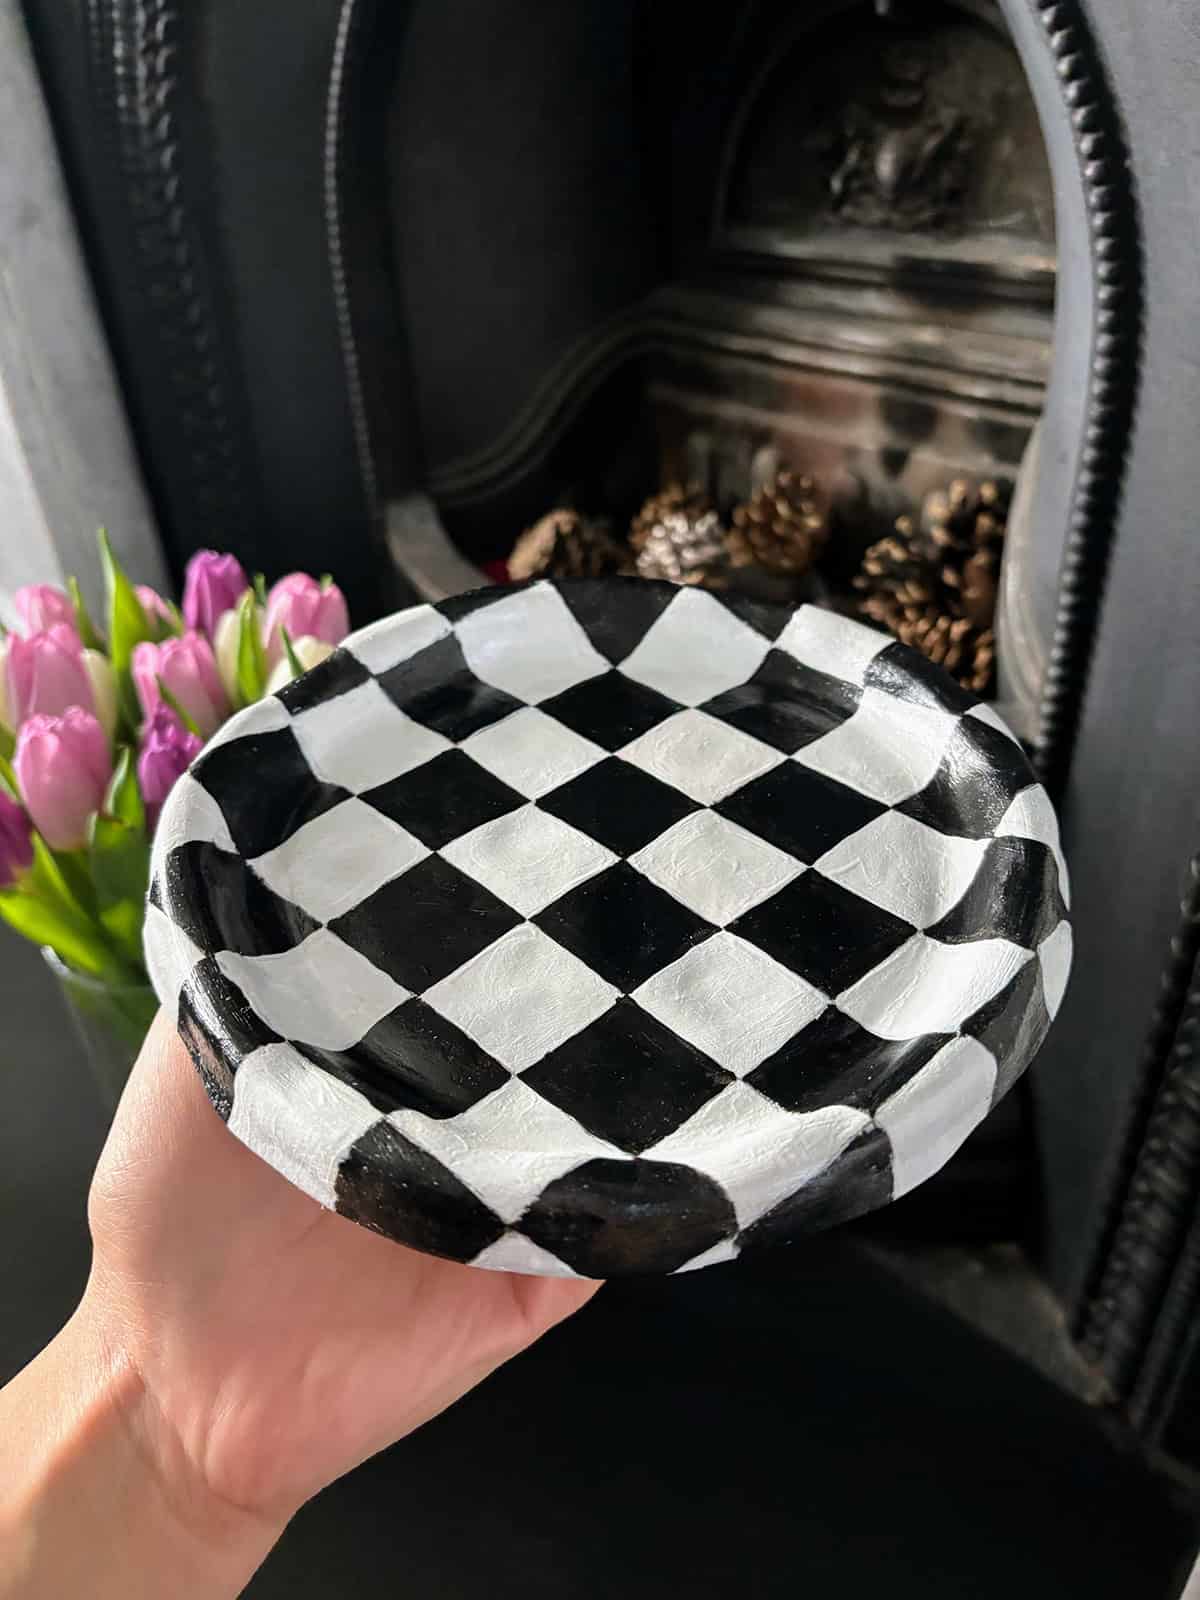
Geometric patterns just work. Roll out two clay colors, lay out a grid, press into a shallow mold, and you’re set. The checkerboard holds up after drying.
Smooth those edges or they’ll chip. Satin sealer gives a bit of protection without making it too shiny. Flat bottoms keep the dish from wobbling around.
People use these for rings, keys, whatever’s in their pockets. If you keep the size consistent, batching is easier. Simple two-color combos outsell the wild mixes, at least in my experience.
Shell Ring Dish + Bubble Tray
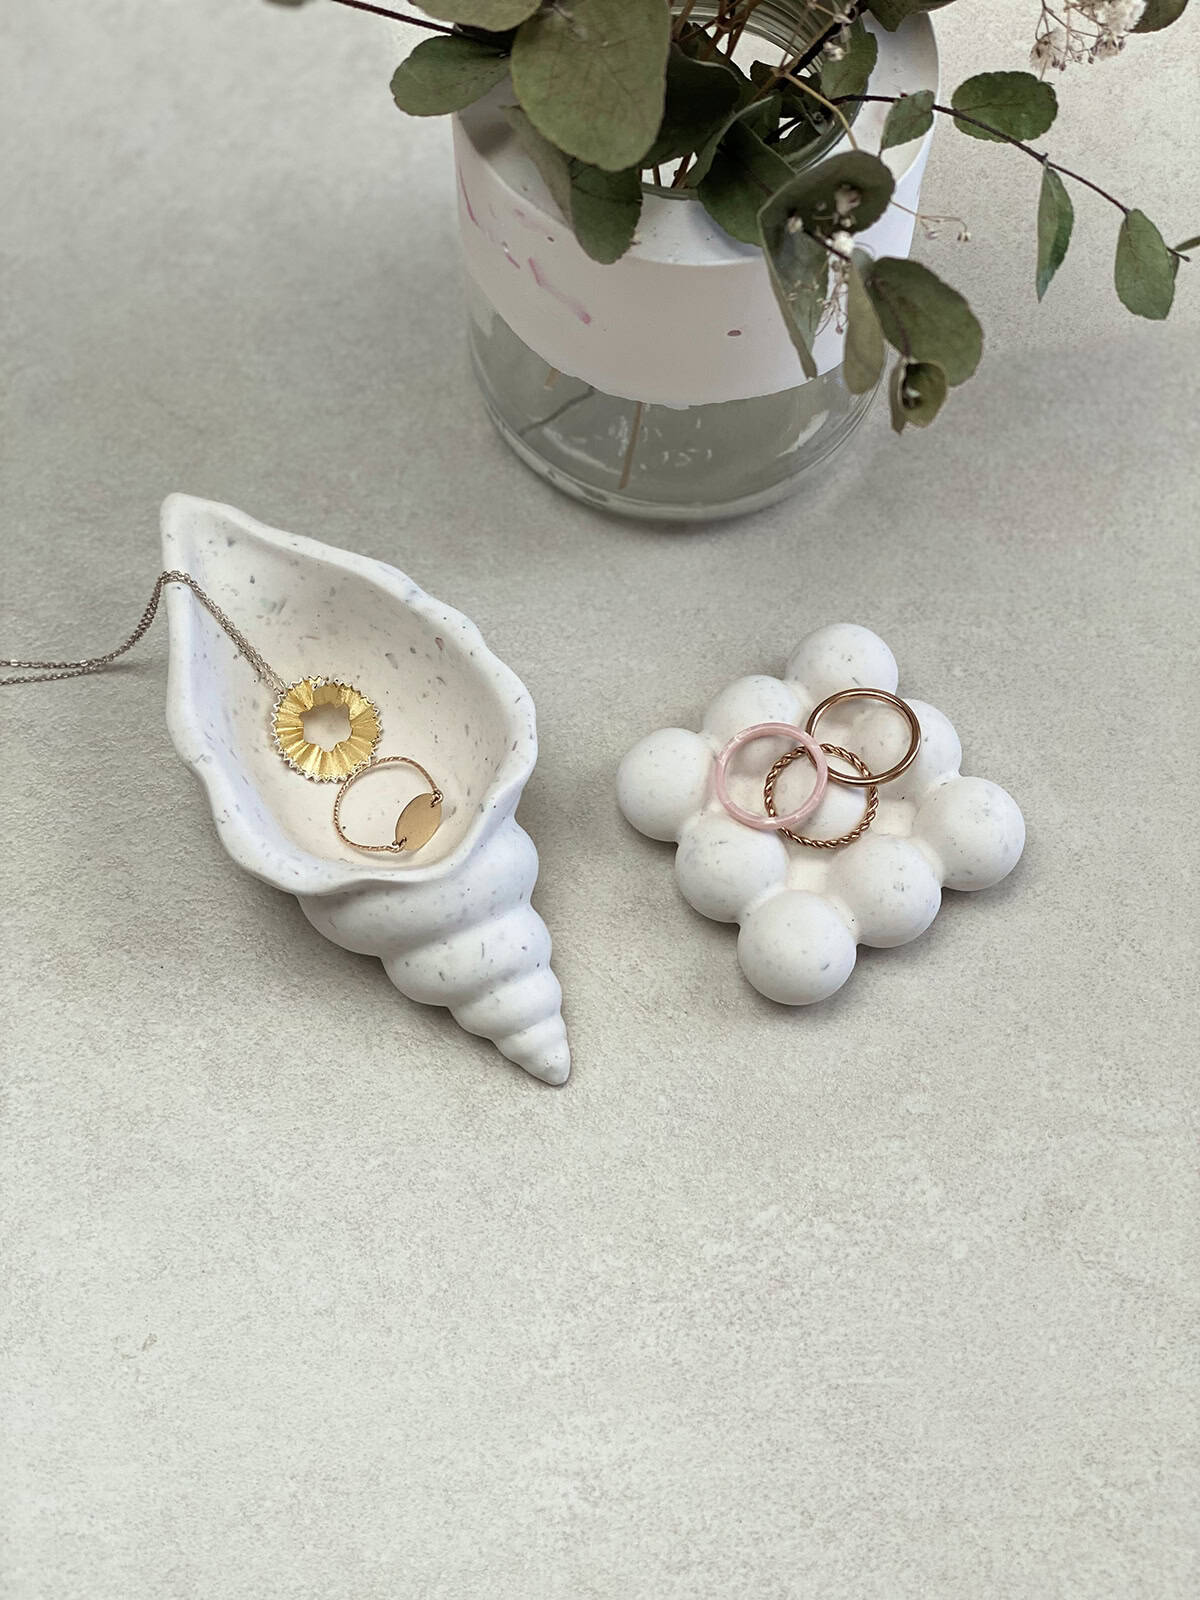
Coastal themes always find buyers. Press the clay into shell molds or shape trays with raised bubble textures—air-dry clay picks up shallow details nicely.
Don’t make the walls too tall or you’ll get cracks. Once cured, you can paint a soft wash or just leave them raw. A little sealer protects jewelry from scratches.
Bundle the shell and bubble trays together—it bumps up your order value with barely any extra effort. Stick to neutral shades so they fit in with most people’s decor.
Custom Family Clay Portrait Plaque
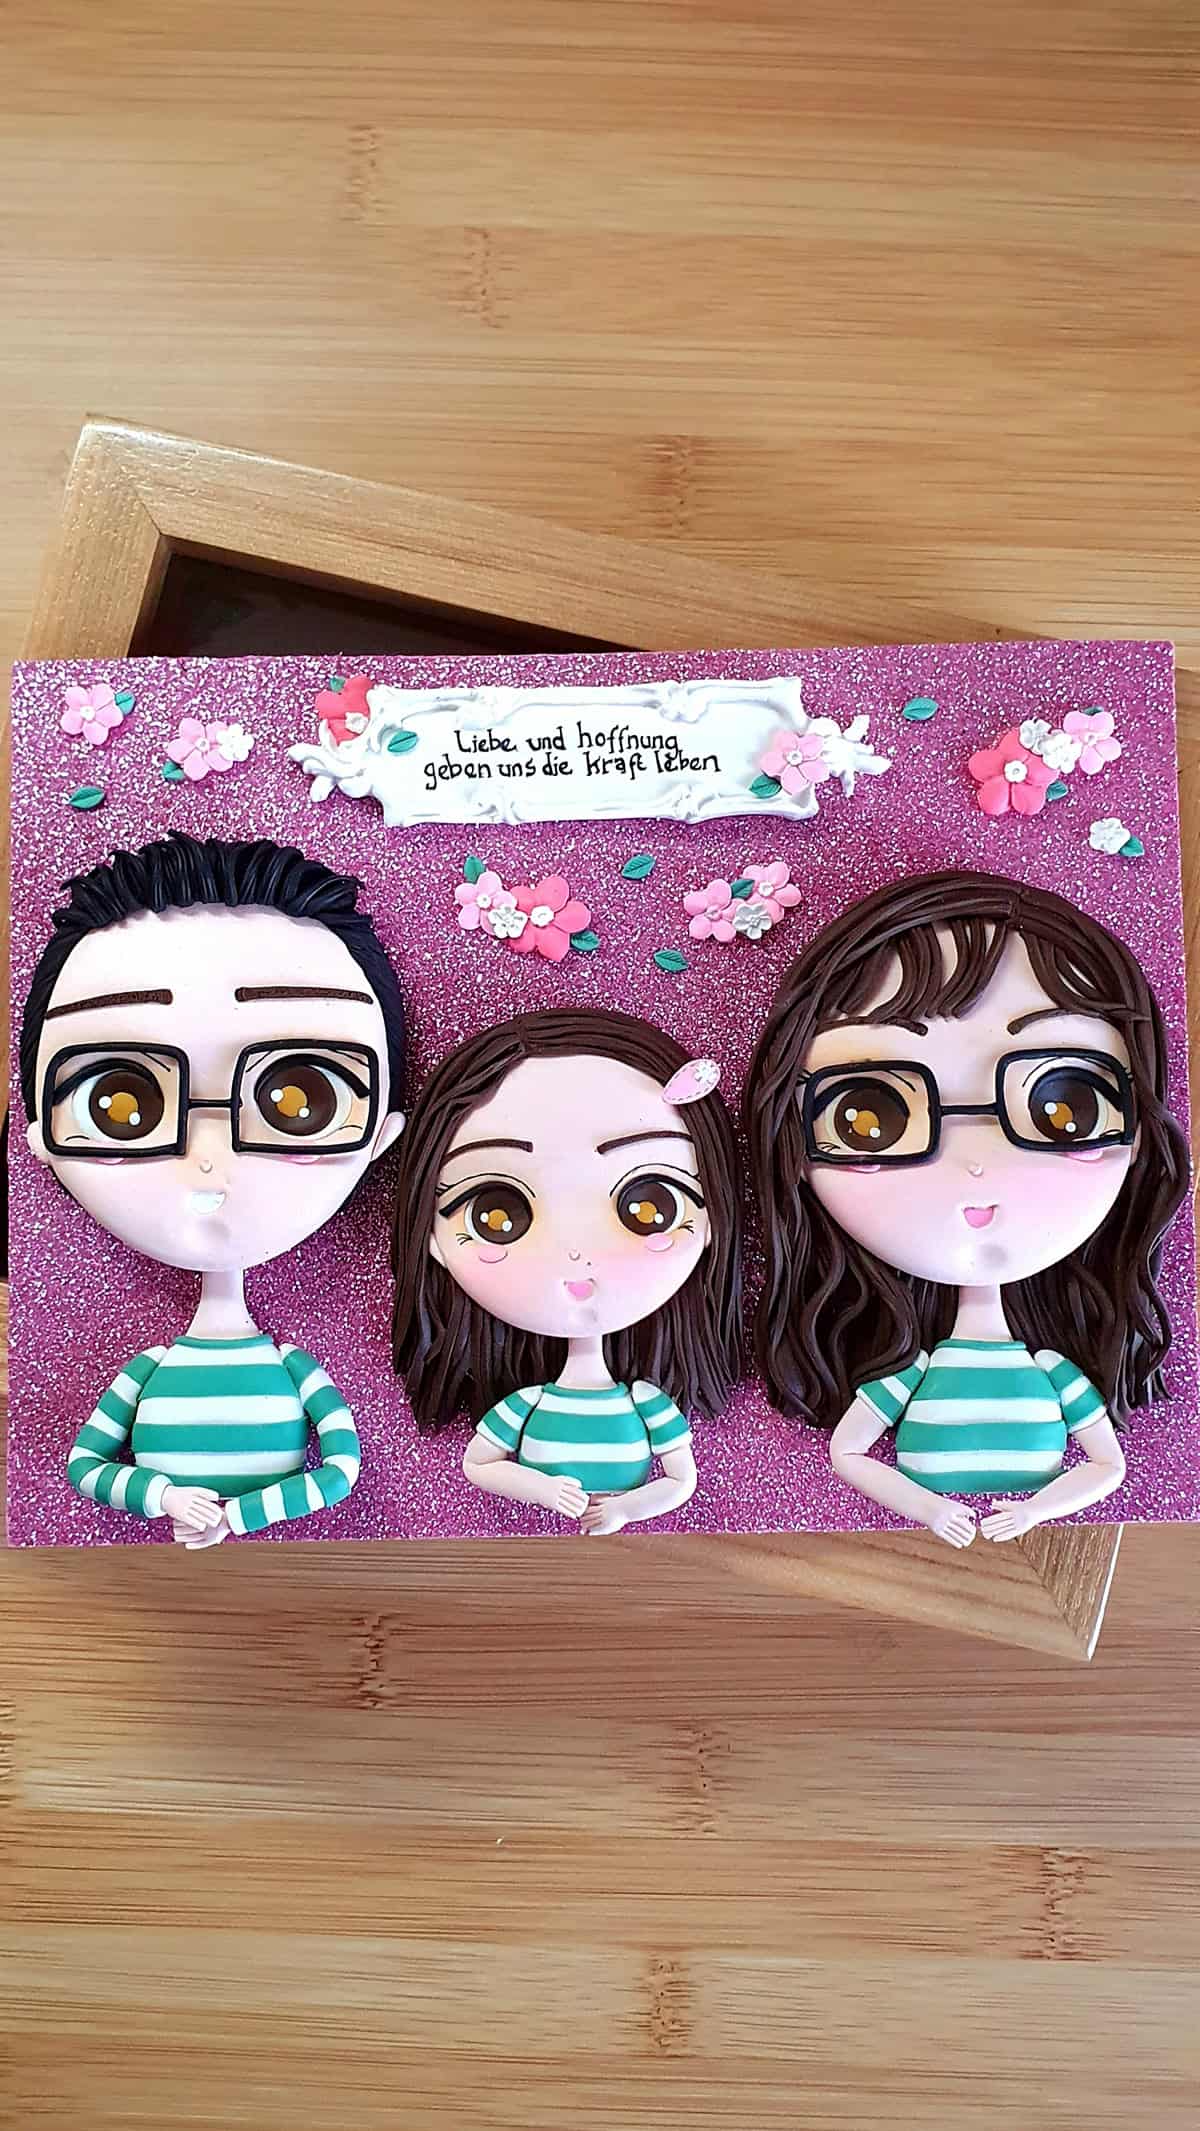
Wall plaques make pretty charming keepsakes for families. You’ll shape little figures to stand in for each person—hair and clothes do most of the heavy lifting for recognition, honestly.
Stick the figures onto a flat clay slab or maybe a wood board. Air-dry clay’s your best bet, but keep the figures pretty low-profile. If you try skinny arms or legs, they’ll just break off and drive you nuts.
Keeping the family size options limited actually saves your sanity. Quick preview sketches help a ton with avoiding endless tweaks. People will pay more if you nail the details and make the finish tough enough to last.
Minimalist Trinket Dishes
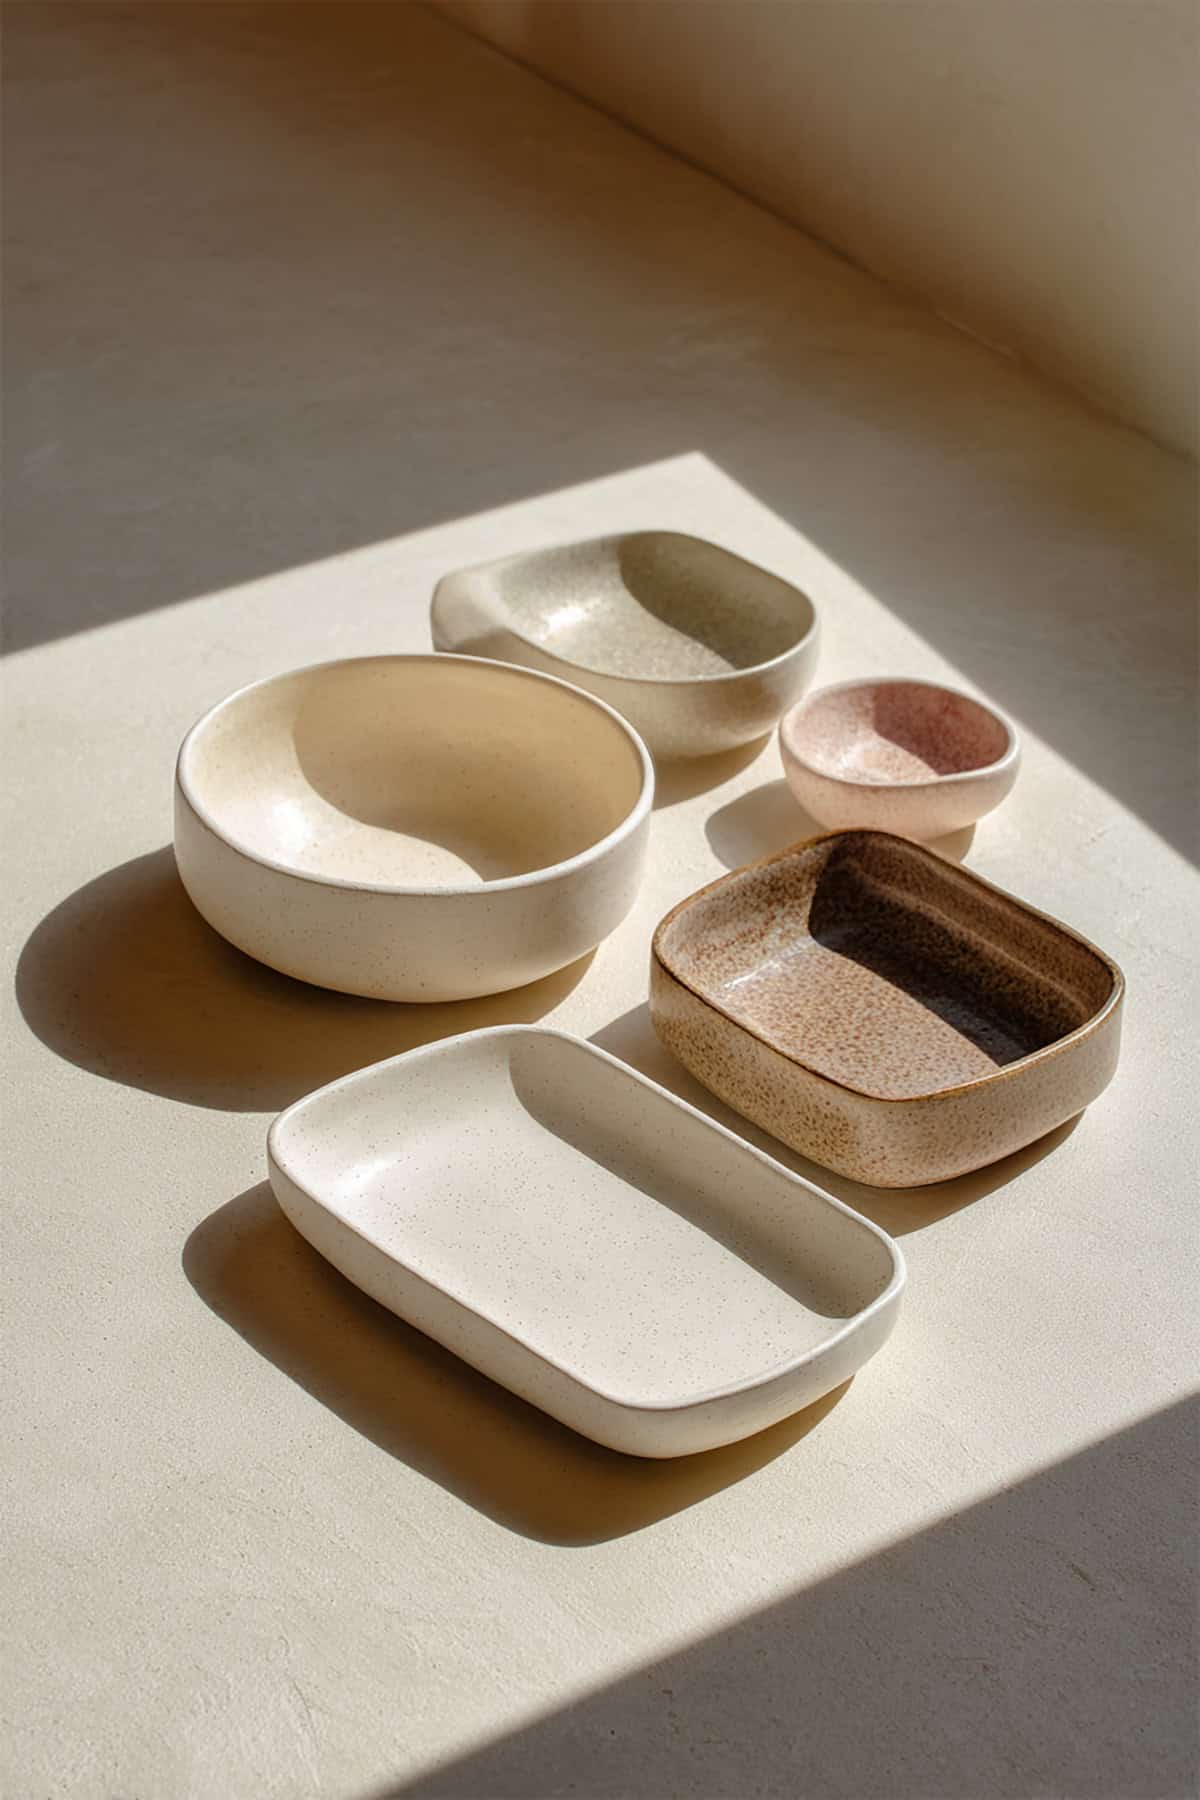
These are a classic for a reason. Round, oval, or square—just keep it simple and clean. Neutral shades like white, taupe, or gray make them feel modern and versatile.
Press in a little texture or a few lines before drying. Seal with a matte or clear coat for some toughness. They’re perfect for keys, rings, or coins—practical, but not boring.
Personalized Name Keychains
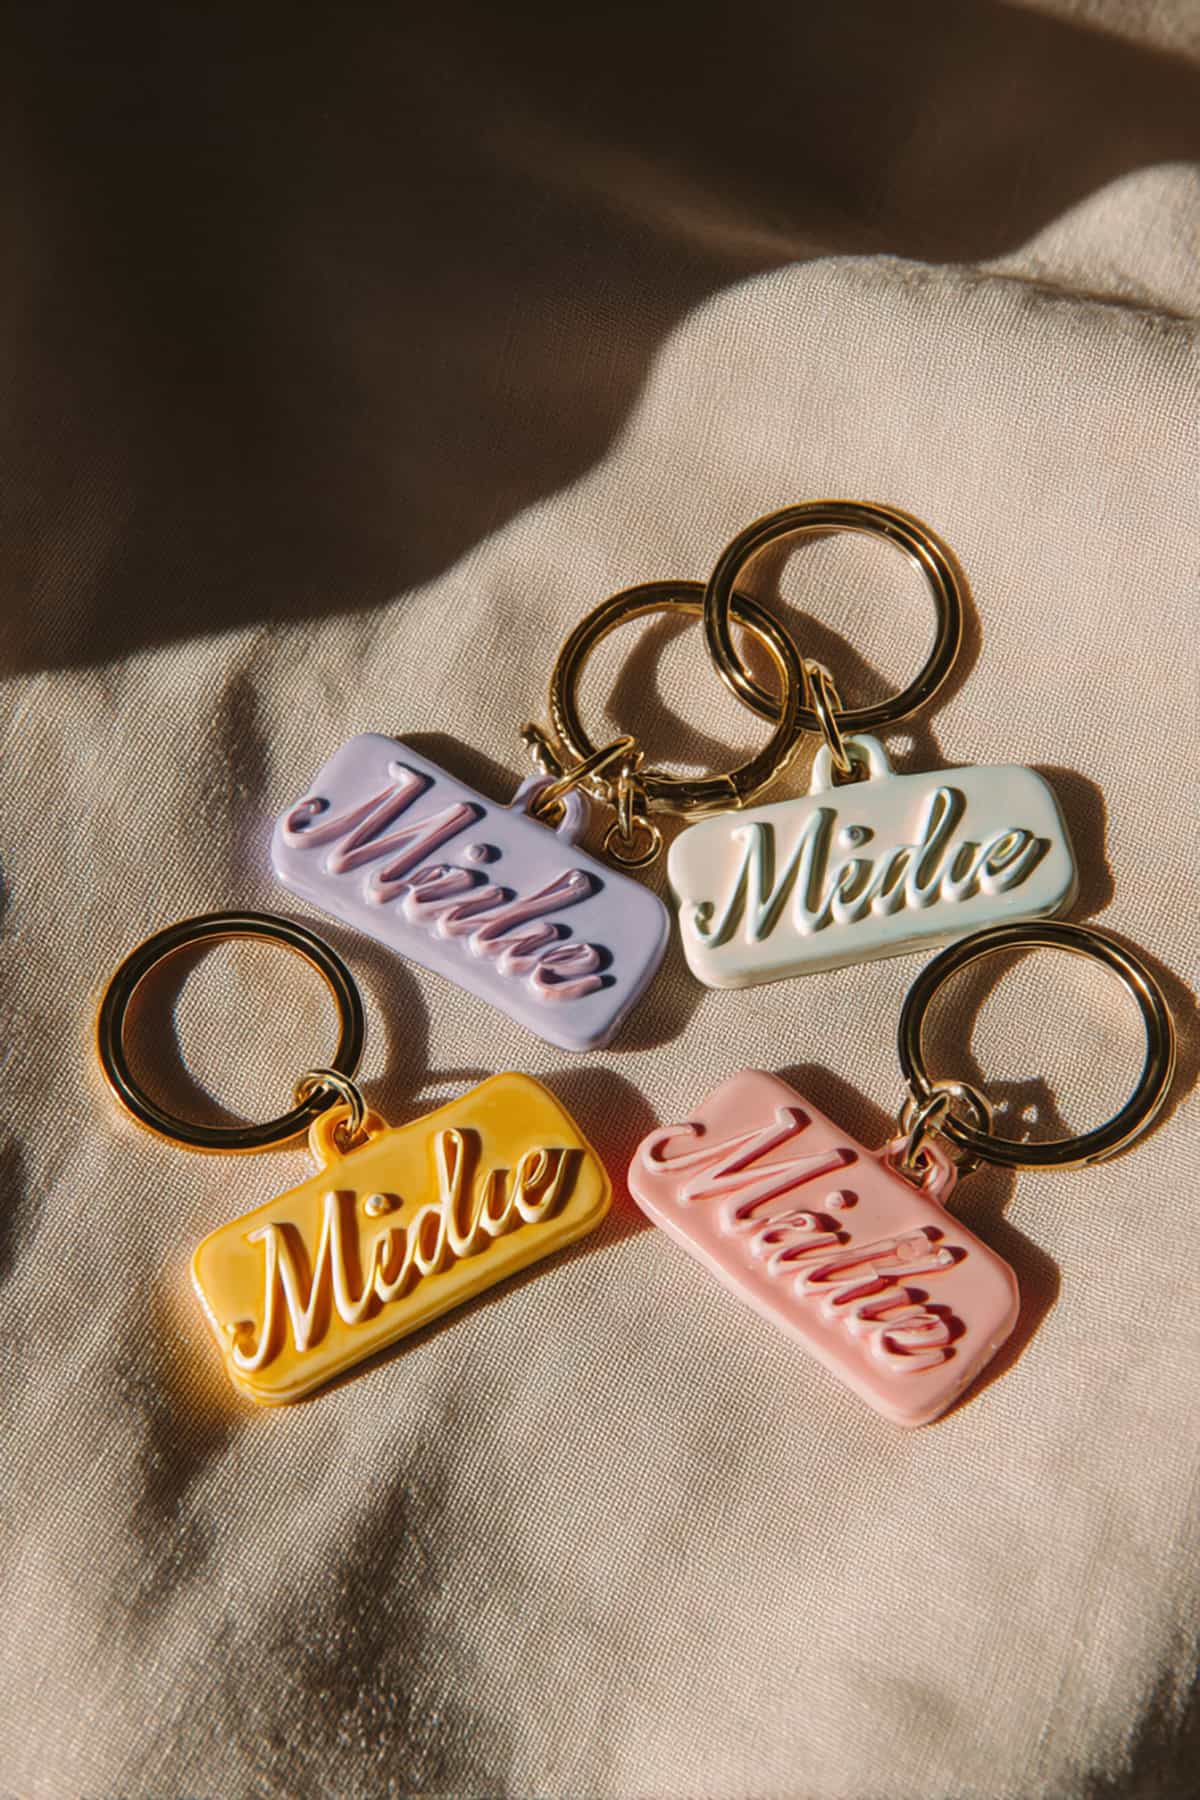
Custom keychains are always in demand. Roll the clay flat, cut out your shape—rectangles, circles, whatever fits a keyring.
Stamp on initials before the clay hardens. Paint with bold colors or a bit of metallic for pop. Once sealed, add the hardware. People love these as gifts—they’re personal without breaking the bank.
Monogram Jewelry Holders
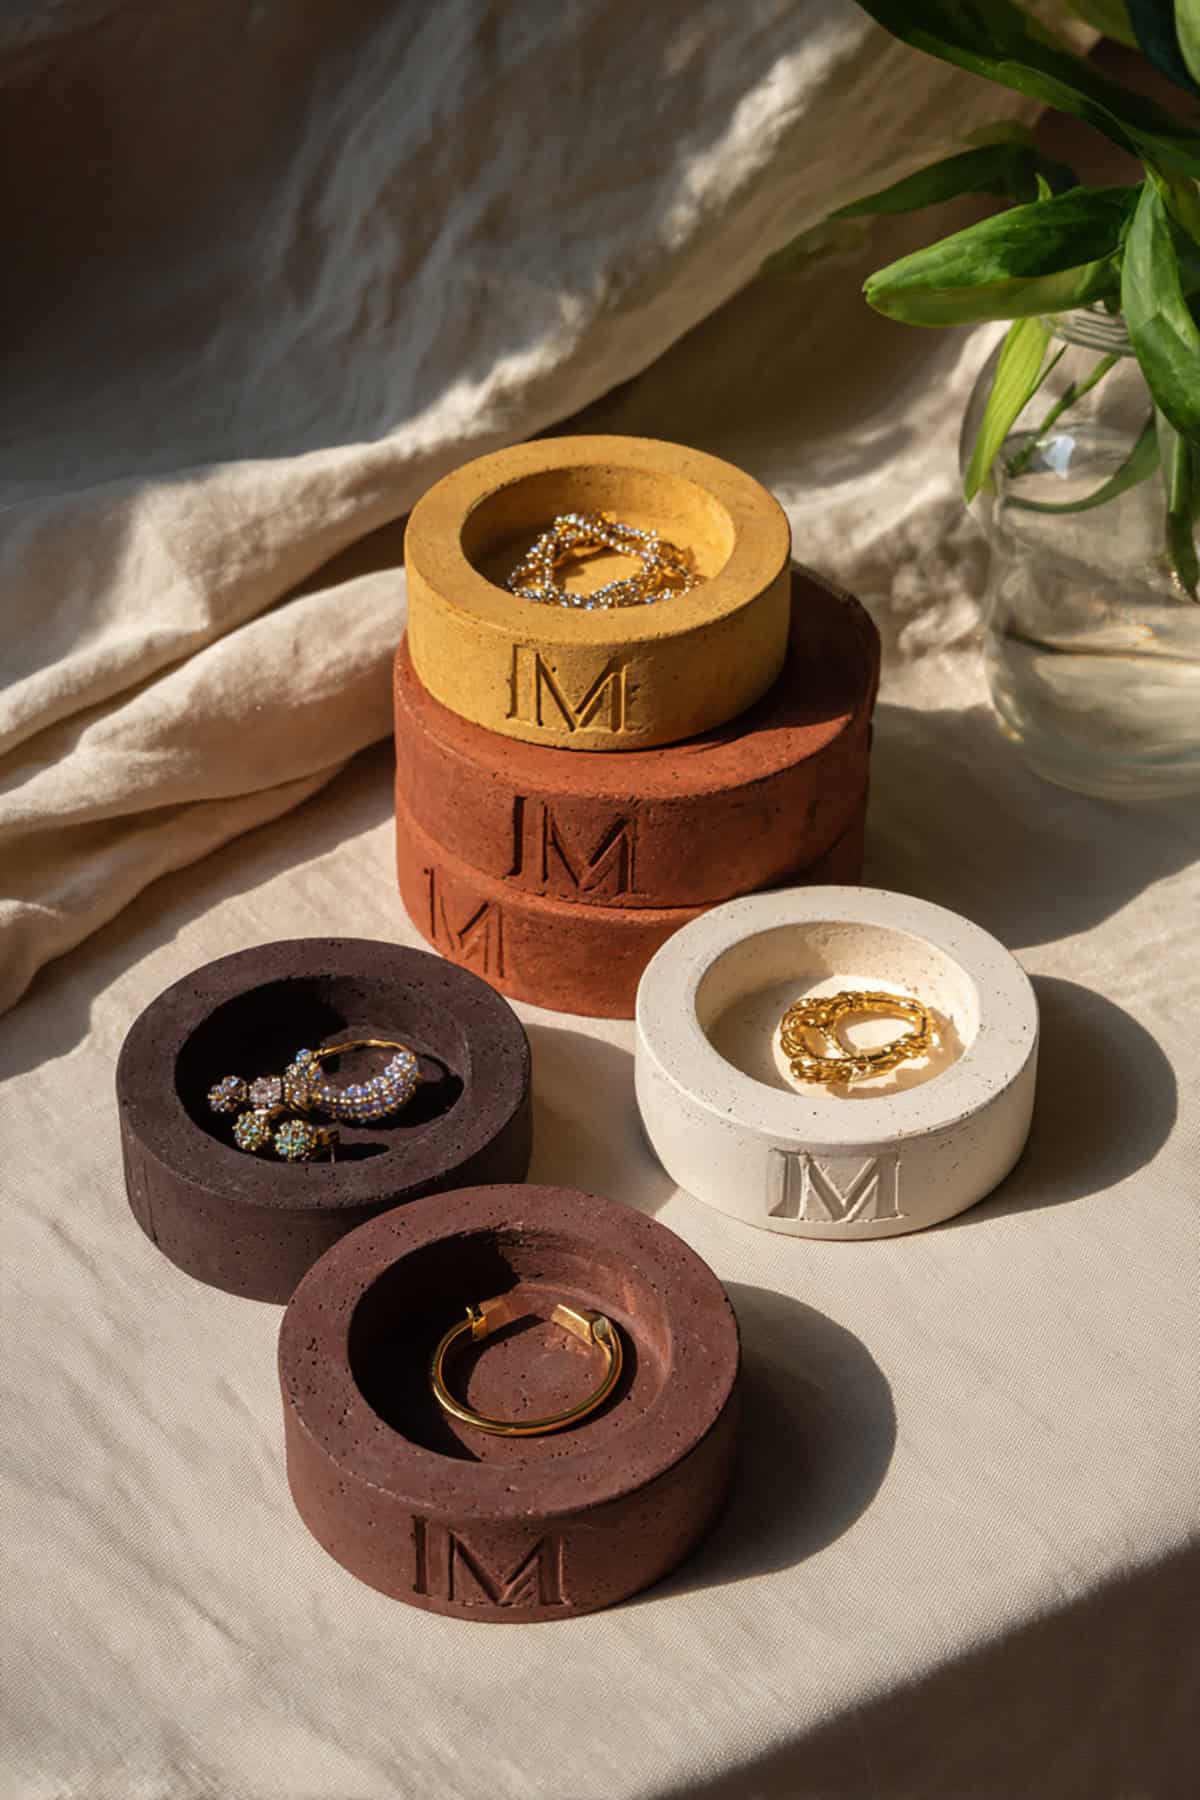
Make little stands or trays with a raised letter—great for necklaces or earrings. A chunky letter as the base looks balanced and does the job.
Carve the letter in before it sets for crisp lines. Metallic or pastel paint works well. Seal it so moisture doesn’t ruin things down the line.
Flower-Shaped Ring Dishes

Delicate petal dishes look great on a vanity or nightstand. Shape thin layers into a simple flower and smooth the edges.
Use something like a spoon to curve the petals up. Once dry, paint soft gradients for a realistic touch. Seal to keep colors fresh. These are a hit with folks who like subtle, nature-inspired decor.
Mini Plant Pots
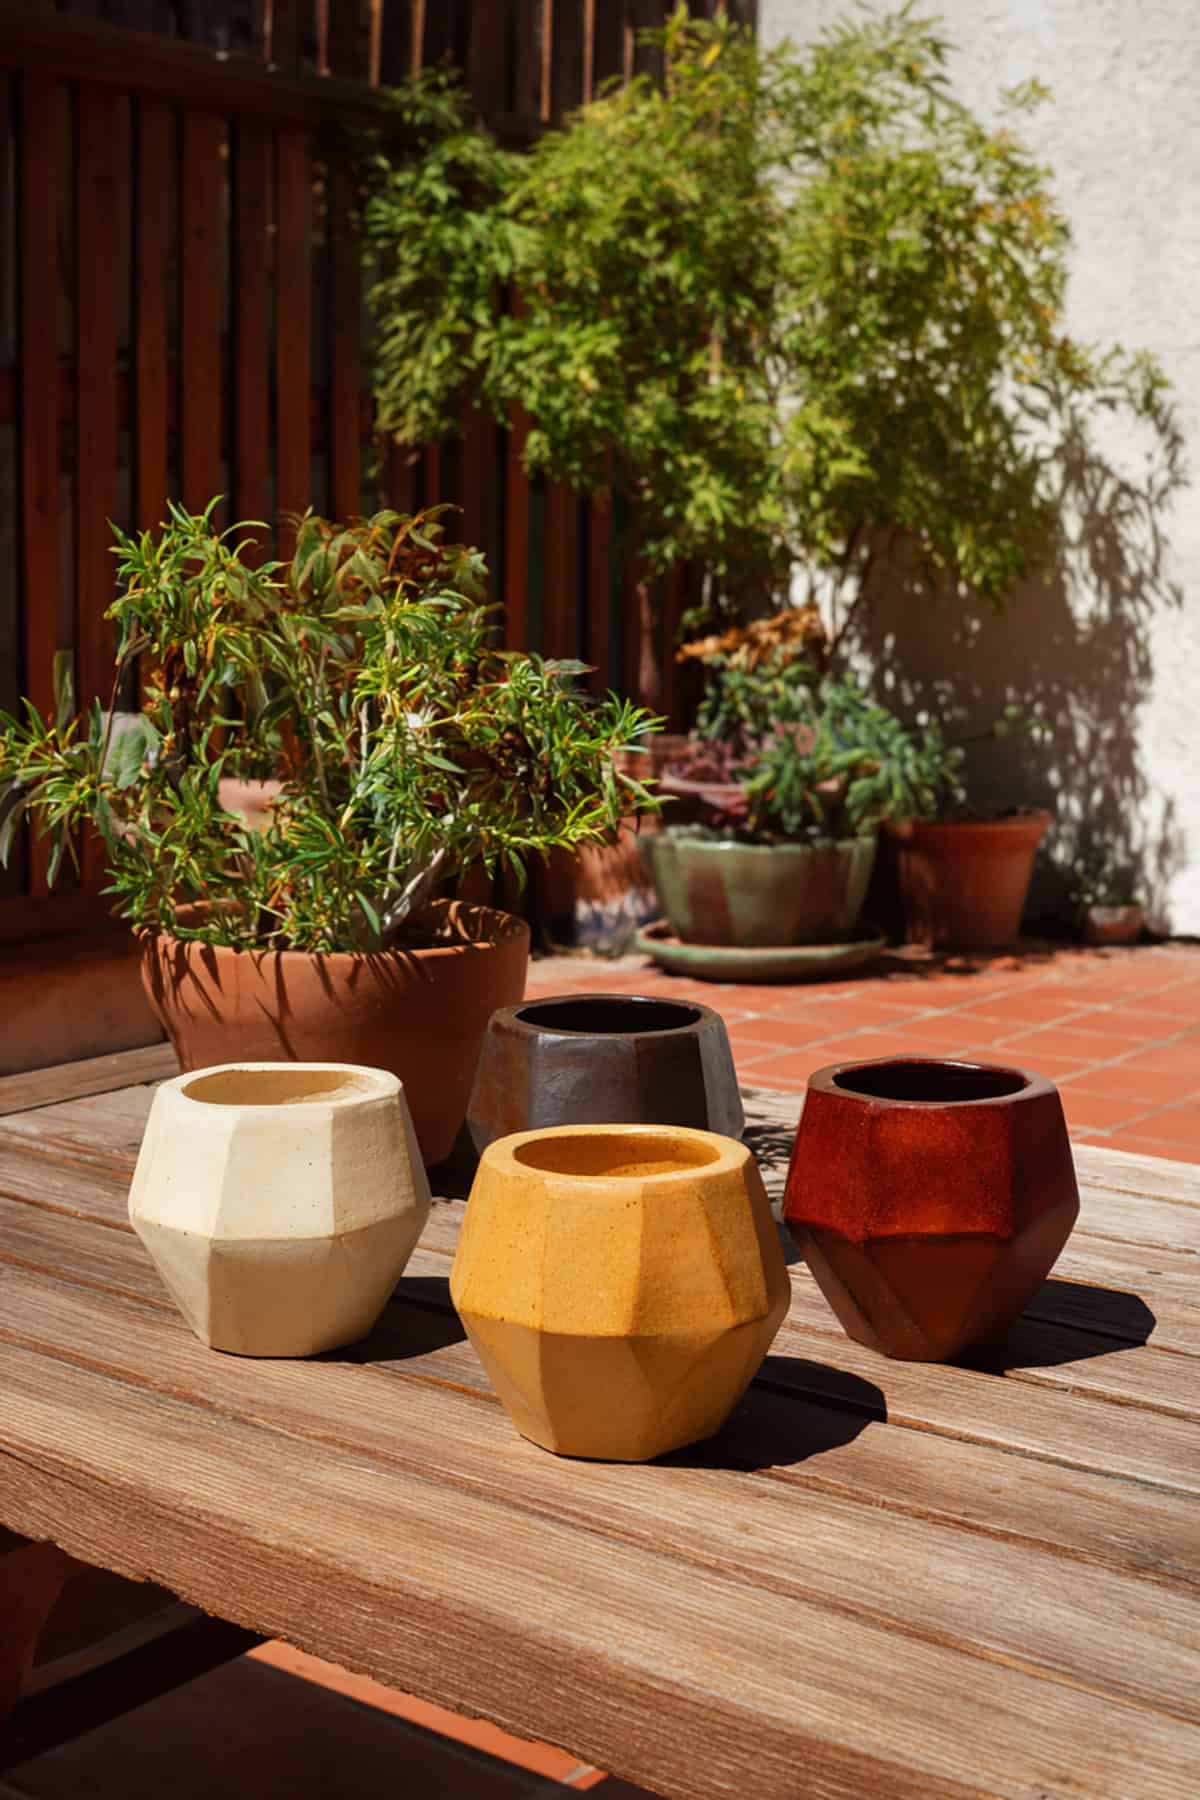
Perfect for succulents or tiny cacti. Go for cylinders, hexagons, or faceted shapes.
Keep the walls thin so they dry evenly. After curing, coat the inside with waterproof sealant. Stick to simple colors or patterns; they fit anywhere. They’re easy to display and usually sell quickly at markets.
Textured Clay Coasters
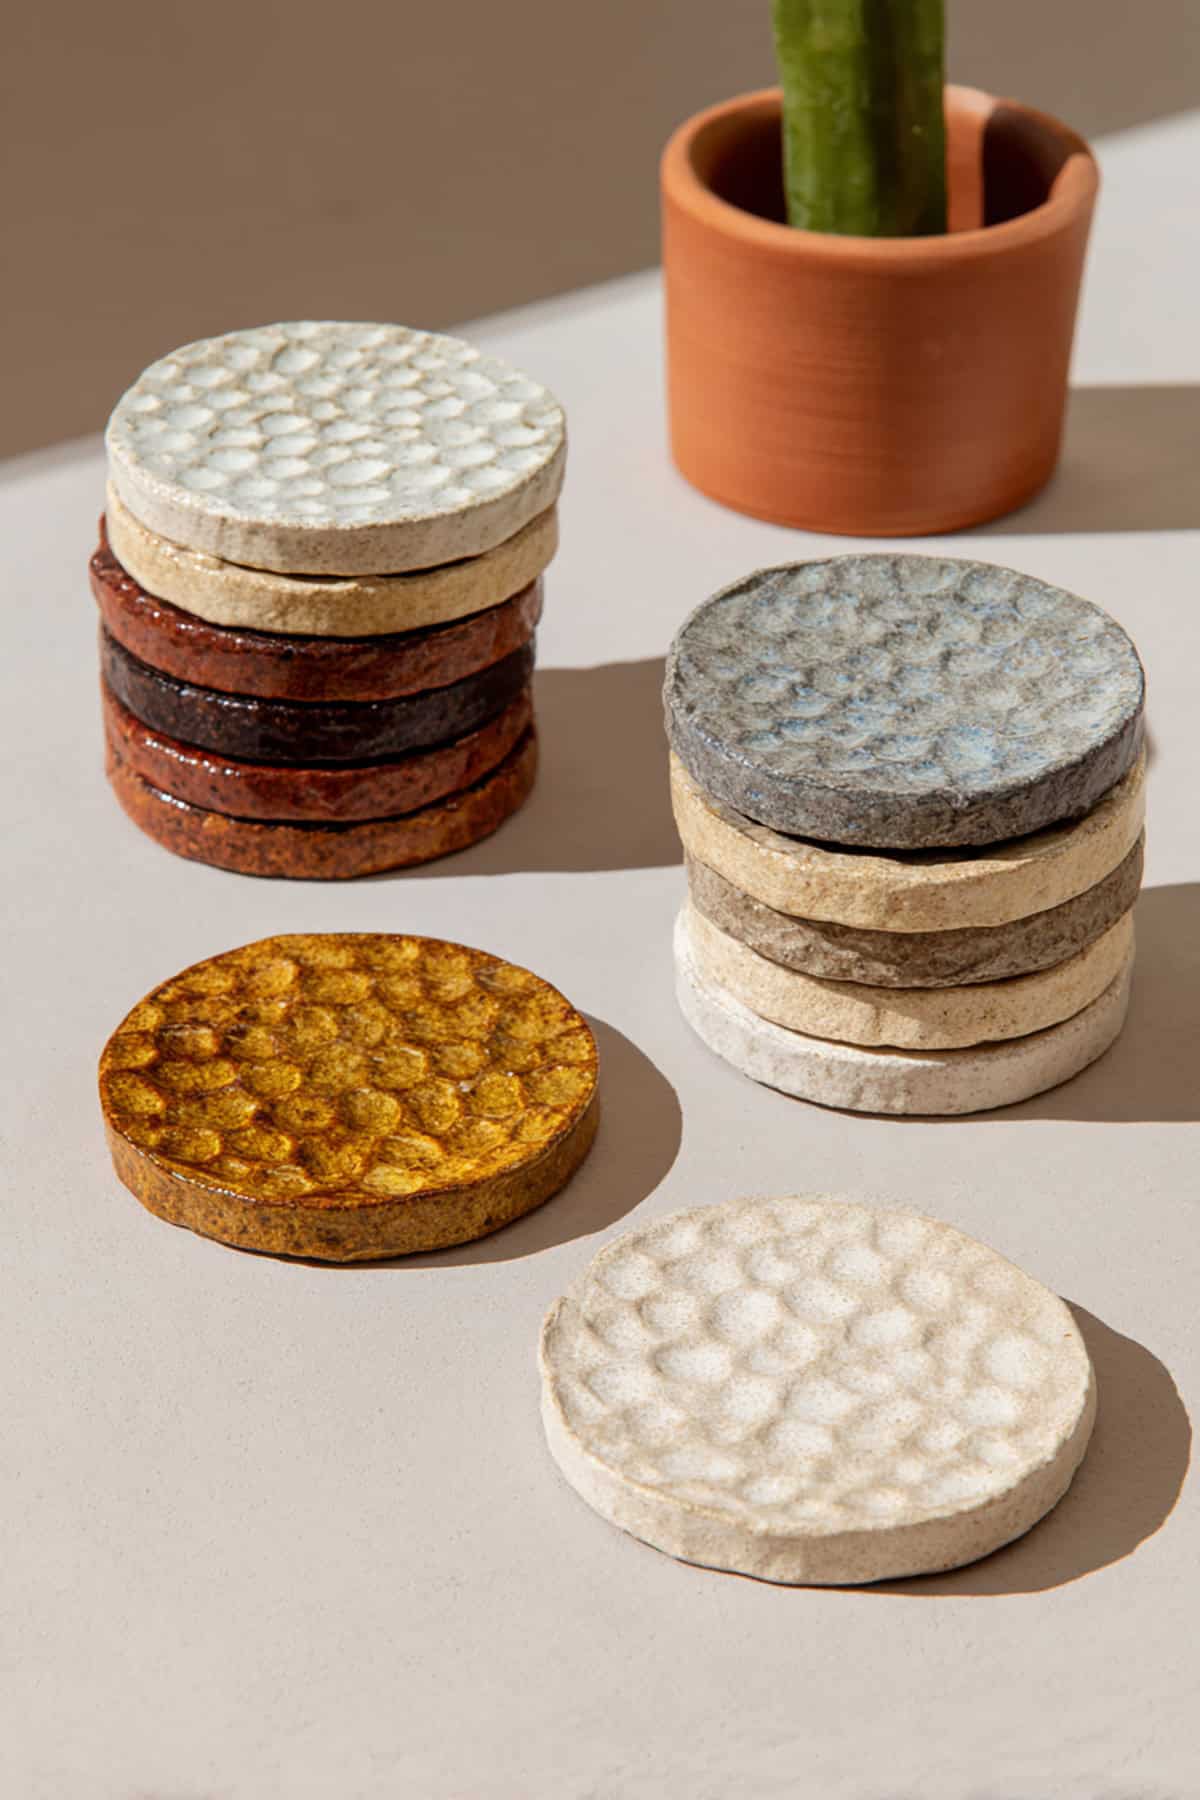
Coasters are practical and you can crank out a bunch at once. Press in lace, fabric, or wood grain for texture.
Cut into rounds, squares, or hexagons. Paint just the raised bits for contrast. Matte sealant keeps them functional. Sets of four or six look great bundled together for gifting.
Handmade Candle Holders
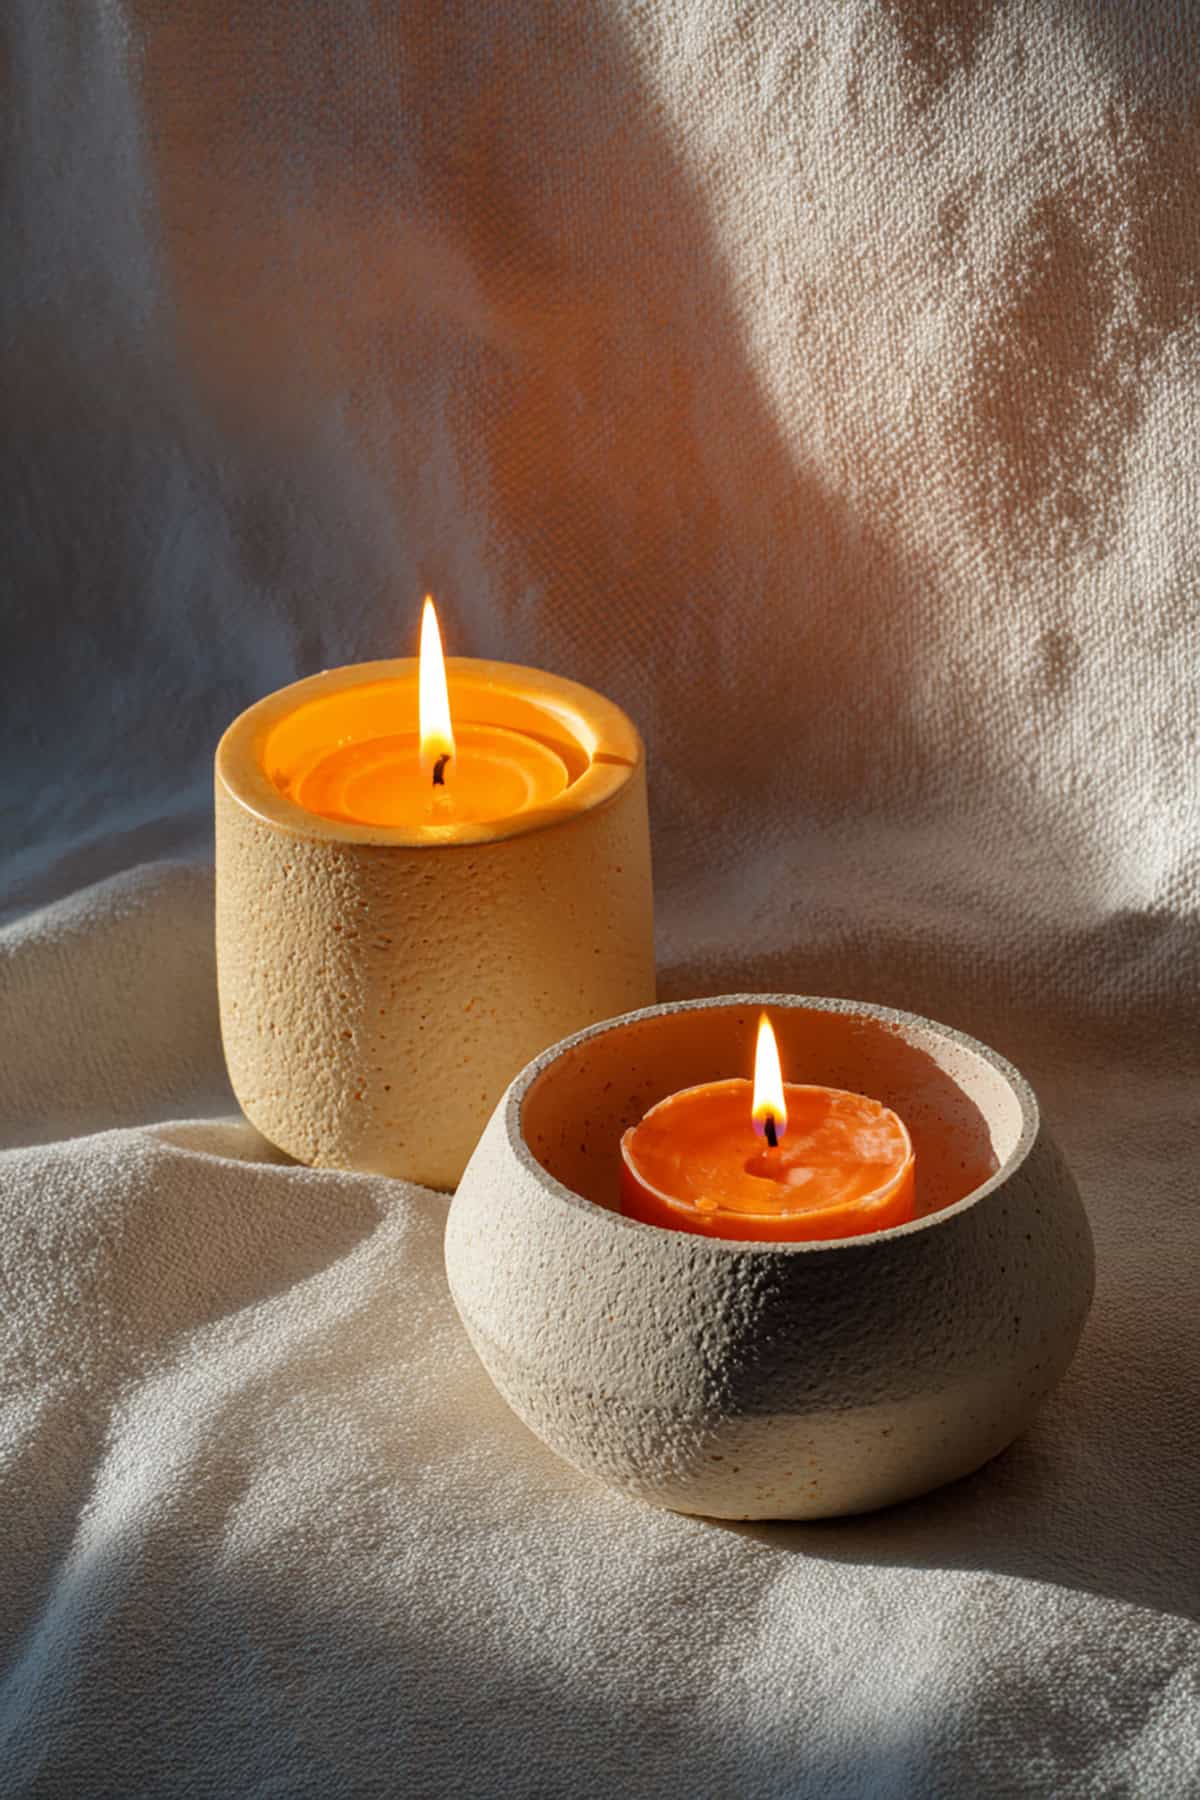
Small candle holders can really cozy up a space. Make sure the cavity fits tea lights or tapers snugly.
Try neutral colors or swirl two shades for a marbled effect. Varnish for a soft, not-too-shiny finish. They’ve got that handmade vibe people want for their homes.
Clay Incense Holders
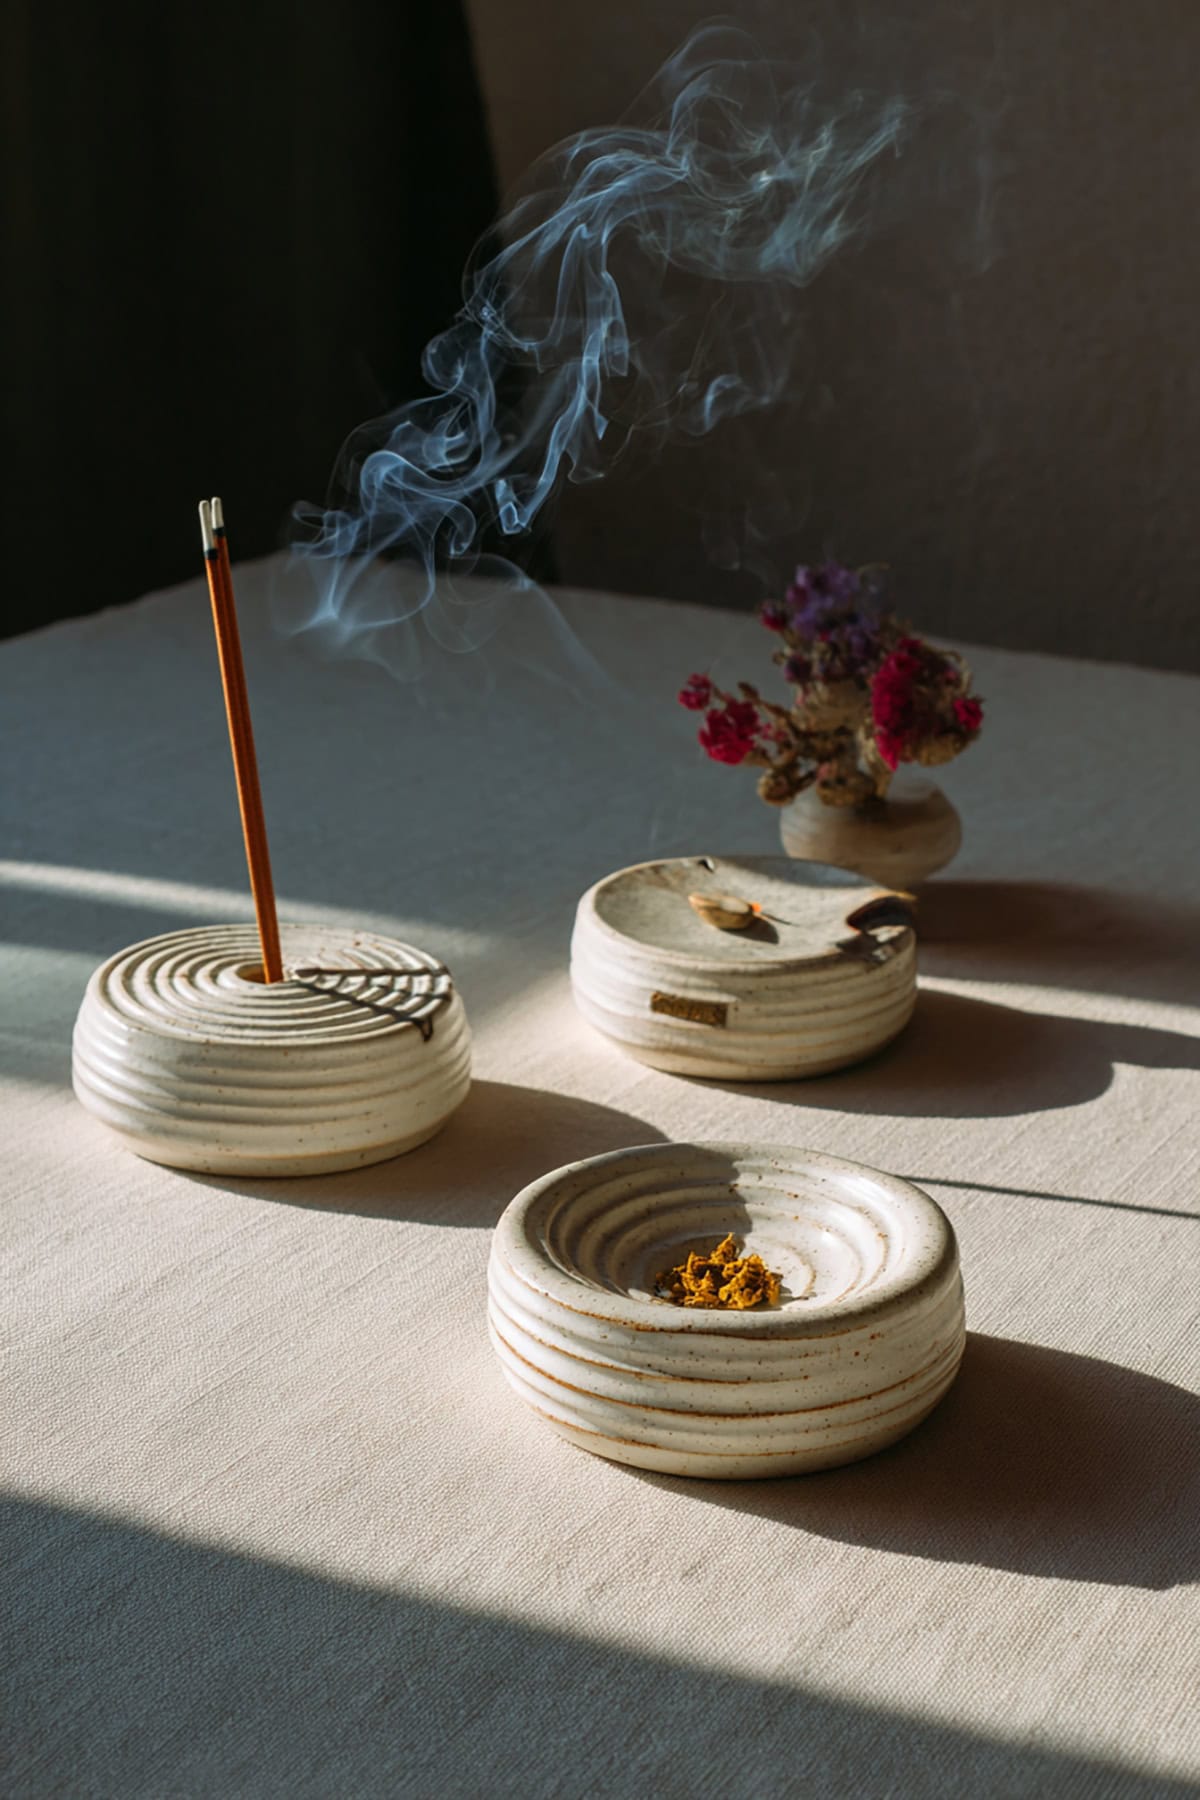
Shape slender trays or shallow bowls that catch ashes. Add a bit of texture or groove before drying, but keep the sides low so smoke doesn’t get trapped.
Earthy paint colors work well. Once sealed, they’re sturdy enough for regular use. Folks who love incense usually appreciate a handmade holder.
Clay Earrings
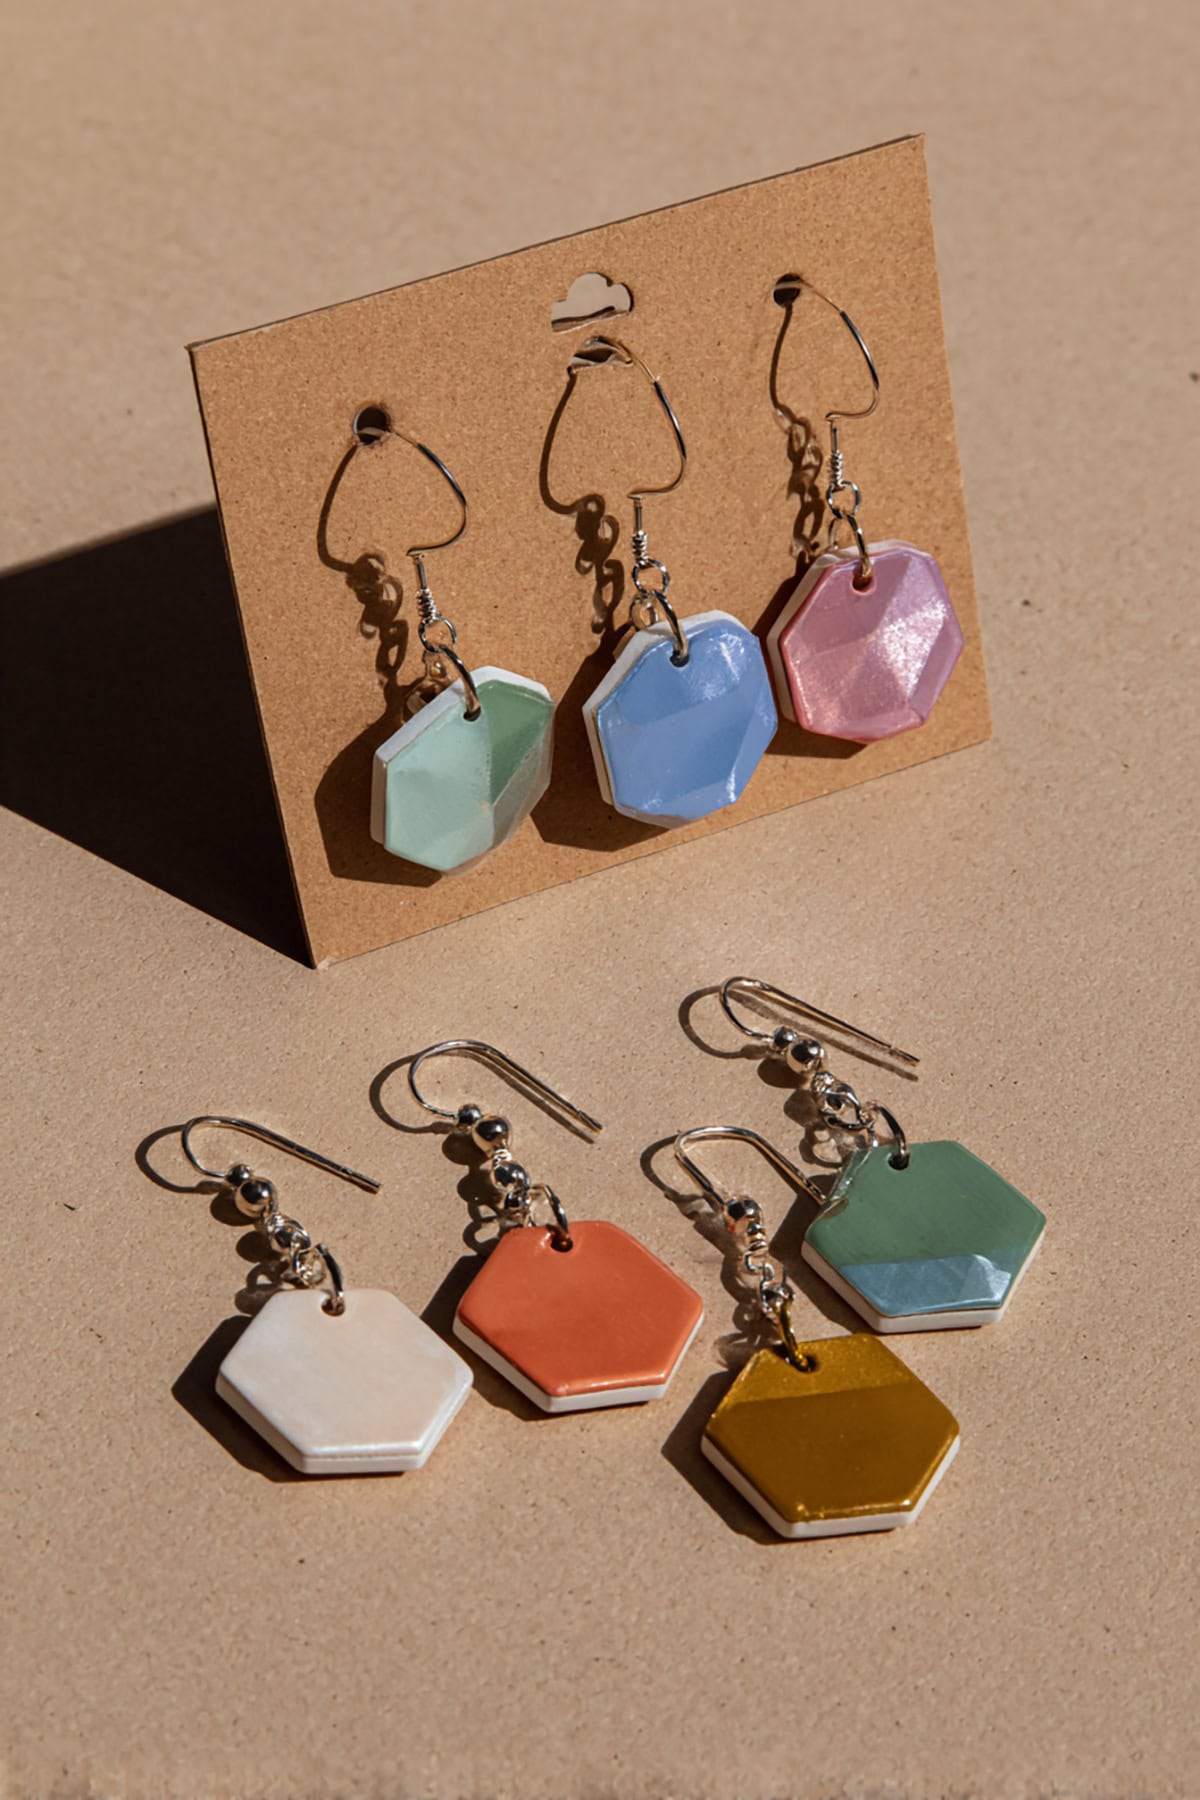
Lightweight and easy to make—dangles, studs, hoops, whatever you like. Roll the clay thin, cut your shapes, and poke holes before it dries.
Sand the edges after drying, then paint with bold or minimalist patterns. Attach hooks or posts with strong glue. They’re quick to batch and offer good margins.
Clay Pendant Necklaces
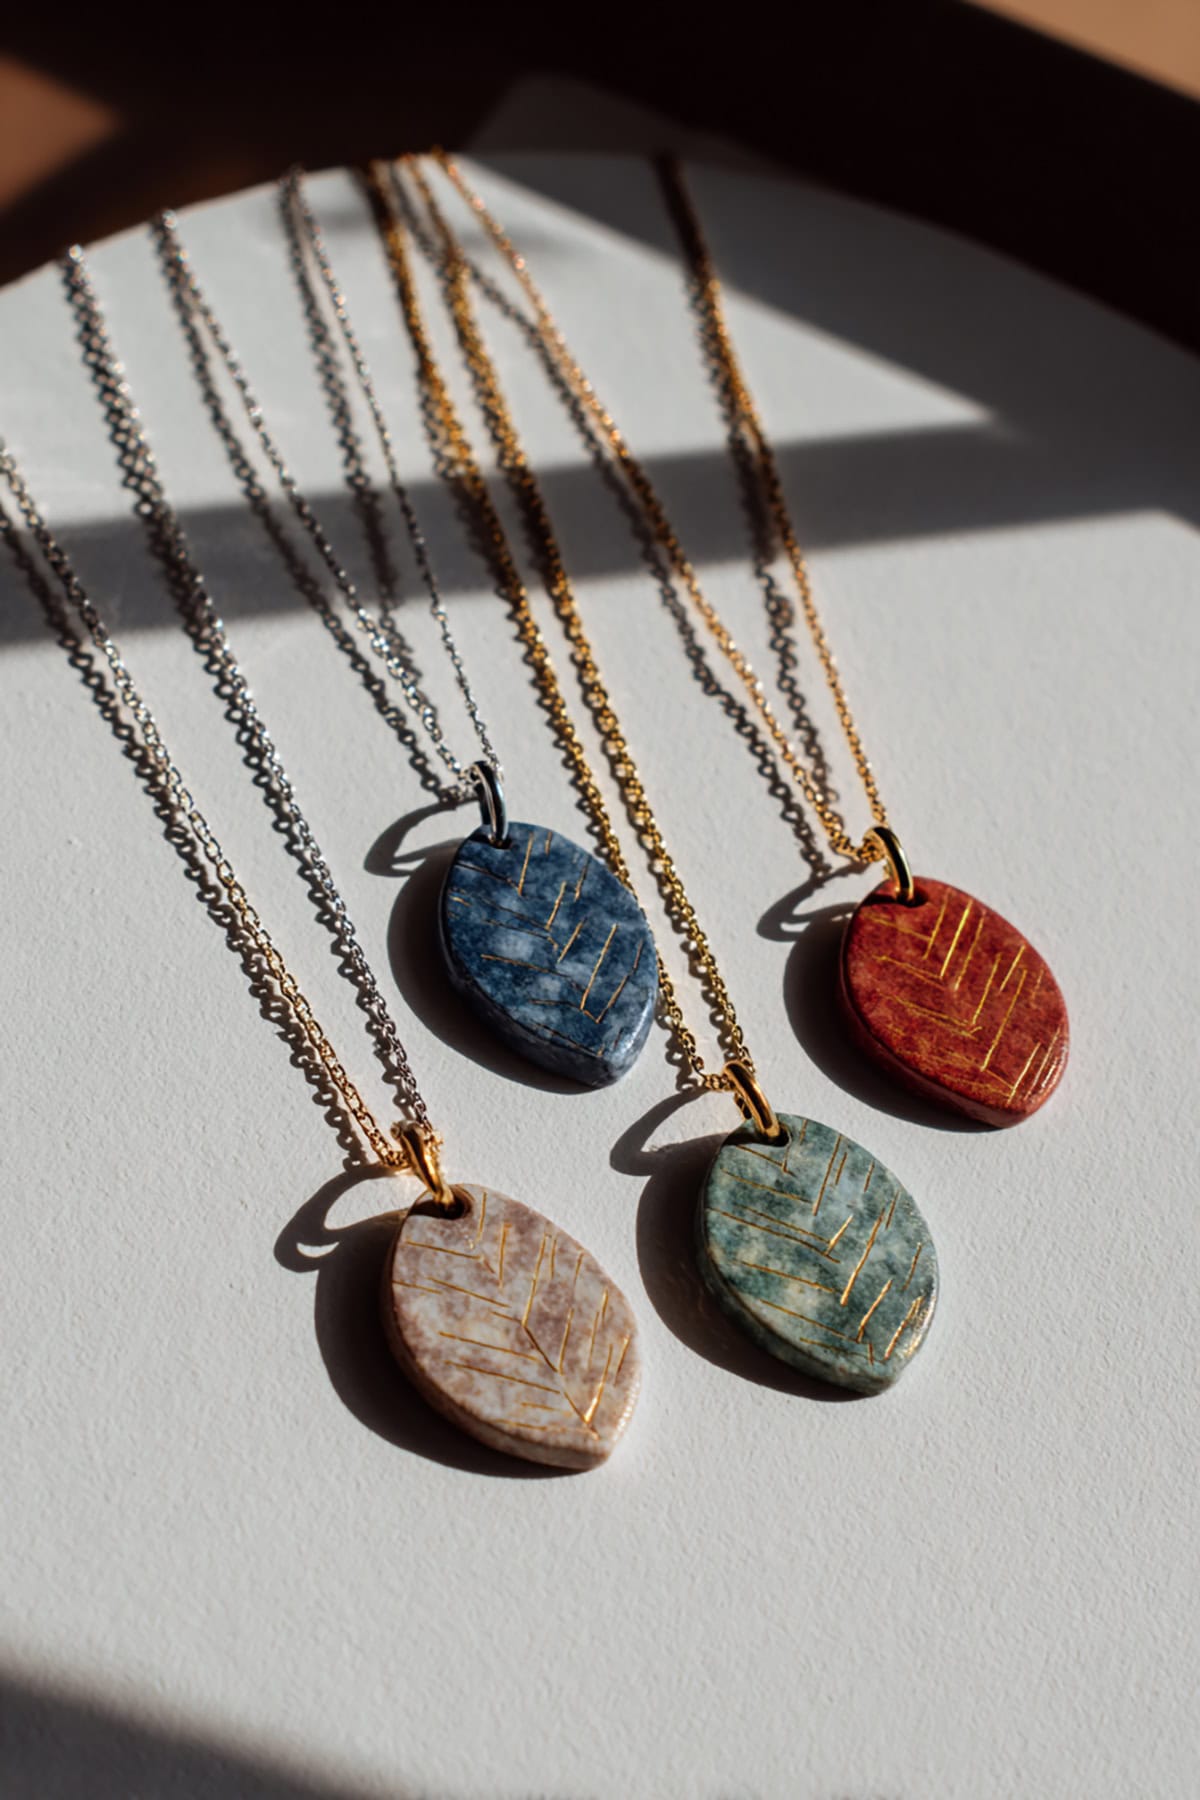
Pendants let you get creative. Try geometric, organic, or symbolic shapes that lay flat.
Emboss with tools or fabric before the clay sets. Paint selectively to add depth. Attach findings with eye screws or string through holes. Each one feels different from mass-produced jewelry.
Decorative Fridge Magnets
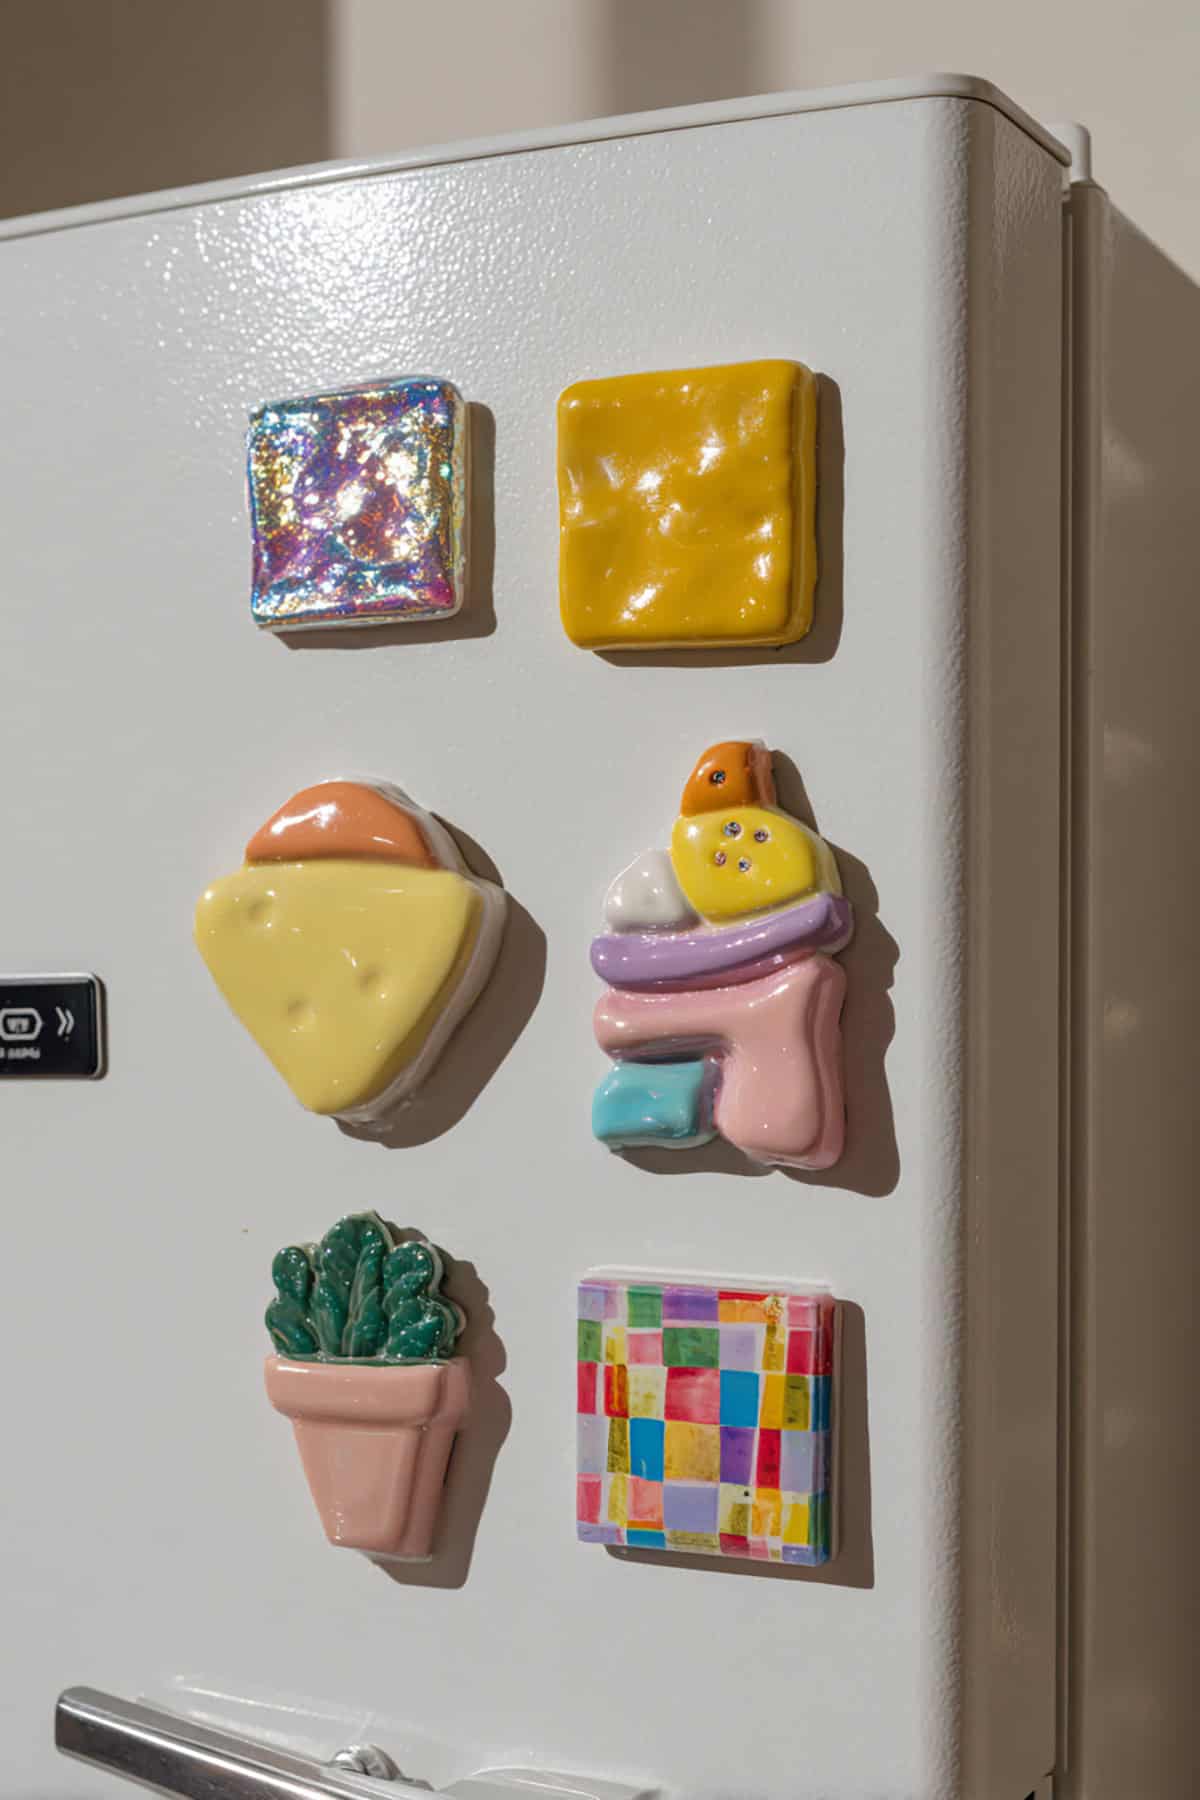
Turn small clay shapes into fun magnets—fruit, animals, abstract designs. Flatten the clay, add details, and paint as you like.
Glue on a strong magnet after painting. These are cheap, collectible, and easy to sell as novelty or souvenir items.
Clay Wall Hangings
Wall pieces add texture to any room. Try semi-circles, arches, or tiles strung together with rope.
Impress some texture or hand-cut patterns before drying. Matte finish keeps the look organic. Neutral or earthy colors fit a bunch of decor styles.
Handmade Clay Beads
Make beads in any shape—spheres, tubes, whatever. Pierce holes before they dry.
Paint in coordinated colors for sets. Add a glossy glaze if you like. They’re great for jewelry makers who want kiln-free supplies.
Clay Phone Grip Toppers
Personalize phone grips with small clay toppers. Keep them light so they don’t weigh down the phone.
Designs can be initials, geometric shapes, or tiny icons. Seal and glue onto pop-style grips. People love swapping these out to match their cases.
Clay Bookmarks
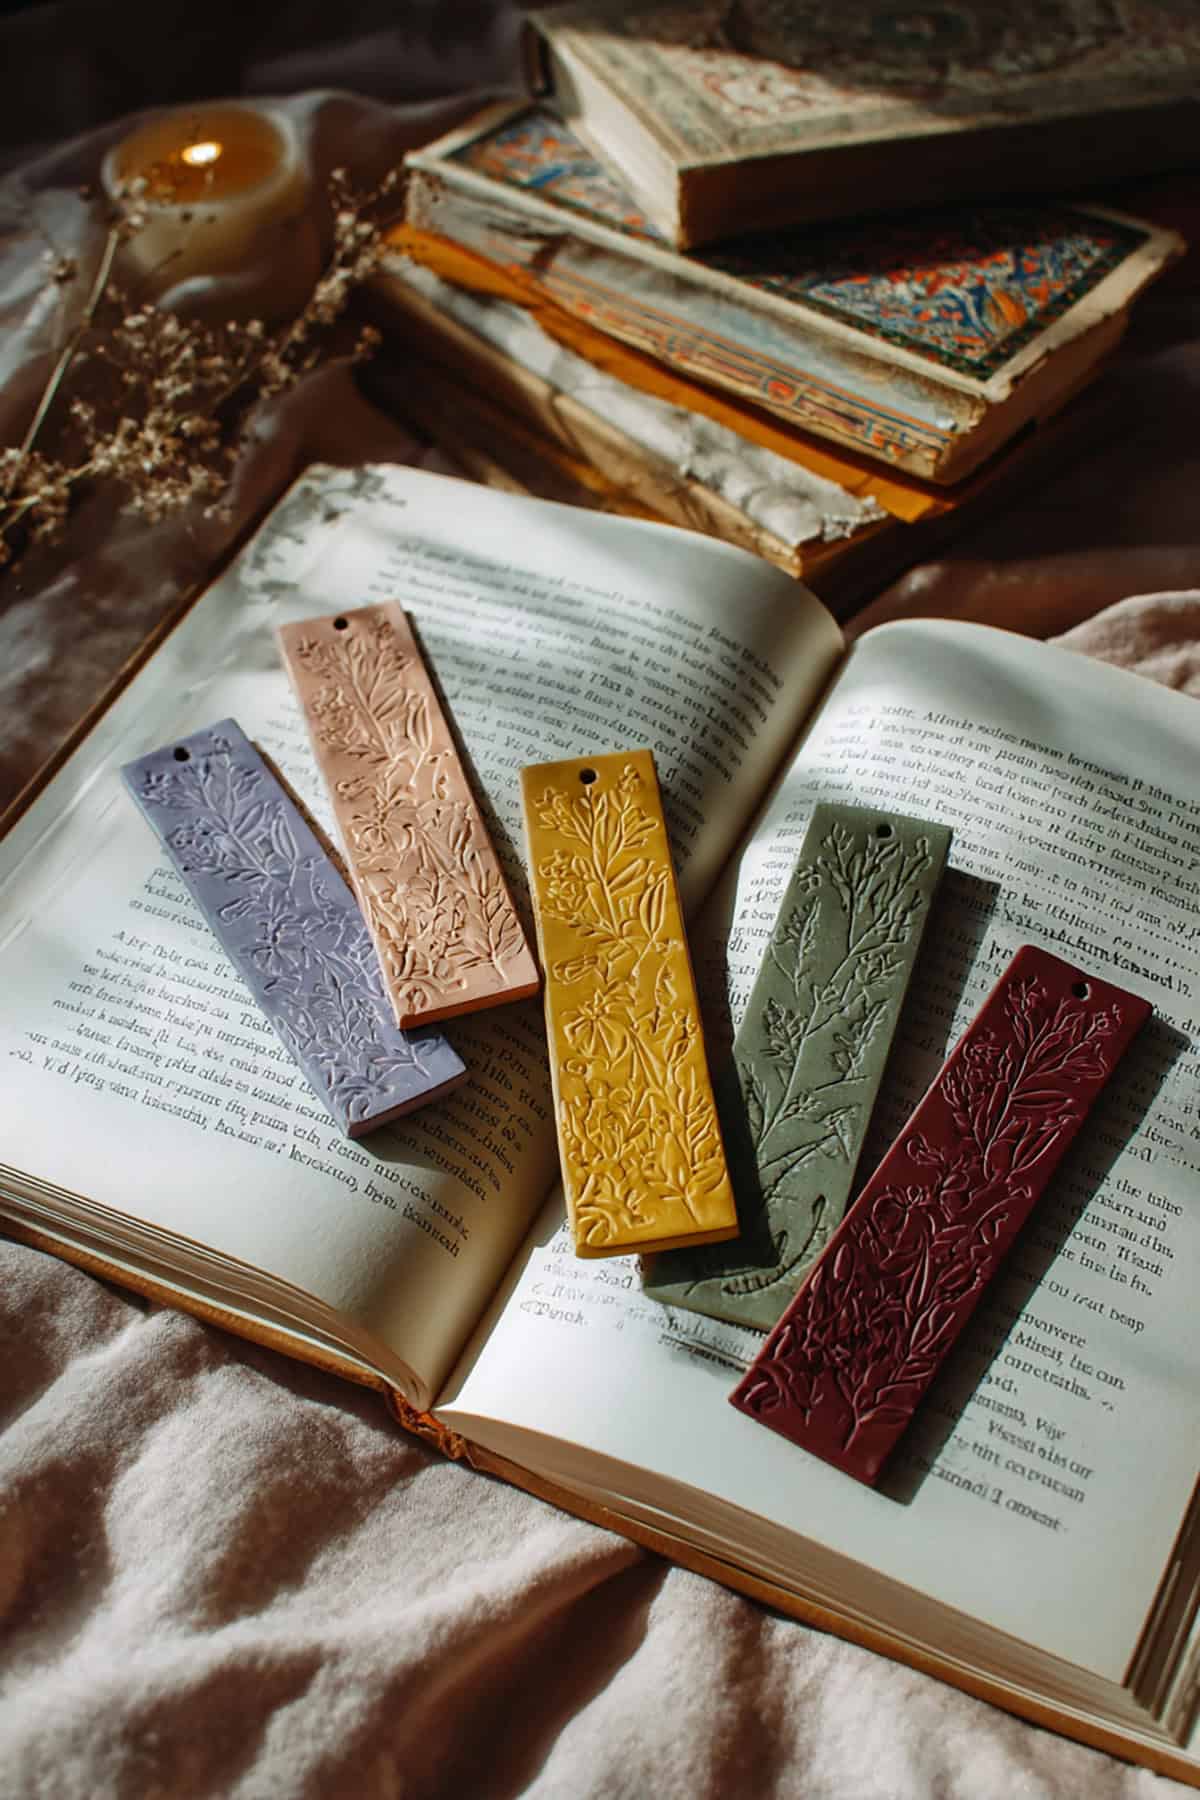
Flat clay strips work as bookmarks. Carve patterns or initials along the edges.
When dry, add a ribbon or tassel for flair. Smooth finish helps them slide between pages. Book lovers appreciate the handmade touch.
Clay Business Card Holders
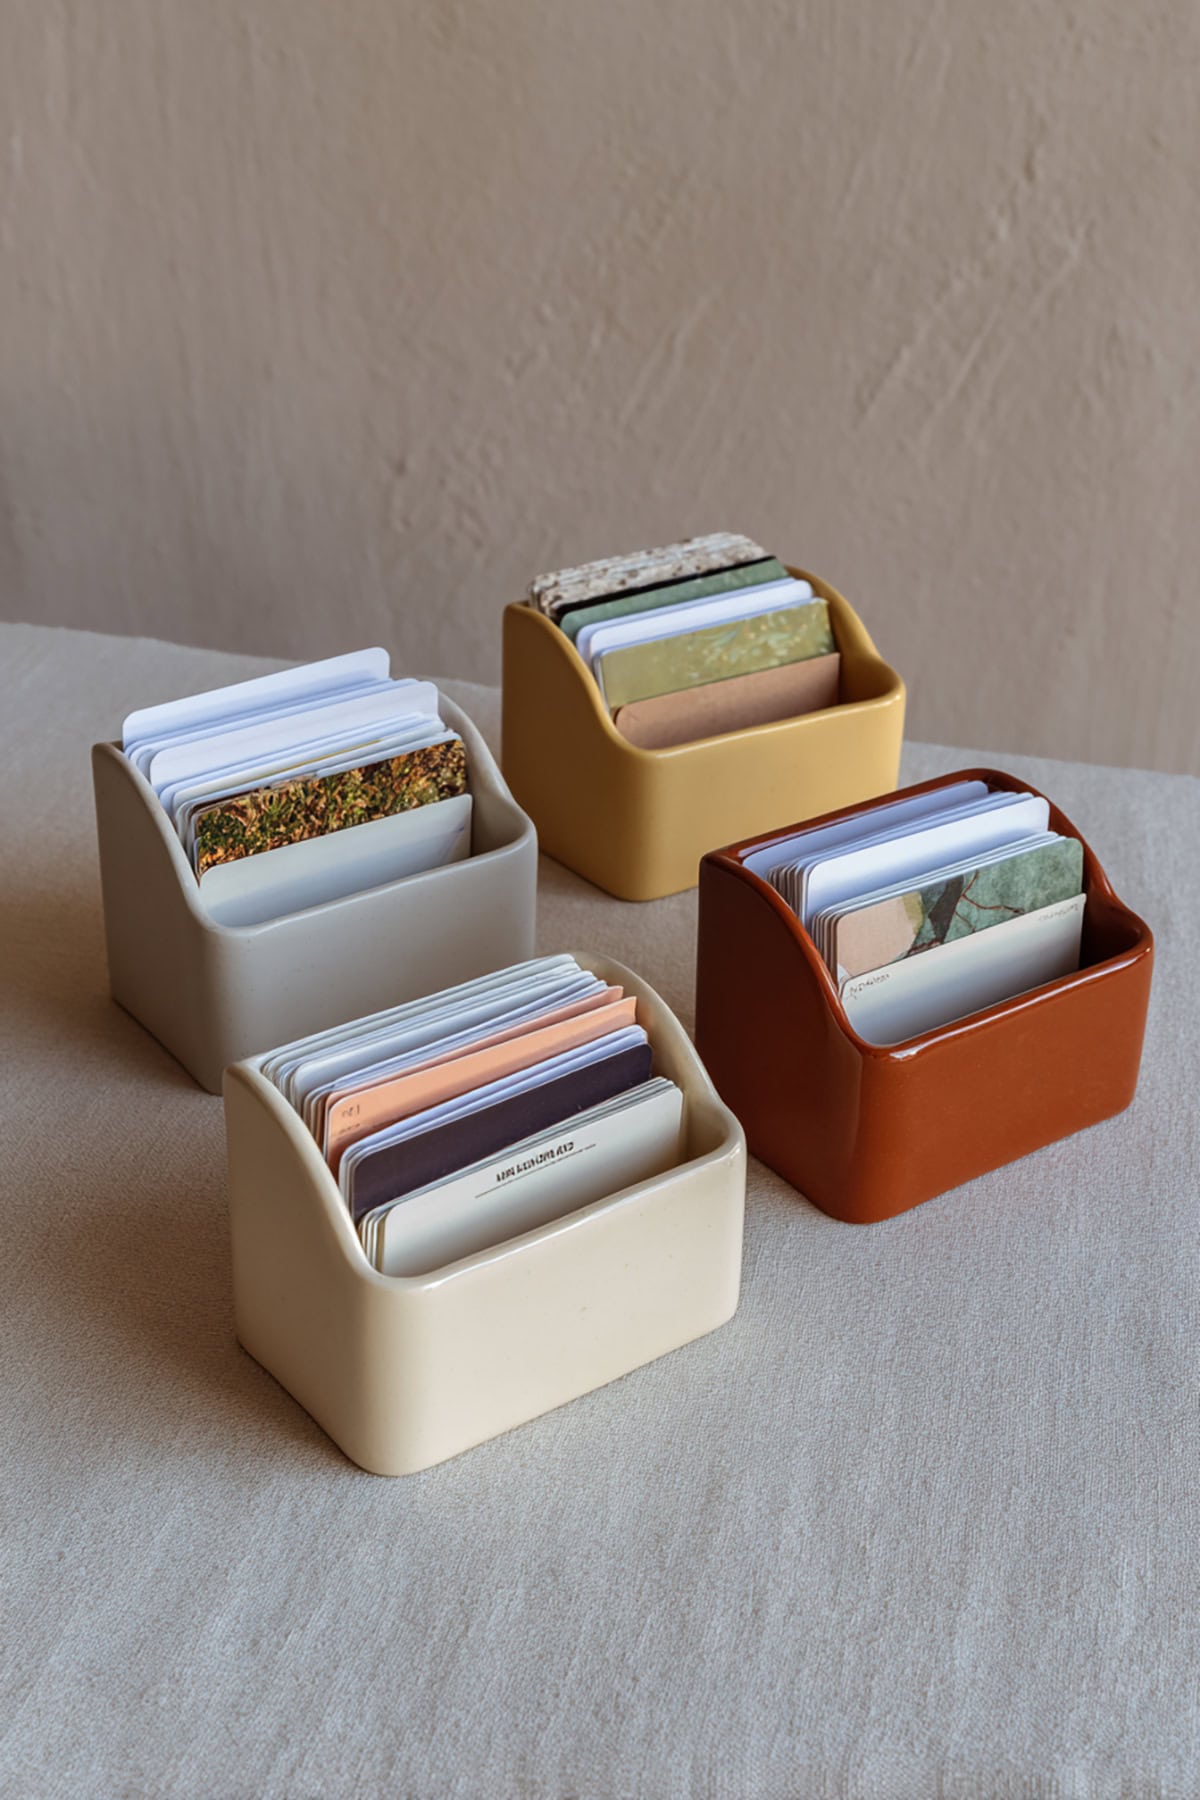
Make card holders with an angled back or a simple slot. Smooth out the edges for a clean look.
Stick to stone or gray tones for a professional vibe. Seal to prevent chips. Handy for anyone who wants a unique desk accessory.
Clay Stamps And Texture Tools

Shape small blocks with raised designs to use as stamps. Once dry and sealed, they can add texture to paper or other clay projects.
Selling sets with simple motifs appeals to fellow crafters who want to speed up their process.
Miniature Clay Food Art
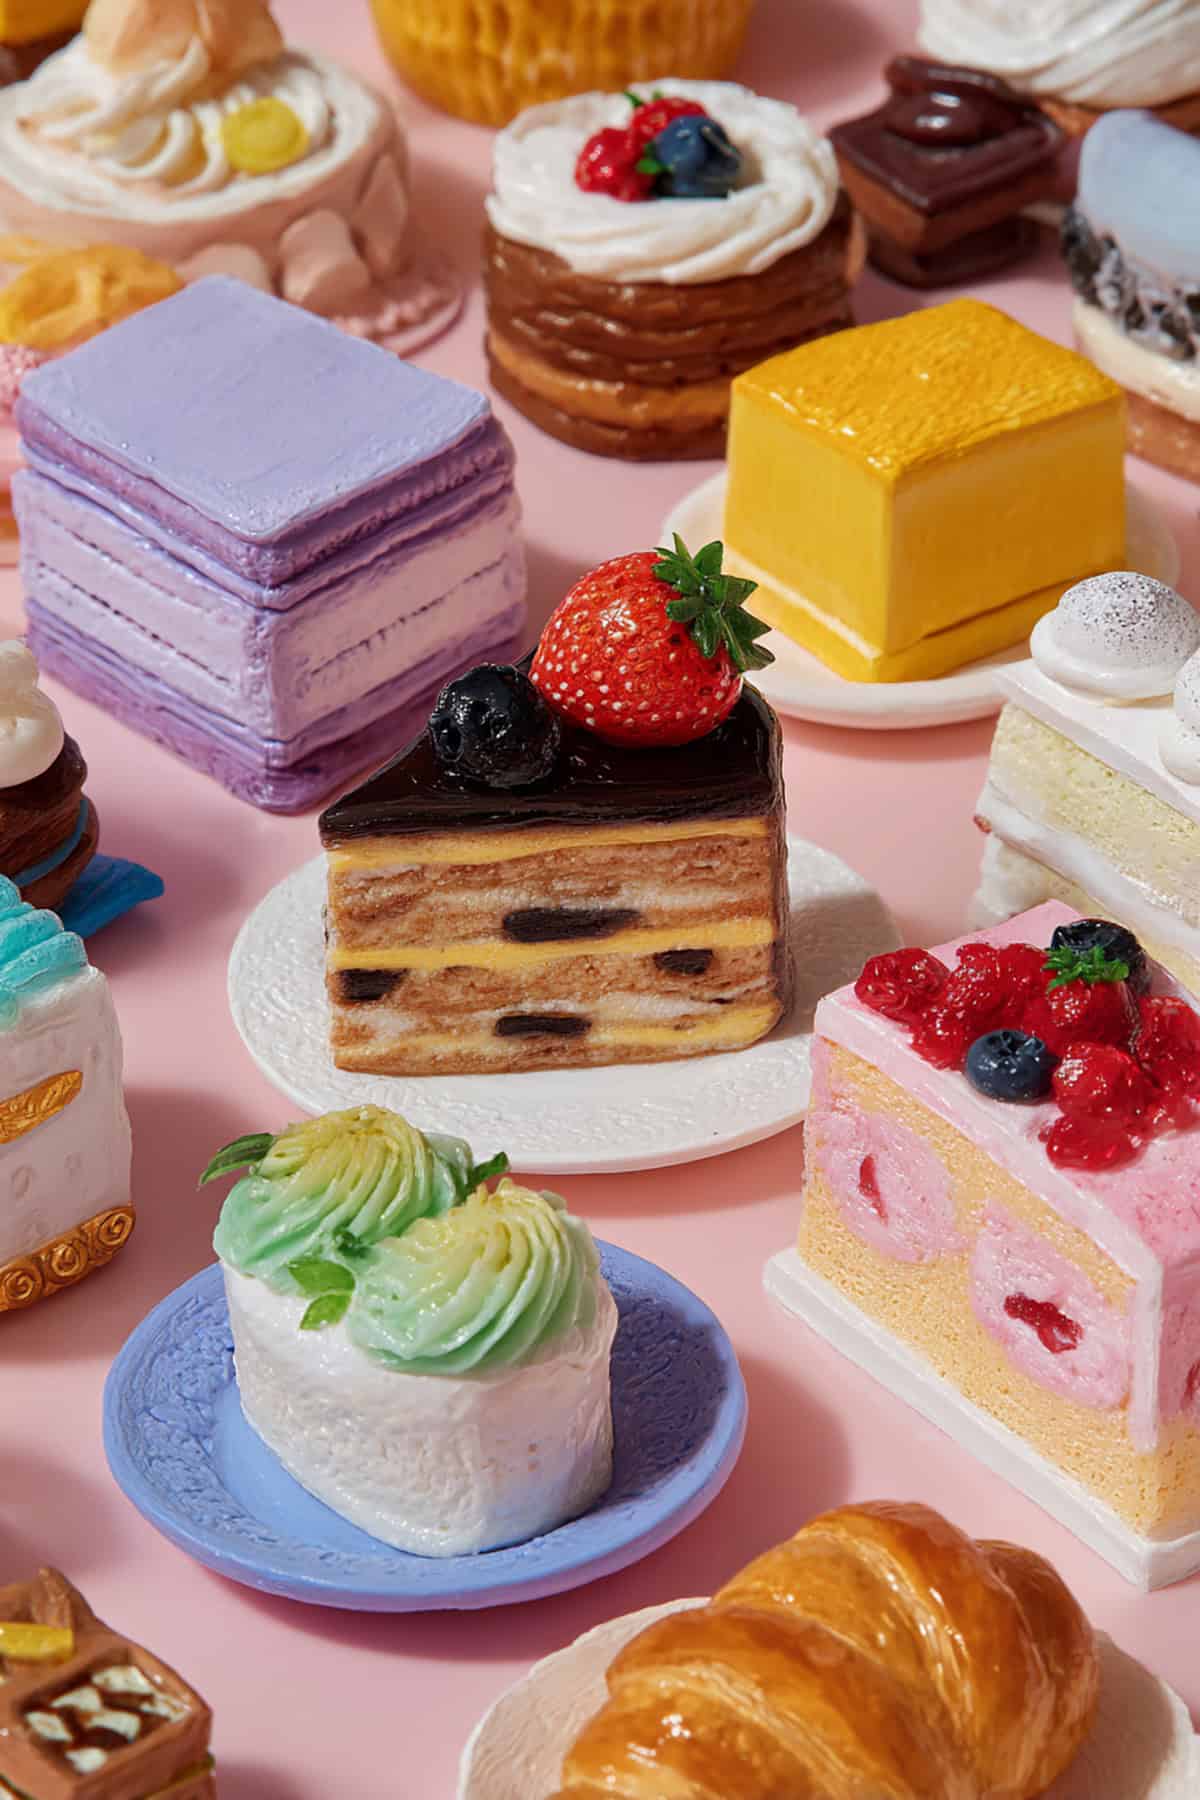
Tiny clay foods are a favorite with collectors and dollhouse fans. Shape fruits, bread, or desserts with layered colors.
Add texture with tools or toothpicks. Glossy varnish makes them look like real confections. They’re a nice way to show off fine detail work.
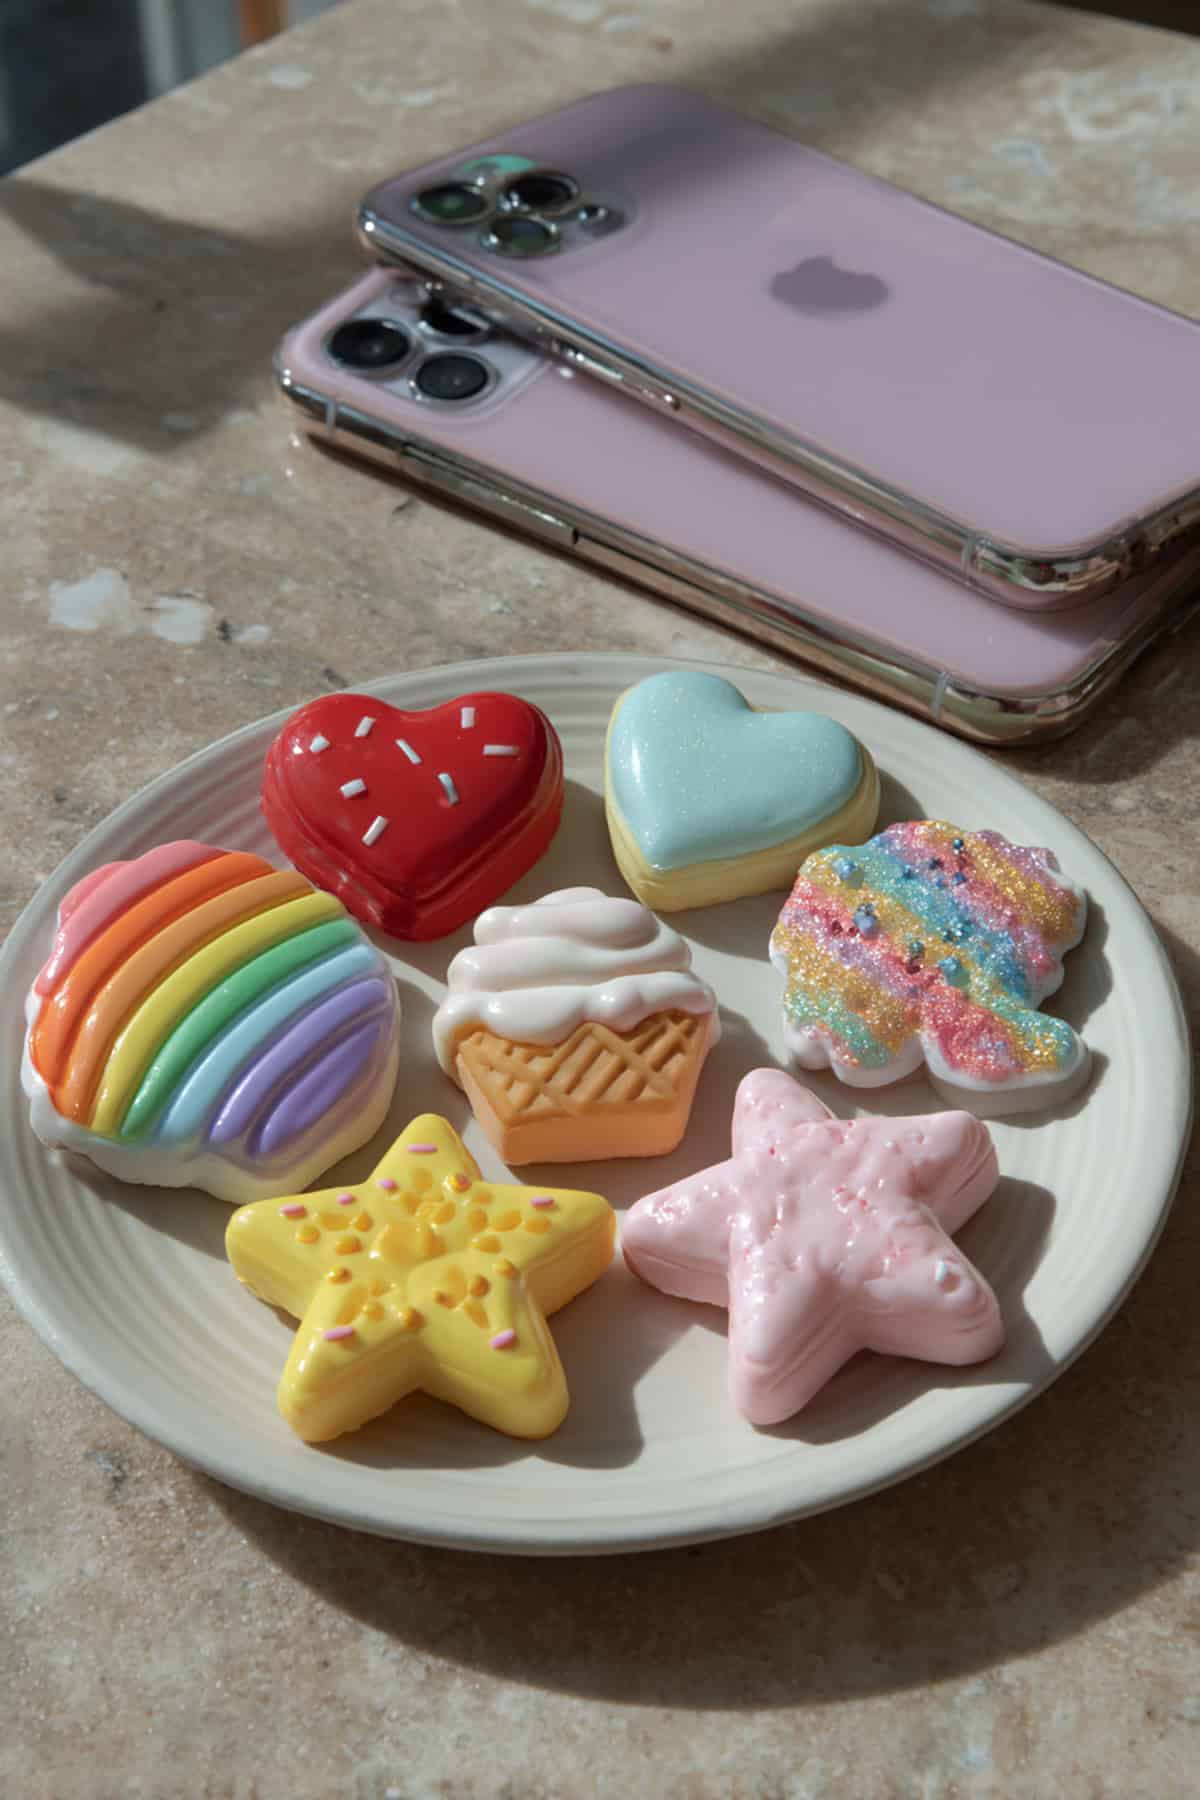
Clay Holiday Ornaments
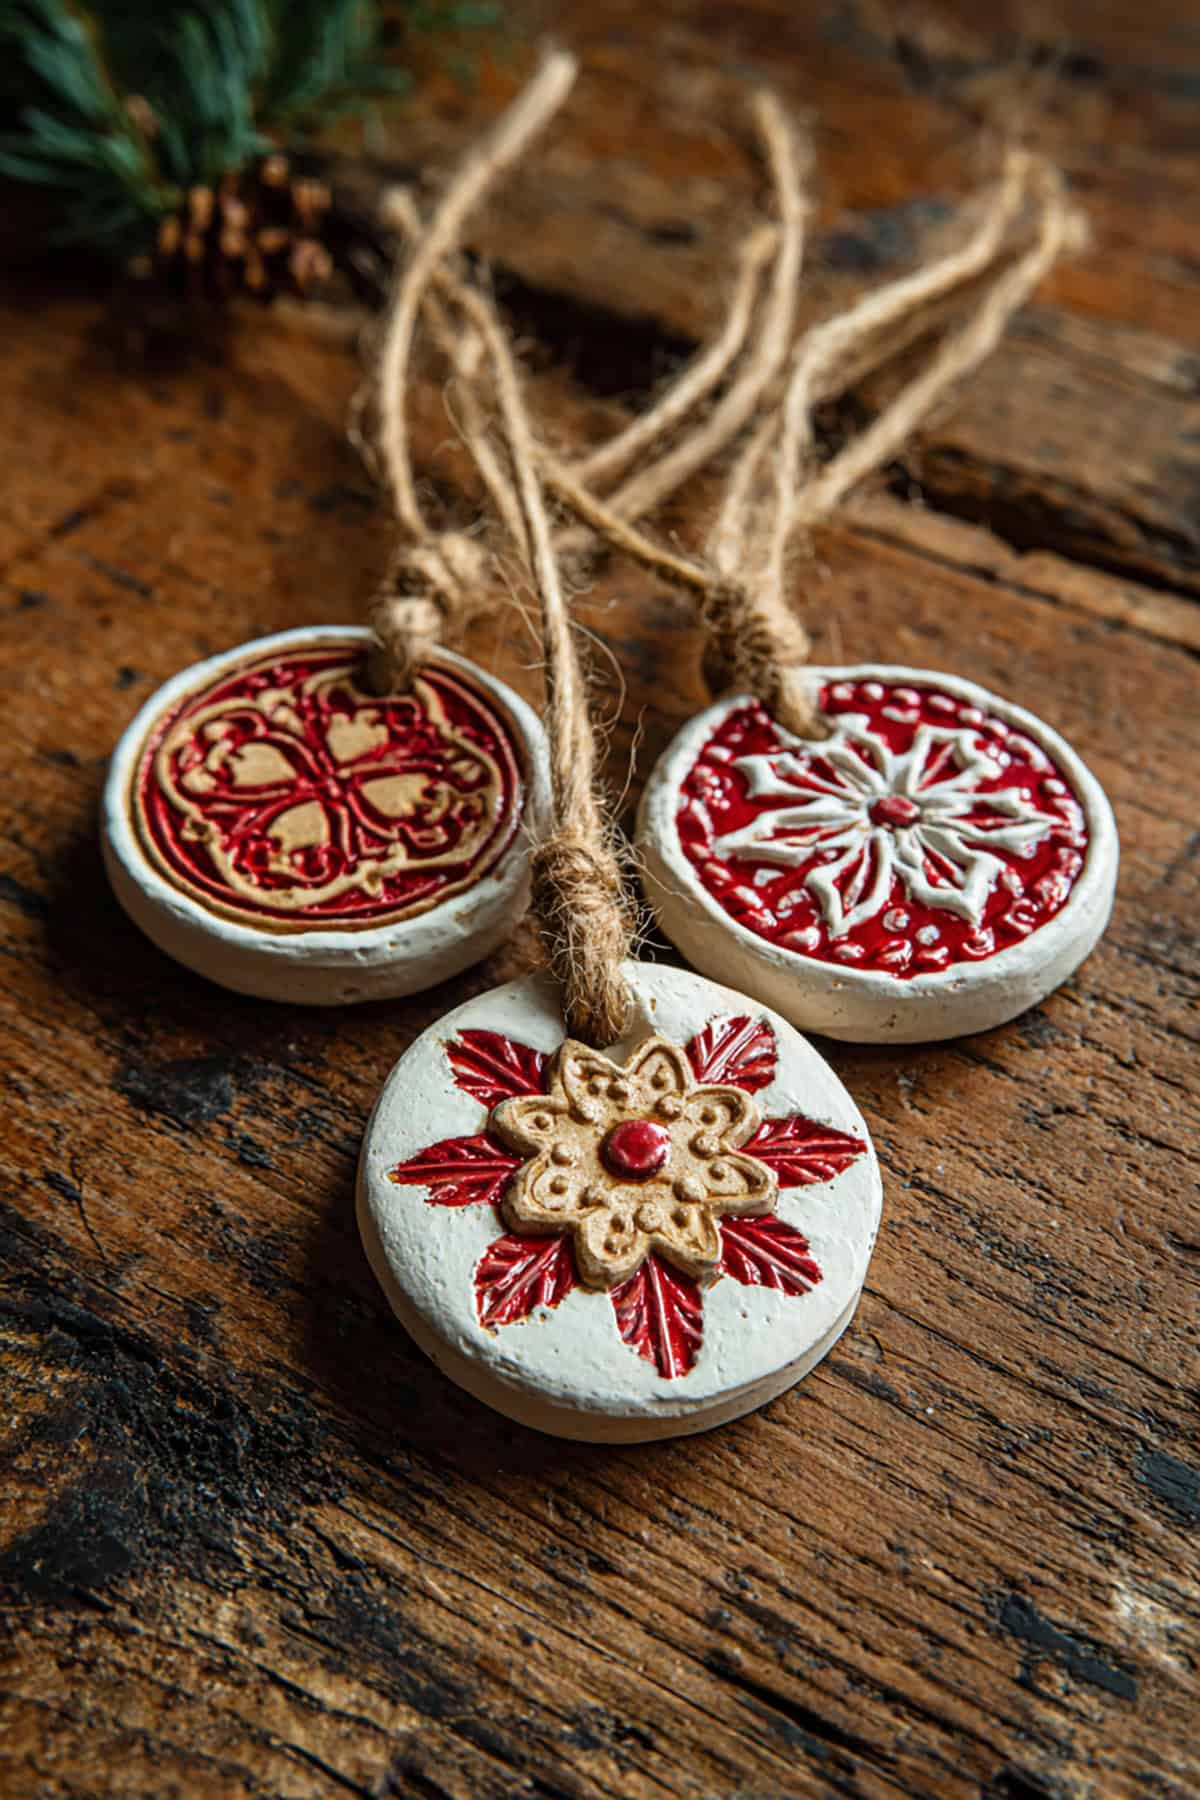
Seasonal ornaments are always popular. Use cookie cutters to shape stars, trees, or hearts.
Poke a hole for ribbon before drying. Personalize with names or dates. They’re easy to store and sell well at holiday markets.
Clay Picture Frames
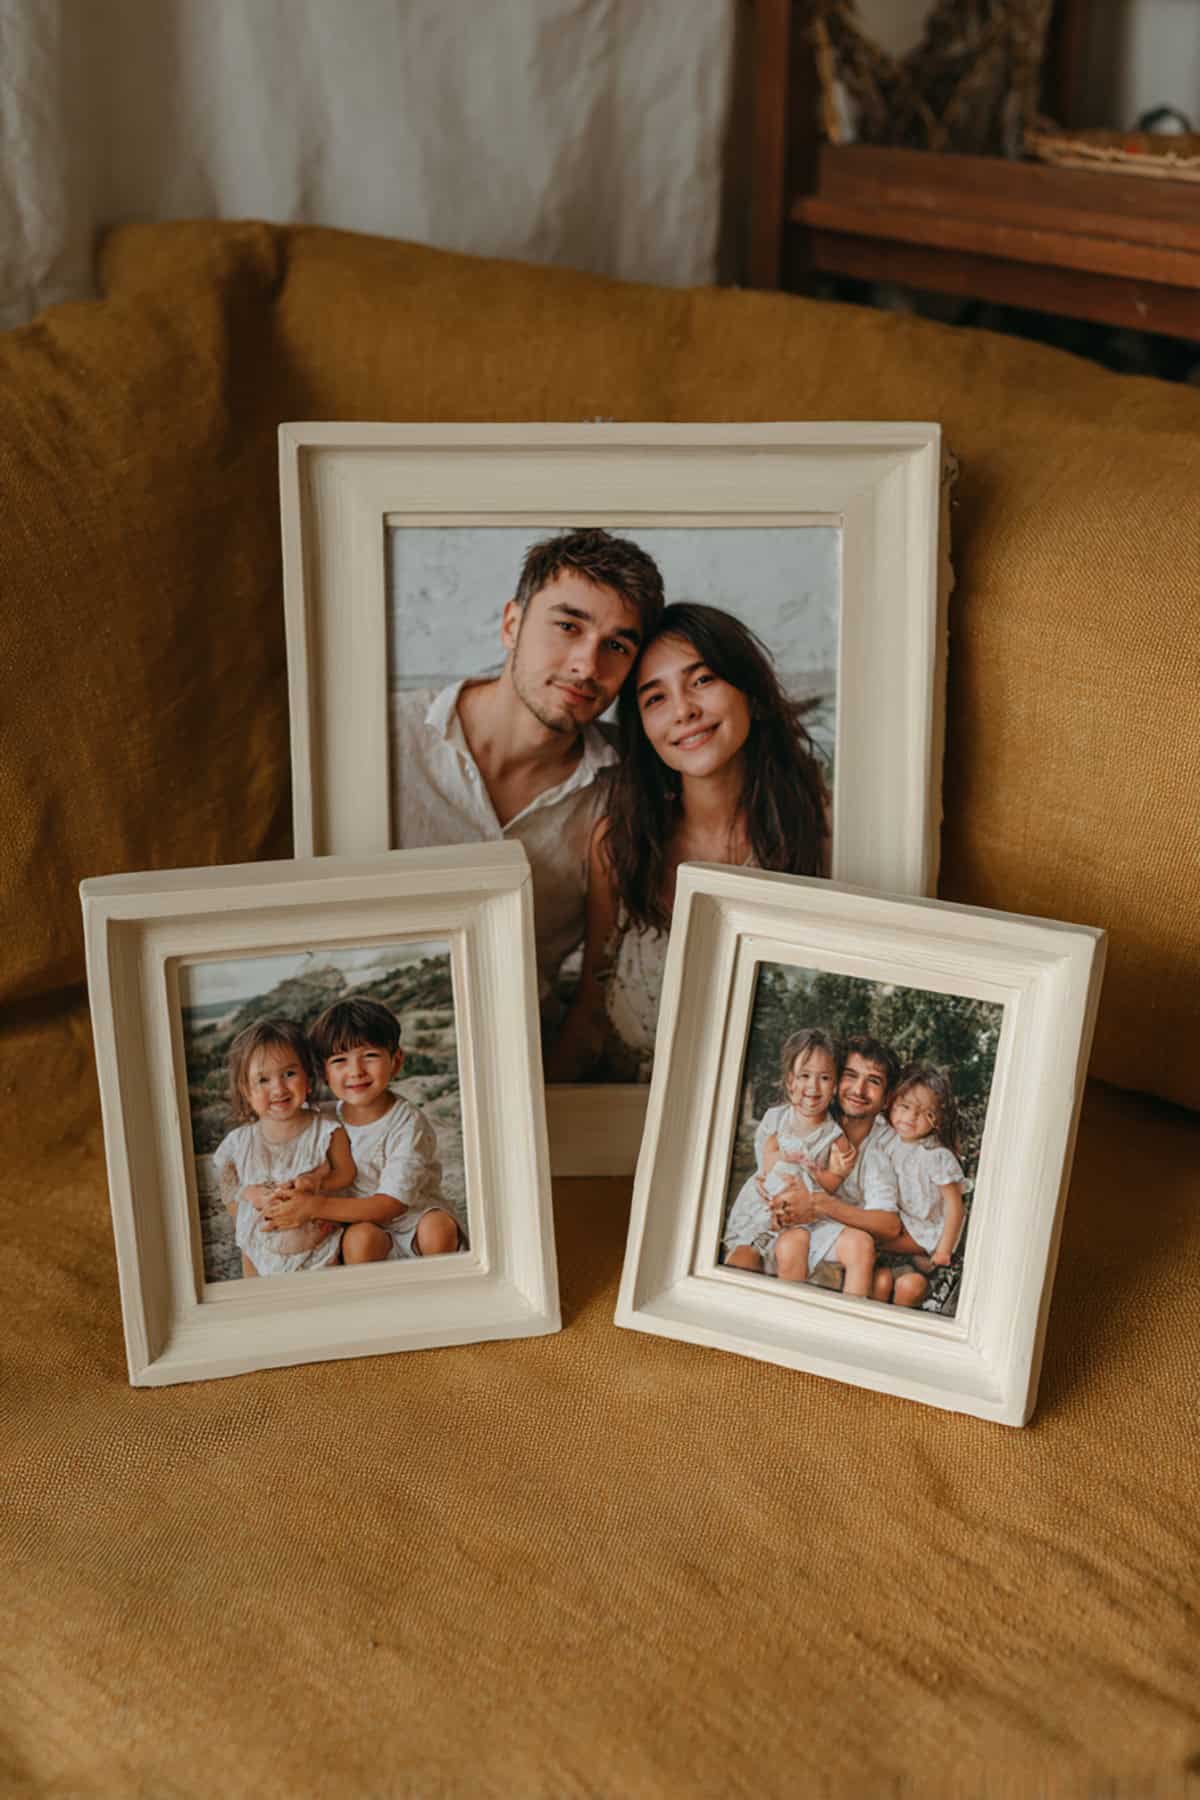
Form frames by hand or use a template. Add borders or patterns while the clay’s still soft.
After drying, sand and paint in subtle tones. Seal for durability. These make sweet gifts or add-ons at craft fairs.
Essential Oil Diffuser Charms
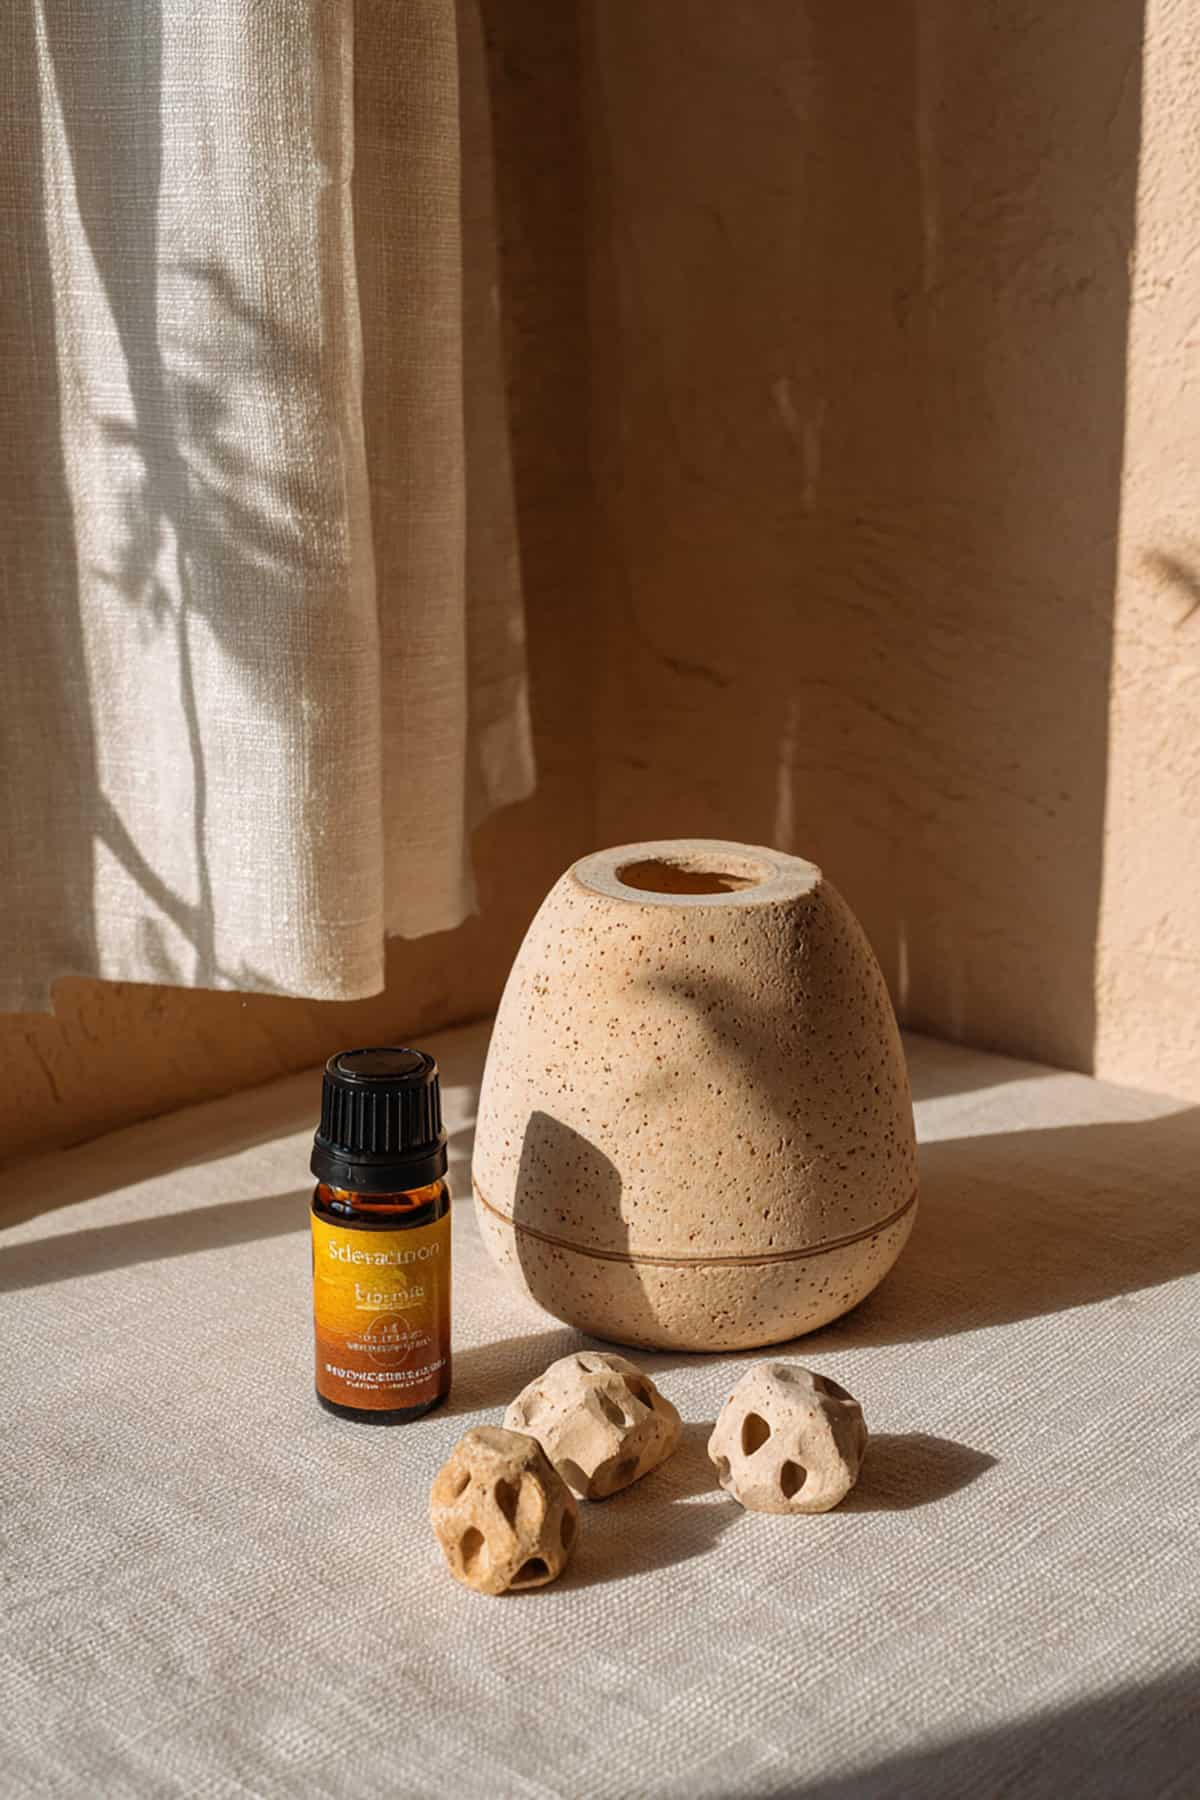
Clay slowly releases essential oils. Make flat pieces with carved surfaces or holes for stringing.
Let them dry thoroughly for best absorption. Only add oils once they’re fully cured. Handy for cars, closets, or desks.
Clay Desk Organizers
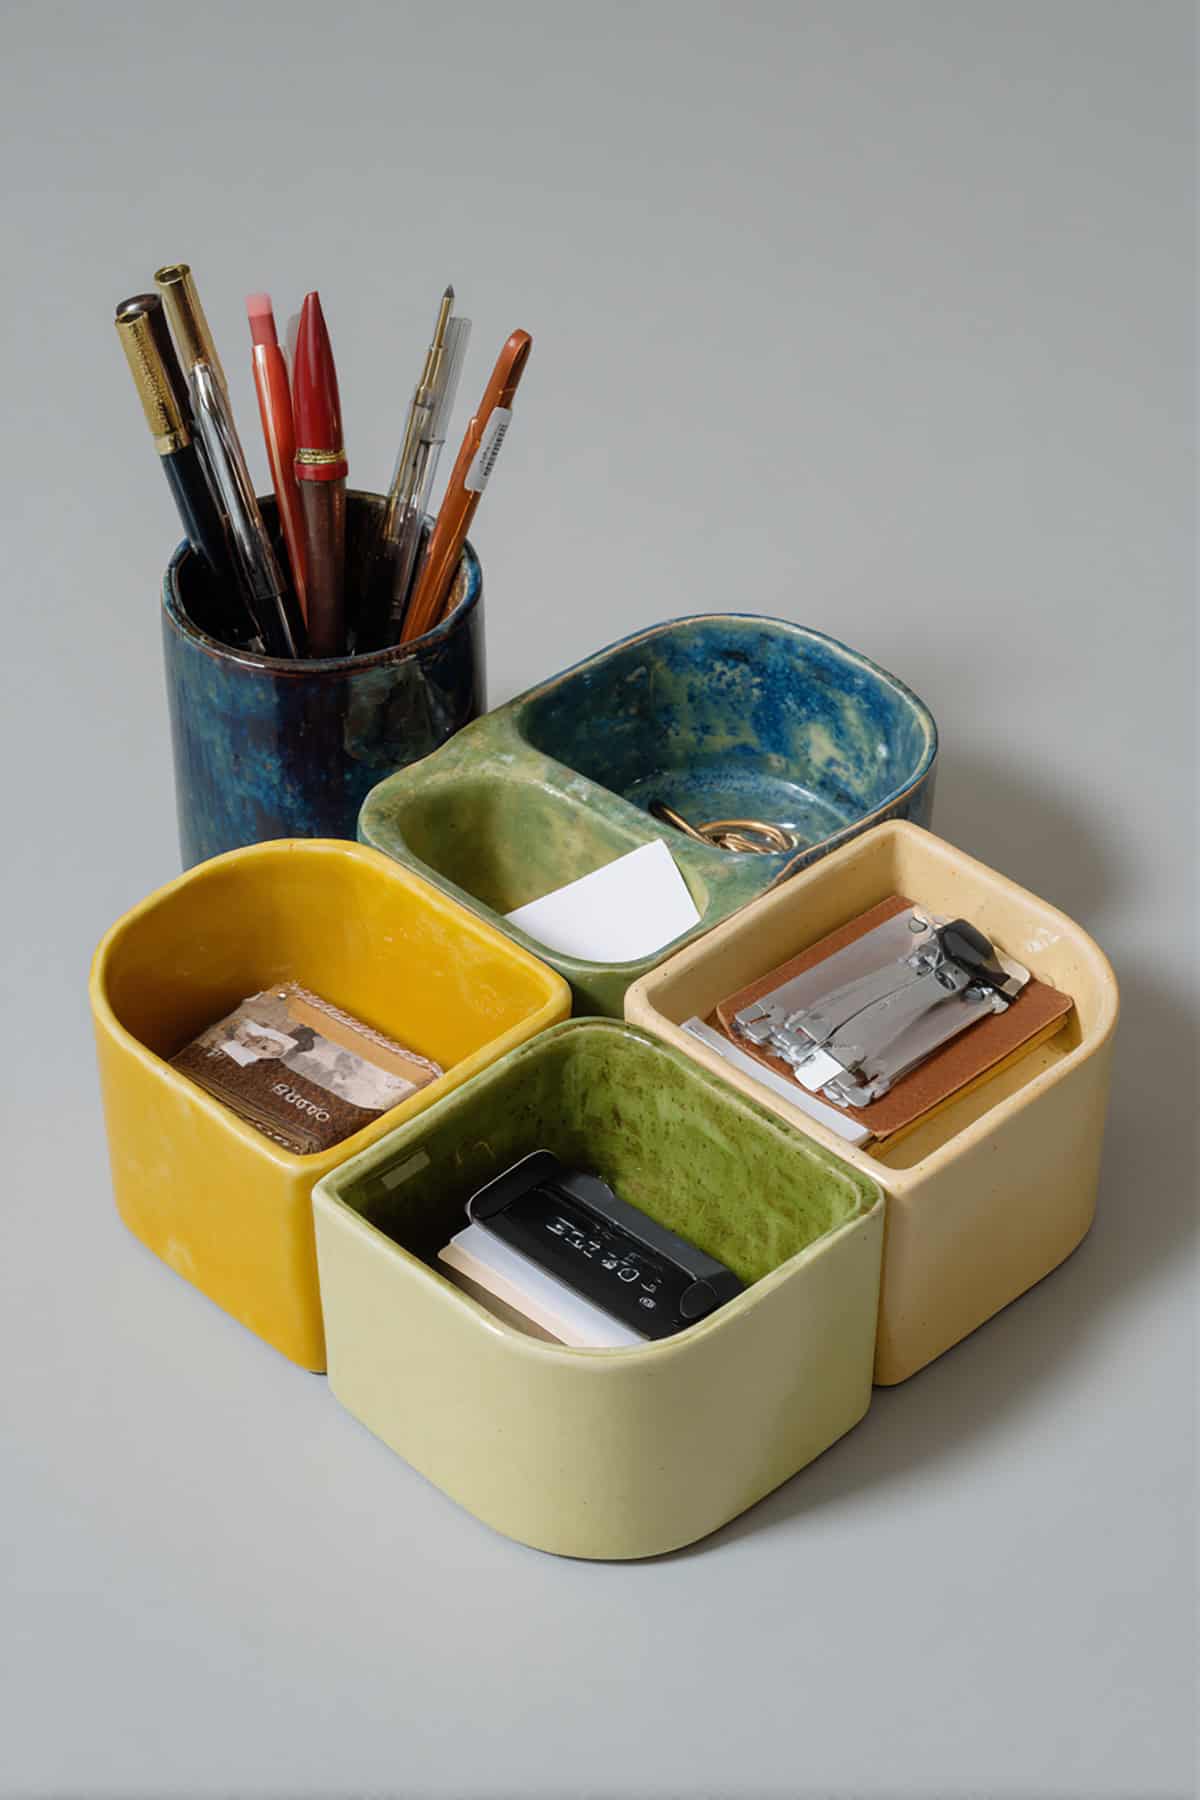
Keep small office stuff in check with divided trays, pen holders, or simple pots. Hard edges look modern, and matte finishes avoid glare.
Seal inside surfaces to guard against moisture. These organizers make desks look neat without being boring.
Faux Ceramic Clay Vases
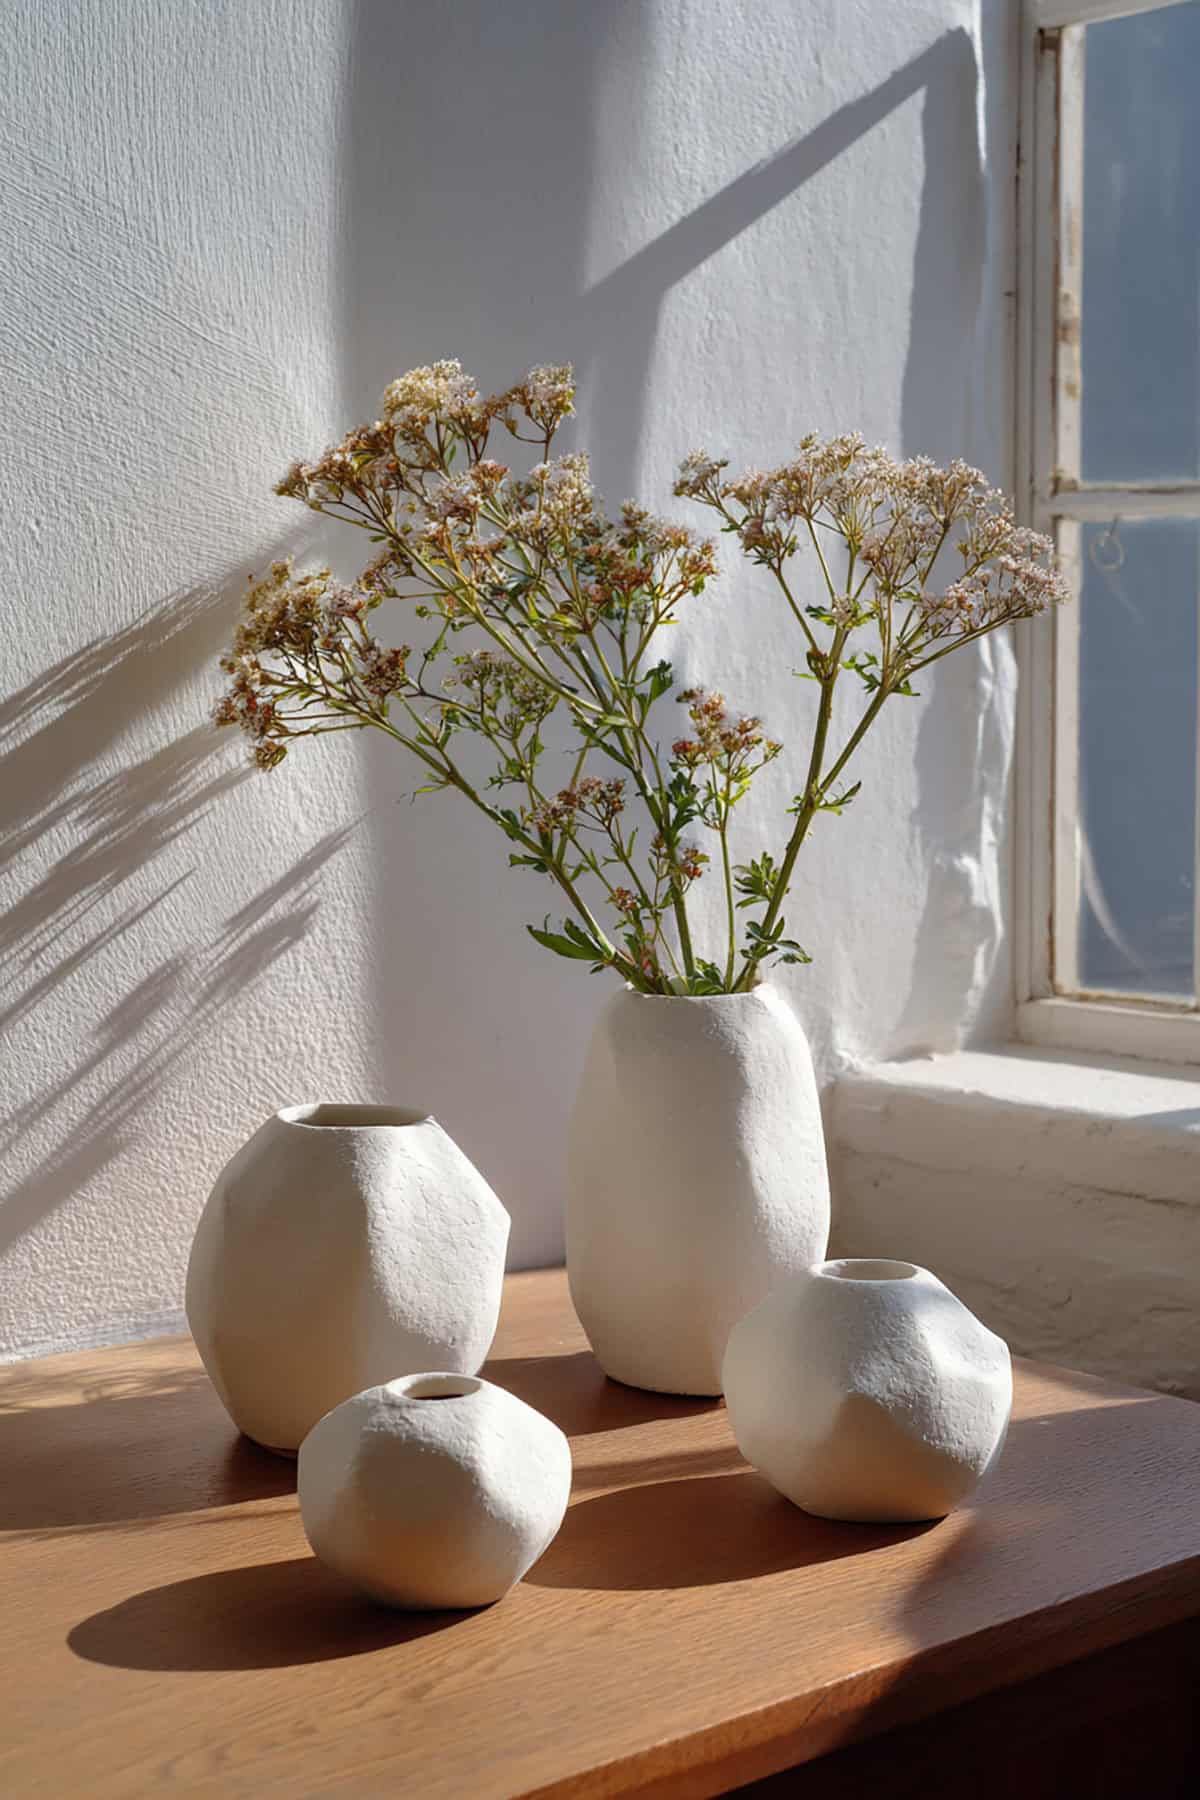
Shape slender or round vases and smooth them out for a ceramic look. Paint with white or speckled finishes after they dry.
Seal the inside if using for dried flowers—these aren’t for water. The handmade look fits the current shelf styling trends.
Clay Wind Chimes
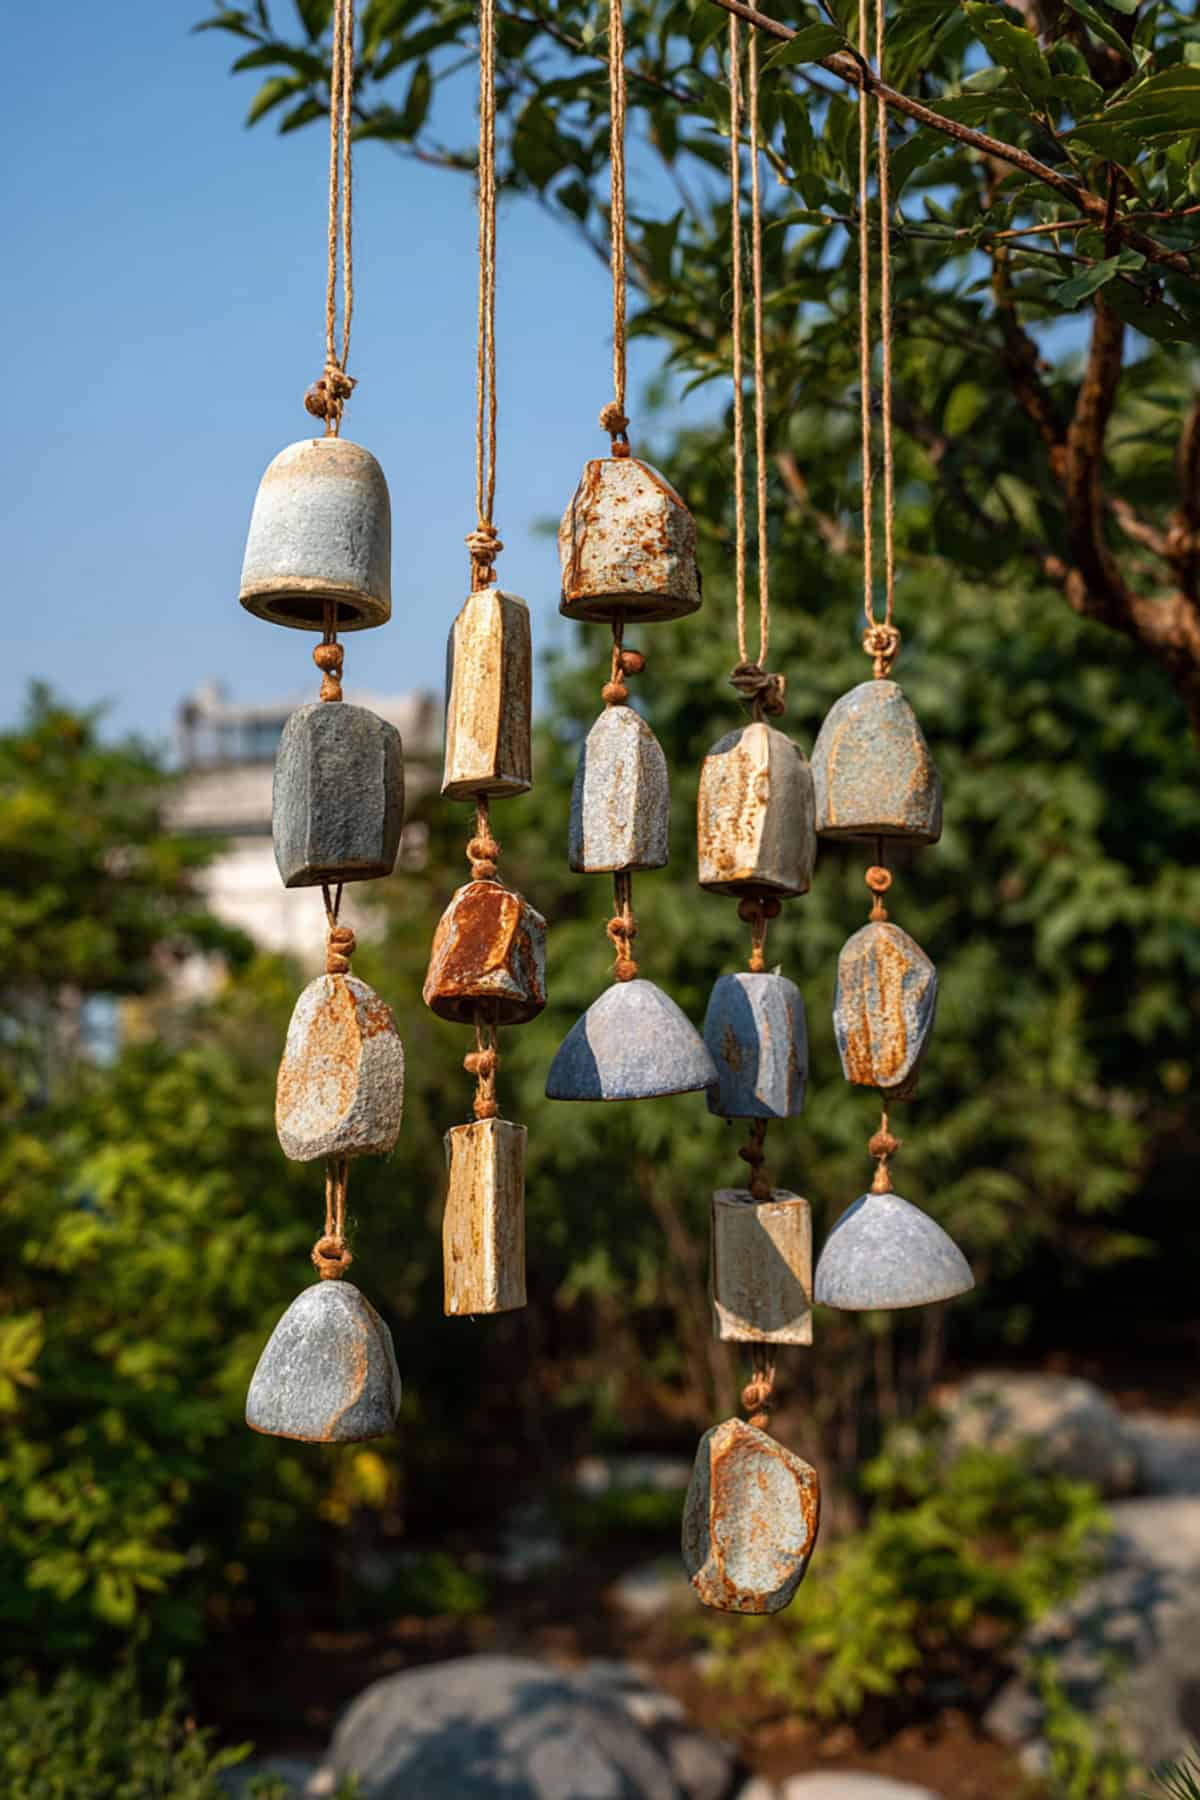
Flat discs or tubes make gentle wind chimes. Punch holes before drying so you can string them up.
Paint in gradient colors for a shifting effect. Assemble with strong thread and a top ring. They sound nice and double as decor.
Zodiac-Themed Clay Dishes
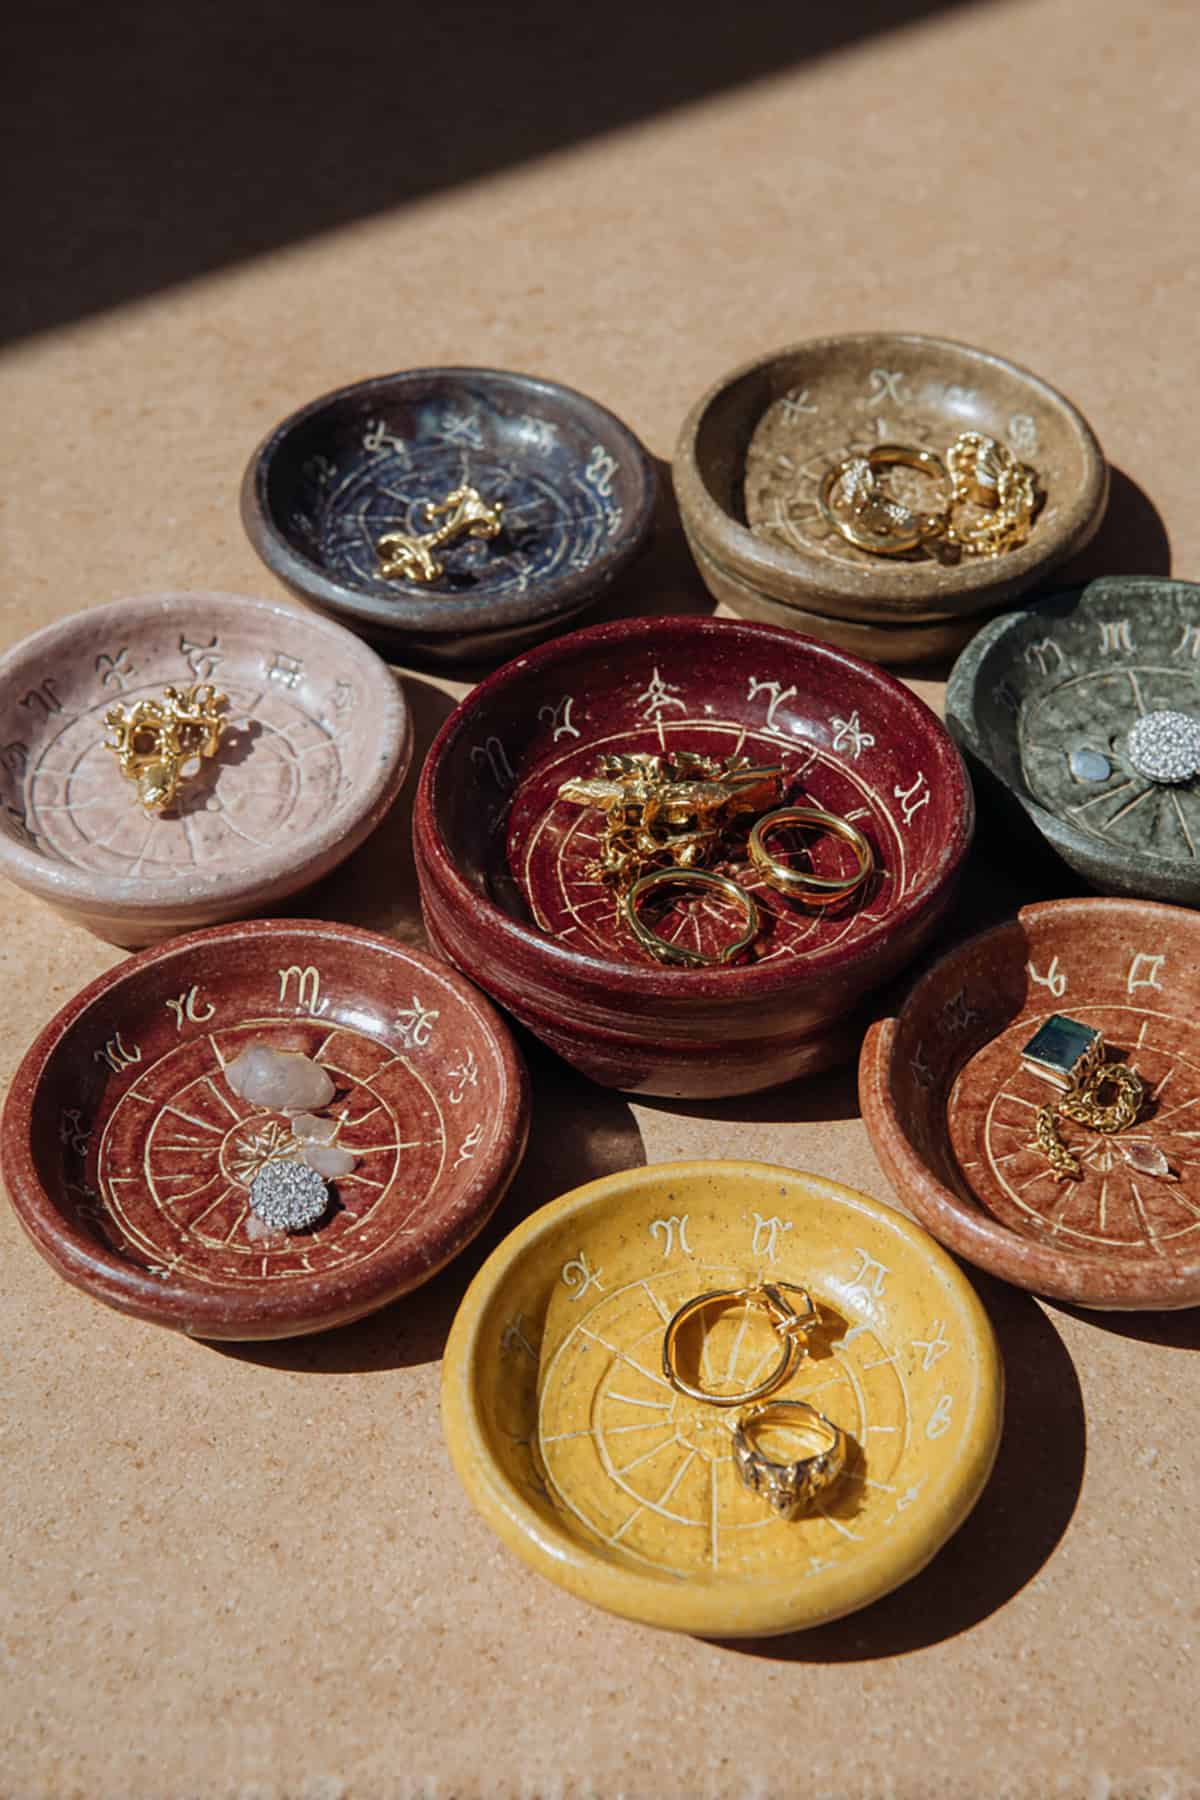
Dishes with zodiac signs are always a hit for gifts. Stamp or carve constellations for a personal touch.
Use metallic or dark paint to make the designs pop. Lightweight and easy to ship—they stay trendy all year.
Clay Pet Name Tags

Durable, lightweight tags for pets. Cut out bones, hearts, or other shapes and stamp on names.
Paint, seal, and add a metal loop. Pet owners love the mix of function and style.
Clay Hair Clips
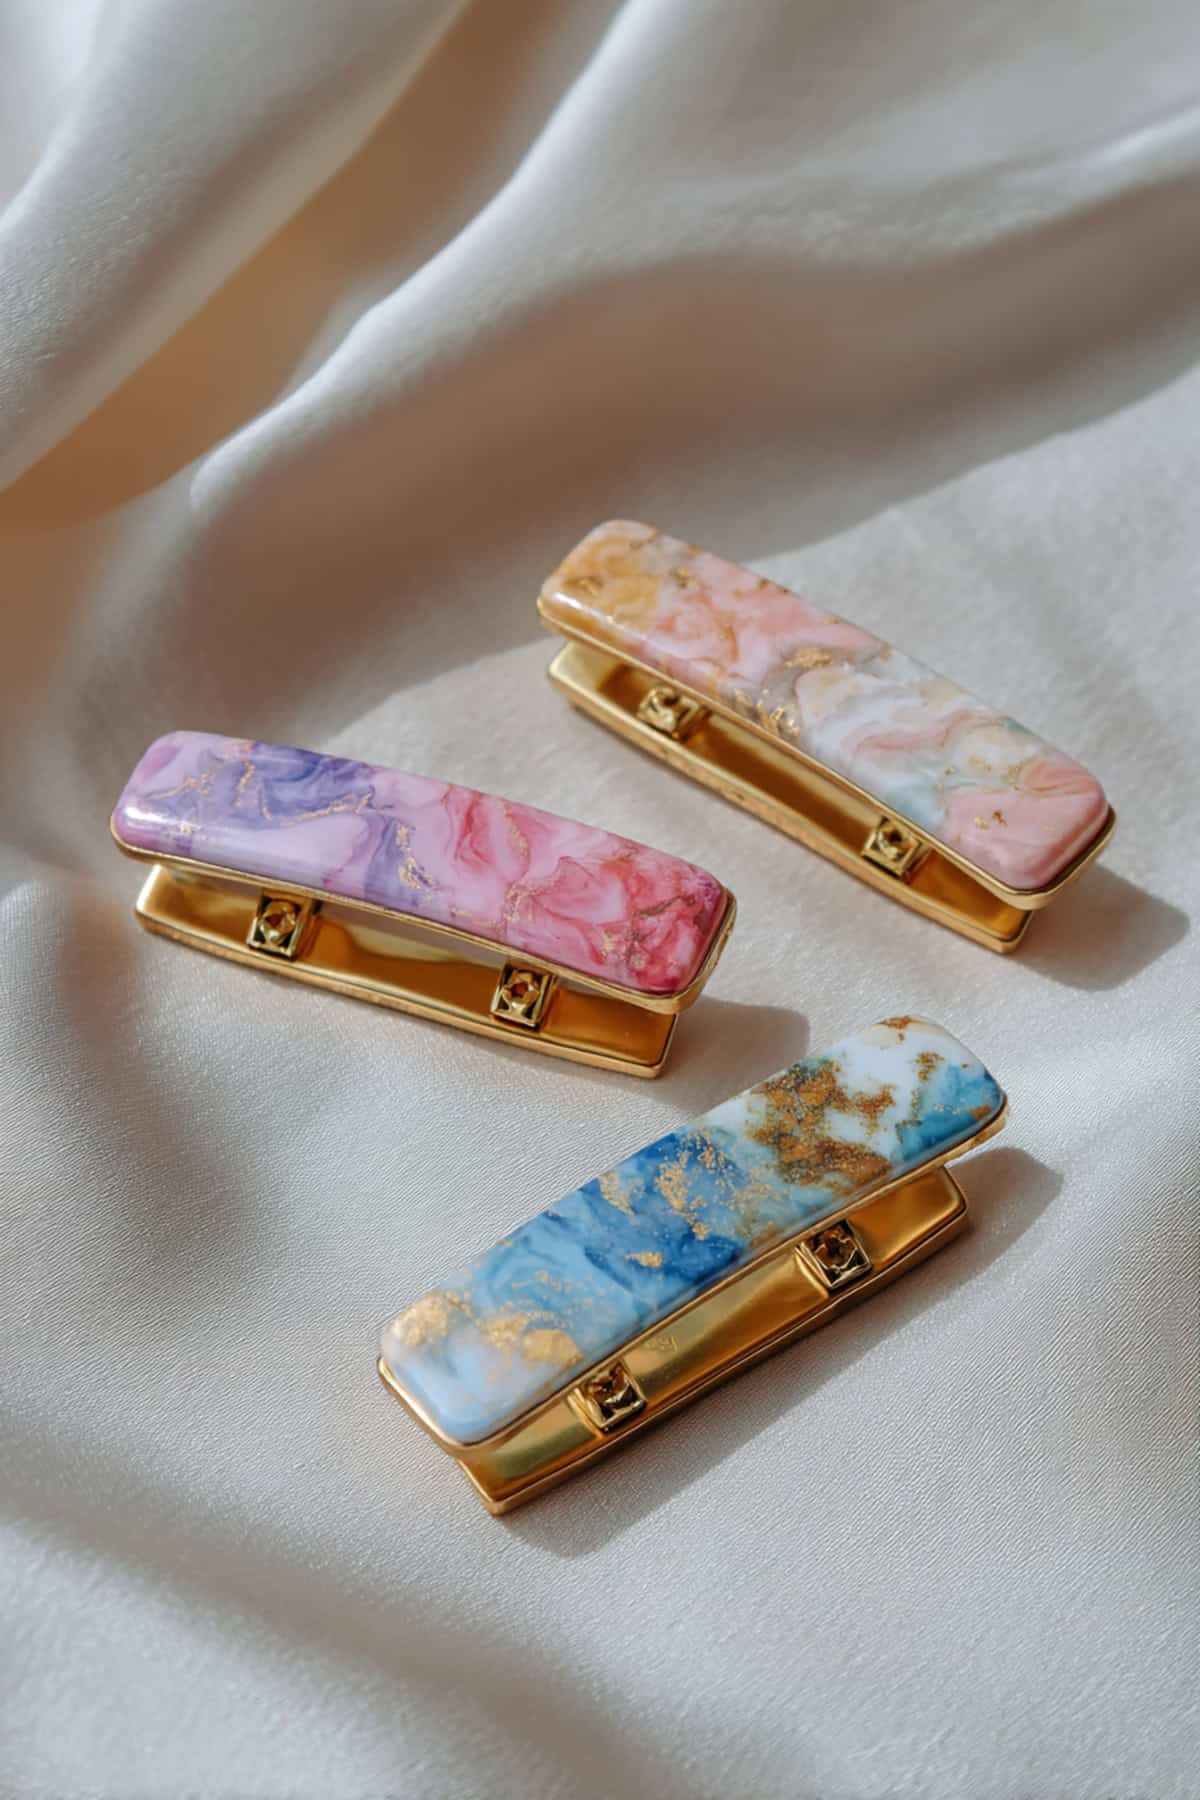
Make decorative pieces to attach to metal hair clips. Keep them thin and paint with terrazzo or marble patterns.
Glue on with strong adhesive. These are cheap to make but super customizable.
Decorative Clay Tiles
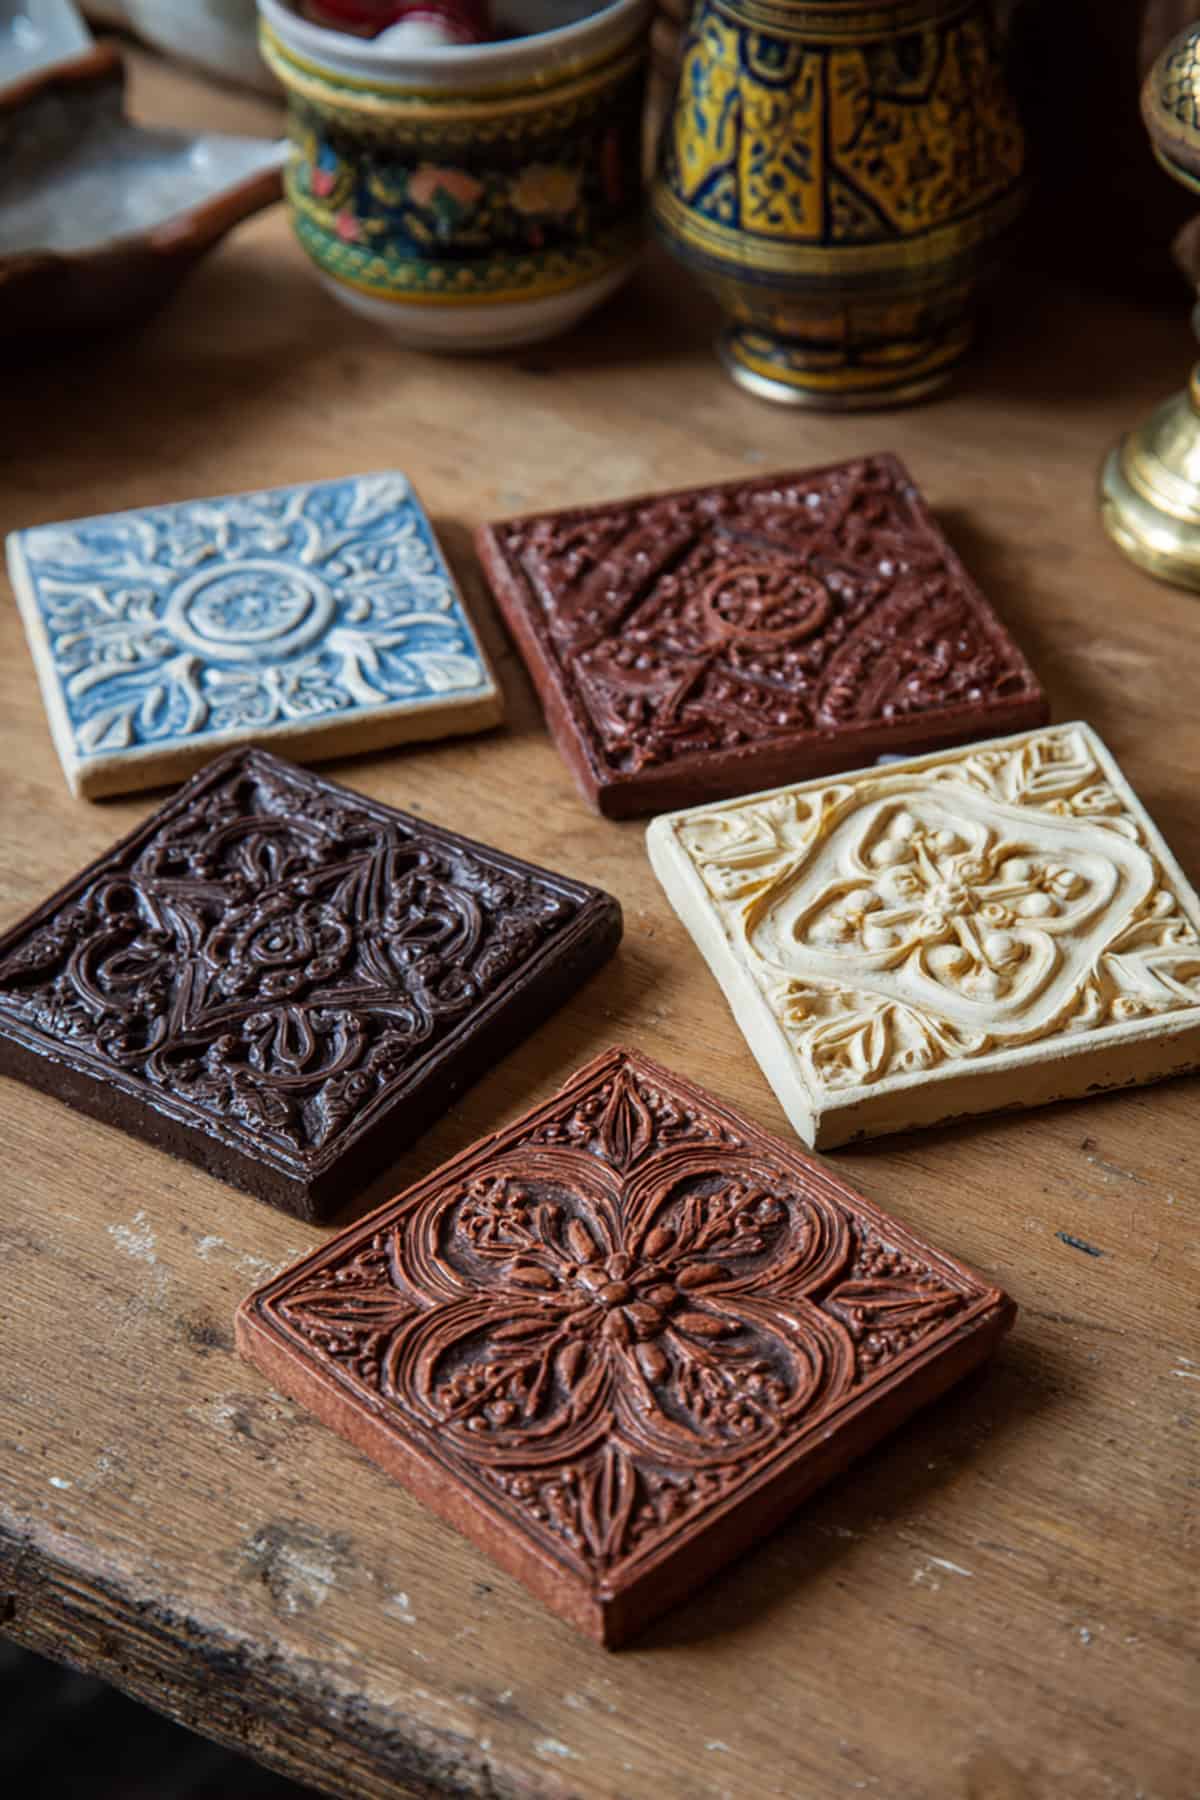
Tiles can be wall art or coasters. Add texture or geometric designs before the clay dries.
Paint in contrasting colors to highlight details. Arrange a few together for display. Limited runs attract home decor fans.
Clay Candle Tray Plates

Trays keep candle wax off surfaces and add a bit of style. Shape shallow, slightly concave plates just wider than the candle base.
Smooth the rim and dry slowly to avoid cracks. Stick to soft colors like beige. Sealed trays work with both handmade and store-bought candles.
Clay Spoons And Scoops
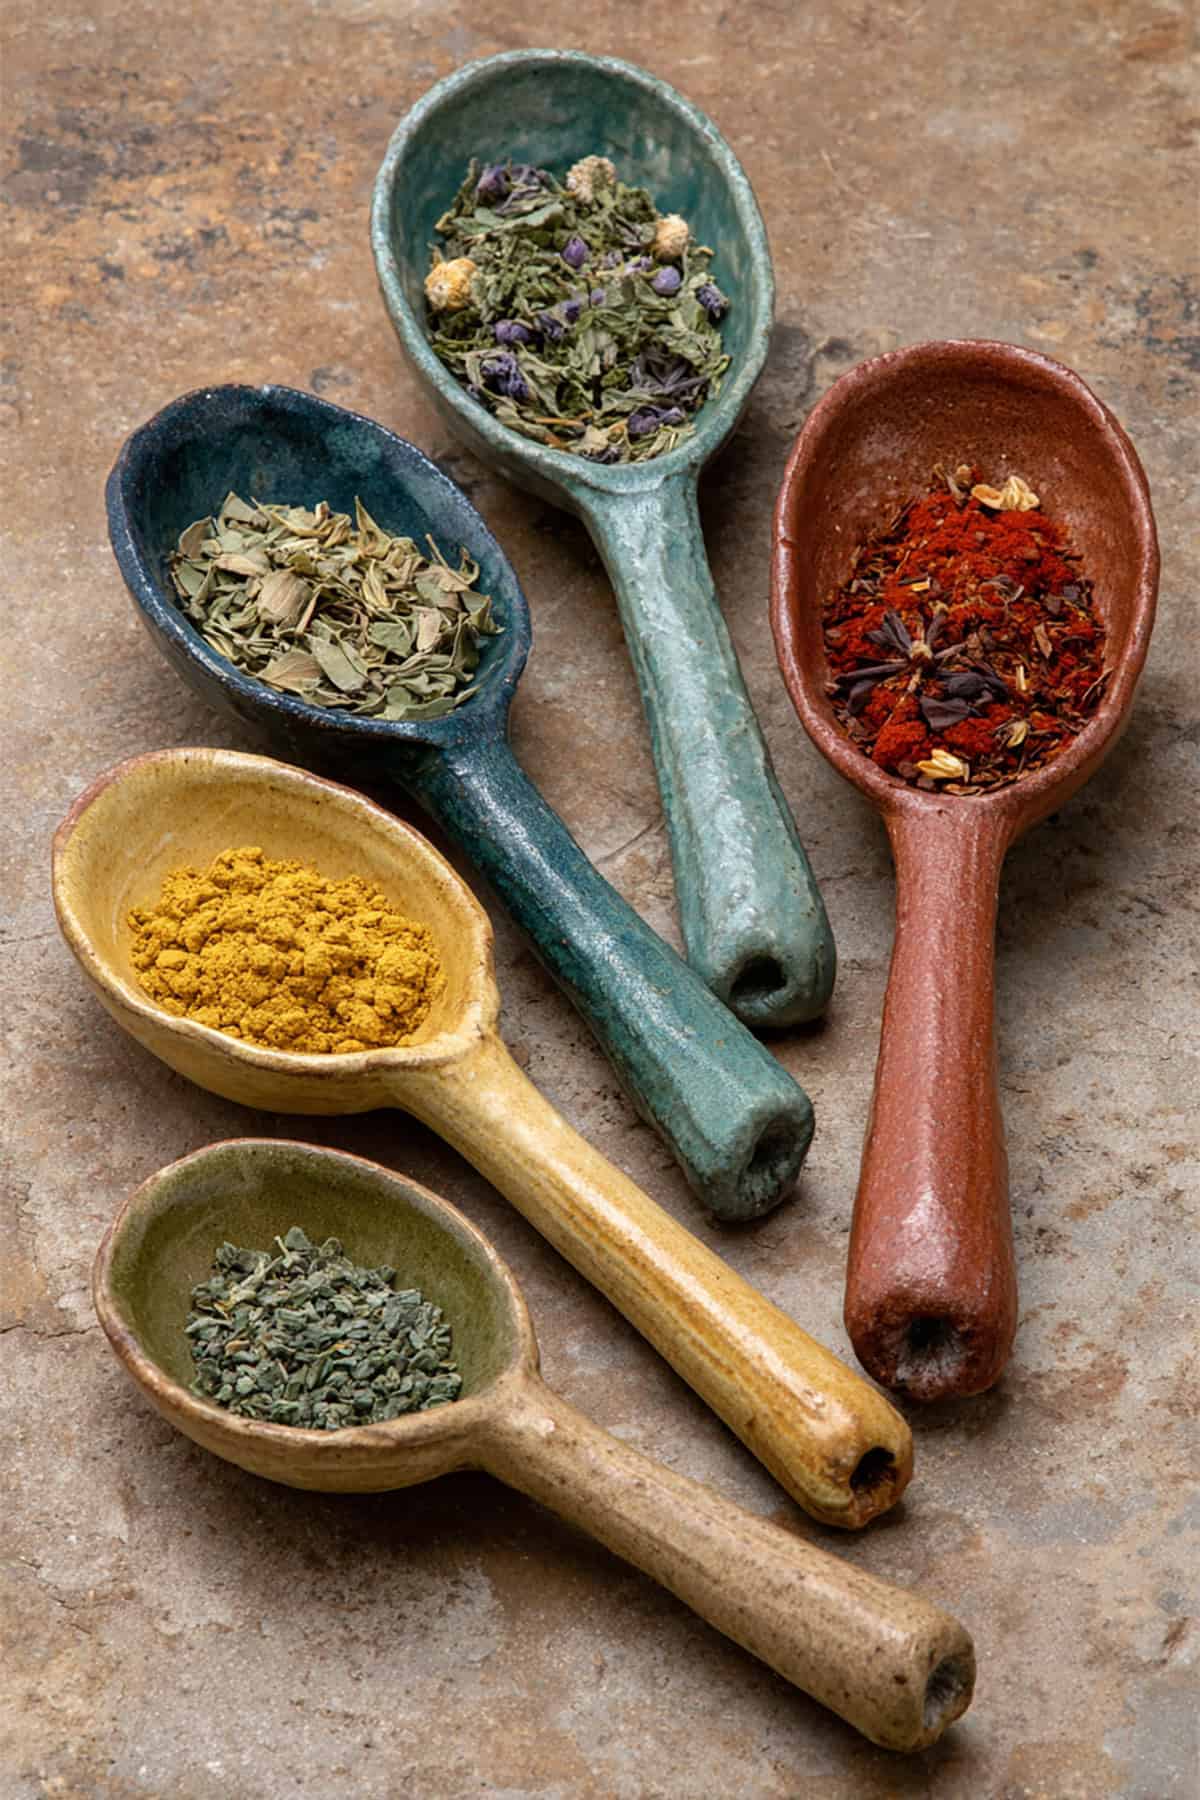
Light-duty spoons work for dry goods or bath salts. Shape shallow bowls with short handles—keep the thickness even.
Decorate after curing, but label as “decor use only” since they’re not food-safe. Sellers usually make that clear.
Clay Letter Blocks
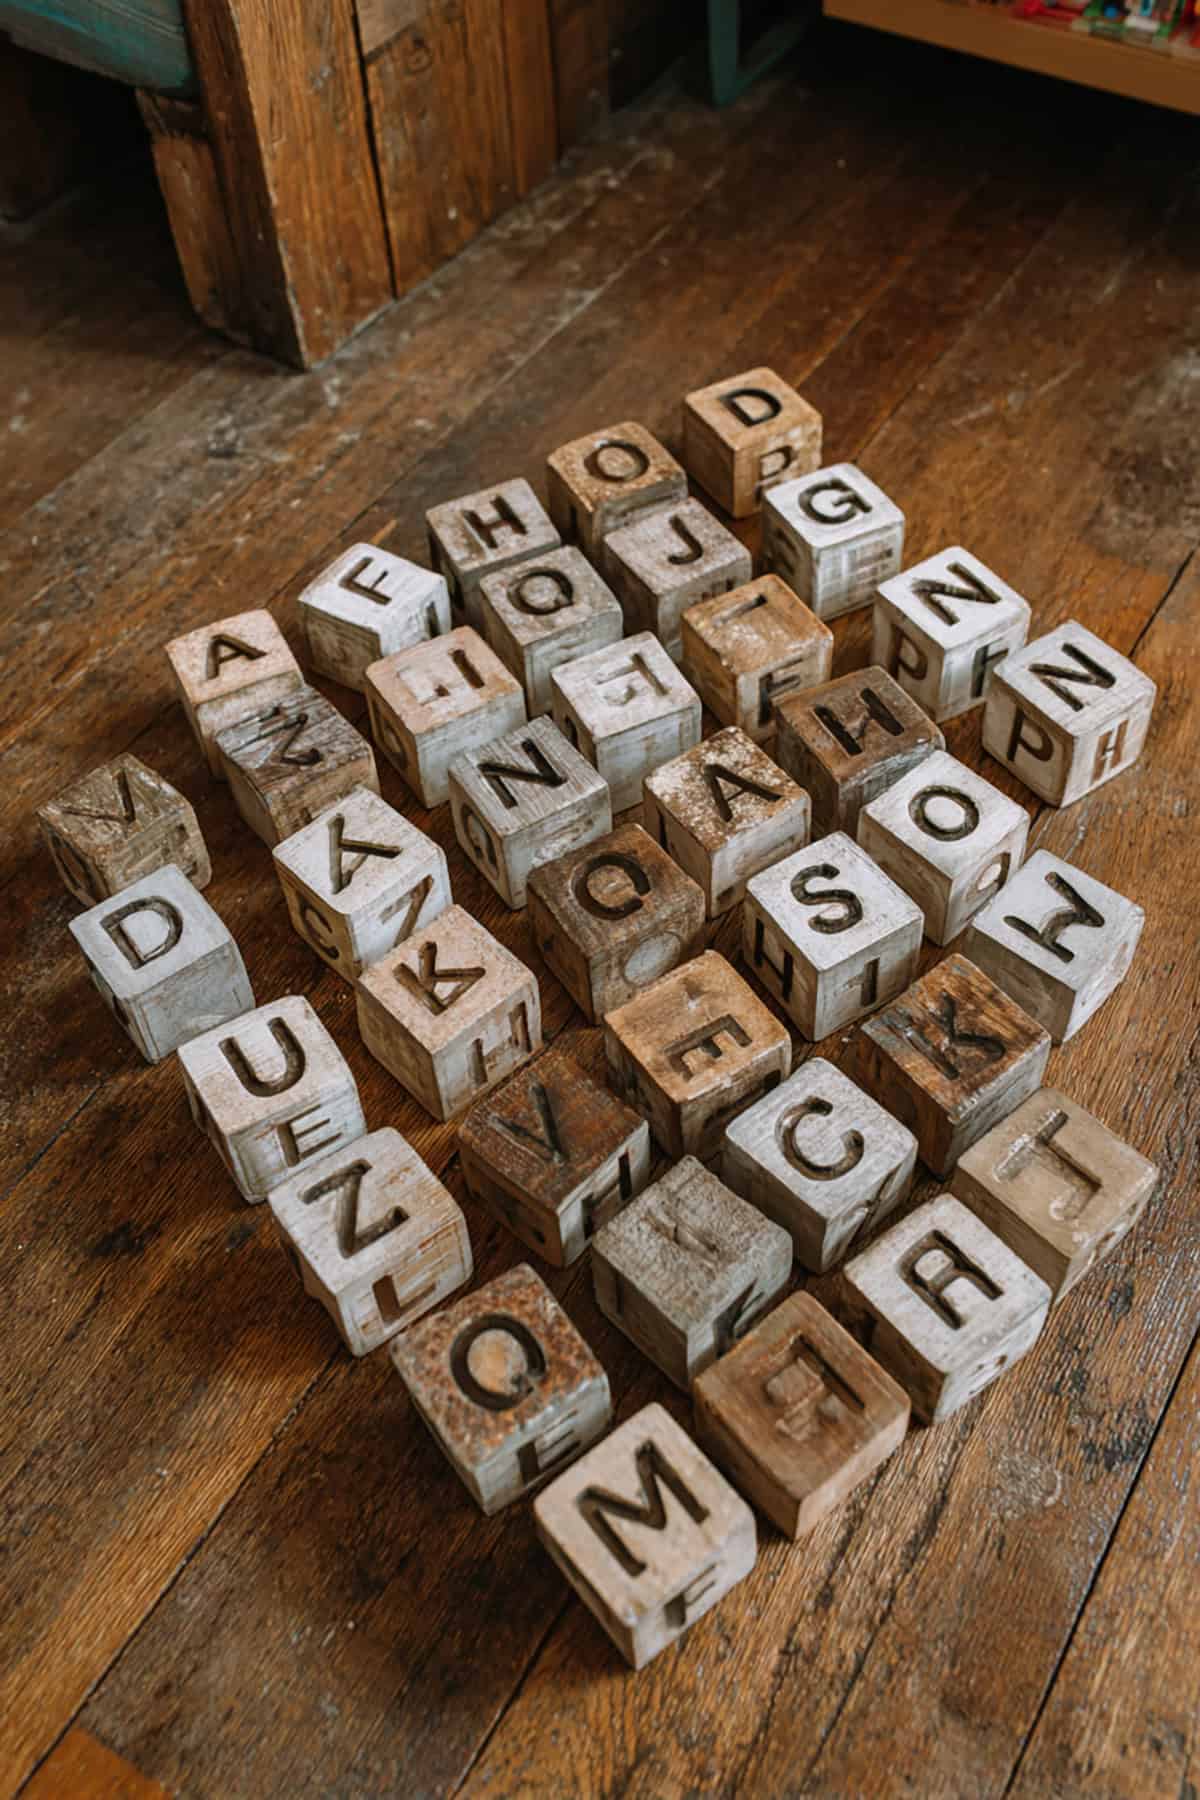
Cut cubes or rectangles and carve in letters. Paint with simple or monochrome tones.
People buy several to spell out names or words. Great for nurseries or office shelves—small, simple, and fun to arrange.
Clay Drawer Knobs
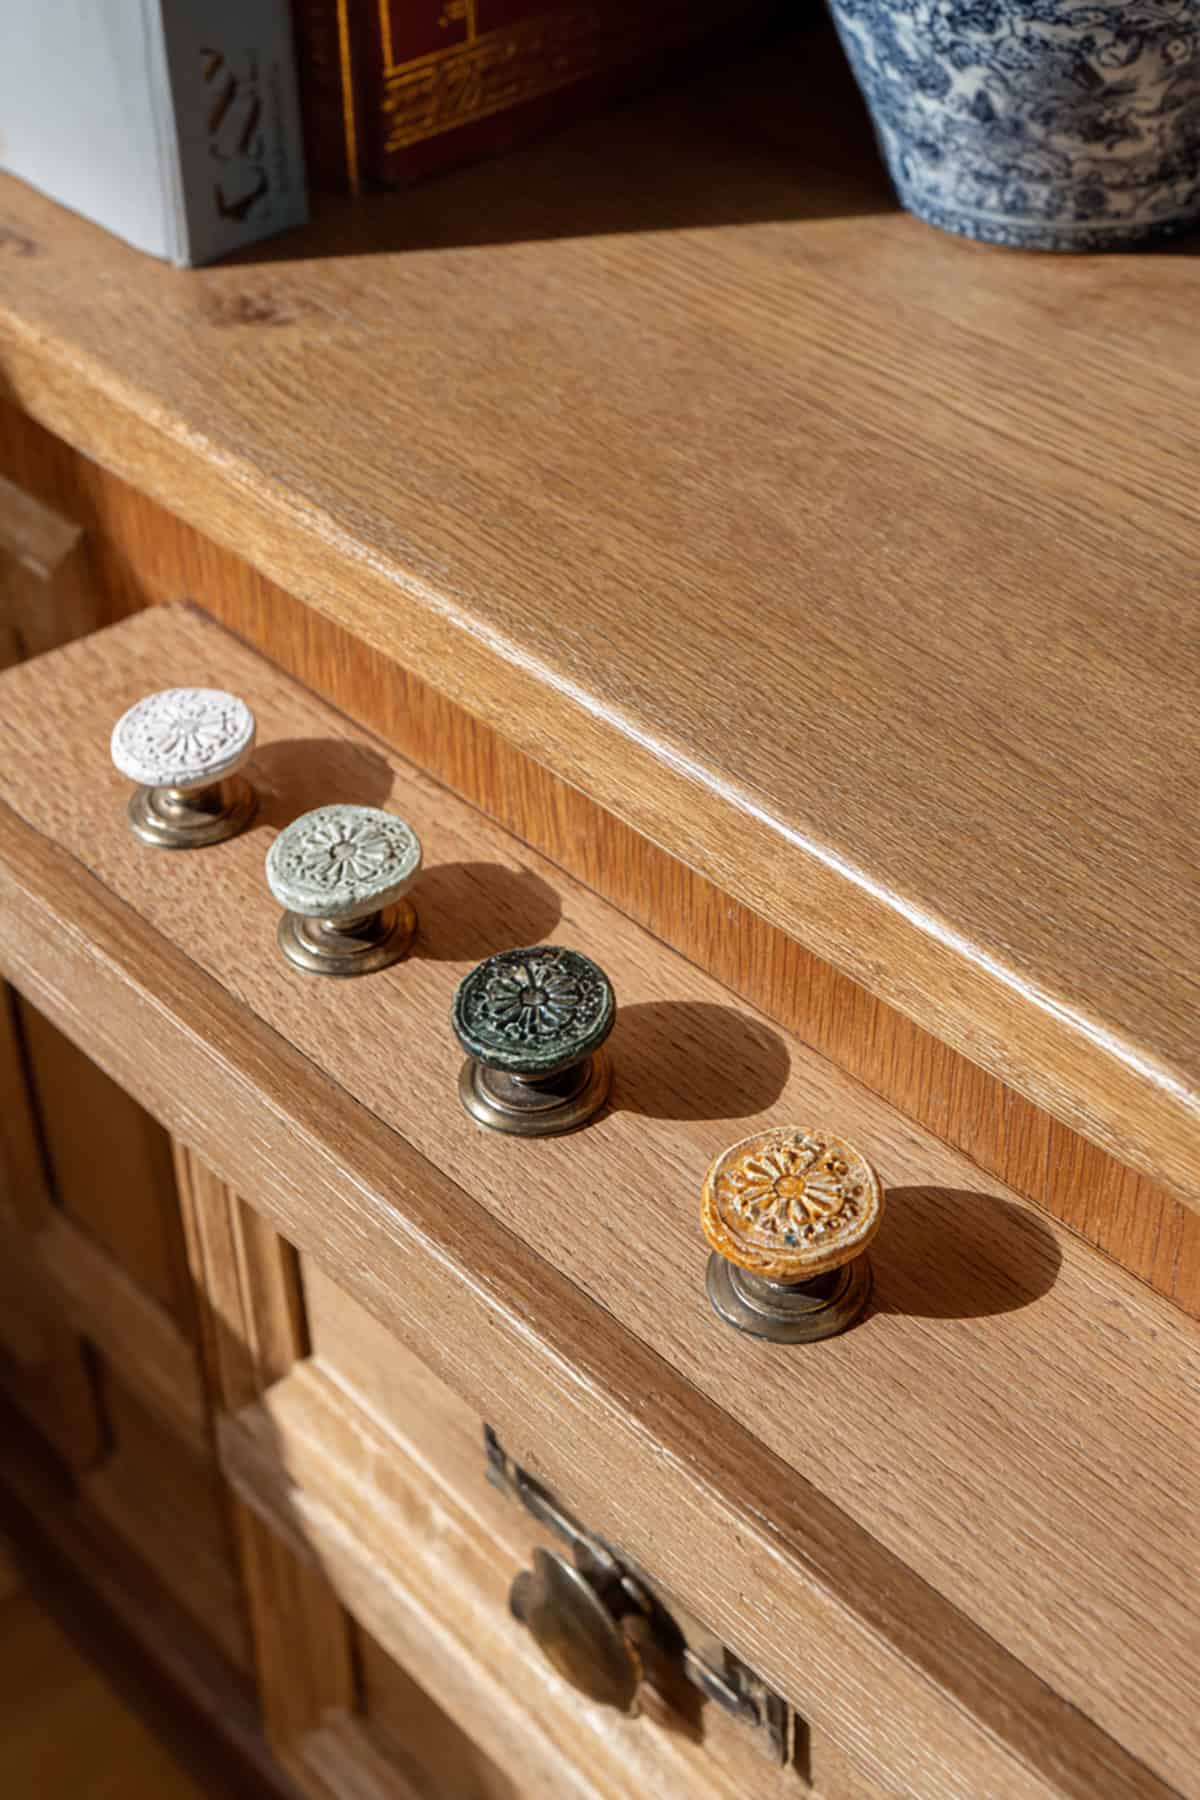
Shape and drill holes for the screws before the clay dries. Round, oval, or even faceted—pick whatever fits the furniture vibe.
Paint them up with acrylics, then add a few coats of sealant for durability. Each knob ends up with its own quirks, which honestly just makes them feel more personal. A great way to update old drawers without spending much.
Layered Clay Art Panels
Stacking thin clay layers onto wood panels gives you wall art with some real dimension. Try overlapping strips or play around with geometric shapes.
Once it’s dry, paint some soft gradients to bring out the depth. Sealing helps the colors pop and keeps the piece sturdy. These panels seem to catch the eye of folks who want texture but aren’t into bulky sculptures.
Clay Bookends
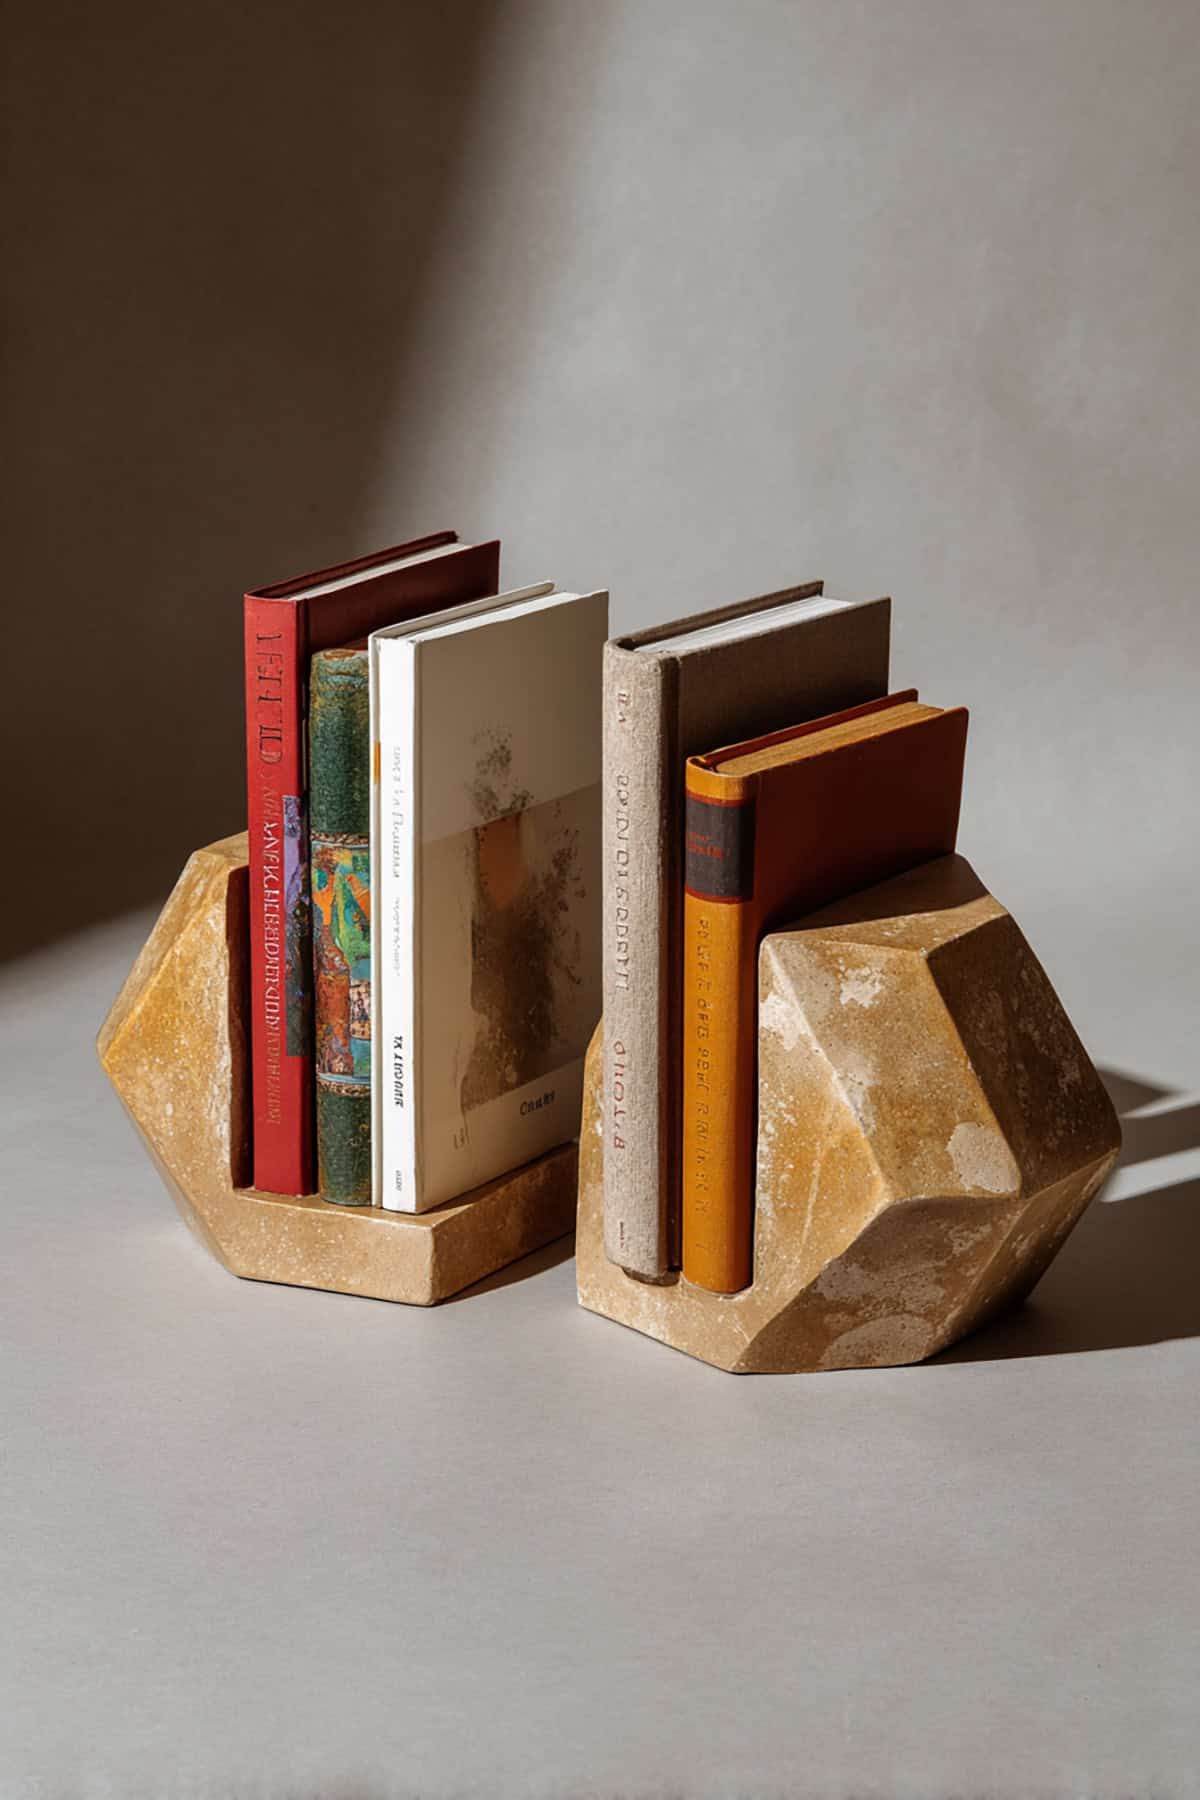
Solid clay bookends are pretty straightforward—go for geometric or curved designs. Make sure the bases are wide enough so they don’t tip, and after drying, you can add stones inside for heft.
A matte finish usually looks sharp and modern. Bookends like these tend to draw in buyers who want something both useful and a bit artsy for their shelves.
Minimalist Clay Sculptures
Those little sculptures with sleek, simple lines—yeah, they just work in modern spaces. It’s all about the curve, the silhouette, the way the piece feels in your hand. Forget fussy details; it’s the shape that matters.
After sanding everything smooth, toss on a coat of paint in some easy-on-the-eyes neutral. You still get that earthy clay vibe, but it’s got polish. Folks who appreciate subtle, handmade touches? They snap these up for their shelves or desks.