Travel souvenirs tend to pile up faster than we expect. A small bowl here, a postcard there, and suddenly everything feels scattered. Still, each piece holds a memory that deserves a visible place in your home. The trick is showing them off without making your space feel busy or disorganized. This guide walks through smart, stylish ways to make that happen.
Table of Contents
- Ways To Display Travel Souvenirs
- Curio Cabinet For Collected Keepsakes
- Everyday Shelves, Travel Story Included
- Simple Scrapbook For Travel Memories
- Shell Souvenir Bowl Display
- Wall-Mounted Cork Map With Pinned Memories
- “Passport Stamp” Print Gallery With Photos
- Travel Trinket Bookshelf With Color Blocks
- Travel Tray On A Console Table
- Travel Hat And Scarf Peg Wall With Labels
- Travel Drawer Display With Compartment Inserts
- Travel Book Nook With Souvenir Bookends
- Suitcase Coffee Table With Curated Layers
- Shadow Box “One Trip, One Box” Collection
- Postcard Wall Grid With Handwritten Notes
- Polaroid + Ticket Photo Line With Mini Clips
- Plate Wall With Destination Ceramics
- Ornament Tree For Travel Keepsakes
- Museum Label Shelves With Tiny Plaques
- Luggage Tag Banner With City Names
- Keyring Display Board With Hooks By Region
- Framed Map With Pinned Keepsakes
- Framed Fabric Swatches From Markets
- Framed Currency Collage With Clean Borders
- Floating Shelf “Mini Museum” With Acrylic Stands
- Coffee Table Photo Box With Hidden Souvenirs
- Clipboard Travel Wall For Rotating Paper Finds
Ways To Display Travel Souvenirs
Souvenirs don’t have to become clutter. Here are a bunch of ways to keep those memories alive and visible, without letting them take over your space.
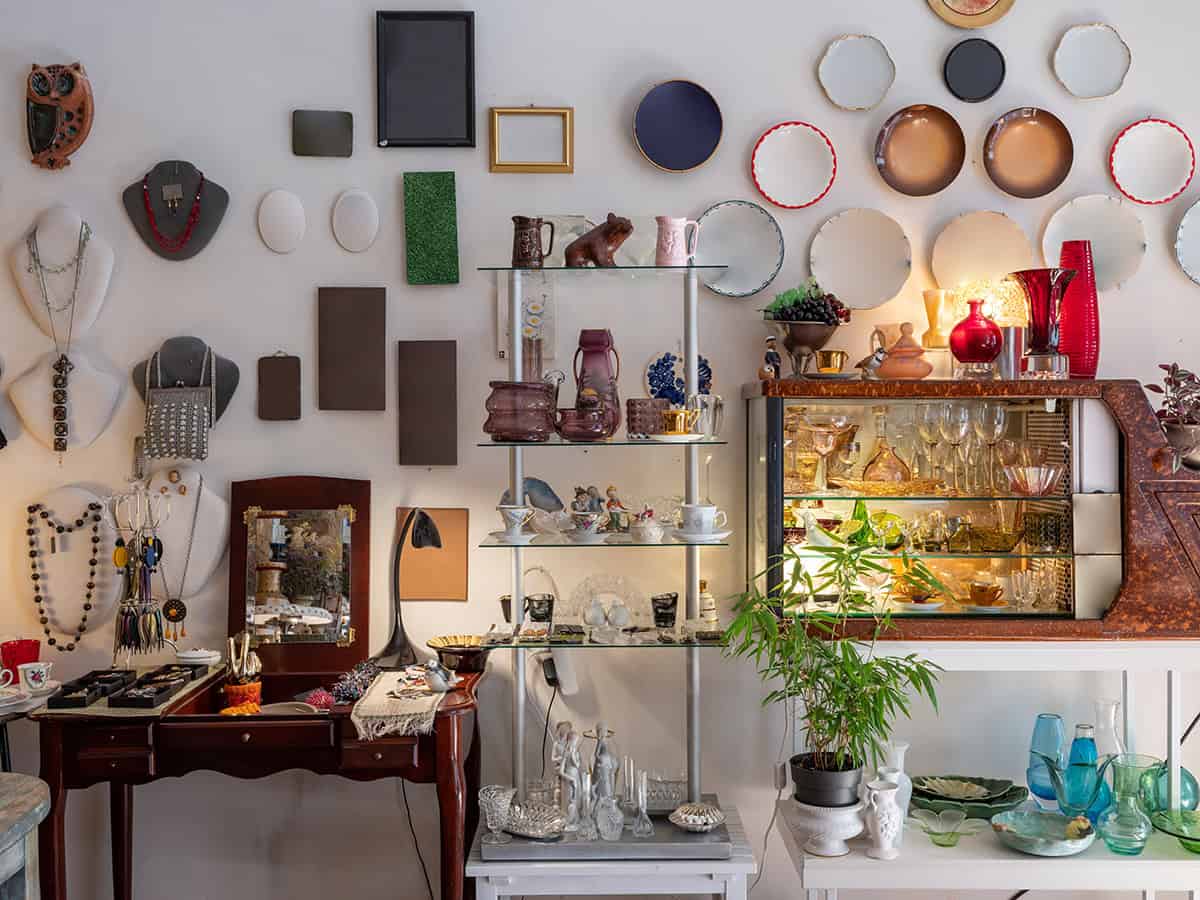
Curio Cabinet For Collected Keepsakes
Glass-front curio cabinets keep your best souvenirs safe and visible. Adjustable shelves mean you can fit almost anything.
Group by trip or material, use risers for depth, and don’t overcrowd. Place away from direct sunlight, and consider locks for extra security.
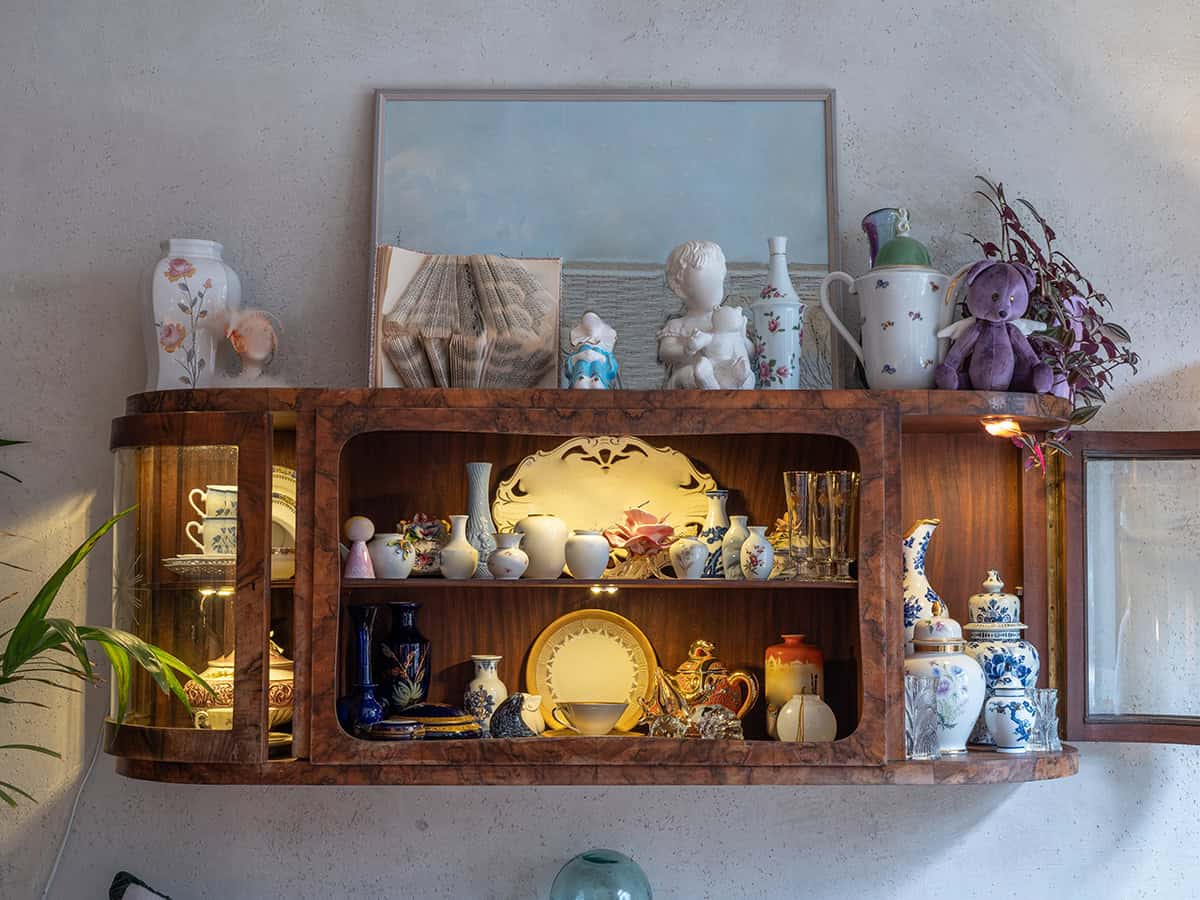
Everyday Shelves, Travel Story Included
Blend travel finds into your regular shelves—one bowl, frame, or book from a trip, mixed with everyday things. The story’s there if you know where to look.
Keep it simple: one travel piece per section, balanced with neutral items. No need to group everything together.
Simple Scrapbook For Travel Memories
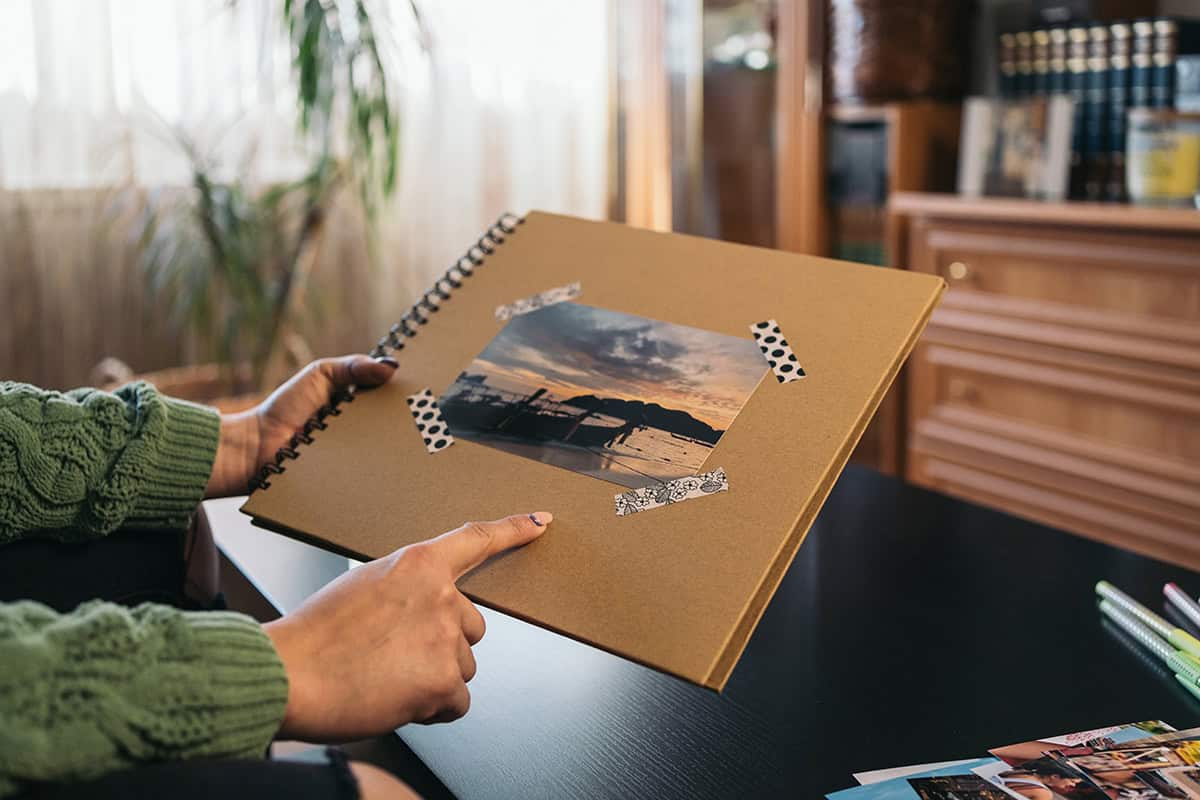
Scrapbooks are old-school but effective. Photos, notes, tickets—just arrange them in order, jot down dates and places, and keep it clean and simple.
Archival paper and sleeves help things last. Store the book somewhere handy for a quiet flip-through now and then. No wall space required.
Shell Souvenir Bowl Display
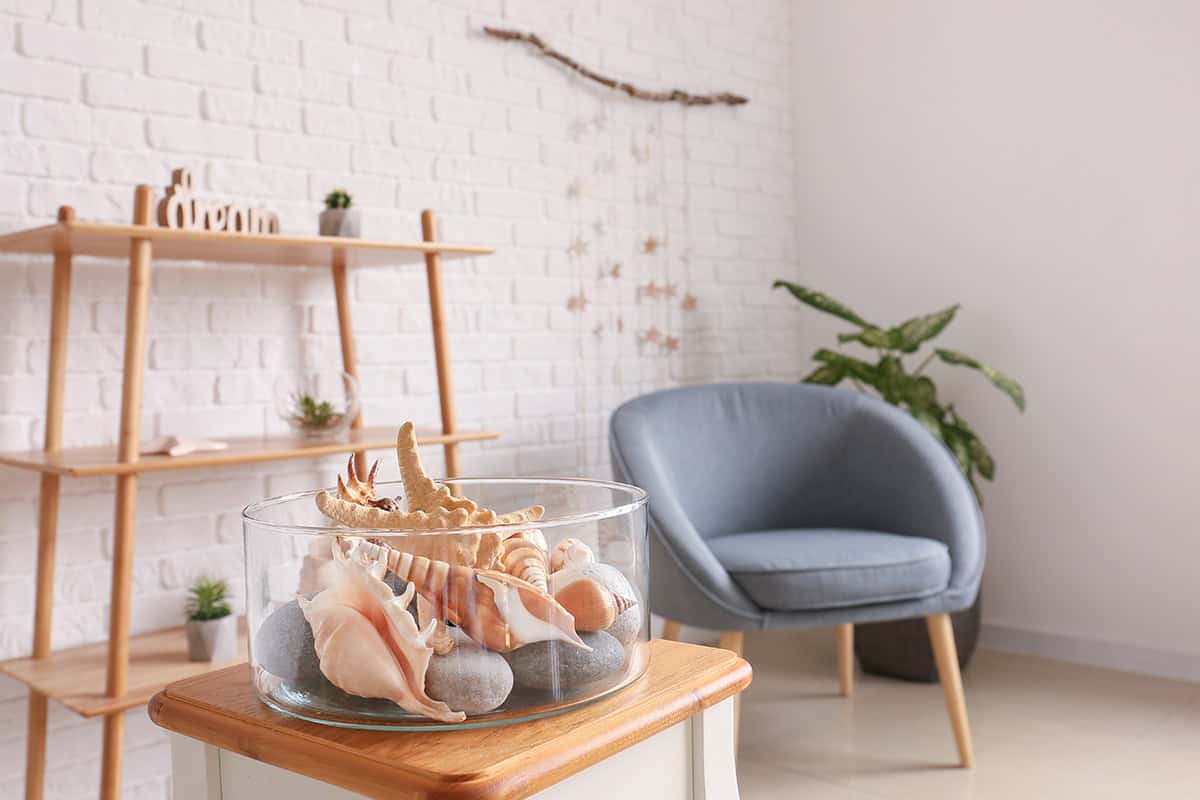
Shells have a way of piling up, and honestly, they look great just sitting in a bowl. Find one that’s shallow enough to let those shapes and colors stand out. The right bowl really frames the whole collection.
Give the shells a quick rinse so they aren’t gritty. A neutral bowl works best—nothing too flashy. Don’t overfill it; a handful is usually enough to make a statement.
Set your bowl on a shelf or table where it’ll catch some light. Skip the bathroom or anywhere damp. The look stays simple and relaxed, no fuss.
Wall-Mounted Cork Map With Pinned Memories
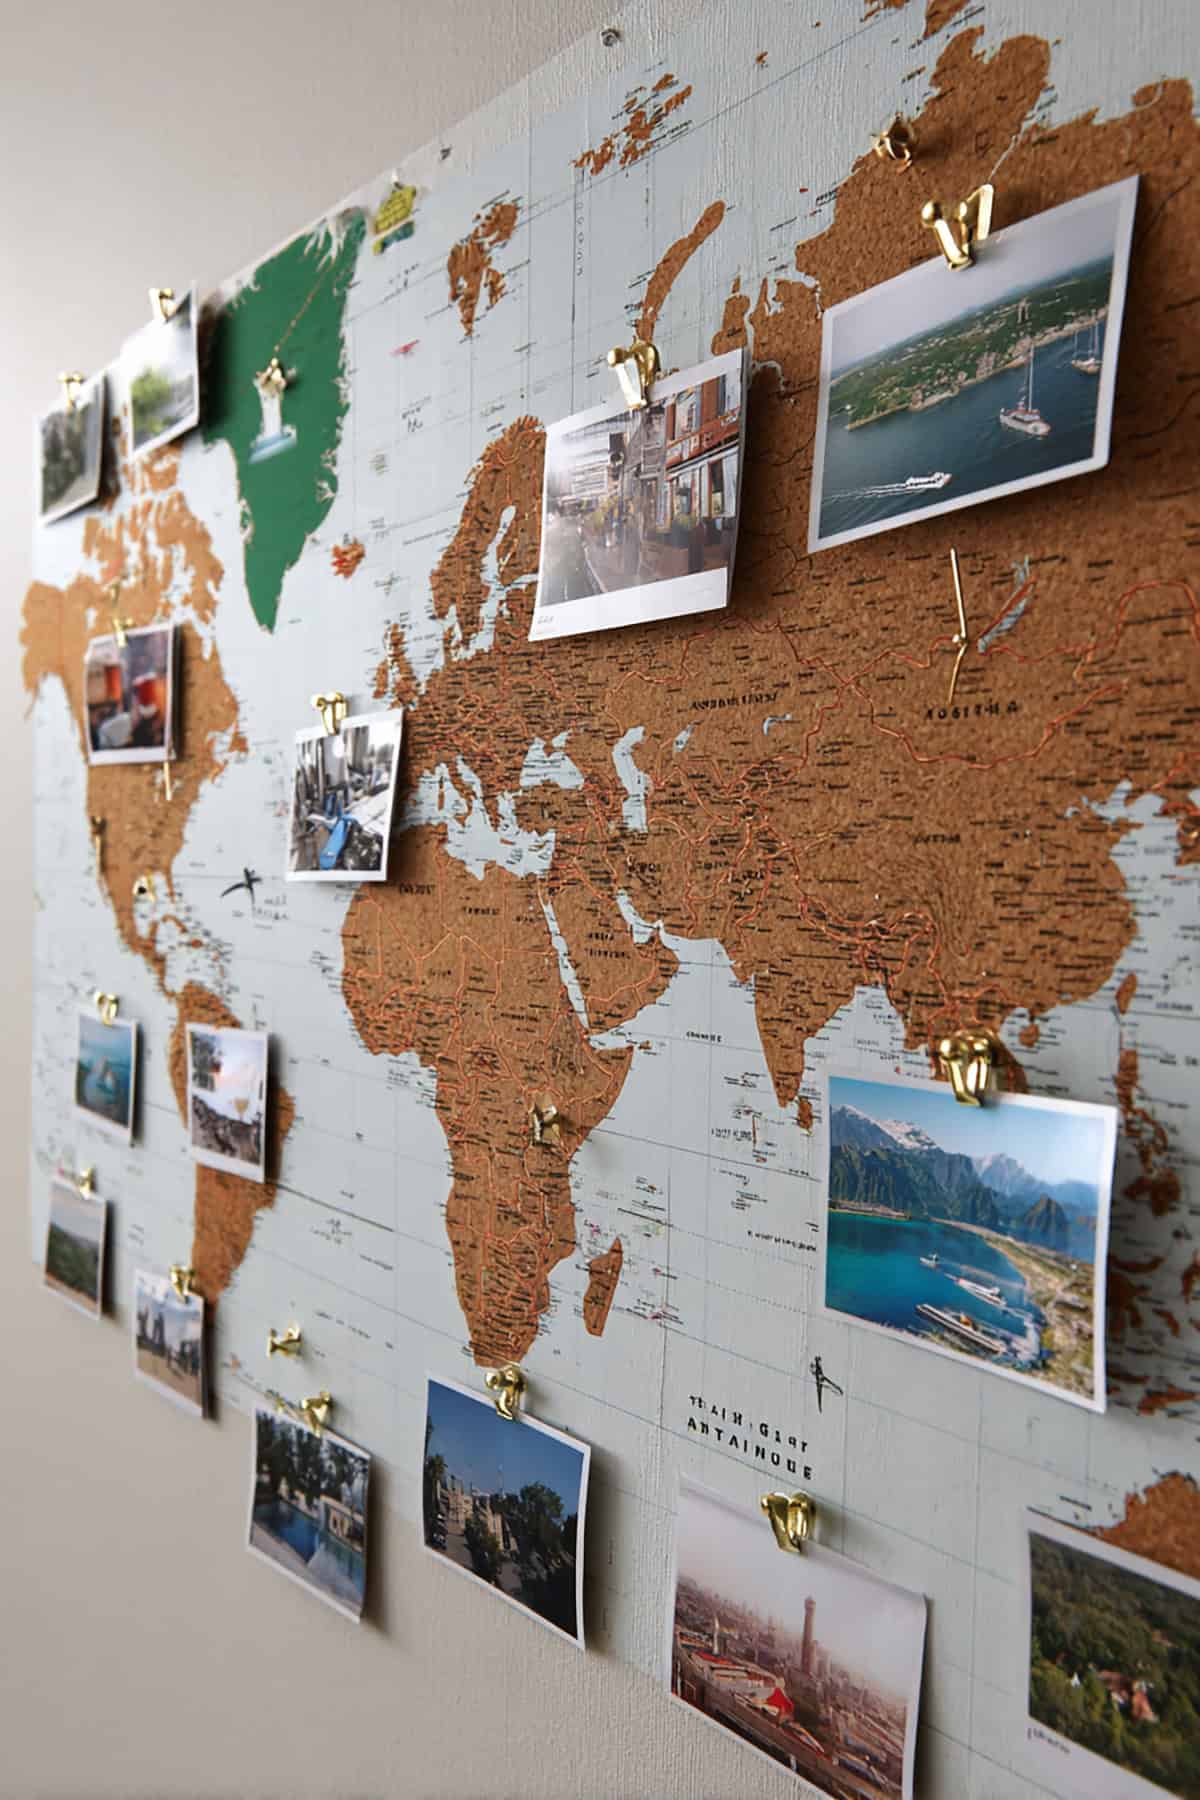
Stick a cork map on the wall and start pinning—tickets, photos, scribbled notes, whatever you picked up. You’ll always know exactly where each memory belongs. The map itself adds some context, too.
Thin pins are gentler on paper. For heavier things like coins, tuck them into tiny envelopes before pinning. Try not to overload one spot—spread things out so the map stays easy to read.
Pick a limited palette for pins and notes if you want it to look pulled-together. That way, you can add new stuff later without messing up the vibe.
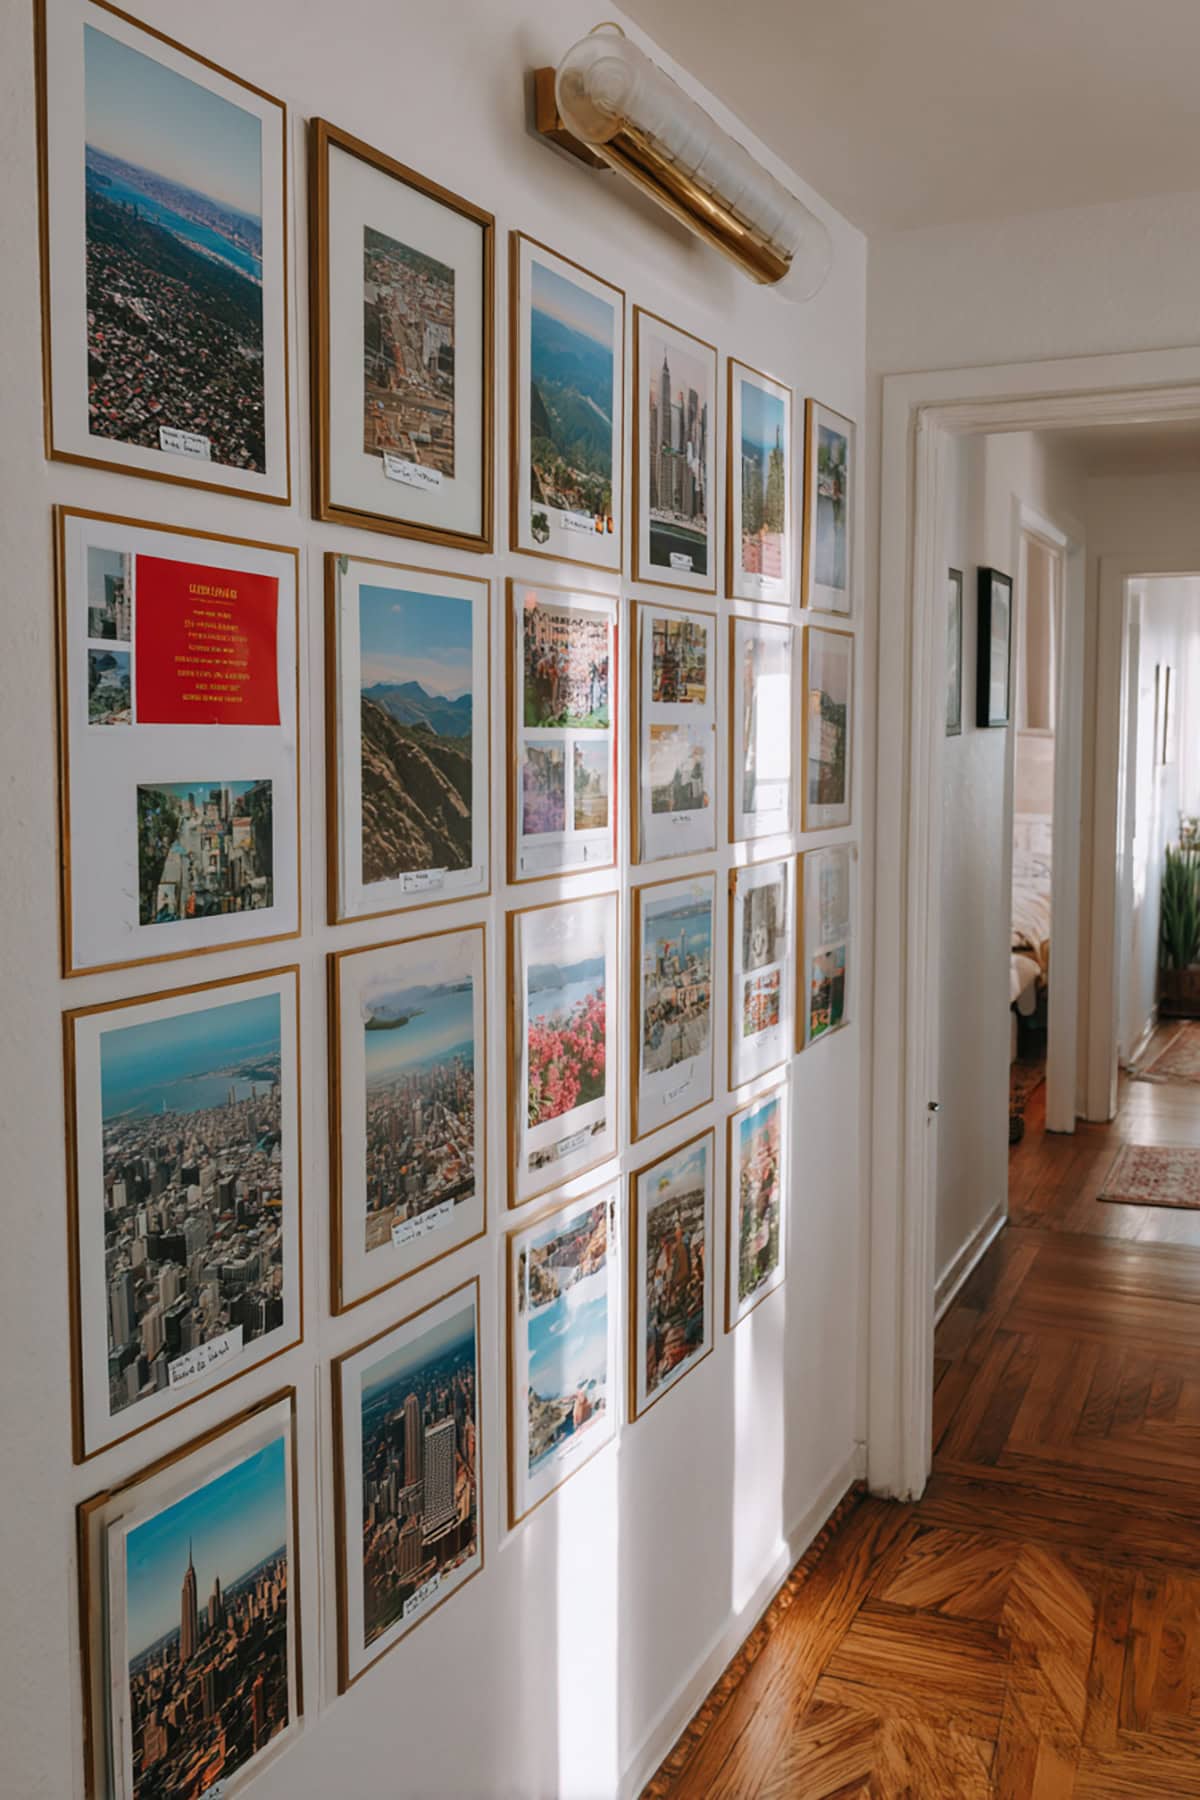
“Passport Stamp” Print Gallery With Photos
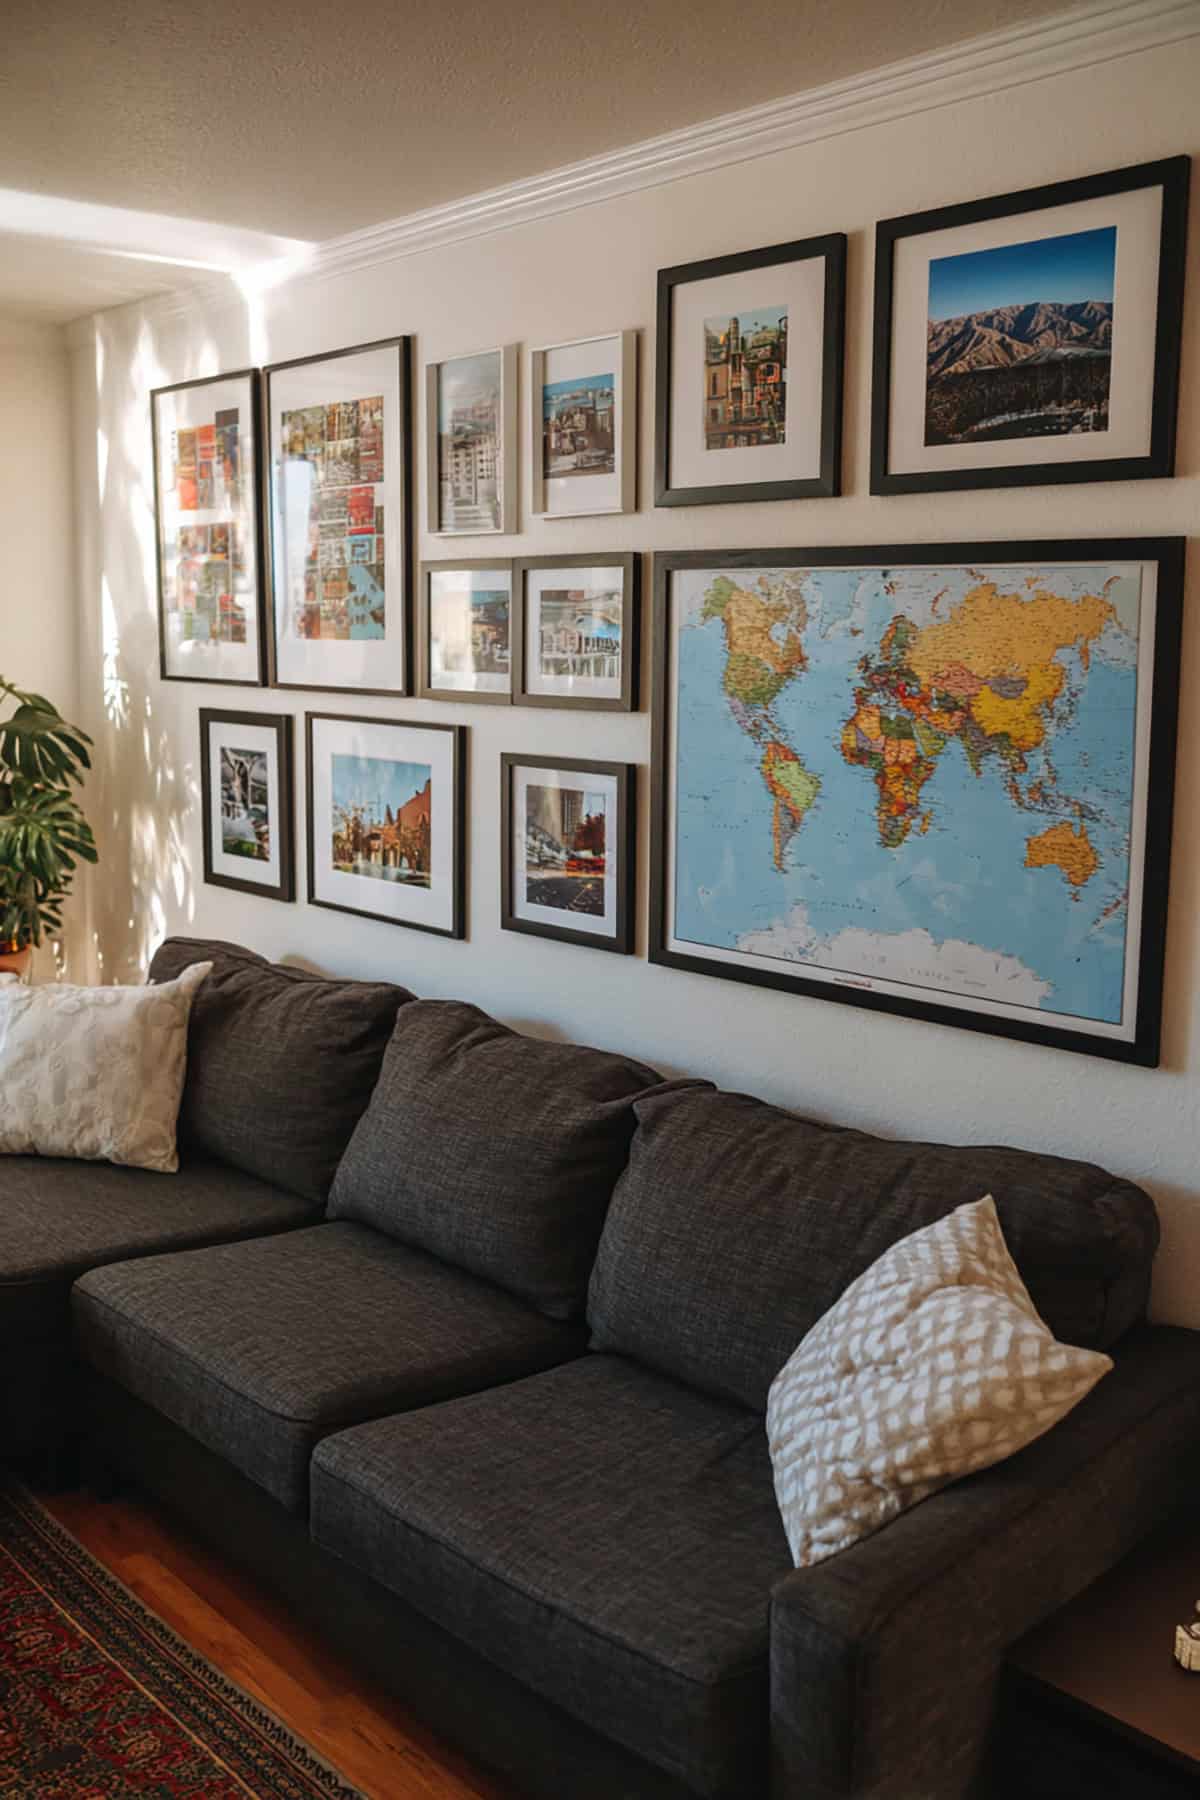
Ever thought about turning your passport stamps into art? Custom prints that look like entry stamps, paired with a photo from the same trip, make for a pretty neat gallery. Wide mats and matching frames help keep things calm.
Hang them in a grid, space everything out, and tuck the city and date underneath in tiny print. This is great for hallway walls or anywhere you’re short on space—or for those who collect more paper than objects.
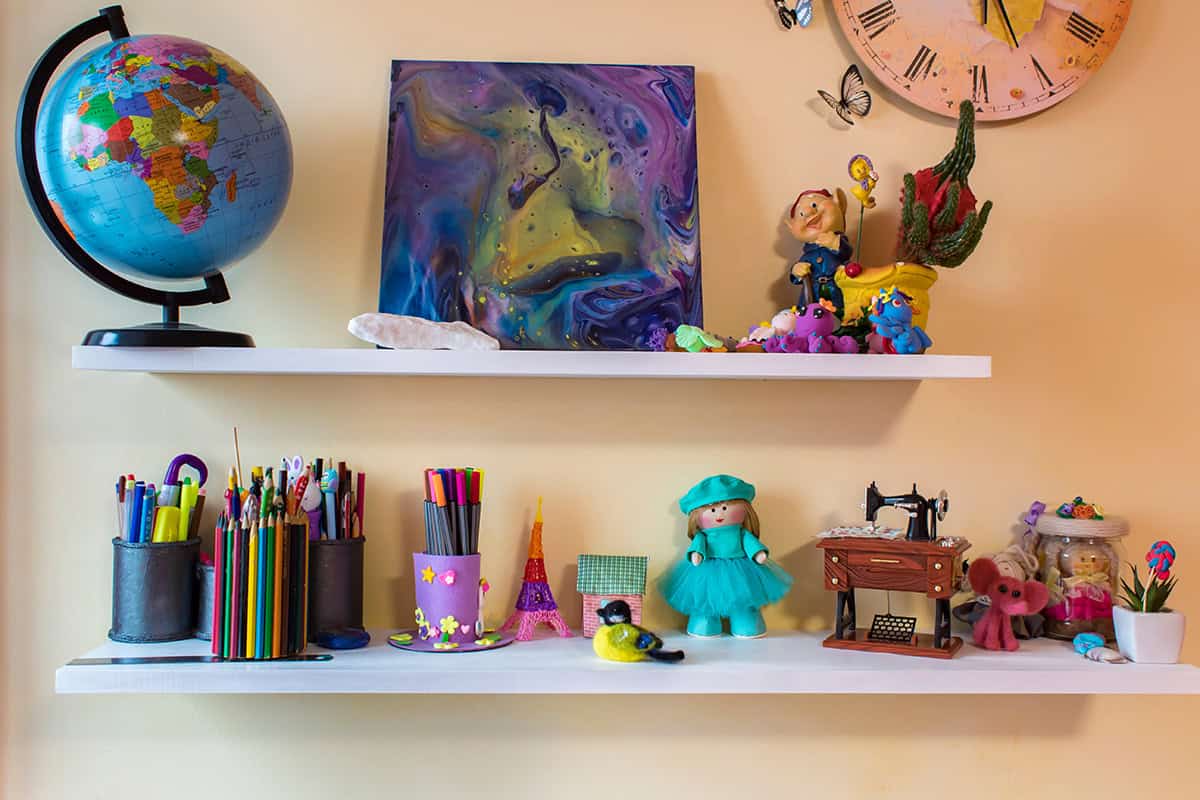
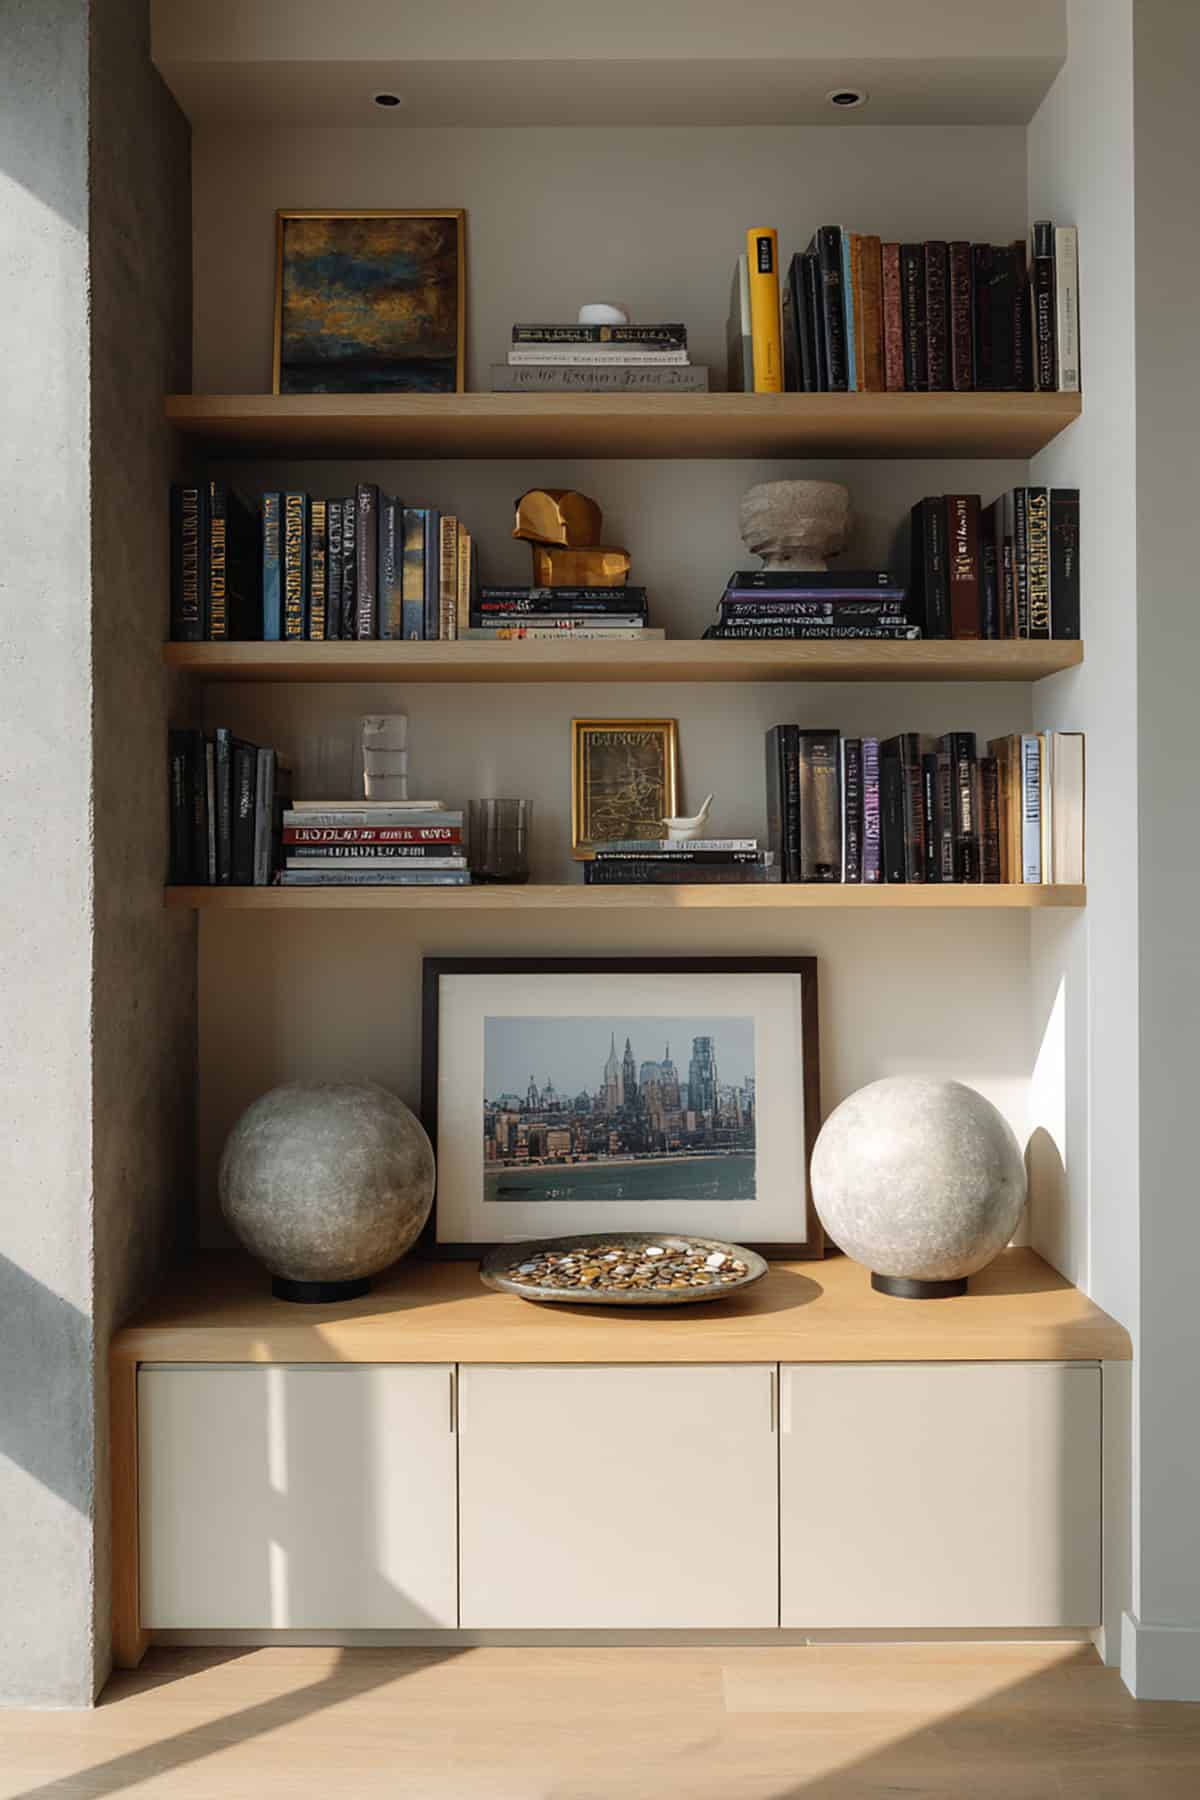
Travel Trinket Bookshelf With Color Blocks
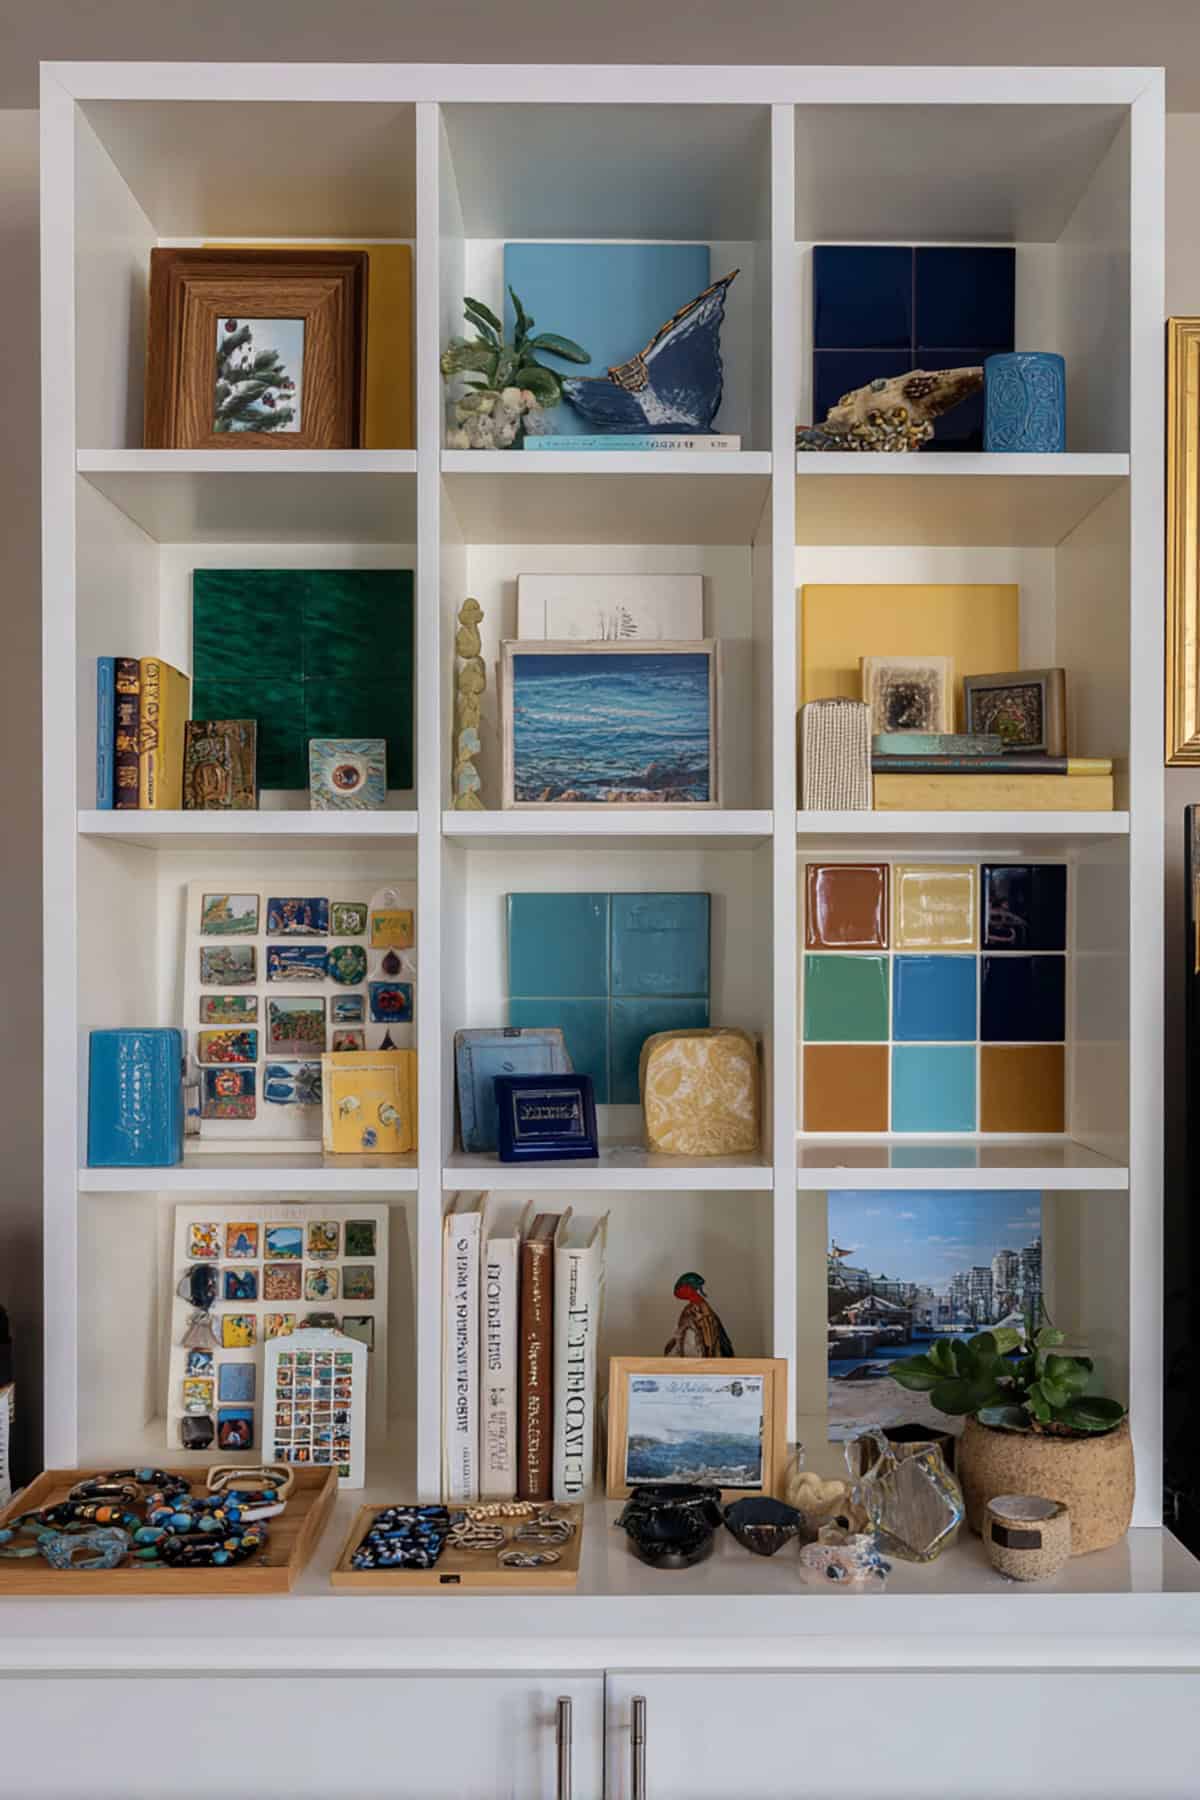
Bookshelves aren’t just for books. Try grouping souvenirs by color instead of size. Ceramics, glass, paper—they all get sorted by shade. Suddenly, it feels more like decor than a collection of random stuff.
If you can, dedicate a shelf to each trip or region. Books at the end help ground things. And don’t cram every inch—leave space so it doesn’t look messy.
Some things collect dust faster than others, so pick items that can handle a quick wipe. Swap out delicate pieces now and then to keep them safe.
Travel Tray On A Console Table
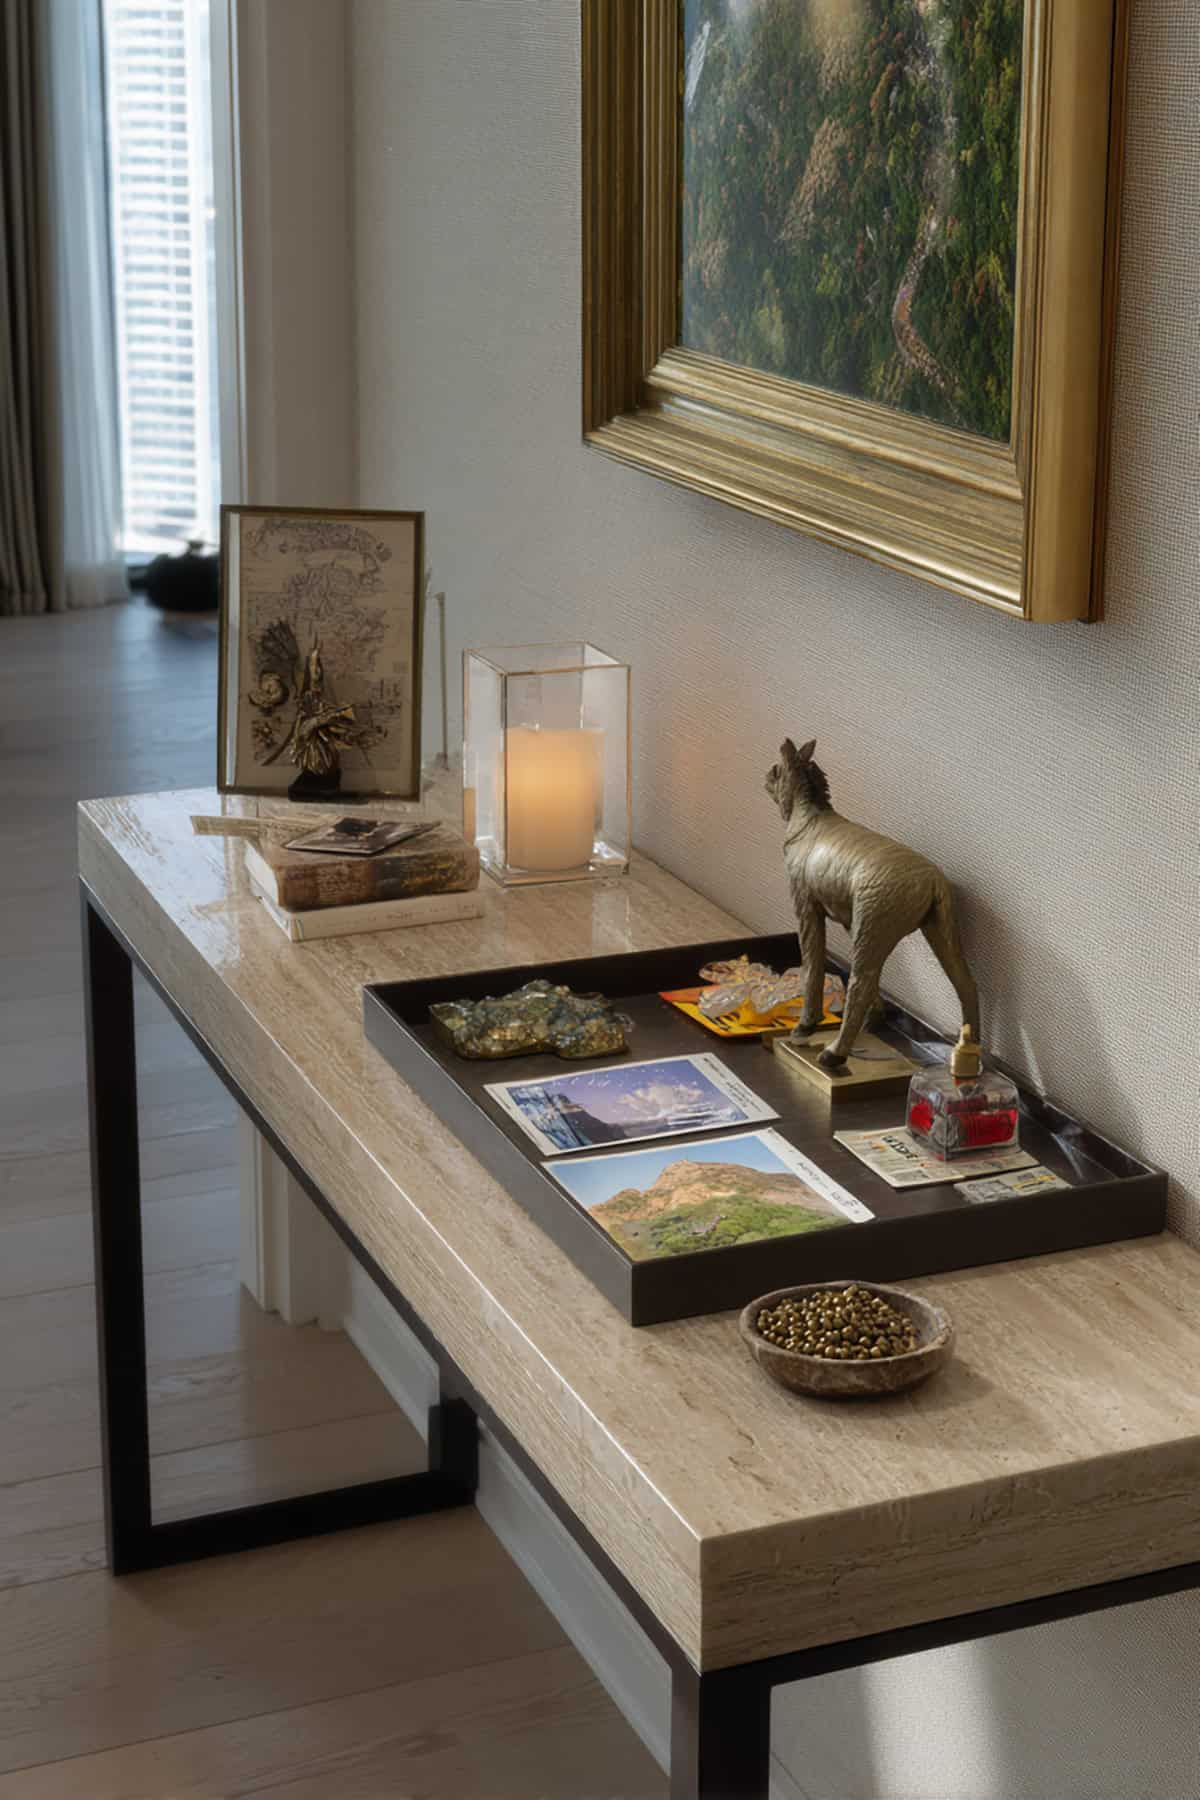
Drop a shallow tray on a side table and you’ve got an instant home for little souvenirs. Coins, keys, ticket stubs—they all stay together and don’t wander off.
Look for a tray with a simple finish and raised edges. Wood, leather, or metal all work. Don’t overload it; a few favorites at a time is enough.
Rotate what’s on display after big trips. Older pieces can go into storage so the tray always feels current.
Travel Hat And Scarf Peg Wall With Labels
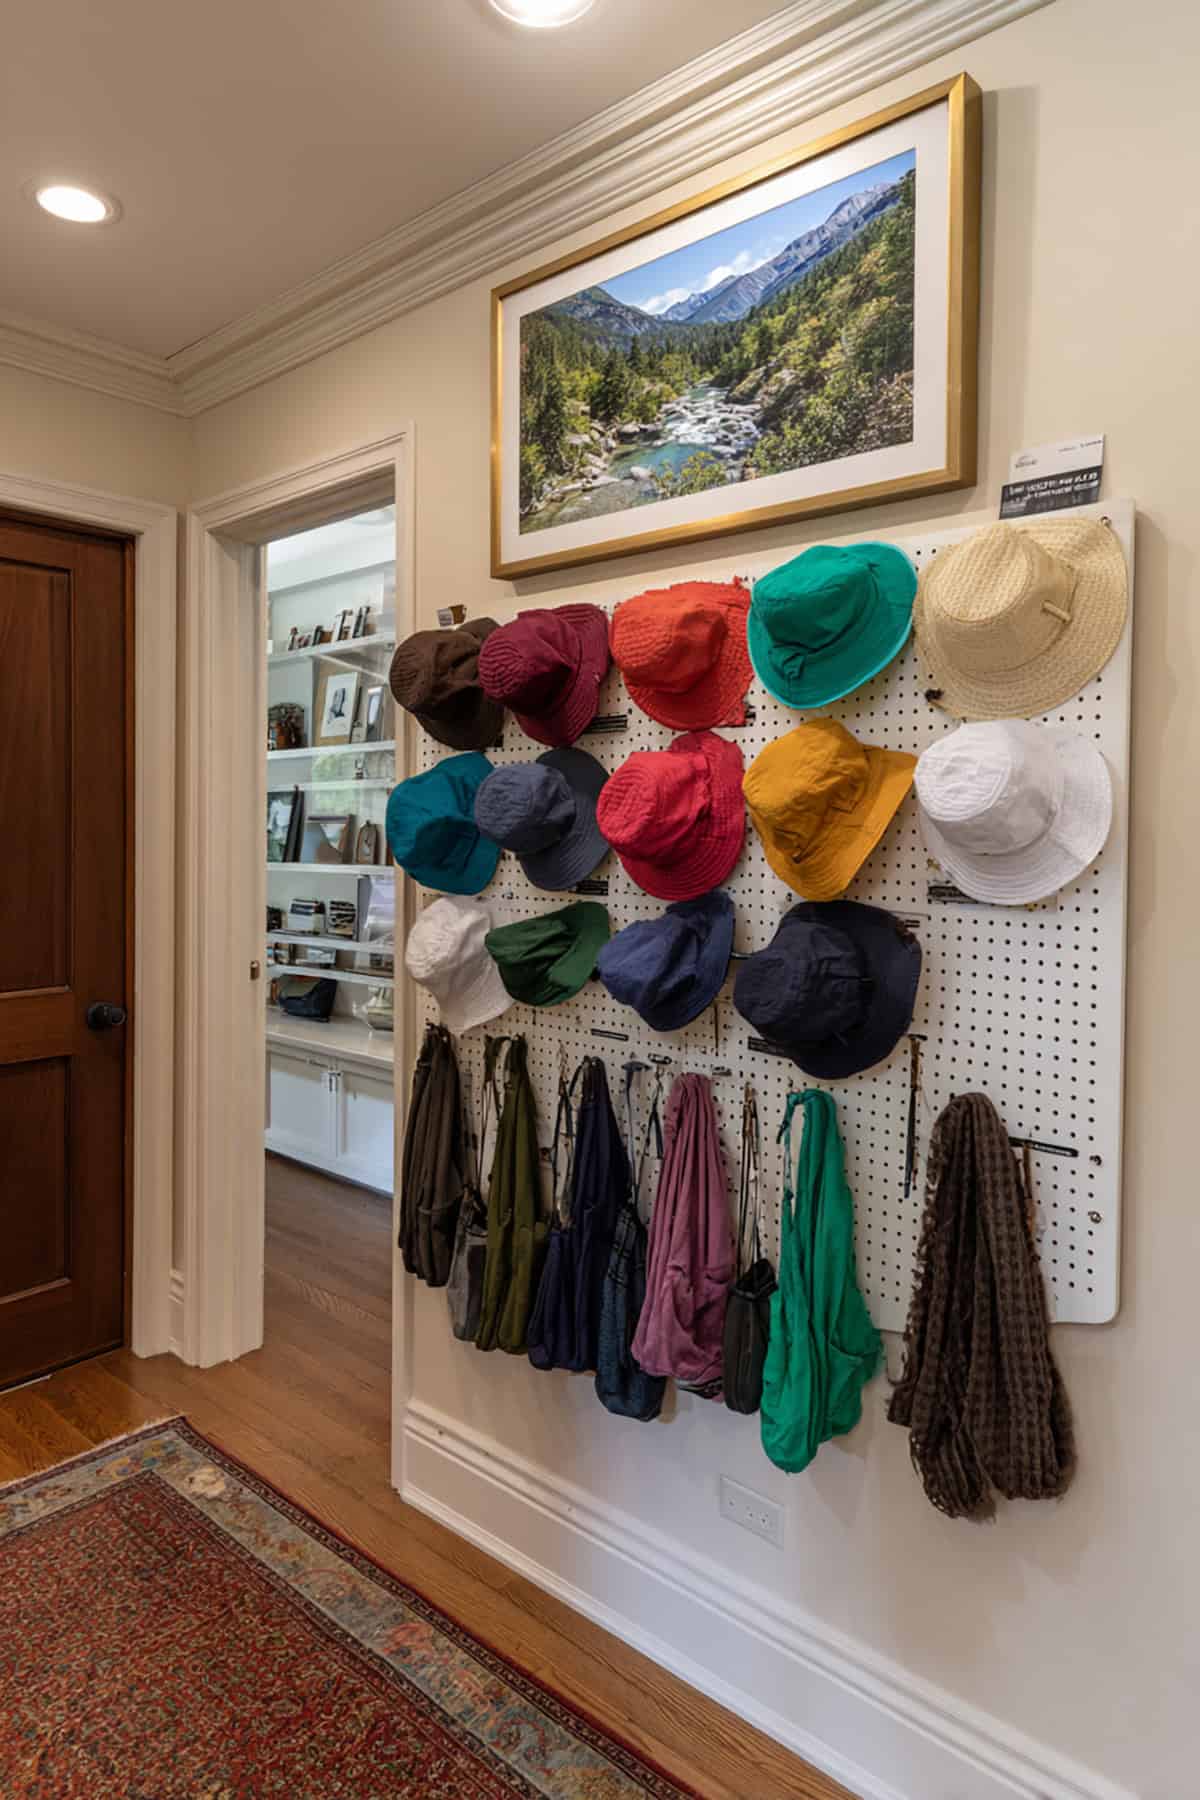
Pegs on the wall aren’t just for coats. Hang up hats and scarves from your travels—they add texture and color, and you don’t need shelves. One item per peg keeps things from getting tangled up.
Tag each peg with the place and year, using printed labels for a clean look. Keep the font consistent for a little polish.
Mount pegs at different heights to avoid overlap. Easy to grab, easy to put back, and it looks a lot more personal than a plain wall.
Travel Drawer Display With Compartment Inserts
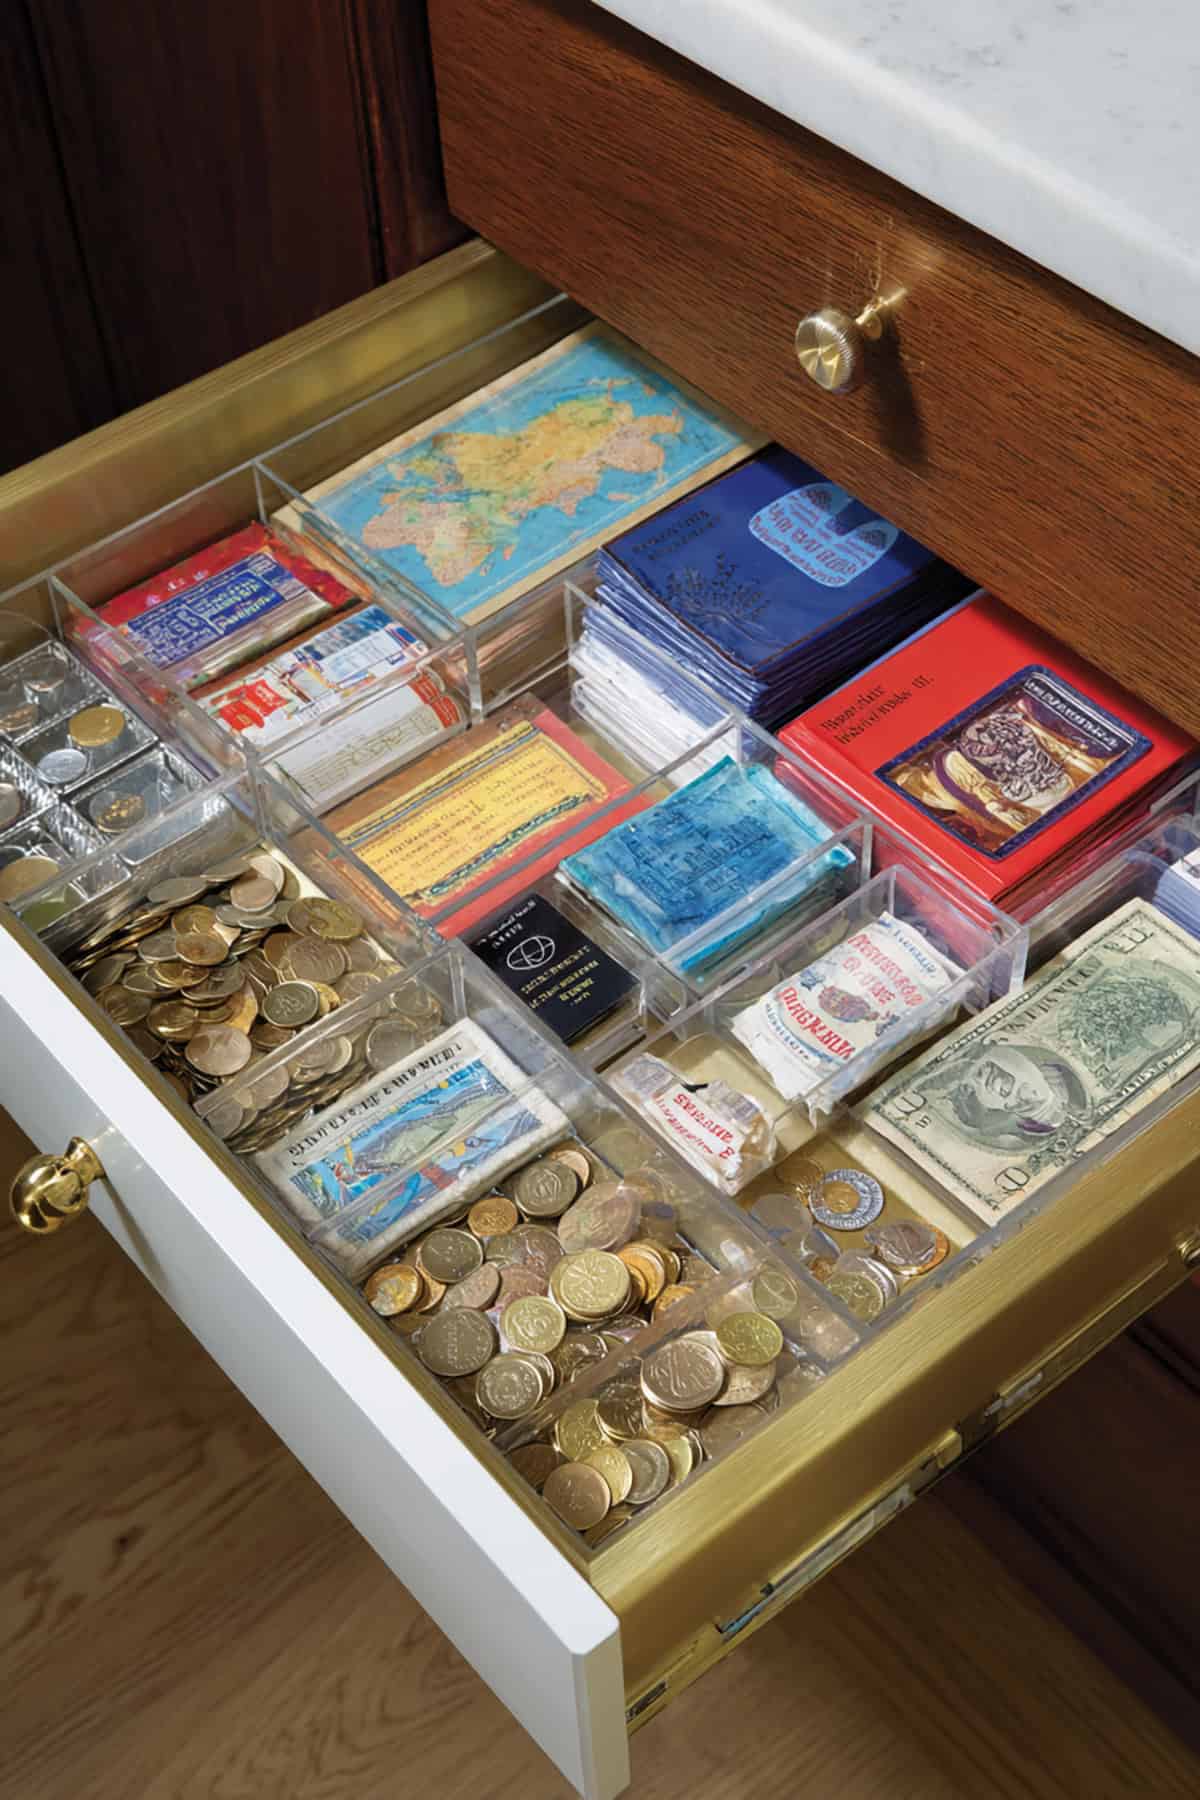
Got delicate stuff? A shallow drawer with dividers is a safe bet. Open it up and see everything at once; each little section holds its own treasure.
Clear acrylic or wood inserts work well. Don’t go too deep or you’ll just end up with a jumble. Line the drawer with fabric to keep things from sliding around.
Great for jewelry, coins, or pins—especially if you like your surfaces clean. Friends can peek without handling anything.
Travel Book Nook With Souvenir Bookends
Mix your travel books with souvenirs for a shelf that tells a story. Landmark-shaped bookends or ones made from local materials add a bit of weight and meaning.
Stick to one souvenir per book group and don’t block the titles. You want to be able to find your next read, after all.
This works in living rooms or offices. It’s subtle, practical, and keeps the memories close by.
Suitcase Coffee Table With Curated Layers
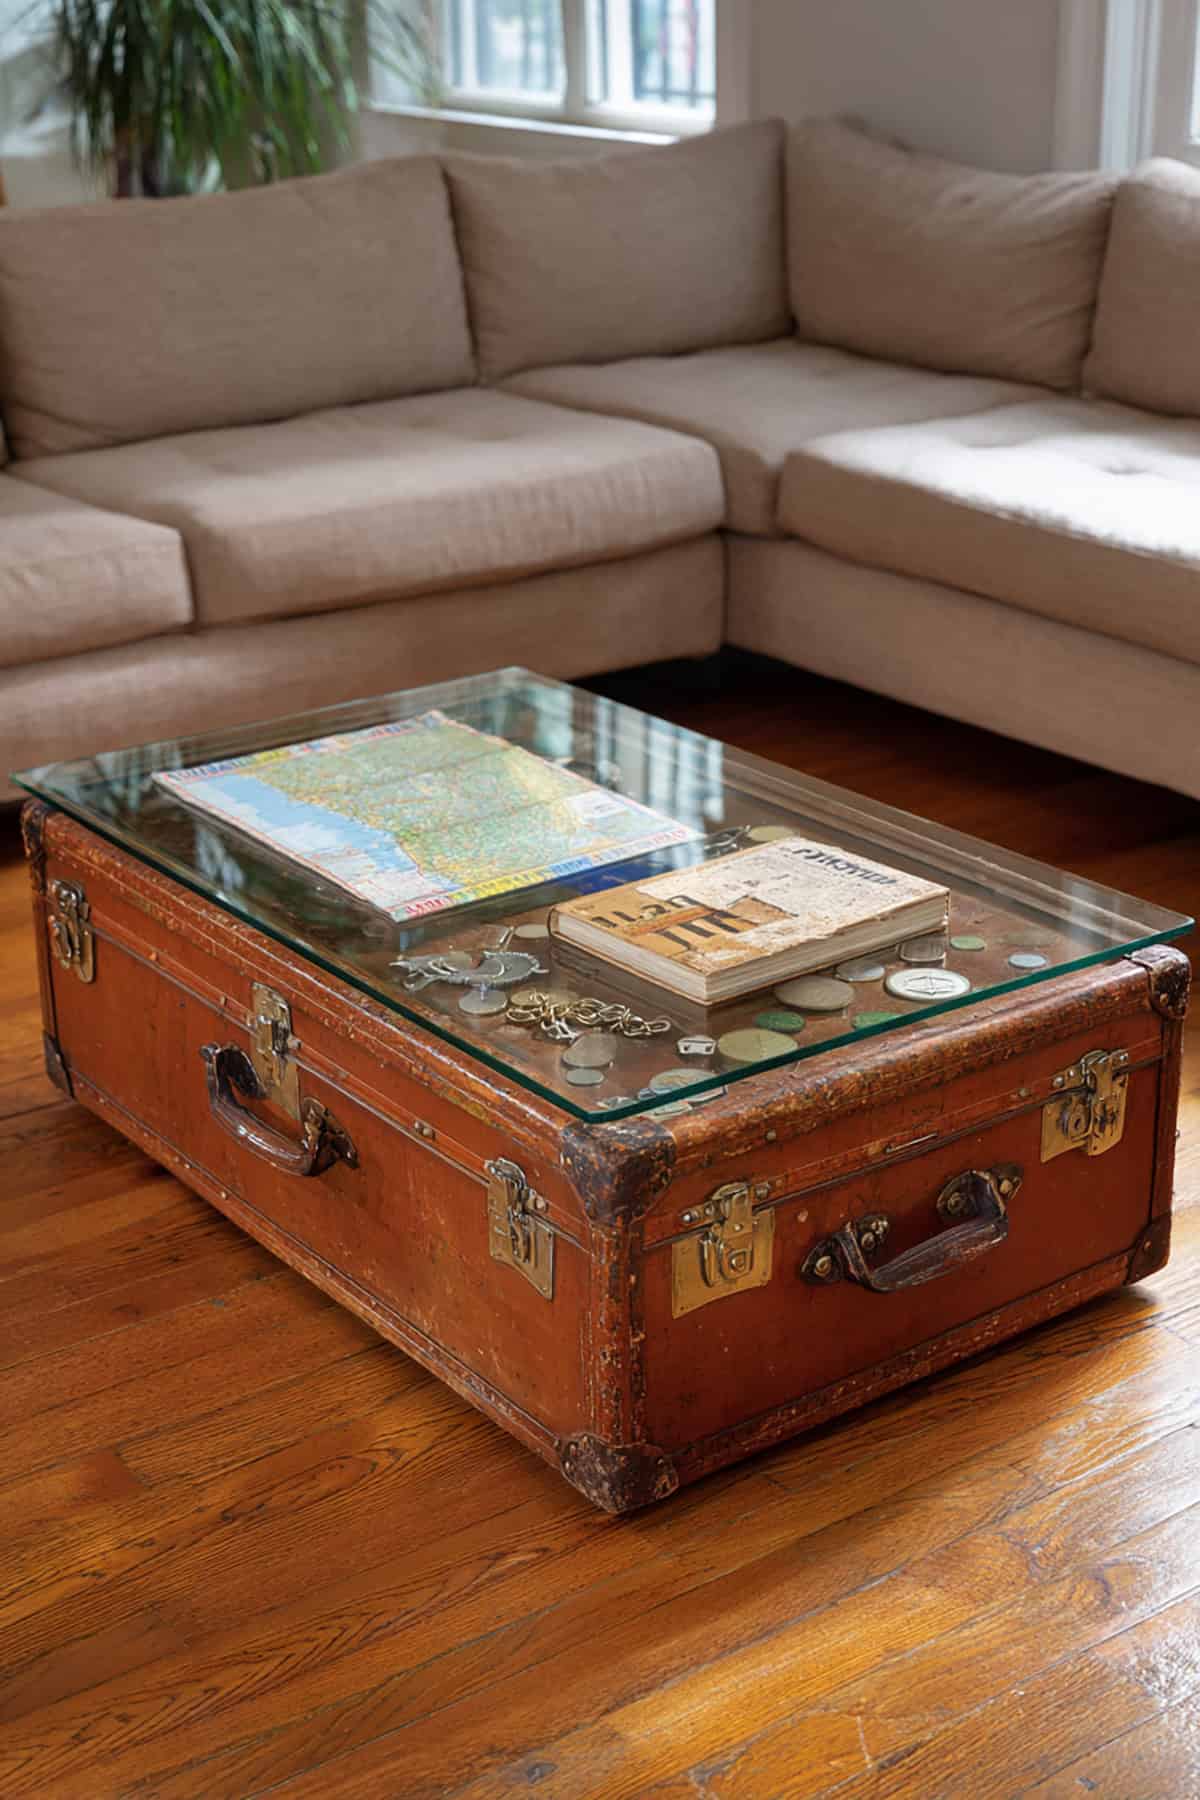
Old suitcase with a glass top? Instant coffee table and display case. Layer bigger souvenirs at the bottom, then lay flat items on top so they’re easy to see.
Shallow suitcases are best—deep ones just swallow everything. Go for a neutral interior so the souvenirs pop.
Switch things up every so often to keep it interesting. Just handle everything gently when you do.
Shadow Box “One Trip, One Box” Collection
Shadow boxes let you dedicate a frame to each trip. It’s like chapters on your wall, and you get to decide what goes inside.
Pick one standout item per box, add a little text for place and date, and keep the background simple. Arrange boxes in a row or a grid—spacing matters more than matching frames.
Postcard Wall Grid With Handwritten Notes
Postcards are basically ready-made art. Clip them to a wall grid—no frames needed—and you can read the messages up close.
Wire or metal grids work well. One card per square keeps things tidy. If a card is light on info, add a small tag for context. Easy to swap as you travel more.
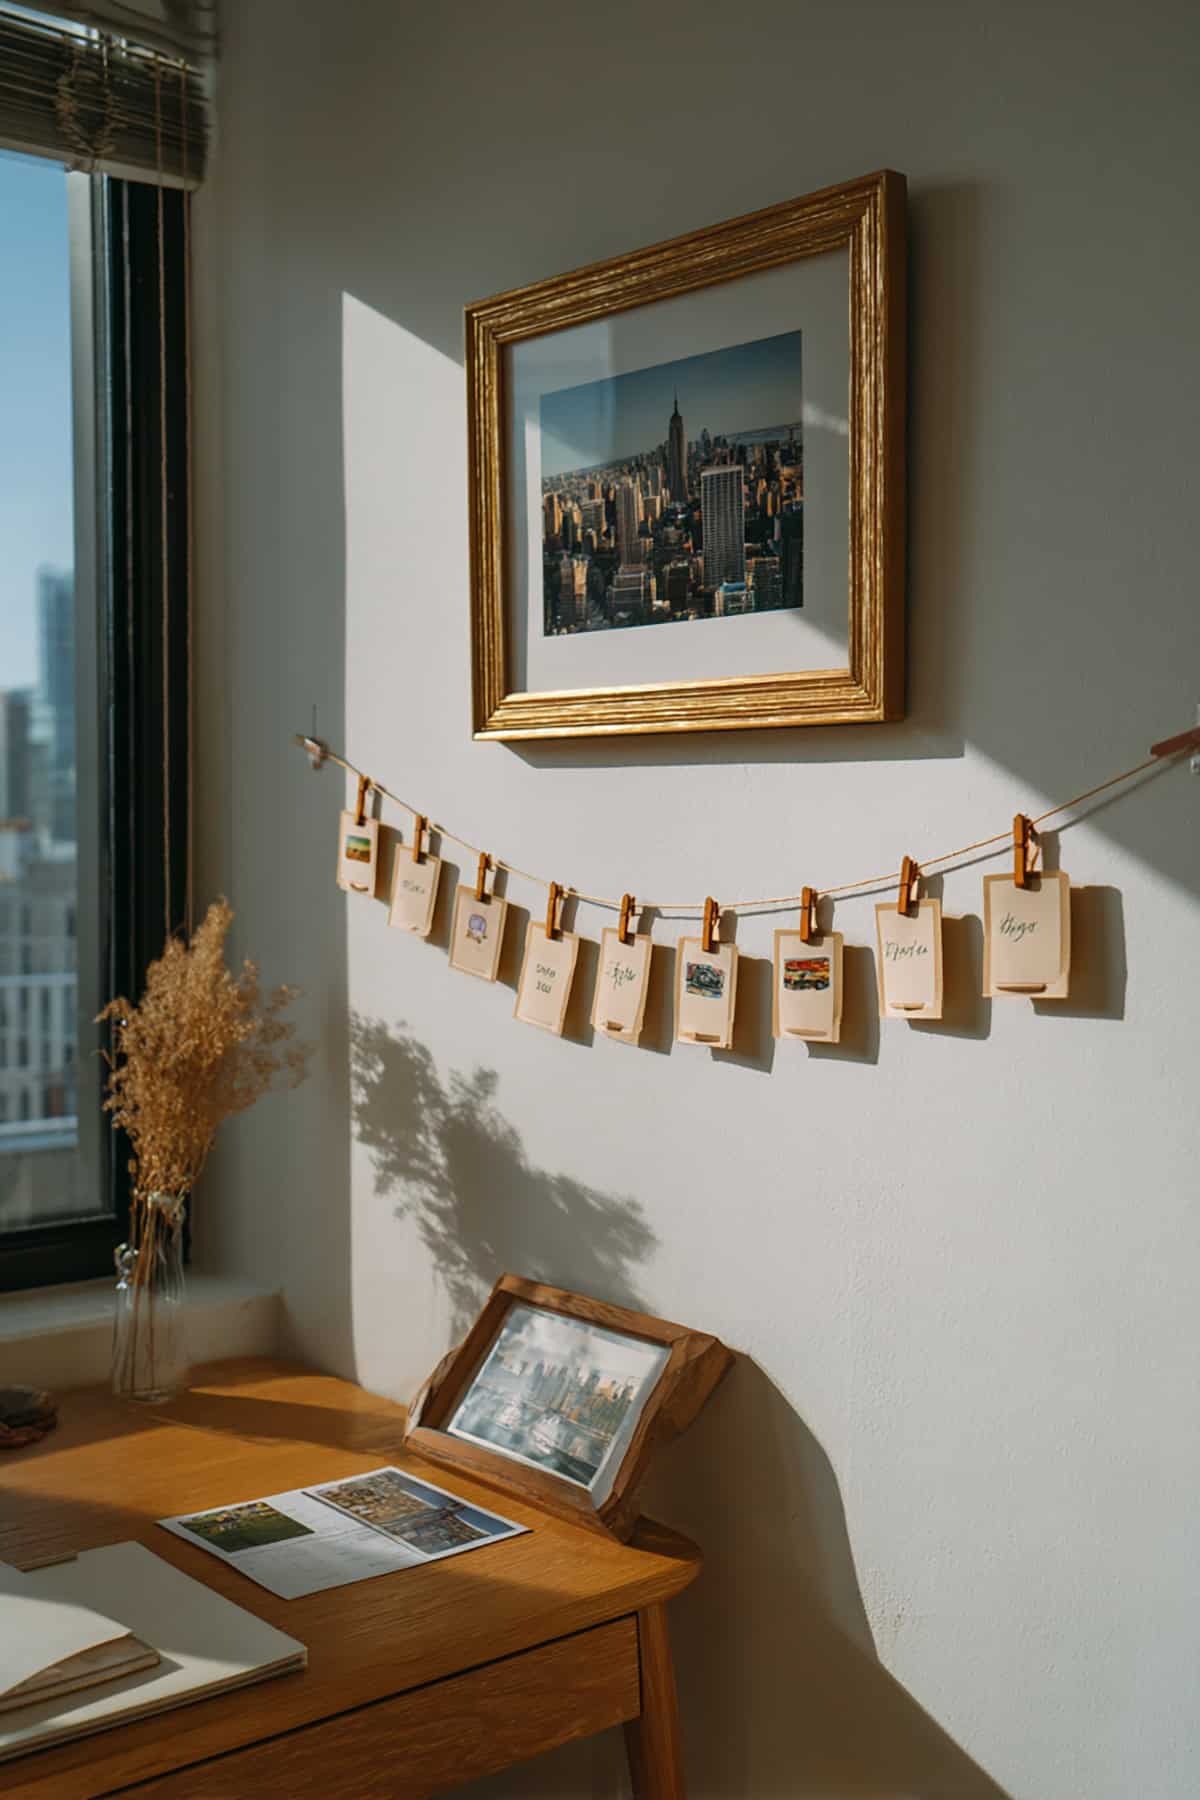
Polaroid + Ticket Photo Line With Mini Clips
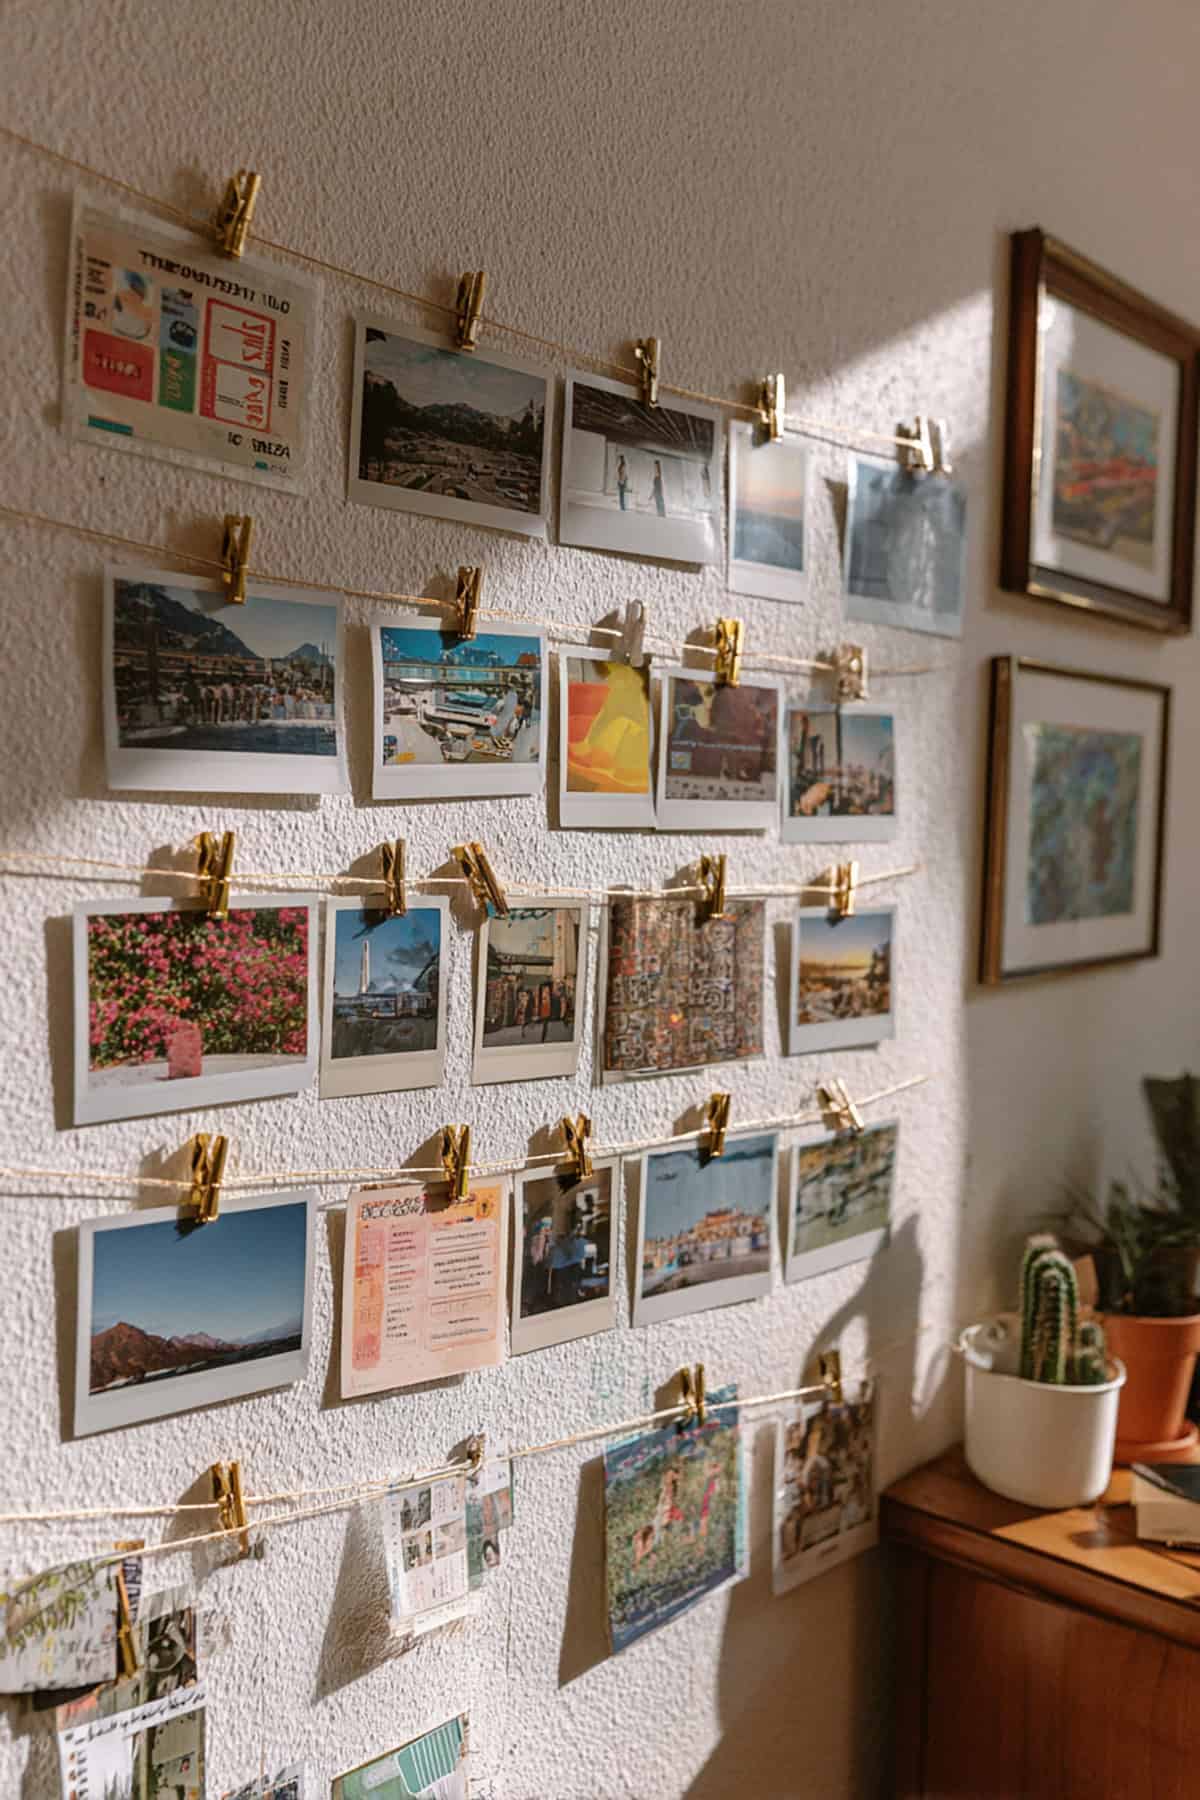
String up a line and use mini clips for Polaroids and paper tickets. It’s casual, fun, and doesn’t hurt your souvenirs.
Keep the line taut so it doesn’t sag. Space out the clips and don’t layer too much. Works best for lightweight stuff, and you can swap out faded photos anytime.
Plate Wall With Destination Ceramics
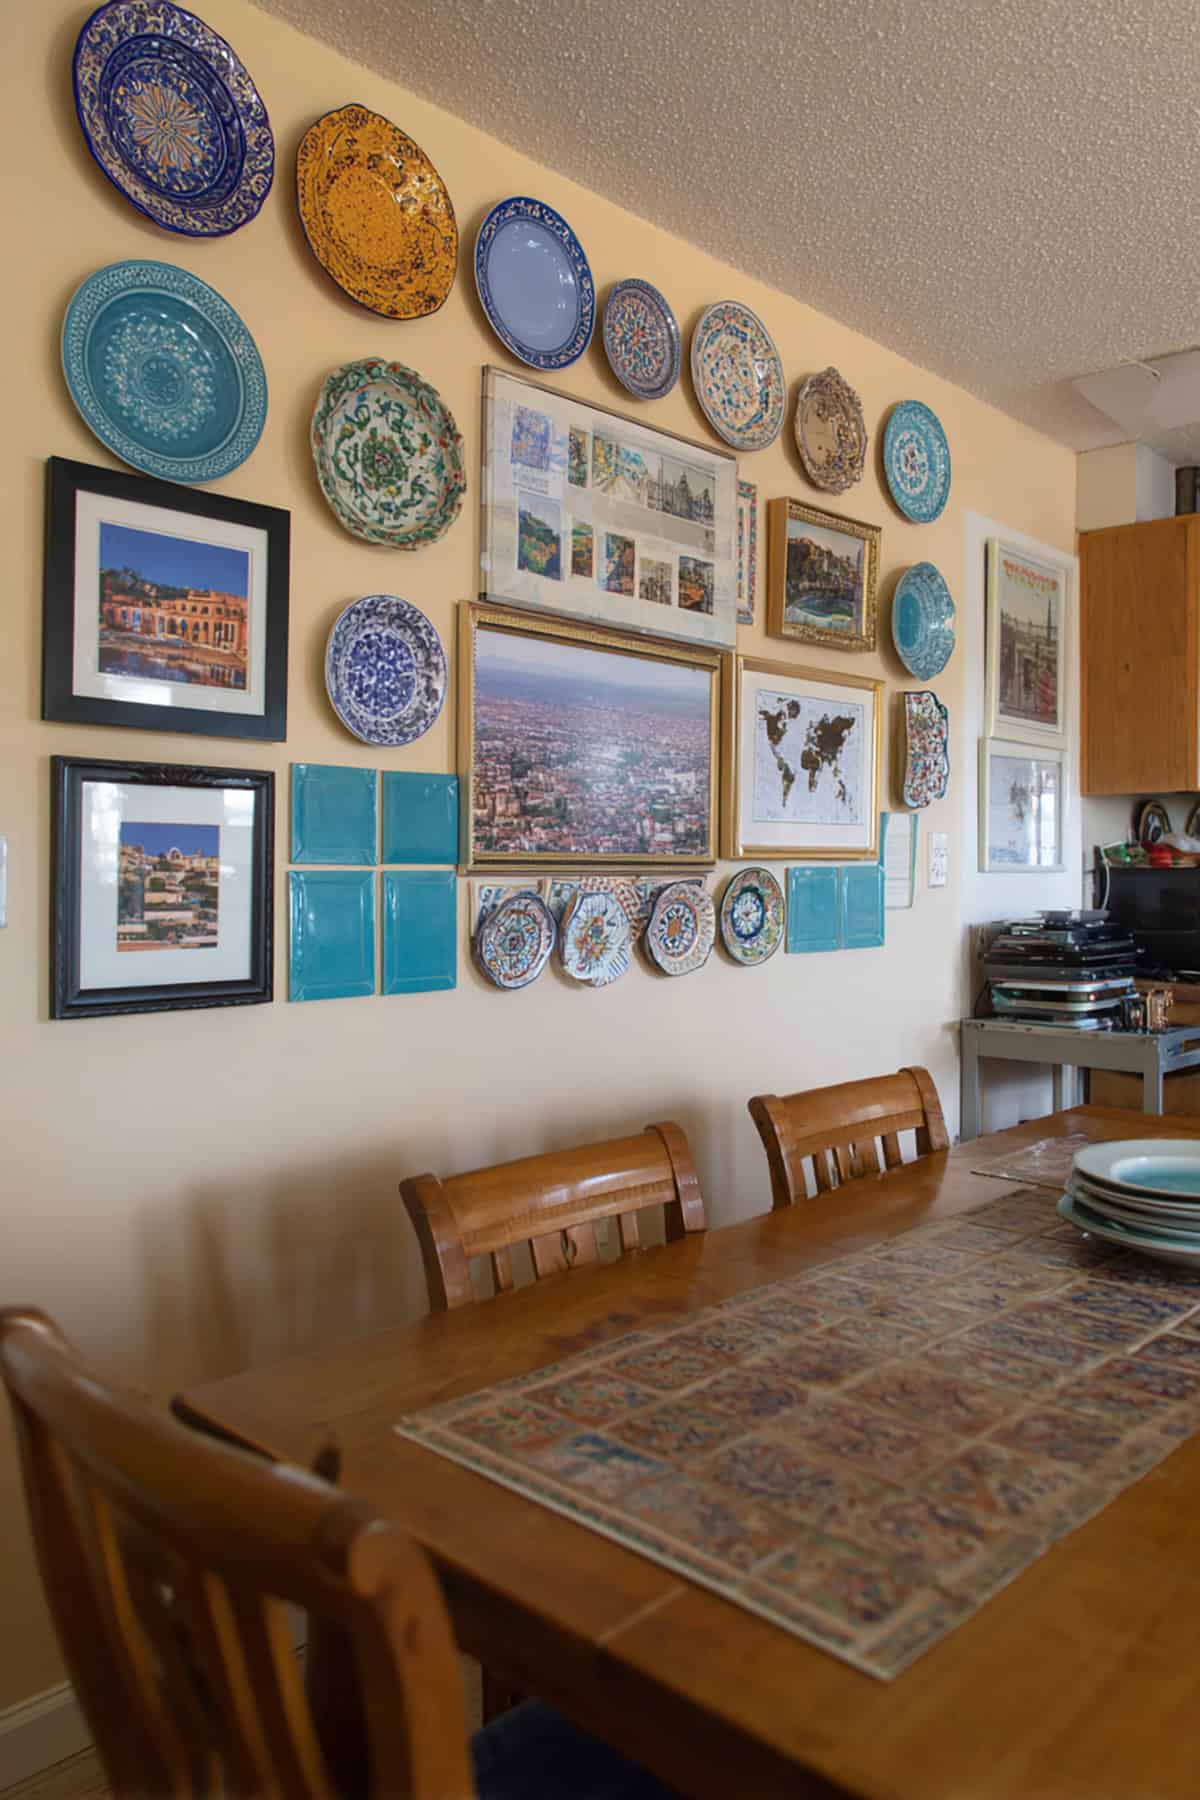
Decorative plates from your travels can turn a wall into a real statement. Plate hangers keep them secure and you get an instant burst of color and pattern.
Lay out the arrangement on the floor first—mix up sizes and shapes, and keep the gaps even. Avoid hanging near heat or moisture, and use a soft cloth to clean.
Ornament Tree For Travel Keepsakes
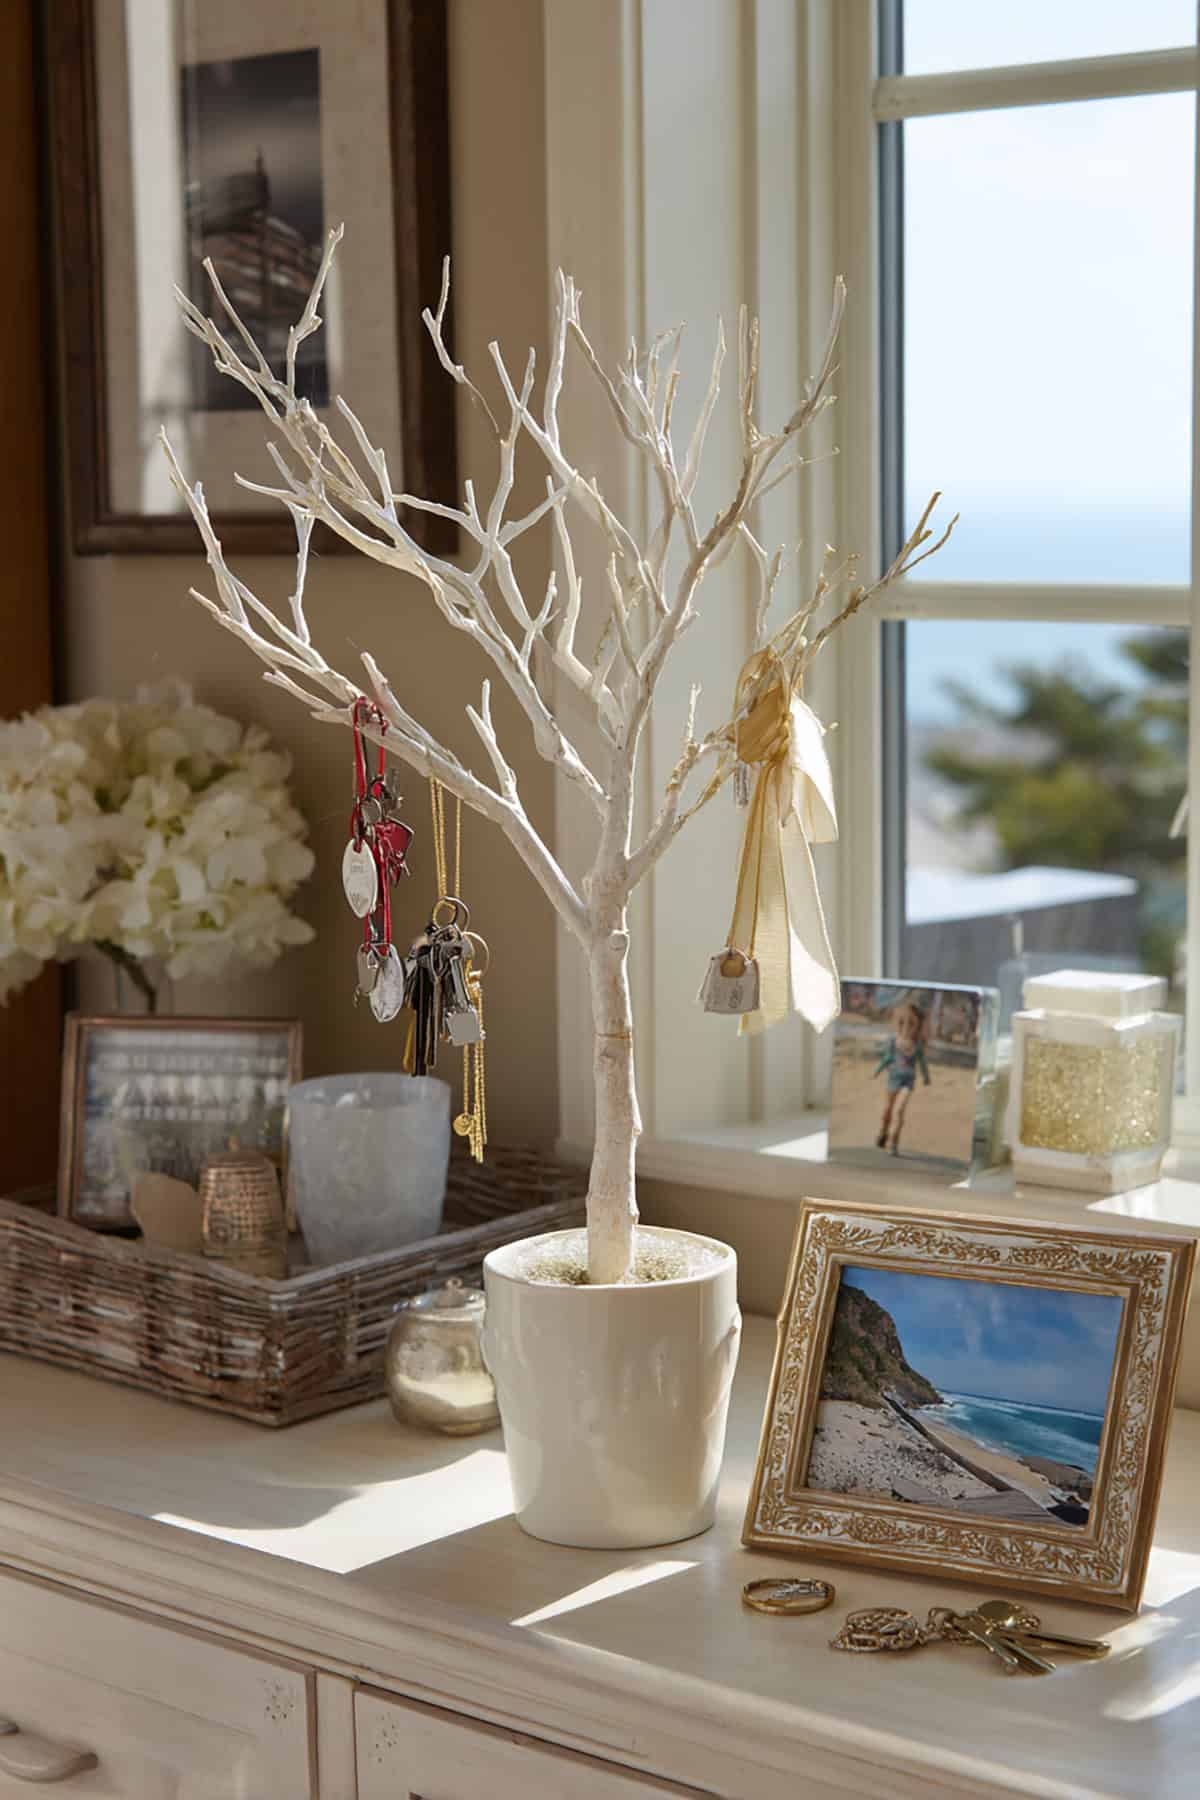
Little ornaments from each trip? Hang them on a tabletop tree, year-round. Each one marks a spot you’ve visited.
Stick with a neutral tree so it doesn’t clash. Give each ornament some breathing room, and add labels if you want. Only use it for lightweight pieces—store the rest safely until next time.
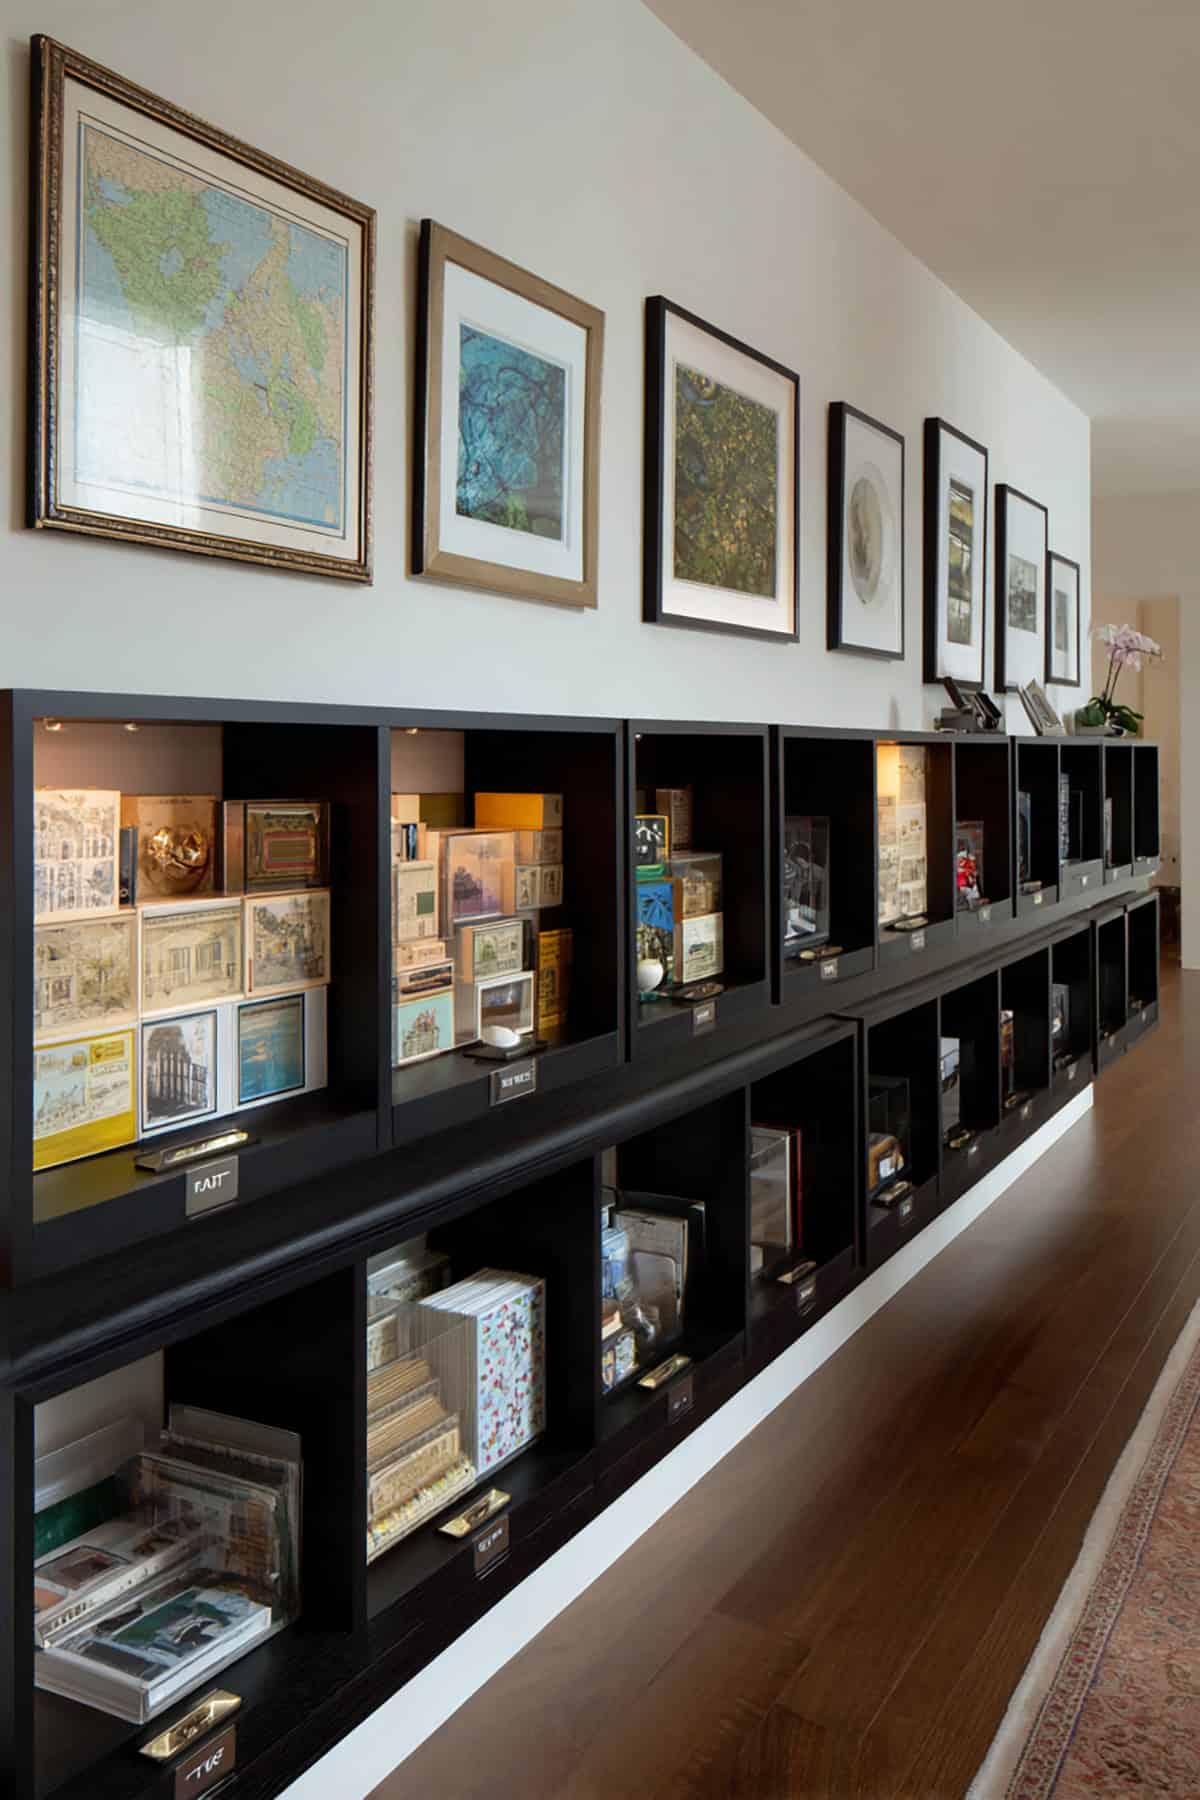
Museum Label Shelves With Tiny Plaques
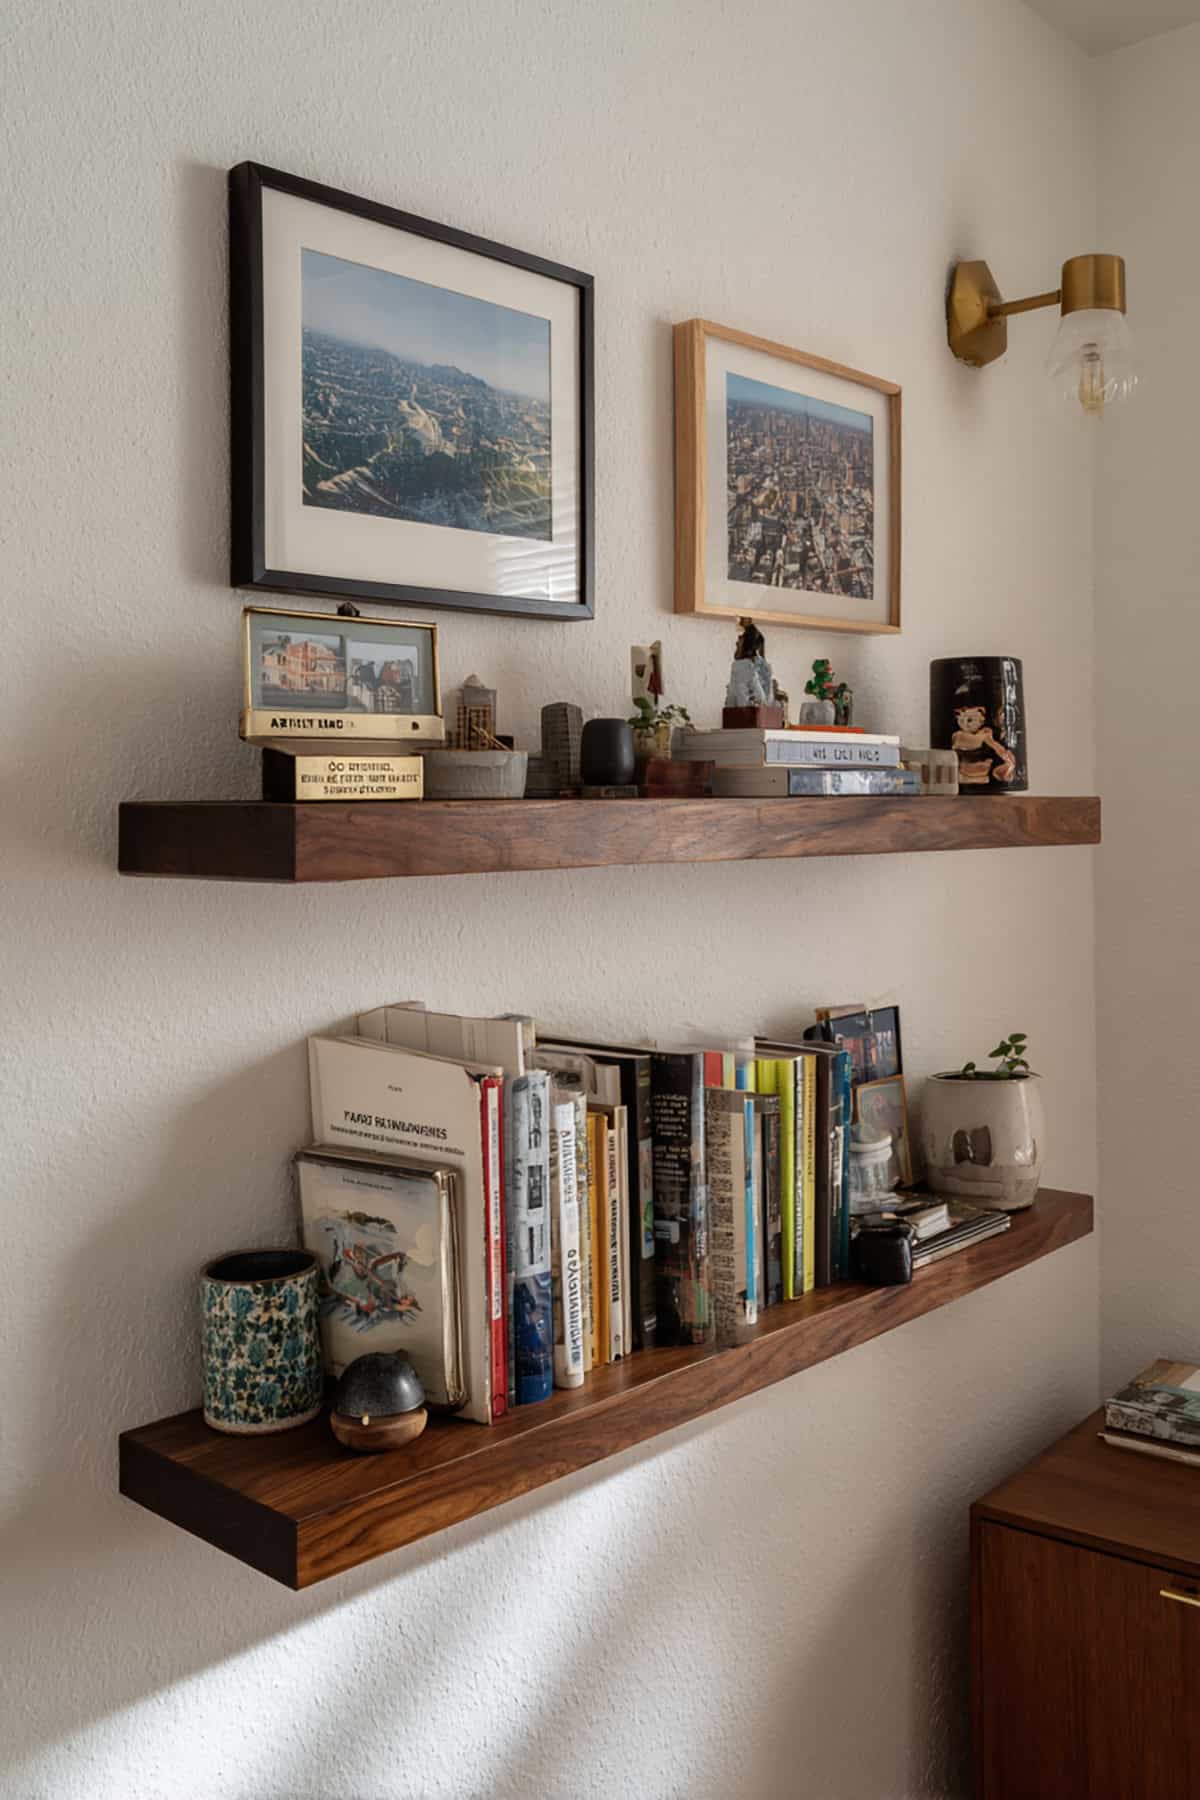
Floating shelves with small plaques give your souvenirs a gallery vibe. Each one gets a short label—just the basics, like location and year.
Identical plaques keep the focus on your finds. Short, factual text works best. Mount shelves at eye level and don’t crowd them; space helps things stand out.
Luggage Tag Banner With City Names
String together luggage tags from your travels for a banner that’s all about the places, not just the stuff. Hang them on a cord or rod, and keep the color palette tight for a cleaner look.
Arrange tags by trip or region. It’s a good solution for small spaces and easy to update as you go new places.
Keyring Display Board With Hooks By Region
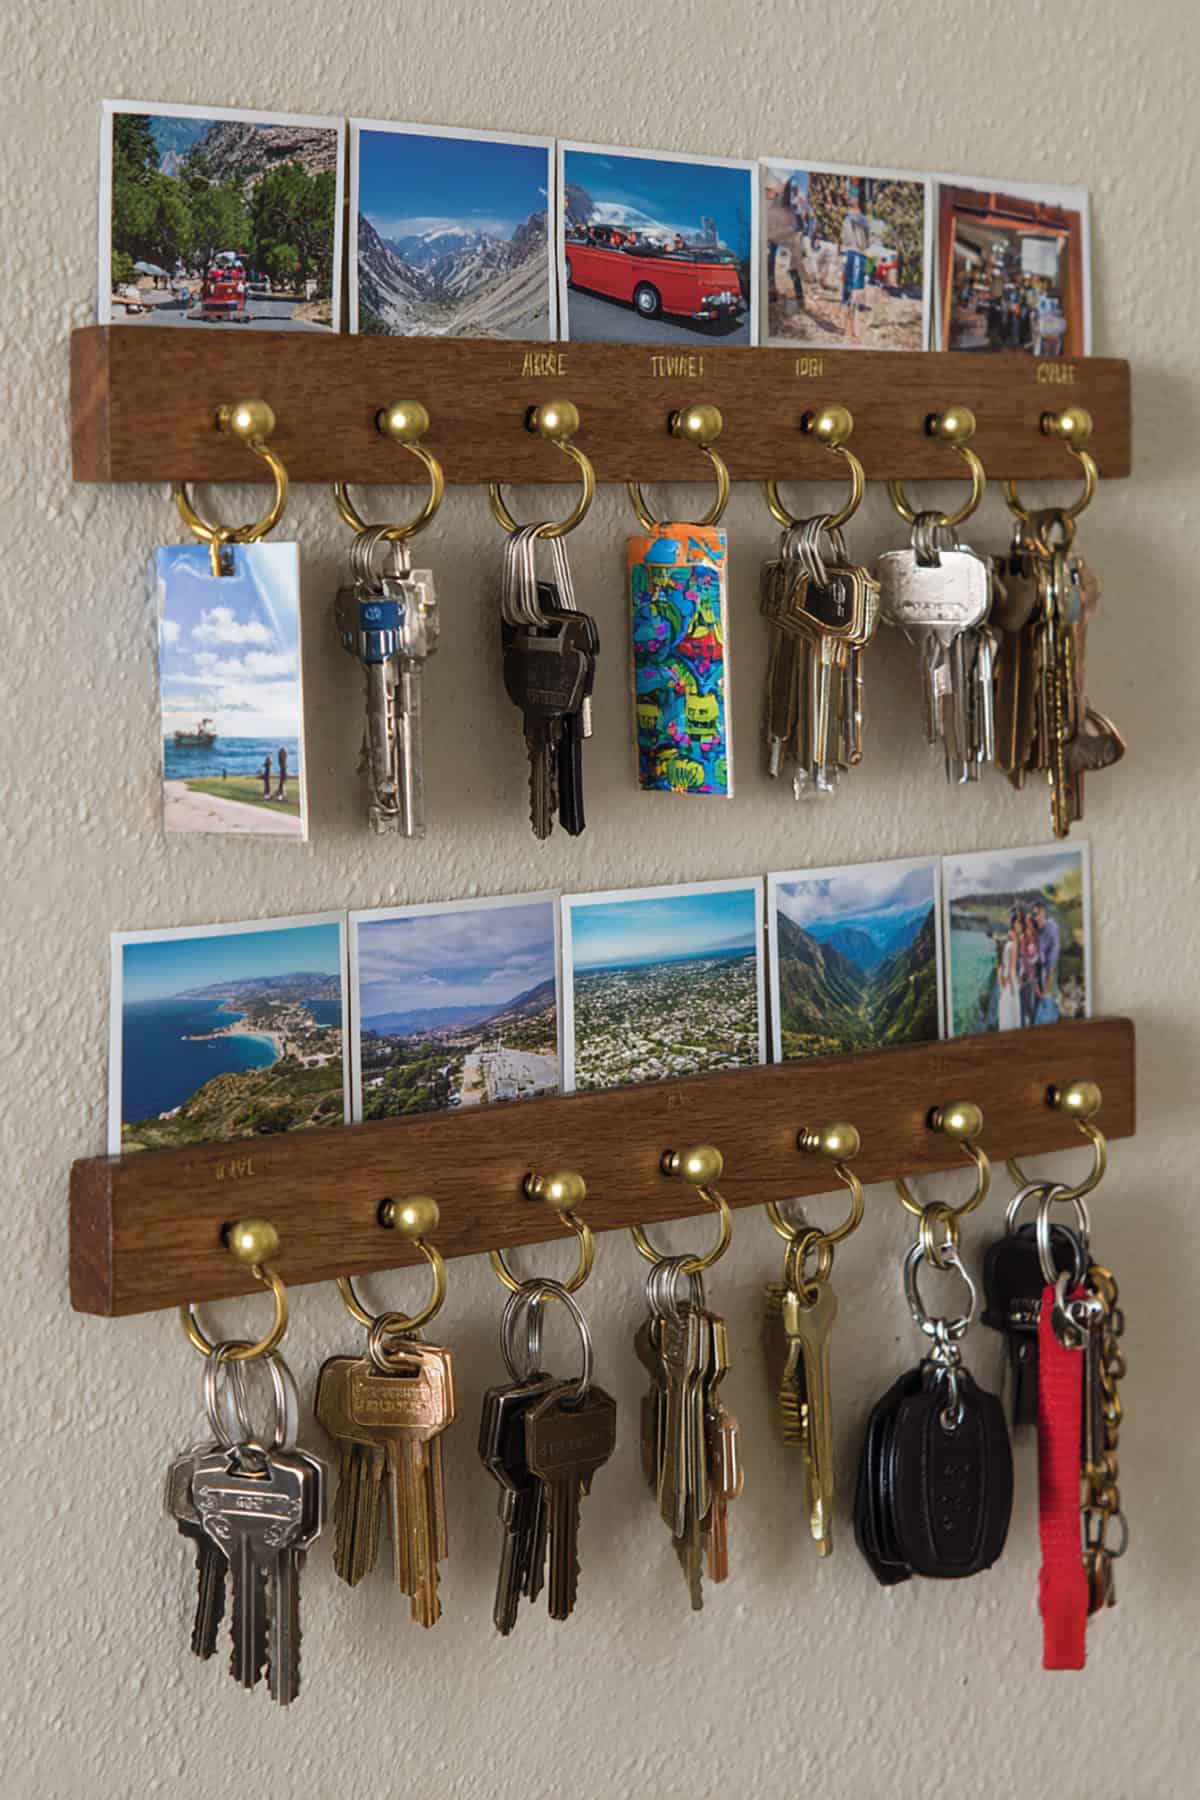
Keyrings pile up fast. Give them a home with a board and some hooks, grouped by country or continent.
Stick the board near your door or desk. Space out the hooks so nothing overlaps, and use sturdy hardware. Labels above each group help keep things clear.
Framed Map With Pinned Keepsakes
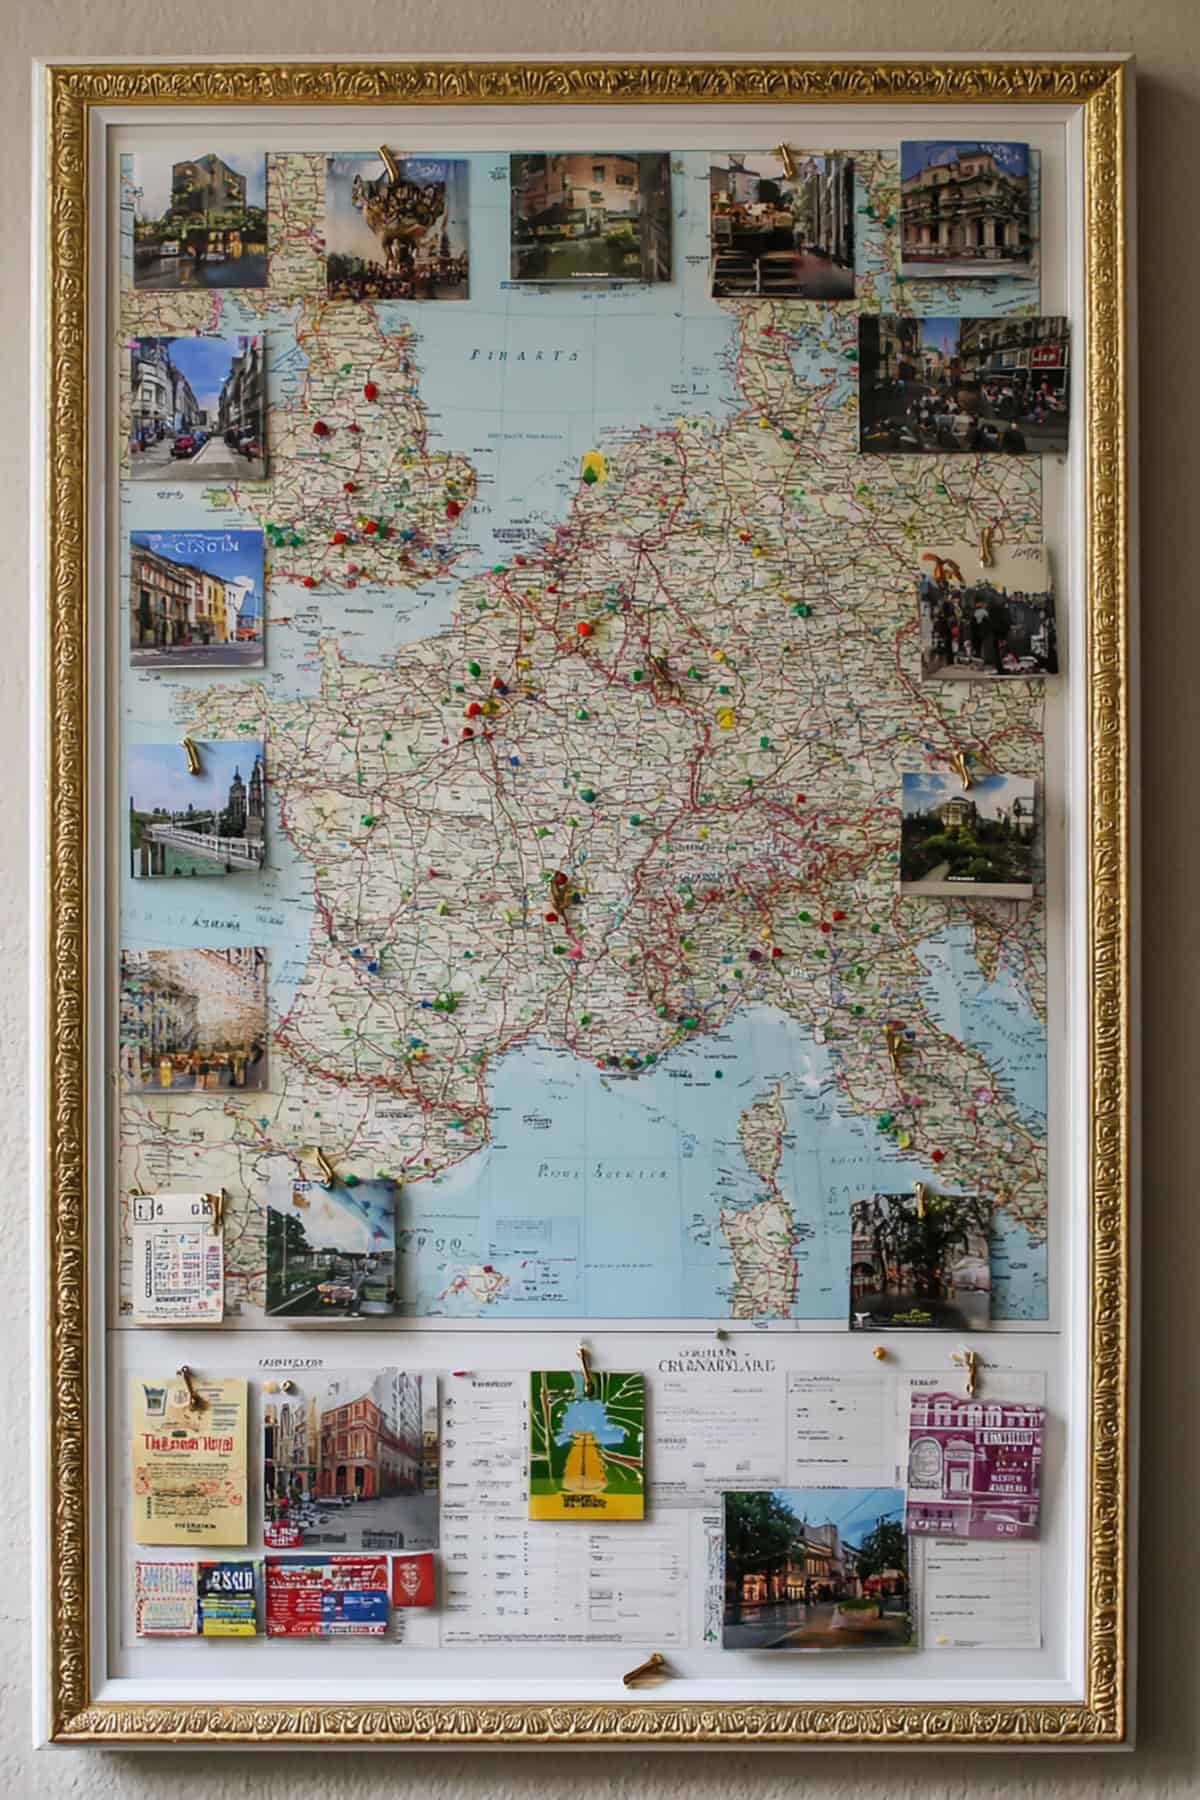
Framing a map and pinning souvenirs behind glass keeps everything safe and dust-free. Go for a deep frame, use acid-free backing, and stick to neutral pin colors.
It’s a good pick for fragile or valuable pieces, and if you ever move, the whole display comes with you.
Framed Fabric Swatches From Markets
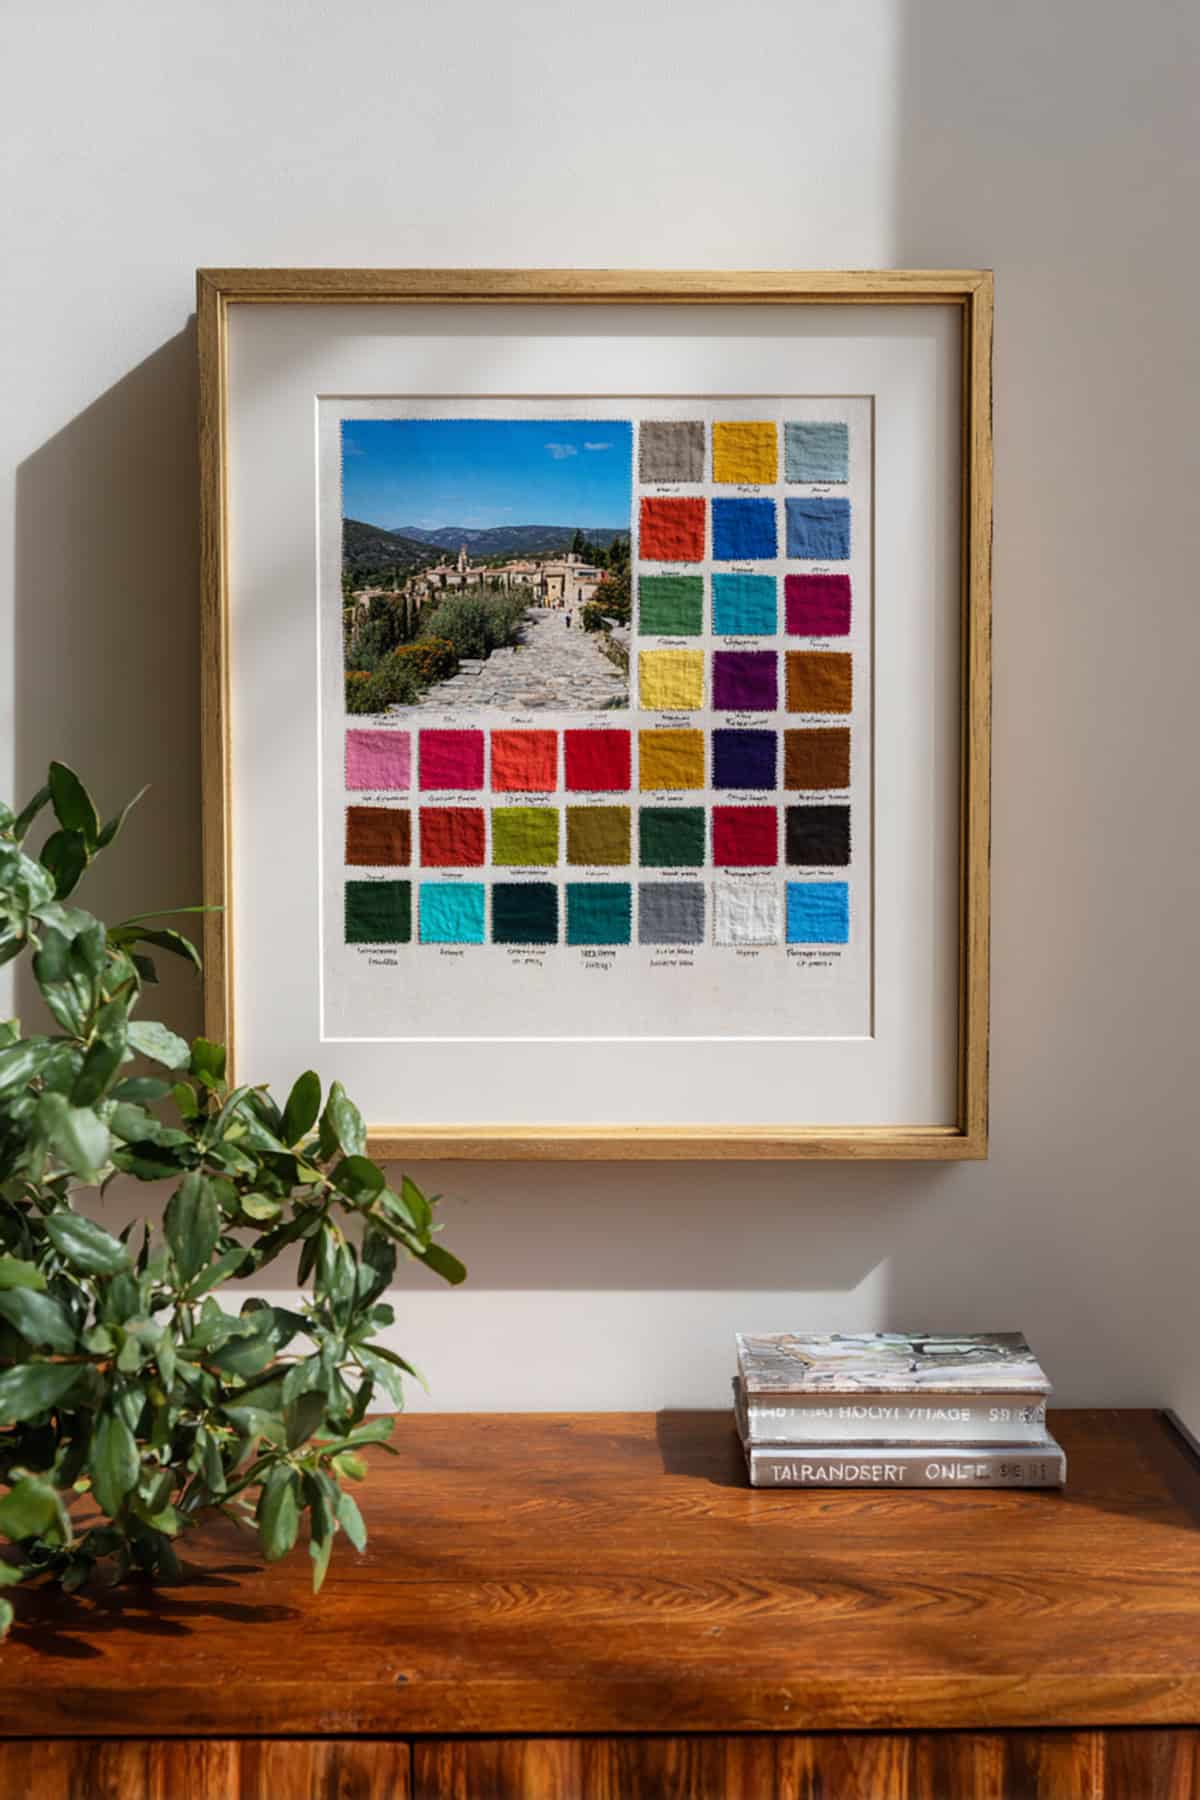
Picked up fabric scraps on your travels? Frame them. Cut to size, use mats for borders, and stick to matching frames for consistency.
This skips the need for bulky storage and is perfect for delicate textiles. Just keep them out of direct light to prevent fading.
Framed Currency Collage With Clean Borders
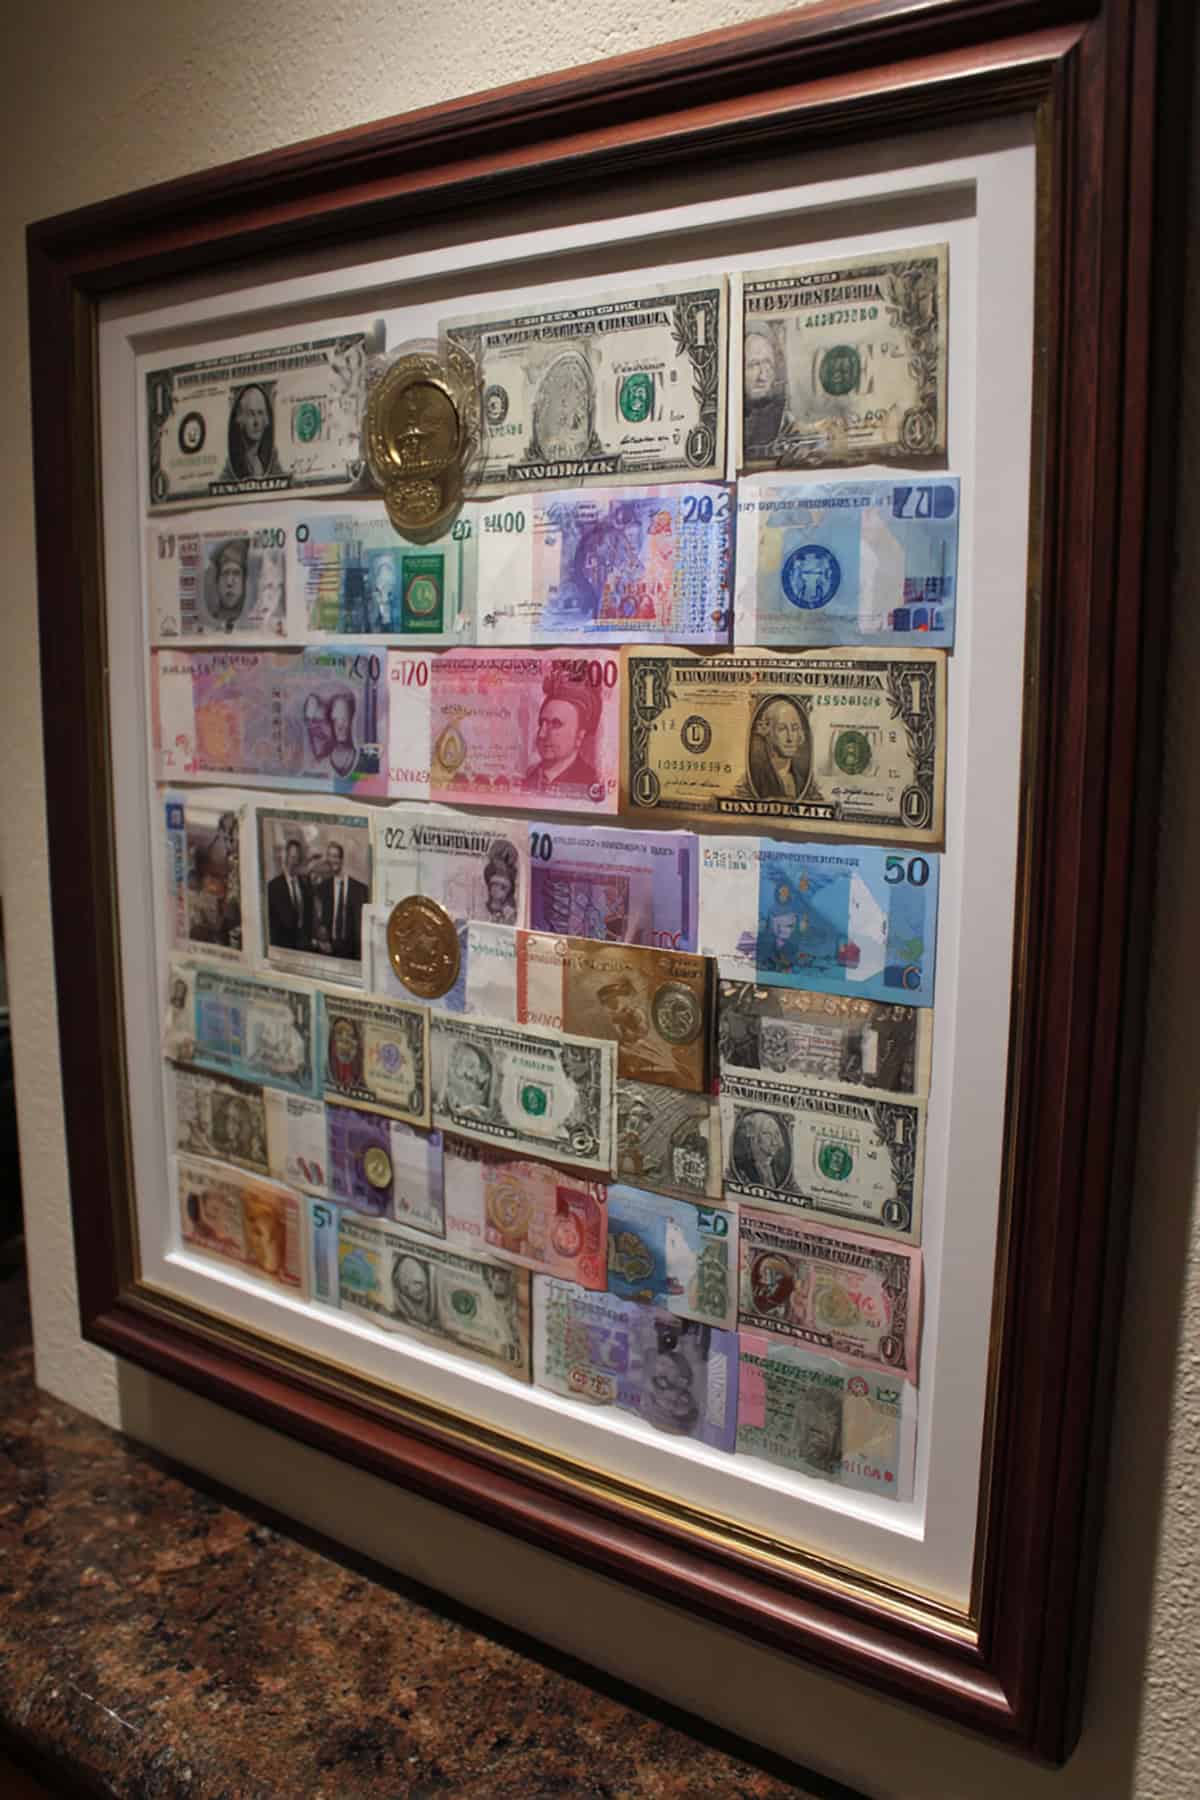
Foreign bills and coins can look pretty cool as a collage. Use a frame with mounts (no glue), line up bills by color or size, and leave some space between each piece.
Just double-check local rules about displaying currency—some places are strict. Frames help protect everything from wear.
Floating Shelf “Mini Museum” With Acrylic Stands
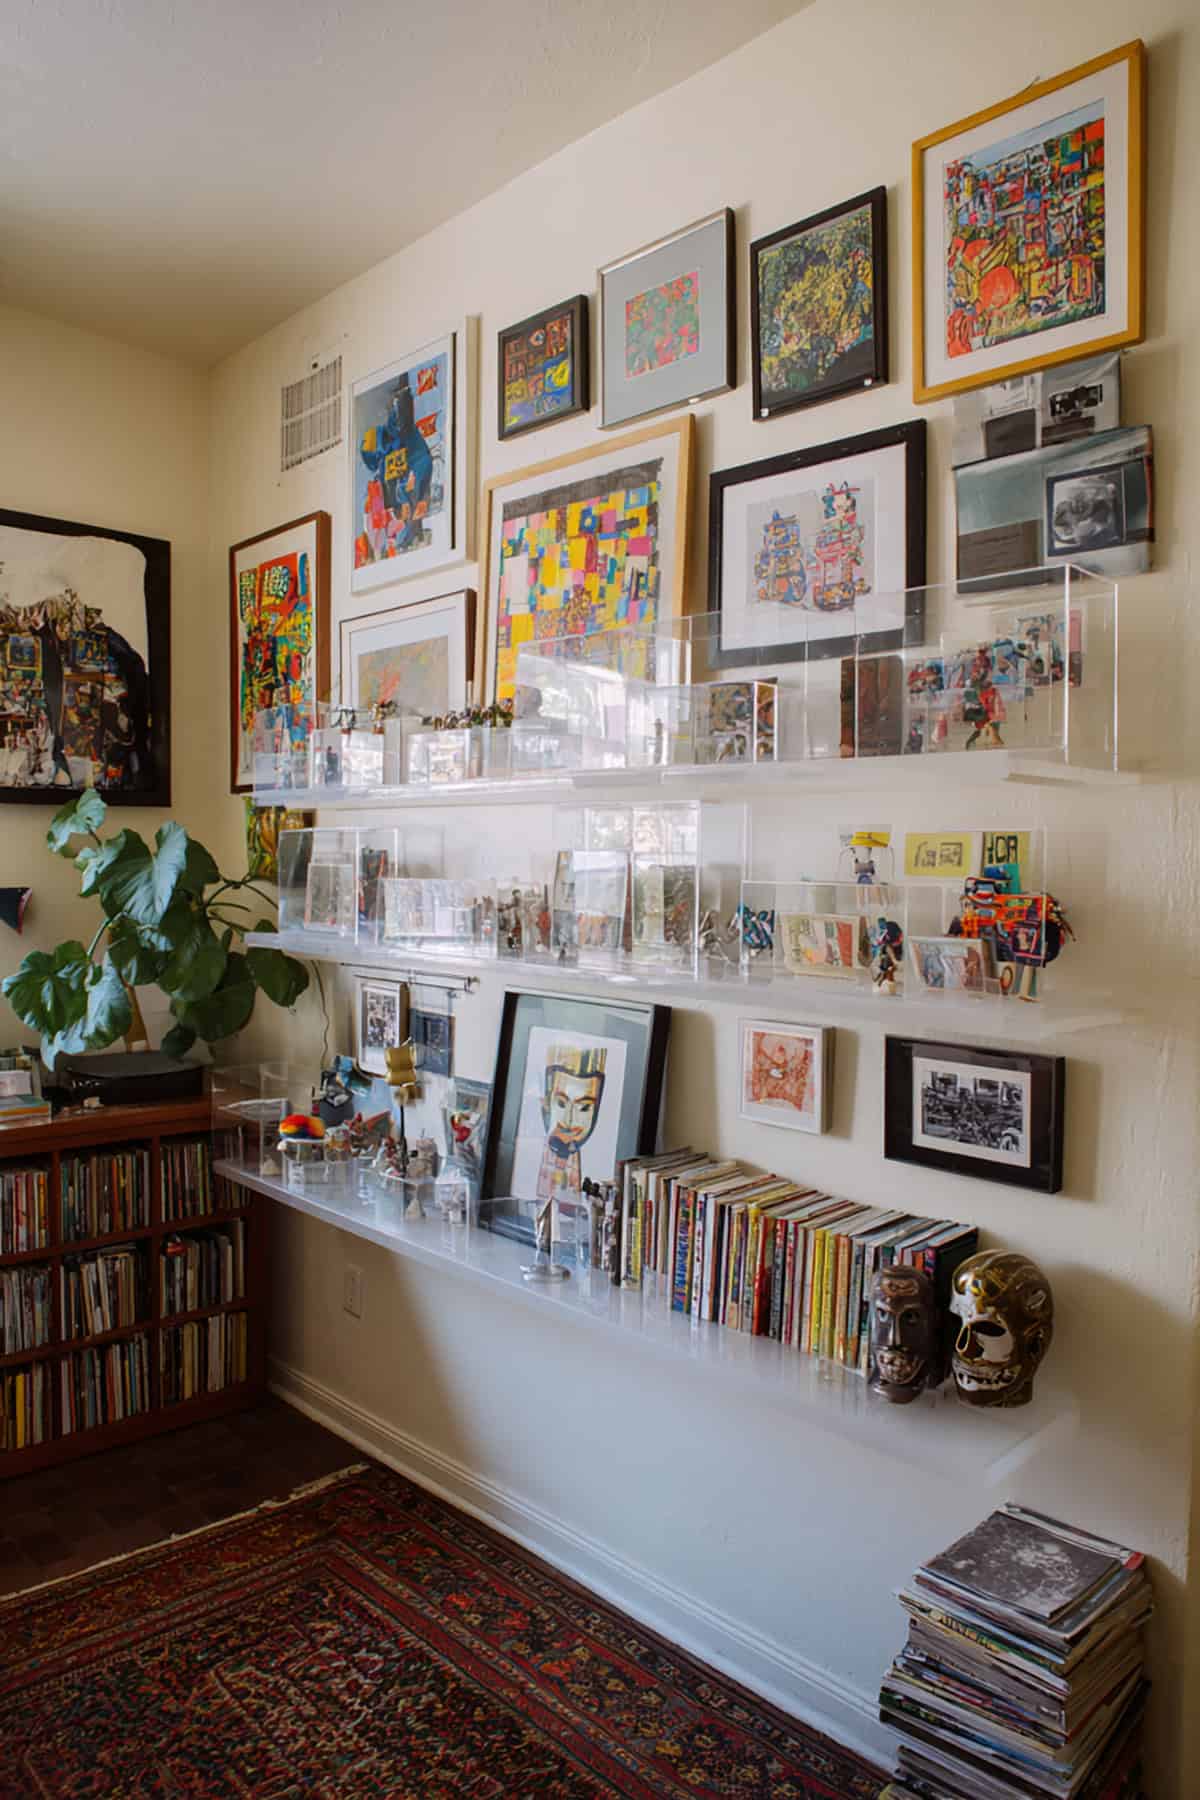
Install a floating shelf and use clear acrylic stands to prop up small objects—coins, medals, tiny art. Each piece gets its own spotlight.
Don’t make the shelf too deep or pile things up. Dust often and rotate items to avoid fading.
Coffee Table Photo Box With Hidden Souvenirs
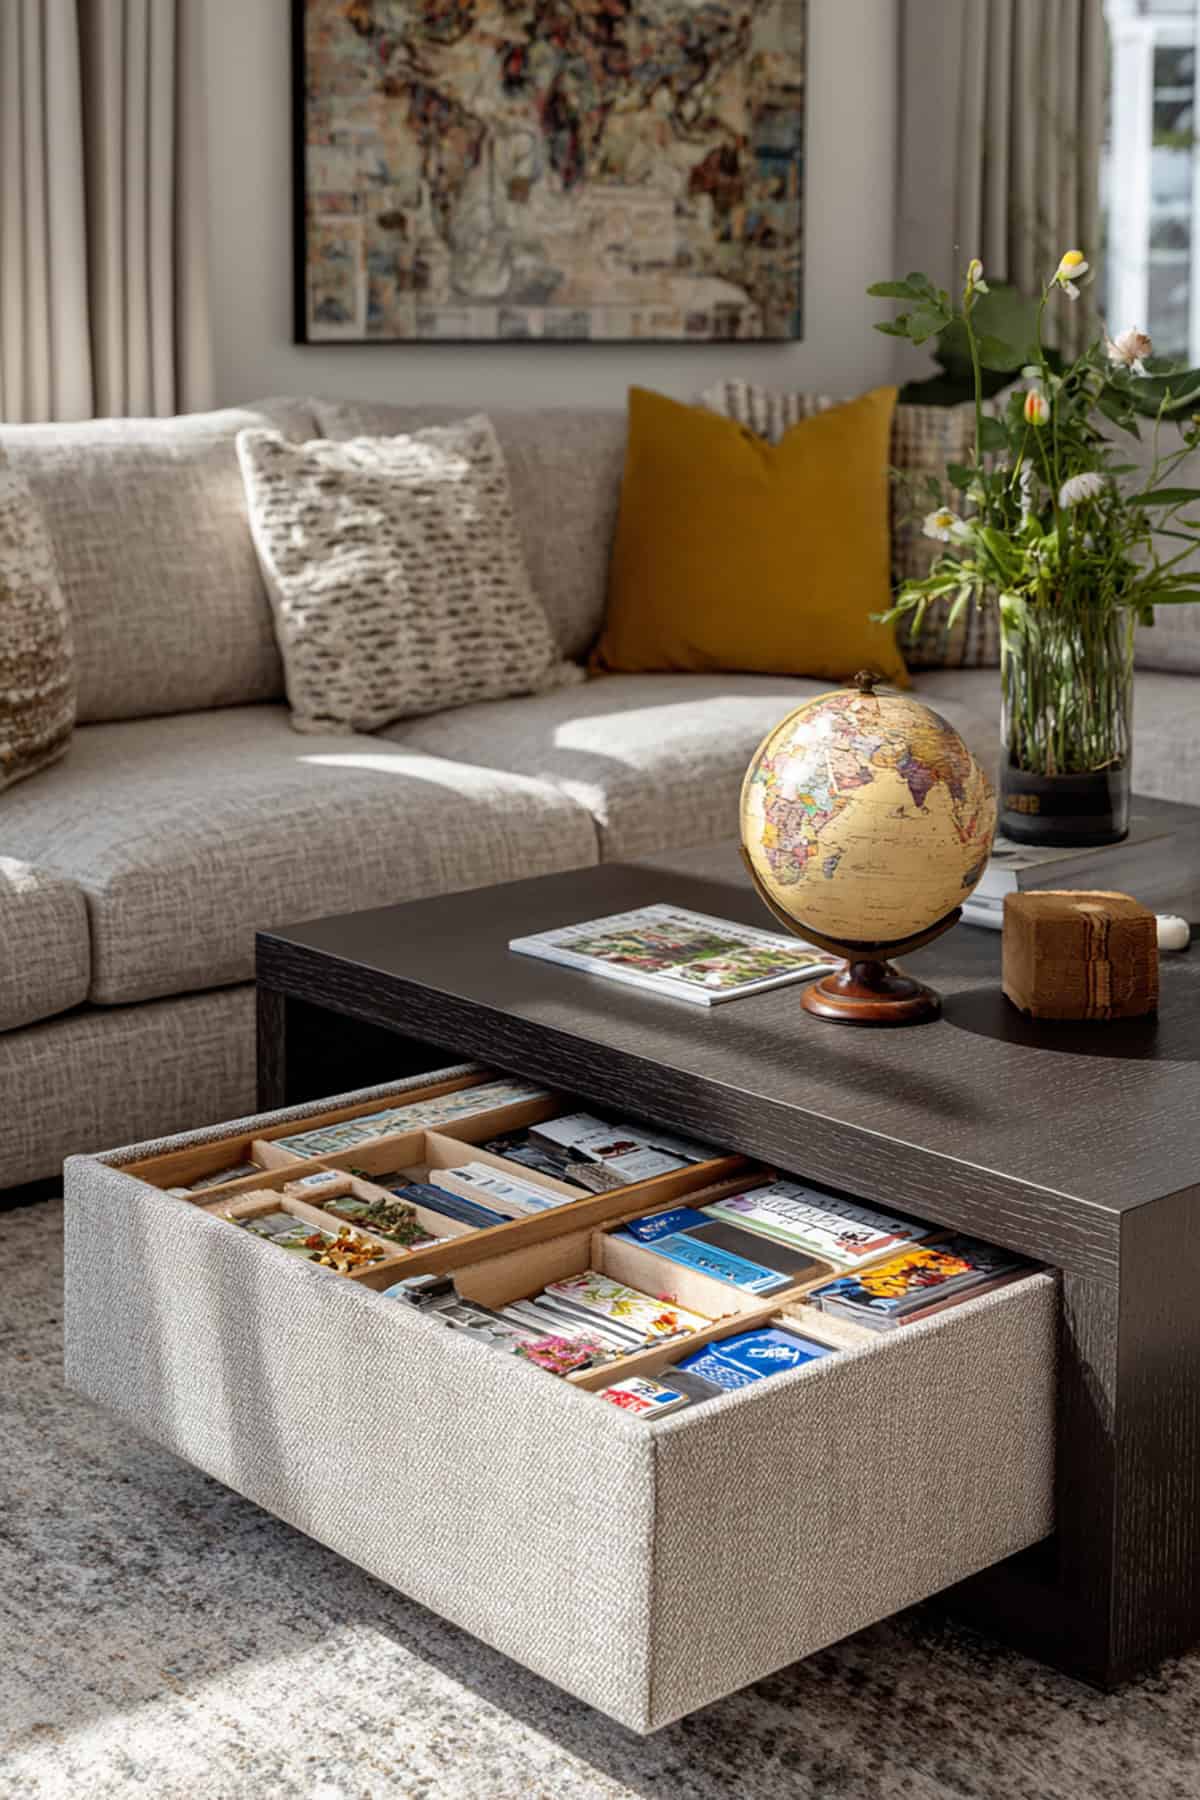
A glass-lidded photo box on your coffee table keeps memories close but out of the way. Photos on top, small souvenirs underneath—easy to peek at, but not in the way.
Pick a box with a snug seal to keep dust out. Arrange everything flat so you can see it all at a glance. Swap out the contents as your collection grows.
Clipboard Travel Wall For Rotating Paper Finds
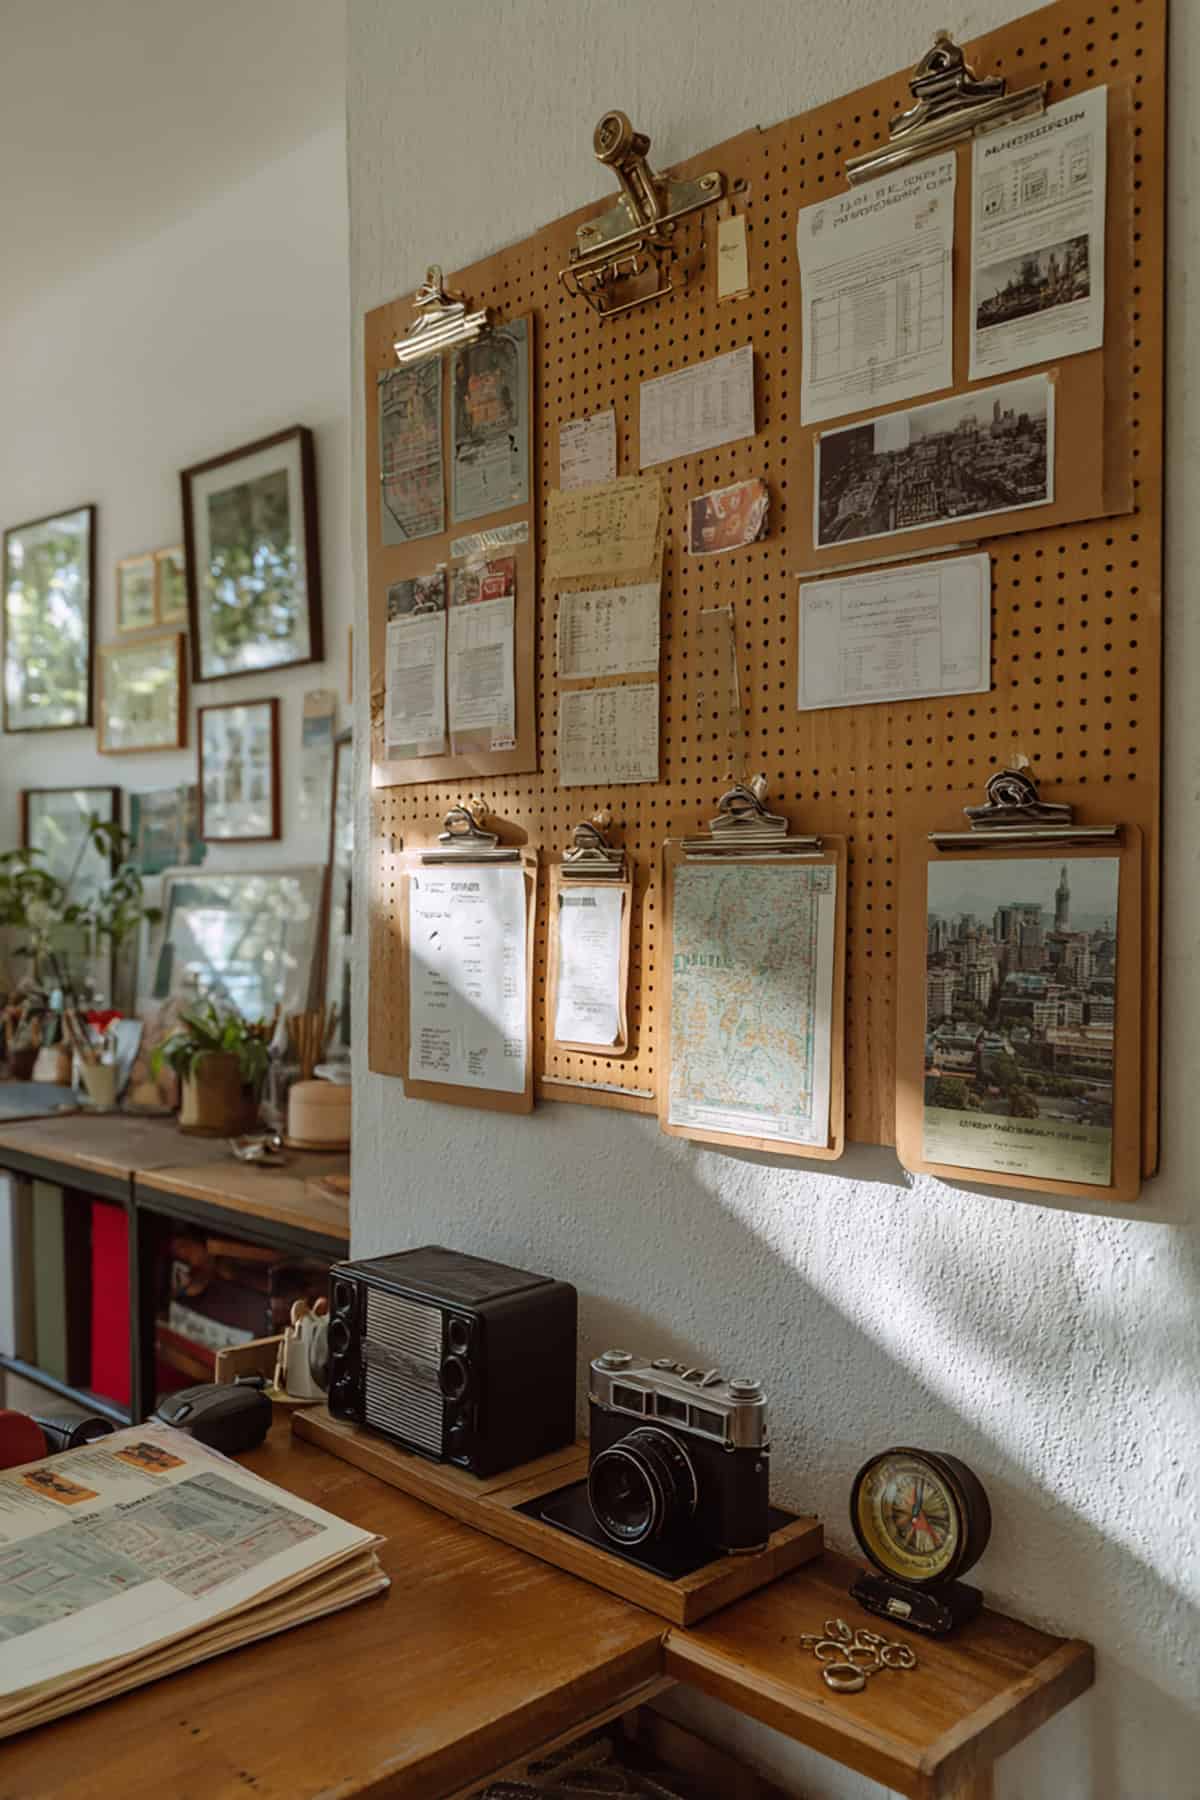
Clipboards make it easy to swap out paper souvenirs—tickets, maps, notes—without damaging anything. Hang them in a row, stick to one size and color, and update after each trip.
Great for workspaces or anywhere you want a rotating display. Storage is simple, too.